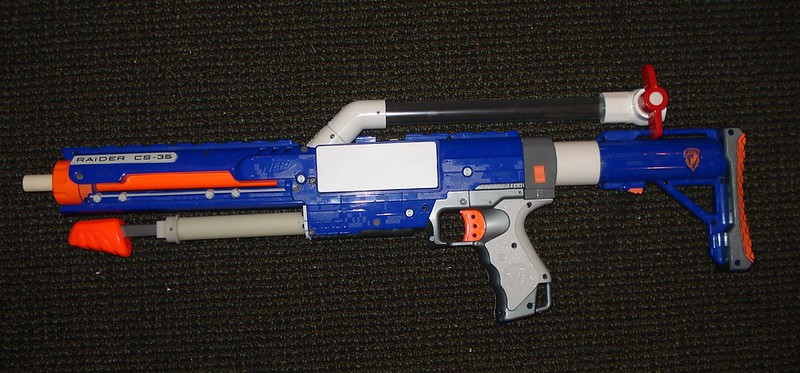
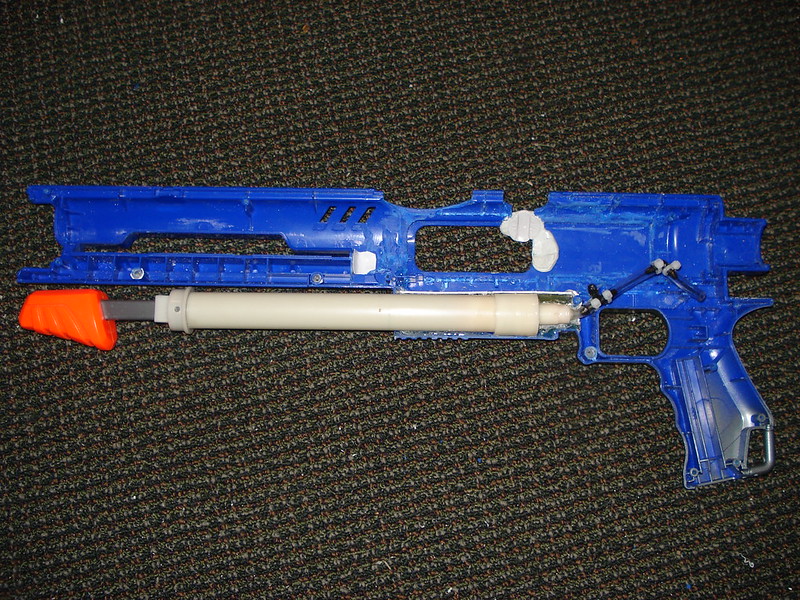
This is a write up and explanation of a recent modified blaster I just built (and am trying to sell). I’m calling it the “UMB Raider” because it’s essentially a UMB (Ultimate Missile Blast) tank in a Raider shell. I’ve done some other things to hopefully make this blaster more durable, adjustable, and customizable. However, it’s overall design is mostly based on what other have done, with a few minor changes.
This project was based on (or received inspiration from) Mutton chop’s “Panty Raider,” Lt. Dan Ice Cream’s UMB Raider, Ahtanie’s (sp?)’s clear Raider, Coop’s SuperMaxx Raider, and Paptachi’s Raider. I think Lt. Dan Ice Cream is the only one who used a UMB tank inside the Raider shell, with the others using AT2K, AT3K, SuperMAXX 1500 or other type of tanks inside. I think SVT (sp?) did a similar Raider blaster, but I never came across his design during the course of this project.
The goal of this project was to build an ergonomic blaster with a streamlined form, but had the power to compete in an outdoor setting. In order to be streamlined it does not have a high rate of fire. It wanted it to be fairly clean so it has cosmetic appeal. It also needed to be able to be easily taken apart (basically just unscrewing the shell and hopper) for repairs, modification, or customization. Since I plan to sell this blaster, it was necessary for the UMB Raider to have the ability to be customized (to some extent) to the customer’s preference.
How modifications are done is pretty self-explanatory from the pictures and more often than not, there is no one way to do something; this write up is a “this is how I did it” sorta thing. However, I will explain why and how I did certain things the way I did.
When looking at the overall design and layout, you will quickly realize that for the most part, there is no absolute and essential list of materials, parts or components. If you’re curious, I used the following key components (I think the PVC pieces used are ½ inch PVC):
- Raider, but no magazine/drum is needed
- Buzz Bee Ultimate Missile Blast tank
- Buzz Bee Ultimate Missile Blast pump OPRV (could be replaced with McMaster OPRV: 50265K23)
- Clear PVC (could be replaced with regular PVC)
- 45 degree PVC coupler (necessary to make the chopper hopper)
- “Regular” PVC coupler
- PVC wye
- Magstrike pump (could be replaced with any other type of sufficiently narrow, hand pump)
- Several 90 degree barb fittings (“L”)
- A “T” push to connect fitting ¼” (I think I used one made by Watts)
- A ¼” push to connect fitting/adapter
- Vinyl tubing (1/4”, I believe)
- Epoxy (microballoons will help save money here)
- Epoxy putty
- JB Weld
- Styrene sheets of various thicknesses
- PVC ball valve (can be replaced with hopper dart door, such as a simple PVC cap or swing check valve)
- CPVC pipe (could be replaced with PETG or some other barrel material
- PVC pipe
- Set/grub screws (can be replaced with simple screws of comparable size)
The Hopper
I originally wanted to make the UMB Raider with a RSCB styled hopper, with the hopper itself being in line with the barrel (this is what Muttonchops did with his blaster); this would produce a very streamlined and elegant design. I decided against this because the air tank would have to be placed where the pump is placed and the air tank wouldn’t have the volume to have the ranges I wanted.
I used clear PVC to monitor my dart load and a 45 degree PVC coupler to create a chopper hopper, as developed by Muttonchops (he’s a smart guy). I used grub screws at most of the joints and where you don’t see them, I used PVC cement) so the final user of this blaster can easily shorten or lengthen any of the PVC lengths. In fact, the clear PVC portion of this blaster should probably be shorted an inch or two to make handling and aiming the blaster easier. However, that’s up to the end user to decide, so I left the clear PVC length as is.

Since the chopper can be complete removed from this blaster (through the use of grub or set screws), a conventional hopper can be installed instead. I don’t see the benefit of it since this blaster requires several pumps to fire, therefore removing any pump-fire-pump-fire capability, but the final user can do whatever they want.
The ball valve has been drilled open slightly, to make turning the red handle MUCH easier. Any other hopper dart door option would work here.

The hopper as pictured hold 9 slugs. As mentioned before, I recommend shortening it about 2 inches. Then it should hold 7 or 8 slugs. Total dart capacity isn’t that big of a deal since the rate of fire for this type of blaster is so slow (relatively speaking).
The OPRV
This is pretty simple to make and pops at about 7 pumps. It can be adjusted to pop in as little as 3-4 pumps. Of course, one could just use a McMaster OPRV instead. I wanted to, but decided against it because I could save almost $15 in total costs (shipping, OPRV, and barb fittings) but using the parts I already had.
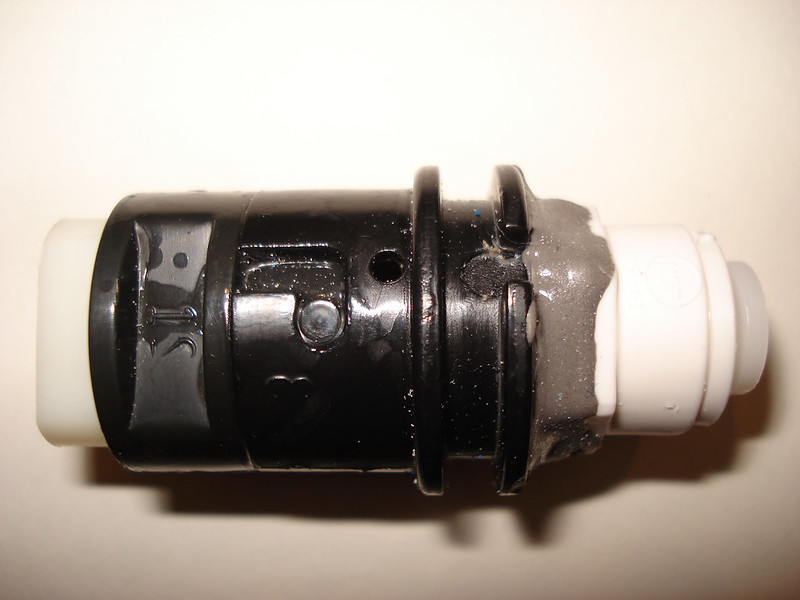


Basically, cut down the OPRV and remove it from the UMB pump handle. Then, JB Weld the push to connect adapter after cutting off the threaded end. Finally, add an appropriately sized screw to make the OPRV adjustable. Right now, it pops at about 7 pumps and without the screw, it’ll pop at about 3-4 pumps.
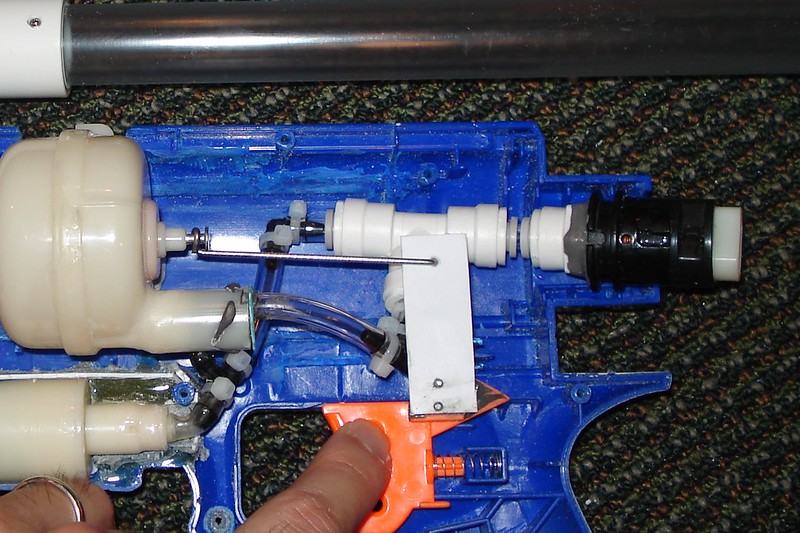
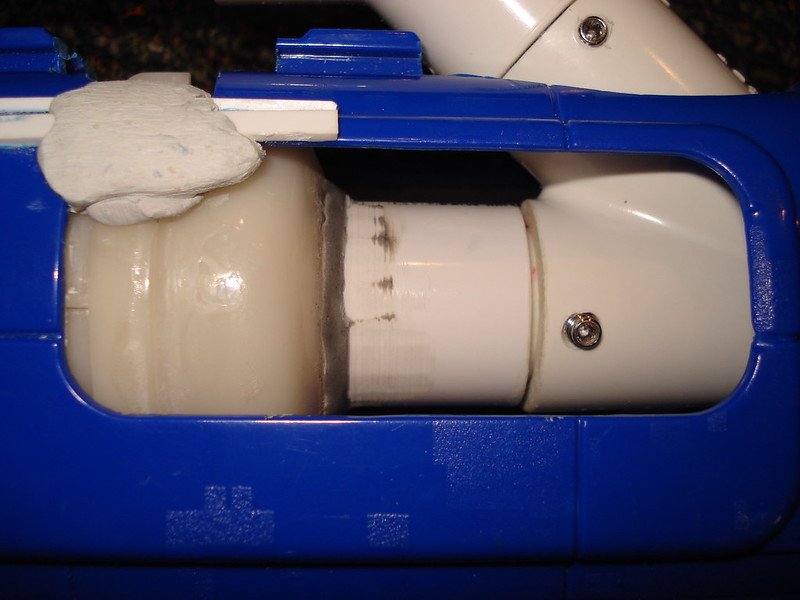
The Tank Placement and Trigger
A picture is worth a thousand words. I used epoxy putty to keep the tank in place and stainless steel wire to attach the air tank release pin to the trigger. The trigger is JB welded and screwed to the styrene sheet. This was one of the easiest parts of this blaster.


The Barrel
I have the longer CPVC barrel installed, but I made a shorter one so that it won’t stick out of the front. I haven’t tested the optimum barrel length and the two lengths you see here are those lengths because that’s all the CPVC I had left. I could shorten the longer barrel so it doesn’t stick out, but the final user can make that call. I’m sure brass, PETG or some other material can be used if one was inclined. I wanted the barrel to be easily swapped out if desired.


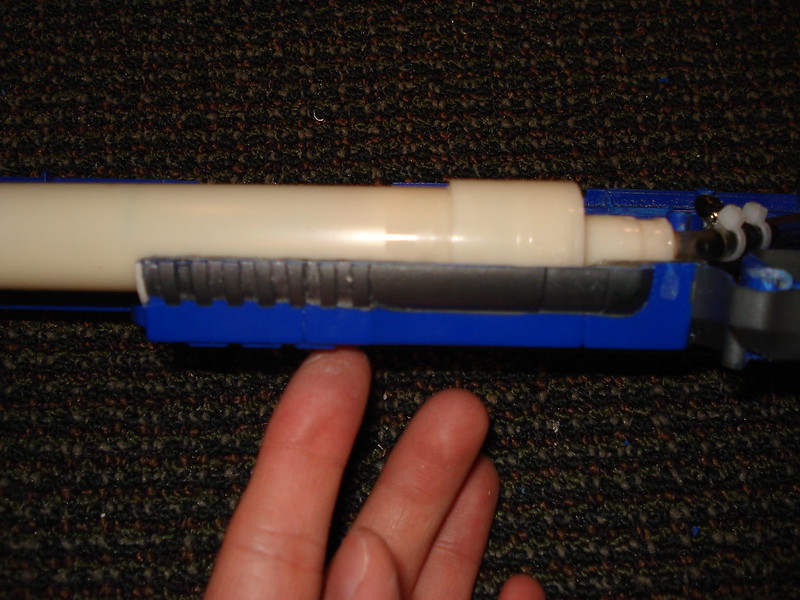
The Pump
One of the challenges of this project was attaching the pump. I’m confident many of you understand how must stress is placed on a pump, especially the handle and pump head. You also probably know that the Magstrike pump is not the most durable of pumps that could be used for a project like this. I used the Magstrike pump because I had one lying around, it was narrow enough to fit inside shell, and it helped streamline the overall look of the final blaster.
Anyways, I wanted to make the pump easily replaceable, whether it’s because it broke, leaks, or someone wants to install a different pump. Therefore, the pump is literally held in with friction between the pump and the epoxy. When the shell is closed, the pump is rock solid. I don’t worry that the pump will slip or twist; the weak link is in the pump itself. In the heat of an intense battle, it’s only a matter of time before something bends or cracks. When that happens, the pump can be easily replaced.
I won’t go through the tedious steps I took to make the pump easily replaceable, but in summary, I carefully centered the pump in one half of the shell after wrapping the pump in plastic. I mixed and poured in the epoxy into the area between the pump and the shell (note how I made some crude walls of out scrap styrene to hold in the epoxy). If you have microballoons use them here. I spent $30 on just epoxy for this project – talk about a stupid and expensive mistake.


Once the epoxy has dried, remove the pump covered in plastic (this plastic should easily pull away from the epoxy). Repeat this process for the other shell.
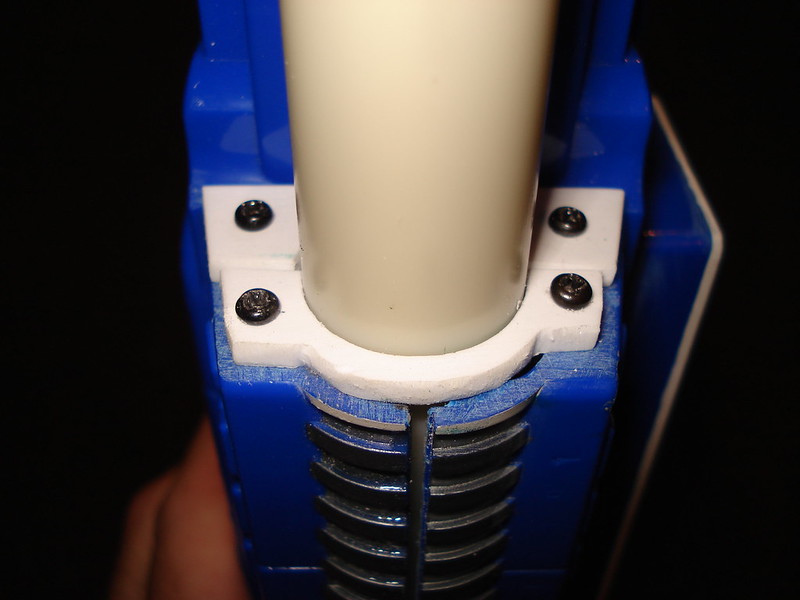
Sanding and trimming will be needed for both halves to make sure everything fits properly, neatly and the pump is lined up and centered when installed. To help secure the pump and shell, I added these pieces of styrene plastic. They are screwed in with 4 Raider screws.


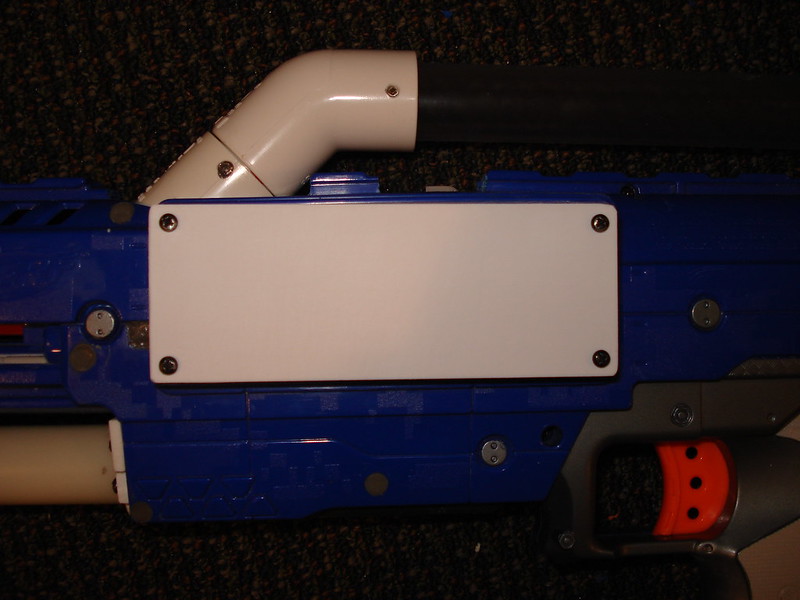
Additional Screws
This is optional, and is more for added durability, ease of maintenance, and “cleanliness” of the blaster. Basically just used epoxy in the shell’s posts (after drilling out the other side) for the screws. Note how these screws face in the opposite direction as the other (stock) screws.


Other Tidbits
The stock is from the Raider, but is modified with PVC (3 inch, I think) and JB Weld to be much stronger. The length is locked so it can’t be adjusted. Depending on the end user, this may be slightly too short (it is for me). However, it works and I didn’t have another unadulterated stock lying around, so I used this one. In case you’re curious, this was used in a previous UMB modified blaster and was set in at the ideal length. After heavily modifying that other blaster, this part became superfluous and I just had it lying around.
I did my best to make this a clean build, but it’s not as clean as it could be.
Performance
Range: 80 feet parallel to ground with the longer CPVC barrel (Genova) with springer fit #8 slugs.
Any thoughts, suggestions or comments are welcome. I will be listing this for sale probably after I do a field test at Koree’s July 25th Nerf war.
Edited by shandsgator8, 24 July 2015 - 09:11 PM.