Jump to content


Photo

Heavy Draw AAbow

Modified Airtight Version
homemade bow writeup

10 replies to this topic

#1 Aeromech

Aeromech

    Member

  • Moderators
  • 434 posts

Posted 15 January 2015 - 04:23 PM

Preface

A friend of mine mentioned she would shoot a bow and arrow before going to a shooting range. Naturally this got me thinking of the AAbow, and I decided to make one. I tried making the one found on Mostly Harmless Arms' site, and ended up with a super leaky bow that did not even fire darts. The creation of this blaster also involved a lot of hammering, and even so did not perform at all. I did not have access to 1/2" Thinwall PVC pipe either, so I changed the design a bit to allow for easier assembly and no hammering, so I could build this at 3AM and not wake up my family. Additionally, this uses a lot of goop. Make this outside so you don't die.


References
Thanks to Mostly Harmless Arms and Kane the Mediocre for the original AAbow designs, without those, this writeup would not have been possible.


Stuff You'll Need
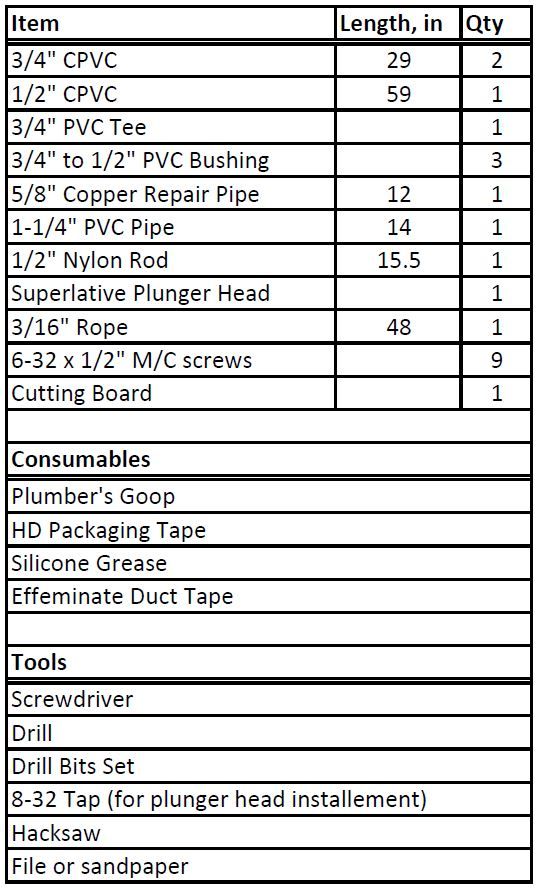
excelcapture_zpse7671890.jpg


Instructions

20150114_014738_zps8dfij25c.jpg
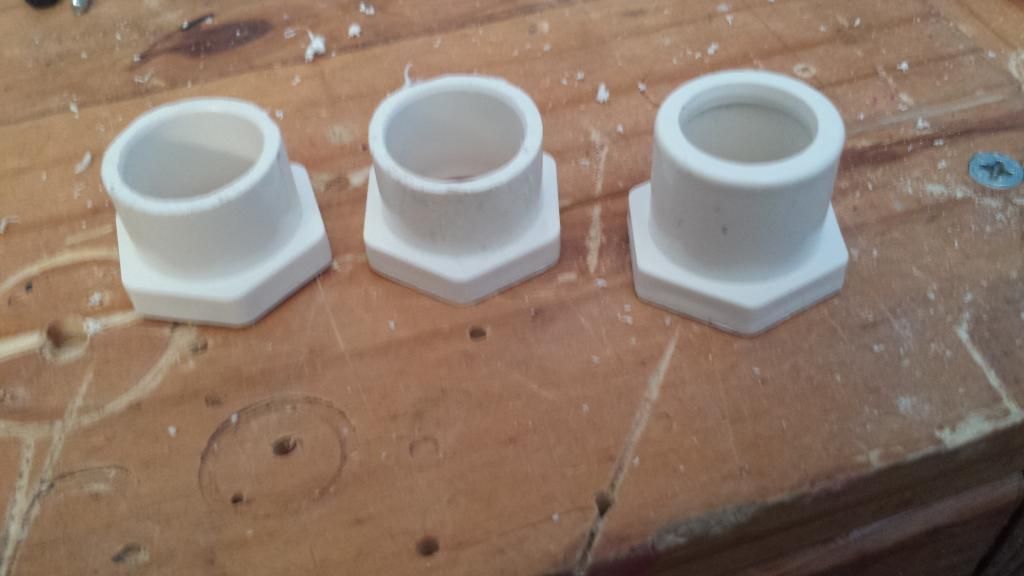
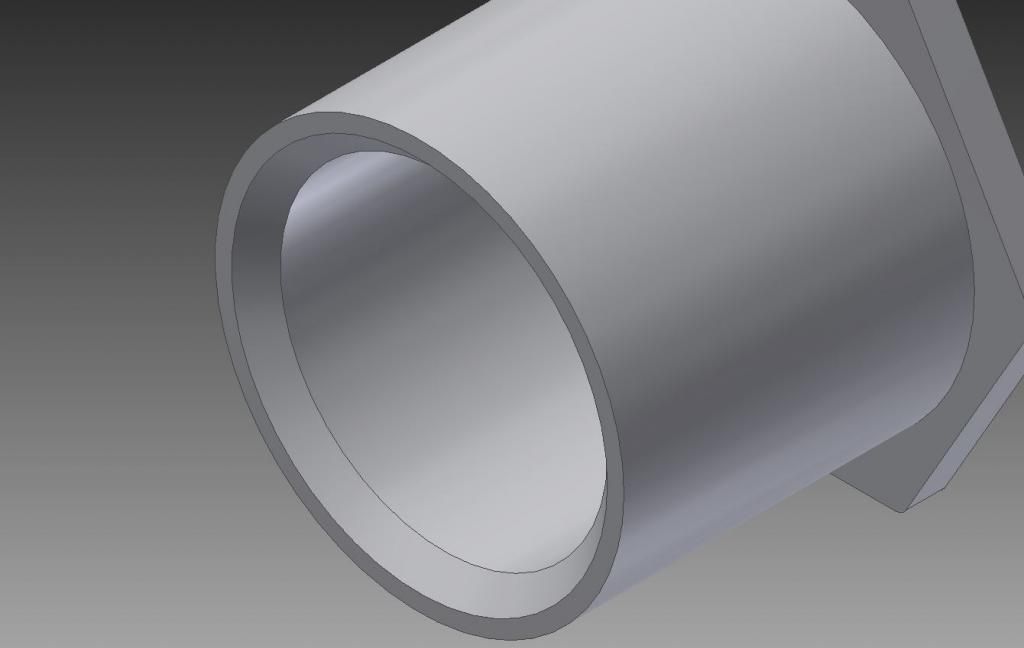
Saw off the inner lip of two of the three 3/4" to 1/2" bushings. These will constitute the bow arms. The untouched bushing will become the bushing that holds your hopper.
0_zps270b1c60.jpg
Bevel that edge. It will make it easier to side over the tape later.
20150114_014947_zpsd63bumgf.jpg
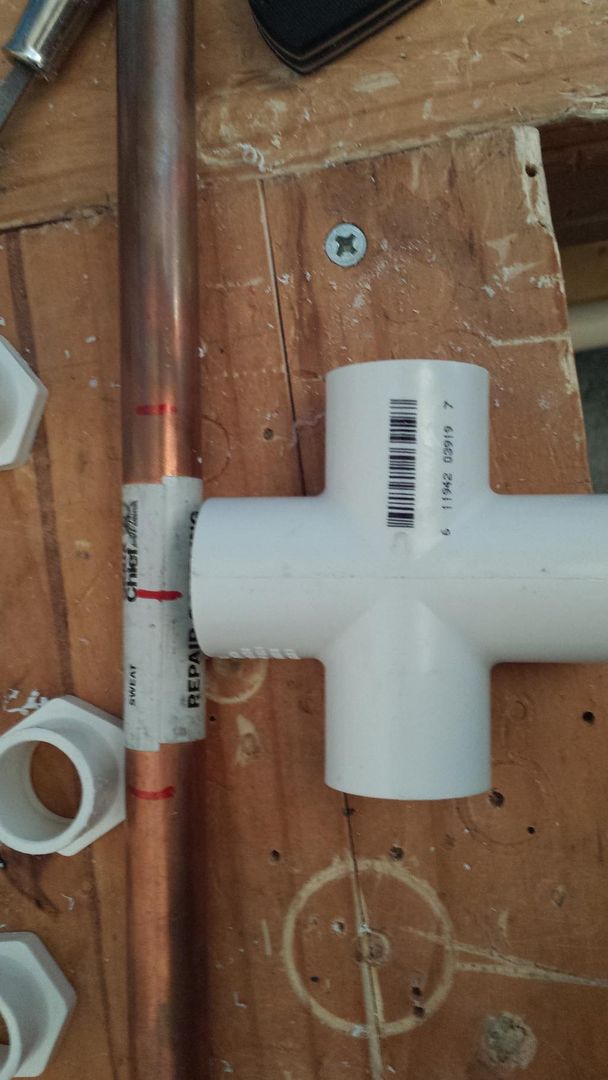
Mark off the center of the copper pipe, and align the center with the middle of the PVC Tee. Mark off the ends of the arms of the PVC Tee against the copper pipe. We'll use these markings later to align everything.
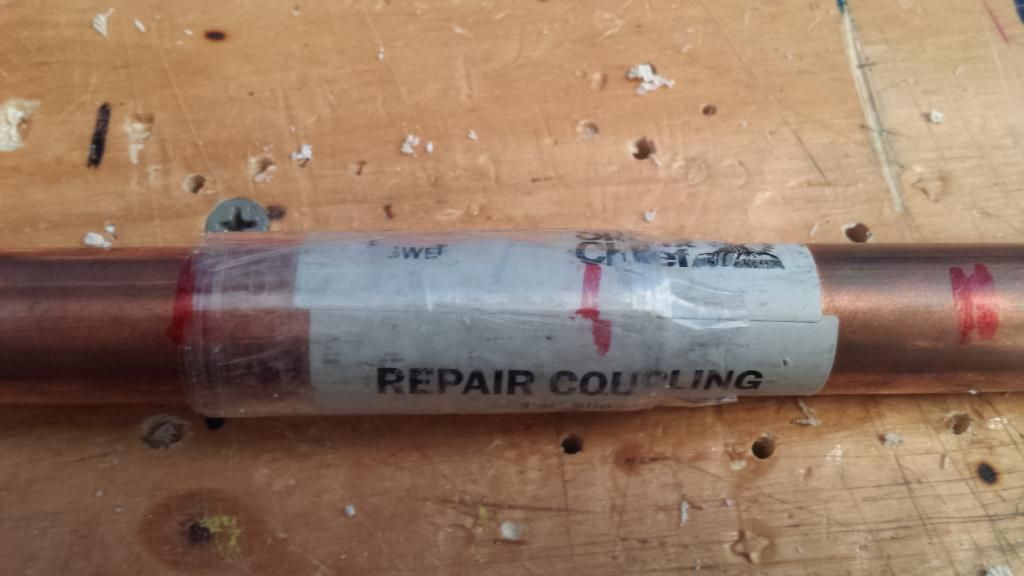
20150114_020213_zpscb3rgi2y.jpg
Wrap tape around one side of the copper pipe, aligning the tape with the mark on the side that was just made. Repeat on the other side.
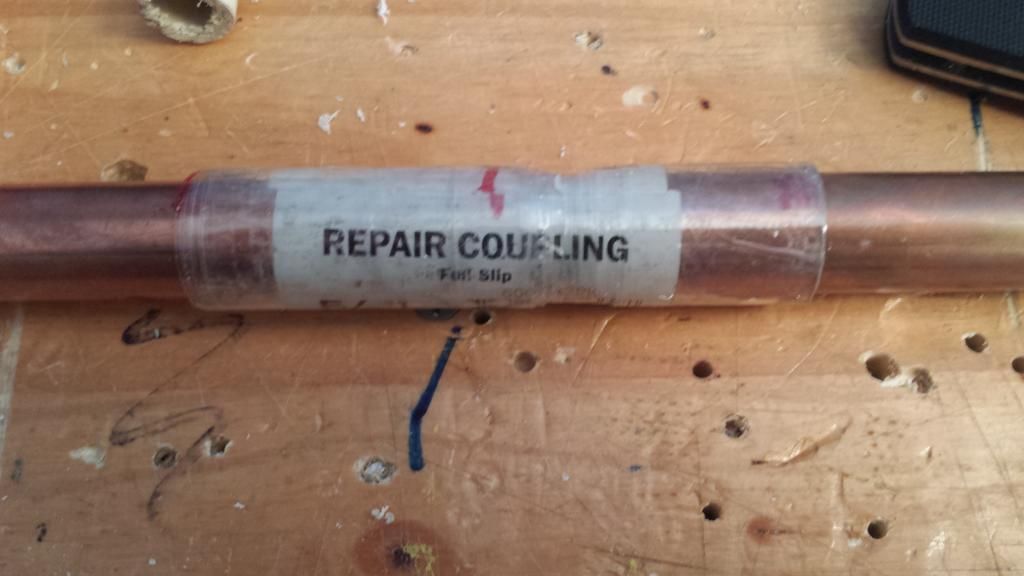
20150114_020929_zpsh6lc4daw.jpg
Trim down the tape so that both ends align with the outer sharpie marks...
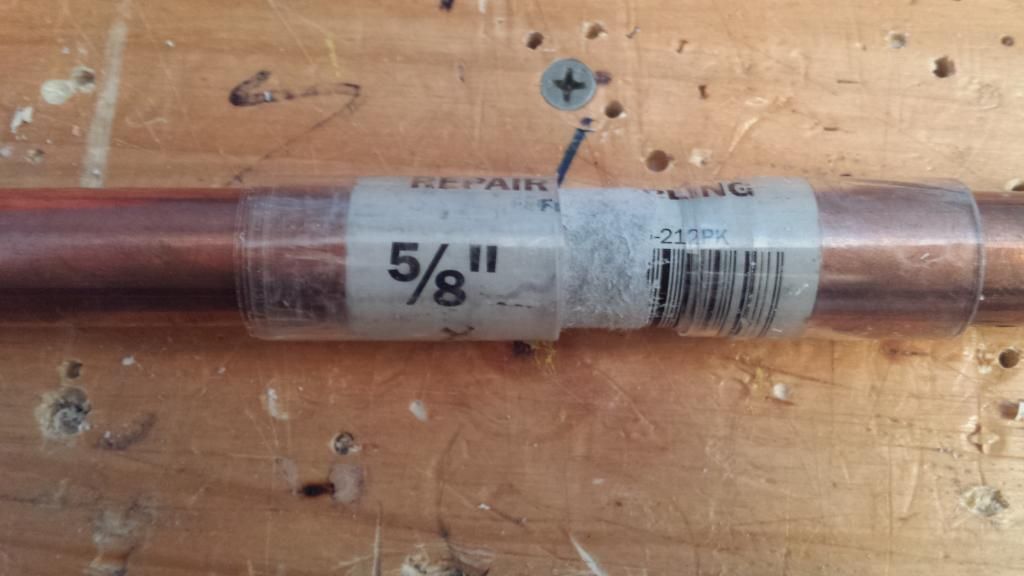
20150114_021121_zpszxdmh2dc.jpg
Trim about an inch or so of the tape from the middle of the copper pipe. This improves airflow later on.

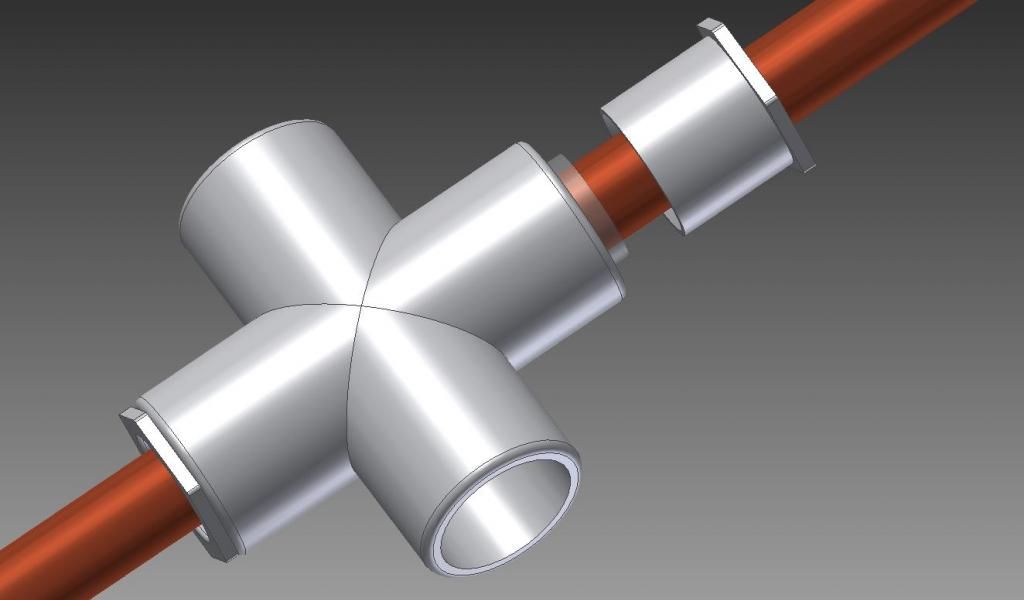
This is the part where my camera decided not to take pictures and we have to resort to CAD drawings instead. Sorry to all the instagrammers here, this will not be artsy. Also, GO OUTSIDE NOW we need some goop.
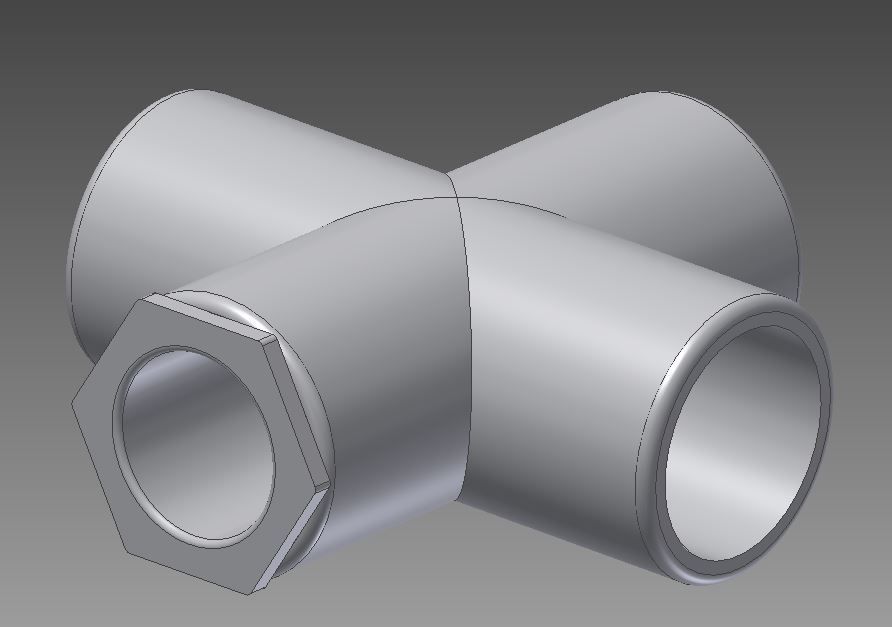
1_zps01dc332a.jpg
Apply a thin line of goop around one of the trimmed bushings then insert it into one of the tee openings.
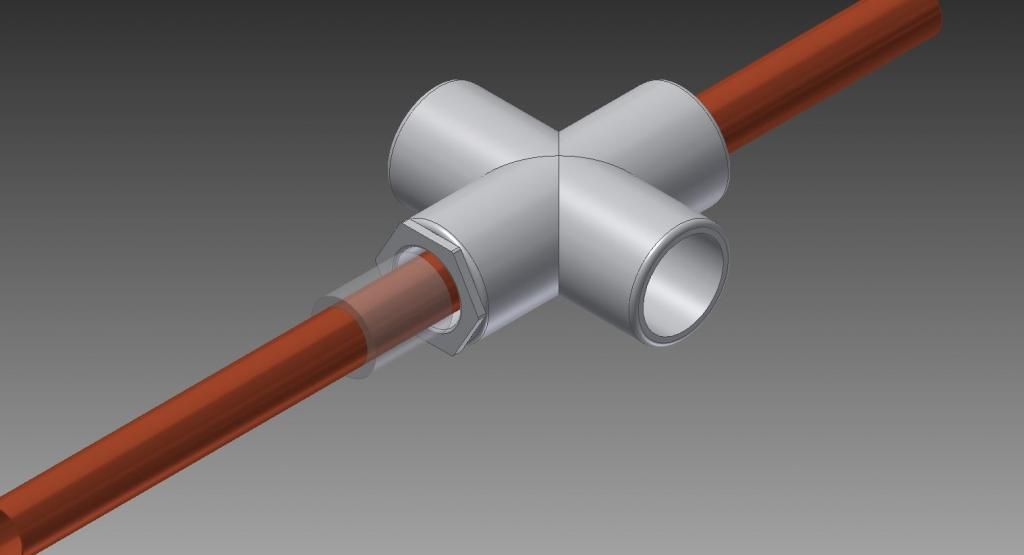
2_zps0900977d.jpg
Apply goop on the tape on the copper pipe, then insert the copper pipe into the bushing up to the tape.
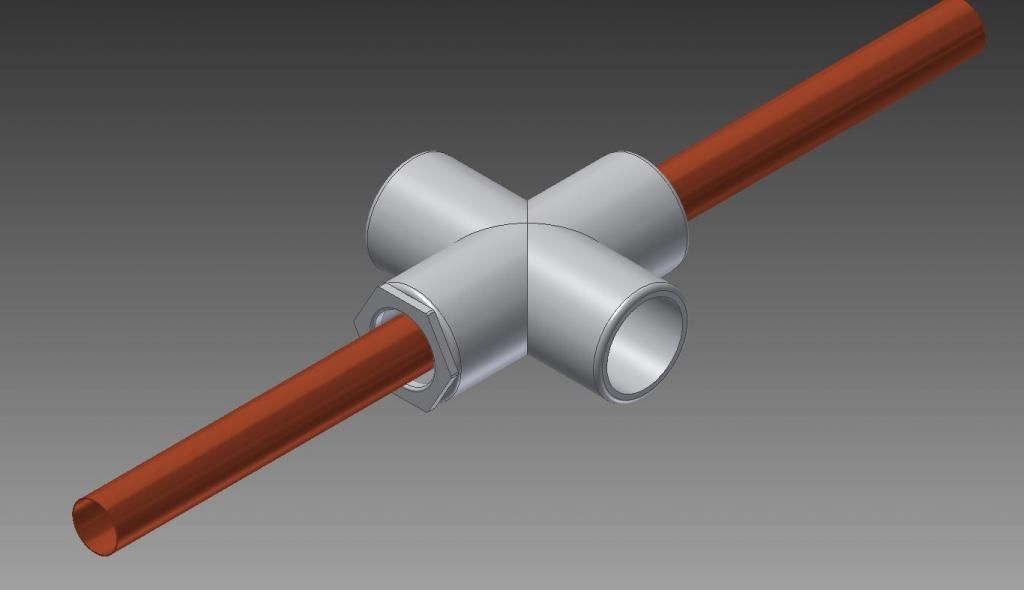
3_zps01f01771.jpg
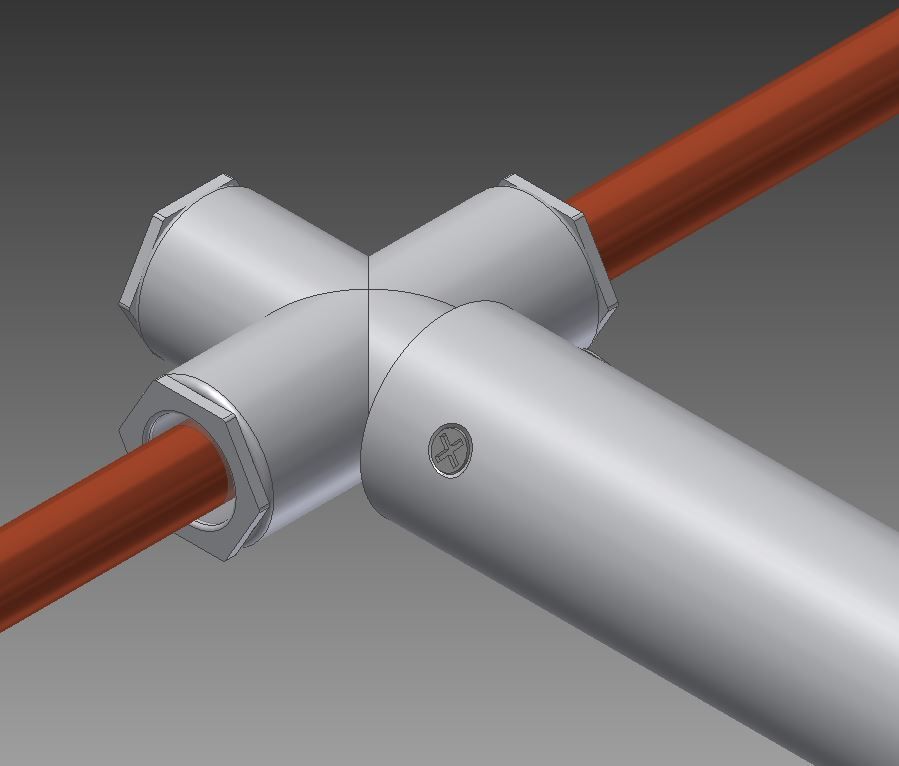
Just like that.

4_zps25017786.jpg
Now, add goop around the outside of the bushing as well as the inside. Then insert this bushing onto the other side of the tee. This creates our airtight bow arms.
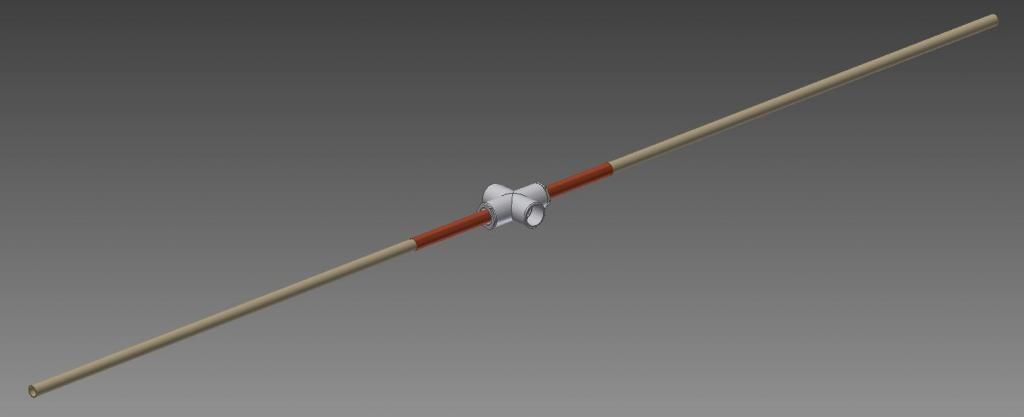
6_zpsebac90e5.jpg
Insert the 1/2" CPVC pipe into the copper, and mark where the pipe is centered. Secure it with a wrap of packaging tape on each side, connecting the copper tube to the CPVC.
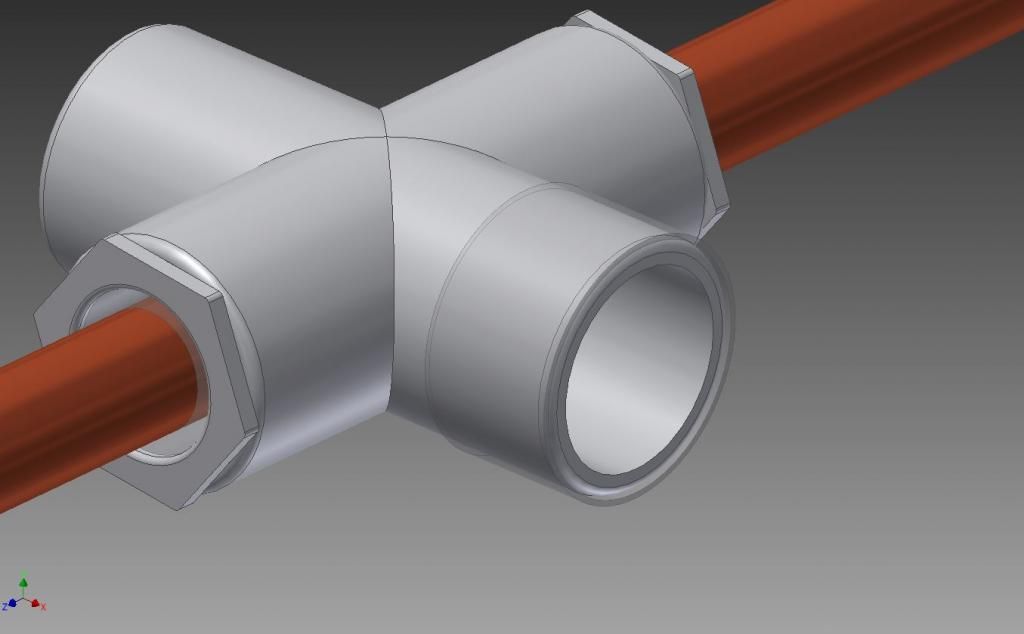
8_zps0e0c849d.jpg
Wrap one of the remaining tee arms with packaging tape, until the 1-1/4" PVC plunger tube fits snugly.
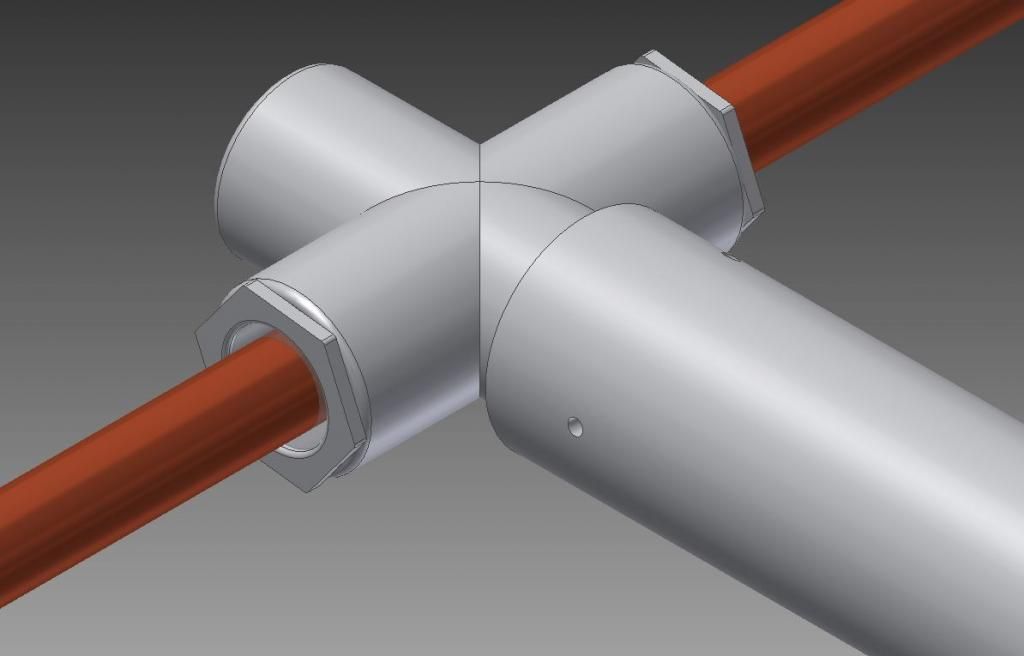
9_zps20d4beff.jpg
Drill some holes.

11_zps4e144169.jpg
Sink some screws. I also placed in the forward bushing (the uncut one) at this point.
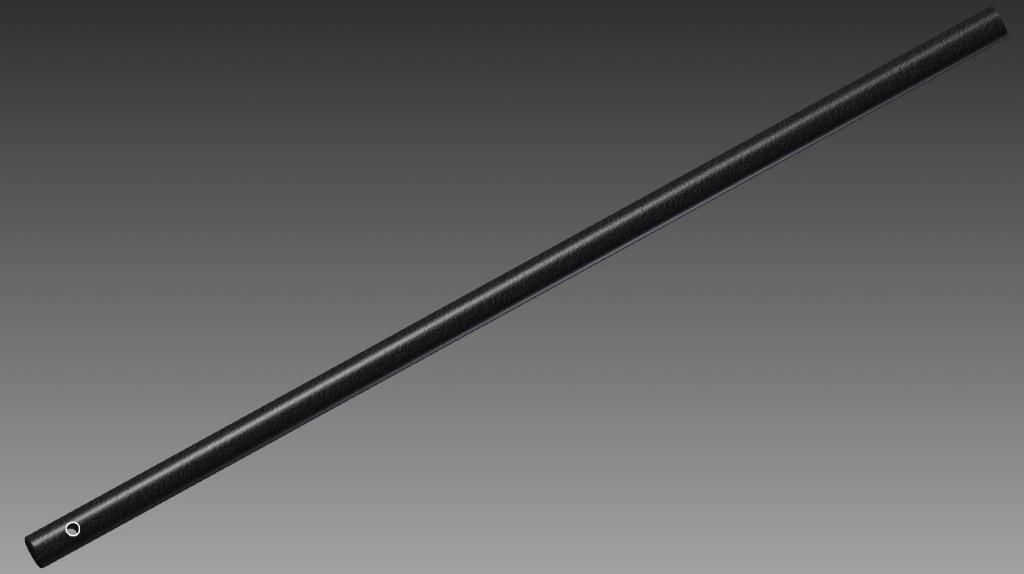
13_zps64a3738b.jpg
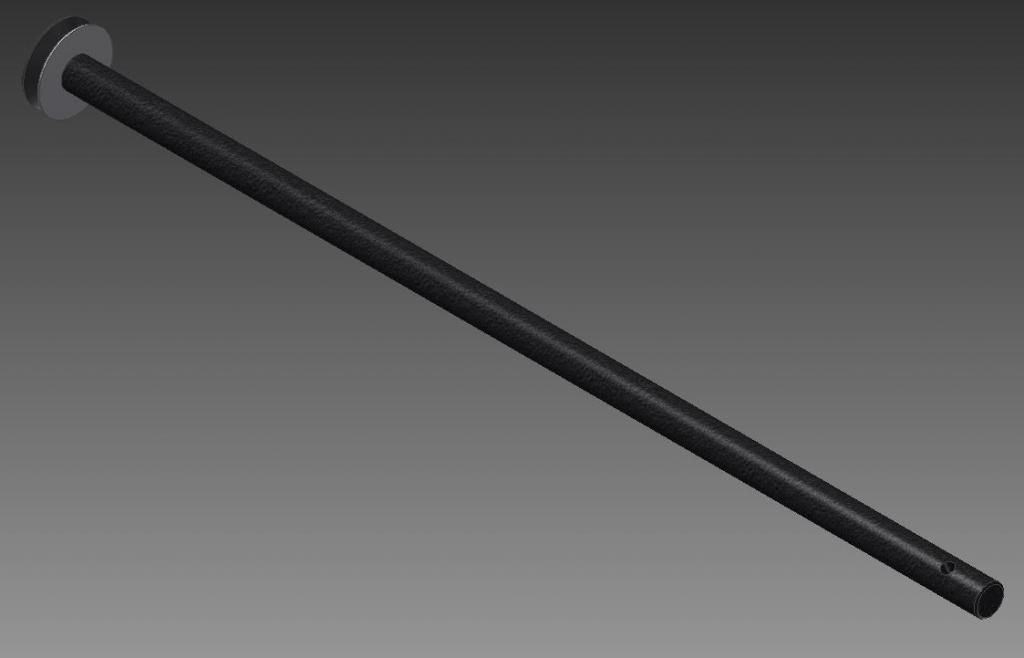
Cut your nylon rod, and drill a 3/16" hole about 3/4" from on end. At the other end, drill a 1 inch deep hole and tap it for an 8-32 M/C screw.
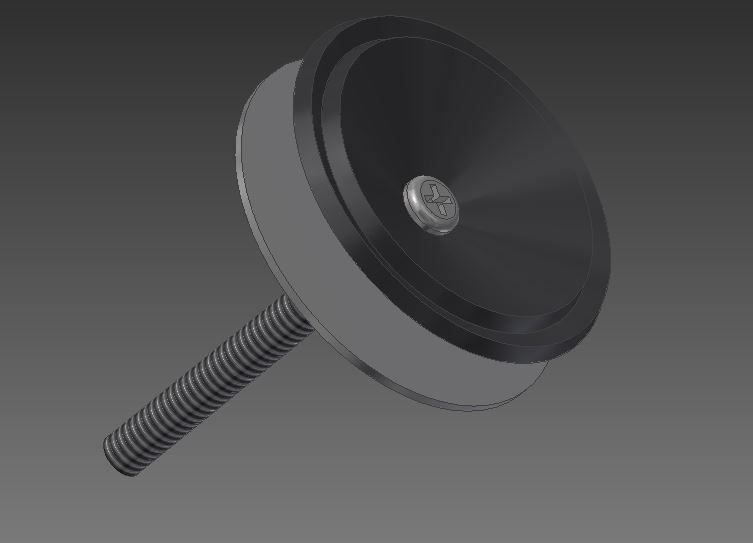
14_zps05c53a38.jpg
This is a superlative plunger head.

15_zps9d645e7e.jpg
Throw on your plunger head. Add lots of lube on there and insert it into the plunger tube.
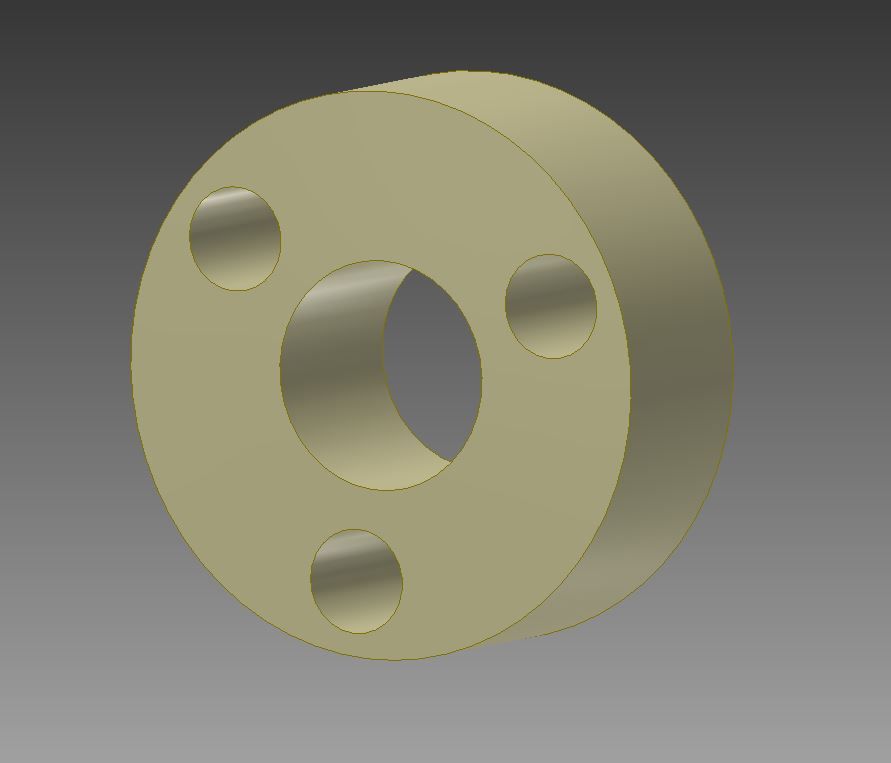
12_zps916a329f.jpg
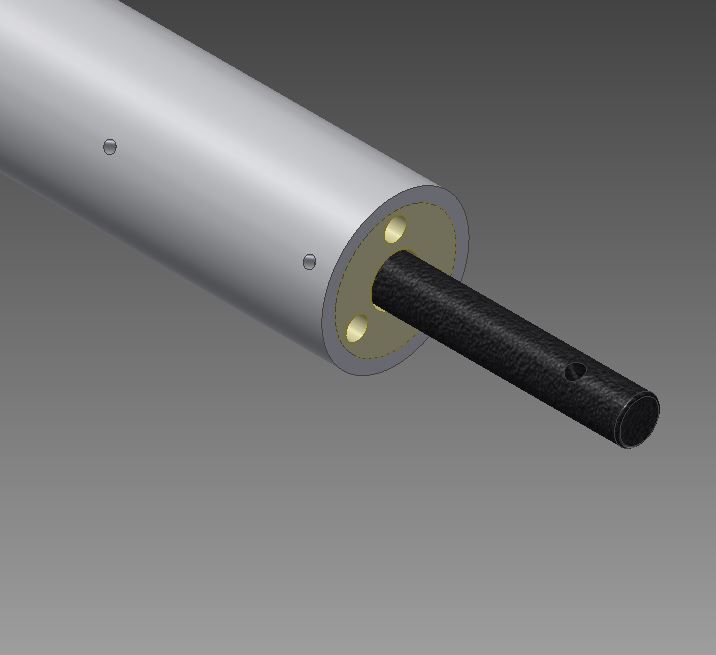
Make two of these from the cutting board. I used the hole saw I used to make rainbows, and then added extra holes to avoid a vacuum forming upon firing.
17_zps9f833a6e.jpg
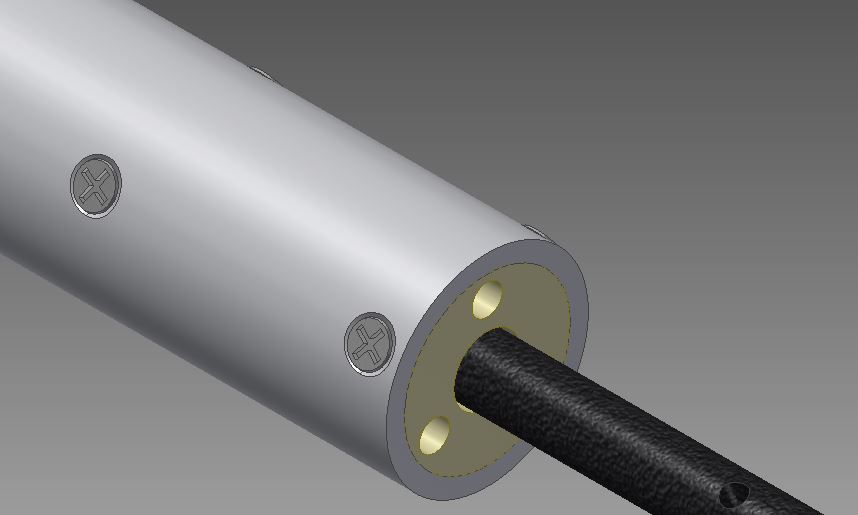
Throw in the cutting board spacers. Make one about 2.5 inches from the rear face of the plunger tube, and one flush with the rear face. These provide two points of support for the plunger rod to rest against, keeping the plunger rod relatively straight without the use of a supporting bar.
18_zps90b1c62f.jpg
Sink in some screws.

7_zps7f0de85e.jpg
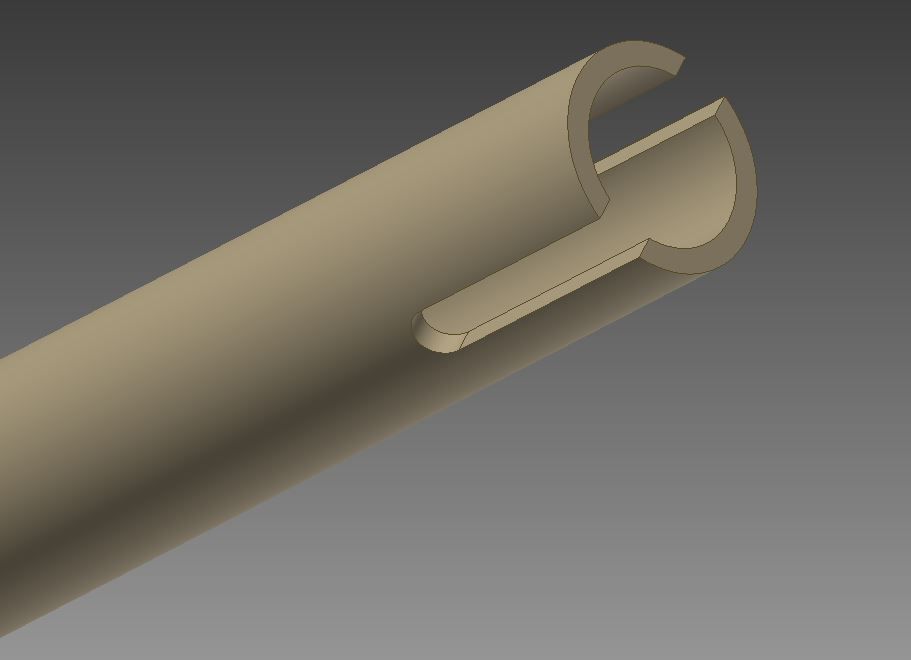
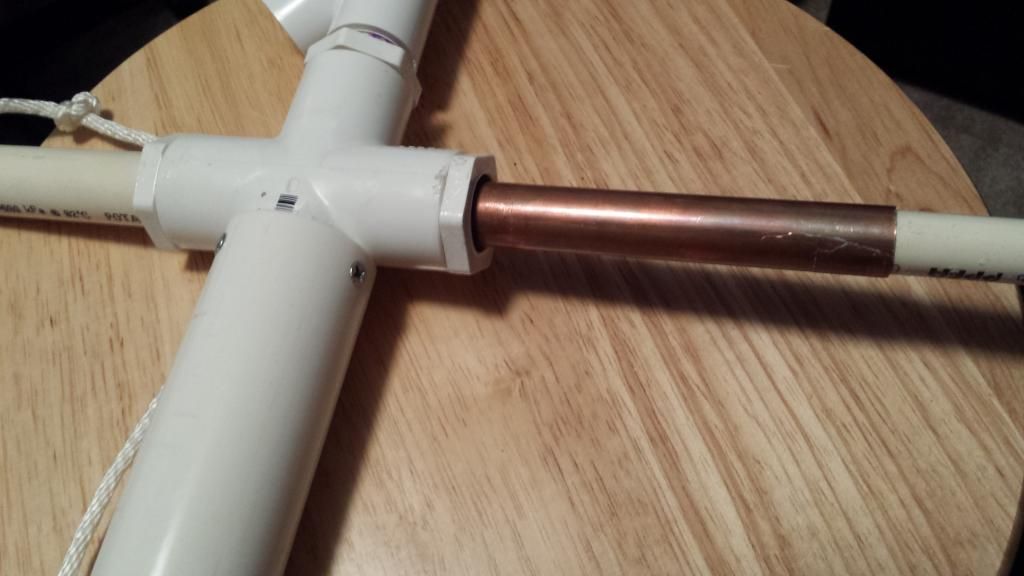
Create a slot at the end of the bow arms 1 inch deep. Start with a 3/16" bit and then use a saw to finish the slots.
20150114_221528_zpscbh1h61y.jpg
If the bow arms aren't on very tight, then use a wrap of packaging tape around the copper to increase the OD of the pipe, allowing for a tighter fit against the bow arms.
19_zpsa0093be4.jpg
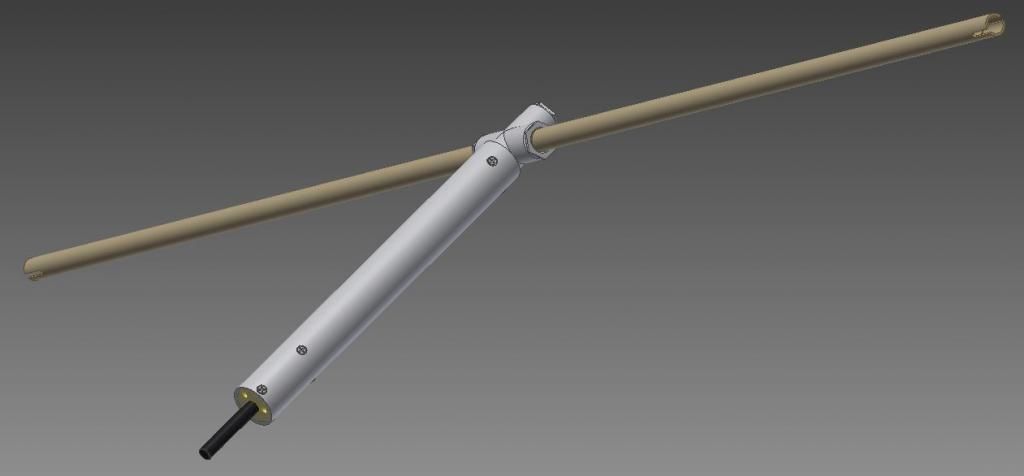
Add the bow arms. Then string the bow with the 3/16" rope.
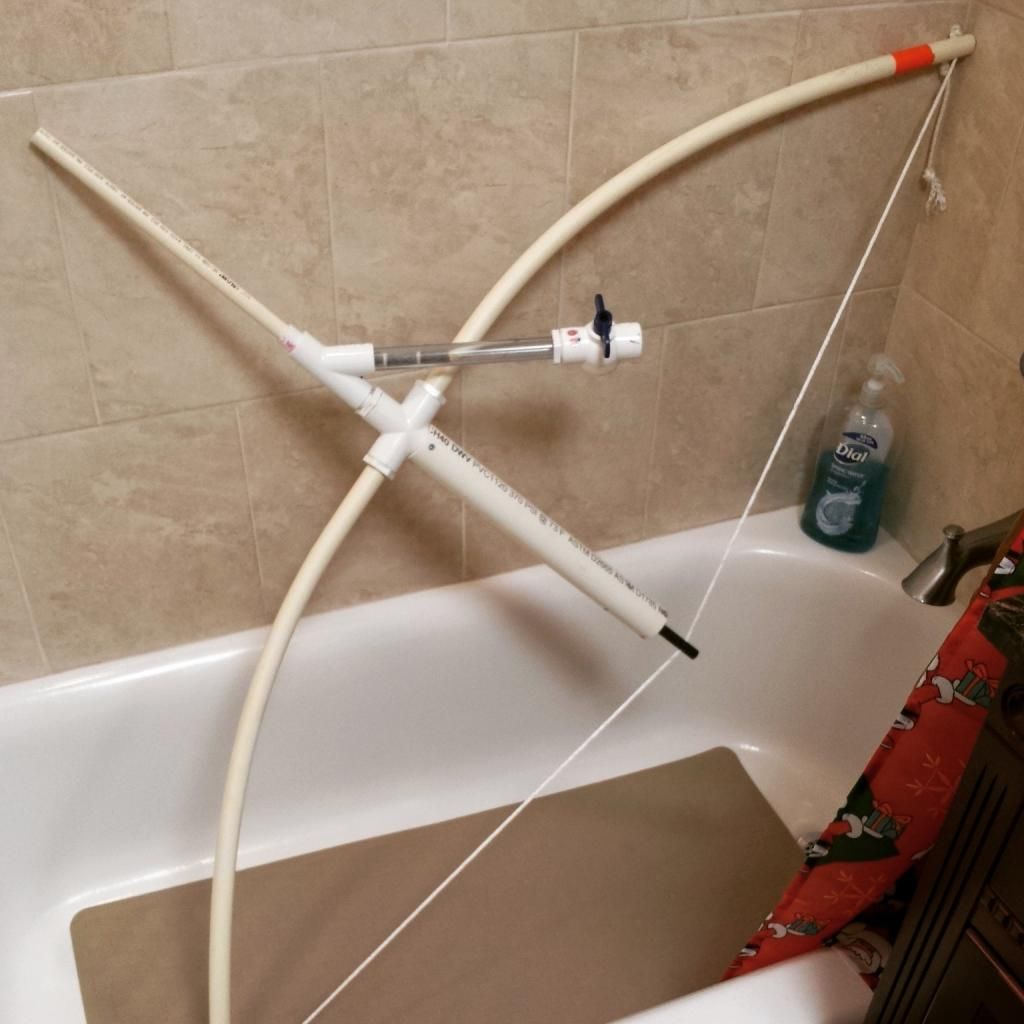
IMG_20150114_151929_zpsldvbl8qp.jpg
In the fume hood.


Results
It's pretty good. Use gloves when you fire this thing, your fingers will be hurting real soon after firing this. Don't be a hero, just get some biking gloves. It shoots really hard. The use of the 1/2" CPVC running the entire length of the bow arms serves to increase the potential energy in the bow arms without increasing the draw distance, which is already pretty substantial at ten inches. I'm using a 14" barrel, but I'm probably going to upgrade to 16 or 18 inches. Works very well with a hopper, and has a good, but not perfect, seal. Goop and tape seems to work at providing a perfect or near perfect seal, so I used that to create this AAbow variant. Give It a shot, the only thing you can't get from the hardware store is the Nylon rod, but I really like this.

Do not use this without goggles. If the rope snaps you can bet you're getting slapped hard in the face.

I like it. You'll see it next time you're in the Northeast


Edited by Aeromech, 23 November 2015 - 01:24 AM.

  • 0
Watch my shitty videos

This is so ghetto but so awesome.


#2 azrael

azrael

    Member

  • Members
  • 393 posts

Posted 15 January 2015 - 04:46 PM

*
POPULAR

I recommend making a stock of some sort. Really helped for aiming and stability for me. I actually used a U-Cup seal on my last Aabow, worked great.
  • 1
Better Nerf By Science!
http://nerfscience.blogspot.com/

#3 Exo

Exo

    Member

  • Members
  • 391 posts

Posted 16 January 2015 - 07:53 PM

Couple things:

1. Are/Why are you not worried about the copper tubing deforming?

2. What is holding the outermost bow arms in their sockets besides hope, dreams, and not-even-implied goop?
  • 0

#4 Aeromech

Aeromech

    Member

  • Moderators
  • 434 posts

Posted 16 January 2015 - 08:28 PM

Couple things:

1. Are/Why are you not worried about the copper tubing deforming?

2. What is holding the outermost bow arms in their sockets besides hope, dreams, and not-even-implied goop?


1) I could not find the particular type of tubing Ryan used in the Hardware store, so I improvised. turns out it works pretty well. The first time I tried this out, my copper tube was not perfectly aligned, and had to be adjusted maybe 1/8" over to get it to the correct orientation. I spent 45 minutes with a vice hammer, mallet, pliers, anything and that pipe did not deform at all. It's a hell of a lot tougher than you'd think. So am I worried about plasticly deforming the copper pipe? No.

2) Friction. And the fact that there is no force actually pulling them off of the copper pipe. Draw a free body diagram of the setup and you'll see.
  • 0
Watch my shitty videos

This is so ghetto but so awesome.


#5 azrael

azrael

    Member

  • Members
  • 393 posts

Posted 16 January 2015 - 08:48 PM

Just reread this. I too, couldn't find a cross that fit snugly into the PVC plunger tube. I used etape and goop, myself.

I am surprised you couldn't find the steel conduit, though. You have access to a Home Depot, right? Should be in the electrical section.
  • 0
Better Nerf By Science!
http://nerfscience.blogspot.com/

#6 KaneTheMediocre

KaneTheMediocre

    Belligerent Asshole

  • Members
  • 613 posts

Posted 17 January 2015 - 10:07 AM

Just reread this. I too, couldn't find a cross that fit snugly into the PVC plunger tube. I used etape and goop, myself.

I am surprised you couldn't find the steel conduit, though. You have access to a Home Depot, right? Should be in the electrical section.

I can't usually find a cross that fits well (It happens once in a while), and I usually use some combination of scotch tape and non-hardening putty to make it seal nice.

As for the pipe, I'm mostly amazed that it seems to have an ID of 5/8". I've never seen anything like that for copper tubes, but as you said it's "repair" tubing so I guess its intended to slide over 5/8" OD copper tubes and get soldered together. I often have trouble finding 3/4" CPVC that fits over the EMT--it sounds like this copper tube is a bit smaller on the OD which makes buying the 3/4 CPVC bow arms much less of a hassle.

I also wouldn't be worried about said copper tube getting ruined--it doesn't have any holes in it, and it's being held in a way that can't properly deform from bending until after the whole cross assembly has exploded. So long as that doesn't happen, I think it will be OK. The EMT was super overkill in my version, it was just the only metal tube I knew that fit 1/2" CPVC on the inside and 3/4" CPVC on the outside.
  • 0
RAINBOW CLAN FTW
I'm Purple

My Half-Baked MHA Site

#7 ShadowKing

ShadowKing

    Member

  • Members
  • 24 posts

Posted 18 January 2015 - 04:01 PM

Great job. I was planning on making a aabow but haven't found the time. However I will make time to make this.
  • 0

#8 azrael

azrael

    Member

  • Members
  • 393 posts

Posted 19 January 2015 - 04:11 PM

I can't usually find a cross that fits well (It happens once in a while), and I usually use some combination of scotch tape and non-hardening putty to make it seal nice.

As for the pipe, I'm mostly amazed that it seems to have an ID of 5/8". I've never seen anything like that for copper tubes, but as you said it's "repair" tubing so I guess its intended to slide over 5/8" OD copper tubes and get soldered together. I often have trouble finding 3/4" CPVC that fits over the EMT--it sounds like this copper tube is a bit smaller on the OD which makes buying the 3/4 CPVC bow arms much less of a hassle.

I also wouldn't be worried about said copper tube getting ruined--it doesn't have any holes in it, and it's being held in a way that can't properly deform from bending until after the whole cross assembly has exploded. So long as that doesn't happen, I think it will be OK. The EMT was super overkill in my version, it was just the only metal tube I knew that fit 1/2" CPVC on the inside and 3/4" CPVC on the outside.

Definitely a bit of a hassle with the 3/4 CPVC. I used the one from McMaster, took quite a bunch of hammering to get them to fit. Since I don't have a CPVC supplier locally, I have to work with what I can get, instead of finding one that has loose enough tolerances. I think I only got it to nest inside maybe 3/4 as much as in your write up. Works well, though, shoots at least 200 fps.
  • 0
Better Nerf By Science!
http://nerfscience.blogspot.com/

#9 Blood Angel

Blood Angel

    Member

  • Members
  • 67 posts

Posted 24 February 2015 - 07:49 AM

Good job on the write up. The pictures, illustrations, and text really make this write up clear.

From what I gather this is a 40in-ish total length limb bow with a 15.5 in draw, correct? "Heavy draw AAbow." I get that too, but more importantly what is the draw weight at full draw? If you need a glove to fire this thing, then that means there is a chance of nerve damage to the fingers. For example: my bow has a 50lb draw weight at a 32inch draw length. If anything, knowing that information can help you plan a better AAbow, should you plan on building another one later.

You can get a mechanical luggage scale from Wal-Mart for about $8: http://www.walmart.c...-Black/39490328
  • 0

#10 Astro

Astro

    Member

  • FNG1 
  • 1 posts

Posted 27 February 2015 - 09:15 PM

Great write-up! Have you heard of 3/4" Aluminium tubing? It has a 3/4" OD and a 5/8" ID", probably very close to your copper repair pipe. In my experience 1/2" CPVC fits in it perfectly and it has an alright fit in 3/4" CPVC.(it is a little snug)
  • 0

#11 Draconis

Draconis

    I am not Lord Draconical

  • Members
  • 2,712 posts

Posted 28 February 2015 - 02:05 AM

Great write-up! Have you heard of 3/4" Aluminium tubing? It has a 3/4" OD and a 5/8" ID", probably very close to your copper repair pipe. In my experience 1/2" CPVC fits in it perfectly and it has an alright fit in 3/4" CPVC.(it is a little snug)


All of the 3/4" Flow-Guard Gold CPVC I have checked has an ID of approximately 18mm. I haven't gotten a chance to check, but I am curious if anyone else has found normal CPVC with an ID of 19mm (3/4")? It would be handy for MEGA barrels.
  • 0
[15:51] <+Noodle> titties
[15:51] <+Rhadamanthys> titties
[15:51] <+jakejagan> titties
[15:51] <+Lucian> boobs
[15:51] <+Gears> titties
[15:51] <@Draconis> Titties.
[15:52] <+Noodle> why is this so hard?


Also tagged with one or more of these keywords: homemade, bow, writeup

3 user(s) are reading this topic

0 members, 3 guests, 0 anonymous users