This is what it should look like in the end. I know some people won’t like this type of paint job, but this was a commission so this is what my client wanted.
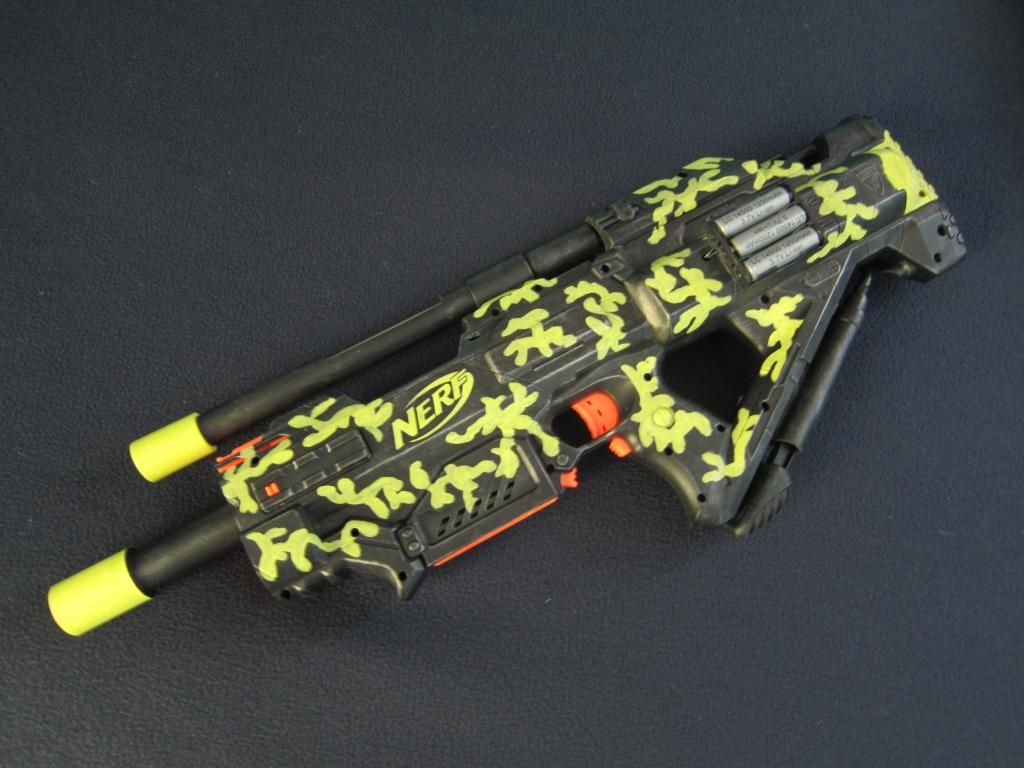
Coop772 did something similar with the stryfe but didn’t have a nerf haven write up so I thought I would. This was based off of his “Strypede” idea (which admittedly has a much cooler name than mine).
These are some of the things that you will frequently need throughout the course of this modification. Some things are optional based on what you want to do with your gun but these are the materials that I used for mine.
Tools and Supplies you’ll need
- Rapidstrike cs-18
- N-Strike Stampede
- Buzzbee Panther
- Hack saw (or band saw)
- Belt Sander (optional)
- Dremel Rotary tool
- Epoxy Putty
- Hot Glue Gun
- Super Glue/Liquid epoxy
- Plasti-dip
- Soldering Iron (and solder)
- RM2 solarbotics replacement motors
- 18-guage wires
- Electric drill
- ½ inch PVC
- 1/2 inch PVC coupler
- 9/16 brass tube
- 17/32 brass tube
- ½ inch brass tube
- Pipe cutters
- Battery harness
- Electrical Tape
- Flexible Clear vinyl tubing (1/4 inch OD and ID)
Okay, now let’s get started.
Take your rapidstrike, open it up, and remove all of the internal components. Make sure you keep track of where everything goes for when you reassemble it.
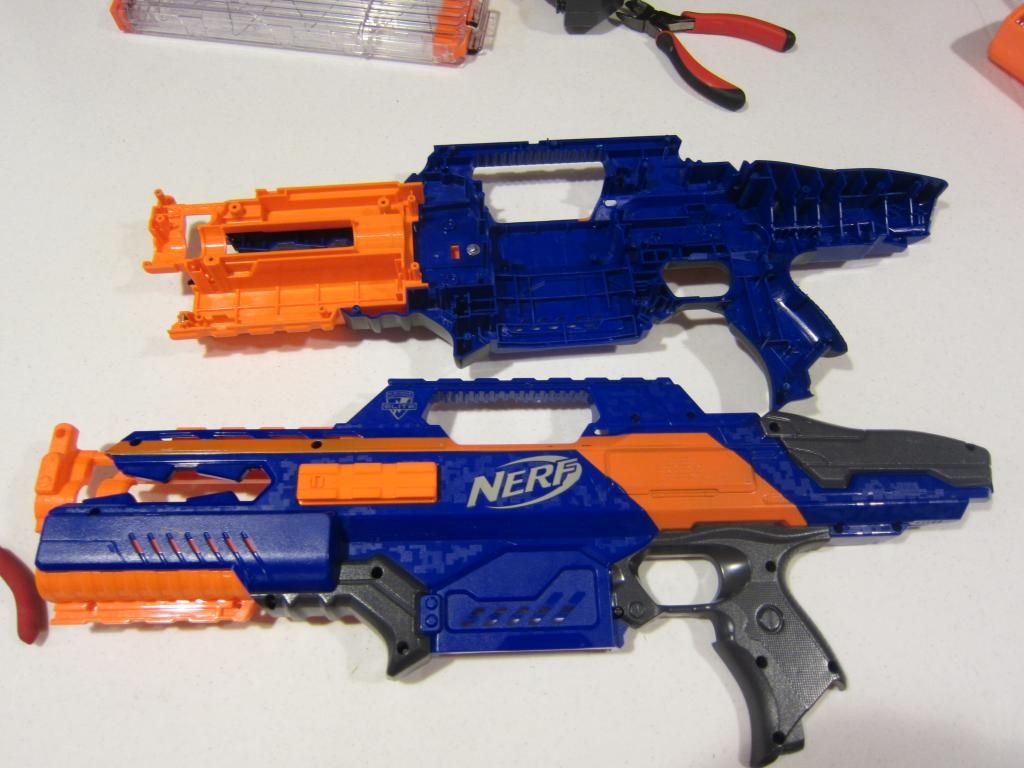
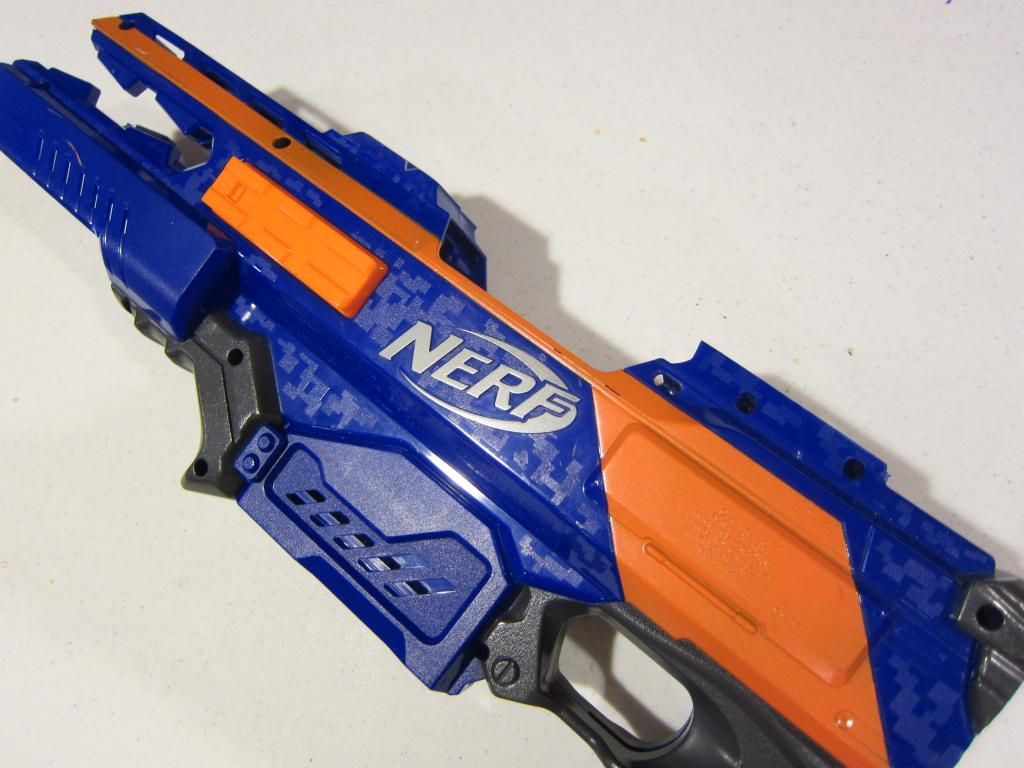
To make room for the brass breech slide that you’re going to make for the panther, you need to get rid of the rapidstrike rail. I recommend a belt sander to quickly smoothen all cuts and make everything very clean.
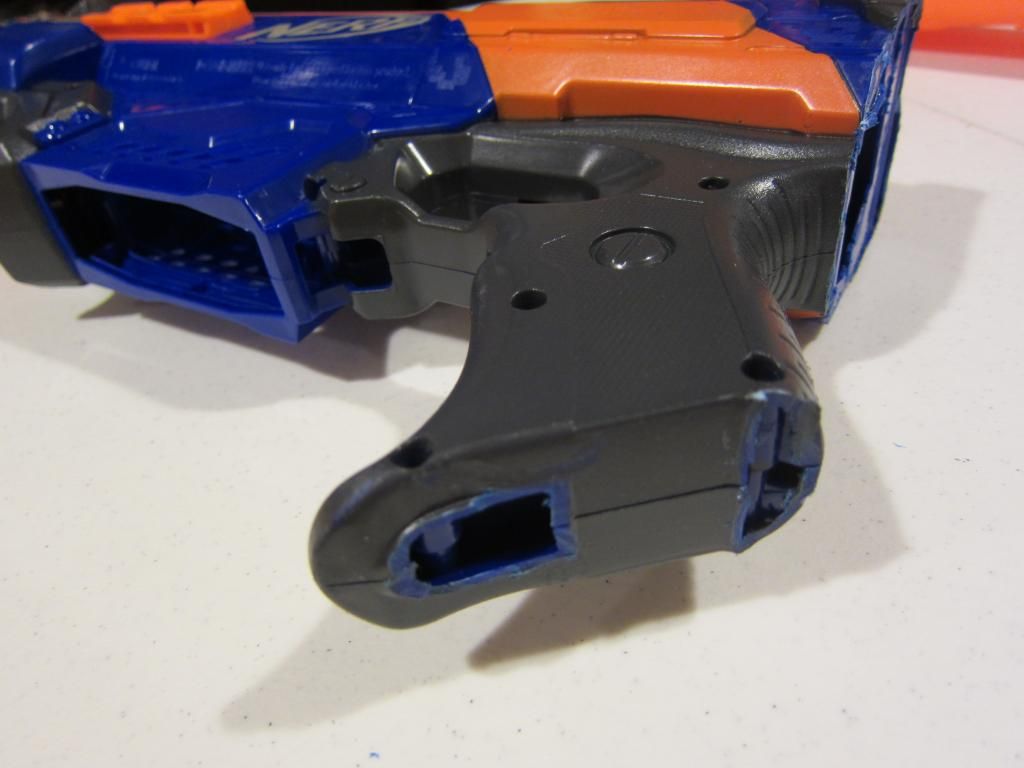
Also remove the plastic nubs and sling mount on the bottom of the rapidstrike handle in preparation for the stampede stock integration.
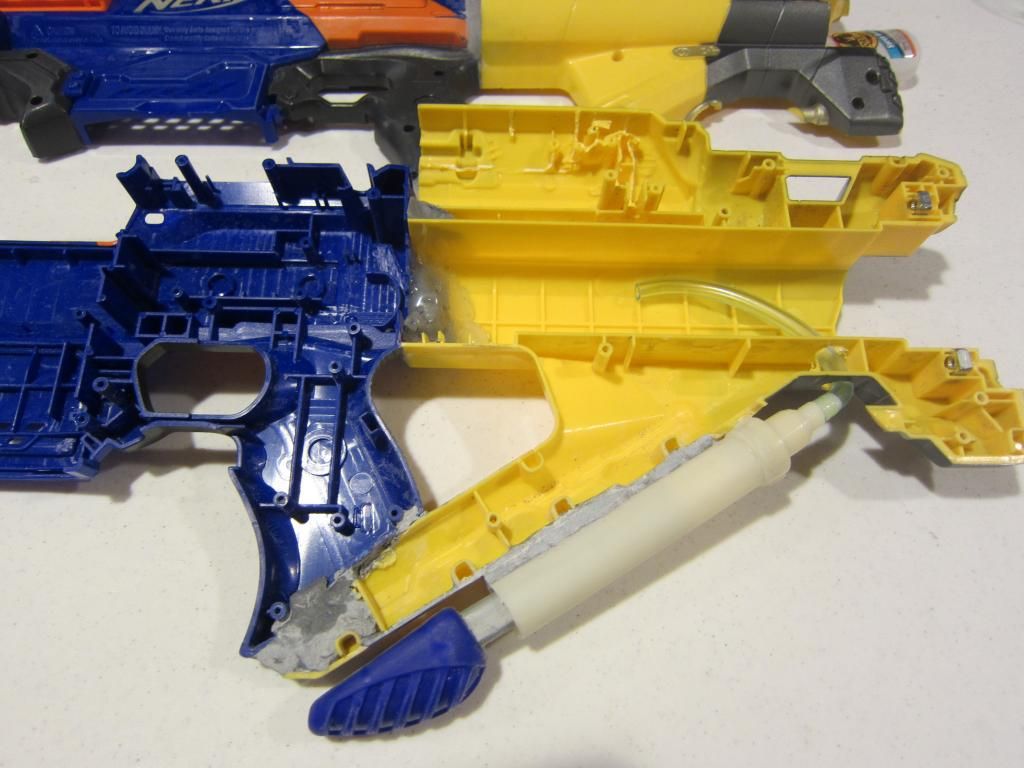
Now take your stampede shell and cut it down with your saw like this. Calculate your cuts accurately because you will have to connect the thumb hole to the rapidstrike.
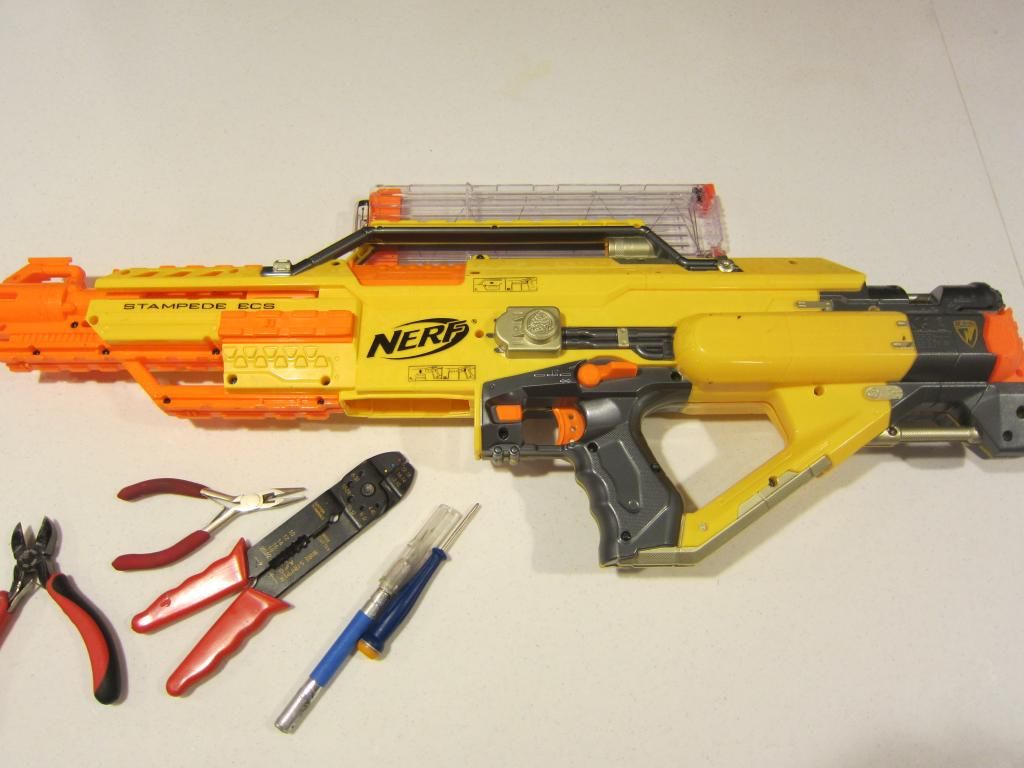
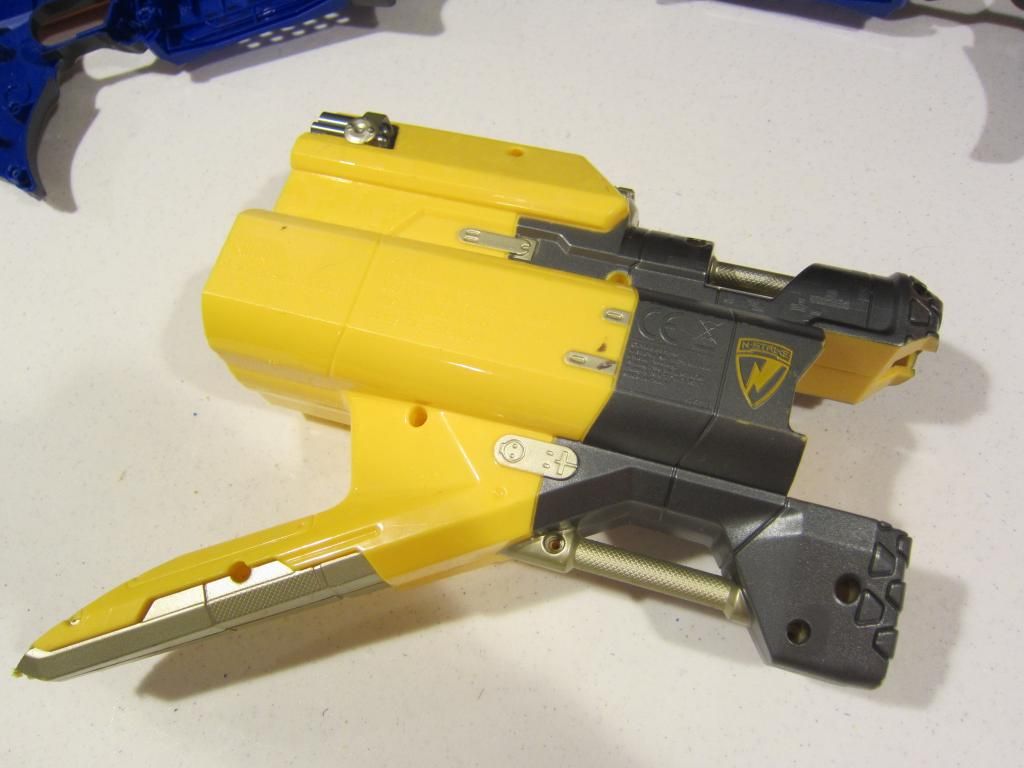
If there is a little gap between the stock/ handle and rapidstrike it’s okay because we will be filling it with epoxy putty.
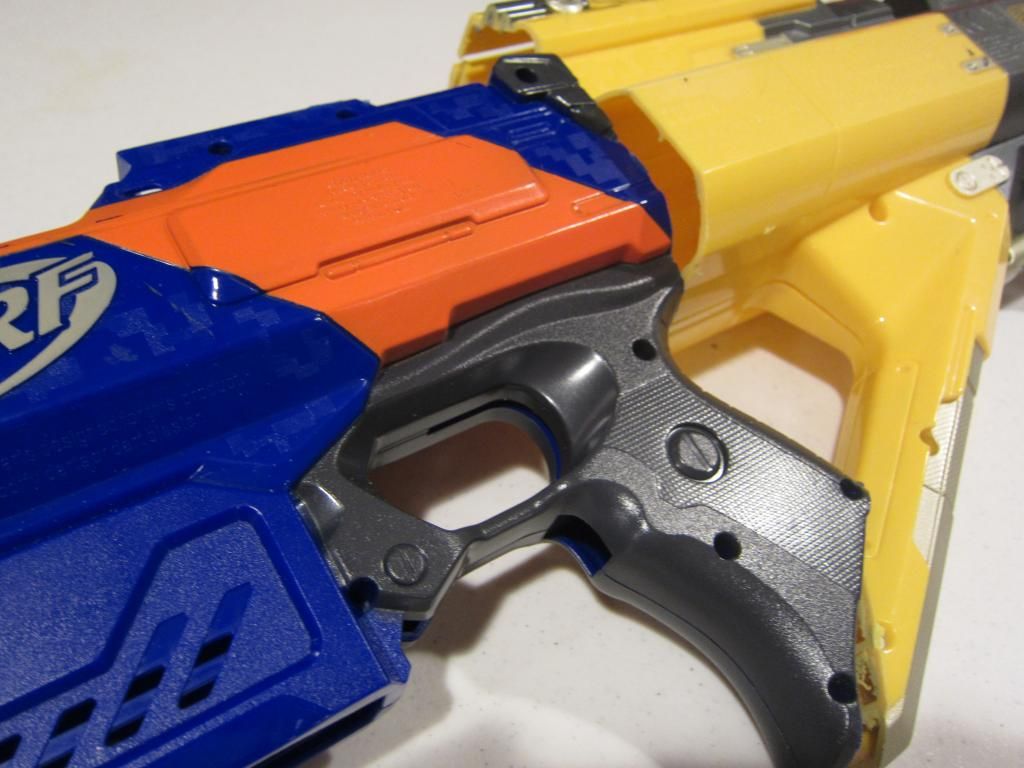
Apply some hot glue to the shells as an initial bond. Make sure that you will be able to cover it with epoxy putty because it is a pain to sand hot glue. Then apply the epoxy putty (using disposable gloves) and sand however much you see fit. Make it neat. Don’t assume paint will cover it up because it won’t!
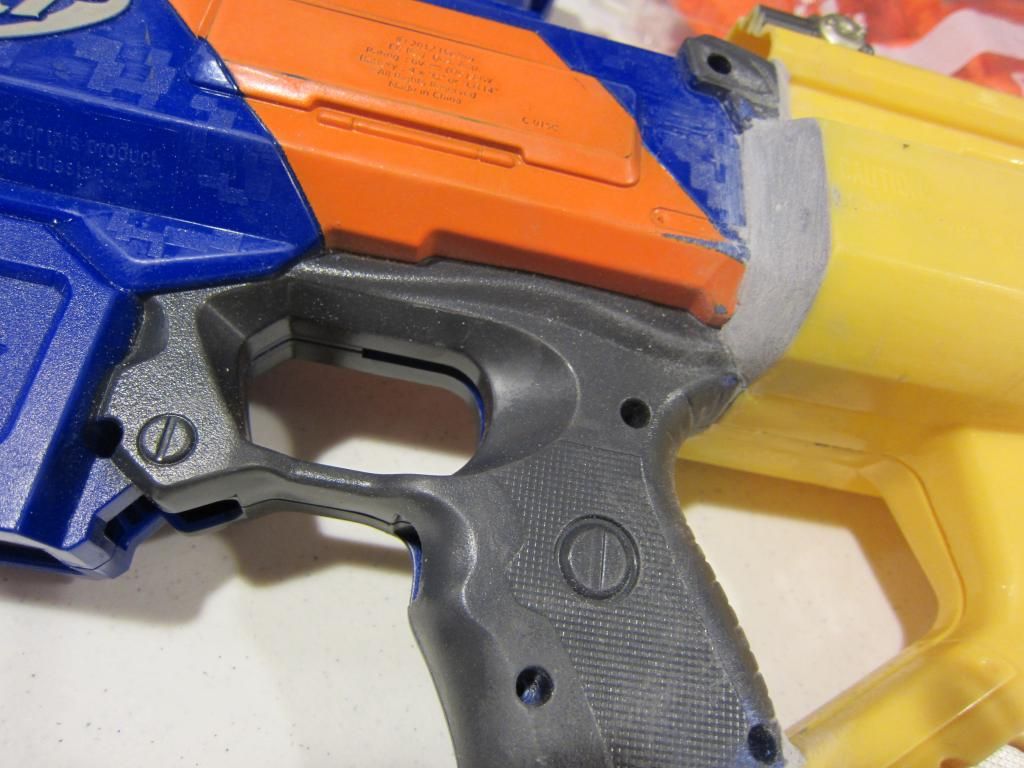
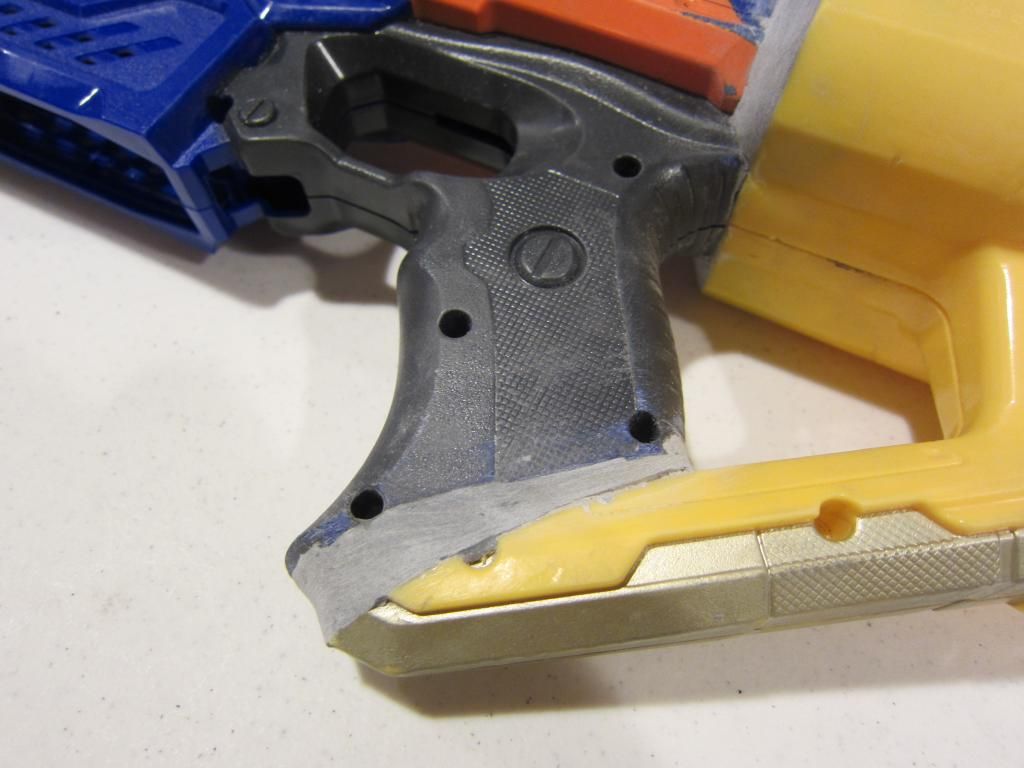
Once the epoxy putty has cured for 20 minutes apply a ton of hot glue and epoxy putty on the inside of the two shells to make sure that they are solidly integrated.
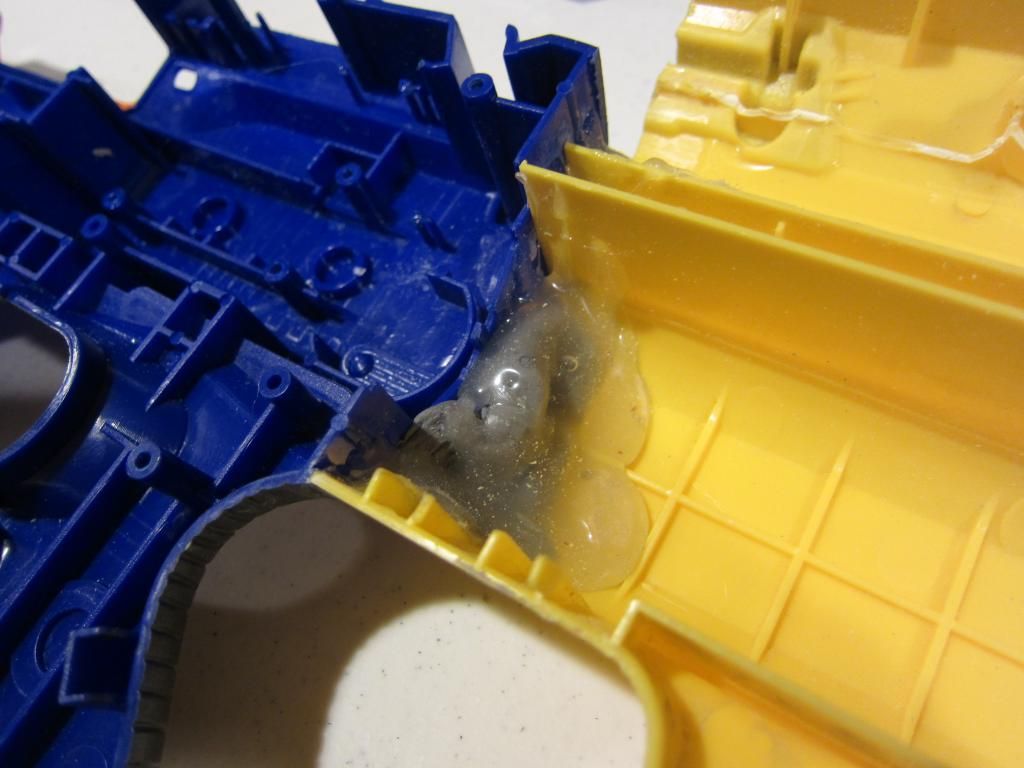
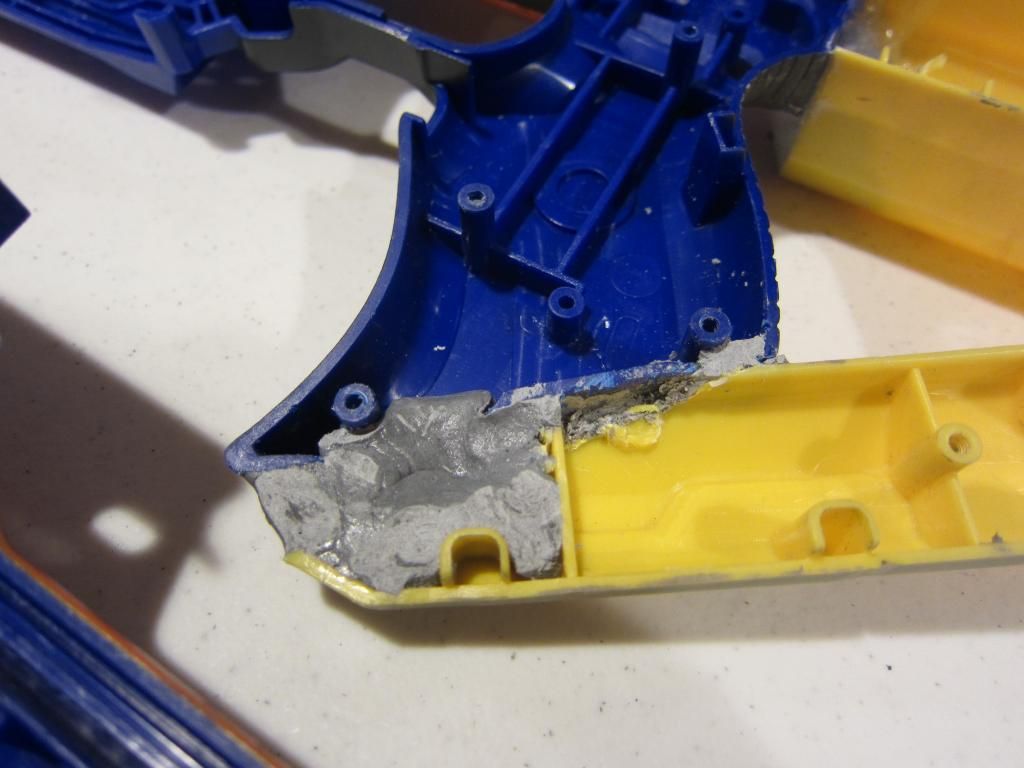
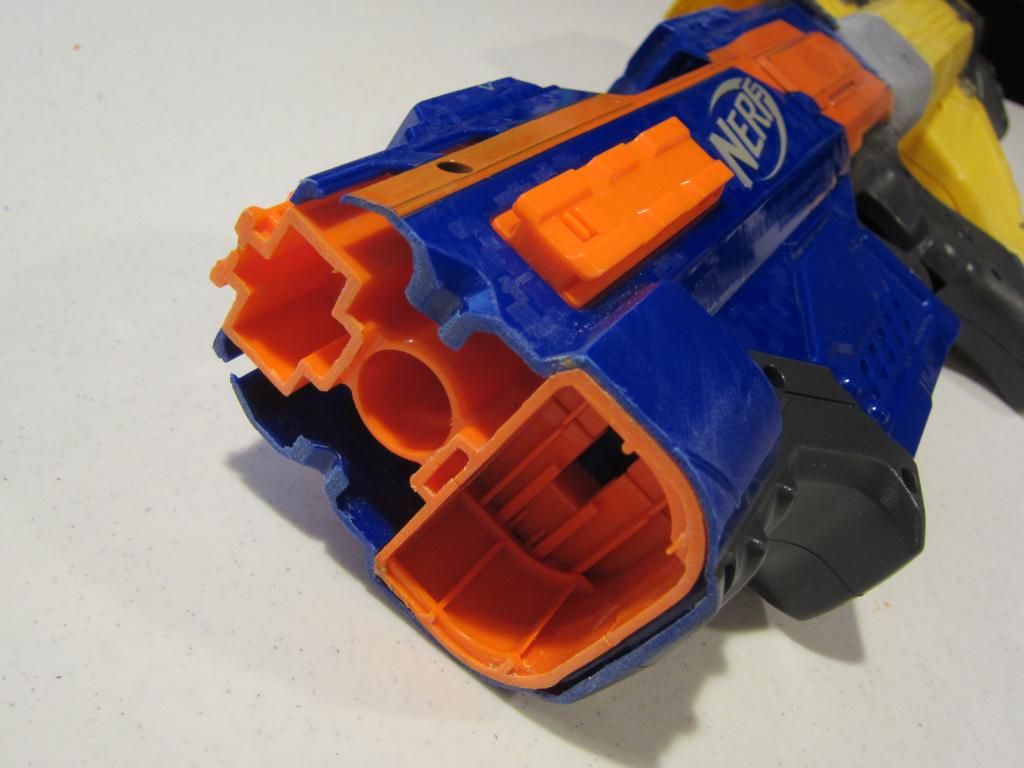
I minimized my rapidstrike on the front because the commissioner wanted me to, but it’s a lot of work and slightly sloppier. You will have to wire the rapidstrike to another battery tray if you choose to get rid of the existing one. If you want to do it it’s fairly simple. Just mark where you want to cut (I choose to cut less than some people so I can keep the tactical rail) and cut it with your hack saw or put it through a band saw.
Now comes the fun part. The panther integration. Take the panther pump (I’m using a shortened hornet pump) and epoxy it to the bottom half of the shell as shown. Then run some vinyl tubing from the pump (secured with liquid epoxy) into the battery tray of the stampede through a hole you will drill.
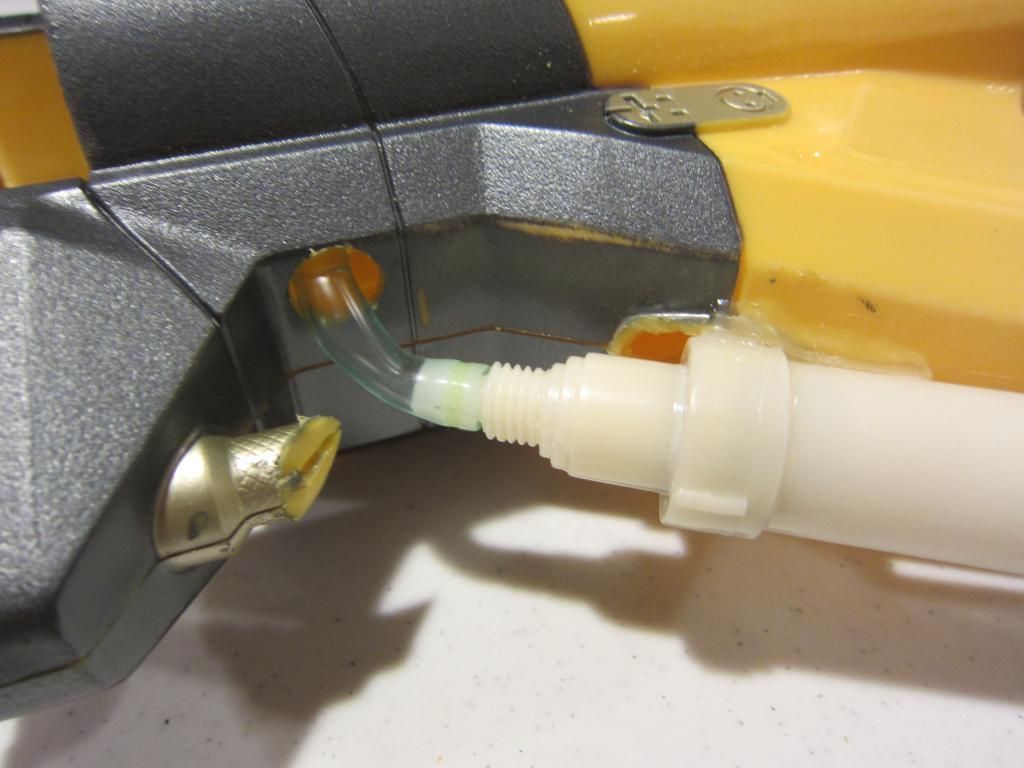
Now take your panther and dremel out the air restrictor.
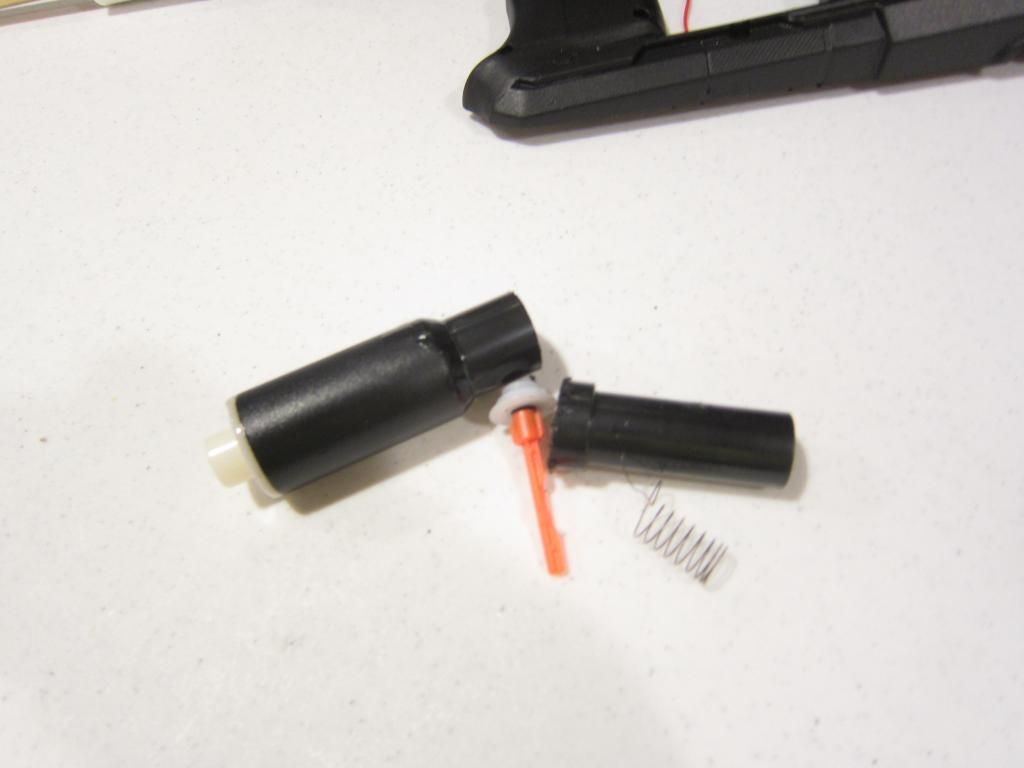
Take this portion of your trigger.
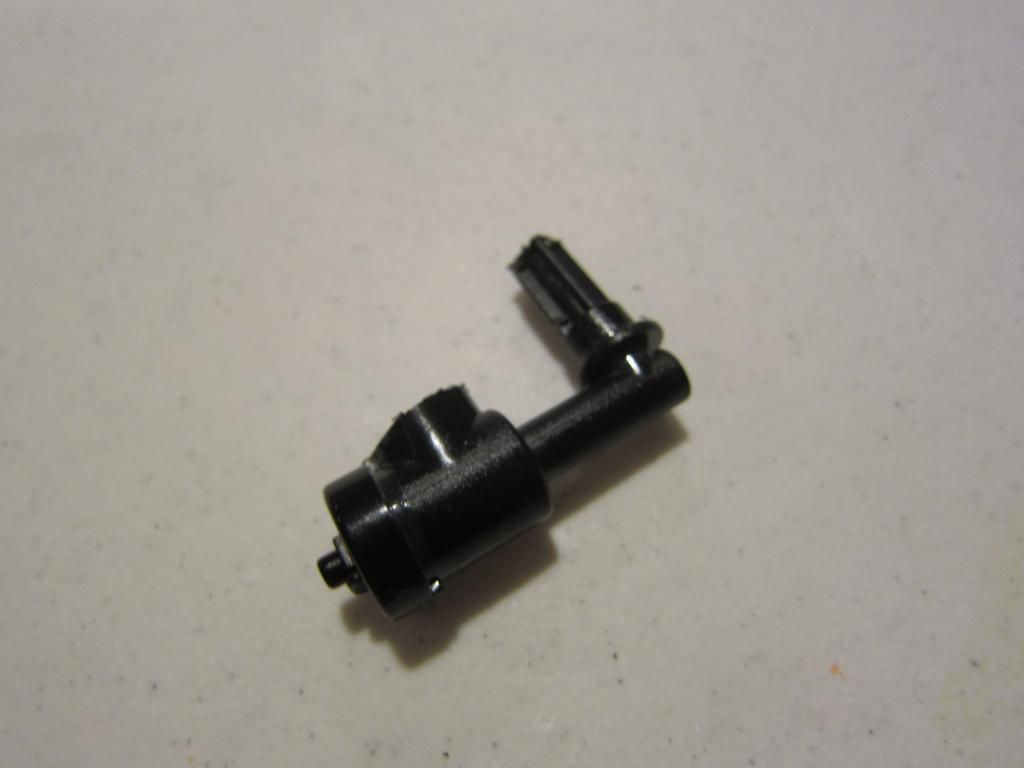
And air tank which you will need to put a ½ inch PVC coupler on. The fit between the coupler and the tank isn’t very tight so wrap a few layers of electrical tape around the tip of the tank until it fits snugly into the coupler. Then epoxy or super glue it on.
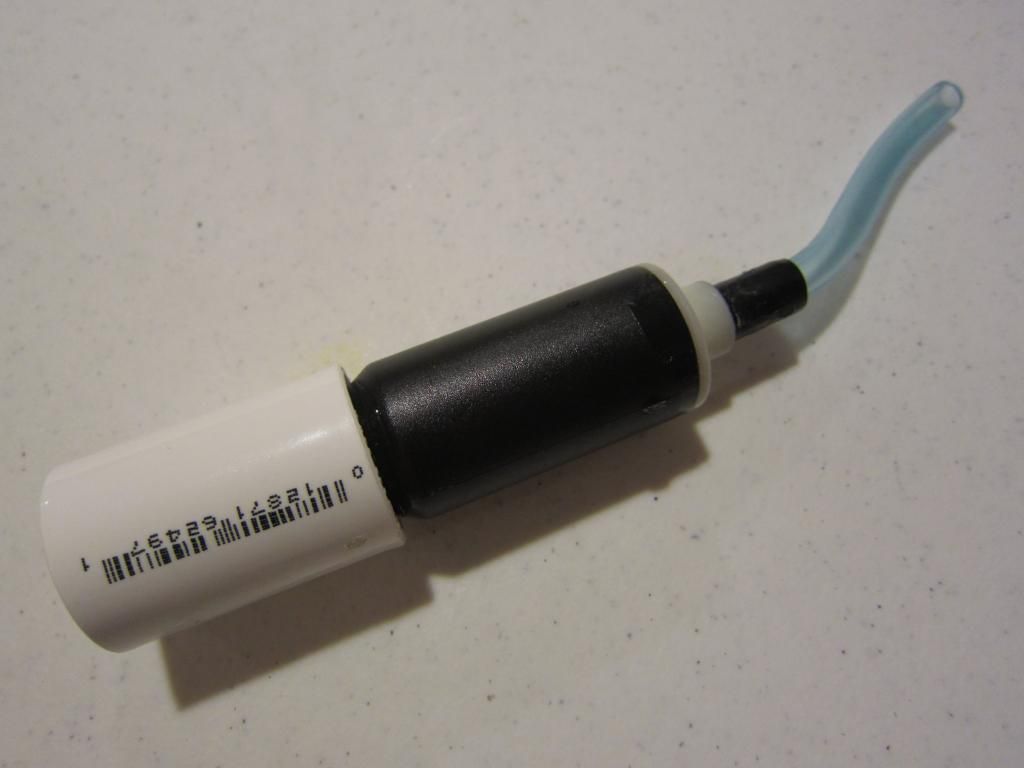
And configure it like this with vinyl tubing.
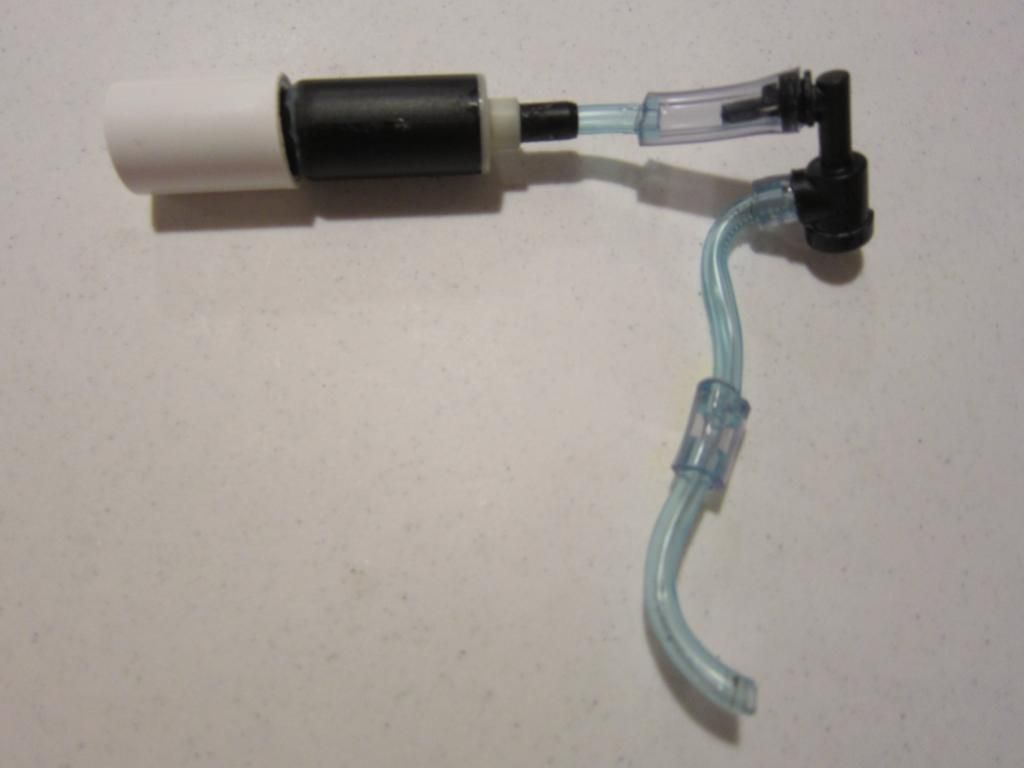
Make sure that your measurements work before you glue anything together. You’ll need to drill a hold on the left side of the stampede shell for your trigger to be exposed. Connect the system to your pump (you can use the ¼ ID Vinyl tubing as a coupler for the ¼ inch OD tubing). Once everything’s perfect, permanently secure it into the shell with hot glue. You’re coupler should be exposed so that you can attach your breech. MAKE SURE that it is level when gluing it in!
Time to make your breech for the panther. I’m going to be making a 17/32 slide brass breech and that will go into the ½ inch PVC coupler. I’m not going to go super in depth into it because SG Nerf has a good guide on his blog. Click here: http://modworks.blog...uild-guide.html
I made mine a little different though and I think it is simpler and more convenient.
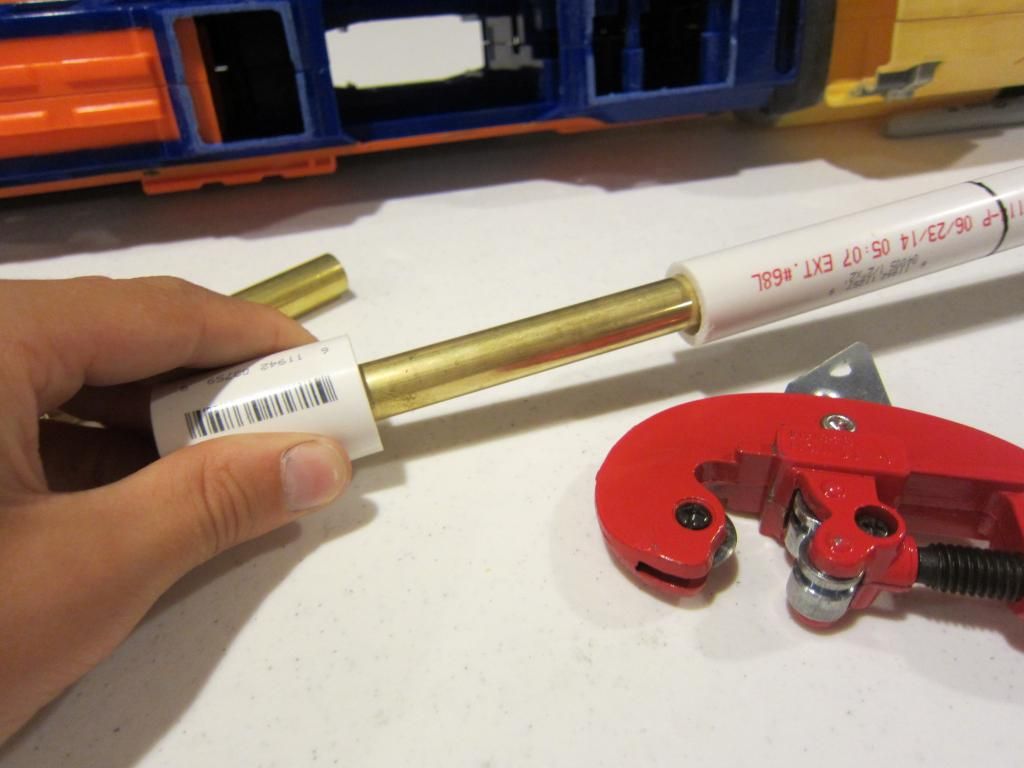
1) Wrap your 8” of 17/32 brass in e-tape so it fits snugly into a 2 inch stub of ½ inch PVC. Secure it into place (Flush with the front of the PVC) with liquid epoxy and let that sit.
2) Take 6.5 inches of 9/16 brass and 6.5 inches of ½ inch PVC. Use your dremel to cut halfway into the PVC making a window about 3 inches long (long enough to insert any type of ammo you want). It should be about 1.5-2 inches away from the end of the PVC pipe because you need room to insert the breech into your couplered panther.
3) Do the same thing for your 9/16 brass tube. Make sure that when you slide the 9/16 into the PVC that it is flush with your cuts and as neat as possible.
4) Inside the rear of the 9/16 brass tube insert a ½ inch length of 17/32 brass and ½ inch brass. This is so when you close your breech, something will push your dart into the 17/32 brass.
5) Wrap your 9/16 sheath in some e-tape (electrical tape) on the front and back so it will fit into your PVC. It should not be visible once inserted into PVC. Secure, position, and let it sit.
6) Once dried slip your 17/32 brass into the 9/16 sheath and you are done.
P.S. If you are going to do painting, paint the PVC before you glue any brass in anywhere because you don’t want to paint brass.
Here are some pics to help you with the assembly:
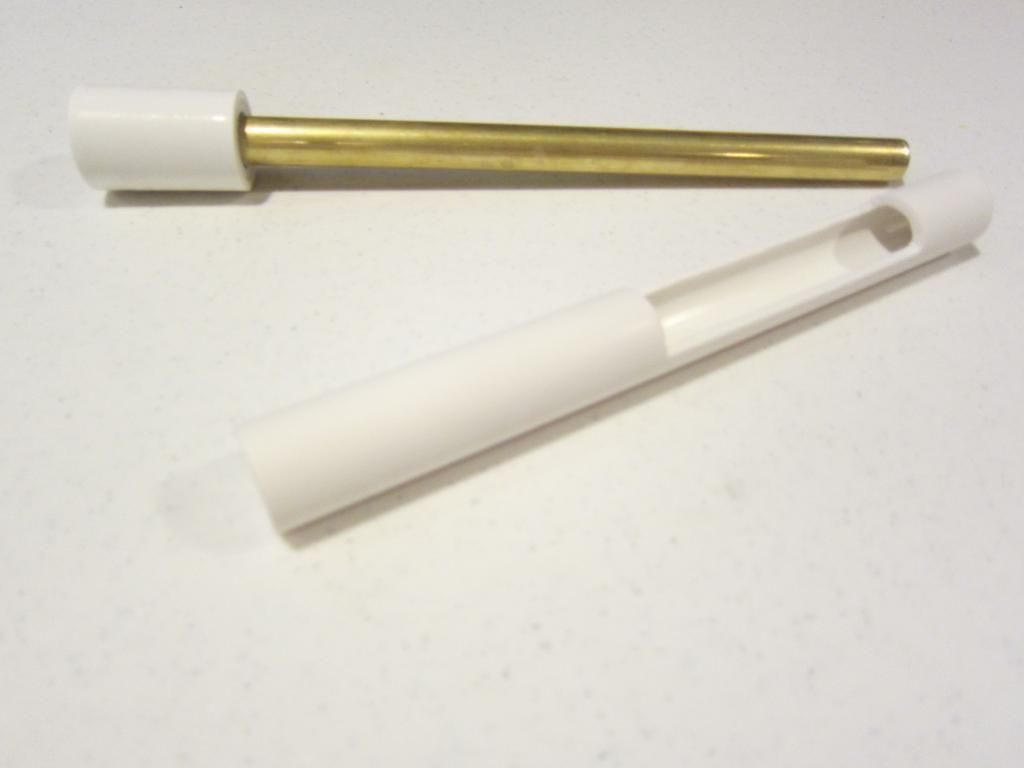
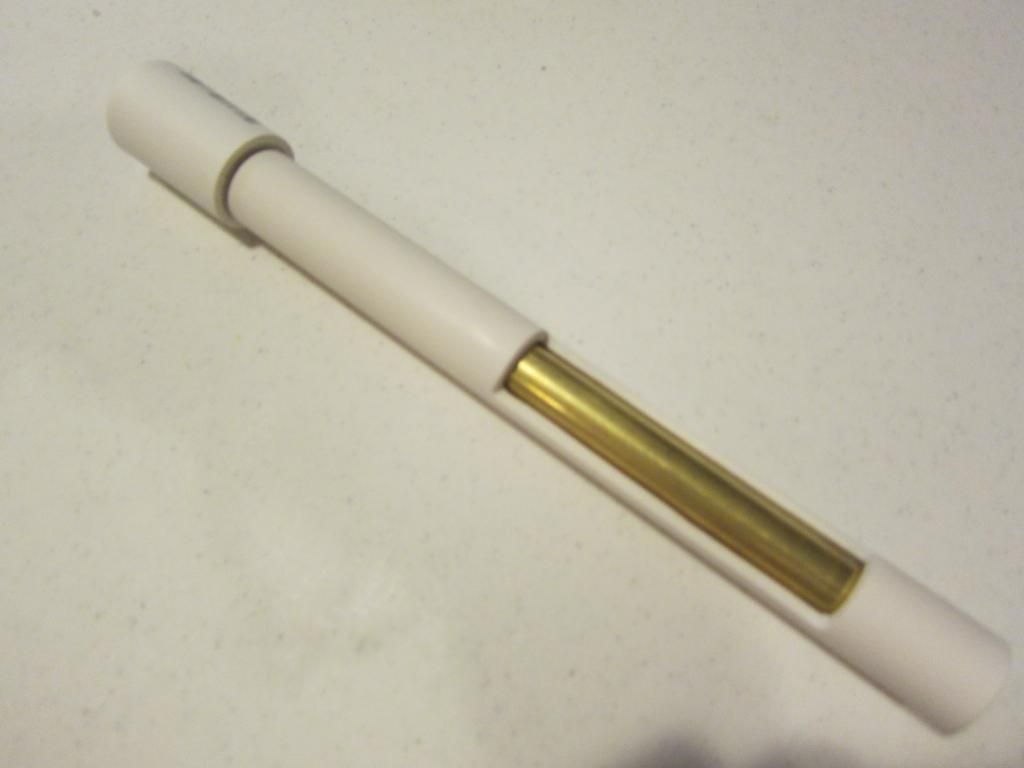
This is what the breech looks like when it is closed. I added a PVC coupler on the tip of my breech just to look cool.
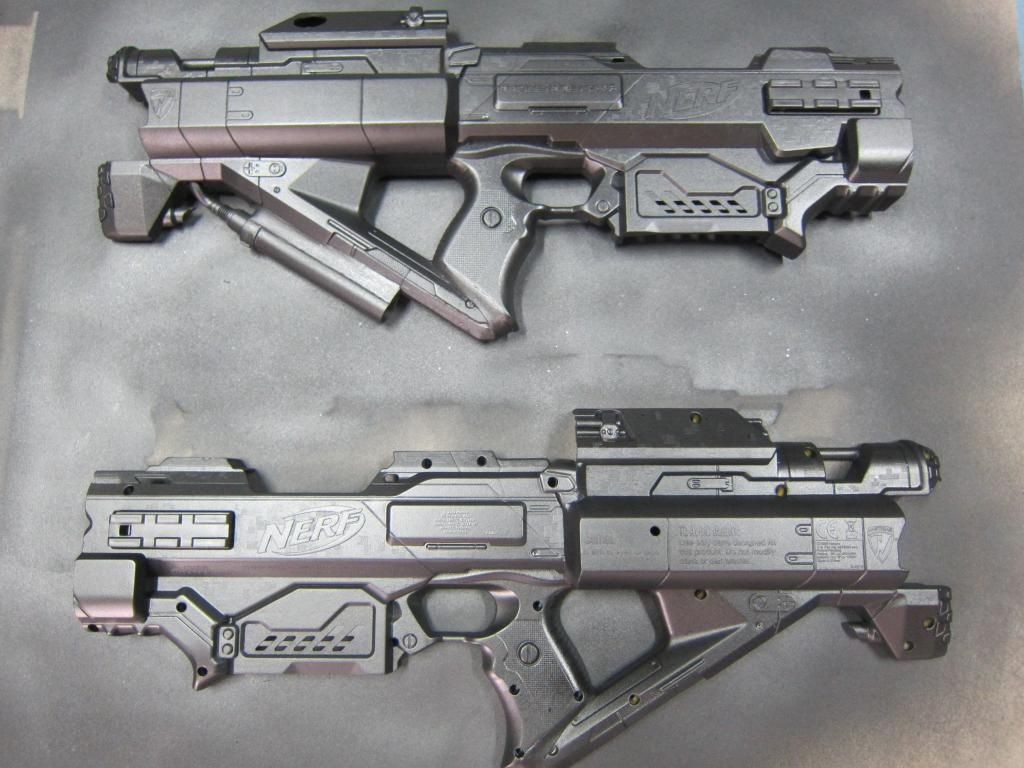
Now that you have gotten this far you’re almost done. Now comes the paint.
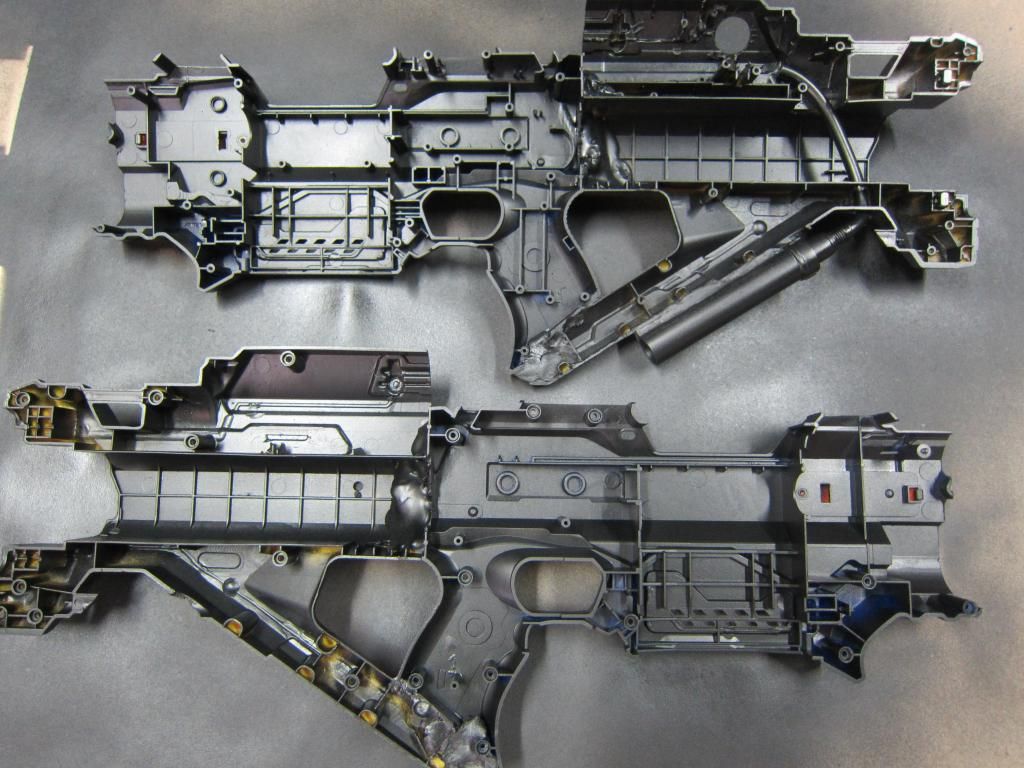
Don’t forget to paint the inside. You don’t want all this work you’ve done to look bad because you can see the stock blue and yellow plastic on the inside so spray the inside.
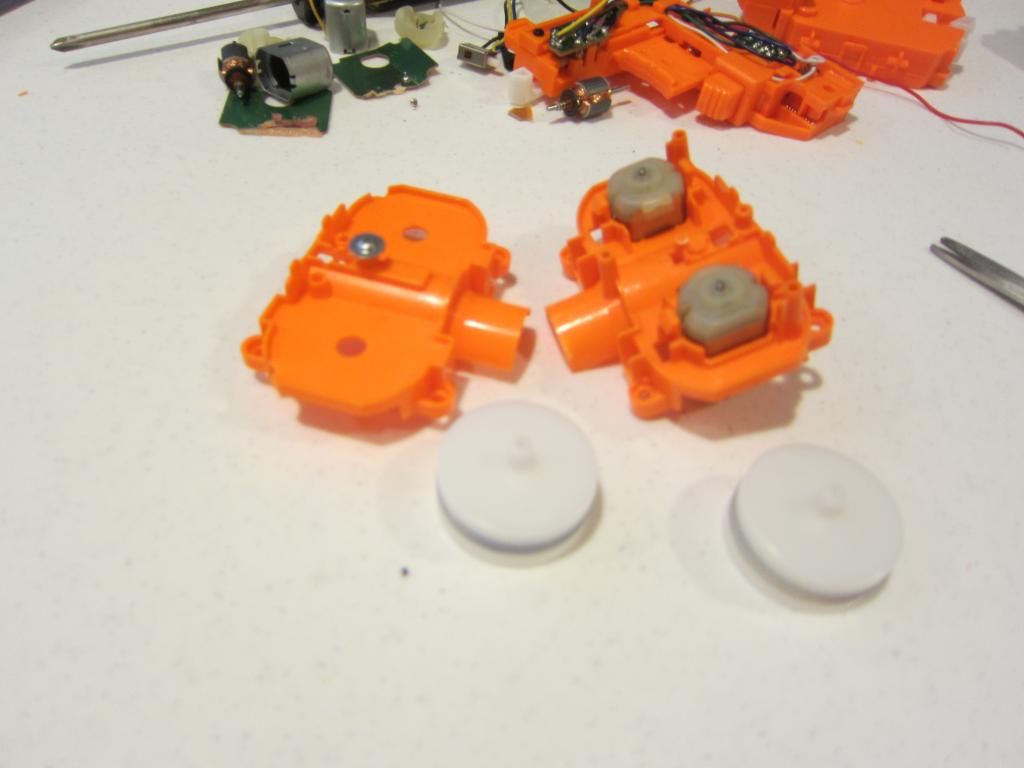
While I’m letting my paints dry I see this as the best time to work on the internal modifications. I’ll be removing the resistance and thermistor on the motors, rewiring the rapidstrike, replacing the motors, and plasti-dipping the flywheels. I won’t cover rewiring extensively but you can go see coop772’s rapidstrike mod guide because he does a pretty good job:
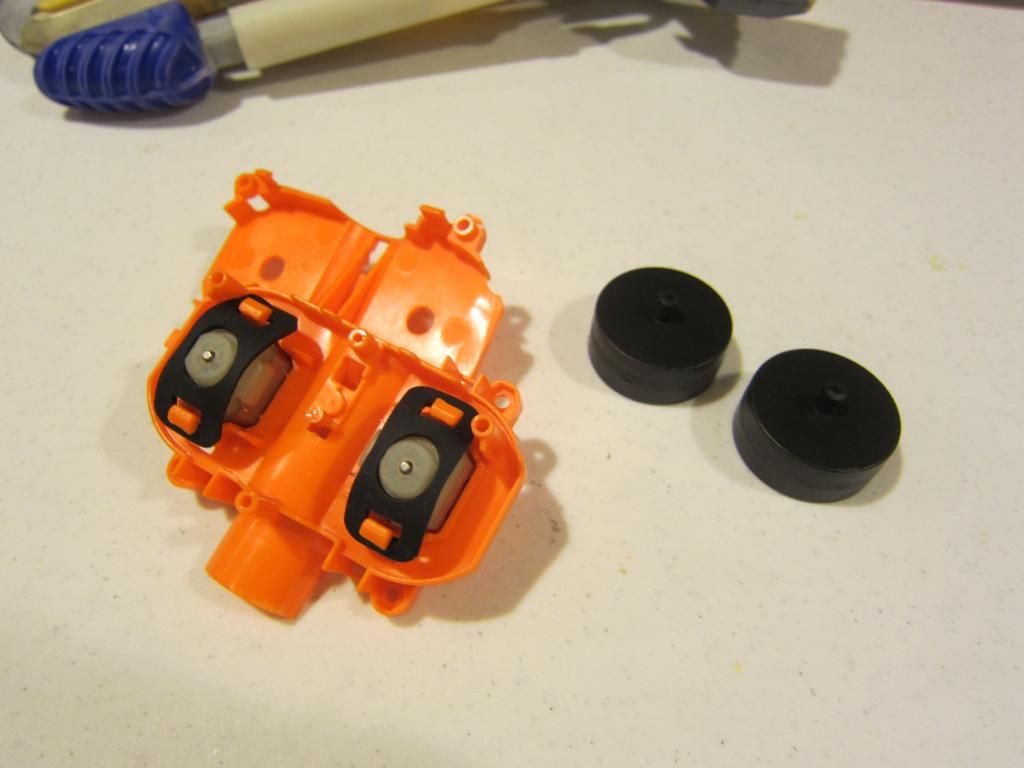
This is the motor housing disassembled. I pulled the casing apart into two halves (there are four plastic clips holding them in). Take a screwdriver, stick it underneath the flywheels and pry them off. Then I ripped the old motors out because I’m replacing them. Don’t do this if you don’t intend to change the motors. The replacement motors in this picture are Solarbotics RM2s.
As you can see the flywheels are black now because I added a rubberized coating to them so they can grip darts better. This will help you get better ranges.
I wired the rapidstrike to an external three AA battery holder on the stampede because I am using lithium ion batteries (trustfires). Drill a small hole so you can run the positive and negative wires into the shell. Connect the positive wire to your red wire in the rapidstrike and extend the back wire you the negative side of your motor.
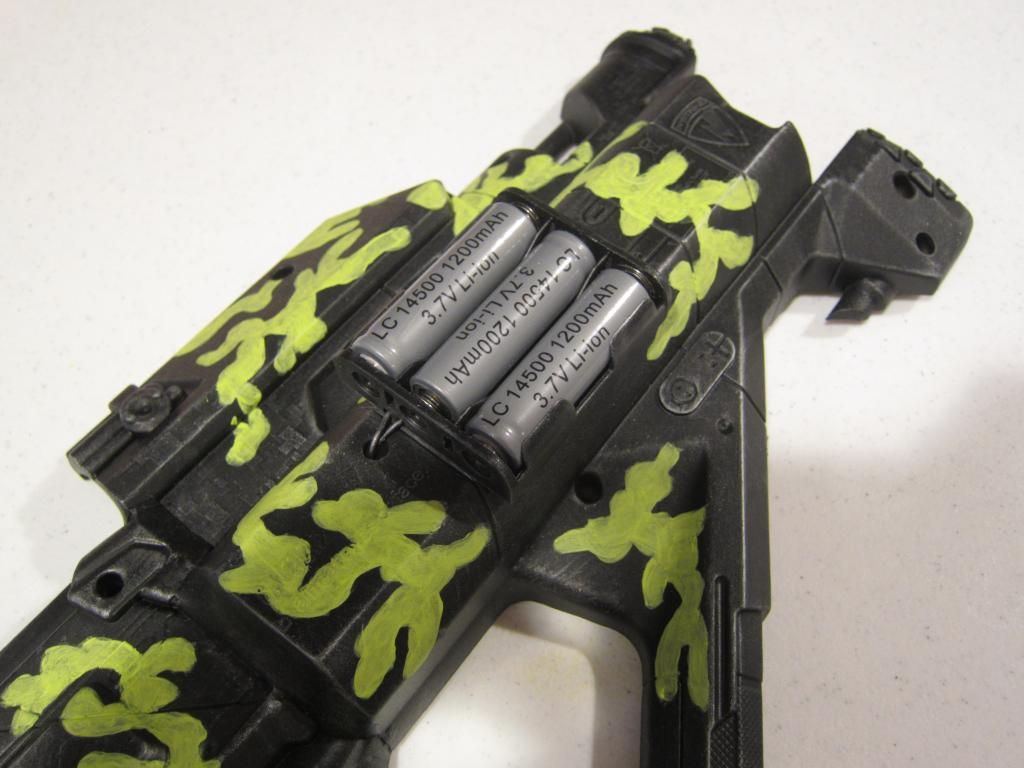
I did this on the left side but this is a lot of work because you have to connect it to the other side where the motors are. The commissioner wanted it to cover the warning logos so I didn’t really give it much thought. If you were to do this, probably do it on the other side so you don’t have to connect the two sides of the shell.
Now reassemble everything just like in stock form then close the shell and screw them back together. Once everything’s done it should look something like this.
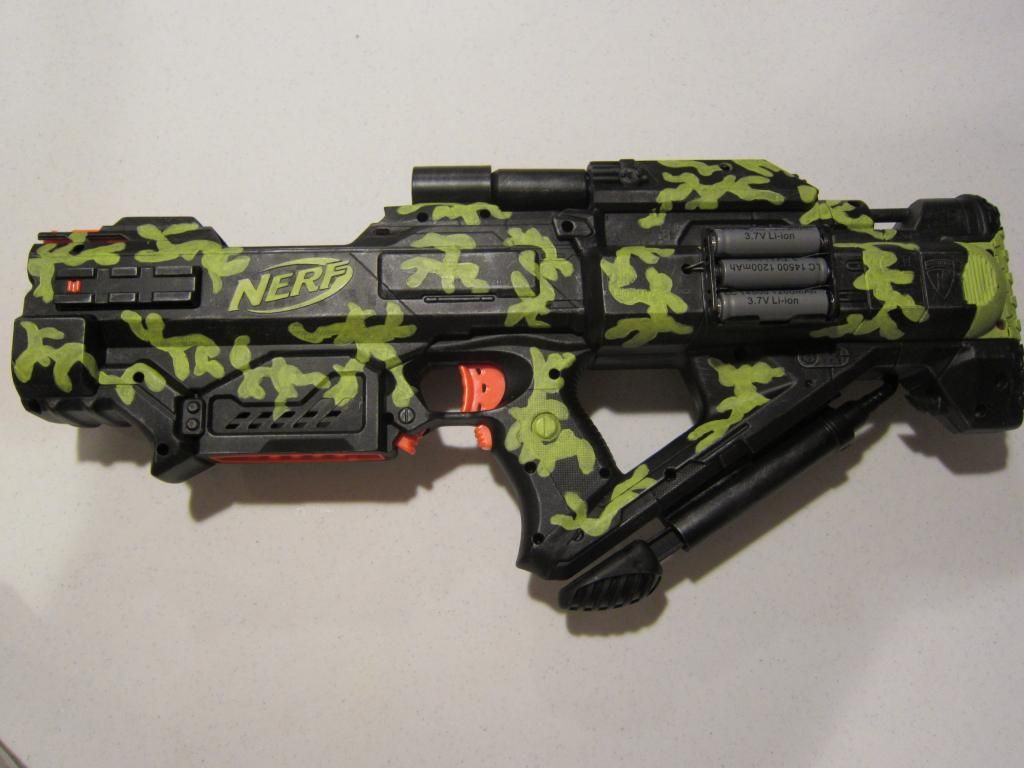

This is the end of my write up. I hope you liked it. If you have any questions or need help feel free to post them below.
This is my youtube channel:
http://youtube.com/user/mag212nerf
Edited by Mag212, 16 September 2014 - 08:20 PM.


