N00B TUBE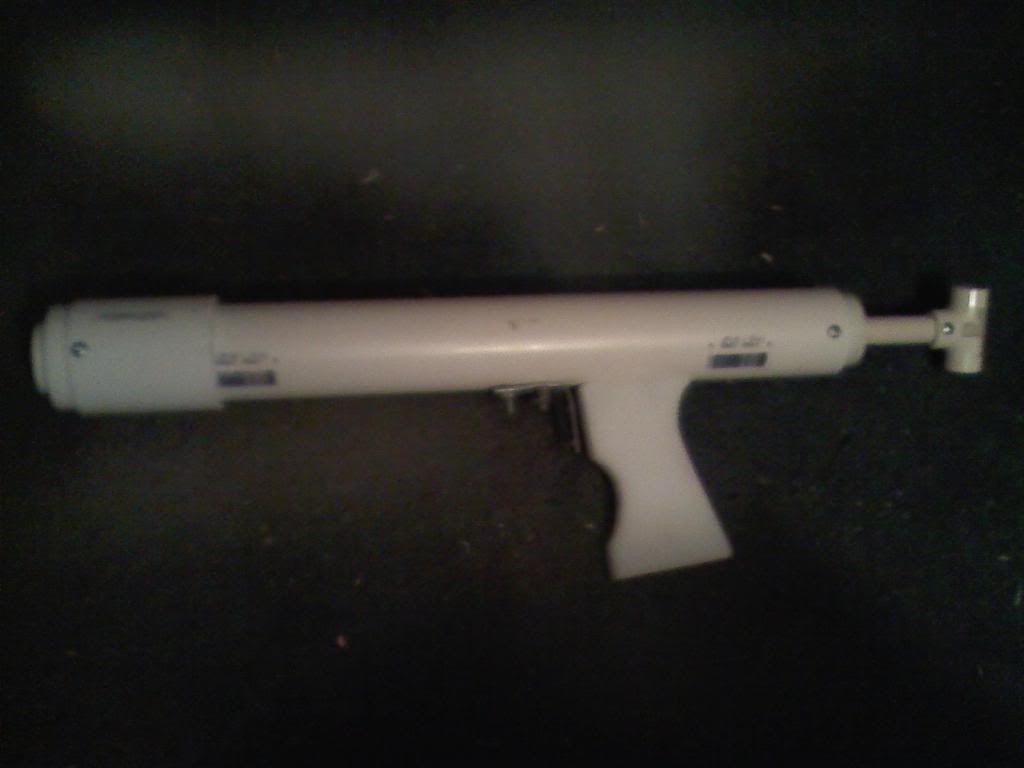
General collection of prewrite-up notes:
-I plan on updating this write-up as time goes on, even after the competition is over. Look for a write-up soon about adding a stock and even a pump option.
-A pullback style blaster based on a design by Andrewraps, and very similar to Snaps. I tried to keep this as cheap as possible without cutting too many corners. It is super flexible on how much draw you want, how much power, etc.
-This is written for the total newcomer, so some stuff may be overly explained; this write-up is suuuuuper long for such a simple blaster.
-This entire blaster can be made from local hardware store materials- I used a spring from McMaster Carr because I already had one, but the others that I have built are all powered by True Value springs (and some are actually more powerful).
-Ranges and stuff are written up at the end, but the results are that this is an easy to build blaster that means you won’t get picked last just because of your foam flinger. It also gives you a lot of basic homemade blaster building experience.
-If you don’t have a drill you can still make a very nice blaster out of this, sans regular trigger- you will just make a pull back and release, like a bow.
-You can build this blaster with just a handsaw and glue it together- it’s that simple. If your local hardware store or plumbing supply house has two foot sections of PVC, you can also complete the rest of the build with just a 3/4 inch PVC pipe cutter. It’s much easier though if you have a drill and just a few bits.
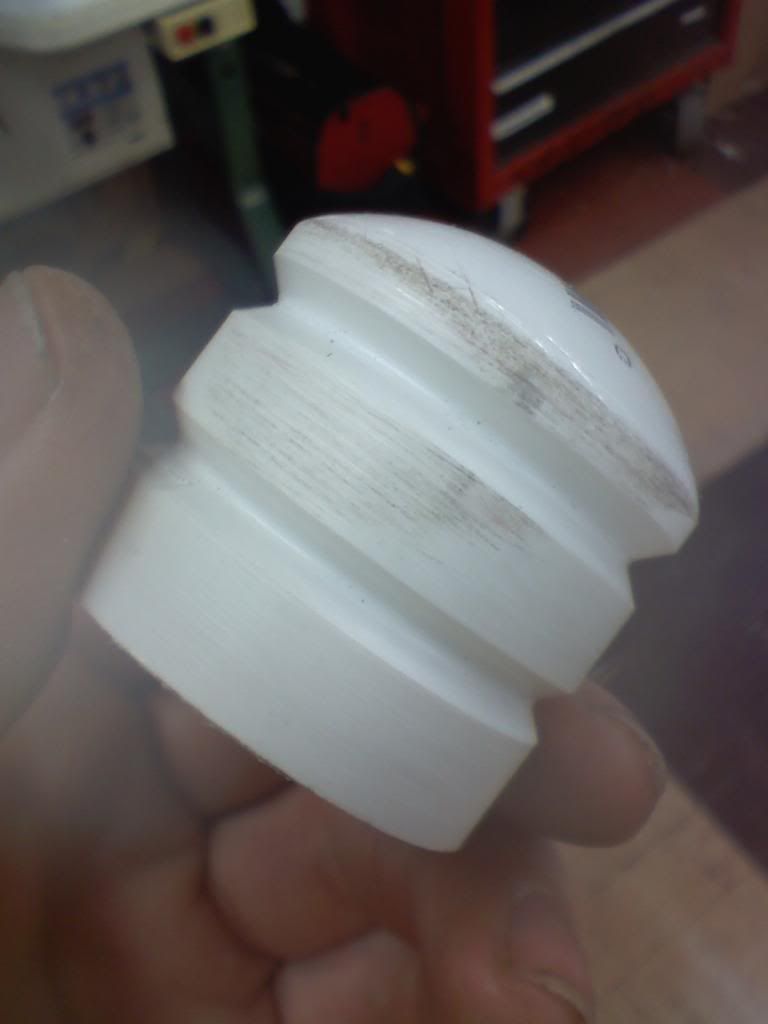
-I have updated the write-up with spoiler links marking out the lathed parts. the lathed plunger heads were sub-par and did not preform nearly as well as the rubber washers.
Please pay attention to the sections of the write-up. If it helps (or this is your first homemade), print this out and highlight the parts you need. The sections are all in order of the build, and all sections are labeled as to the power tools (or lack there-of) you need for that version of a step. Each section labeled with a power tool is kept to one paragraph to help keep confusion to a minimum.
Materials
Body (in order of assembly, front to back)
-1/2” x 3/4" PVC reducing bushing
-3/4” x 1.5” PVC reducing bushing
-1.5” coupler (don’t use the in-pipe style of bushing. Get a coupler.)
- 1.5” PVC pipe, 2.5 inches longer than whatever spring(s) you use; 2’ sections available at Home Depot
-1.5” end cap (if you are building this without a drill, duplicate the three fittings on the front instead)
-handle material, if you have a drill and a saw: something like 3/4 inch thick wood or plastic (3”x4”) works fine.
-if you don’t have a drill, use a “make your own T” fitting, 1.5 inch to 1 inch or 3/4.
Plunger Assembly
-Spring to power the blaster; I used a [k26] from McMaster Carr. I checked at True Value, the best local spring equivalent for me would probably be 4 #42 springs. It’s all based on how hard you can pull though, so you may find that you need to experiment with a few different spring sizes before deciding. If you mix springs, make sure that they won’t slip inside each other when you shake the blaster.
-1/2" CPVC end cap
-24 inches of 1/2 inch CPVC
-1” of 1/2" PVC (also used for other things, you’re going to need more don’t worry)
-1/2" PVC coupler
-1/2" CPVC T fitting
*Without lathe, with drill:
-1/4x20 bolt 3/4" long with matching lock nut
-#10 finishing washer (looks like half of a donut)
-1.25” rubber washer
-1.5” rubber washer (1/16” thick)
-1.25 inch OD, 1/4 inch ID washer (metal)
*Without lathe, without drill:
-one of the #6 screws listed below in the hardware section
-small washer that fits on said screw with an OD of 3/8” or 1/2"
-1.25” rubber washer
-1.5” rubber washer (1/16” thick)
-1.25 inch OD, 1/4 inch ID washer (metal)
*With Lathe:
Trigger: (if you have a drill)
-Pan Head 10-24 x 3/4” bolts; I got mine in a 6 pack at Home Depot (came with regular nuts)
-2x 10-24 locknuts (you can use the nuts that come with the bolts, but be prepared to keep adjusting them)
-1.5” corner brace, or similar two-hole bracket. Got mine at Home Depot; bought the galvanized versus the prettier stainless to save a couple bucks.
-Trigger spring #1- I used something I had laying around; the True Value equivalent would be half of a #4
-Trigger spring #2- get an extension spring that fits over the 10-24 bolt, and cut off the ends, then cut it to a 1/2" long. Make sure you have a drill bit large enough to make a hole that this spring will slide through.
Misc. Hardware
-1 pack of #6 x 1/2” Pan Head Phillips sheet metal screws (also used in other homemades, available in packs of 16 at Home Depot)
-your favorite writing utensil; I use fine-point sharpie because it writes on PVC and cleans off easily
-PVC pipe glue; I usually use the red and white can of all-purpose cement, not strictly needed if you have a drill/screws
Most of these parts were a little under $17 total. However I already have the #6 screws, 1/2” CPVC, 1/2” PVC, [k26], and pipe glue. I would say that the total build cost should be no more than $25- unless you are starting from scratch with no materials or saw/pipe cutter. You will have plenty of 1/2" CPVC and 1/2" PVC (both commonly come in 10’ lengths and cost about $1.50 each), screws, and more left over to make barrels, hoppers, and other projects with.
Tools
-PVC Pipe cutter; if you don’t have one, get one. Even a cheap one- mine is from True Value, cost me $5. Used for building most homemades and very important for barrel/hopper making, since it makes straight cuts and grooves. Can be either a 3/4 or 1 inch cutter.
-Hacksaw or similar, and a miter box is great if you have one (for those new to this, it helps you cut straight)
-Phillips screwdriver
-Drill with 1/8”, 1/4", and 11/16” drill bits. Write-up will explain places for skipping drilling.
-Sandpaper; you want something that can get the job done (say, 60-80 grit) and something to really finish the job right (100 will do fine, I use 150 to 200 afterwards)
-Silicon grease or white lithium grease; spray on or a little tub to rub on with your finger. There is some discussion on what will harm O-rings/rubber, but for your first blaster, you may not even use it long enough before building something else for it to wear out. Your dad might have some with his plumbing supplies if he is a little more DIY (like you, since you are looking at building this)
-something sharp if you don’t have a drill- you need to make a starter hole for one screw
Helpful Tools
-Magnet, somewhat powerful
-Hammer, handy for… persuasion
-Table Vise, also handy for… persuasion
The Build
This first part can be done with or without a lathe- if you don’t have a lathe, also pick the appropriate section regarding with/out a drill.
~WITH A LATHE AND DRILL~
~WITHOUT A LATHE~
Plunger head, with drill: (I do not currently have a picture of the non-lathed plunger head. I will get one in my “spare” time.)
Put a 1/4" hole in the 1/2" CPVC end cap, and put the bolt through it with the head on the inside. Then assemble in the following order: metal washer, 1.5 inch rubber washer, 1.25 inch rubber washer, finish washer (rounded side towards the rubber), locknut.
Plunger head, without drill:
Take you “something sharp” and make a starter hole for the #6 screw in the 1/2” CPVC end cap. Then use the screw and screwdriver to put the hole all the way through. Be careful, as the screw will heat up through friction on the plastic. Take the screw back out. Then assemble on the screw in the following order: small metal washer, 1.25” rubber washer, 1.5” rubber washer, 1.25” metal washer. Screw all of this to the end cap and tighten down hard enough to start the rubber washer bowing forwards. Try not to strip the plastic end cap though or you will need to start over.
Your CPVC plunger rod should be about 17 inches long for a [k26] so that you have a little extra. If you aren’t sure how long you need yours, make the plunger rod 4 inches longer than your 1.5” pipe body- you can always cut it down later. If you do not have a drill, skip down a couple paragraphs to where it says “SKIP TO HERE”, but read the stuff in between at some point as it has some useful general information.
Now that those are taken care of:
Take your CPVC plunger rod and mark an ‘A’ on one end. Mark a ‘B’ on the other. Then mark the CPVC at 1.5” from the A end of the CPVC- this is the font of the catch, where the bolt will hold the plunger head back. The second mark is a little more approximate and is the back end of your spring or spring combination. For this, measure back 2.5 inches (this will be about the back end of your catch), and then add the length of your spring. This is also about where the CPVC will go through the back end cap. Subtract a little from it when you mark (up to a 1/4 inch), so that when the blaster is put together the springs are slightly compressed at rest- but just slightly.
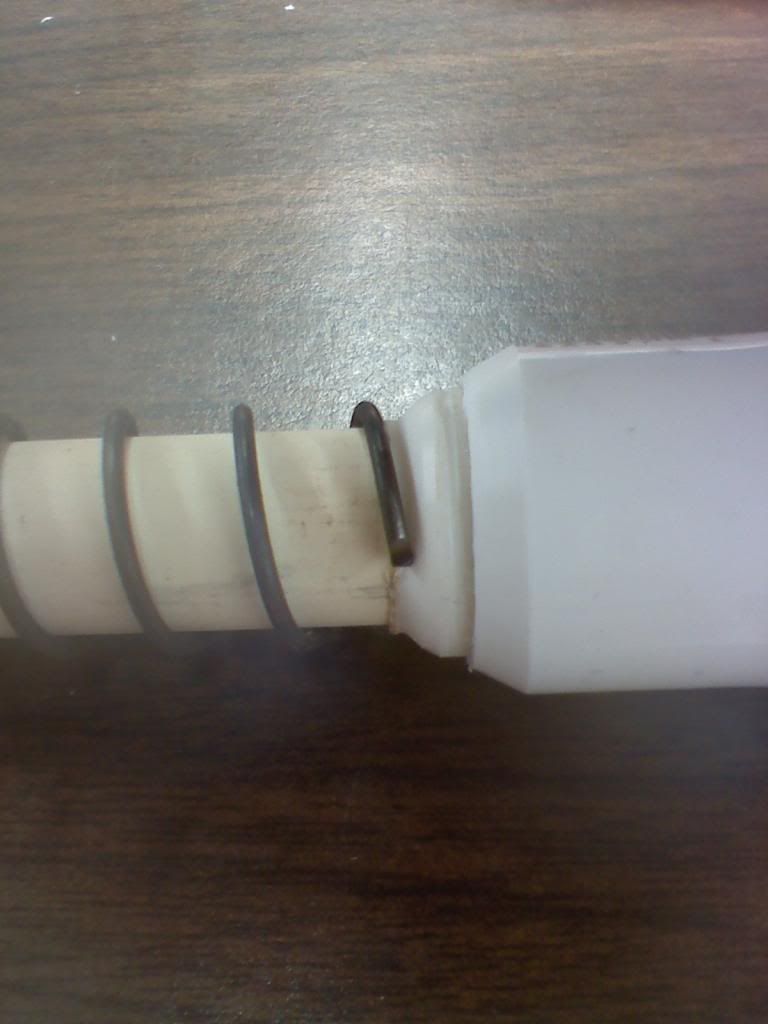
Take the 1" stub of 1/2" PVC and push it onto the CPVC so that your 1.5 inch section is shoved through and hanging out. Then cut 1" of the 1/2" PVC coupler and sand out the ring inside it. Slide this down on to the pipe stub. Both may need some persuasion- use a vise, closed but not tight, on the CPVC. Hammer the CPVC through the pipe stub and the coupler at the same time- see picture. You want the front face on the pipe stub and coupler to line up and be flat to help support the catch bolt together; if you use a vise, you don’t have to worry about it not lining up. Otherwise, sand them a little so they line up.
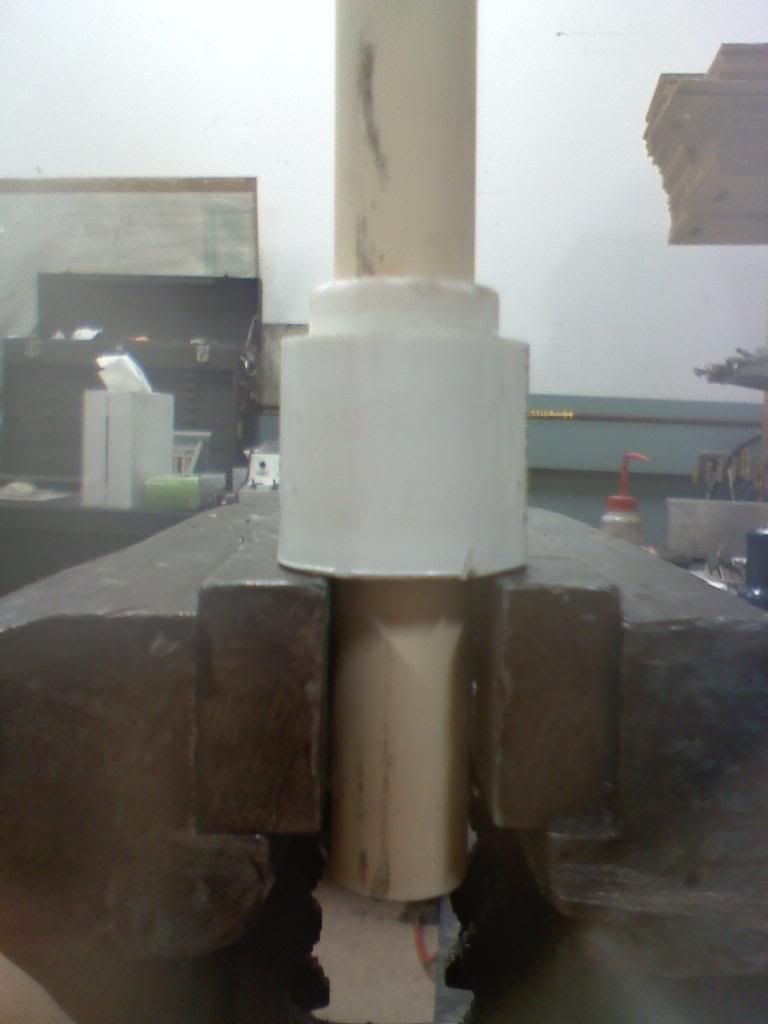
At this point, access to a lathe is faster but definitely not required. You want to angle the back end (the side with more CPVC sticking out) of the pile of pipe and fitting so that it makes a ramp for the catch bolt. This can also be done with some patience with 60 grit sandpaper or even the basics done with a knife (you take all responsibility for your fingers). See picture.
Stick the A end of the plunger rod into the plunger head and glue it in. Make sure you do this right… you don’t want it popping off when you prime the blaster!
This next part focuses on the lathed plunger head, but has some important general information for all homemades- the preeminent plunger head needs no padding.
SKIP TO HERE
For the front of the blaster, nothing special is needed: smash the 3/4" reducing bushing into the 1.5” bushing. A hammer can be useful for this. Stick these into the 1.5” coupler. Persuade when needed. Glue them together if you don’t have a drill. If you do have a drill, you can use extra screws to hold them together.
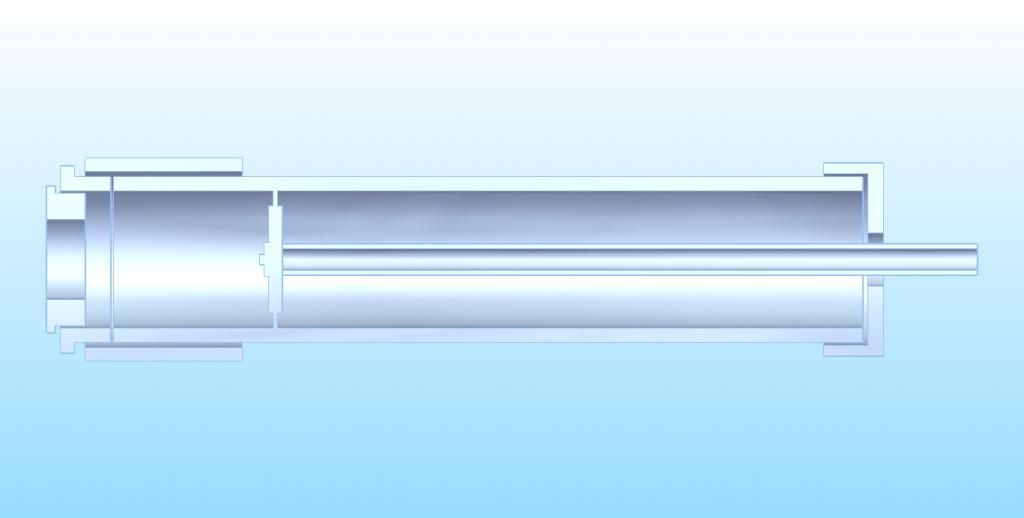
Stick the front end you just made on to the 1.5” pipe. Mash it on good BUT DON’T GLUE IT- you want to be able to take it off if you ever need to service the blaster or if you want to reuse your plunger head in your next blaster! Slide the plunger head with rod into the back end (depending on your seal, you may want to grease it up now to make it easier). Slide it all the way to the front, and put your spring(s) in on the CPVC plunger rod.
~WITH A DRILL~
Put the 1.5” end cap with 11/16” hole on the pipe (make sure the CPVC is poking through before you push it on). Drill a hole in the pipe through the end cap with the 1/8” drill bit. Put a #6 screw through this hole. Now drill two or three more holes evenly spaced around the pipe and end cap, putting screws in them as you go. This will hold the back end and all the guts inside the blaster when you prime it.
~WITHOUT A DRILL~
If you don’t have a drill, you should have gone the route of buying another set of coupler and reducing bushings. Hammer and glue these together, same as the front.
With the plunger head and rod with spring in the plunger tube, hammer the back end on as well. Make sure that the CPVC rod is coming through the adaptors before you really start hammering, you don’t want to bust up the end. If you trust how hard you hammered the front and back on, there is no need to glue the couplers- I take no responsibility though. Glue the CPVC T fitting on, and skip to the section titled “IF THIS IS YOUR FIRST HOMEMADE” if this is your first homemade. You are now done with the blaster build.
You should now have a pipe, with some fittings on one end and either a fitting or another set of fittings in the back. The CPVC should be poking through a few inches, and if you shake the blaster, the spring should not be shaking around too loosely inside. Mark on the CPVC where it exits the blaster, and then pull the CPVC as far out as it will go- you want to “solid stack” the spring. Having an extra set of hands here helps, but if you don’t have them, have someone else help you. Mark the new point where the CPVC exits the blaster, and carefully let the CPVC back in- if you simply let go, you are “dry-firing” and will hurt the blaster, if not blow the front end out. Take the back end and the guts out. Measure the distance between the lines you just drew- this is your ‘draw’.
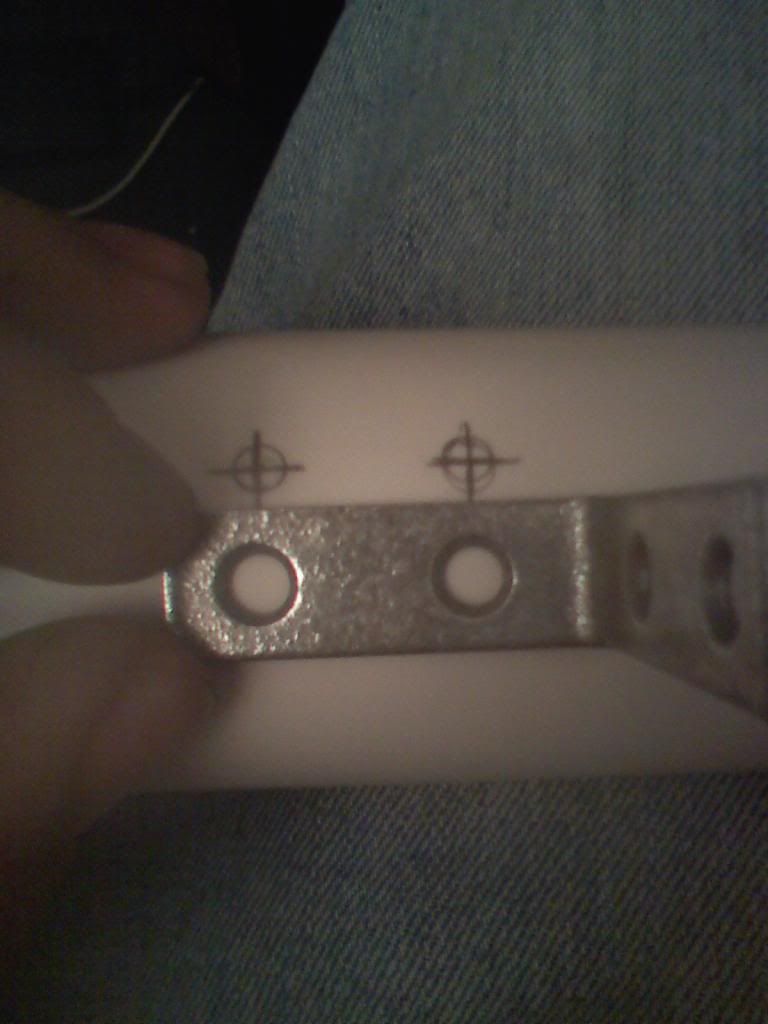
I happen to have just over 7.75 inches of draw. Subtract this number from the distance from the rear line (towards the ‘B’ end of the plunger rod) up to the flat face of the catch; mine being 15 inches. So 15-7.75= 7.25 inches. Measure from the back of the 1.5” pipe forwards that far, and add 1/8” because reasons (thickness of the PVC at the back, blah blah blah). Make a mark on the pipe with your favorite writing utensil. This is the point where you need to drill a hole for the trigger bolt. However, first you need to hold one of the angle brackets up to this mark… like a trigger. Put the mark on the pipe inside the front hole, and make a similar mark in the rear hole (see picture if this doesn’t make sense). The second one is for the bolt that holds the trigger on. Drill these out with the 1/8” drill bit.
Before you put the trigger together, take one of the two bolts you need and flip one over on its head on some heavy duty sandpaper- 60 grit works great. Sand off about half of the head’s height. This helps to keep the bolt from catching on whatever spring you are using (especially k26s, they hang down a little).
Take the back end off and prepare for some fun. If you have the magnet thing, just grab the head of one of the trigger bolts and reach it down the plunger tube and stick it through the a hole (sanded bolt goes through the front hole). The other option is to put the bolt in the pipe and wiggle the pipe until the end of the bolt is at the hole. Stick a strong-ish fridge magnet to the side of the pipe (you will know it’s strong enough by whether the bolt reacts or not). “Hop” the pipe up so that the large end up the bolt goes up, while the small end is held down in the hole by the magnet- it will fall right through. Using a long screw driver may help if you have troubles. You can also just be cheesy and drill a hole in top of the plunger tube above, and flip the whole thing over. Put the bolt on the screwdriver and carefully insert up into the hole until it comes out the other side. Put a nut on each bolt as you put it through, so they don’t fall out.
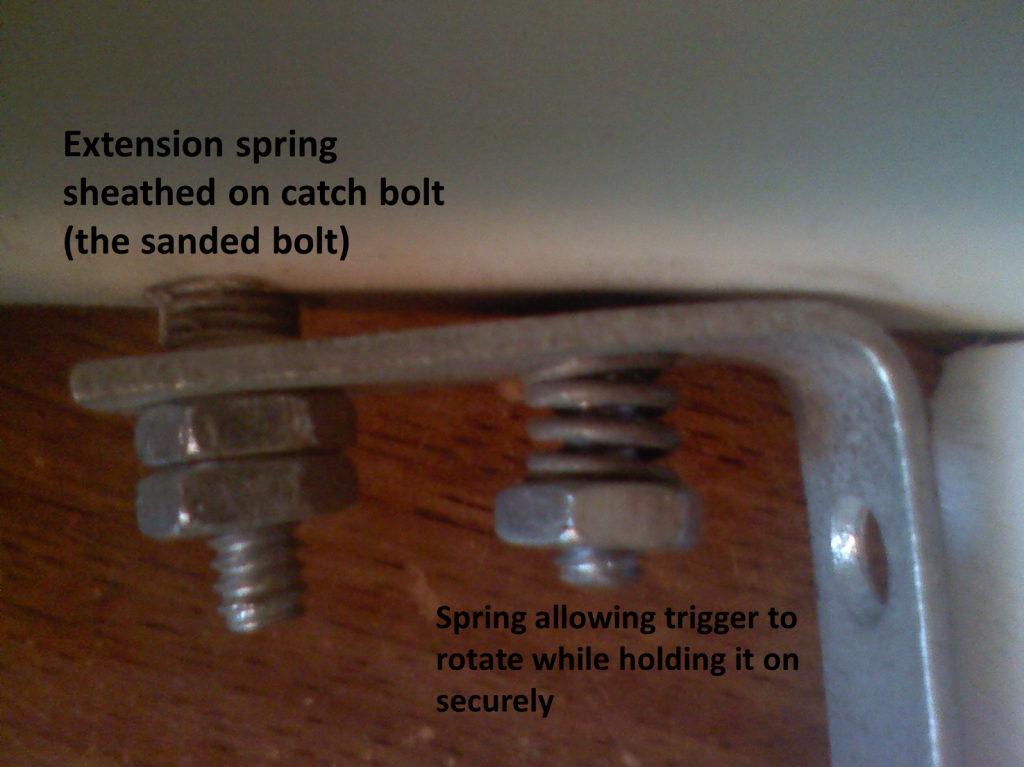
When you have both bolts in their holes take off the nuts (if you have them on), and put the extension spring on the front bolt (the one you sanded) and wiggle the corner bracket on to them (make sure you get it in the right direction!). Put a nut on the front bolt; put the trigger spring and then a nut on the back bolt. Spin them on so they won’t fall off for now. Make the front bolt stick into the pipe about 3/8 to 1/2 an inch; the length of the extension spring will determine this distance.
Any time you pull the blaster apart from now on to service it, you will have to pull the plunger out the front, as long as you didn’t glue the coupler on, just mashed it good with a hammer. Put the back end back onto the blaster. You can now hammer or glue it on as you wish.
Handle shape is mostly personal preference. Cut out a shape you like out of wood, plastic, whatever, and sand the shit out of it so that it’s comfy. I cut my handle out of some plastic stuff I had at work, similar to cutting board that a lot of NIC uses. Hold it up behind the trigger so that you are able to pull the trigger back about 3/8 to 1/2 of an inch at the bottom (arc of furthest travel), and then stops when it hits the handle. It helps to hot glue the handle in place here, but it’s not necessary. Drill a hole in the top of the plunger tube opposite the handle that is large enough for your screw driver and the screw you use to hold the handle on. I used the ones that come with the corner brackets, and I have skinny drivers, so I got away with 1/4" hole. Stick your 1/8” drill bit down through this hole and drill into the pipe and down into the handle. Hold the plunger tube upside down now and put a screw on the screw driver and put it up into the hole on the other side you just drilled and get it started. Then you can flip it over and really be able to press on it as you screw it in. Make two or three holes to screw in your handle. This is the same procedure for making a SNAP handle, if you move on to make any of those.
Now the trigger must be adjusted. You want the rear bolt to have enough compression on the spring so that it’s holding pretty tight, but don’t get it to full compression (“solid stacked”). For the front bolt, you want it in the plunger tube far enough to reliably catch, but not far enough to make the trigger pull not disengage (fire). If you need too, sand the handle down a little where the trigger hits to get a longer pull. There is a limit beyond which sanding and won’t help, because the catch bolt is jammed at an angle though its hole. If you really can’t get the catch to disengage, try using a bigger drill bit for the front hole. Once you have your bolts where you like them, glue them to the nuts (or add a second nut and tighten them together). If you use hot glue for this, try to use high temp- high temp is more for gluing things together while low and medium temp are more for filling spaces and providing reinforcement. Check on it every now and then to make sure they haven’t come loose. If the nut comes loose or comes off, you could miss-fire and [insert safety spiel here on shooting things you didn’t mean to] or dry fire and hurt the blaster.
IMPORTANT UPDATE #1: (6/3/14)
-I was messing around with the NB pictured up top, and it stopped catching. When I opened it up, expecting destroyed parts and a needed redesign, I found that the catch (layers of pipe and a fitting) had slipped apart. The answer was to simply push the fitting back on. If you keep the blaster primed for extended amounts of time while running around, this will happen more often. One solution is to glue the pile together or to put a 1/8" hole and one of the #6 screws into the catch.
IMPORTANT UPDATE #2: (8/5/14)
-After APOC '14, I learned a few more things about the design and maintenance of it. If you cut the body too long, simply add a 1/2 inch pvc coupler behind the spring (works if you have a [k26]) or somthing similar to add a little more compression. If its too much, cut it down a little- use the middle with the ring so that they spring doesnt just go right through.
-The front bushing on one of the NT's came loose towards the end of the day and shot right off- hammering the bushings on is great, gluing is safer, but screwing it on means you can still take it off. If you don't have a trigger, feel free to glue the front on.
Enjoy,
PBZ
AKA Cap’n Whitebeard
IF THIS IS YOUR FIRST HOMEMADE
Your blaster is almost complete. Take a stub of 1/2" PVC about 1.5 inches long and make “tightening rings” in it with a pipe cutter. This involves slowly cutting through the pipe about half way, forming a grove which naturally forms ridges on each side. Make several of these along the entire length of the stub- it helps to leave it on a longer piece and make the rings, and then use the last ring to cut all the way through- this way you have a handle to hang on to. Hammer this into to back end of a 1/2 inch Y-fitting (available on McMaster Carr, 3D printed from some members, or follow directions here on NH to make one) and hammer it in. It takes some practice making rings, but they make the stub removable from the front of the blaster (unless you just glue it in- not normally recommended). Then you need a hopper- about 12” of 1/2 inch PVC will do fine. Make some rings in one end of this and push it into the top of the Y-fitting. Put a 1/2" end cap on the other end, or a ball valve, or spend the money like Xellah (pronounced zell-Ah) and get some special ass, hella s'pensive thing from Sweden or some shit that is like a piece of heaven in ball valve form kissed by an angel. Anyway, if you don’t put some form of end on, you will blow your load out the hopper and be firing blanks out the business end.
Barrels are a little more involved than you might think; too short and you lose accuracy while too long and you lose range. Also, too tight of a barrel and you lose range and speed to friction, while too loose and you lose range and speed because air is rushing around the dart instead of pushing it. The best length for each blaster is determined by trial and error, but as long as you get it within an inch or so either way of "optimal/perfect" you will be fine. I normally use a generic 1/2" CPVC barrel, sanded and hammered home as far into 1/2" PVC as I can get it. It has a decent dart fit for cheap Frost King foam (available in places such as True Value), and a usually poor, tight fit on higher quality foams like the white. It is too small for foams such as beige. It lets you pick up a lot of ammo from the field, which is nice- some barrels are incredibly picky and wont fire anything but one or two foam types.
I start by sanding an 8-16 inch piece of 1/2" CPVC until it just goes into the PVC (use 80 grit. do a quick clean up with 100 or 150). The tighter the fit, the harder it is to get on, but the PVC helps to keep the barrel straight and the tighter the better for that. I usually get between 3 and 6 inches of PVC cover on, depending on how much sanding I do. You can make the PVC cover as small as an inch or so (like most people), but like I said, I like to help reinforce the somewhat fragile and sometimes slightly bent CPVC. The reason the cover is actually important is… you have to push it into the 1/2" PVC Y-fitting! Ta-da! If it is a tight fit in the fitting (usually is) then you don't really need to make rings on barrels. If you get enough covered though, you could make some lighter rings at the other end of the cover (towards the middle of the barrel- not on the CPVC though!) and make a grip to pull your barrel out for putting it away or for changing barrels.
At the back of the barrel (covered, the end that will be inside the Y-fitting) you want to ‘ream’ out the barrel so that darts go into it more easily and form a seal. Start with some sandpaper (60 grit, then 100) wrapped around your finger (forms a cone) and spin the barrel around your finger to make the inner edge of the barrel into a ramp leading in. it doesn't need to be deep (and you actually don’t want it more than about a 1/4 inch, but it does need to go most if not all of the way out to the outer edge of the 1/2" PVC. You can also use a knife and gently carve out the ream, or some pipe cutters have a corner thing you poke into a pipe and turn to clean up the edge.
Ranges: (cause I know you wanted to hear this first...)
I did my test firing in a long hallway at work- far more than even a +bow will cover- and the results, from shoulder height (around 5 feet and flat of course) using a [k26] are 70ft, +/- 5. Distance was measured using the floor tiles. Distance will depend greatly on the strength of the spring or spring combo you use, which is of course determined by how hard you can pull. If you don’t have a trigger (built with no drill) make sure you can hold the plunger back so you have a second to aim. If you can’t hold it back, use it to do some strength training to get in shape- make sure you do both arms or the extra muscle on one side will make you lean sideways and throw off your aim. Oh, and it’s good to be able to shoot with either hand for when you have to shoot from cover.
Edited by Aeromech, 23 November 2015 - 01:31 AM.


