Jump to content


Photo

Double SnapBow

You've heard of the Double Rainbow, Now there's the Double Sna
Double rainbow SNAP bullpup spring homemade writeup

23 replies to this topic

#1 He Who Mods

He Who Mods

    Member

  • Members
  • 108 posts

Posted 16 March 2014 - 08:24 PM

After all the hype around Koree’s Double-Rainbow design recently, I decided I would try my luck with one that didn’t need polycarb or clear PVC. I went through many prototypes such as this
P1020195_zpsf11a45d6.jpg
A latex powered double-SNAP

But I eventually decided I would put a spring in it and make it more practical like this.
IMG_3694_zpsbf9d12a4.jpg
This was a really fun blaster to make and is super accurate, shoots super far, and is super comfy. It isn't perfect aesthetically, but that's because this was made from scrap parts and my other prototypes that didn't always work.

Since this is my entry in the homemade contest, I am putting this in the “plusbow” category because while it doesn’t necessarily need power tools, they certainly do help and some experience is very helpful. On to the tool list! (warning-this write-up is EXTREMELY picture and text heavy)


TOOLS
Drill-required
Dremel-required
Scroll Saw-Optional
Screwdrivers-Required
Tap 6-32 and ¼-20-required(unless you use sheet metal screws, which will work, but won’t be as reliable)
Countersink-optional

ADHESIVES
Epoxy Putty-required
Super Glue-required
Goop-required
Hot Glue-Required
Etape-required
Packing tape-required

SUPPLIES (all required)
1-1/4” PVC
1-1/2” Thinwall PVC (I found mine at a small local hardware shop, look around and you’ll eventually find it)
small stub of 1” PVC
1/2” CPVC
1” to ½” PVC reducing bushing
2x 3/4” PVC endcaps
2x 1/2” CPVC elbows
2x ½” CPVC endcaps
1-1/4” PVC TEE
3/4” thick hardwood- doesn’t really matter what it is, just for a handle.
[k26] Spring-Link here: Mcmaster Link

HARDWARE
1” long 10-32 bolt and nut
2x 1-1/4” fender washer
1-1/4” Neoprene Rubber Washer
1-1/2” Neoprene Rubber Washer
#8 finishing washer
Lots of 6-32 bolts- 1/2 “and 3/8” long
Lots of #6 sheet metal screws-1/2” long
1/4-20 bolts- 1/2” and 2” long with nuts
1-1/2” L Bracket
Clothespin

LOWER BODY

For the lower body, you will need:
22” of 1-1/4” PVC

Step 1
Mark Quadrants of PVC

Step 2
Cut slots and drill trigger hole where instructed by the diagram.
IMG_3846_zps5437c705.jpg
(sorry the image is weird, I currently don't know how to insert the word template I made)
The top slot is where the plunger rod will move through
Measure ½” from either side of the top quadrant line and dremel that section out.
IMG_3814_zpsd7150af4.jpg
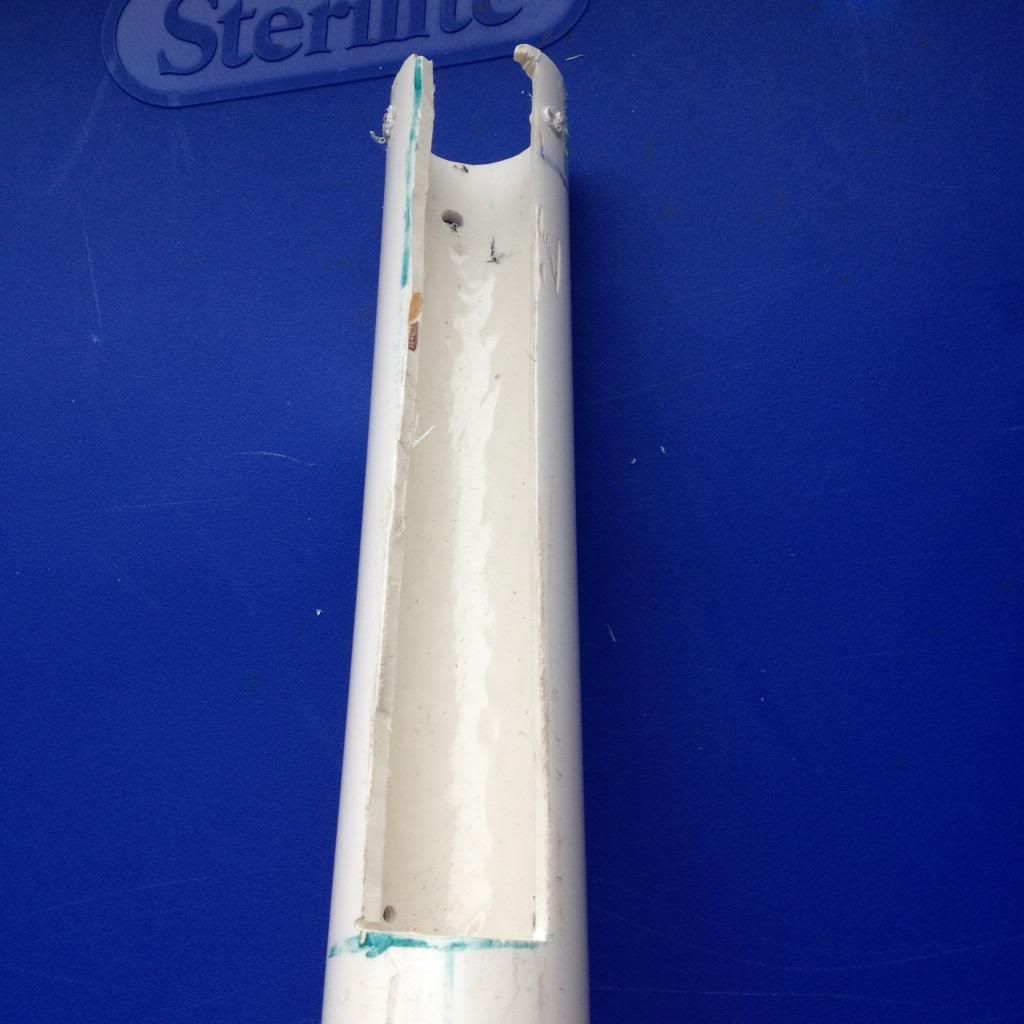
The trigger hole should be drilled on the bottom quadrant.


UPPER BODY/PLUNGER

For the plunger you will need:
16” of 1-1/4” PVC
Your reducing bushing
Packing Tape
Goop

Step 1
Make a 1” wide slot on the bottom quadrant line just as you did with the top line 8.25” from the front of your PVC
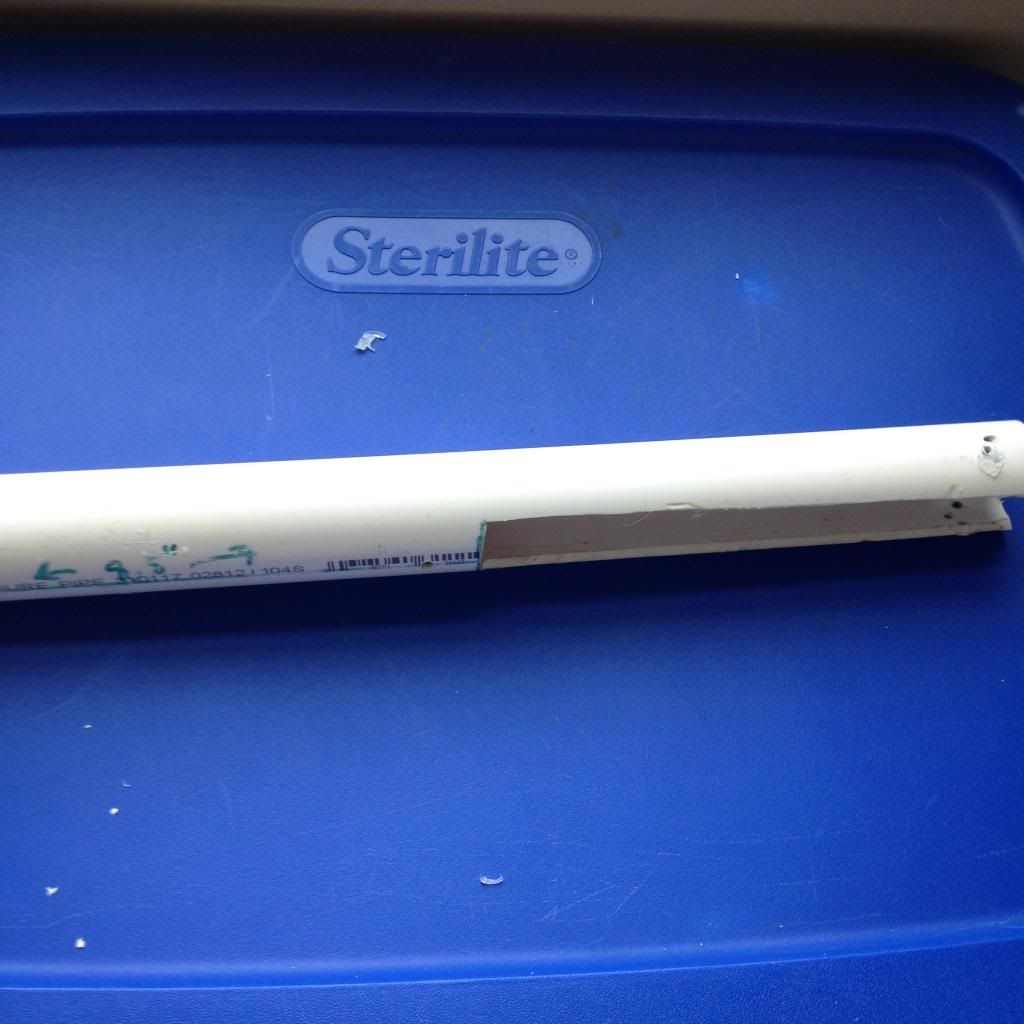
IMG_3815_zps6cdf9d87.jpg
Step 2
Wrap the reducing bushing in packing tape until it fits snugly in the front of your plunger. Then goop it in and use sheet metal screws on each quadrant line to secure it. (you can countersink the screws if you want, I did just because it looks better)
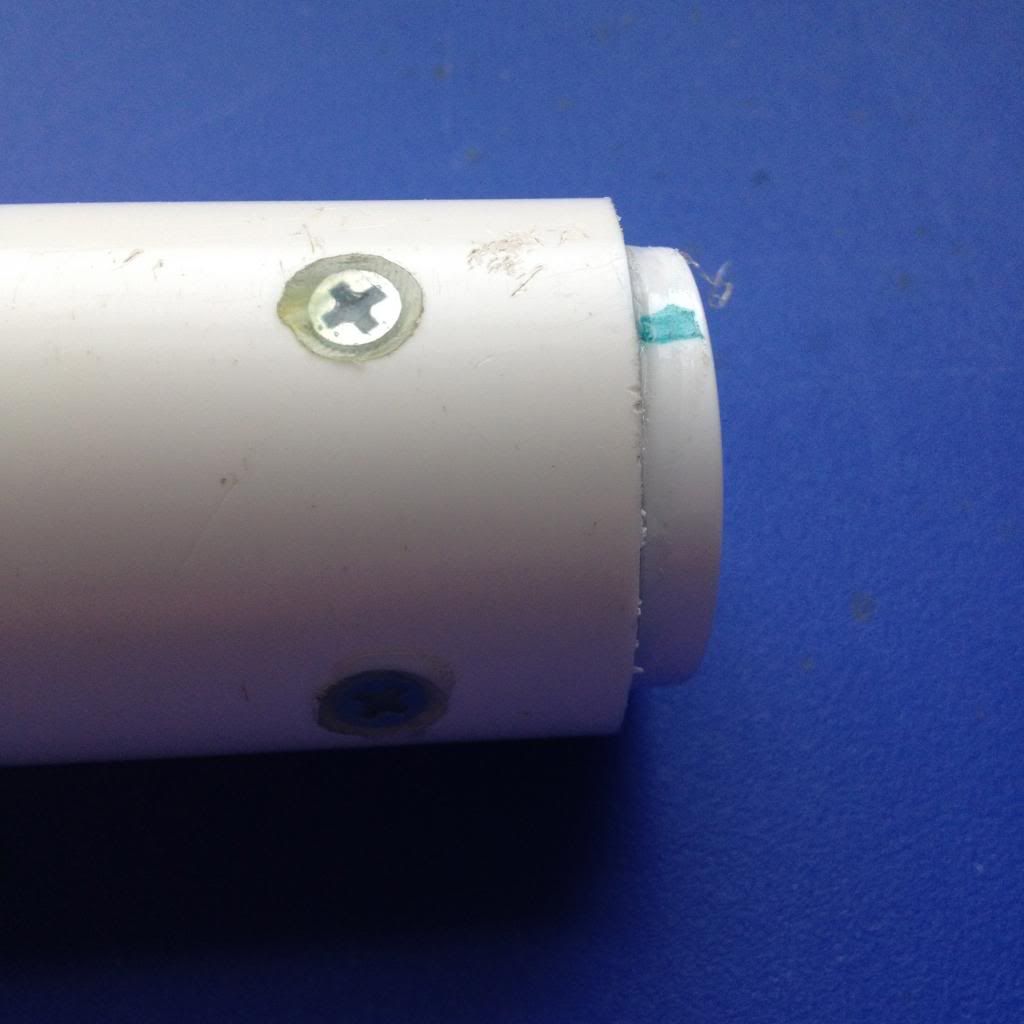
IMG_3816_zps877804f1.jpg

PLUNGER ROD

For the plunger rod you will need:
A 7.25” length, 10.5” length, and small stub of ½” CPVC
The CPVC elbows and Endcaps
Two ¾” PVC endcaps
Two 1-1/4” fender washers
Your Rubber washers
The 10-32 bolt and nut
#8 finishing washer
Epoxy Putty
[k26] Spring

The Plunger rod is the most intricate piece of the blaster, but is very simple to understand.

Step 1
Make a standard washer-sandwich style plungerhead. To do this, drill a SUPER CENTERED hole in a CPVC endcap for the 10-32 bolt to go through, then lay on the fender washer, 1.5” rubber washer, 1.25” rubber washer, and then the #8 finishing washer and nut. If you want to make the sandwich more stable, sand the top of the endcap flat and superglue the metal washer on first.
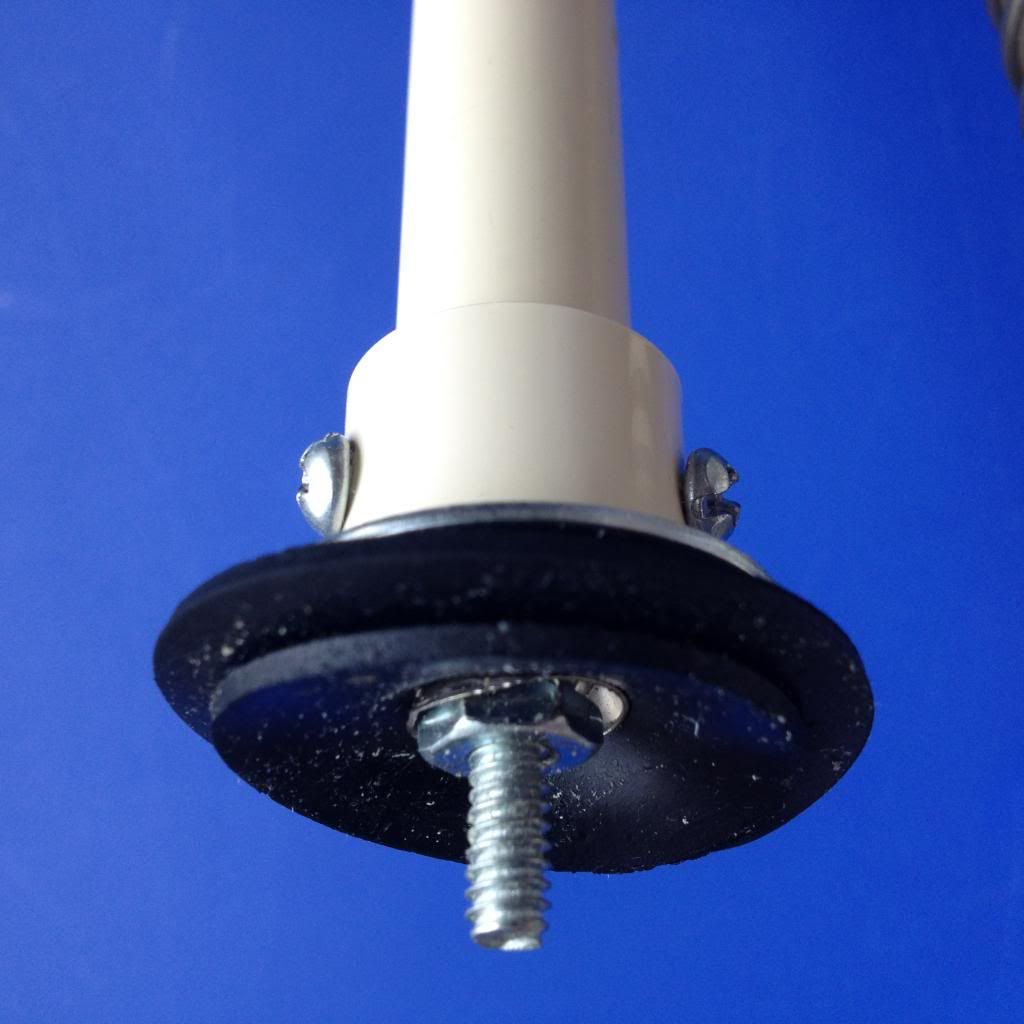
IMG_3818_zpsbe77b388.jpg
Step 2
Move on to the catch face. Unlike normal SNAPs, the catch face and the plunger head are separate units. This is very simple, center your fender washer onto the top of the endcap and superglue it down. It helps to sand down the top of the endcap first. Then put epoxy putty around it in the shape of a ramp.
IMG_3819_zps71a9545d.jpg
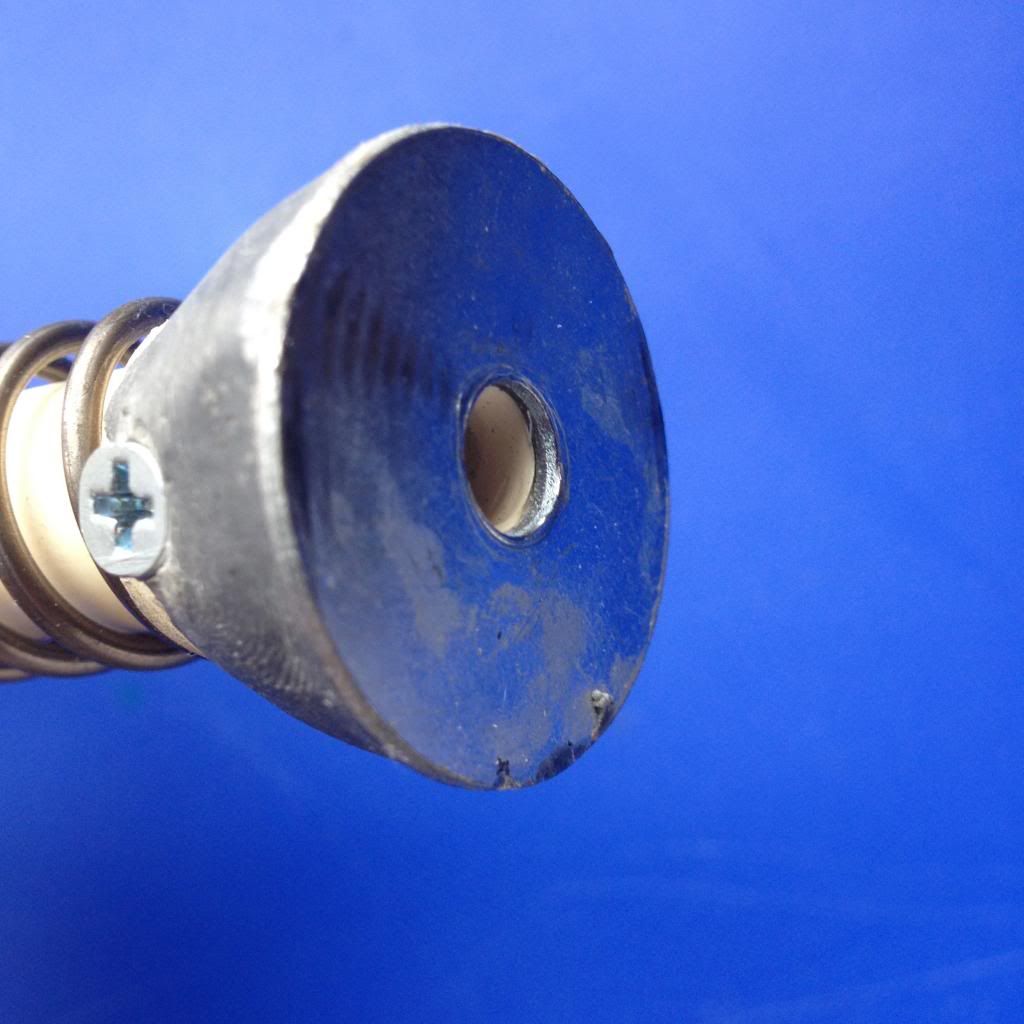
Once it dries, you can sand it down to make an even smoother ramp for the nail to glide up.

Step 3
Take your two ¾” endcaps and drill 5/8” holes in them to allow the ½” PVC to slide smoothly through them.
(there is no picture because it is fairly self explanatory)
Step 4
Assemble the rod. Put the small stub of CPVC in between the two elbows and screw them together. Then, put the two lengths of CPVC in each elbow. On the shorter length, slide an endcap on it and then secure the encap with your plunger head attached. On the larger length, slide down your encap, then slide on the [k26], and then secure the catch ramp.(there will be some pre-compression, so be careful not to let the catch ramp shoot off.

Here is the finished product, secure ALL the couplers with 6-32 bolts.
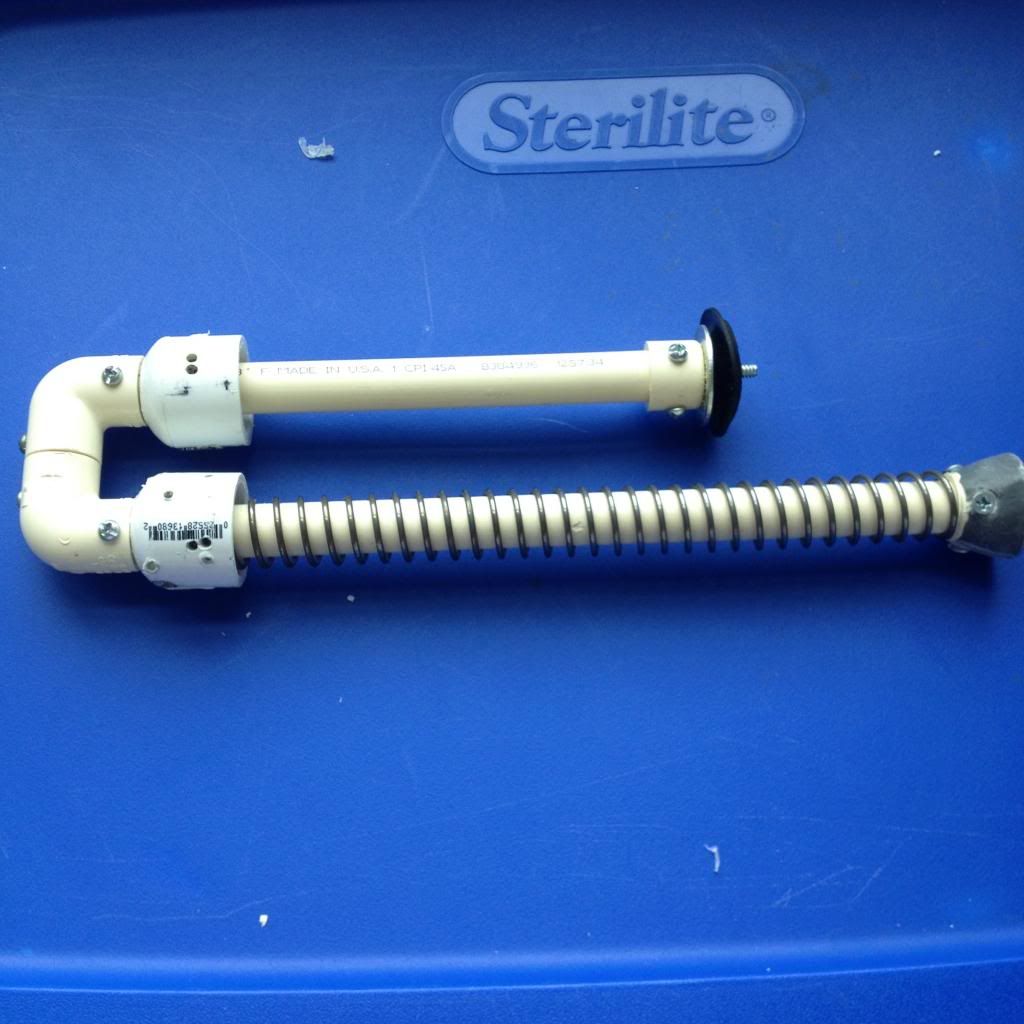
IMG_3820_zps788e7893.jpg
HANDLE
For the handle you will need:
Your hardwood of choice
A small stub of either 1.5” thinwall or regular PVC.

Step 1
Cut out a handle shape of your choice and sand to your liking.
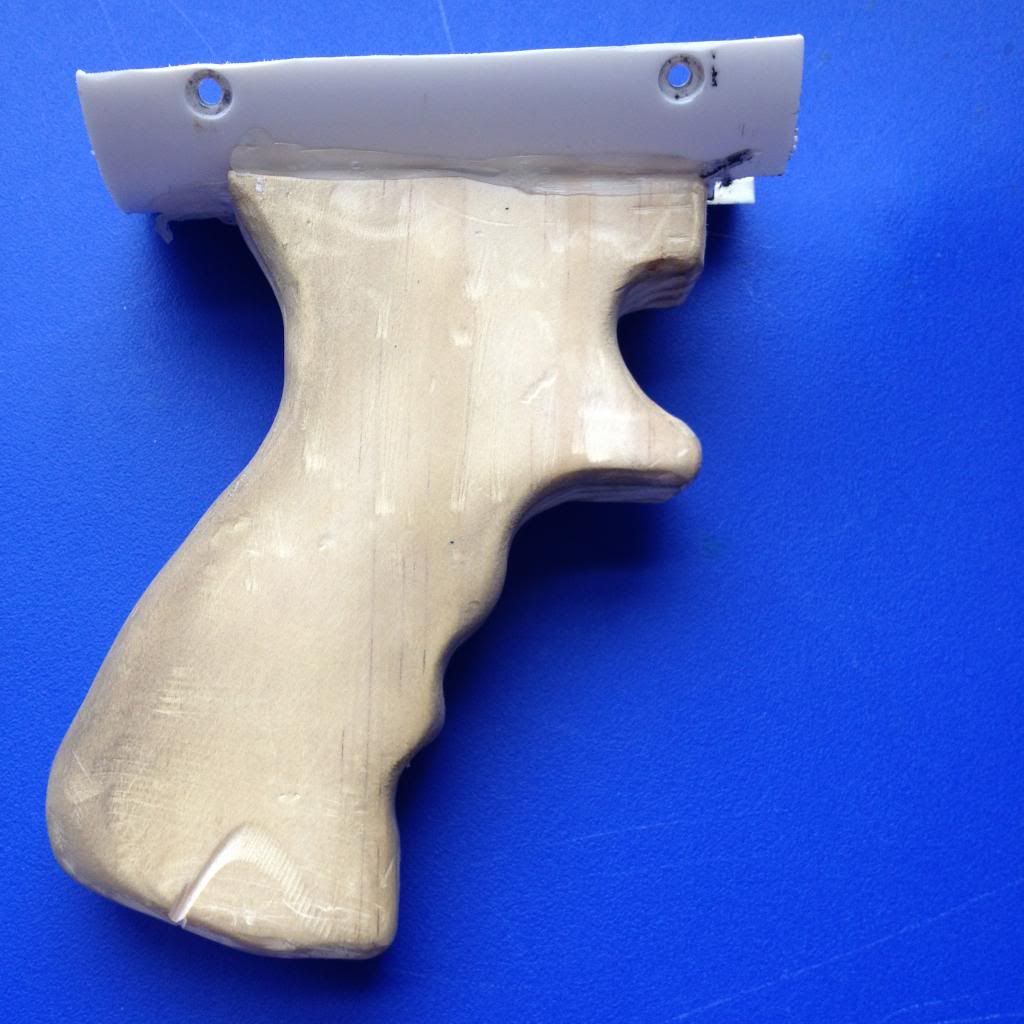
IMG_3821_zpscb3279d5.jpg
Step 2
Secure a semi-circle of the PVC to the top of the handle. This will be used to secure the handle to the blaster.
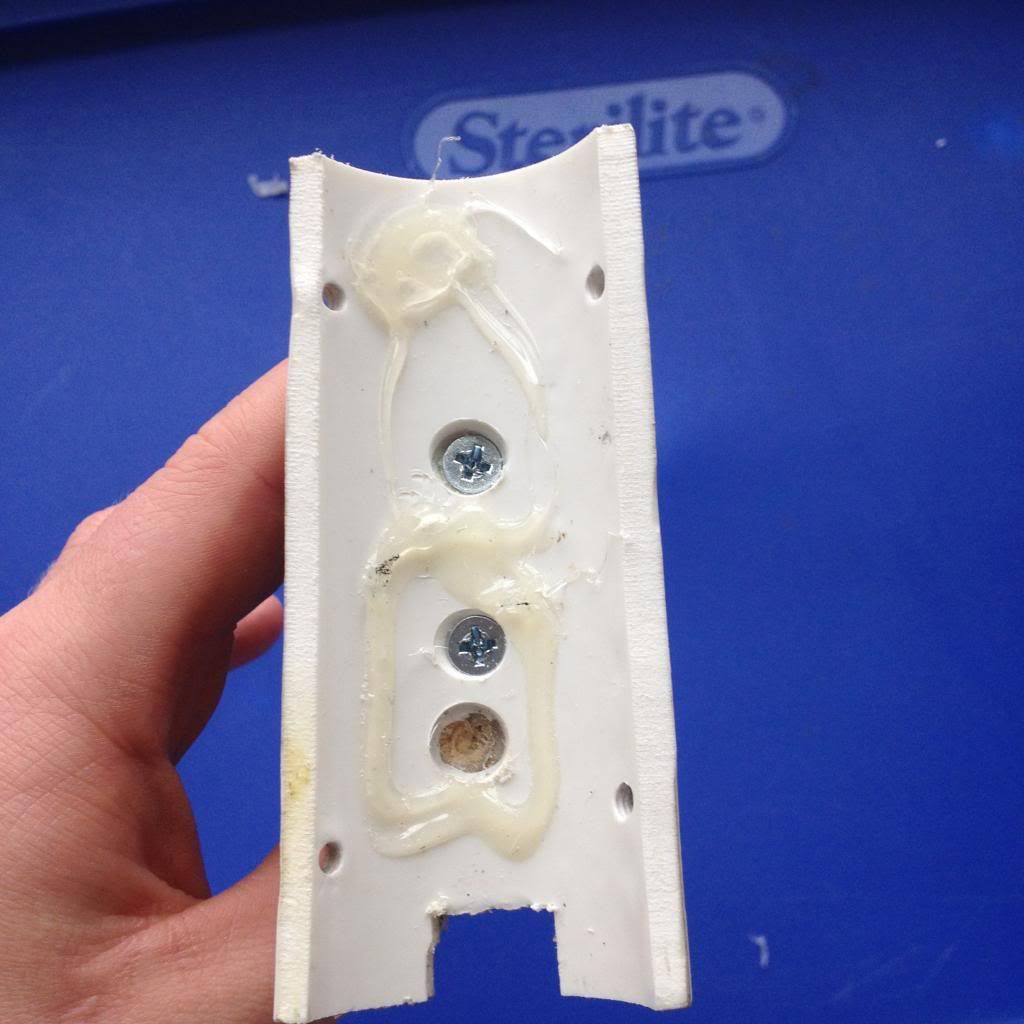
IMG_3822_zps5abd9787.jpg
STOCK and SPACERS
For the stock you will need:
A 1.25” TEE
A small stub of 1.25” PVC
A small stub of 1” PVC

Step 1
Shove the 1.25” PVC all the way into the tee, cutting off any excess, then wrap the 1” PVC in etape until it snugly fits into the 1-1/4” PVC and leave 1.5-2 inches sticking out.
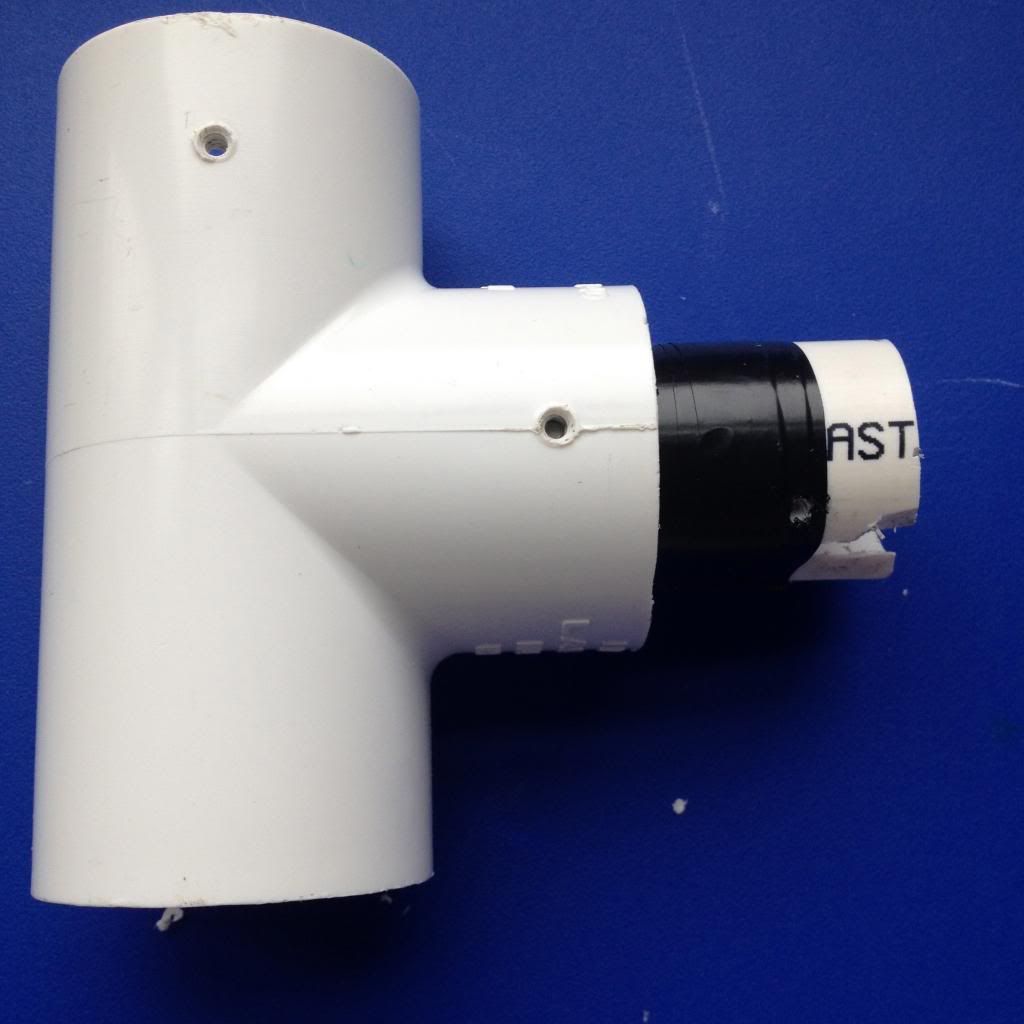
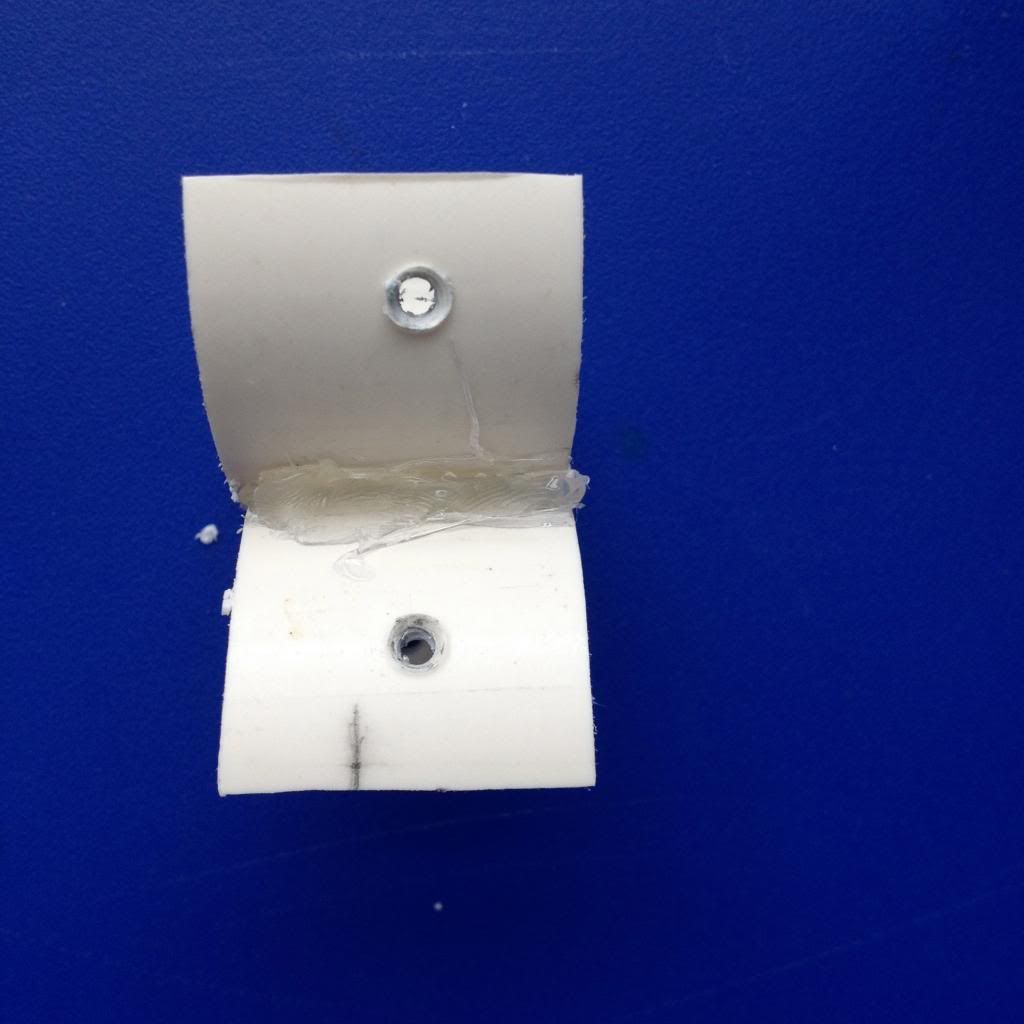
IMG_3823_zps0d8b82f7.jpg
Step 2
Cut a 1” slice of 1.5” Thinwall PVC and cut that in half. Use the ½” long ¼-20 bolt and nut to secure them on top of each other.
IMG_3824_zps0a53fb47.jpg
IMG_3825_zps989a5fcb.jpg
FOREGRIP

For the foregrip, you will need:
6” of 1.5” Thinwall PVC
2” long ¼-20 bolt

Step 1
Take your 6” piece of thinwall and cut a 1” long and ¾” wide slot on the bottom quadrant of PVC.
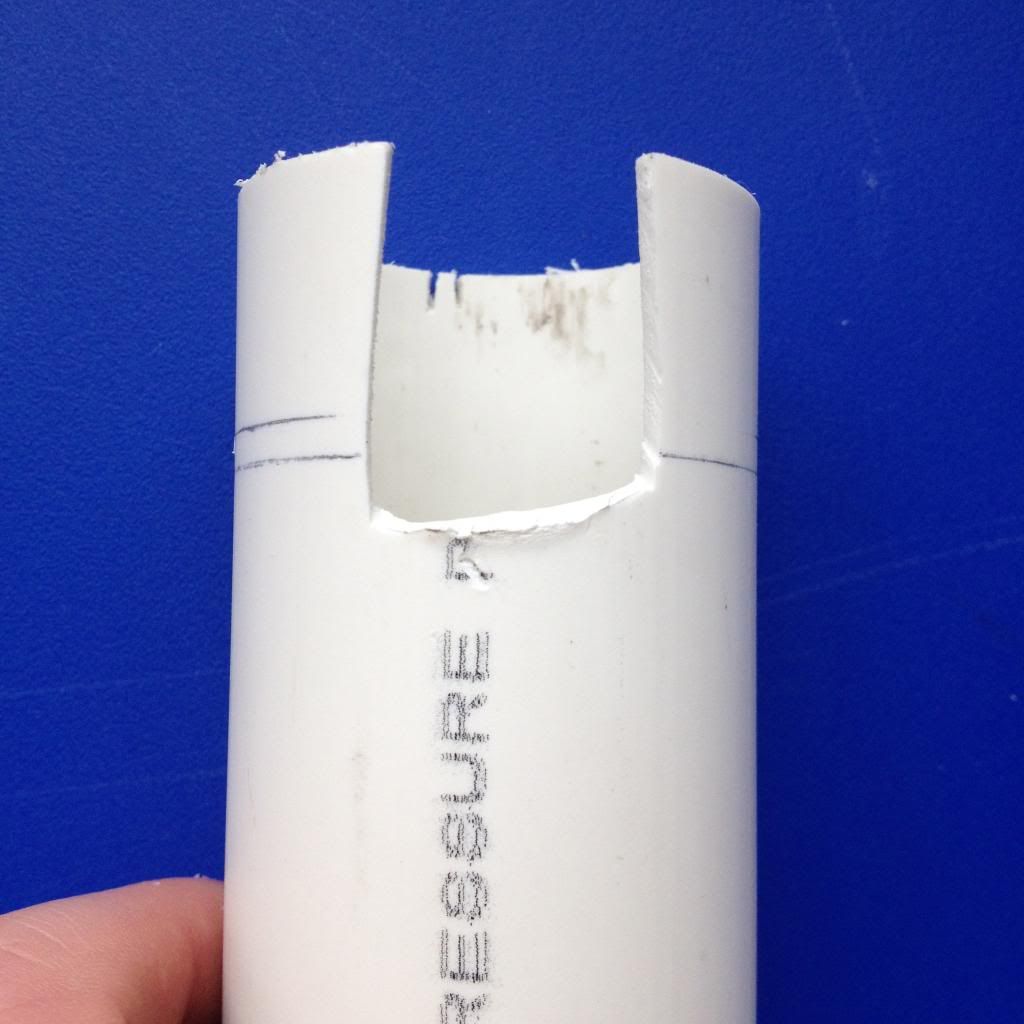
IMG_3826_zpsfc577e7d.jpg
Step 2
Drill 2 holes parallel to each other and tap them for ¼-20 ¾” from the back of the grip.
IMG_3828_zpsf7576b29.jpg

Finished Grip should look like this.
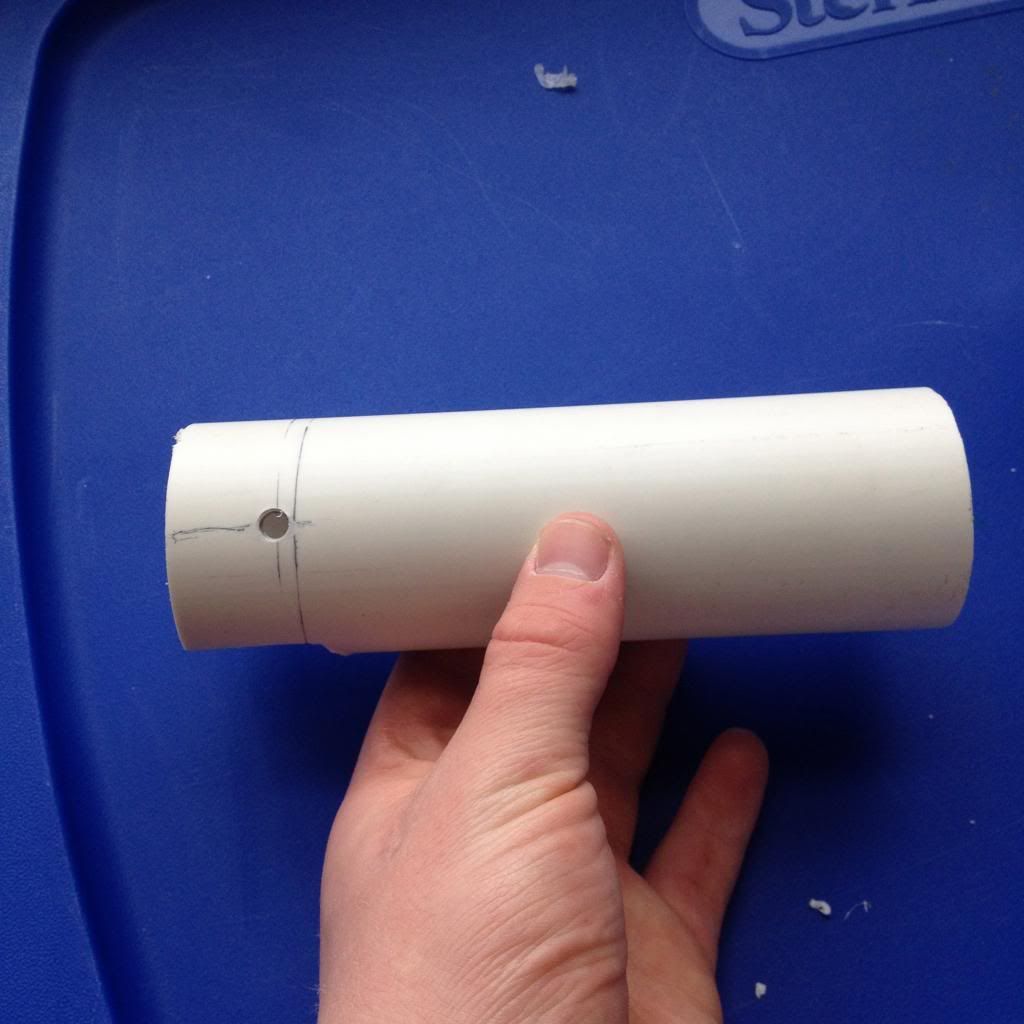
IMG_3829_zps985fe441.jpg

TRIGGER
For the trigger you will need:
Clothespin
Nail
Epoxy putty
Screws
L Bracket

Since there are so many SNAP trigger instructions out there, I will provide a link to my favorite design.My personal favorite trigger
(all credit goes to NOM for teaching me how to make SNAP triggers-I have used his design 20+ times and it has never failed)

ASSEMBLY

Step 1
Screw trigger so the nail lines up with the trigger hole shown in the diagram.
IMG_3830_zpsc487f9fd.jpg
Step 2
Slide Plunger rod assembly into the lower body, you will need to pull the trigger down when you do this.
IMG_3834_zps6a453225.jpg

Secure the ¾” endcap with four 6-32 bolts.
IMG_3833_zps24b68660.jpg
Step 3
Slide on plunger.
IMG_3835_zps8f3888f7.jpg
Next, slide the separator we made in the back. Use four sheet metal screw to secure it- 2 on each side.
IMG_3836_zps3fa0e427.jpg
Hot glue a small piece of 1.5” PVC in between the plunger and the lower body at the front of the blaster. Make sure it won’t interfere with the foregrip.
IMG_3839_zps3b8904c9.jpg
Step 4
Attach the handle by drilling and tapping 4 holes, 2 on either side of the piece of PVC on top of the handle.
IMG_3839_zps3b8904c9.jpg
Step 5
Slide the stock in the lower body, the 1” PVC should fit snugly, if not, wrap a few layers of etape around it to make it snug.
IMG_3841_zpsebe3f836.jpg
Step 6
Slide the foregrip onto the front of your blaster and thread the 2” long bolt through
IMG_3804_zps7d3aacb0.jpg

Step 7
Slap a hopper on your new blaster and fling some foam!
IMG_3843_zpsfa2863be.jpg
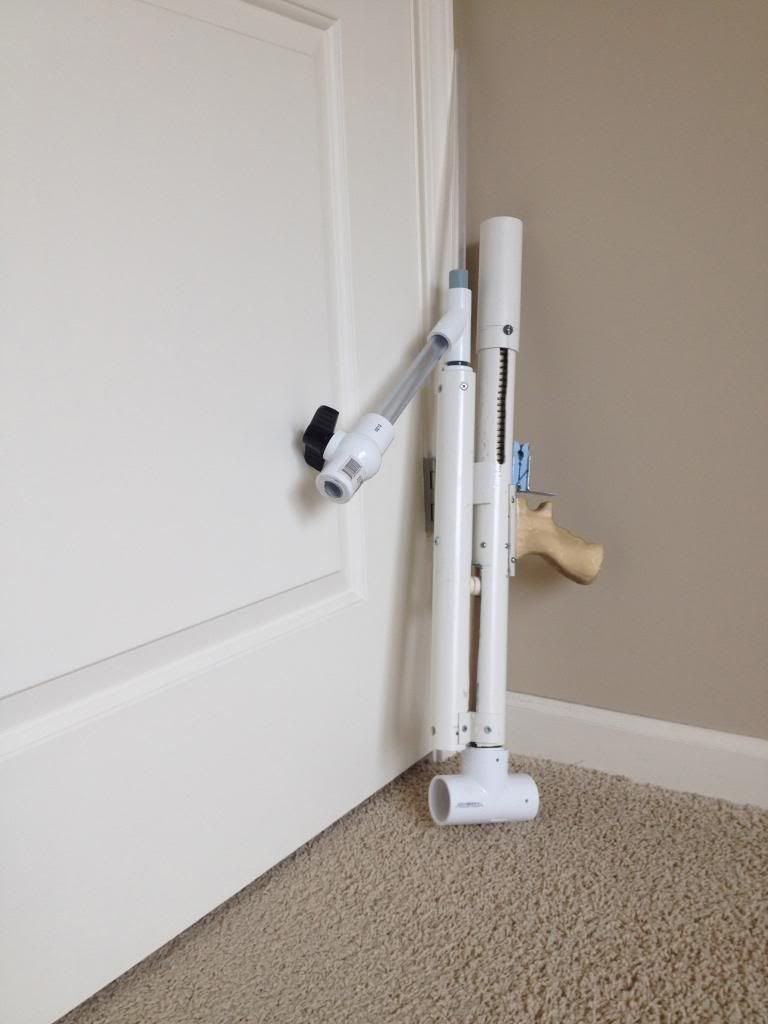
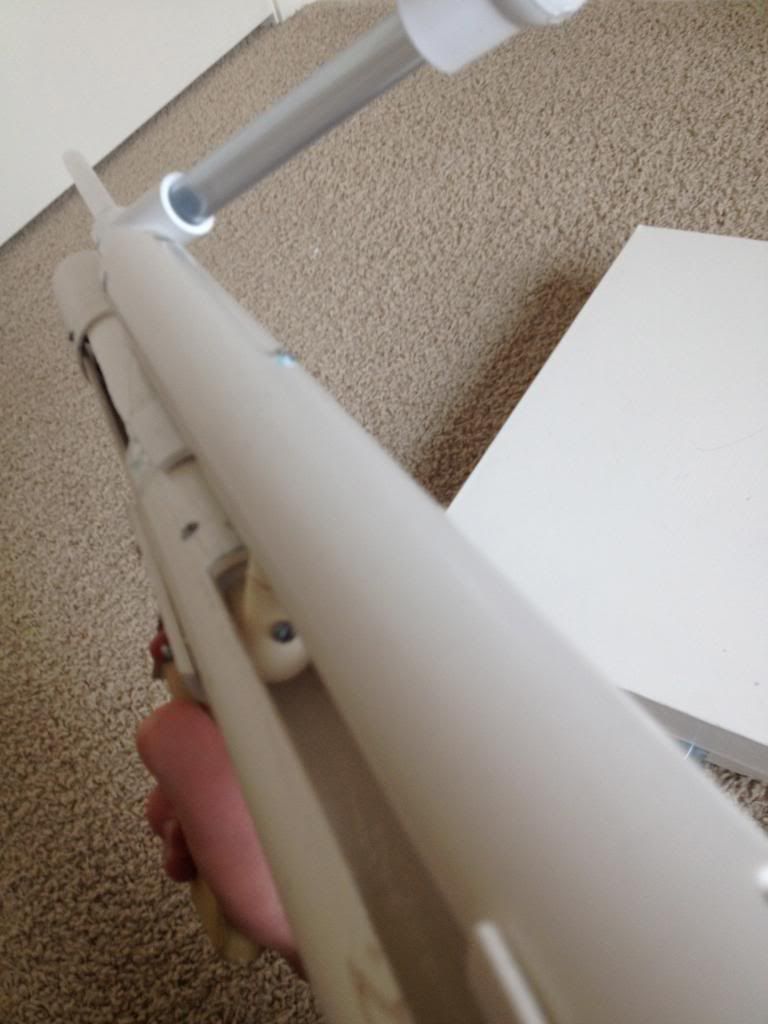
THE FINISHED PRODUCT
Here’s your pics.
IMG_3844_zps22915cdc.jpg
IMG_3845_zps8568b250.jpg
IMG_3804_zps7d3aacb0.jpg
IMG_3694_zpsbf9d12a4.jpg
Overall, I love this blaster. The feel of it is great, it is really accurate, it feels really solid in your hand, and I can’t wait to use it in the next war. The prime is one of my favorite parts of the blaster since it is SO smooth and I can spam darts like no other blaster in my armory, even my good ole pumpsnaps.

RANGES
I don’t have official ranges yet, but they rival those of my pumpsnaps, which shoot 100-110 feet flat.

Alright guys, that just about wraps things up, hopefully you enjoyed my first real write-up. If you have any suggestions on the picture quality, write-up, or blaster itself, feel free to post them below to tell me what you think. I have some more ideas in the future for some crazy SNAPs so look out for those. Thanks for reading! biggrin.gif


Edited by Aeromech, 23 November 2015 - 01:34 AM.

  • 0

#2 Daniel Beaver

Daniel Beaver

    HQRSE CQCK

  • Moderators
  • 2,096 posts

Posted 16 March 2014 - 09:09 PM

Let us know how that CPVC U holds up over time.
  • 0

#3 He Who Mods

He Who Mods

    Member

  • Members
  • 108 posts

Posted 16 March 2014 - 09:25 PM

Let us know how that CPVC U holds up over time.

I have fired about 500 shots with this plunger rod since I had used the same plunger rod in many prototypes and casual wars with friends in snow and heat. So far, I see no sign of stress, but I will make sure to improve the design if it does. Also, is there really that much force on the U? Almost all the pressure from the spring is being supported by the 3/4" end cap. All the U has to support is the super light plunger head and there isn't that much friction on the prime to warp it.
  • 0

#4 andrewp413

andrewp413

    Member

  • Members
  • 18 posts

Posted 17 March 2014 - 05:49 PM

Great write up! The pictures were good quality and it was all very clear. I have never built a "double" anything but I have made a pump action rl3. Would you say that newer members should start with something easier to machine (snapbow) or is the machining of the PVC minimal enough that people with a hacksaw and a dremel (like me) could manage?
  • 0

#5 Exo

Exo

    Member

  • Members
  • 391 posts

Posted 17 March 2014 - 07:00 PM

Great write up! The pictures were good quality and it was all very clear. I have never built a "double" anything but I have made a pump action rl3. Would you say that newer members should start with something easier to machine (snapbow) or is the machining of the PVC minimal enough that people with a hacksaw and a dremel (like me) could manage?

PVC in general is verrrry machinable, even if all you have is hacksaw+dremel. Long cuts and the slots will be physically laborious, but are completely doable. Here's hoping you have a lot of cut-off wheels, you'll need them.
  • 0

#6 Mully

Mully

    Member

  • Members
  • 342 posts

Posted 17 March 2014 - 08:07 PM

PVC in general is verrrry machinable, even if all you have is hacksaw+dremel. Long cuts and the slots will be physically laborious, but are completely doable. Here's hoping you have a lot of cut-off wheels, you'll need them.


At this point I pretty much only use a dremel to do slots/pump-slides etc, it requires some practice, but it works well, and with proper practice/effort the slots look great.
  • 0
S.C.U.N.

#7 He Who Mods

He Who Mods

    Member

  • Members
  • 108 posts

Posted 17 March 2014 - 08:43 PM

Great write up! The pictures were good quality and it was all very clear. I have never built a "double" anything but I have made a pump action rl3. Would you say that newer members should start with something easier to machine (snapbow) or is the machining of the PVC minimal enough that people with a hacksaw and a dremel (like me) could manage?

Thanks andrew! I have built several homemades before (most being SNAP variants) , so this project was not too difficult for me. Even so, I don't think too much experience is needed for this blaster because it does not require any fine machining and is mostly cutting and fitting together PVC. I used a dremel for the entire project, only using my scroll saw to chop up lengths of PVC since I didn't want to use a hacksaw. Like Exo said, a hacksaw and Dremel is all you need to make this blaster since PVC is pretty easy to machine. Also, if you have already built a pump action RL2, you would have no problem with this blaster. Hopefully that helped.
  • 0

#8 andrewp413

andrewp413

    Member

  • Members
  • 18 posts

Posted 18 March 2014 - 02:16 PM

Thanks for the replies, I will hopefully build one of these soon. Since I don't have any 1 1/2 inch thin wall PVC could I just use 1 inch and 1 1/4 inch PVC combo? (Assuming that I can find an appropriately sized washer.)
  • 0

#9 Mully

Mully

    Member

  • Members
  • 342 posts

Posted 18 March 2014 - 02:52 PM

Thanks for the replies, I will hopefully build one of these soon. Since I don't have any 1 1/2 inch thin wall PVC could I just use 1 inch and 1 1/4 inch PVC combo? (Assuming that I can find an appropriately sized washer.)


You could theoretically, you'd just lose a lot of range and power. You'd also have to downsize everything. 1-1/2" thinwall isn't that difficult to find; check your local tractor supply stores, or irrigation supply stores, or even your local home Depot or Lowes, sometimes they carry it.

Edited by Mully, 18 March 2014 - 02:52 PM.

  • 0
S.C.U.N.

#10 Buffdaddy

Buffdaddy

    Do not buy from this member

  • DO NOT TRADE
  • 824 posts

Posted 18 March 2014 - 03:17 PM

You could theoretically, you'd just lose a lot of range and power. You'd also have to downsize everything. 1-1/2" thinwall isn't that difficult to find; check your local tractor supply stores, or irrigation supply stores, or even your local home Depot or Lowes, sometimes they carry it.


If you can find 1 1/4" thinwall (sometimes that is the largest thinwall you can find at any hardware store), then you SHOULD be able to also use a 1 1/2" sink tailpipe, or similarly sized piece from that part of the plumbing section. Those are generally the same dimensions as +bow plunger tubes, and would slide perfectly inside the thinwall. But test fit before you buy. It would suck to buy the batch of PVC that was a little thicker than usual.
  • 0

#11 andrewp413

andrewp413

    Member

  • Members
  • 18 posts

Posted 18 March 2014 - 07:34 PM

Sorry for the confusion, I meant to use it as the lower part of the body instead of I 1/4 inch and still have the same plunger volume in the plunger tube. Theoretically, I can downsize just the part that the priming handle slides on to 1 inch PVC.
  • 0

#12 He Who Mods

He Who Mods

    Member

  • Members
  • 108 posts

Posted 18 March 2014 - 09:36 PM

Ooohhh, I see, using one inch PVC as the lower receiver is a great idea and takes away the stress of finding 1-1/2 thinwall. I think that's a very possible solution to not having thinwall, while still keeping the same range, unlike what would happen with a pumpSNAP. I definitely would want to see if it works so if you finish your design with 1"PVC, could you either PM me a picture or post it in this write-up?
  • 0

#13 koree

koree

    Member

  • Members
  • 311 posts

Posted 18 March 2014 - 10:03 PM

Nice job! I'm really happy to see that my funky layout is being used in other people's projects. I'm glad to see a good writeup as well.

On the note of using 1" pvc for the lower body, I highly recommend doing this. I did it a version I made with a CPT. LINK It lightens up the blaster a ton and I think it's easier to work with as you can use 1 1/4" pvc for the pump sheath. Additionally I suggest not extending the PVC to the back to make a stock. I think it adds a lot of unnecessary weight and dremmeling out those channels is a pain. Instead I think it's more effective to take nylon rod or smaller diameter pvc to make a +bow esque stock.
  • 0

#14 andrewp413

andrewp413

    Member

  • Members
  • 18 posts

Posted 19 March 2014 - 02:25 PM

Will do he who mods. While the double design is not the best option for newer members if you can find thin wall, eliminating that should be easy enough.
  • 0

#15 He Who Mods

He Who Mods

    Member

  • Members
  • 108 posts

Posted 19 March 2014 - 05:51 PM

Nice job! I'm really happy to see that my funky layout is being used in other people's projects. I'm glad to see a good writeup as well.

On the note of using 1" pvc for the lower body, I highly recommend doing this. I did it a version I made with a CPT. LINK It lightens up the blaster a ton and I think it's easier to work with as you can use 1 1/4" pvc for the pump sheath. Additionally I suggest not extending the PVC to the back to make a stock. I think it adds a lot of unnecessary weight and dremmeling out those channels is a pain. Instead I think it's more effective to take nylon rod or smaller diameter pvc to make a +bow esque stock.

Thanks koree! I remember seeing that when I was researching your double rainbow design and one of my first prototypes was highly based off your CPT with latex tubing and a 1" lower receiver. I also am planning a new version soon that incorporates more of your original design. Thanks for the ideas.


Will do he who mods. While the double design is not the best option for newer members if you can find thin wall, eliminating that should be easy enough.


Yeah, I know this isn't the best option for a "noob's first homemade, but I figured I might as well put the write-up into the contest. I think it would make it much easier to use 1" in the lower receiver and make it easier for a noob who doesn't have thin wall. On another note, if you are trying to find thin wall, the easiest thing to do is call ALL the hardware stores in your area or an area you frequently visit. I couldn't find any suppliers near me, but when I visited my grandparents, I was able to find it at a small, family run shop in their town. Hopefully that somewhat helps your search for the mythical 1.5" thin wall.
  • 0

#16 bhajj94

bhajj94

    Member

  • Members
  • 180 posts

Posted 03 May 2014 - 03:32 PM

I know this thread hasn't had a post in a few weeks, and wouldn't try to revive it but I felt like this should be added. I saw that his Word document was kind of vague and only included the bottom pipe, so I made a bit nicer one in Photoshop for my own template because I would like to make one, and made a few minor altercations to the stock of it. I hope this isn't seen by the mods as posting in a dead thread.Posted Image
  • 0
Probably lurking somewhere...

#17 Langley

Langley

    LGLF - Since 2002

  • Administrators
  • 2,997 posts

Posted 04 May 2014 - 11:17 PM

Will do he who mods. While the double design is not the best option for newer members if you can find thin wall, eliminating that should be easy enough.


Would like to hear how this worked out.

I know this thread hasn't had a post in a few weeks, and wouldn't try to revive it but I felt like this should be added. I saw that his Word document was kind of vague and only included the bottom pipe, so I made a bit nicer one in Photoshop for my own template because I would like to make one, and made a few minor altercations to the stock of it. I hope this isn't seen by the mods as posting in a dead thread.


Not at all, that's a great contribution to the thread.


To He Who Mods, I'd really like to see you update this writeup now that you've had a chance to play with this blaster. I think if you gave it another revision, with a new inexperienced nerfer in mind as your audience, it would go a long way towards the criteria for the homemade contest. If I were in your place, I would try rebuilding it from raw materials and flesh out the steps you glossed over a bit. You could also incorporate bhajj's diagram or something like it. You could even try making printable templates that can be taped onto the blaster to show where to cut. In any case this is a great design and I'm looking forward to taking a crack at it myself.

Edit: I'm not sure this is a valid entry for the plusbow class. The materials and required tools would suggest that this is more of a snap entry.
  • 0

You can poop in my toilet anytime champ.

2016 Nerf War Schedule
Bless you, my son. Now recite 3 New Members Guides and 5 Code of Conducts for your sins.


#18 He Who Mods

He Who Mods

    Member

  • Members
  • 108 posts

Posted 05 May 2014 - 05:21 PM

I know this thread hasn't had a post in a few weeks, and wouldn't try to revive it but I felt like this should be added. I saw that his Word document was kind of vague and only included the bottom pipe, so I made a bit nicer one in Photoshop for my own template because I would like to make one, and made a few minor altercations to the stock of it. I hope this isn't seen by the mods as posting in a dead thread.Posted Image

Wow, thanks. Currently myself and another member are working on version 2 of the double snap which will be easier to build and be much more efficient. Do you mind if we use this diagram in the second one?

Would like to hear how this worked out.


Not at all, that's a great contribution to the thread.


To He Who Mods, I'd really like to see you update this writeup now that you've had a chance to play with this blaster. I think if you gave it another revision, with a new inexperienced nerfer in mind as your audience, it would go a long way towards the criteria for the homemade contest. If I were in your place, I would try rebuilding it from raw materials and flesh out the steps you glossed over a bit. You could also incorporate bhajj's diagram or something like it. You could even try making printable templates that can be taped onto the blaster to show where to cut. In any case this is a great design and I'm looking forward to taking a crack at it myself.

Edit: I'm not sure this is a valid entry for the plusbow class. The materials and required tools would suggest that this is more of a snap entry.

Don't worry Langley, update will be out soon once finals are over. It will be much easier to follow, be cheaper, and have a super efficient design. I will edit this into the SNAP category and expect an update in the next month. Thanks for everyone's support and feel free to keep posting your ideas and designs for the Double Snap.
  • 0

#19 bhajj94

bhajj94

    Member

  • Members
  • 180 posts

Posted 05 May 2014 - 06:54 PM

Wow, thanks. Currently myself and another member are working on version 2 of the double snap which will be easier to build and be much more efficient. Do you mind if we use this diagram in the second one?

Nope, go ahead and use this, its all yours. The Photoshop file is actually to scale completely, I could give you a link if you pm me. If you don't have Photoshop, GIMP is a free version that's not nearly as good, but will get the job done for templates, and I have that type of file too. Glad I could be of some help here.

Edited by bhajj94, 05 May 2014 - 06:57 PM.

  • 0
Probably lurking somewhere...

#20 He Who Mods

He Who Mods

    Member

  • Members
  • 108 posts

Posted 13 June 2014 - 02:30 PM

Nope, go ahead and use this, its all yours. The Photoshop file is actually to scale completely, I could give you a link if you pm me. If you don't have Photoshop, GIMP is a free version that's not nearly as good, but will get the job done for templates, and I have that type of file too. Glad I could be of some help here.


Thanks man, the template will really help.

Sorry about the wait for version 2.0 of the double snap. I am planning ideas but summer has been super busy with getting ready for school and sports and all of that, which is why I couldn't make the contest deadline. I hope to produce a write up sometime by the end of July, but until then, feel free to post your improvements and versions you made to help other members make a better blaster.
  • 0

#21 F man 47

F man 47

    Member

  • Members
  • 11 posts

Posted 07 December 2014 - 02:49 AM

Very nice blaster you have there He who mods, i have tried to recreate your design myself from your writeup, but have hit a small problem with the plunger rod. For some reason with the upper plunger rod attached the blaster will fire very slowly, not enough to fire a dart. But without the top part of the plunger attached the rod springs out very hard. The top plunger seal is only about a 70% seal. I have tired changing the seal and buffing up the springs but the plunger rod still moves very slowly for some reason with the whole blaster combined.

Edited by F man 47, 07 December 2014 - 02:50 AM.

  • 0

#22 spencerak

spencerak

    Member

  • Members
  • 172 posts

Posted 07 December 2014 - 11:48 AM

Very nice blaster you have there He who mods, i have tried to recreate your design myself from your writeup, but have hit a small problem with the plunger rod. For some reason with the upper plunger rod attached the blaster will fire very slowly, not enough to fire a dart. But without the top part of the plunger attached the rod springs out very hard. The top plunger seal is only about a 70% seal. I have tired changing the seal and buffing up the springs but the plunger rod still moves very slowly for some reason with the whole blaster combined.


Your top plunger rod likely isn't centered, that would account for the bad seal and crazy friction.
  • 0

Holy shit it's Captain Slug.


#23 F man 47

F man 47

    Member

  • Members
  • 11 posts

Posted 08 December 2014 - 04:41 AM

Your top plunger rod likely isn't centered, that would account for the bad seal and crazy friction.


I think that could be the problem, but am not sure of a solution for it. I have tried using a 1.5 inch fender washer with a 3/8 ID for my seal,which fixes my problem of the slow plunger rod; but it only gets a 40% seal and does not fire a dart. I have no access to large hardware store here in Hong Kong and my hardware stores do not carry fender washers, is there any other way of centring the plunger rod?
  • 0

#24 He Who Mods

He Who Mods

    Member

  • Members
  • 108 posts

Posted 20 December 2014 - 10:11 PM

I think that could be the problem, but am not sure of a solution for it. I have tried using a 1.5 inch fender washer with a 3/8 ID for my seal,which fixes my problem of the slow plunger rod; but it only gets a 40% seal and does not fire a dart. I have no access to large hardware store here in Hong Kong and my hardware stores do not carry fender washers, is there any other way of centring the plunger rod?


Hey F man 47, glad you liked the design! Sorry about the late reply, I have slowed down with nerfing and only occasionally check the forums. As said before, I am almost sure a centered plunger rod is your problem. The best way I was able to center mine was by re-drilling the hole in the 3/4" end cap so that it is perfectly centered. I also made sure the CPVC "U" shape was perfectly level. If the centered plunger is your problem, that explains why the seal isn't 100% too. Hope that helped!
  • 0


Also tagged with one or more of these keywords: Double rainbow, SNAP, bullpup, spring, homemade, writeup

0 user(s) are reading this topic

0 members, 0 guests, 0 anonymous users