Jump to content


Photo

The Roughcut 2 to 1

A twist on the coupler mod.

7 replies to this topic

#1 Griever 2112

Griever 2112

    Member

  • Members
  • 439 posts

Posted 16 May 2013 - 08:11 AM

OK, so I got inspired after seeing someone throw couplers on a Roughcut... and I thought well, that is a cool idea... but else can you do with that... Spring replacements on this thing will be a bitch because of its gears. But what if you took both plunger tubes and fed them into one output.

Materials:
- Roughcut (duh)
- Epoxy
- Epoxy putty
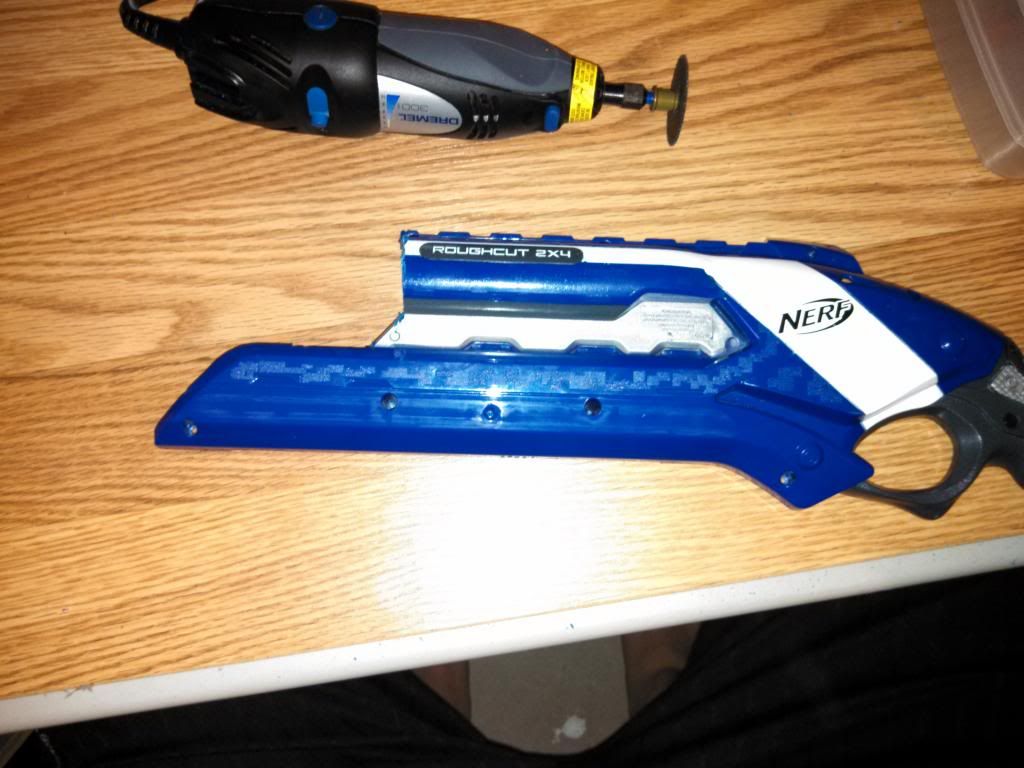
- Dremel or Rotary Tool brand of your choice.
- cutting wheel
- grinding bit
- carving bit (possibly optional)
- 90 degree 1/2" PVC elbow
- 1/2" PVC "T" coupler

Step 1: First thing is the Turret Dissasembly and deconstruction.
First is obvious gut the Roughcut and then unscrew the back plate of the turret. The Turret itself is not needed but the back plate is very useful for holding the couplers and also to reattach to the Plunger tubes.
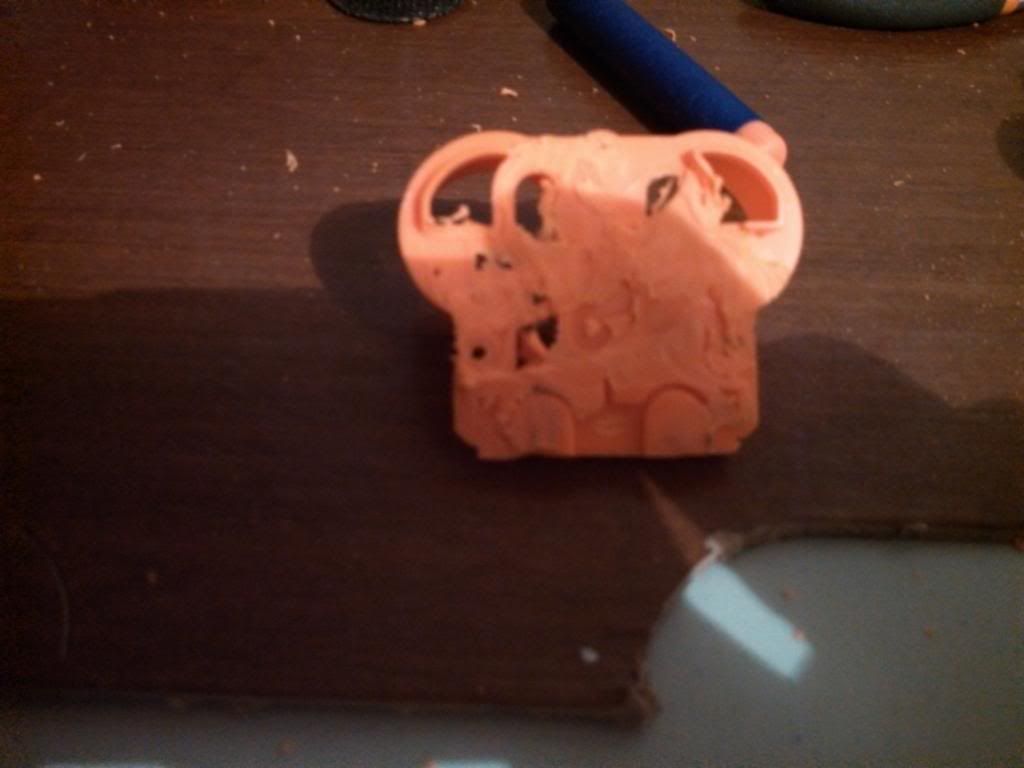
Posted Image

Trimming down the bottom is optional. But with the cutting wheel and grinding but make the surface around the air output ports as flat as possible. The quarter circle pieces directly around the air output are fine to keep. And I highly recommend it because you can use them as guides to hold the couplers in place.
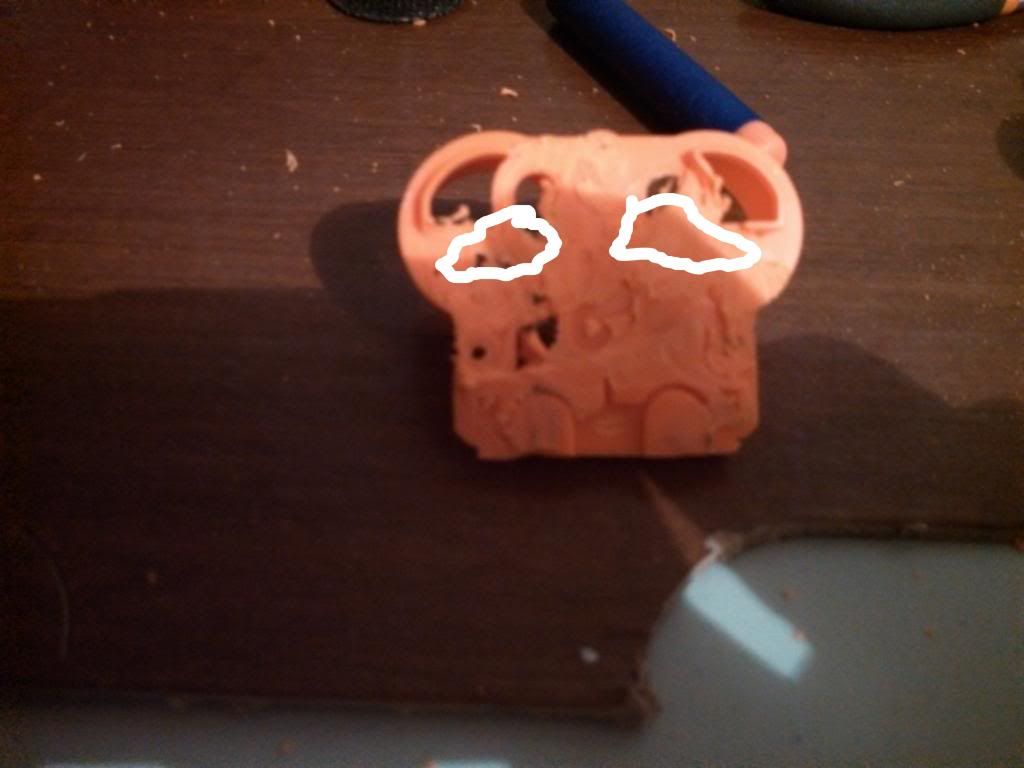

Posted Image
With the carving bit you will need the to open the air output more by carving out these area. If you turn over the piece the back shows where the plastic is thinner. or carve out the whole hole. I left the thicker piece for support for the coupler.


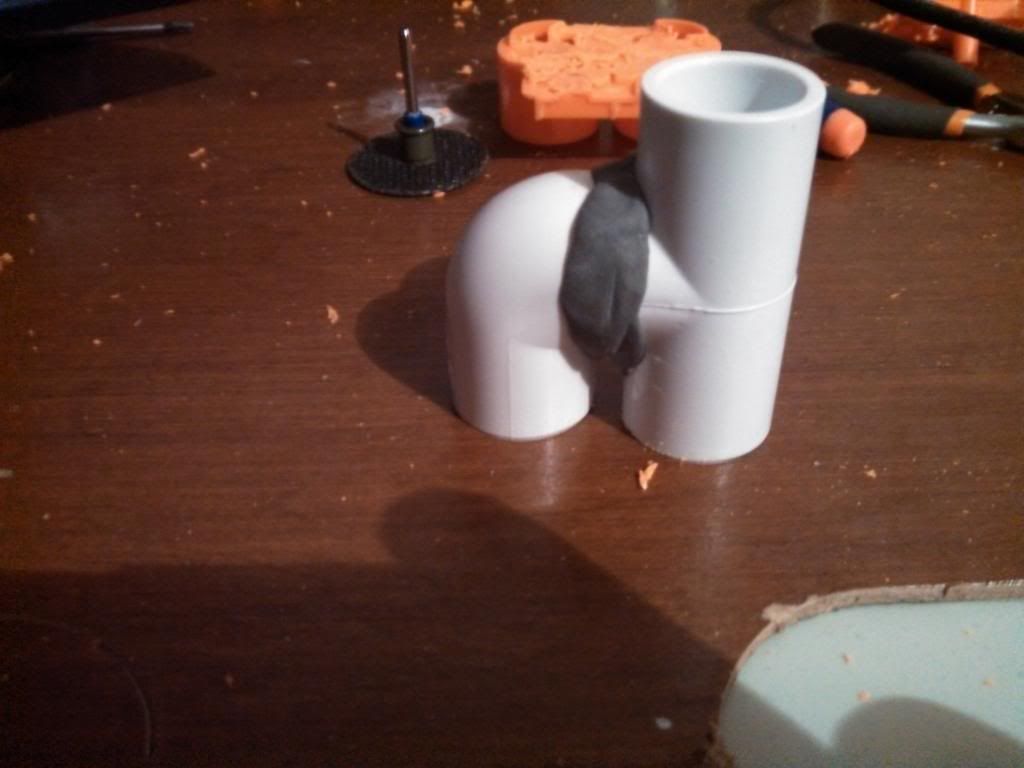
Step 2: The coupler.
Posted Image
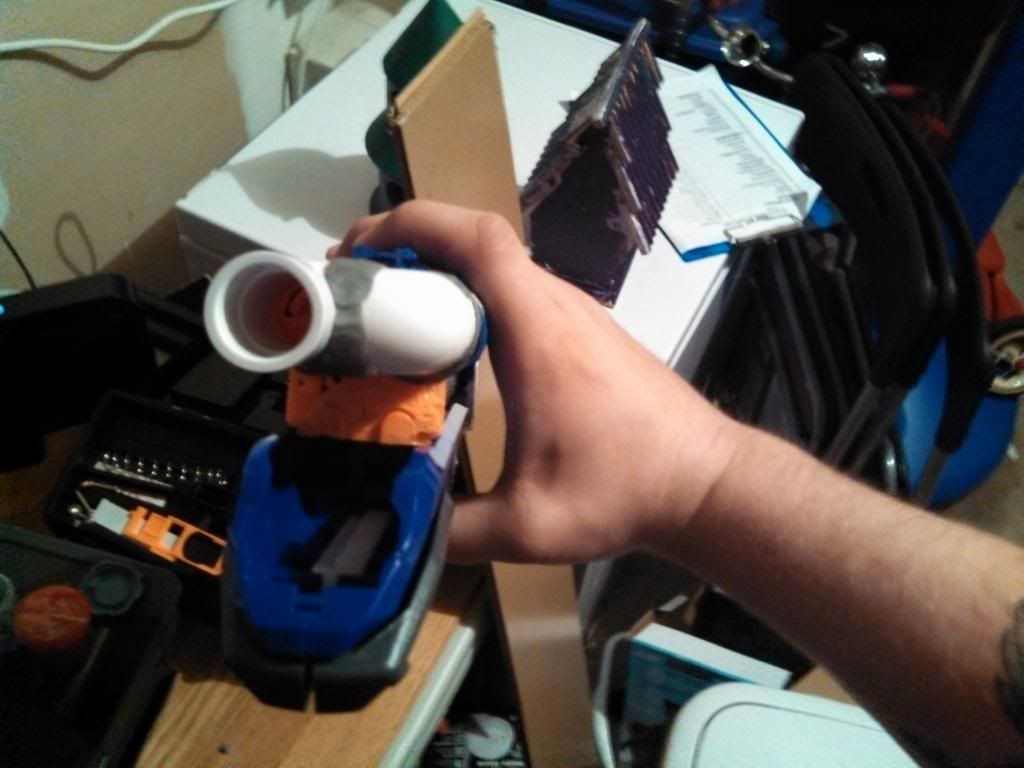
Start by cutting down one side of the elbow joint and bottom portion of the "T". I eyeballed my cutting it's pretty much And kept fitting and cutting using the black plate as my guide.

Once you have your fit. Epoxy the 2 pieces together. Once the set cover the seam in epoxy putty to make sure you have no leaks there, and to reinforce the bond.

Step 3: connecting the two.

(My picture got corrupt, I will retake if I can)
This is the simple part. Put epoxy on the ends of the coupler and set it against the back plate. Fairly straight forward. Once the epoxy is dry then, like the coupler, epoxy putty around the seams for leak protection and stability.

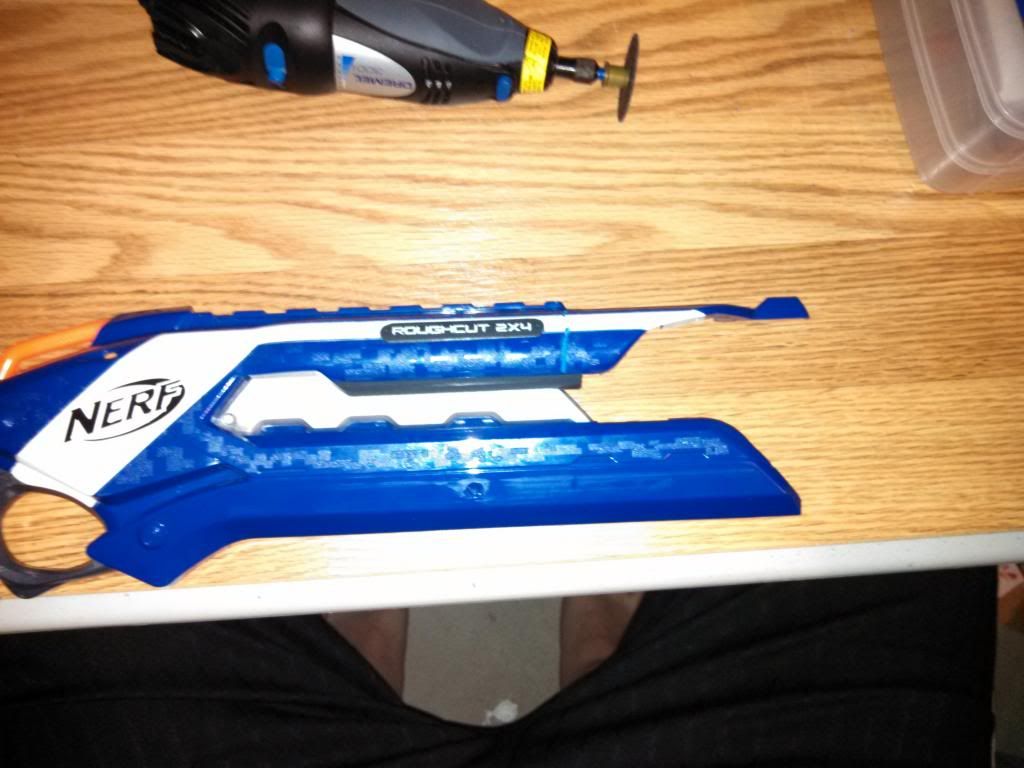
Step 4: Shell modification.
Posted Image
This is the shell before cutting.

Posted Image
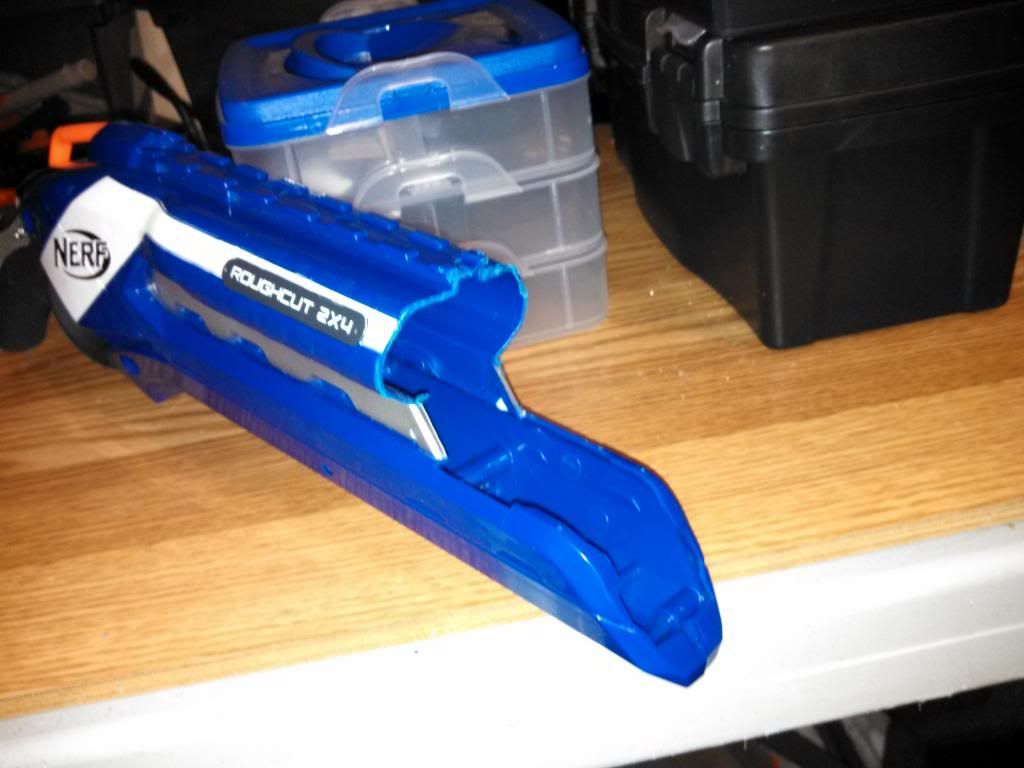
The shell after cutting. It is pretty much a straight line up from the tip of that little triangle. But you will need to angle it just slightly or loose a screw port.
Posted Image
This is what the shell will look like once cut.

Step 5: Reassembly.


The Roughcut is a very easy blaster to put back together as long as you didn't touch the gear assembly. It comes out as a solid piece and goes back in as one. Now take some epoxy and run in along where it connect to the plungers. BE VERY CAREFUL NOT TO GET ANY EPOXY ON THE PLUNGERS!!!!! You can use super glue too. My Advice put the back plate on pull it off a little, not all the way, add a little bit of the adhesive and then push back on. Once it is dry put it back together.

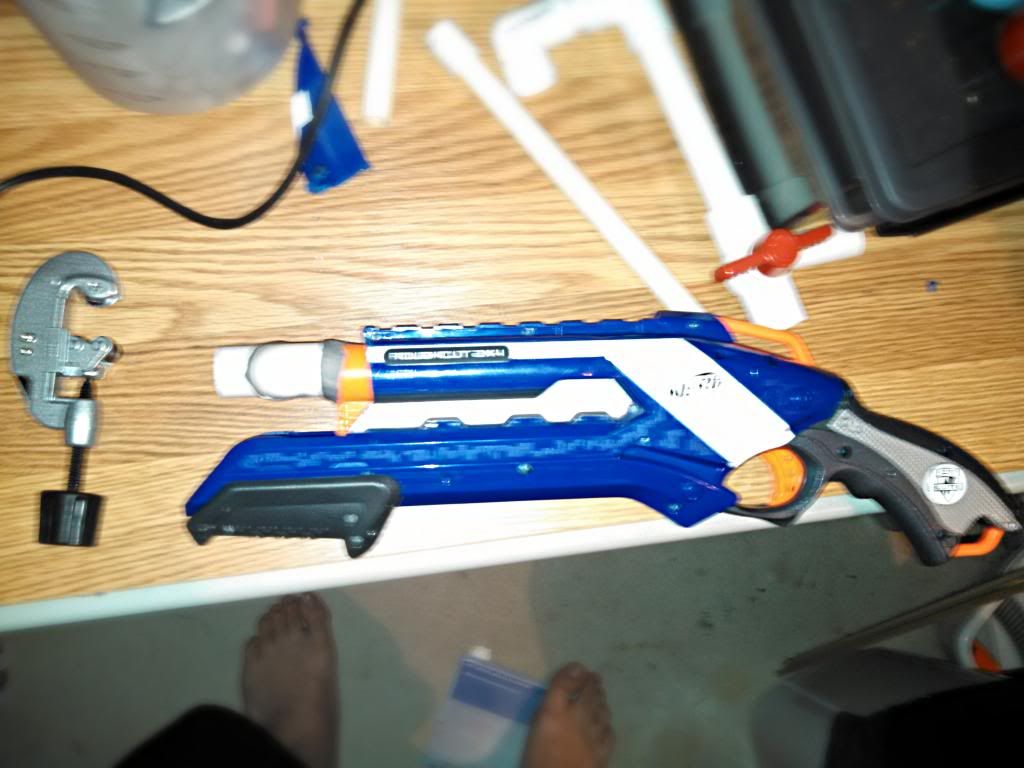
Side View
Posted Image

Front(ish) View
Posted Image

Personally I think this look pretty clean, I could probably cover the hole from the no turret, but I got no styrene.

This will fire Stefans from a speedloader, I did try a small RSCB clip but it adds too much dead space for it to fire. I didn't try a hopper, but we will see.
  • 0

Griever 2112 still plays with his alpha trooper quite often despite owning one of the scariest +bows.

My Youtube Page

#2 MAV13

MAV13

    Member

  • Members
  • 129 posts

Posted 16 May 2013 - 10:32 AM

So is this shooting twice as far as a normal Roughcut, which should be nigh on 100+ feet?
  • 0

#3 Griever 2112

Griever 2112

    Member

  • Members
  • 439 posts

Posted 16 May 2013 - 10:52 AM

Haven't done a proper range test just yet, I finished this up this morning before work, and was testing to make sure it was functional, and with what barrel setup. As soon as I get a firing demo prepared I will edit it and add it.
  • 0

Griever 2112 still plays with his alpha trooper quite often despite owning one of the scariest +bows.

My Youtube Page

#4 Exo

Exo

    Member

  • Members
  • 391 posts

Posted 16 May 2013 - 04:16 PM

So is this shooting twice as far as a normal Roughcut, which should be nigh on 100+ feet?

Due to that amount of deadspace, I highly doubt it. But, with a real barrel, it should be a lot better.
  • 0

#5 hamoidar

hamoidar

    Member

  • Members
  • 367 posts

Posted 16 May 2013 - 08:56 PM

First of all, I really think this is a good idea! However, I can see a few problems.

1. The plungers do not fire at the same time, therefor, the first plunger that fires will have more effect on the dart than the second. This will decrease range but only slightly.
2. I wish the barrel was centered with the gun, as I like to sight along the tactical rail. Of course, this is a matter of personal preferance.
3. Not a problem: I think that using two smaller plungers to fire a dart at the same range as one large plunger is a great idea! why? Because, two small plungers might be able to fit into a shell/cavity that a large one would not.

Overall a very good job!
  • 0
NerfHaven > Your control panel > Profile > Change Signature > Inserts dumb sig > What! No pictures! > Inserts next best thing: http://nerfhaven.com...howuser=114052' class='bbc_url' title='External link' rel='nofollow external'>Best thing on Nerfhaven!

#6 archangel24

archangel24

    Member

  • Members
  • 215 posts

Posted 16 May 2013 - 10:35 PM

Going off of what hamoidar said, there is a lot of deadspace in your current set up. I would highly recommend using two 1/2" CPVC elbows and a 1/2" PVC T. You could cut away from the PVC T and bore it out to fit the elbows into and then put that set up onto the plunger tubes. It will cut down on the deadspace and should be significantly more air efficient. Since the right plunger tube is the one that fires first and it's the one with the most direct airflow in your current set up. You could also modify the trigger timing so that the two sides fire off at the exact same time and eliminates the delay. All of this would theoretically increase performance and efficiency.

Otherwise this is a great mod and it would be awesome to see a chopper set up on this.
  • 0
QUOTE(Talio @ Oct 14 2010, 10:37 PM) View Post

I would much perfer a game that's free of KY. I like it rough. Right, Vacc?

"She went all Ghetto Fab on you."

#7 clownieX

clownieX

    Member

  • Members
  • 104 posts

Posted 16 May 2013 - 11:23 PM

Ahhh, thought I saw this coming one you showed the shell of a rough cut in your last video. Looks cool, glad to see you've done it. Can't wait to try this one myself, now I can work on my next mod.
  • 0

#8 Griever 2112

Griever 2112

    Member

  • Members
  • 439 posts

Posted 17 May 2013 - 07:52 AM

Thanks for the feedback, I will definitely be taking these ideas into account and probably revisit this, or maybe redo the front coupler.

@hamoidar - you can fix the catches to fire both of at the same time a la the way the slamfire mech works like Archangel mentioned. Since this was my only spare Roughcut I didn't get a chance to try it for fear of messing it up. But that would alleviate the discrepancy of the split second between barrels.

@archangel24 - I can probably cut down on some of it by trimming down the connection to the backplate. Honestly didn't really think about that. I did consider that idea, but CPVC is too small, in my opinion and using PVC so much would be cut out I would worry about the integrity of the setup. With this current setup using the stock springs, I could not get a hopper to work on it. It does work well with a speedloader, but my ultimate goal will be to get a hopper/chopper to work on this.
  • 0

Griever 2112 still plays with his alpha trooper quite often despite owning one of the scariest +bows.

My Youtube Page


0 user(s) are reading this topic

0 members, 0 guests, 0 anonymous users