Jump to content


Photo

Designing a crossbow - no barrel

... and hello again!

15 replies to this topic

#1 FountainPenFan

FountainPenFan

    Member

  • Members
  • 12 posts

Posted 29 March 2013 - 11:40 PM

Cosmetic primary view.
Posted Image

Hello all. This is my first time back to NerfHaven for a long time (close to six years ago.) Some of you may remember me as member Mr. Tubb. Since then I've earned my Eagle rank in the Boy Scouts of America, graduated high school, and am studying at CSU Long Beach to get a BS in Mechanical Engineering. But, you didn't click this topic for a biography, so I'll get on to the design.

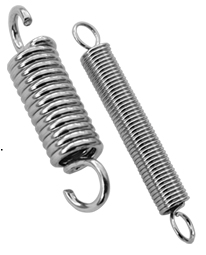
I drafted this a few days ago in Google's Sketchup modeling freeware (which I am quite fond of.) I did not draft the extension springs (example) because that would be somewhat of a pain with this program.

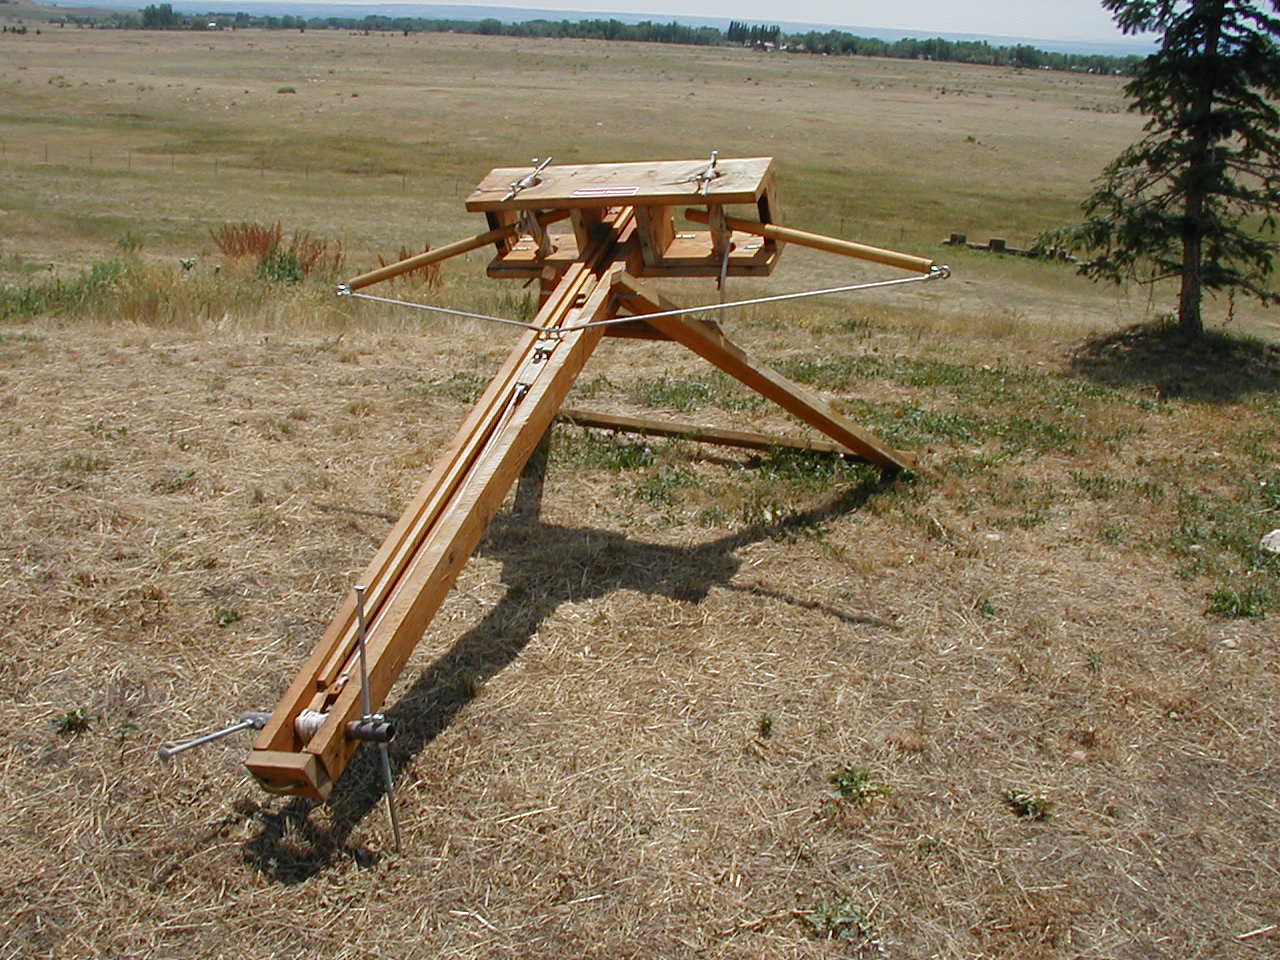
Extension springs will be emplaced between the bolts (blue) of the crossbar (goldenrod) and the priming bolt (blue) that runs through the dart sled (bright green.)

Pulling the dart sled (bright green) back will store tension in the springs. This tension will be stored until ready to fire by rotating the catch block (darkest green) such that the handle is flush with the frame (yellow), capturing the bolt pin (white) that is screwed into the mount (purple.) It will operate similar to what I believe are called dead man's triggers (such as those sadly used in suicide bombs) meaning that after one's hand leaves the handle the catch block should rotate about its pin (blue) and release the bolt pin. This will send the dart sled sliding down the rail, at the end of which the dart (loosely mounted on the white plastic straw shown on the front of the bolt sled) should be launched.

Technical primary view.
Posted Image
Technical side view
Posted Image
Technical trigger view
Posted Image
Technical side view, trigger released.
Posted Image
Sled/rail view while primed.
Posted Image
Sled/rail view after firing.
Posted Image

Thank you for reading. Any thoughts you might have would be appreciated, and I would be happy to answer any questions.

EDIT

I will be attempting the making of this in the next few days, as I will be on Easter break from college.

Edited by FountainPenFan, 29 March 2013 - 11:56 PM.

  • 0

#2 481IceDragon

481IceDragon

    Member

  • Members
  • 245 posts

Posted 30 March 2013 - 12:04 AM

How strong are the springs your going to be using?
Im thinking if the springs are to strong either the dart will have a wicked fishtail to it, or will slam around in the "barrel" and cause jams.

Also, will the dart fit over the white shaft, or inside of it? I take it this is to be a muzzle loading style blaster?

Edited by 481IceDragon, 30 March 2013 - 12:05 AM.

  • 0

#3 FountainPenFan

FountainPenFan

    Member

  • Members
  • 12 posts

Posted 30 March 2013 - 12:23 AM

How strong are the springs your going to be using?
Im thinking if the springs are to strong either the dart will have a wicked fishtail to it, or will slam around in the "barrel" and cause jams.

Also, will the dart fit over the white shaft, or inside of it? I take it this is to be a muzzle loading style blaster?


The spring strength is pending, as I have yet to test any by hand (which I will do tomorrow) but I will keep your thoughts in mind. Considering that the springs are external, I could tone them down by using slightly longer springs.

Yes, the hole in the back of the (stock elite) dart will fit over the white shaft, and it is muzzle loading. I would like to make the fit of the white shaft tight but removable, so that I can use the darts I originally made for blowguns in the crossbow as well:
Posted Image
Though the more recent versions are made of felt (fabric) rolled with hot glue around a straw rather than foam as above.
  • 0

#4 Zorns Lemma

Zorns Lemma

    Sir Scrt

  • Moderators
  • 1,277 posts

Posted 30 March 2013 - 12:33 AM

Unless your drawings are set at some crazy perspective that really distorts size, you'll have a hard time finding extension springs to fit the specifications you want. Most of the ones in the 10lb range have a draw to length ratio of 2:1 max.

I would suggest something more elastic than spring steel like bungees or elastic tubing.

Edited by Zorn's Lemma, 30 March 2013 - 12:35 AM.

  • 0
"In short, the same knowledge that underlies the ability to produce correct judgement is also the knowledge that underlies the ability to recognize correct judgement. To lack the former is to be deficient in the latter."
Kruger and Dunning (1999)

#5 FountainPenFan

FountainPenFan

    Member

  • Members
  • 12 posts

Posted 30 March 2013 - 12:42 AM

Unless your drawings are set at some crazy perspective that really distorts size, you'll have a hard time finding extension springs to fit the specifications you want. Most of the ones in the 10lb range have a draw to length ratio of 2:1 max.

I would suggest something more elastic than spring steel like bungees or elastic tubing.


Good to know, though I was planning on redrafting the lengths of the rail (red) and crossbar (goldenrod) once I have measured the unstretched and fully stretched lengths of the springs I'm able to get. I don't need the rail to be two feet long (as drafted) anyway if I can get the same acceleration in a shorter length. Thanks for the advice.
  • 0

#6 FountainPenFan

FountainPenFan

    Member

  • Members
  • 12 posts

Posted 30 March 2013 - 01:26 PM

These look about ideal for what I'm doing, though I'm not sure if the draw weight of two of these (combined: ~50 pounds) would be excessive. Of course, this design doesn't have a barrel for a spring to build up pressure in, and is therefore more wasteful or the tension, so I would need a bit more power than a barreled nerf blaster to get the same ranges.

After some thought, particularly with some worry about the purple catch block snapping, I've revised the design to make it a bit sleeker and stronger.

Posted Image

Trigger elements are in purples, rail elements in red, and bolts in blue

Posted Image

Posted Image

Posted Image

Posted Image

Trigger detail cutaway:
Posted Image

Rail detail cutaway:
Posted Image

Front underside:
Posted Image

This ought to be more ergonomic, and the catch/trigger block should also slide off the catch rod (which will have the springs looped around it on its other end) easier. With that assumption, firing should simply involve sliding the firing hand further towards the front of the grip section. Again, the proportions of the rail length to crossbar width are pending.

Thoughts?
  • 0

#7 KaneTheMediocre

KaneTheMediocre

    Belligerent Asshole

  • Members
  • 613 posts

Posted 30 March 2013 - 01:53 PM

I like the way you've dealt with the dart-guide. Some of my early crossbows were difficult to make and looked like crap because I cut slots in PVC instead of constructing something like I see here.

As far as propulsion, I would strongly recommend against using metal springs for a direct-propulsion blaster. In pneumatic blasters, there's a speed ratio (from the volume ratio) between plunger speed and dart speed. Additionally, the tight barrel delays the firing of the dart allowing the plunger tube to build pressure before firing, which further increases the ratio. With direct-propulsion, you don't have these ratios, so all the spring-force in the world won't help you if it's connected to a massive, and therefore slow-moving plunger. For these reasons (and the extension ratio issue Zorn mentioned) I'd recommend some sort of elastic cord (rubber bands, bungees) or bow arms, as they will add much less mass to the moving parts of your blaster.
  • 0
RAINBOW CLAN FTW
I'm Purple

My Half-Baked MHA Site

#8 FountainPenFan

FountainPenFan

    Member

  • Members
  • 12 posts

Posted 30 March 2013 - 02:35 PM

I like the way you've dealt with the dart-guide. Some of my early crossbows were difficult to make and looked like crap because I cut slots in PVC instead of constructing something like I see here.

As far as propulsion, I would strongly recommend against using metal springs for a direct-propulsion blaster. In pneumatic blasters, there's a speed ratio (from the volume ratio) between plunger speed and dart speed. Additionally, the tight barrel delays the firing of the dart allowing the plunger tube to build pressure before firing, which further increases the ratio. With direct-propulsion, you don't have these ratios, so all the spring-force in the world won't help you if it's connected to a massive, and therefore slow-moving plunger. For these reasons (and the extension ratio issue Zorn mentioned) I'd recommend some sort of elastic cord (rubber bands, bungees) or bow arms, as they will add much less mass to the moving parts of your blaster.


I see - so the elastic would have a better weight-tension ratio than steel springs and allow for more flexibility in the rail sizes? If so, I will most likely take that route. Thanks for the advice.

EDIT

Any suggestions for lubricating the inside of the rail? I thought of covering the inside surfaces with clear packaging tape, since it's quite slick on the non adhesive side.

Edited by FountainPenFan, 30 March 2013 - 03:10 PM.

  • 0

#9 KaneTheMediocre

KaneTheMediocre

    Belligerent Asshole

  • Members
  • 613 posts

Posted 31 March 2013 - 02:27 AM

Any suggestions for lubricating the inside of the rail? I thought of covering the inside surfaces with clear packaging tape, since it's quite slick on the non adhesive side.


If you make it out of reasonably slippery materials (pretty much any plastic) you can probably get away with not using any lubrication. Most blasters need lube because they use rubber seals, and rubber is a exceptionally not-slippery. Smooth plastic can rub on plastic all day without any problems.

Adding clear packing tape might work for a while, but as it starts to fail, it will make a huge mess of things.
  • 0
RAINBOW CLAN FTW
I'm Purple

My Half-Baked MHA Site

#10 Meaker VI

Meaker VI

    Member

  • Moderators
  • 1,192 posts

Posted 01 April 2013 - 11:20 AM

I've got a frame for a design that is very similar to this lying around in my garage for when I get time to get back to it.

Some things I've learned so far:
I'm not sure about your 2nd design, it seems like you'll need tension on both sides of the bolt to keep it from rotating and binding or just flying out at you. My design is more like your first design, except that I am trying to do away with the arms by using latex tubing creatively wrapped around the length of the blaster.

Your bow arms appear to be held in place by a thin plate on top, attached to diagonal vertical-bracing, attached to a thick piece on the bottom. I'd think it'd make more sense and be easier to machine to just use a solid piece across the top.

Your dart pusher looks like it'd impale darts, drop the little bar-extension. You shouldn't need to be in contact with the dart by the time it gets to the end of the barrel, and you'll have lower mass moving mass that way.

And looking at it again, your darts aren't being guided in by the frame, are they? That explains the stick you've got, but it'll probably be better to make a section that the darts can be guided down with 3 or 4 points of contact. My setup is like this: [ ] where the dart goes in the middle, and it works fine (except that I need to bevel the edges to keep the darts from shredding).

You shouldn't need lube if it's smooth to begin with, I'm using poplar and it works fine.

Add a slot to drop darts into.

And some Sketchup tips:
Turn off the sky/ground. You're an engineer, not an architect.

Don't smooth your square models, it makes them look weird.
  • 0

#11 FountainPenFan

FountainPenFan

    Member

  • Members
  • 12 posts

Posted 01 April 2013 - 10:33 PM

After going back to the drawing board:

Posted Image

Posted Image

Posted Image

Posted Image

Posted Image

Posted Image


Posted Image


New trigger/rail sled cutaway:
Posted Image
The tube, taking the place the block with the dart peg, which will avoid the need to coat the inside with acrylic and will be made of either a metal tube or PVC pipe.

EDIT

This version will have tension the bottom and top, and there will be rubber bands stretched across the two paler blue pins near the trigger block to act as a trigger return.

Edited by FountainPenFan, 01 April 2013 - 11:07 PM.

  • 0

#12 Meaker VI

Meaker VI

    Member

  • Moderators
  • 1,192 posts

Posted 02 April 2013 - 11:43 AM

After going back to the drawing board:
...
The tube, taking the place the block with the dart peg, which will avoid the need to coat the inside with acrylic and will be made of either a metal tube or PVC pipe.

EDIT

This version will have tension the bottom and top, and there will be rubber bands stretched across the two paler blue pins near the trigger block to act as a trigger return.


Looking better, however I'm not sure how well that tube-launcher will work.

Here's what I did:

Posted Image

The first two are perspectives, the third is looking down the 'barrel', and the fourth is a view of the trigger/dart pusher. The trigger could probably also be a snap trigger. The box on top would be a magwell, darts just drop in in front of the dart pusher, and a rubber-banded block at the back would go forward and block the darts when the launcher was fired. The parts list is pretty straight forward, I didn't take exact measurements just now, but it's something like 64" of 1" x 1/4" bar stock (wood or plastic), 32" of 1" x 1/2" bar stock, a 1/2" dowel, and some misc. other pieces (probably 12"x12" of 1/4" and 6 x 12 or less of 1/8" material). There should also be a dowel mounted vertically 6" or so back for the latex to wrap around, and there'd need to be a way to keep the stuff on the blaster (large fender washers screwed on).
  • 0

#13 Zorns Lemma

Zorns Lemma

    Sir Scrt

  • Moderators
  • 1,277 posts

Posted 02 April 2013 - 01:09 PM

Less 3D models and more actual builds please. I'm going to close this thread in 1 week if there isn't any evidence of something actually being built.
  • 0
"In short, the same knowledge that underlies the ability to produce correct judgement is also the knowledge that underlies the ability to recognize correct judgement. To lack the former is to be deficient in the latter."
Kruger and Dunning (1999)

#14 FountainPenFan

FountainPenFan

    Member

  • Members
  • 12 posts

Posted 02 April 2013 - 01:49 PM

Less 3D models and more actual builds please. I'm going to close this thread in 1 week if there isn't any evidence of something actually being built.

Alright. I am going to be meeting with the friend who is going to be helping me with getting (more inexpensive) wood and making all the machined cuts this Friday, and was just posting the design's development to see if there was any input. Thank you for the notice.

@Meaker VI: Interesting design. My only question is if those round pairs of pegs at the front are the mounts for whatever you're using for the tension, and if so I wonder if you'll have unnecessary slack as the dart pusher nears the front of the rail. I'm keeping with the crossbow's perpendicular arms so that I can have tension throughout the travel of the dart pusher.

Edited by FountainPenFan, 02 April 2013 - 01:55 PM.

  • 0

#15 Meaker VI

Meaker VI

    Member

  • Moderators
  • 1,192 posts

Posted 02 April 2013 - 05:03 PM

@Meaker VI: Interesting design. My only question is if those round pairs of pegs at the front are the mounts for whatever you're using for the tension, and if so I wonder if you'll have unnecessary slack as the dart pusher nears the front of the rail. I'm keeping with the crossbow's perpendicular arms so that I can have tension throughout the travel of the dart pusher.


There needs to be another peg midway down the top & bottom for the latex to wrap around. That'll eat up any slack. Arms are an easy option to add if that doesn't work, so it's not a big deal. The biggest change from mine to yours is the barrel/dart pusher setup.
  • 0

#16 FountainPenFan

FountainPenFan

    Member

  • Members
  • 12 posts

Posted 08 April 2013 - 10:30 PM

I don't have pictures, but I was able to make a trial construction of the 3rd draft. I left too much room for error in making a dart guide out of four cut pieces of wood attached together, so the sled wobbles up and down quite a bit when not under tension. I have not tested it with tension yet, and likely won't because I don't expect it to work well.

So, I'm taking some of the advice from this thread and also changing the design from a faux crossbow to a more realistic shoulder mounted ballista (so I'm dubbing it the SMB.)

Posted Image

Posted Image

Just like a ballista my design uses rigid arms (blue) that pivot under tension to move a bowstring. The rail is now to be made up of 4 wooden dowels (pink) precisely spaced apart that will directly guide the dart as it is pushed from behind by the (dark red) block. The catch block (red) is also separate from the trigger in this new design, and for the trigger I plan to release the bowstring from the catch block by using a set of 2 connected clothespins: one inside the dart guide right by the catch with a string running through a hole in the bottom of a frame and attached to a second clothespin. When the outer clothespin is pressed, the inner one should have the same amount of travel and lift the string onto the angled part of the catch.

I will attempt the new design this weekend.
  • 0


0 user(s) are reading this topic

0 members, 0 guests, 0 anonymous users