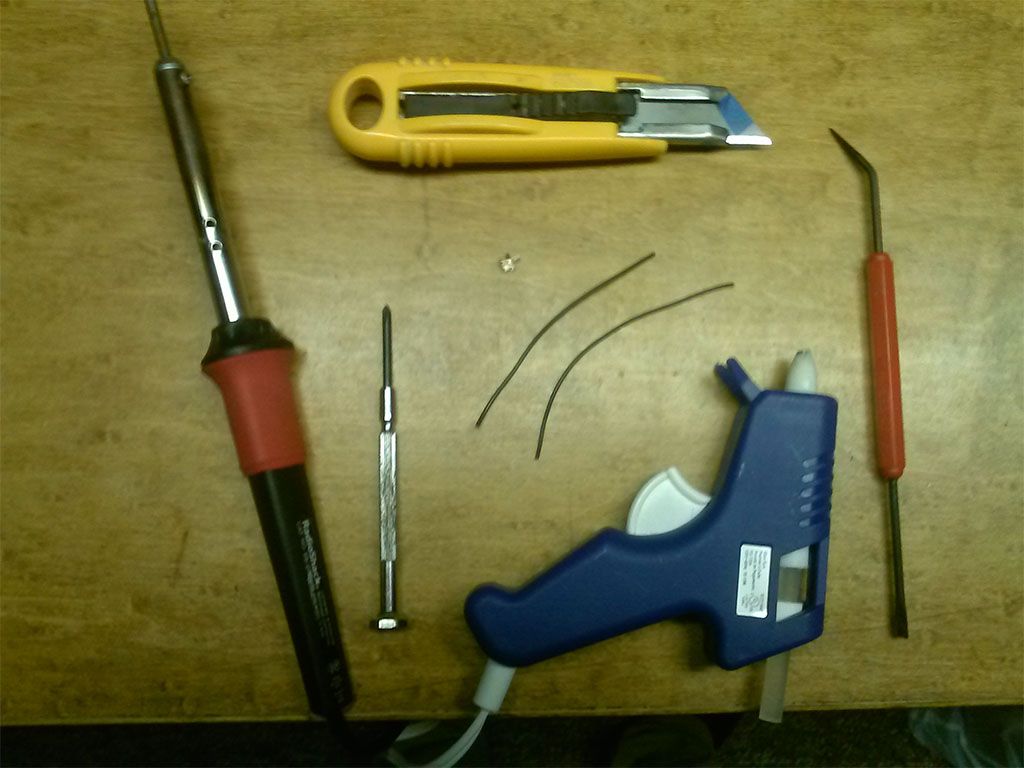
Jump to content


Photo

Nerf Elite Firestrike LED Replacement

Simple, Yet Effective

5 replies to this topic

#1 SoftButFirm

SoftButFirm

    Member

  • Members
  • 8 posts

Posted 19 March 2013 - 10:26 AM

Hey guys, I'm SoftButFirm (Literally...). I've been into Nerf for a while but just now decided to join the forum. I wanted my first post to be something useful, so I decided to make a tutorial for changing out the LED on the new Firestrike. It's pretty simple (Actually really simple), but I hope someone will get some use of it. Anyway, without further adieu, here it is.

What you need:
1. A Firestrike
2. Small diameter wire (Not sure how big, mine was salvaged)
3. Soldering iron
4. A white LED (Not sure about kind/size. Once again, mine was salvaged)
5. Screwdriver
6. Knife/something to scrape off old solder with (Optional, but useful)
7. Hot glue gun (Optional, but useful)
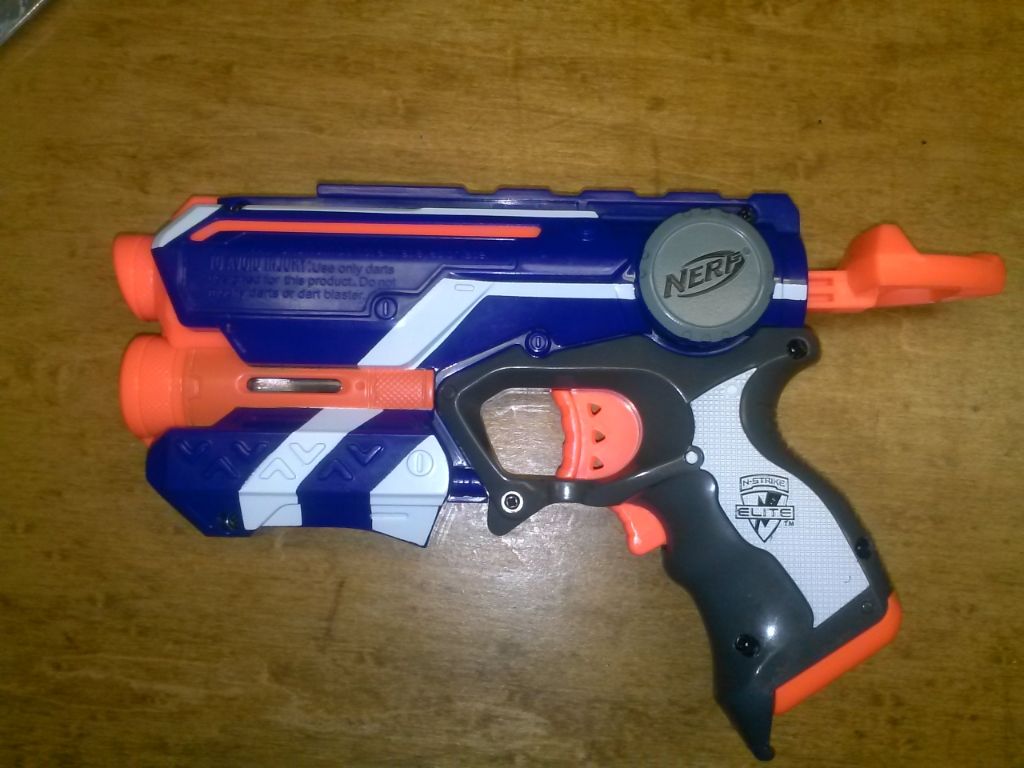
Posted Image


Step 1
Get your blaster.

Posted Image


Step 2
Open that muhfuhkah up!
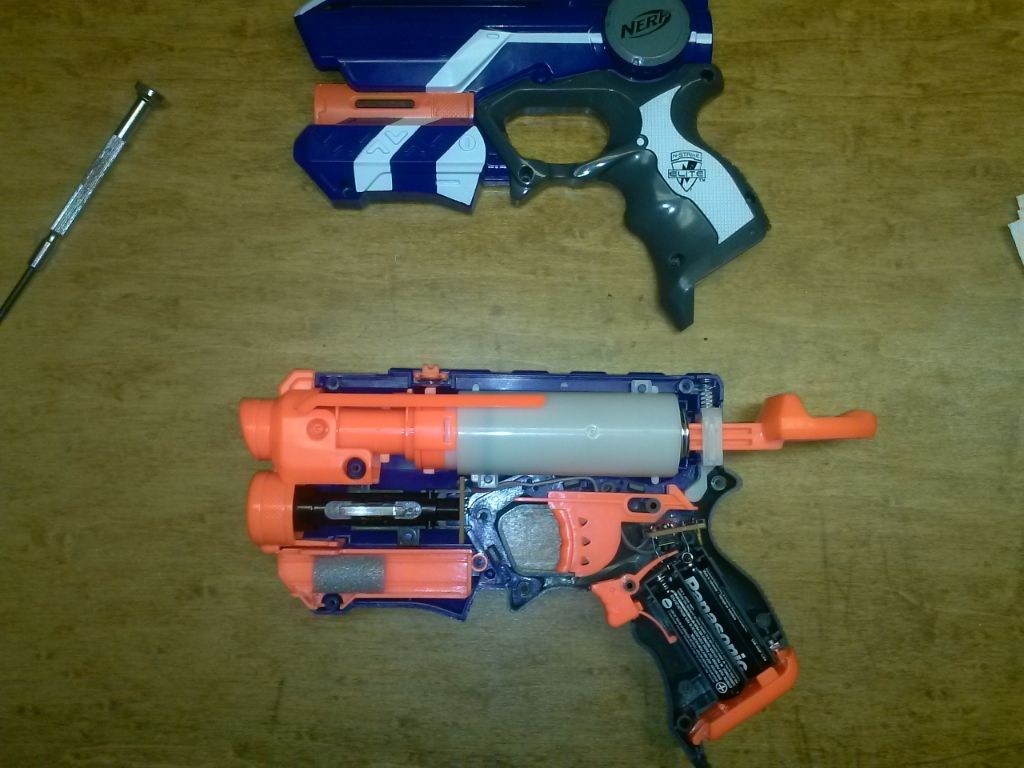
Posted Image


Step 3
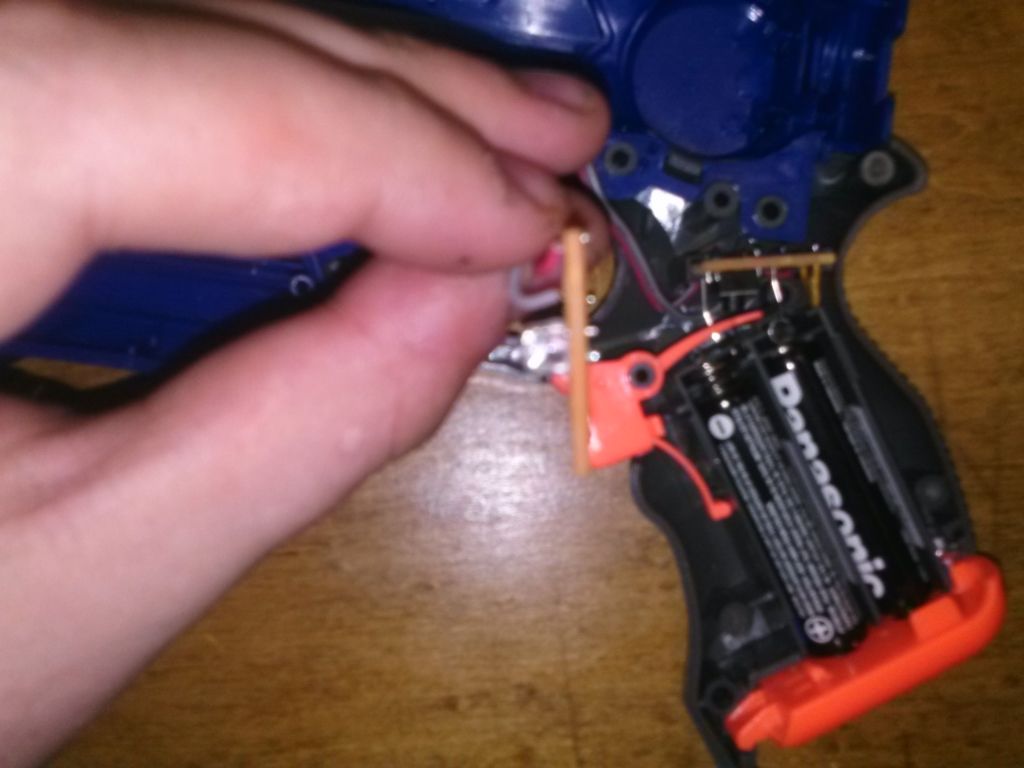
Take out mostly everything beside the black thing.
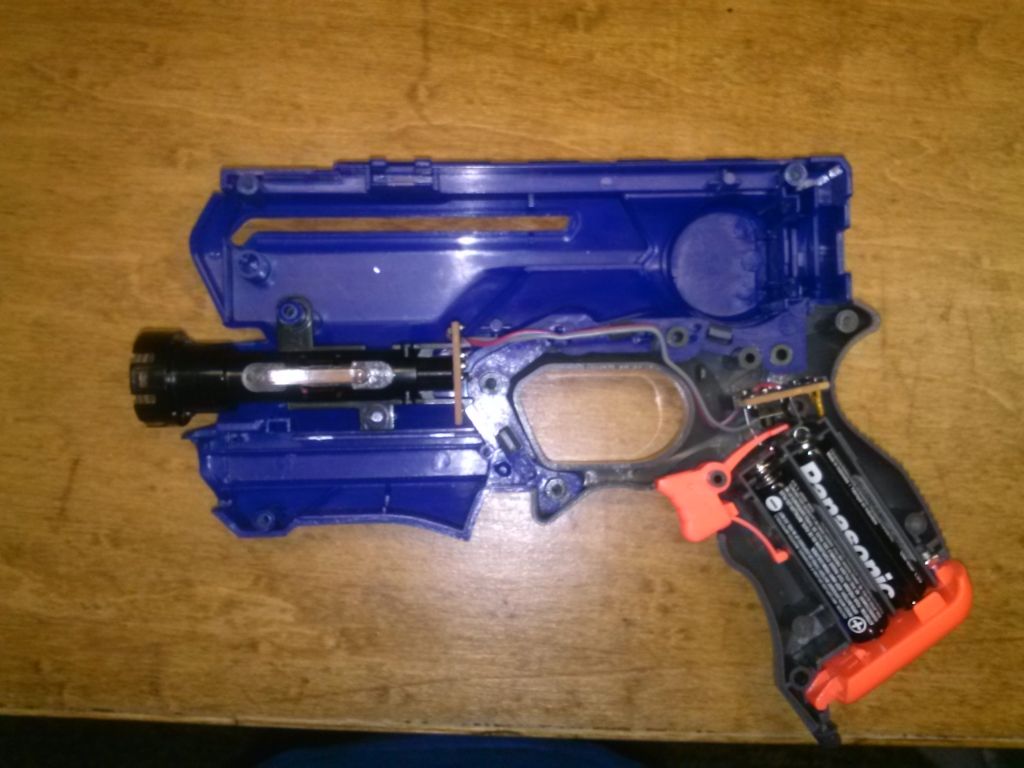
Posted Image


Step 4
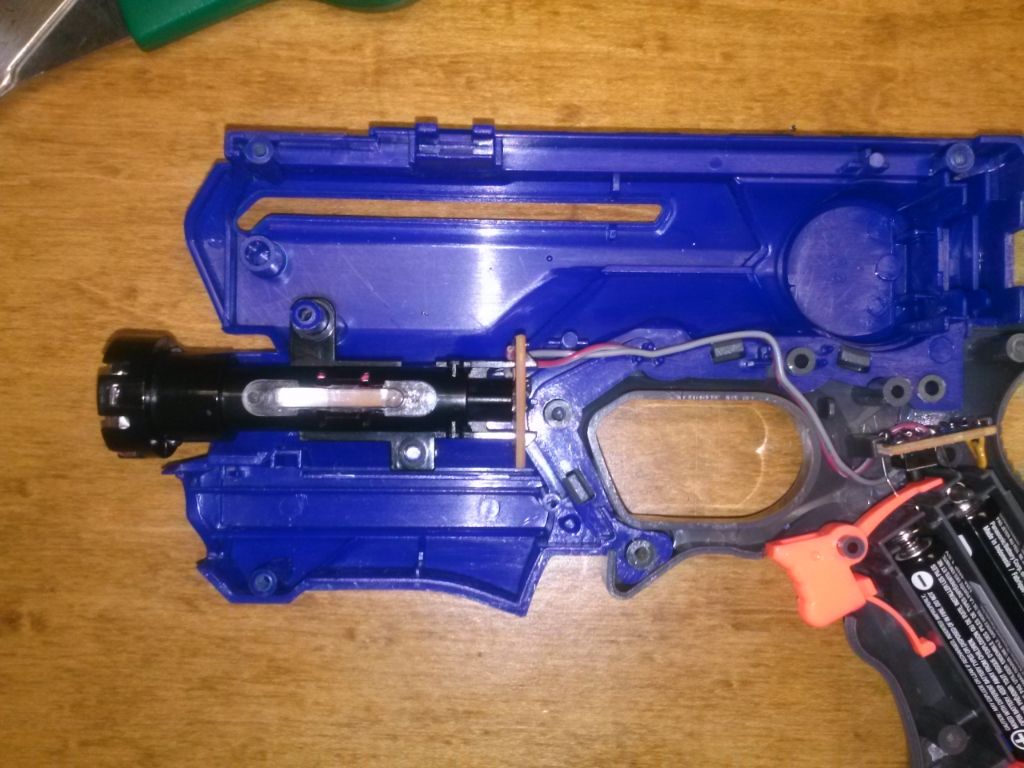
Pull out the black thing. Notice the clips on the back. Push them together and pull the black thing off the circuit board.

Posted Image


Step 5
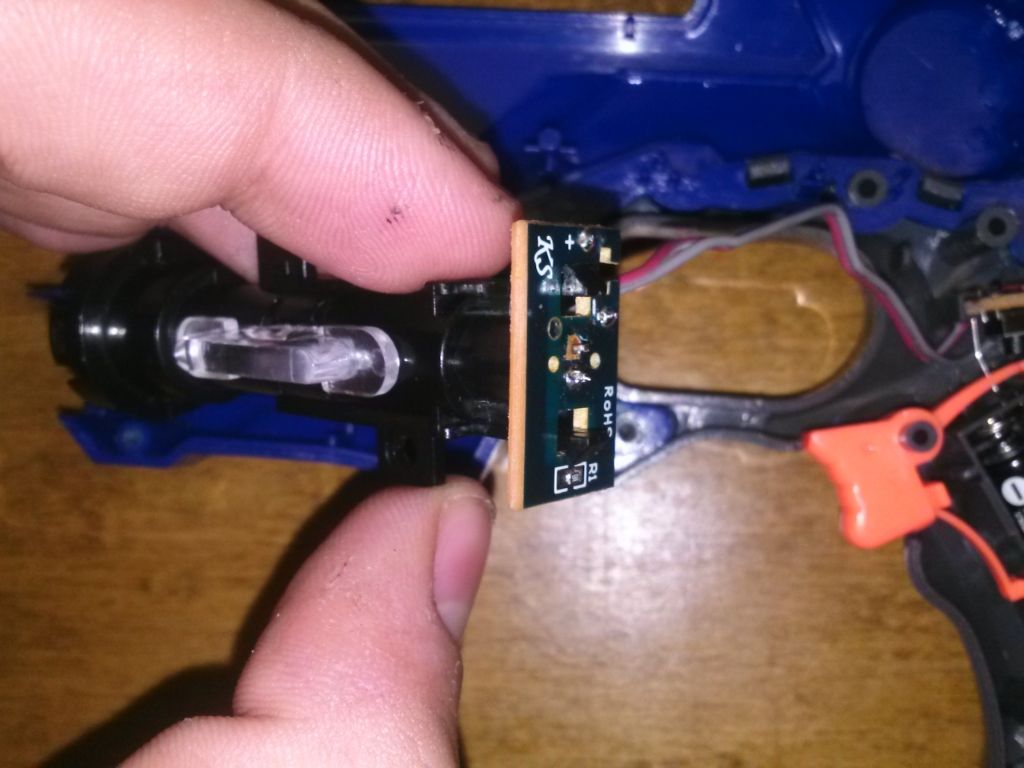
You will see the small red LED. Get rid of it. I used a soldering iron to heat the solder around the LED pegs so I could remove it.

Posted Image


Step 6
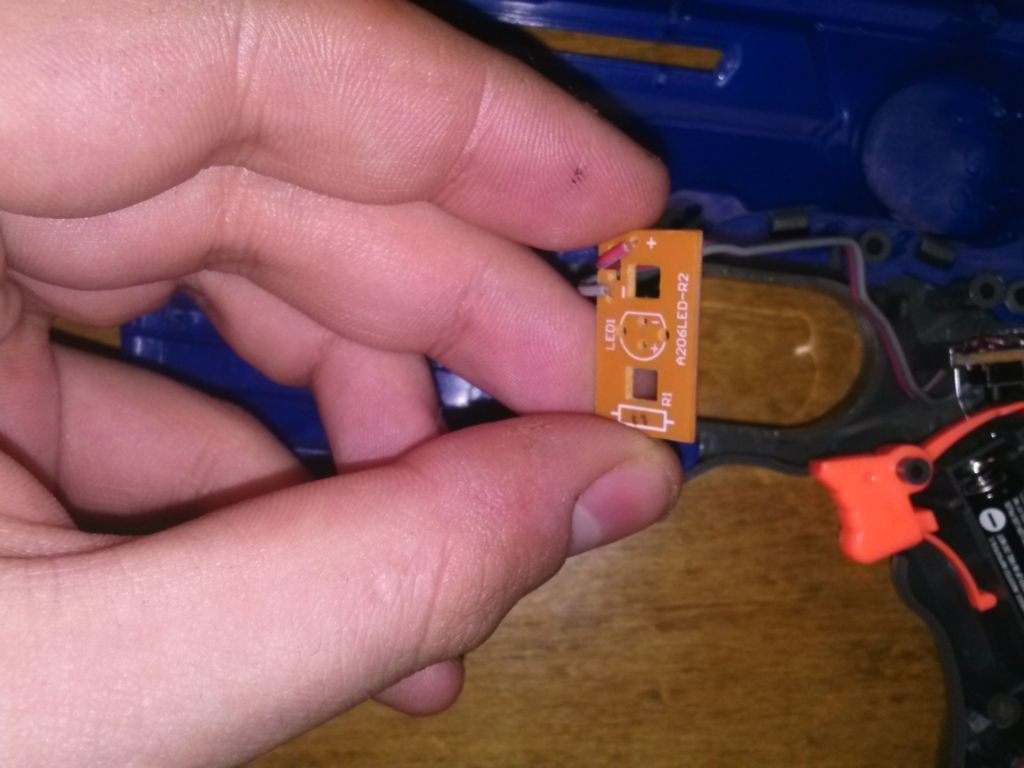
Once your red LED is off, you should just have this circuit board. Notice the circle where the LED was. It has the + and - holes labeled. These labels will come in handy later.
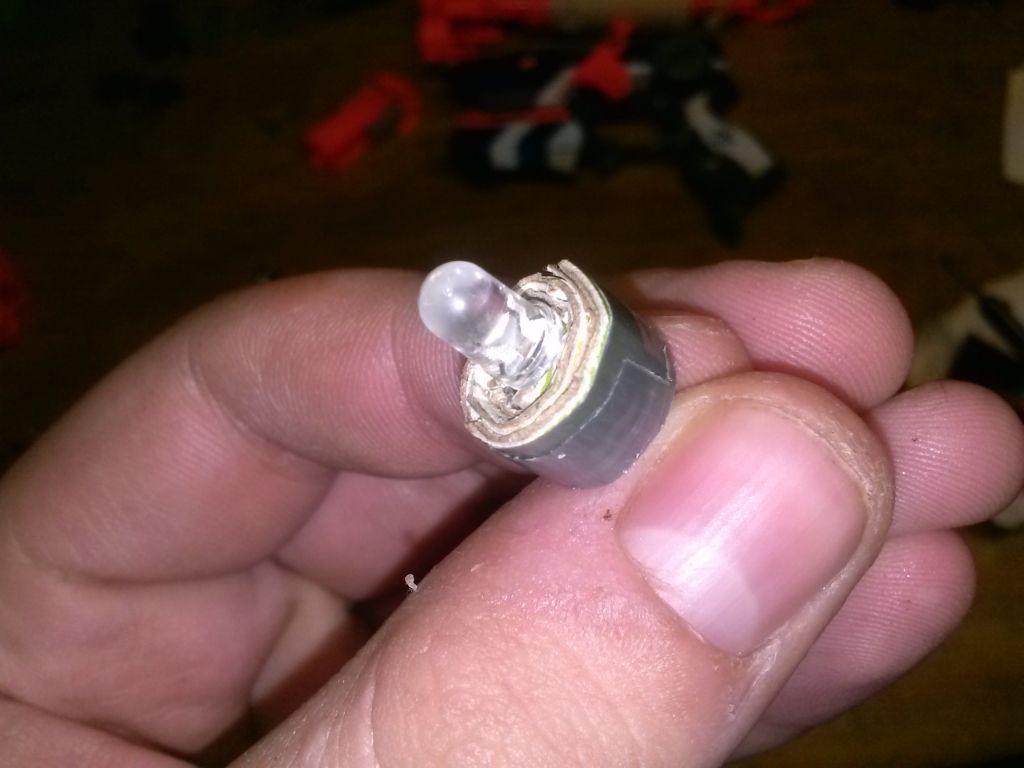
Posted Image


Step 7
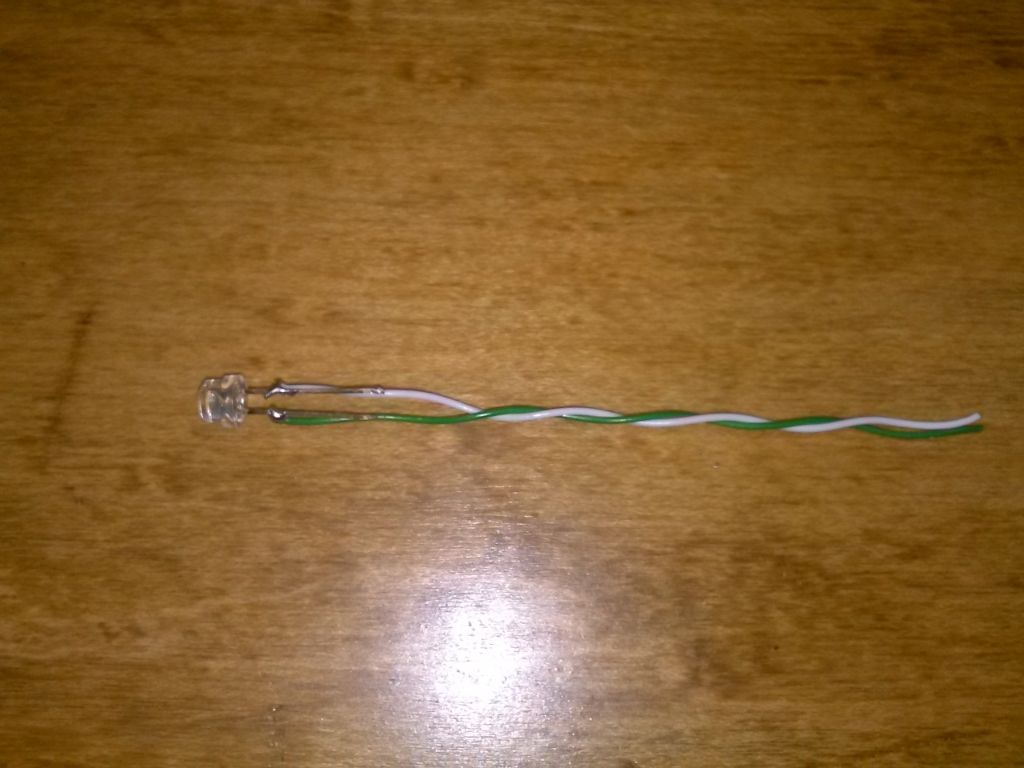
Now on to making your white LED. Take your wire and cut off a few inches (Remember, you can always make it shorter). Solder it to the LED. I used white for positive and green for negative (I later switch to red for positive and black for negative).

Posted Image


Step 8
Add some space-filling material around the base of the LED. I just used cardboard and some duct tape.
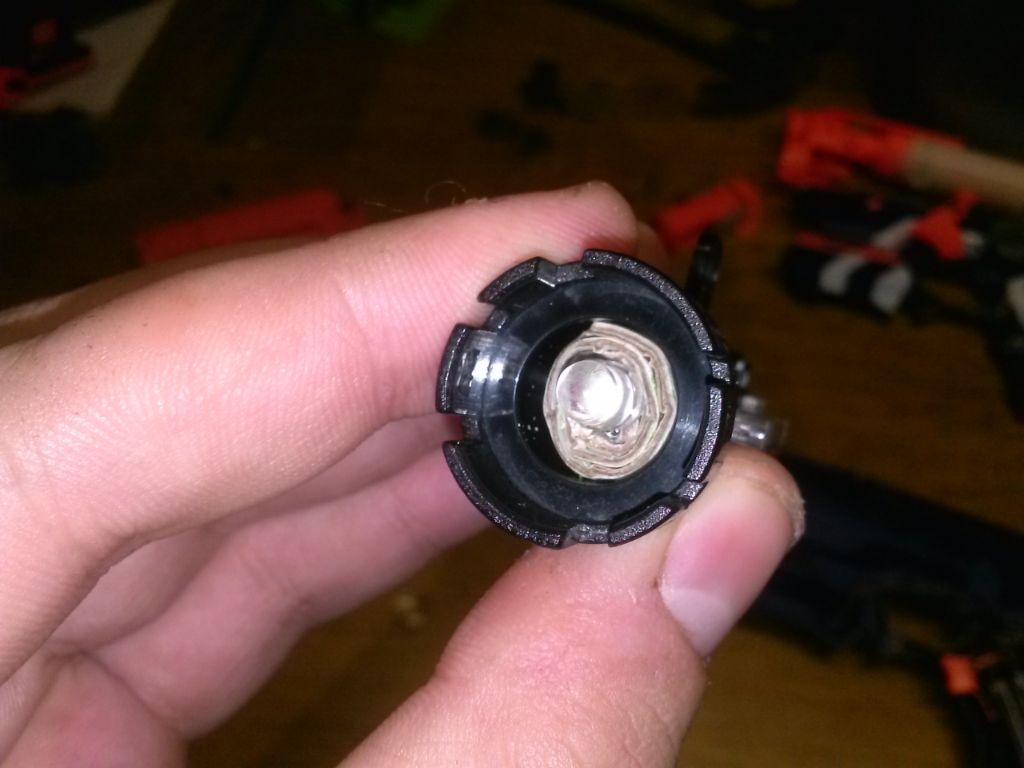
Posted Image


Step 9
Pry the lens off of the black piece with a small screwdriver.

Posted Image


Step 10
Place the LED in the black piece. Your space-filling material sould keep the LED centered and should keep it from going up or down. To further secure it, add some hot glue to attach the cardboard to the black thing.
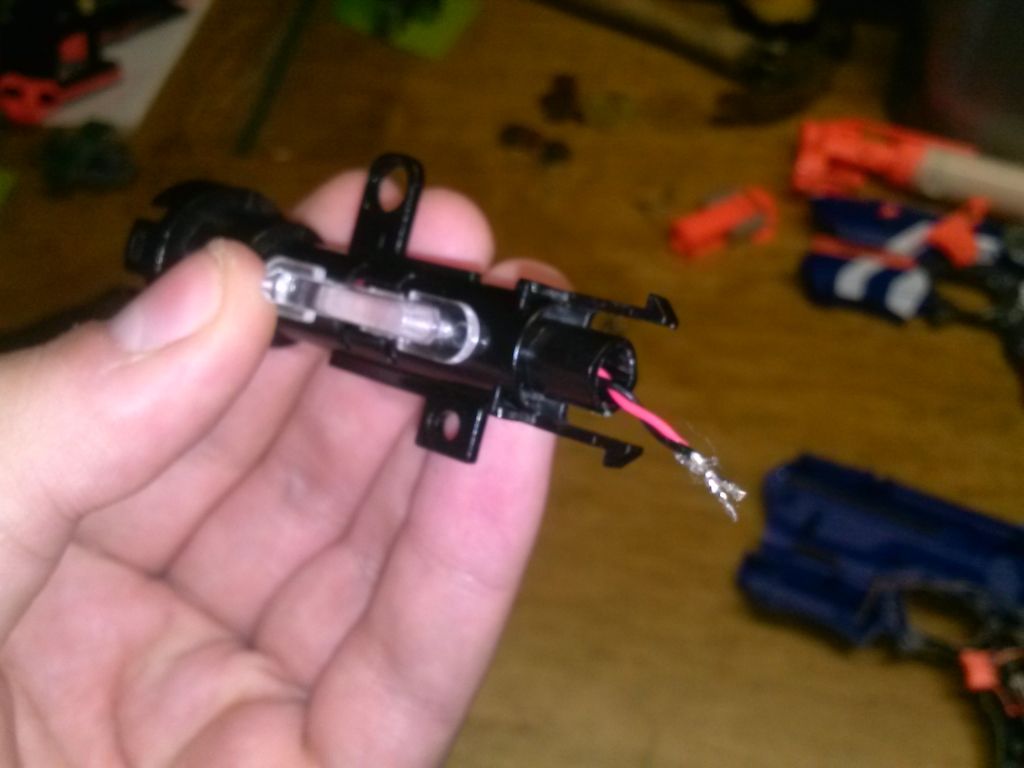
Posted Image


Step 11
Thread the wires out the back like so. Like I said, I switched from white and green to red and black (Red = positive, black = negative).
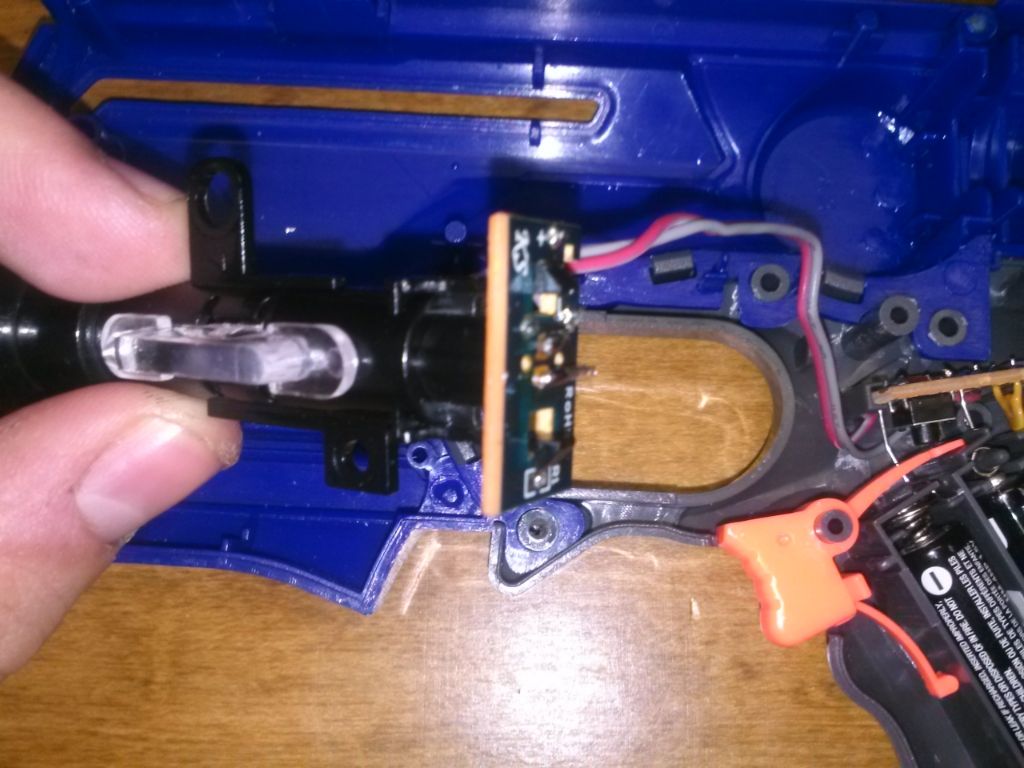
Posted Image


Step 12
Solder your wires to the circuit board. This should be pretty easy, seeing as the holes are labeled.

Posted Image


Step 13
Put the pegs on the black thing back into the holes on the circuit board so it latches back into place.

Posted Image


Step 14
Put the finished assembly back into your gun.

Posted Image


Step 15
Put the plunger and anything else back in.

Posted Image


Step 16
Close up your gun and screw it back together.

Posted Image


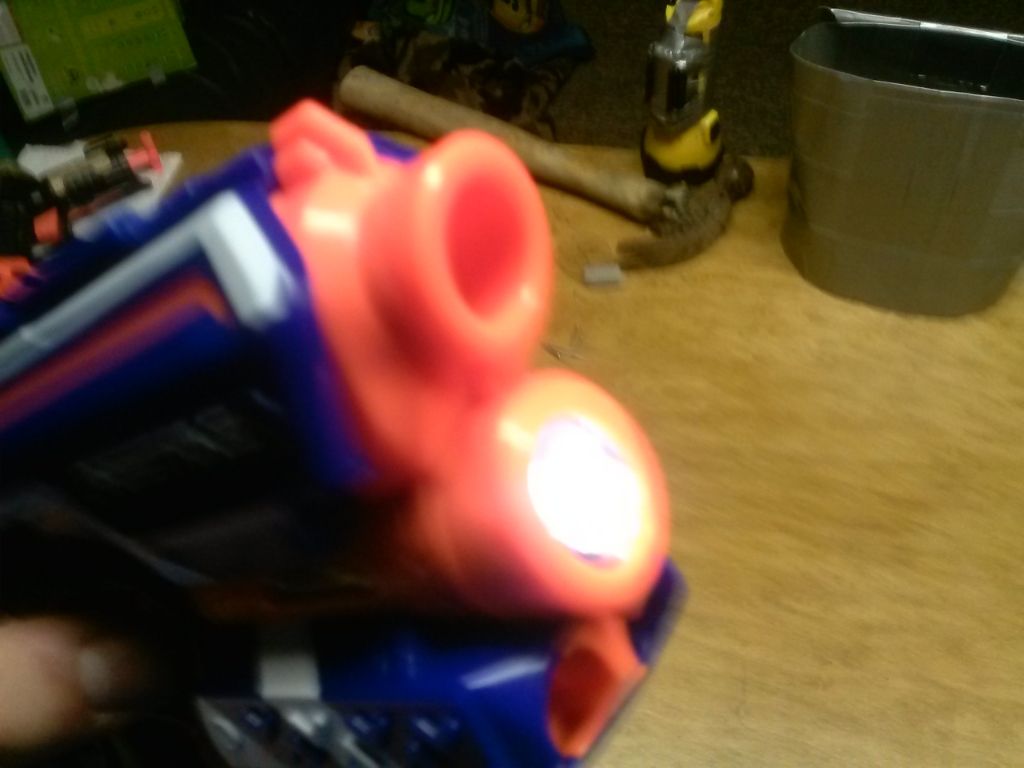
And you're done! Pretty simple, right? Just some basic soldering really. I've included some pictures of the final thing at the end. If you have any questions, please feel free to ask.

Posted Image
Posted Image

Also, if folowing this was too hard for some reason, I made a video. It's made with the same pictures, it just has my voice over them to help a little more.
http://www.youtube.com/watch?v=WWCtGrW4DLI

Edited by SoftButFirm, 19 March 2013 - 06:38 PM.

  • 0
Playing assassin at my school right now. Load-out is as follows:
Primary: Stryfe running off three Trustfires
Secondary: Triad

Status: Alive
Current kills: 0 (Finna get one tonight I hope)

#2 HOTH

HOTH

    Member

  • DO NOT TRADE
  • 557 posts

Posted 19 March 2013 - 11:49 AM

Great descriptions, but for me at least no pictures are showing up in the actual write-up.

Easy to follow nonetheless, which is commendable.
  • 0
My YouTube

Solved the Rubik's Cube in 46 seconds

"Nobody understands quantum mechanics" - Richard Feynman

#3 SoftButFirm

SoftButFirm

    Member

  • Members
  • 8 posts

Posted 19 March 2013 - 02:03 PM

Great descriptions, but for me at least no pictures are showing up in the actual write-up.

Easy to follow nonetheless, which is commendable.


Just uploaded the photos to Photobucket instead, so they might work now.
  • 0
Playing assassin at my school right now. Load-out is as follows:
Primary: Stryfe running off three Trustfires
Secondary: Triad

Status: Alive
Current kills: 0 (Finna get one tonight I hope)

#4 jamesandyori

jamesandyori

    Member

  • Members
  • 31 posts

Posted 24 March 2013 - 11:26 AM

I've been doing this same mod to the tac lights that come with the Recon. Your write up is real spot on. But at Step 6 and beyond is were we differ.

Step 6 once you clean the board from the red led, just solder the new bright white led to the board,, trim the the excess legs and assemble.

Unless by doing steps 7-12 you trying to avoid the sides of the barrel from lighting up, which in that case you would need to relocate the bulb closer to the end.

Thanks,
James
  • 0

#5 SoftButFirm

SoftButFirm

    Member

  • Members
  • 8 posts

Posted 24 March 2013 - 09:54 PM

I've been doing this same mod to the tac lights that come with the Recon. Your write up is real spot on. But at Step 6 and beyond is were we differ.

Step 6 once you clean the board from the red led, just solder the new bright white led to the board,, trim the the excess legs and assemble.

Unless by doing steps 7-12 you trying to avoid the sides of the barrel from lighting up, which in that case you would need to relocate the bulb closer to the end.

Thanks,
James


Thanks for the feedback. Always good to hear other opinions. But the reason I relocated the LED to the front was because I thought if I kept it in the back, I would just get a small white circle about the size of the original red LED circle (Which wasn't that big). So I moved the white LED to the front, allowing it to spread more around the room. But I never did try just soldering it straight to the board, so you might be right - you might just be able to put it right on the board.
  • 0
Playing assassin at my school right now. Load-out is as follows:
Primary: Stryfe running off three Trustfires
Secondary: Triad

Status: Alive
Current kills: 0 (Finna get one tonight I hope)

#6 jamesandyori

jamesandyori

    Member

  • Members
  • 31 posts

Posted 24 March 2013 - 10:16 PM

Thanks for the feedback. Always good to hear other opinions. But the reason I relocated the LED to the front was because I thought if I kept it in the back, I would just get a small white circle about the size of the original red LED circle (Which wasn't that big). So I moved the white LED to the front, allowing it to spread more around the room. But I never did try just soldering it straight to the board, so you might be right - you might just be able to put it right on the board.


I honestly didn't think of that. I could still do it on the board and I will let you know how it turns out.

James
  • 0


0 user(s) are reading this topic

0 members, 0 guests, 0 anonymous users