Jump to content


Photo

Roughcut quick reload turret mod.

Didnt think of a name yet...

13 replies to this topic

#1 481IceDragon

481IceDragon

    Member

  • Members
  • 245 posts

Posted 15 March 2013 - 08:12 PM

Okay folks I've been working on this for quite a while, and it's actually a lot easier then I thought.
This write up may seem dumbed down to many of you, but writing this as if someone with absouletly no clue about anything nerf would be able to understand, and follow.

Goal of this mod
-To increase reload times on the Roughcut.

Tools needed
-1 Roughcut, and a few extra Roughcut turrets. This is an ideal mod if you have stripped the gears on your roughcut, or broke it in some other way.
- 1 dremel or similar tool, with cutting wheels, sanding bits and, I personally used a conical grinding bit.
- Various bits of duct tape.
- Water and a device to boil it. (Not required in most cases, but makes some steps easier.)
- sharpie marker, not required but makes cutting more accurate.
- liquid wrench white lithium grease spray. (For the AR's)
- some type of lubricant. silicone grease, white lithium grease, etc. (for the plunger tube. Don't use the spray.)
- patience, and safety glasses if you want them.

I'll be using some borrowed photos for some things as my camera card stopped functioning...
Disassembly.

Start with your blaster obviously and take out all the screws. They are all the same size on mine. Open it up and it should look like this. (Photo courtesy of nerfmodsandreviews)
Posted Image

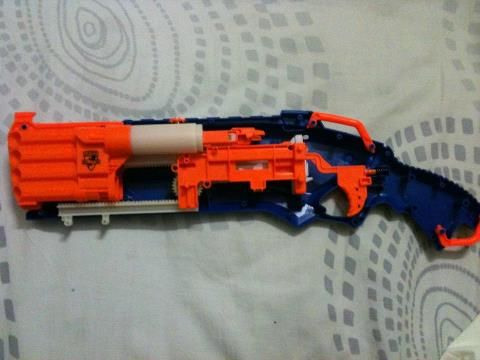
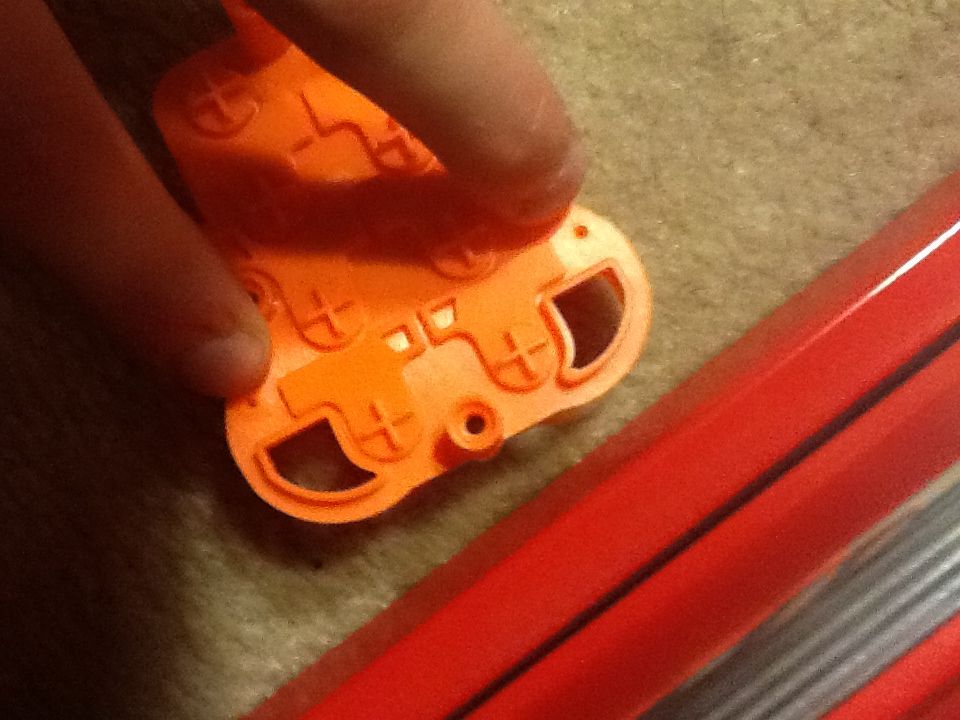
Take out your internals. That's everything that orange or white.

Ignore the paint..my experimental method didn't work out.
Posted Image


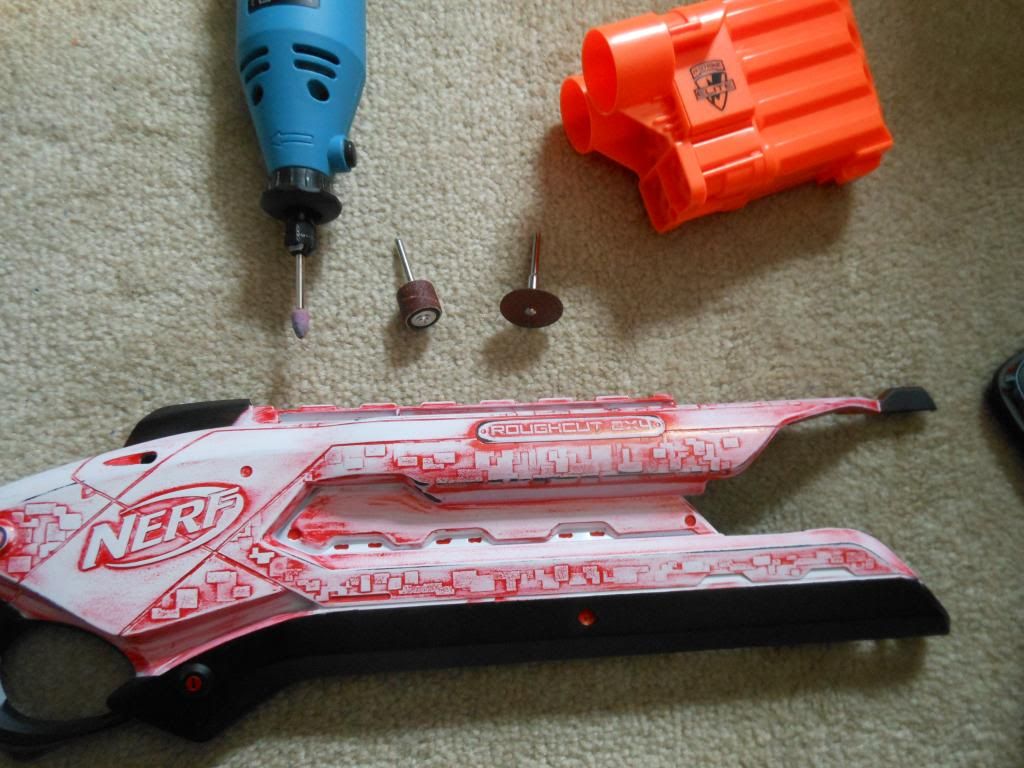
Modifying the shells of the blaster

Now look at the front part where the darts go in. Use your dremel with the cutting wheel and trim off all these parts that are marked with the sharpie.
Posted Image

NOOOO! Not the N-strike logo, you moron! :D

Posted Image

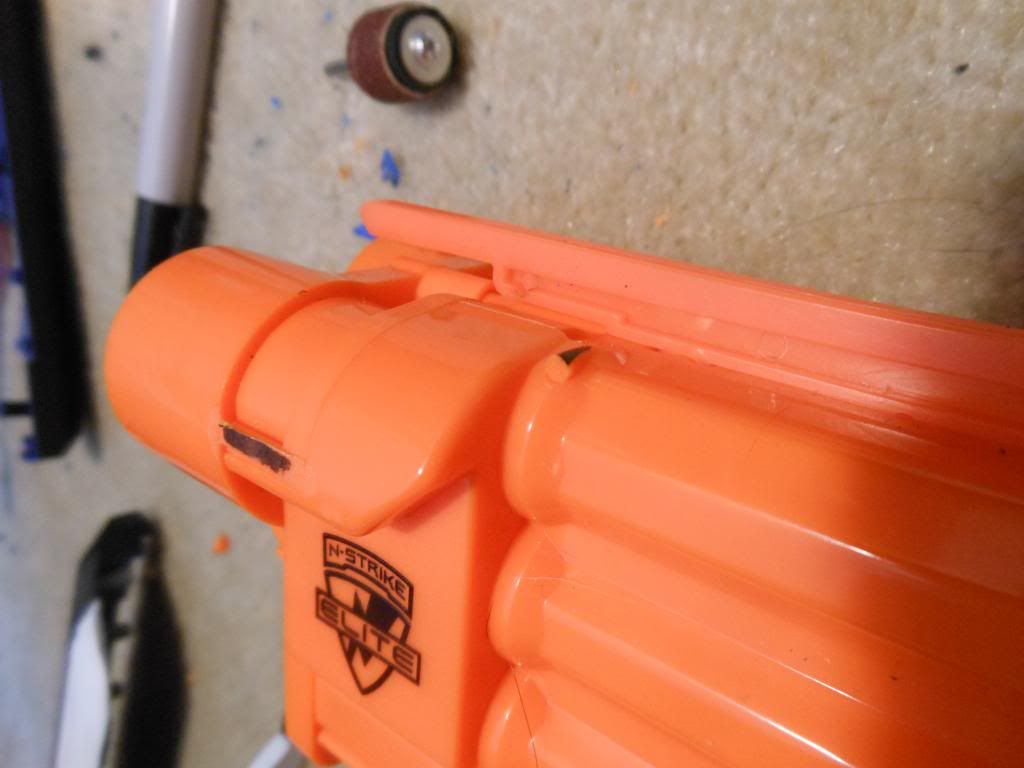
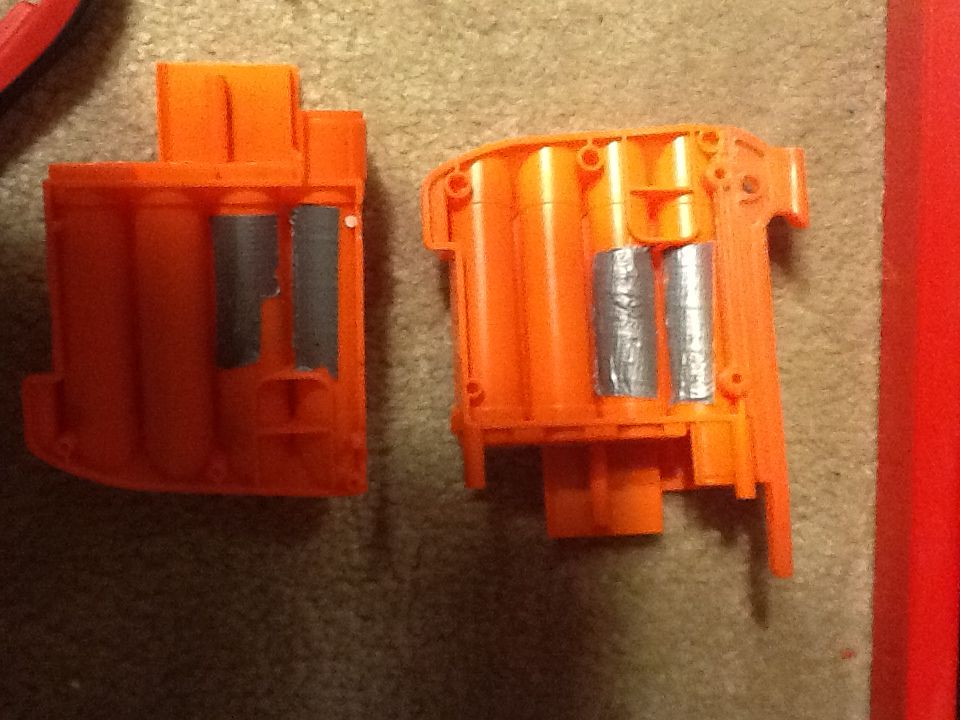
Hers a comparison for what you will be doing to the shell. Left side is stock, right is modified. This is to allow the easy addition and removal of the turret.
Posted Image

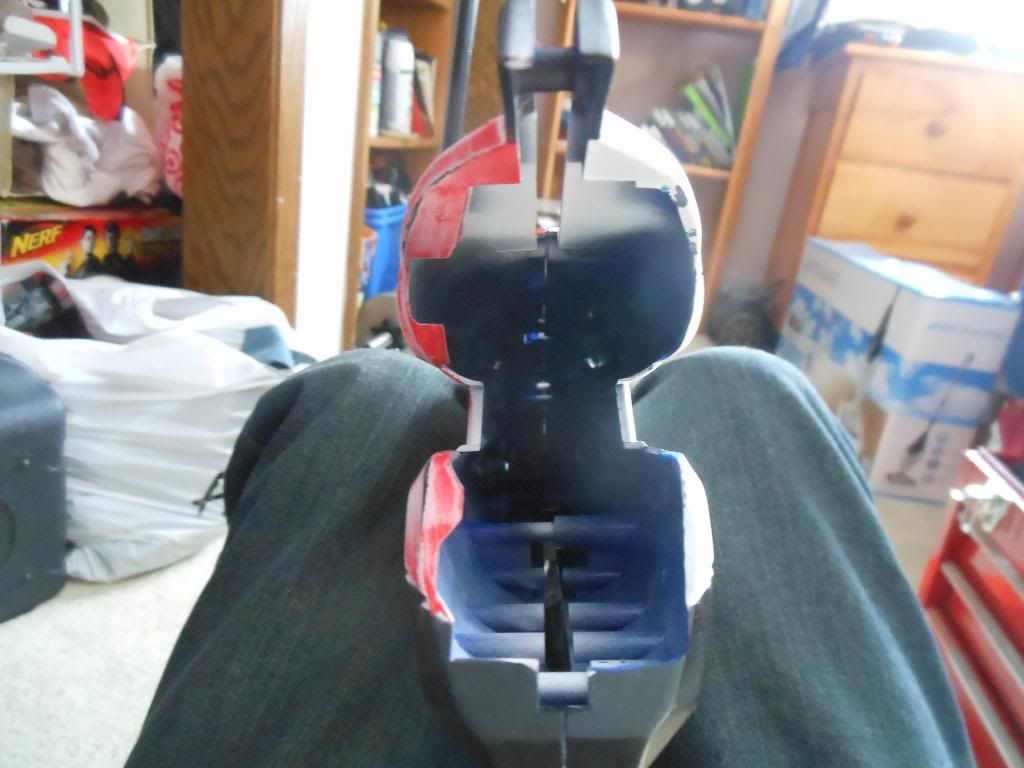
Here is what we will be removing on the Roughcut shell itself. Simply copy the line I drew and cut it with the cutting wheel on the dremel.
Posted Image

Posted Image

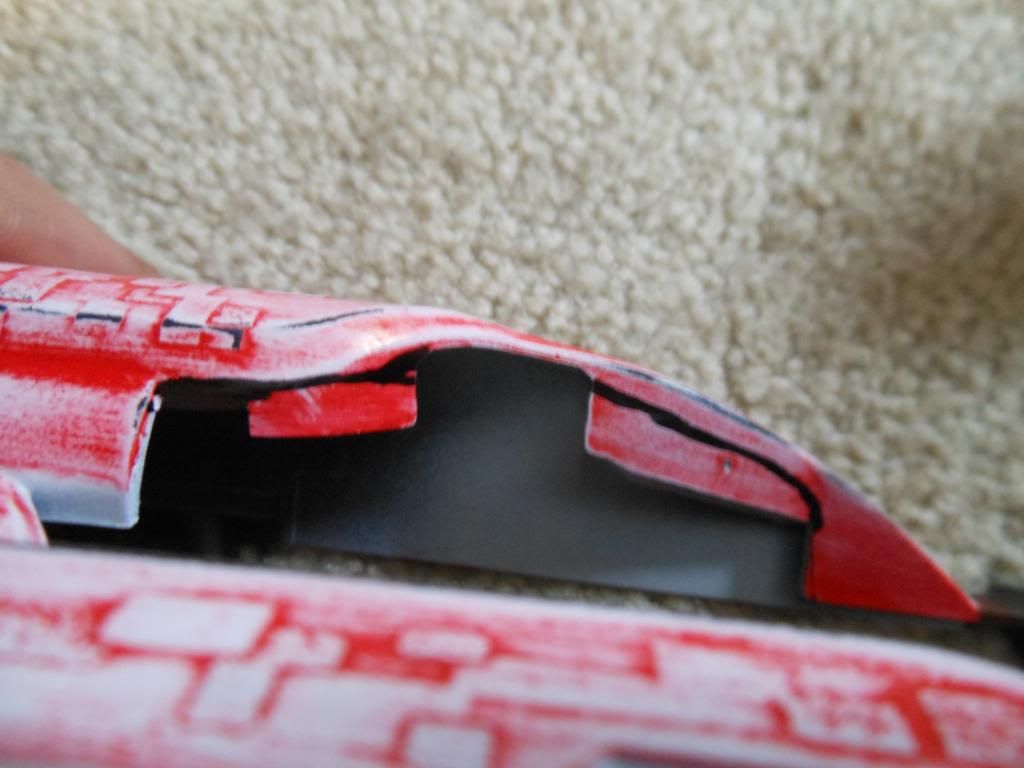
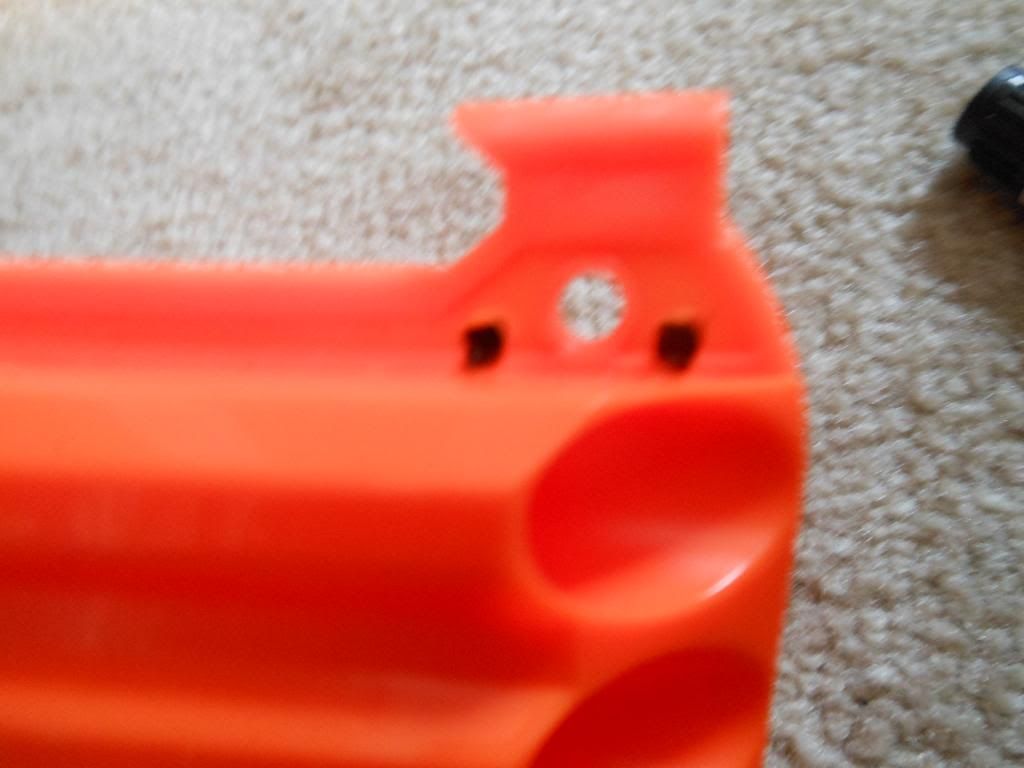
This black line you will want to use either the grinding bit or sanding but, and simply grind the lip flush with rest of the shell. This will really aid in the addition and removal of the turret.
Posted Image

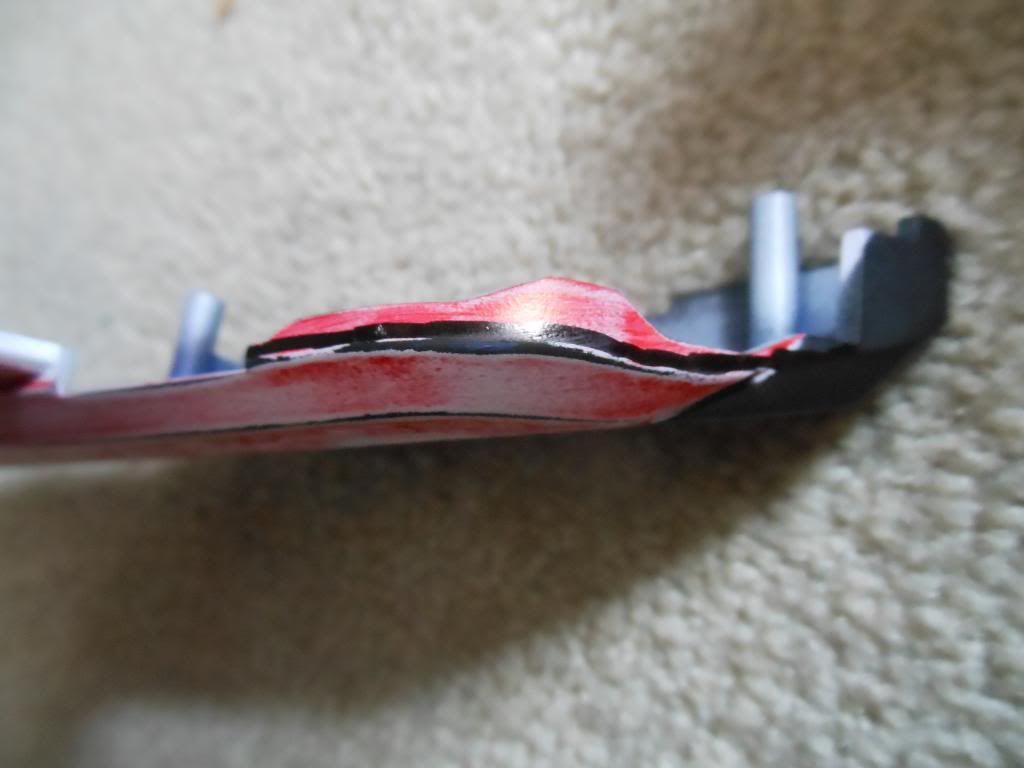
Now use the sanding bit to curve the front edge of the shell like this.
Posted Image

Posted Image

You are basically done with the shell now. Now there are some small things to do to improve the functionality of this blaster, and enhance this modification.

Here is a video to explain some things I couldn't quite explain with text or pictures. I uploaded it to photobucket, so the image quality is crap.
http://i1297.photobu...zpscad9df6b.mp4

Increasing the air seal-

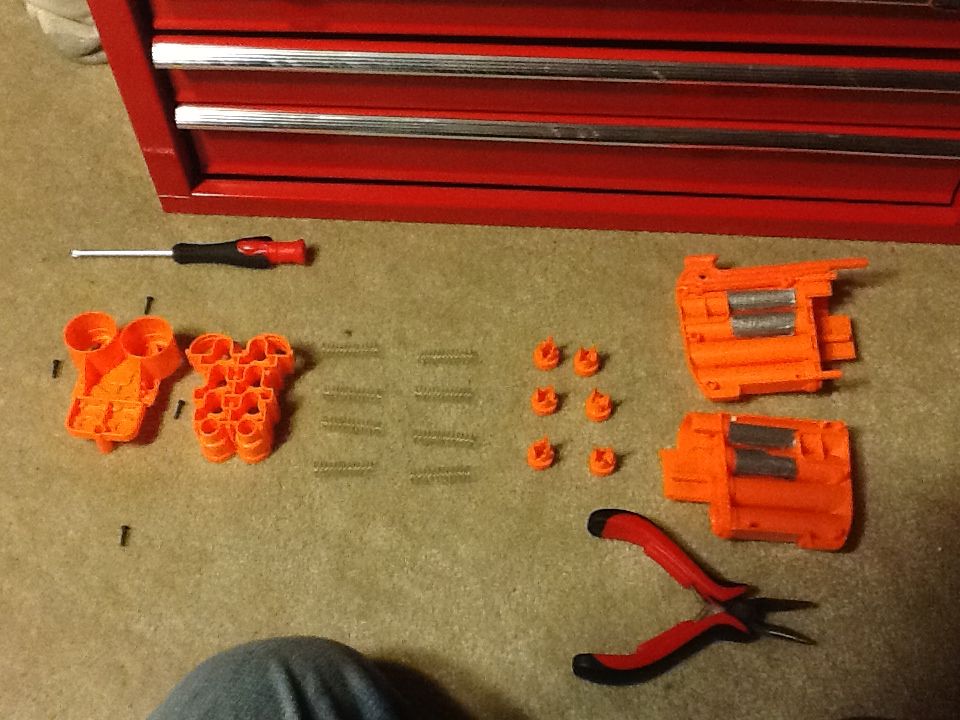
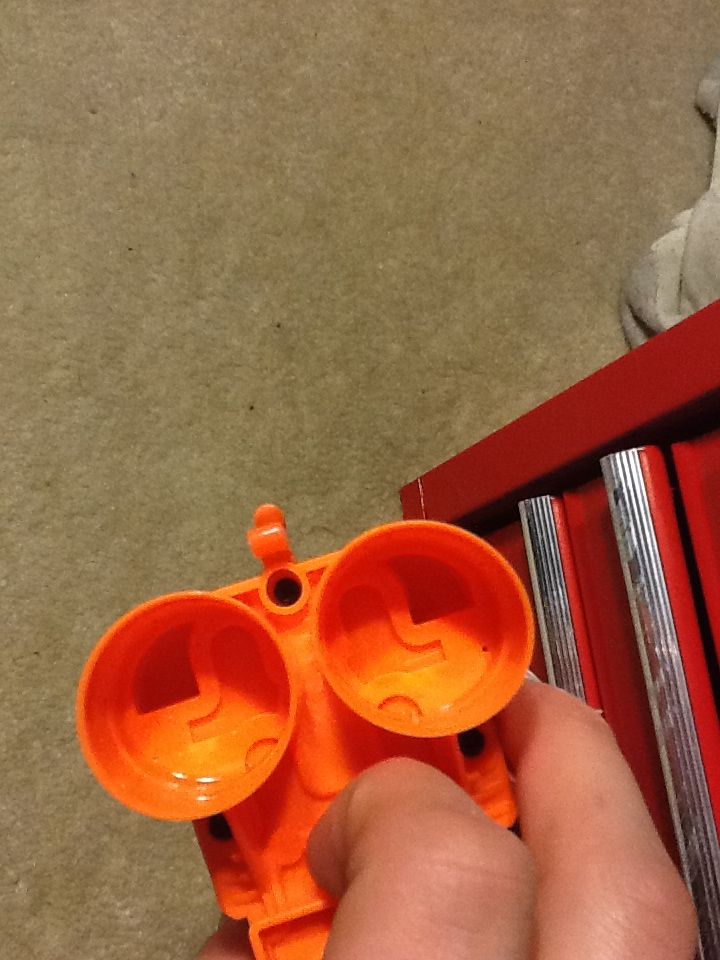
Disassemble your turret. Here is an exploded view. There are 4 screws holding it together, and the rest is friction fit, but I was unable to separate so I boiled some water and briefly dipped it in, then immediately pulled it apart with my pliers.
Posted Image

I Got this idea from coop. Put some duct tape over the air release holes in the barrel, and dab some hot glue onto these two holes in the front.
Posted Image

Posted Image

Now assemble the turret, and make sure your AR spring are in there, unless you want an 8 shot- shotgun.
Add some grease, or liquid wrench spray to this area. Tis will make the replacing, and removing of turrets much smoother, as it is such a good seal it tends to pull the plunger tubes a little. I went with the liquid wrench, as its lower viscosity.
Posted Image

Reassemble your blaster, and screw everything together. I loosened the front two screw which, in theory should make it easier to remove and replace the turret.

Here's the video on the function.
http://i1297.photobu...zpseaef11d1.mp4

As always, comments and questions are welcome.

Edited by 481IceDragon, 15 March 2013 - 08:25 PM.

  • 0

#2 KoRnEd

KoRnEd

    Member

  • Members
  • 209 posts

Posted 15 March 2013 - 08:36 PM

Not going to lie, this is pretty awesome.
On a different note, if I'm getting this correct, the duct tape allows the clip to stay seated? You might want to reconsider using a different method...
  • 0

20:07 tiredKitty living in NYC, you could spend a lot of time in Chinatown and only speak the mother tongue
20:07 tiredKitty Not a good idea, btw.

I have identified the problem: "maverick"


#3 Rexar5

Rexar5

    Member

  • Members
  • 9 posts

Posted 15 March 2013 - 08:43 PM

On a different note, if I'm getting this correct, the duct tape allows the clip to stay seated? You might want to reconsider using a different method...


It just covers the air release holes. The clip just stays seated with friction. And it seems like it has plenty of friction based on the apparent effort to remove and replace it in the video. There are not really any significant forces on it anyway.
  • 0

#4 KoRnEd

KoRnEd

    Member

  • Members
  • 209 posts

Posted 15 March 2013 - 08:48 PM

It just covers the air release holes. The clip just stays seated with friction. And it seems like it has plenty of friction based on the apparent effort to remove and replace it in the video. There are not really any significant forces on it anyway.


Oh right >.> My fault for not reading it properly and not knowing how roughcuts work...
  • 0

20:07 tiredKitty living in NYC, you could spend a lot of time in Chinatown and only speak the mother tongue
20:07 tiredKitty Not a good idea, btw.

I have identified the problem: "maverick"


#5 andtheherois

andtheherois

    Member

  • Banned
  • 821 posts

Posted 15 March 2013 - 09:52 PM

Cool mod. How well does the slamfire work with this done? Does the turret fly out or move at all?

As a side note, you don't have to give credit for the air release holes. People have been plugging up those damn holes since they have been on the barrels.

Edited by andtheherois, 15 March 2013 - 09:52 PM.

The YooToobz
Photobucket

Winning rounds is rewarding, deal with it. We don't play fucking patty cake over here.


#6 481IceDragon

481IceDragon

    Member

  • Members
  • 245 posts

Posted 16 March 2013 - 12:30 AM

Cool mod. How well does the slamfire work with this done? Does the turret fly out or move at all?

As a side note, you don't have to give credit for the air release holes. People have been plugging up those damn holes since they have been on the barrels.


I think the last four shots in the video were slam fire. It moves forward with the plunger tubes. The air seal is the same, and range doesn't seem affected.

This video was also taken BEFORE the liquid wrench was applied to the turret to make it easier to remove. It's still secure, but it's not as bad.

Edited by 481IceDragon, 16 March 2013 - 12:31 AM.

  • 0

#7 Exo

Exo

    Member

  • Members
  • 391 posts

Posted 16 March 2013 - 01:39 AM

This is cool and unique, so applause for that, but it's kinda silly, sort of like making a jaguar's mag removeable, you really don't want to pay $5 (or $20, in this case) for another mag. Also, keeping the barrels, air inlets, and plungers clean during a war is going to be nearly impossible.
  • 0

#8 HOTH

HOTH

    Member

  • DO NOT TRADE
  • 557 posts

Posted 16 March 2013 - 01:54 AM

This is great. Nice job.

but it's kinda silly, sort of like making a jaguar's mag removeable, you really don't want to pay $5 (or $20, in this case) for another mag. Also, keeping the barrels, air inlets, and plungers clean during a war is going to be nearly impossible.


^^ I am going to have to disagree with you. You can purchase another Roughcut, preform the same mods, then have two functioning roughcuts and two clips. That doesn't seem too bad. Or buy a broken one for cheap on the forums. This really makes the roughcut versatile and useful.

Also, keeping the "barrels, air inlets, and plungers clean during a war" seems like a very petty complaint. I don't see how its any worse than what can happen to a standard barrel, speedloader, or coupled turret that is removable.
  • 0
My YouTube

Solved the Rubik's Cube in 46 seconds

"Nobody understands quantum mechanics" - Richard Feynman

#9 Exo

Exo

    Member

  • Members
  • 391 posts

Posted 16 March 2013 - 10:43 AM

Stuff, brevity.

The reason it's iffier than a speedloader/etc. is because the plungers don't have anything protecting them-say, a bushing-from exposure to dirt/etc., and the "mag" has valves and such that you would want to be kept clean, especially from the plunger side, as dirt have a higher chance of getting into the plungers, or an even harder to clean place, the AR valves.

As for finding them used, sure, you could try that, but as someone who doesn't have access to online commerce and buys everything locally, that's not a possible option, which leaves me with buying new. As for having two or some reasonable number of RC's modded this way, dual-wielding them (pump-action considerations aside) would leave you with one mag for each blaster, so the way you'd make the most of this mod would be to keep one as a backup off-field, and keeping all the mags on you.

I like the idea, I've always thought that a mag-fed version of the RC would be the shizznits. While it would take a lot more machining skill, I'd prefer to see N-strike mags used in that role. More capacity by default, and although you'd have to load 2 of them at a time, I think the whole thing could net a lot more range as you're not limited by the stock AR system.
  • 0

#10 481IceDragon

481IceDragon

    Member

  • Members
  • 245 posts

Posted 16 March 2013 - 11:07 AM

This is cool and unique, so applause for that, but it's kinda silly, sort of like making a jaguar's mag removeable, you really don't want to pay $5 (or $20, in this case) for another mag. Also, keeping the barrels, air inlets, and plungers clean during a war is going to be nearly impossible.


This is an ideal mod if you have stripped the gears on your roughcut, or broke it in some other way.


  • 0

#11 Nerfomania

Nerfomania

    Member

  • Members
  • 207 posts

Posted 16 March 2013 - 05:43 PM

Color me impressed.

This is really cool.

It is an excellent way to make the Roughcut a more viable blaster. And I imagine it will not be too hard to find a broken one sometime in the future.
  • 0
20:45 Talio I'll have the talk with you
20:45 Talio penis in vagina
20:45 Talio fin

#12 481IceDragon

481IceDragon

    Member

  • Members
  • 245 posts

Posted 16 March 2013 - 08:21 PM

Color me impressed.

This is really cool.

It is an excellent way to make the Roughcut a more viable blaster. And I imagine it will not be too hard to find a broken one sometime in the future.


Thanks! I got the idea from watching the turret get pulled off the plunger assemblies in either coops or psyks original review, and something just clicked I guess. It's not perfect, because the plunger tubes have some wiggle back and forth. If they were somehow immobilized front to back it would be complete (I thought of gluing them down, but that would prevent opening it, dur.)
  • 0

#13 Crater

Crater

    Member

  • Members
  • 91 posts

Posted 17 March 2013 - 12:30 AM

I actually like that red and white paintjob. How'd you do it, just drybrushing?
  • 0
Crater is a combination of a box and a dent in the ground. (Thanks Tangerle)

I'll stand on my head and gargle peanut butter for 70 dollars.


#14 481IceDragon

481IceDragon

    Member

  • Members
  • 245 posts

Posted 17 March 2013 - 12:56 AM

I actually like that red and white paintjob. How'd you do it, just drybrushing?


Are you serious? Haha I was brushing the the logo in with some red and it went off the logo so I tryed to wipe it off like a normally would, but it smeared....so then I dipped a cloth in the paint and rubbed it on similar to how you would stain wood.. Then It dried and I didn't like it so I put it under the sink and wiped off as much as I could with a paper towel...
  • 0


0 user(s) are reading this topic

0 members, 0 guests, 0 anonymous users