Let's get started.
Use a small saw or a rotary tool to remove the bulges of the battery compartment on the shell of the blaster. Make it look like this:
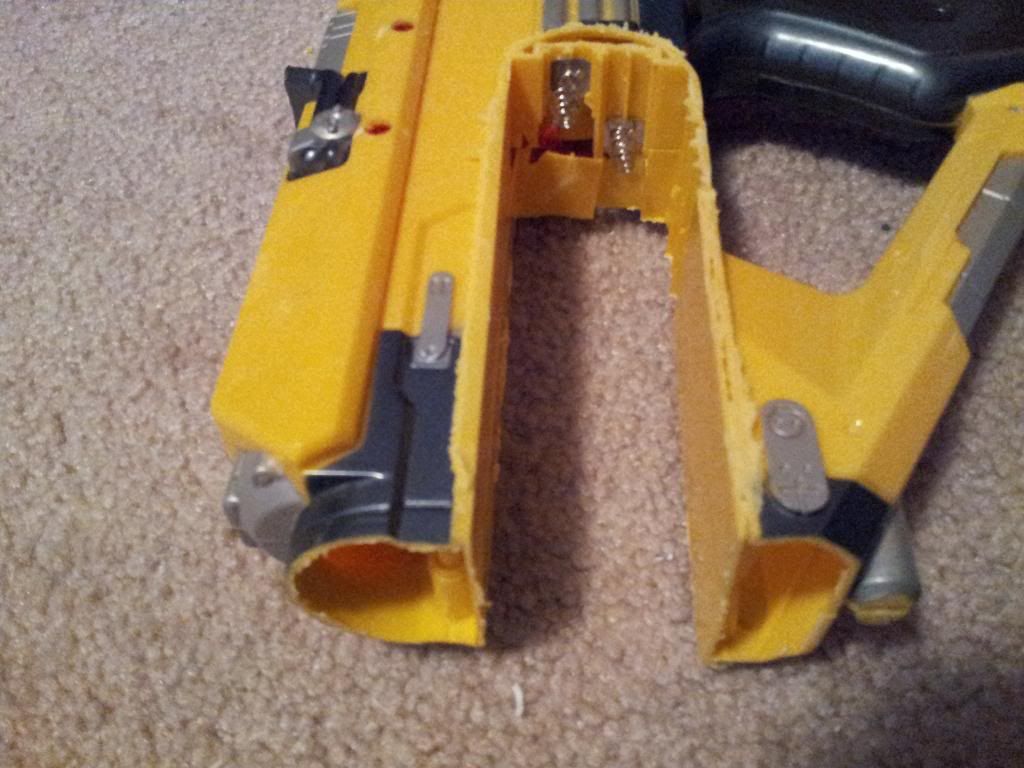
I could have taken off another half an inch, but I would have sacrificed the screw port behind the plunger assembly. I decided it was not worth the risk.
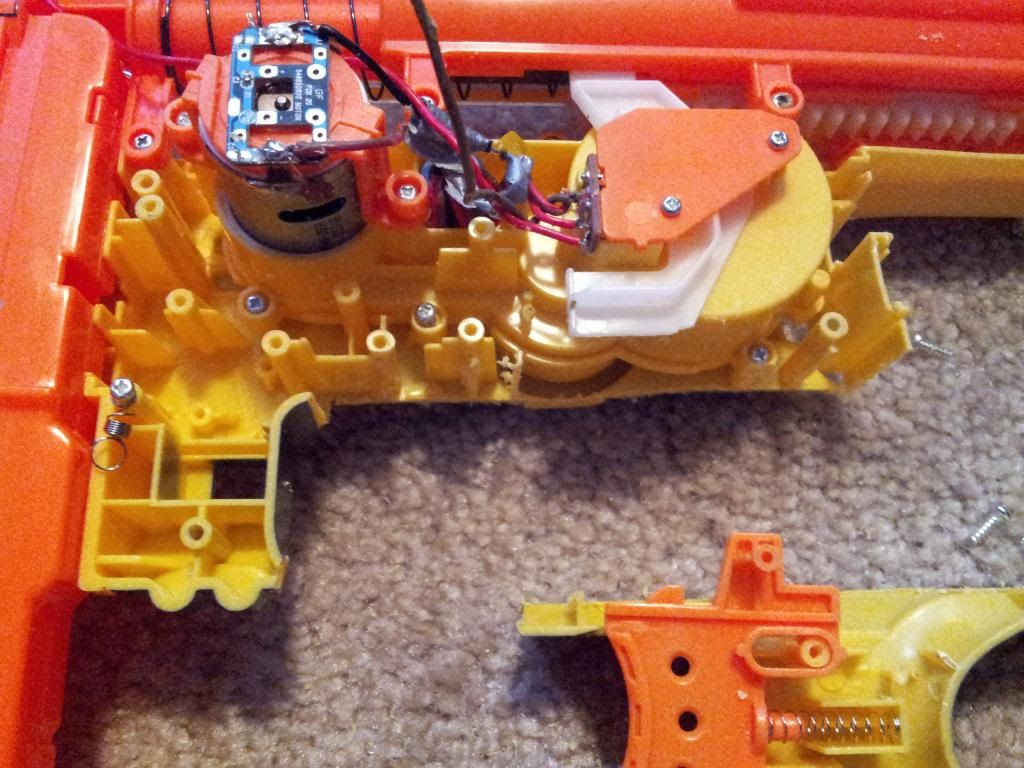
You'll be removing the springs that used to connect the battery tray. In fact, you can completely detach all wiring from the battery. Yes, this necessitates listening for when the blaster fires the round before the trigger can be released, but even with this removed, double feeding has been very rare. More on this later I can already hear the protests but bear with me.
Pop it open and perform any modifications you want, AR removal, spring replacement, padding, whatever. There are writeups all over the place for that stuff. Just be sure to remove every single lock in this thing, it will save you a lot of trouble in the end.
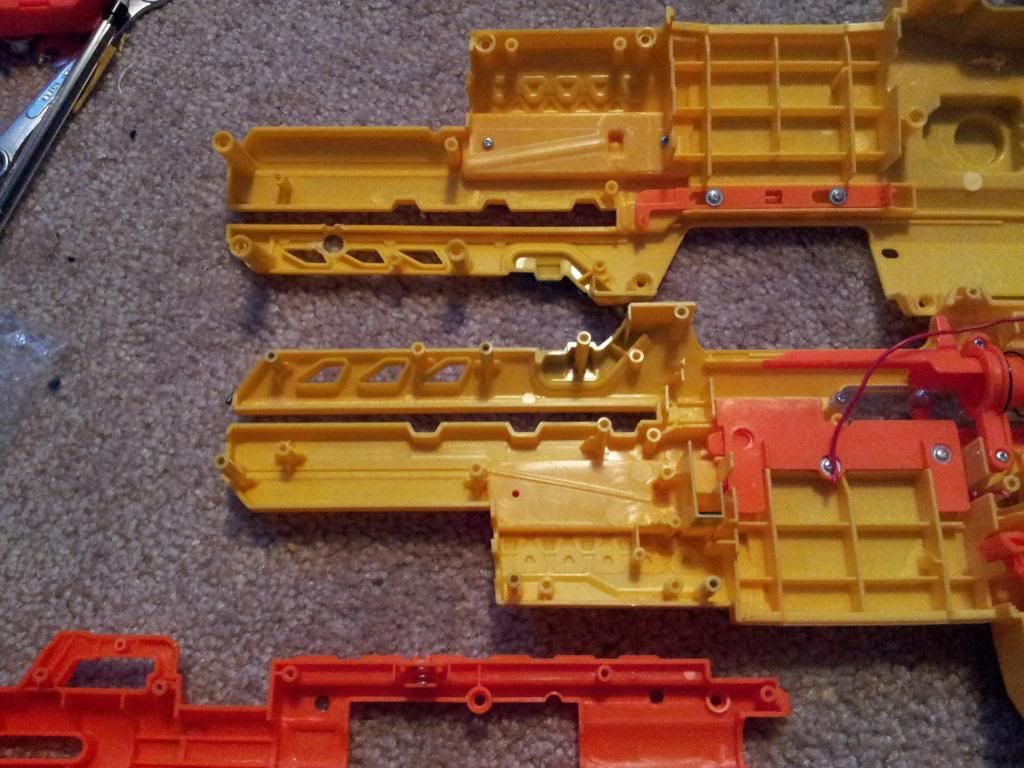
Remove the bottom rail from the orange inside barrel assembly of the Stampede, as shown below.
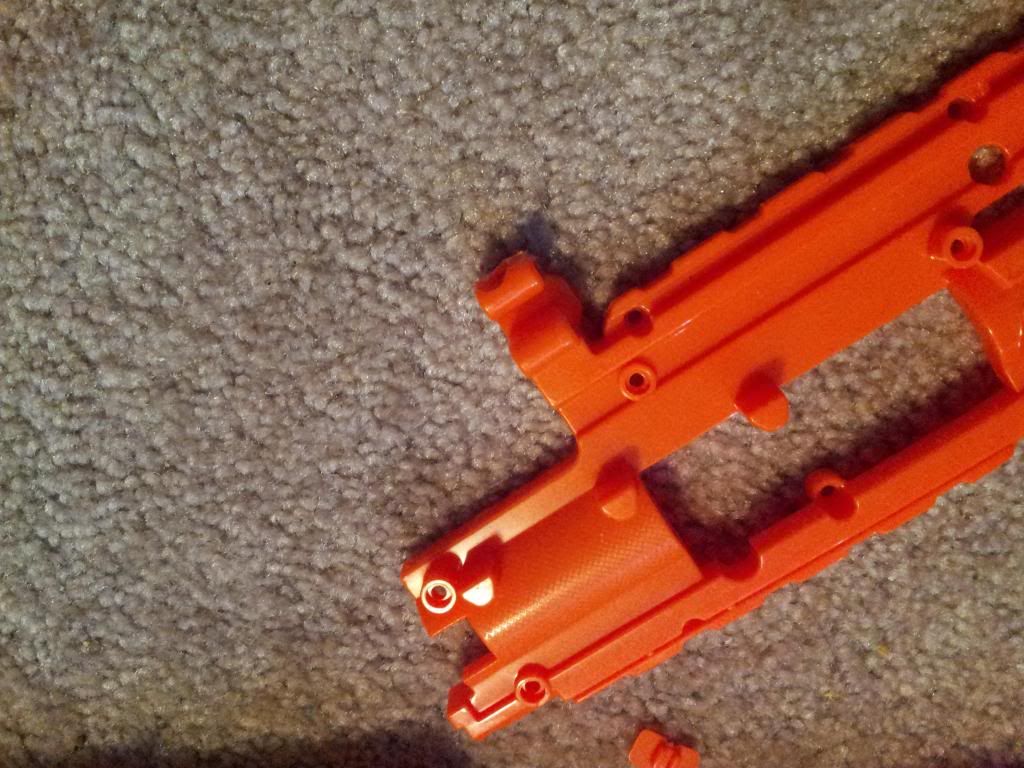
When you test fit the blaster back, you'll be left with this; the recess in the center of the forward end is necessary.
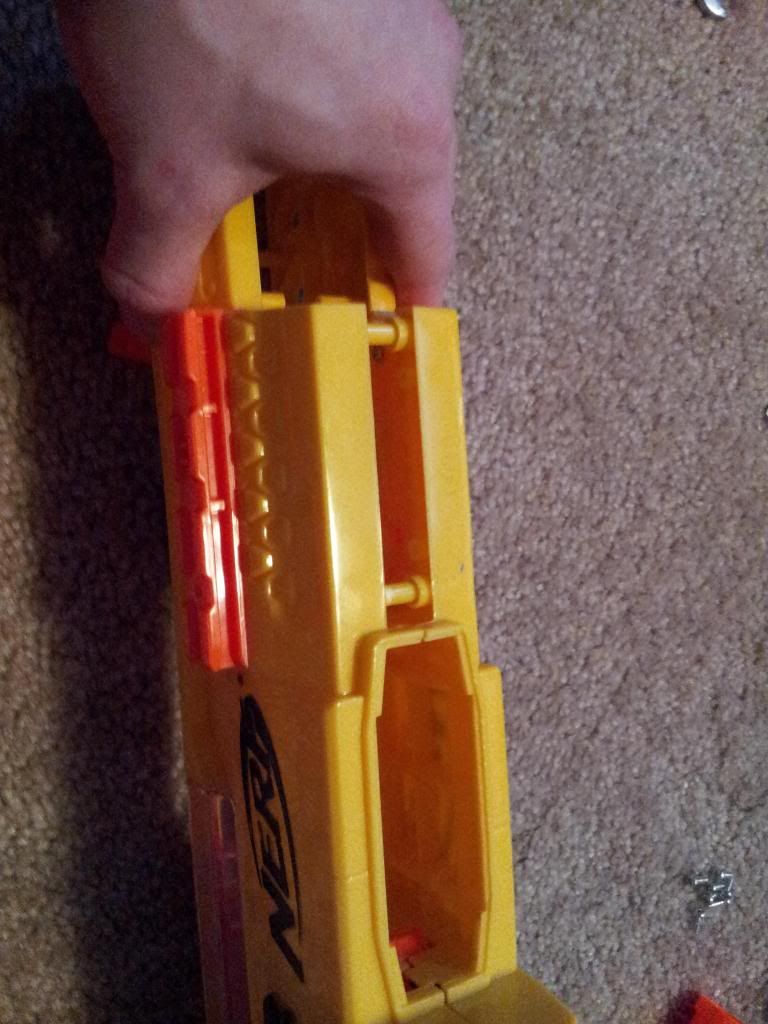
Oh Jesus, no turning back now.
The next part involves powering the blaster. The stock battery tray has been tossed, so two 4x AA battery holders have been replaced, with one on each side. Use two or three small screws drilled through each box to secure them onto the side of the blaster. This will yield a potential of 12V with standard AAs.
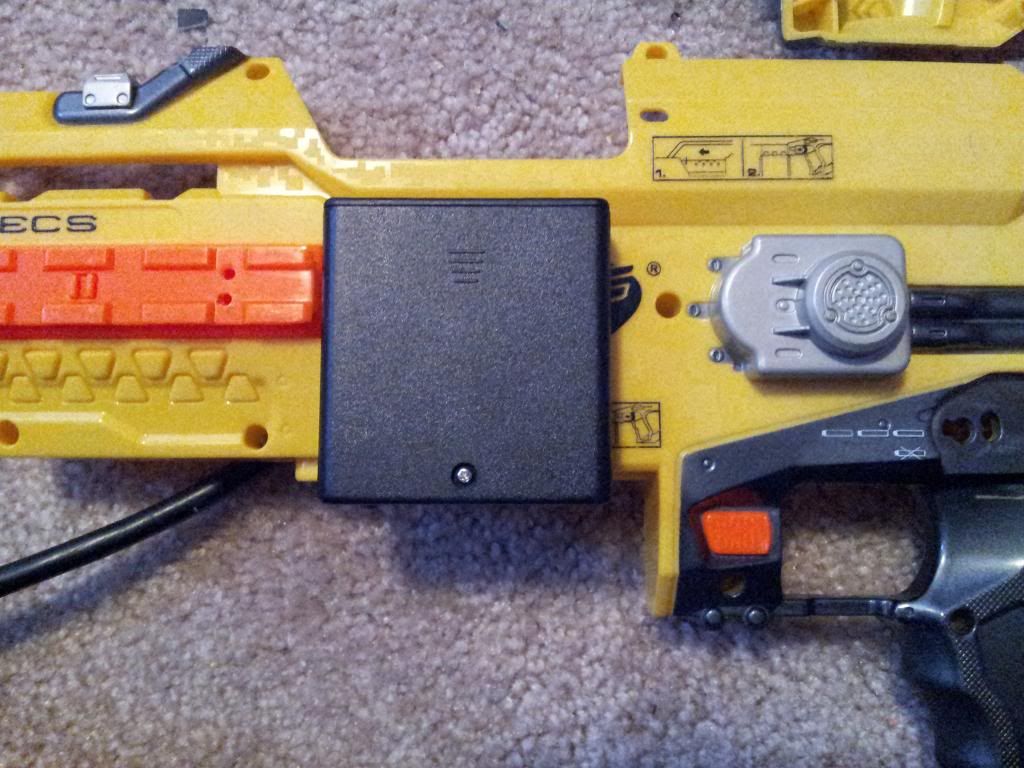
You should have this; the black boxes behind the magazine well are battery boxes that were just installed.
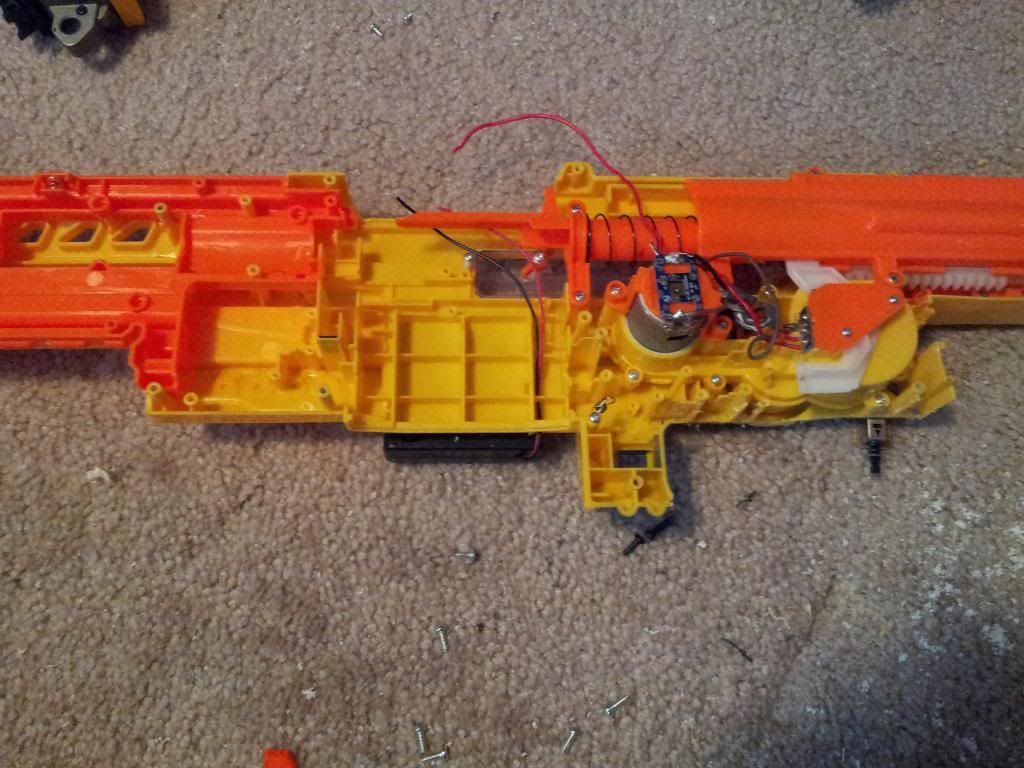
For the forward magazine release, a picture speaks a thousand words.
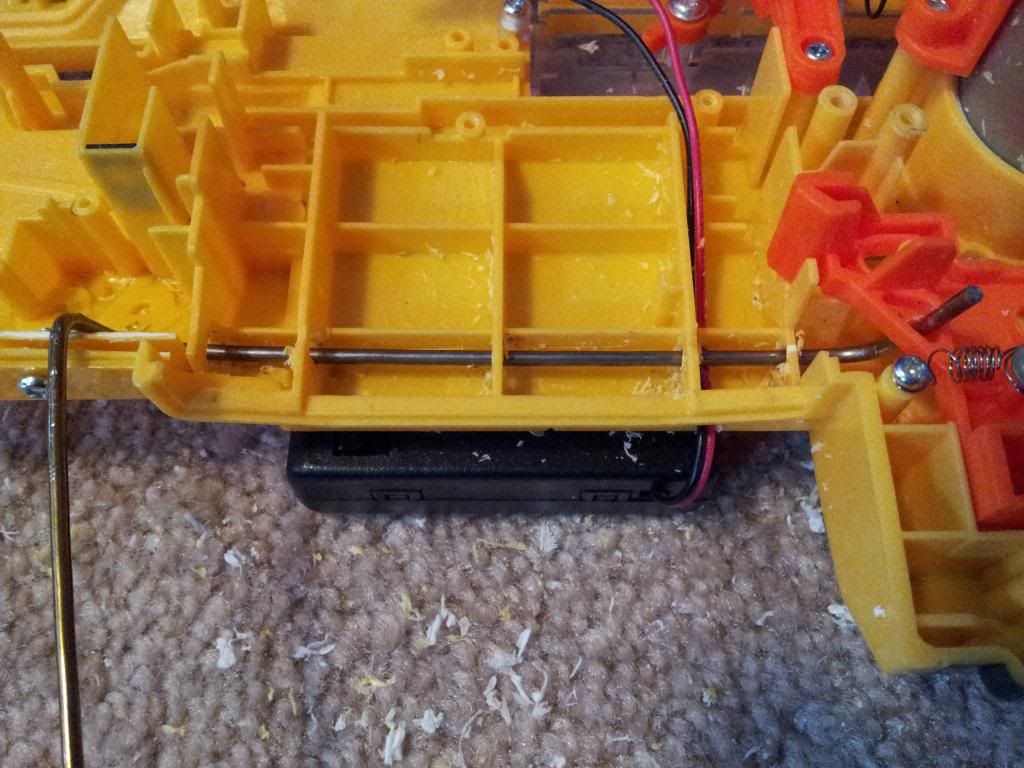
Drill through the inner walls of the magazine well, leaving enough room for whatever metal rod you choose to use for your magazine release. After the straight rod is inserted into the channel you drilled, then bend it at each end, and drill a hole through the orange magazine release. I only used a wire hanger, so it's a tad squishy, but if a beefier steel rod was used, this won't give you any problems.
As seen in the same image, the wires from the battery compartments have been run through the same recess in the magazine well. Cut another channel just above and parallel to the mag release rod, leading the wires to the front of the blaster, inside the space in the fore end. You will need to add extra wire for this, the wires with the battery boxes aren't quite long enough for this.
Now for the new trigger,
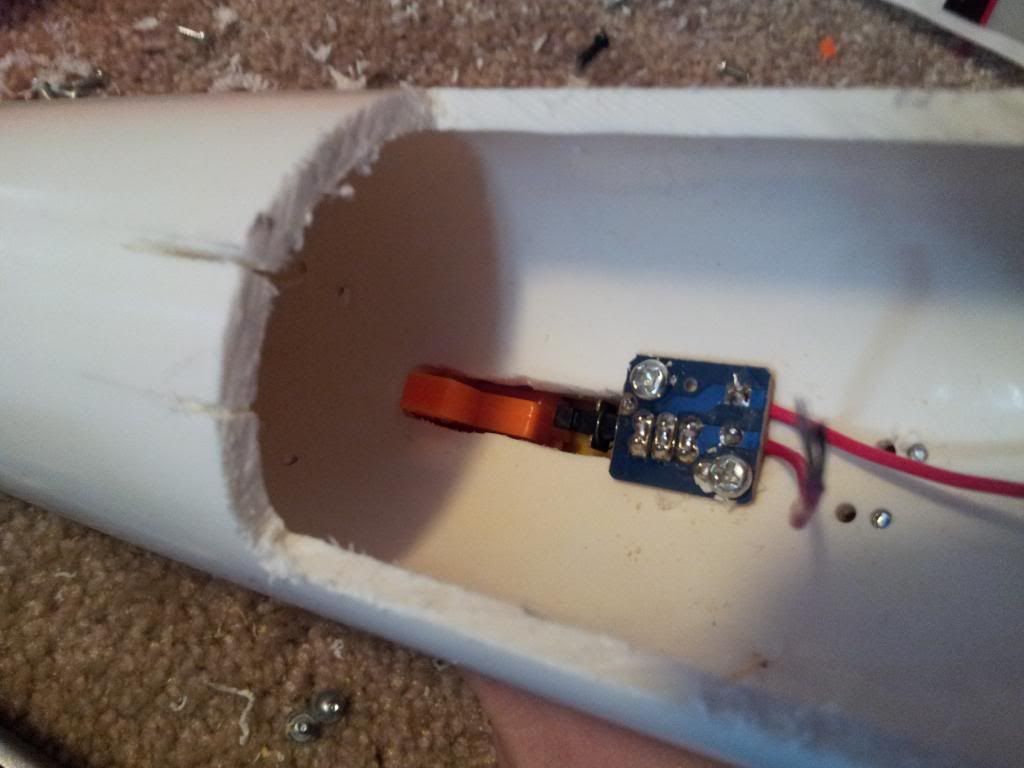
The Housing of the whole operation is 2 inch PVC, the momentary switch, salvaged from one of the locks, is held in place by two small screws. The Handle itself is secured with a few longer screws into the PVC. A small slot needs to be cut into the bottom of the PVC to allow the mag release wire to pop through.
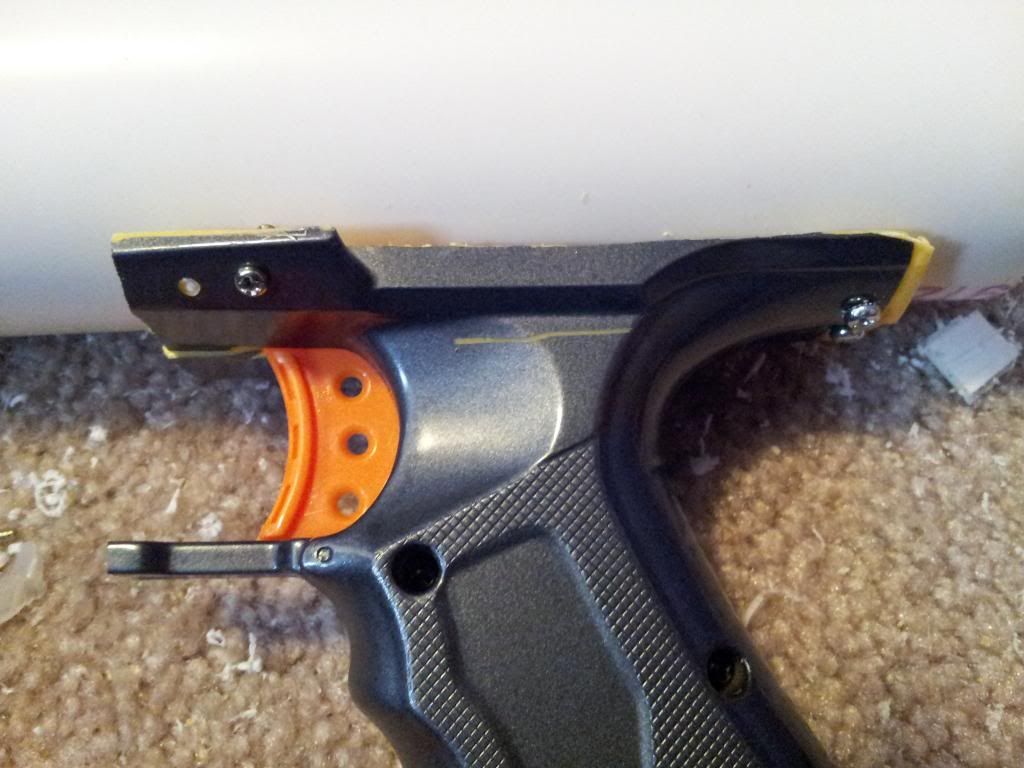
Wire up the whole thing in series, and connect the motor into the circuit as well, remember that we cut of the original hardware from the circuit.
Here is a photo of the almost completed blaster; the duct tape on the bottom rear of the blaster is holding on a piece of plywood with epoxy curing, this wood covers up the recess created when we hacked off the handle.
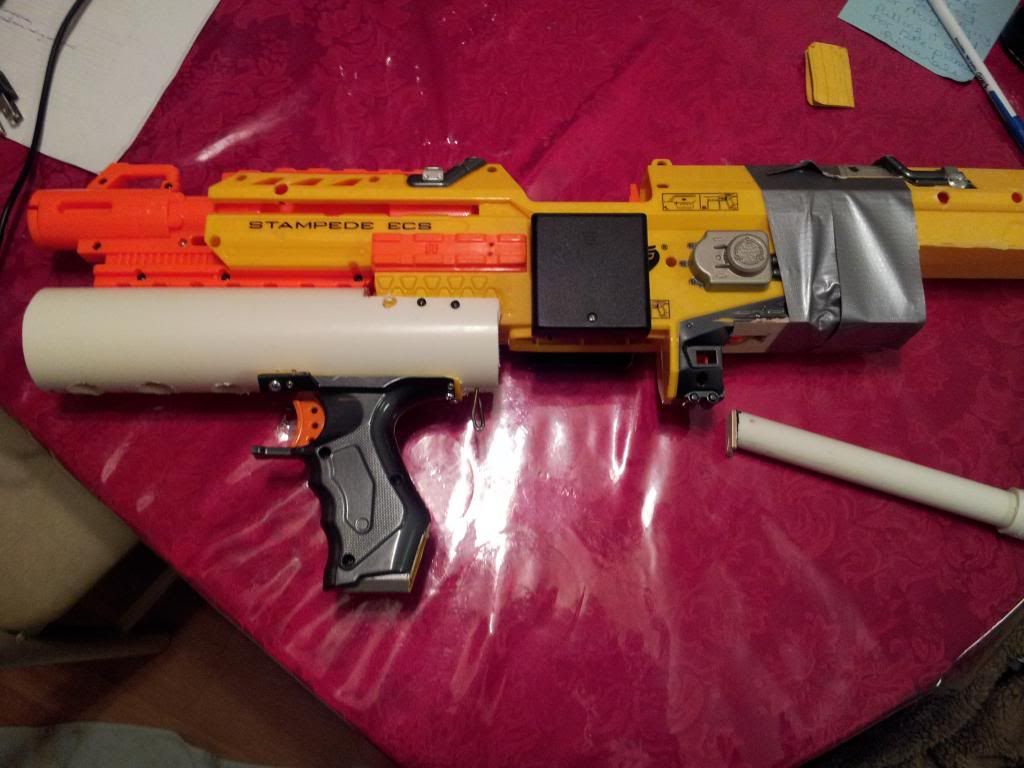
The PVC pipe itself is secured onto the orange "rail" of the blaster by several screws. The holes seen on the bottom of the pipe were drilled to allow my screwdriver to secure screws through the top of the pipe through the orange rail of the blaster. Four screws bolt the pipe to the yellow fore end as well, though only two are visible. The 1/2" PVC on the bottom right on the image is part of the stock, and a square of plywood is also secured onto the PVC using epoxy. Screws are then screwed into the corner part of the squares, and into the blaster shell. The next picture shows the nearly completed blaster.
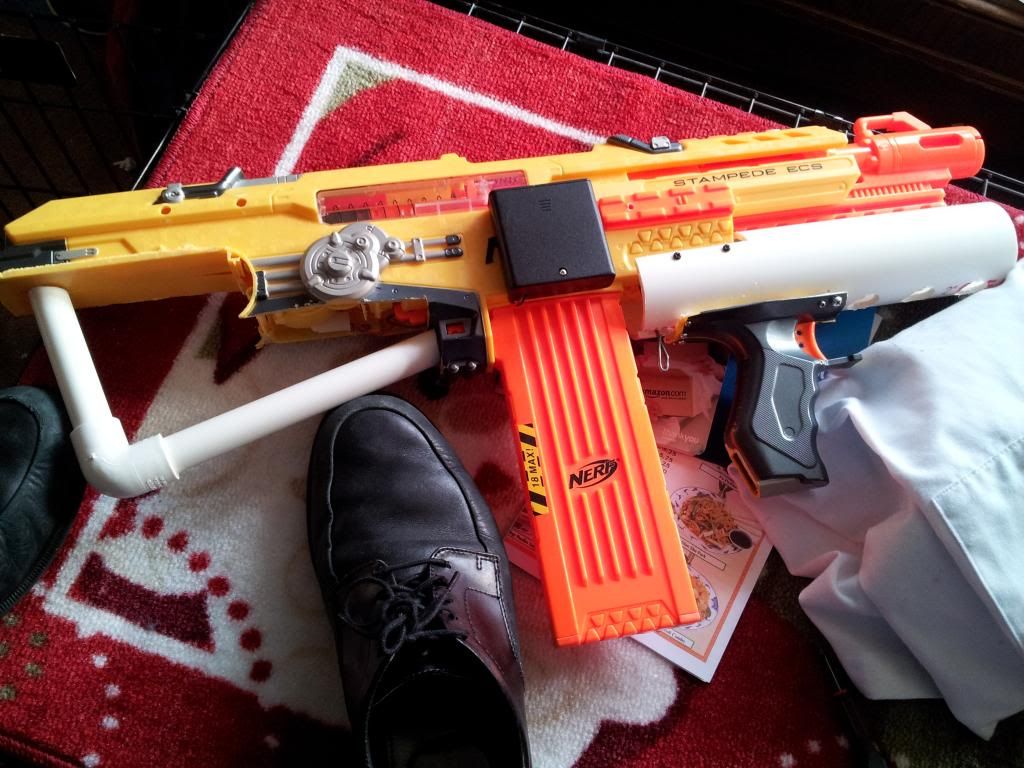
The above photo was taken before the previous one, so no epoxy or wood squares on the 1/2" PVC are visible, but this is what the profile view looks like now. I'm in school, so as soon as I return home, I'll upload another completed photo.
Results:
-Because of the removal of the original hardware, the blaster needs to have the trigger puled until the dart leaves the barrel, otherwise the dart tooth will retract and theoretically jam the blaster. Honestly though, this has not been a problem in my experience.
-Blaster is now about three inches shorter overall. Yes, it could be shorter, but I still want the thing to be visually appealing, (if that's still possible.)
-Ergonomics are alright, handle extends just a bit further than I would like, but when you're running around with this thing, you don't notice it that much. I'm also of a smaller stature, so a normal sized human should have no problem wielding one.
-Empty space in the 2 inch PVC leaves room for other additions like a tac light or series of infrared lights. Night vision, anyone?
-Yeah, there is nothing new in terms of ranges or functionality, but damn it is cool.
Video coming soon
Thanks for reading!


