Jump to content


Photo

Airtech 3000 Bling Internals

My take on SGNerf's TP3K

18 replies to this topic

#1 T da B

T da B

    Member

  • Members
  • 80 posts

Posted 13 November 2012 - 11:46 PM

Background:
This will be my first proper write-up! Let me start out by saying this mod is not for those on a tight budget. Should you choose to accept this quest, your components are going to run you $100+. You might think this is a little over-the-top, but you'll put those feelings aside when you see how well it performs. This will be the powerful thing that I have ever created, and it's all thanks to getting inspired by this writeup from SGNerf! I got the components from SGNerf, but I followed Ryan Mc#'s writeup for the modding. Without further adieu, let's create a monster!

Required Materials:
Posted Image

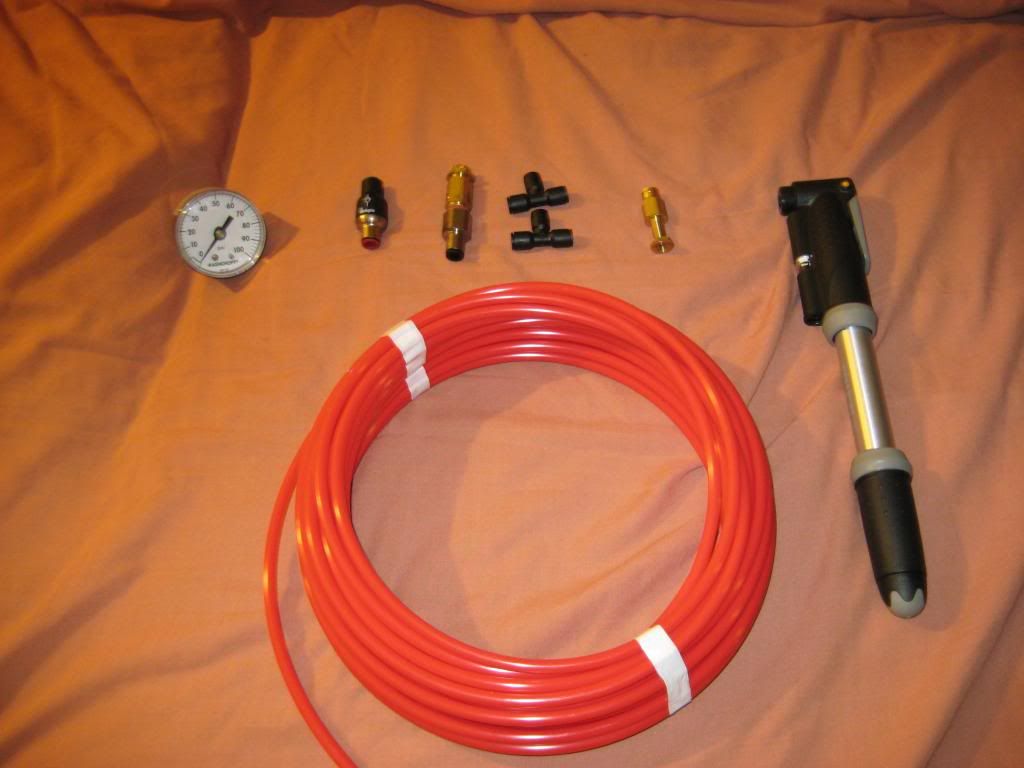
Clockwise from top left:

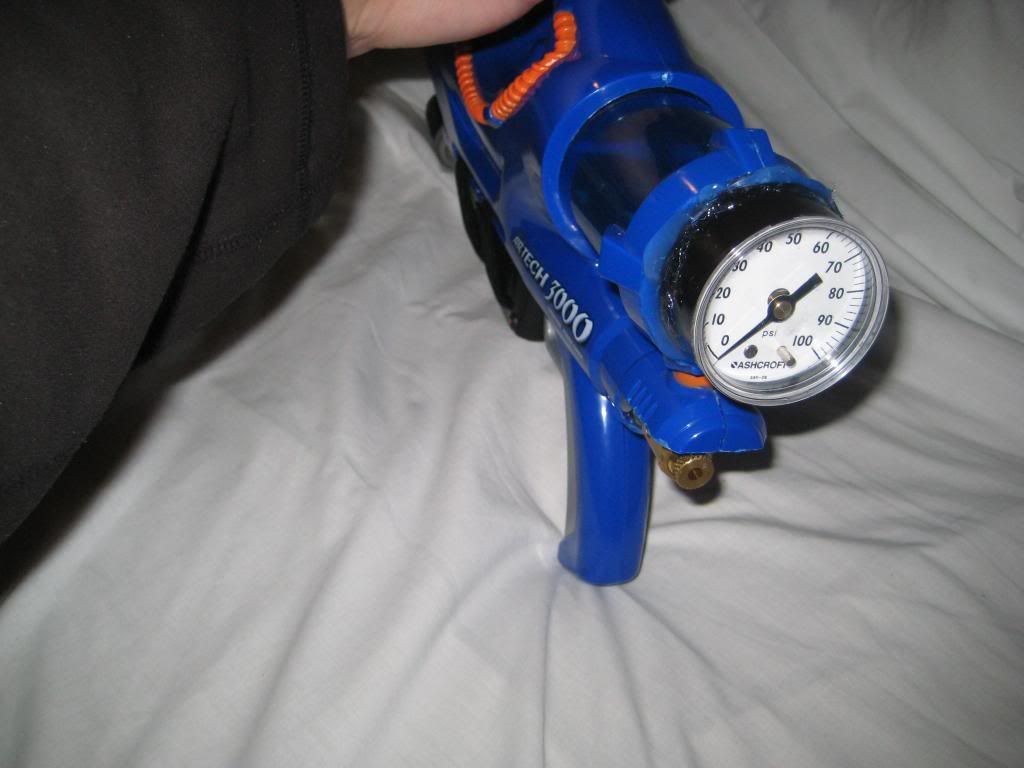
  • 3846K431 - Multipurpose Gauge, Steel Case, 2" Dial, 1/8 NPT Center Back, 0-100 PSI connected to 5779K129 - Nylon and Nickel-Plated Brass Tube Fitting, Adapter for 1/4" Tube OD X 1/8" NPT Female Pipe
  • 1096T2 - Nylon/Nickel-Plated Brass Check Valve with Fitting, 1/4" Tube OD X 1/4" Tube OD, Buna-N Seal
  • 50265K2 - Multirange Brass Pop-Safety Valve, 1/4 NPT Male, 25-200 PSI connected to
  • 5779K131 - Nylon and Nickel-Plated Brass Tube Fitting, Adapter for 1/4" Tube OD X 1/4" NPT Female Pipe
  • 2x 5779K34 - Nylon Tee for 1/4'' Tube OD
  • Schrader to 1/4'' Push-to-Connect adapter from This ebay listing (might be gone)
  • Topeak Mini G dual action bike pump from http://bikes.oversto...ouseonline.com/
  • 5181K231 - Crack-Resistant Polyethylene Tubing, .170" ID, 1/4" OD, .04" Wall Thickness, Red, 50' L

Posted Image

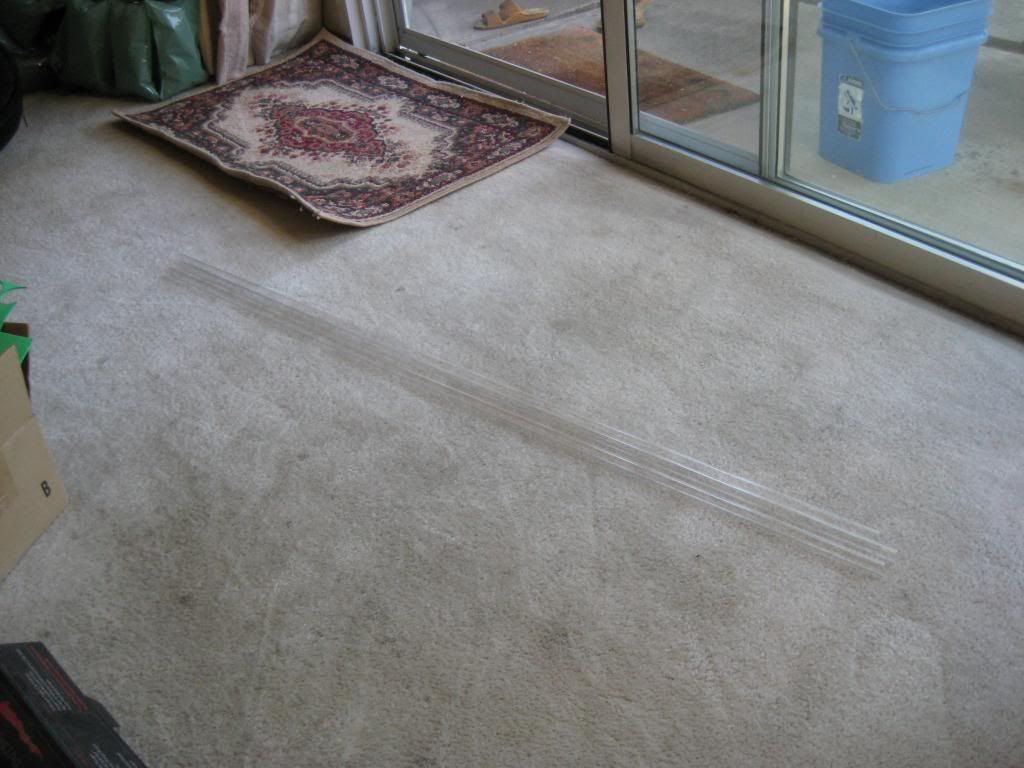
For my barrel material, I went with 2044T43 - Cut-to-Length Round Plastic Tube, .53" Inside Diameter, 4' Length. This tubing is made of polyethylene and is WAY cheaper than Mcmaster's PETG tubing. It is moderately strong when all six barrels are glued to a couple of turret spacers. I will be using 13'' barrels for this blaster.

Posted Image

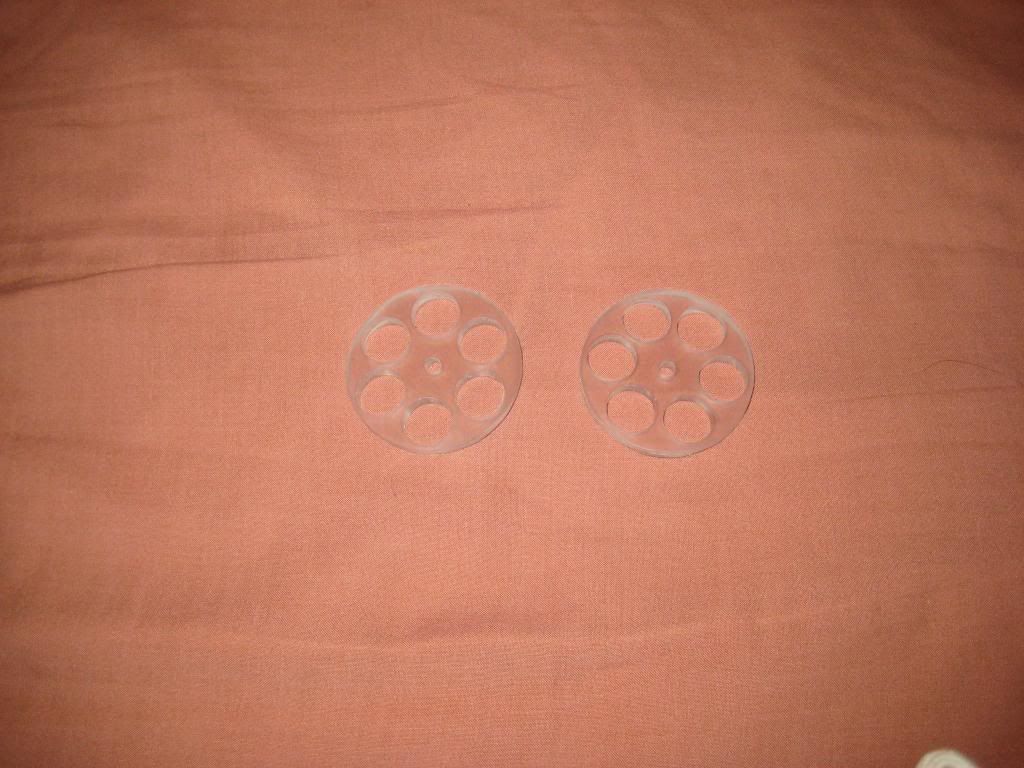
This is a pair of barrel spacers made by Venom213 of Nerfhaven. His sales page for these is here. They serve to keep the barrels perfectly aligned as well as adding structural integrity to the entire turret. I went with 19/32'' holes to fit the Mcmaster polyethylene tubing perfectly.

Posted Image

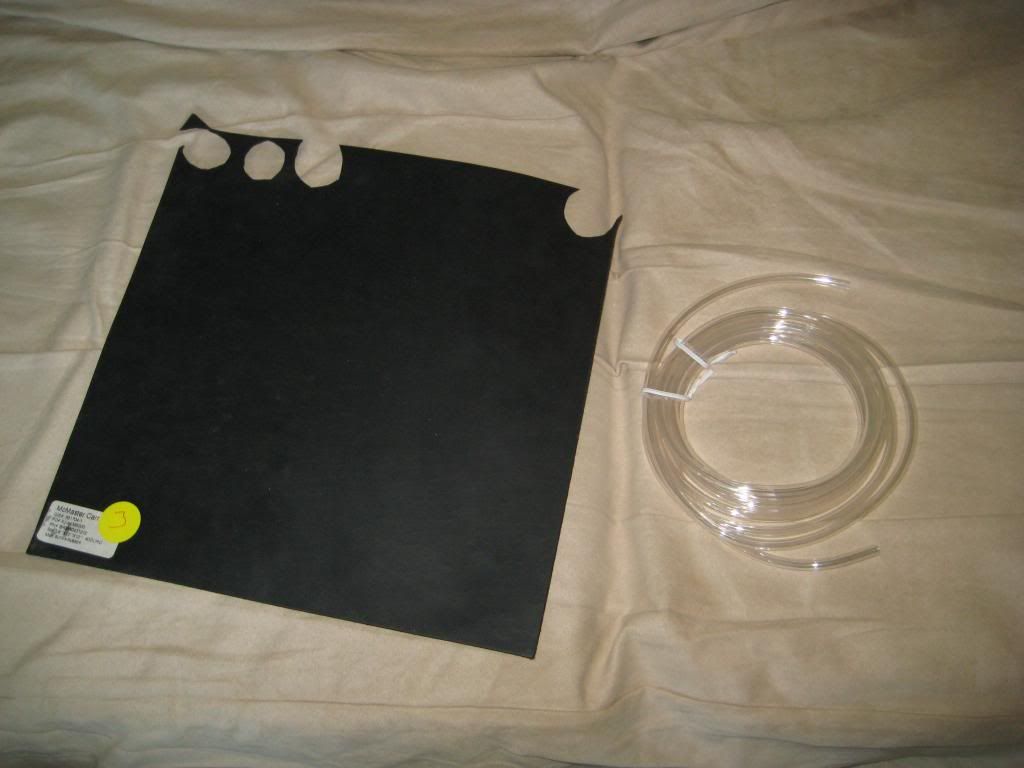
On the left is 1/8'' oil-resistant Buna-N rubber, Mcmaster part # 8635K164. This is what I use for my air tank to turret seals these days. It works magnificently! On the right is some Vinyl (PVC) tubing that I got at Orchard Supply Hardware. I decided that the 25 feet of polyethylene tubing I bought is too rigid. Yeah, I know--I'm an idiot for buying 25 feet of it. The problem with this project is that you have to cram a lot of components into a relatively small space. Inside the AT3K shell a lot of the space is taken up by the trigger, firing pin, and air tank. I needed flexible tubing to do the job, so that's the explanation for that one.

Write-up:
  • Start by taking the blaster apart. Don't worry--there aren't any glued on pieces that require boiling water on this blaster! However, there are very small nubs along the rim of the shell that fit into very small holes in the other half. If you bend the shell too much getting the two halves apart, you risk snapping off some if these nubs. I don't think they're essential, since there are enough screws to hold everything together.
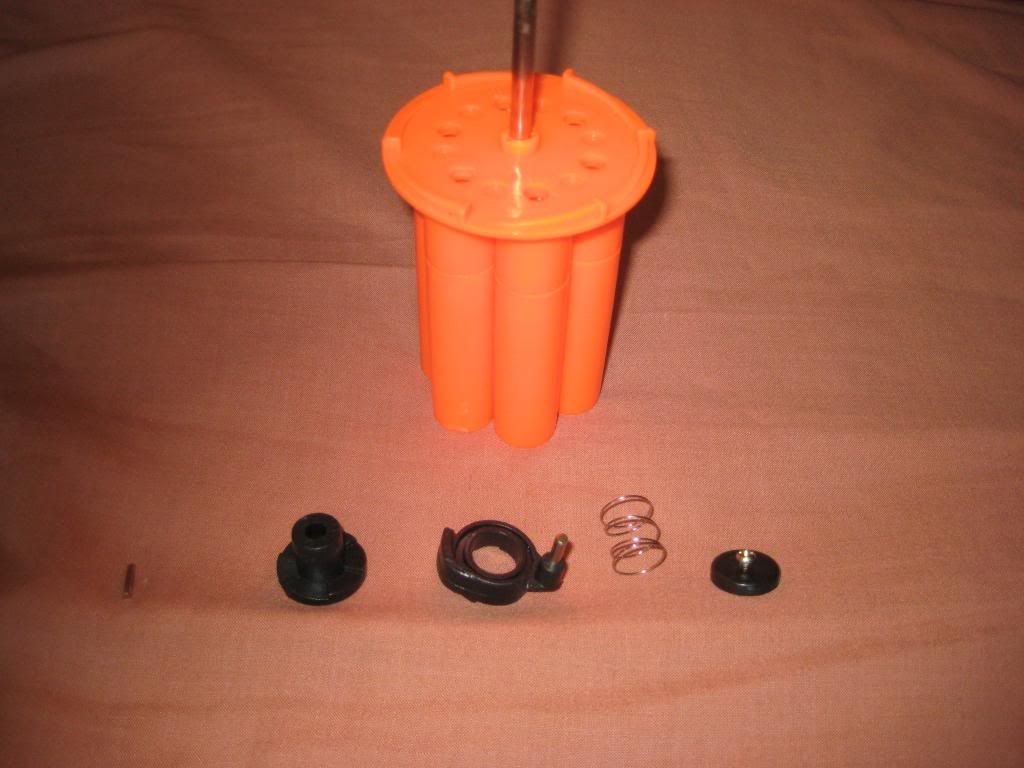
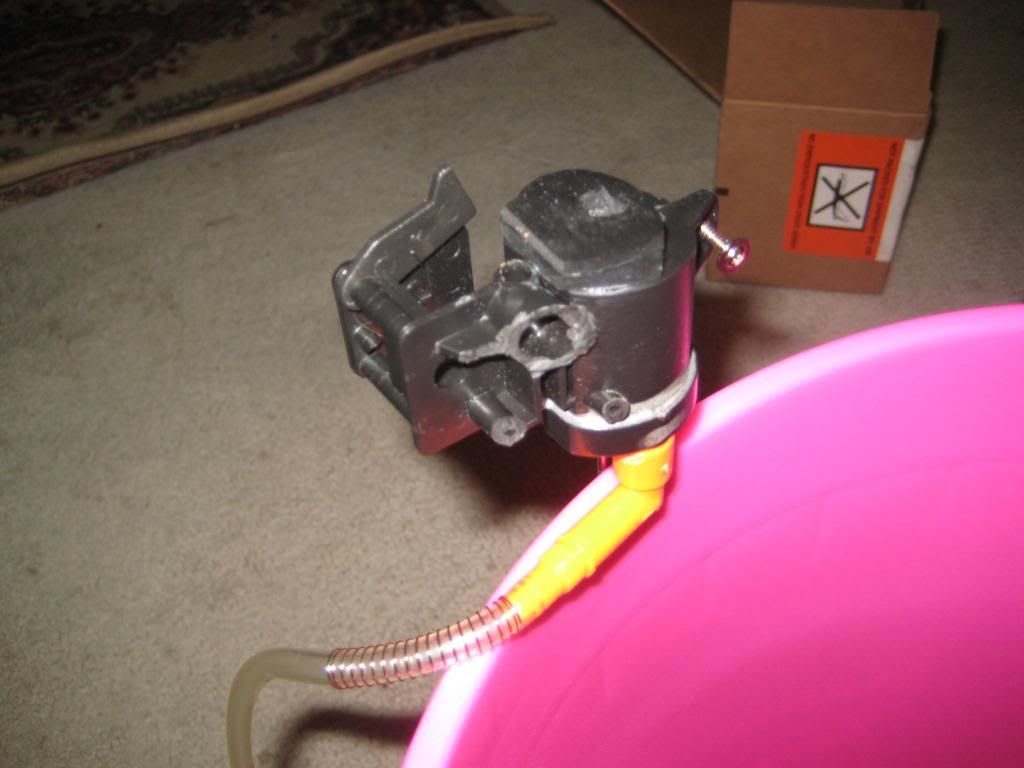
  • Remove the turret by unscrewing the screw at the rear end of the rotation mechanism. When disassembled, it should look like this:
    Posted Image
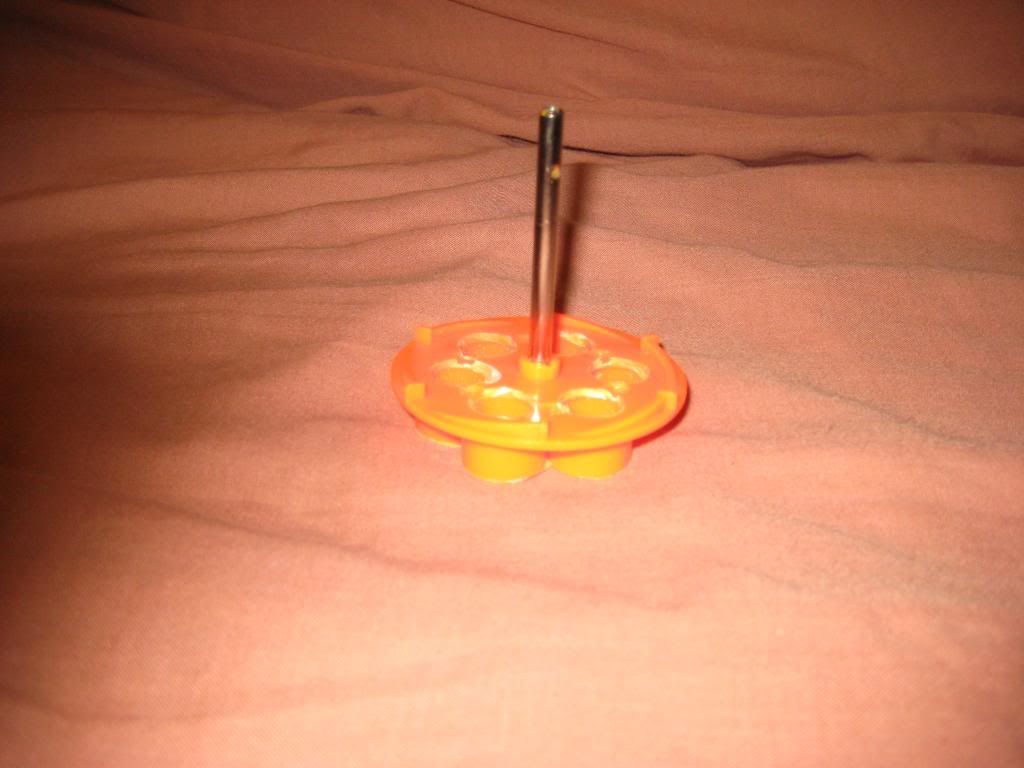
  • Drill 1/2'' holes into the back of the turret and chop down the barrels. It should look like this:
    Posted Image
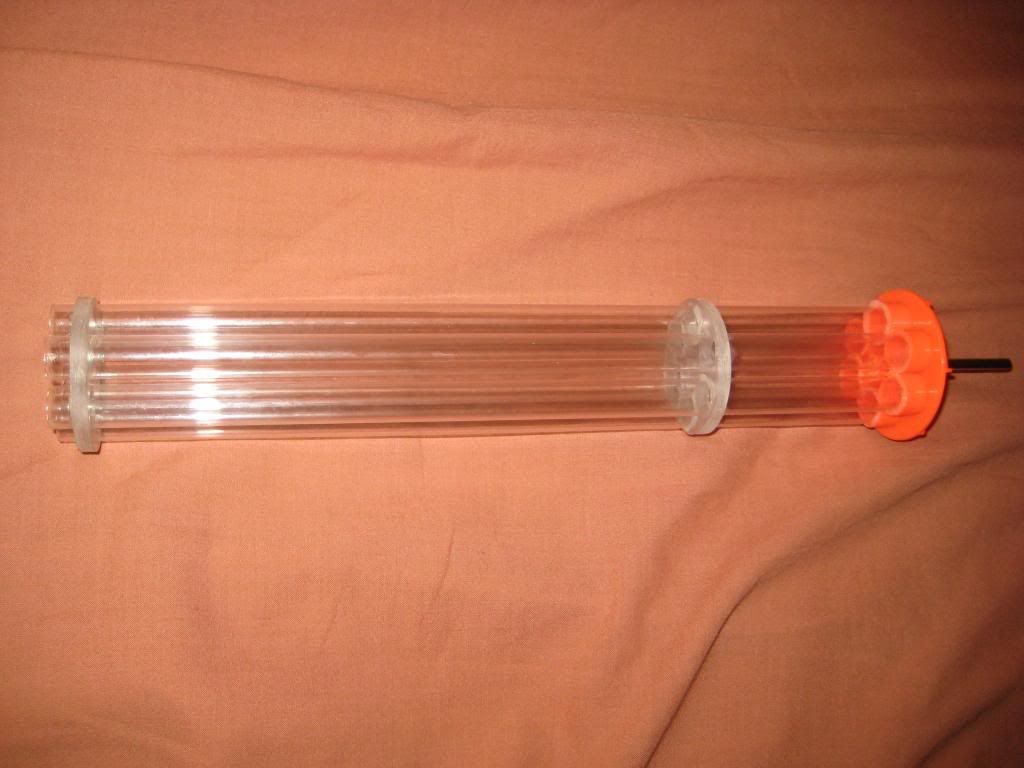
  • Cut 6 pieces of polyethylene tubing (or whatever barrel material you use) into equal lengths. I went with 13'' barrels--the rationale behind this was that a proper Supermaxx 1500 takes 12'' barrels and the AT3K has a bigger air tank. Insert your barrels into the orange turret; they should slide in perfectly with no dremeling! Then slide your barrel spacers over the barrels into the spots you want them to occupy. Move them slightly, then mark a dot with a sharpie on each barrel at equal lengths away from the spacer. This will mark the spot where you will glue. Slide the spacers back into position over the black dots. Now you will go one at a time--pulling a barrel out slightly, applying glue at the base and at your black dots, then twisting it into position. When complete, it should look like this:
    Posted Image
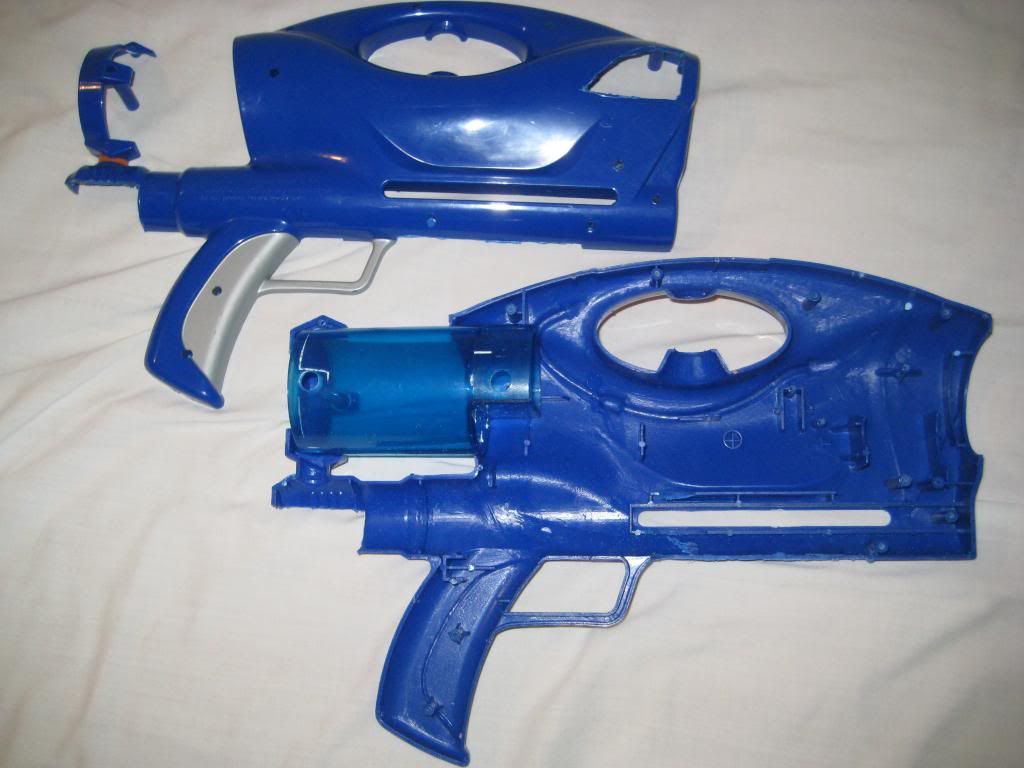
  • Now it's time to dremel down the shells. I dremeled behind the handle--this opening will house my pop-safety valve. Cut a hole in the top half of the shell for rear loading. I agree with Ryan McNumbers's statement that any air blaster that isn't rear loading sucks to use. You will also need to dremel a slot on both sides of the shell in front of the trigger guard to house the bike pump. Dremel out a hole in the back of the blaster for the PSI gauge--I basically just got rid of the "bump" that stick out of the rear of the blaster. It should look like this:
    Posted Image
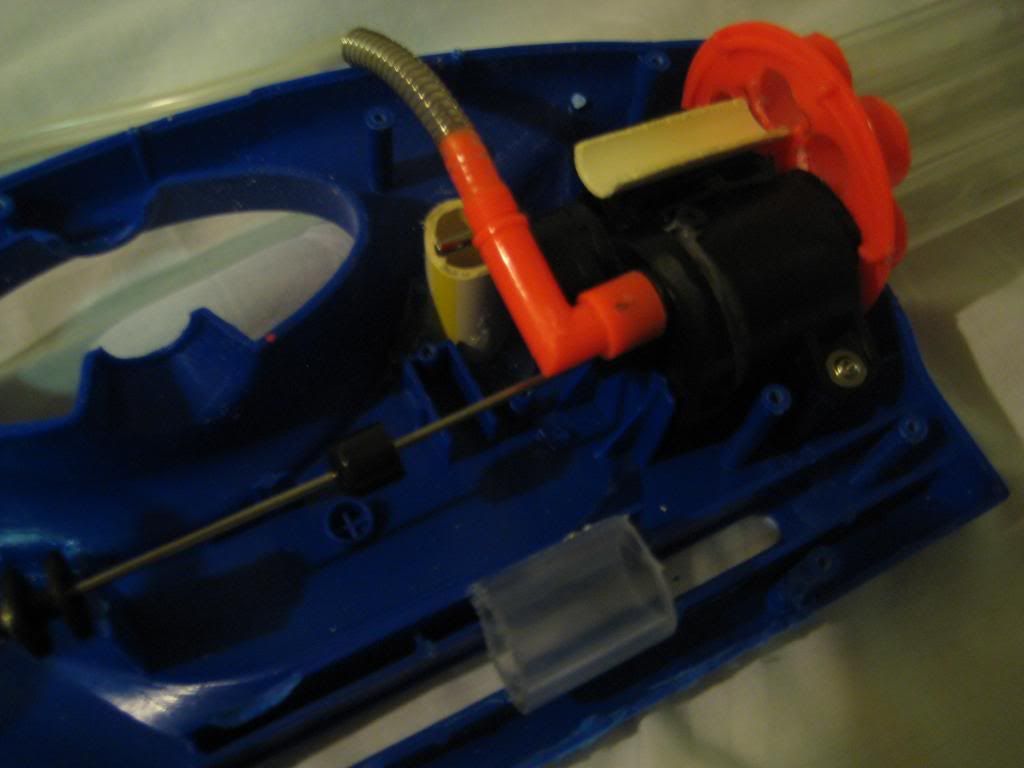
  • Now it's time to prepare the air tank. Take everything out except the air tank unit itself. The rotation mechanism will be discarded for this mod guide, since the Topeak bike pump isn't compatible with the rotation mech. I used two pieces of 1/8'' Oil-resistant Buna-N rubber and epoxied them onto the air outlet. This will allow for a perfect seal with the turret! After the epoxy cures, I am going to hot glue a "half-pipe" piece of CPVC onto the side of the air tank to act as a dart-loading guide. Your air tank should look like this:
    Posted Image
  • Now it's time to reassemble the turret. Lube up the rubber and the entire back of the turret so you can minimize the friction between the plastic and rubber. I also sanded down the back of the turret with fine sandpaper to eliminate any sharp edges that might file down the rubber. I took a piece of CPVC and cut it in half length-wise to act as sort of a "dart-loading guide." Hot glue it to the air tank. You'll notice that if you rotate the turret, the back of the metal turret shaft spins freely and gets kind of stuck. You will need to glue something to either the air tank or the inside of the blaster's shell to keep the rotation mech in place. I used a piece of CPVC. To secure my bike pump to the shell, I will be using velcro straps. I took a piece of clear PVC and glued it near the bottom of the shell to keep my front velcro strap from sliding back. After that, it's finally time to screw down the air tank assembly! Here's what everything should look like:
    Posted Image
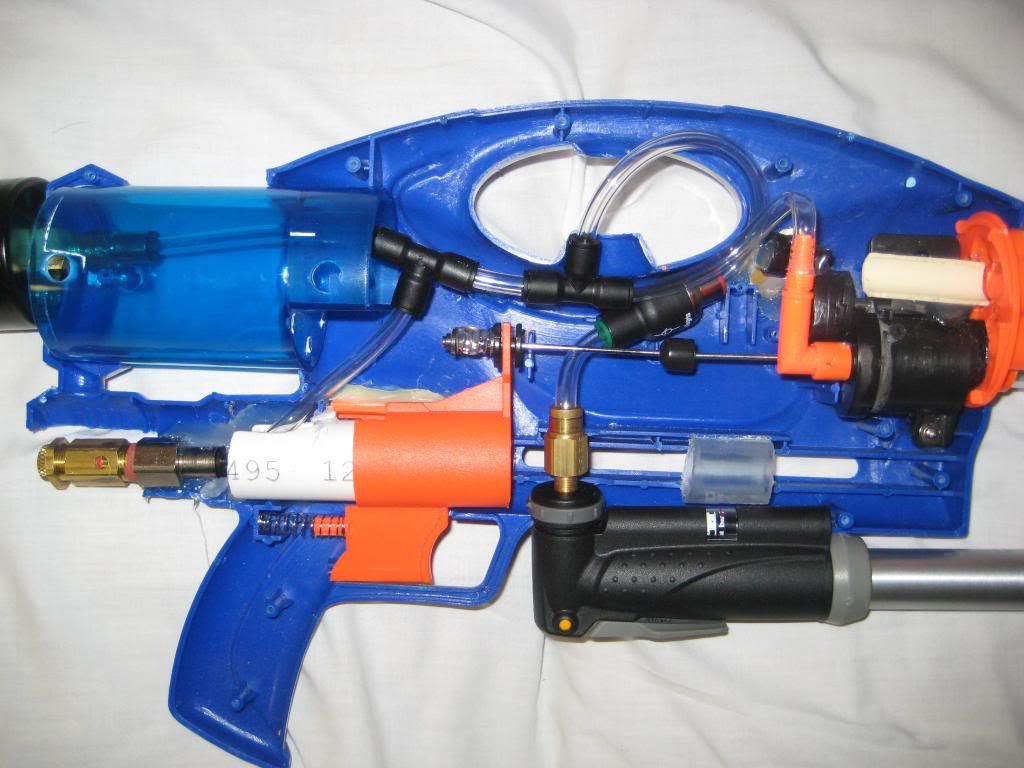
  • I can't believe it's finally time for the bling! Time to turn the AT3K into a pneumatic uber blaster that would make any pimp proud. The trick is to get everything to fit without interfering with the trigger. Years of Tetris have made me an expert as saving space, so study the picture carefully. I decided to attach the PSI gauge with hot glue instead of brackets--I think it looks a lot cleaner this way. Also notice the piece of 3/4'' PVC behind the trigger--this was essential in preventing the trigger from riding upwards. If you remove the stock pump, there is nothing to guide the trigger smoothly and straight backwards. I hot glued a cylinder of 3/4'' PVC onto a small piece of 3/4'' PVC as a riser. Hot glue is good because you get infinite tries--it took me quite a few to get my alignment perfect. The pop-safety valve is hot glued into place as well. I glued my firing pin spring because I didn't have any small, super-strong springs that could handle 70 psi, which is what I intend to operate this blaster at. Tetris FTW!
    Posted Image
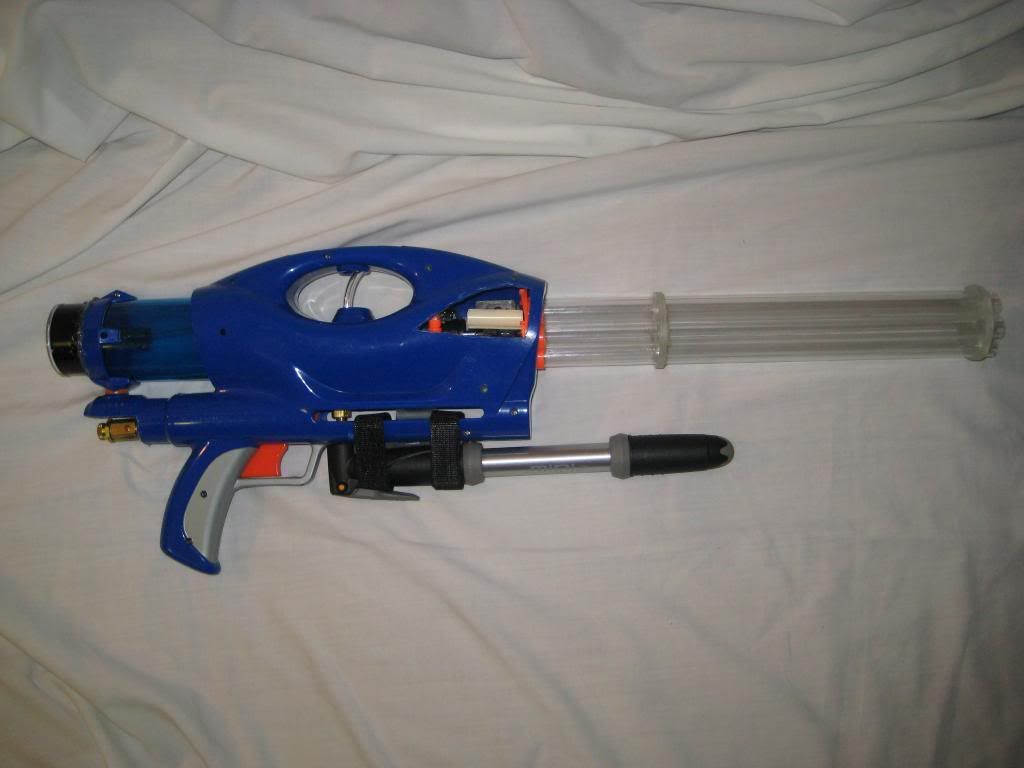
  • Finally, it's almost that time. The moment that took so much blood, sweat, and tears to reach--victory is near! It's time to put together both halves of the shell--I had to dremel down a little nub on the top half of the shell to get things to sit correctly. I used a couple strips of Velcro to hold my air tank snug against the shell. you can see the piece of clear PVC that serves as a Velcro spacer in the first picture. The gap I dremeled fit the Topeak pump almost perfectly! I hot glued the PSI gauge to the back of the shell as the final step and it seems to be holding pretty well. Isn't she beautiful? I'll have fps data coming soon!
    Posted Image
    Posted Image

Performance:
Fellas, the Chrony results are in! The numbers are, as they should be, staggering! 2 pumps gets me slightly higher that 200 feet per second, and 3 pumps got me up to a maximum velocity of 341.5 feet per second! That was at 62 psi with #6 slug darts. This AT3K is officially banned in American paintball arenas :lol:

Cheers!

~T da B

Edited by T da B, 30 January 2013 - 05:35 PM.

  • 0
Make it funky.

#2 Mully

Mully

    Member

  • Members
  • 342 posts

Posted 14 November 2012 - 12:10 AM

That is a very smooth very clean mod,
Excellent work:)

Mully
  • 0
S.C.U.N.

#3 quertyman

quertyman

    Member

  • Members
  • 188 posts

Posted 14 November 2012 - 12:43 AM

Wow! This is great. I am sure you could integrate this whole system into other blasters too. Also What does 341 fps relate to in range? And how many pumps does it take to get those ranges?

Edited by quertyman, 14 November 2012 - 12:44 AM.

  • 0
I have identified the problem: "maverick" -Daniel Beaver

#4 therealnerfjunkies

therealnerfjunkies

    Member

  • Members
  • 122 posts

Posted 14 November 2012 - 01:05 AM

This is cool and all but, it shoots WAY too hard to be war legal. I am guessing that you just made it for fun/to show it off? Good work, by the way.
  • 0
"You forgot the one rule of making a remake. Don't fuck with the original."

#5 T da B

T da B

    Member

  • Members
  • 80 posts

Posted 14 November 2012 - 02:46 AM

@Mully: Thanks a lot for the great feedback! It really motivates me to do great work.

@quertyman: It takes me 3 easy pumps to reach 60 psi, since my pump is dual action. Unfortunately, I don't have a tape measure long enough to measure the range!

@therealnerfjunkies: Haha you're right--it's definitely not war legal! I underwent this project to try and mod an air blaster to the max, and I think I've succeeded :) Thanks for the feedback!

Another thing I didn't mention is that I'm using Mod Man's red FBR. It has a very tight fit in my polyethylene tubing, yet shoots much harder than my thinner grey FBR. Anybody know why? This seems to disprove the hypothesis that air guns like a looser dart fit.

~T
  • 0
Make it funky.

#6 hamoidar

hamoidar

    Member

  • Members
  • 367 posts

Posted 14 November 2012 - 11:00 AM

Another thing I didn't mention is that I'm using Mod Man's red FBR. It has a very tight fit in my polyethylene tubing, yet shoots much harder than my thinner grey FBR. Anybody know why? This seems to disprove the hypothesis that air guns like a looser dart fit.

~T da B

At 63psi, dart fit is nothing. :D Great job, a very clean write-up and mod. I would recommend reinforcing the tank with iamthatcats method. He did a write-up a while back, just search for the topics he has started.
  • 0
NerfHaven > Your control panel > Profile > Change Signature > Inserts dumb sig > What! No pictures! > Inserts next best thing: http://nerfhaven.com...howuser=114052' class='bbc_url' title='External link' rel='nofollow external'>Best thing on Nerfhaven!

#7 makeitgo

makeitgo

    Member

  • Members
  • 216 posts

Posted 14 November 2012 - 11:47 AM

... Also What does 341 fps relate to in range? And how many pumps does it take to get those ranges?


In my test and experiments, assuming it's fired flat and at an average height of 5 feet (average shoulder level), you can multiply the FPS by 0.56 to get a general sense of range. Conditions pending.

Another thing I didn't mention is that I'm using Mod Man's red FBR. It has a very tight fit in my polyethylene tubing, yet shoots much harder than my thinner grey FBR. Anybody know why? This seems to disprove the hypothesis that air guns like a looser dart fit.

~T


I've actually found the same thing. A snug fit is best all around for my blasters. The density and firmness of the foam could have a bearing on performance. I've discovered that in higher powered blasters that the foam actually deforms in the barrel due to the sudden pressure increase. As it exists in its deformed state, it tries to straighten itself out.

At 63psi, dart fit is nothing. Posted Image Great job, a very clean write-up and mod. I would recommend reinforcing the tank with iamthatcats method. He did a write-up a while back, just search for the topics he has started.


Agreed. Here's my Tank Reinforcement guide as well. These tanks will eventually rupture without reinforcement. I've had 2K and 3K tanks rupture after a few hundred shots at 55PSI. However, since my reinforcements, I've had them upwards of 100PSI without incident and still going strong.

Rupturing occurs on the flat back part of the tank. It first appears as a ring of white stress marks .The whiter and fuller that circle gets, the closer it is to blowing.


  • 0
"...he is one speedy bastard." ~ Cheyner

#8 Daniel Beaver

Daniel Beaver

    HQRSE CQCK

  • Moderators
  • 2,096 posts

Posted 14 November 2012 - 12:45 PM

... Also What does 341 fps relate to in range?

It implies that this blaster can shoot well over 150ft with the right darts.
  • 0

#9 Zorns Lemma

Zorns Lemma

    Sir Scrt

  • Moderators
  • 1,277 posts

Posted 14 November 2012 - 01:44 PM

Is the valve at the back and the pressure gauge just there to monitor the AT3K tank? Any plans to expand the system with a hard tank?

Also, nice post.
  • 0
"In short, the same knowledge that underlies the ability to produce correct judgement is also the knowledge that underlies the ability to recognize correct judgement. To lack the former is to be deficient in the latter."
Kruger and Dunning (1999)

#10 T da B

T da B

    Member

  • Members
  • 80 posts

Posted 14 November 2012 - 02:21 PM

Good call on the tank reinforcement, guys! I will be doing that from now and on.

@Zorn: Yup, the gauge and pop-safety valve are there for safety and monitoring. You can count on a hard tank coming in the future :)

~T
  • 0
Make it funky.

#11 hamoidar

hamoidar

    Member

  • Members
  • 367 posts

Posted 14 November 2012 - 04:52 PM

If you want a good guide on making a hard tank (for the 3k) I made one a while back, here: http://nerfhaven.com...howtopic=23221' class='bbc_url' title='External link' rel='nofollow external'>RAD-v1
Just make sure you integrate a bleed valve between the hard tank and the AT3k tank, otherwise all your air will blow out in one shot.

Edited by hamoidar, 14 November 2012 - 04:53 PM.

  • 0
NerfHaven > Your control panel > Profile > Change Signature > Inserts dumb sig > What! No pictures! > Inserts next best thing: http://nerfhaven.com...howuser=114052' class='bbc_url' title='External link' rel='nofollow external'>Best thing on Nerfhaven!

#12 The Snake

The Snake

    Member

  • Members
  • 31 posts

Posted 14 November 2012 - 07:05 PM

Background:

Fellas, the Chrony results are in! The numbers are, as they should be, staggering! I have recorded a maximum velocity of 341.5 feet per second at 62 psi (3 pumps) with #6 slug darts. This AT3K is officially banned in American paintball arenas :D/>/>/>

Cheers!

~T da B

Holy God that is fast! You need to use stock darts in that thing or you'll kill someone.
  • 0
Go Nerf!
"This may send you into peals of laughter" -Zero Talent

#13 Draconis

Draconis

    I am not Lord Draconical

  • Members
  • 2,712 posts

Posted 14 November 2012 - 07:45 PM

Holy God that is fast! You need to use stock darts in that thing or you'll kill someone.


Or maybe, you know, only pump it twice. Or set the OPRV lower.
  • 0
[15:51] <+Noodle> titties
[15:51] <+Rhadamanthys> titties
[15:51] <+jakejagan> titties
[15:51] <+Lucian> boobs
[15:51] <+Gears> titties
[15:51] <@Draconis> Titties.
[15:52] <+Noodle> why is this so hard?

#14 SonReeceSonJensen

SonReeceSonJensen

    Member

  • Members
  • 662 posts

Posted 16 November 2012 - 01:15 PM

I applaud you, I also believe in dropping some skrilla now and then, but I want to get the most out of it which leads me too....

I am sure you could integrate this whole system into other blasters too.


I was thinking the exact same thing! If you set up your air blasters with a removable connector at the tank you could swap the guts it in and out. If you are doing this level of modding it would not be rocket science to make the pump and the gauge modular with something like these.

I feel inspired, thank you for that :D
  • 0
The Difference:
-Guns shoot bullets that kill people
-Blasters shoot darts that tag people

I do not play with guns.

#15 ShaNayNay

ShaNayNay

    Member

  • Members
  • 254 posts

Posted 16 November 2012 - 09:27 PM

I'm a tad confused as to why this shoots so much farther than the typical overhauled at3k. I'm assuming that you are just overpumping it?
  • 0

New Jersey is fuckin weird


#16 Daniel Beaver

Daniel Beaver

    HQRSE CQCK

  • Moderators
  • 2,096 posts

Posted 17 November 2012 - 10:24 AM

I'm a tad confused as to why this shoots so much farther than the typical overhauled at3k. I'm assuming that you are just overpumping it?

It's because this one can be pumped up to 60psi, about twice as high as sane pressure levels.
  • 0

#17 Elmo1234

Elmo1234

    Member

  • Members
  • 36 posts

Posted 18 November 2012 - 01:02 AM

Jesus! This is nice! Semi off topic, how do you like Mod Man's Red foam? If you do not wish to post in this thread you can PM me.
  • 0

#18 SgNerf

SgNerf

    Member

  • Members
  • 204 posts

Posted 18 November 2012 - 11:57 AM

Nice job T da B! Looks great!

Some interesting add-on info from my experience for those who are keen to also try this setup:

Note that the more air tubing in the setup, the more combined total internal air volume there is in the system, which is a factor in determining the PSI vs pumps... as T da B mentioned, 3 pumps from the Topeak Dual G pump in his system reaches 60+ PSI, which similar to my experience with the same setups using the same amount of additional air tubing and connections too.

For those who are planning a basic layout without the pressure gauge or safety valve (and without all the associated extra tubing and connectors), the total system air volume will also be naturally less in comparison, so you will notice a difference in PSI vs pumps.

I currently have modded AT3Ks which just connect the pump tubing straight through a quick-connect check valve and then into the air tank (so the overall amount of tubing used is much less), therefore this naturally results in higher pressure with the same number of pumps. In such basic setups, i've found that with 3 full pumps using the Topeak Dual G pump, the PSI can average around 70-75 PSI instead (which is the practical limit 'cos any higher and the trigger becomes too difficult to pull).

So far, i've not found much significant difference in actual ranges between both setups though... so i guess its just a minor balance/trade-off between slightly more internal air volume vs slightly higher pressure.

Just for general reference. Posted Image

Edited by SgNerf, 18 November 2012 - 12:00 PM.

  • 0
Nerf News & Reviews! >> http://www.sgnerf.blogspot.com
Nerf Mod Guides! >> http://www.modworks.blogspot.com

#19 T da B

T da B

    Member

  • Members
  • 80 posts

Posted 18 November 2012 - 07:22 PM

@SonReece: Modularity was a big thing for this project--the push-to-connect fittings make it extremely easy to disconnect and reconnect things. I only wish I figured out a more elegant way to attach the psi gauge and make it easily detachable! In any case, I'm glad to have been an inspiration.

@Elmo: Mod Man's foam is very good foam, one of the best I've used yet. It's very dense, but not as dense as Swift foam, and has a tight fit in my polyethylene tubing as well as 17/32'' brass and Flowguard Gold CPVC. It has a snug fit in 9/16'' brass. Combined with my green felt tips from Mcmaster, I'm ready for some yuletide Nerfing :)

@SgNerf: Thanks for the great feedback--it really means a lot coming from one of my modding heroes! I can't thank you enough for your help--I know I bombarded your blog with about a million questions about your TP3K. Right now I'm working on your brass slide breech and brass breeched SMG Stampede, so prepare for more questions from me in the near future!


In the future, I might do a budget version of this write-up, using barbed fittings rather than push-to-connect and trimming down some of the higher cost components.

~T
  • 0
Make it funky.


0 user(s) are reading this topic

0 members, 0 guests, 0 anonymous users