Jump to content


Photo

pSyk's "Auto-Loading" Rampage 3k + Vid

Super Picture Intensive!

24 replies to this topic

#1 pSyk

pSyk

    Member

  • Members
  • 76 posts

Posted 29 October 2012 - 11:46 AM

Hello!
Long time no write-up!
:)

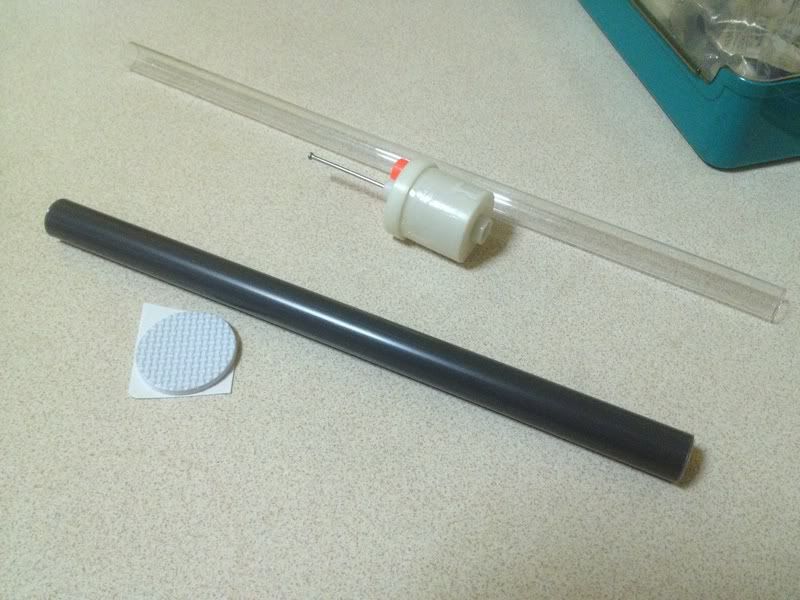
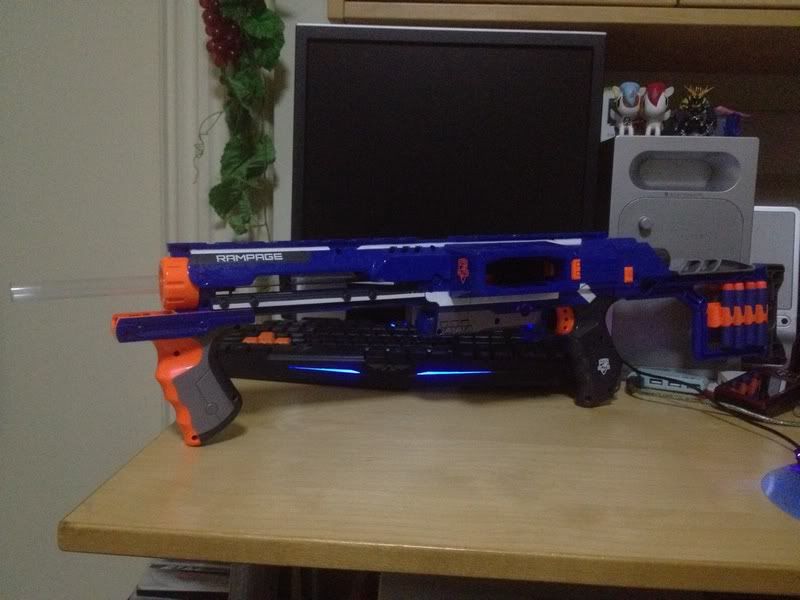
Let's start by showing you what you'll end up with:
(Or rather... what I ended up with)
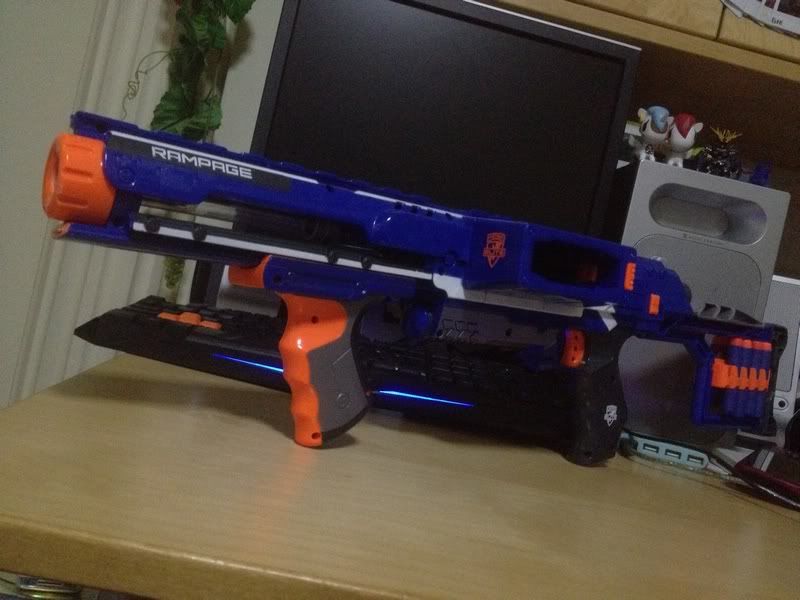
Posted Image
TA-DAA!
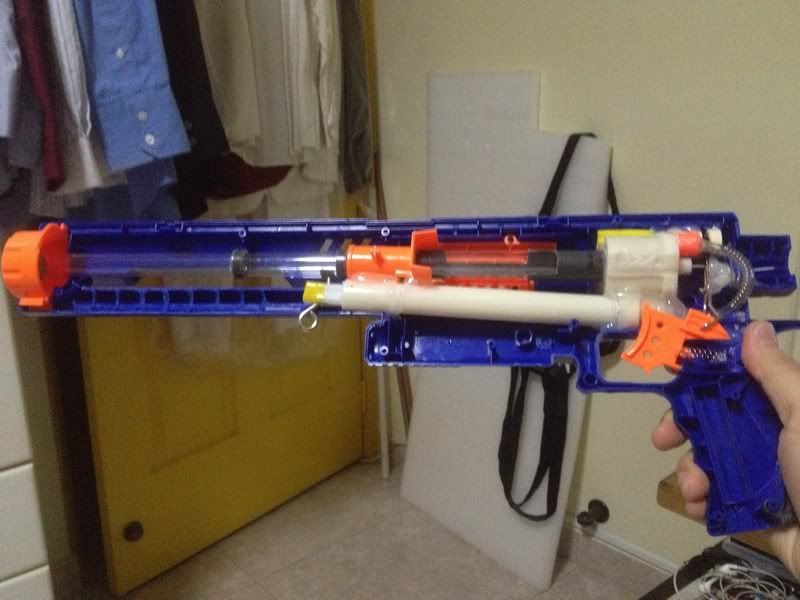
A Stock N-Strike Elite Rampage!

Just kidding.
It looks almost like it's stock.
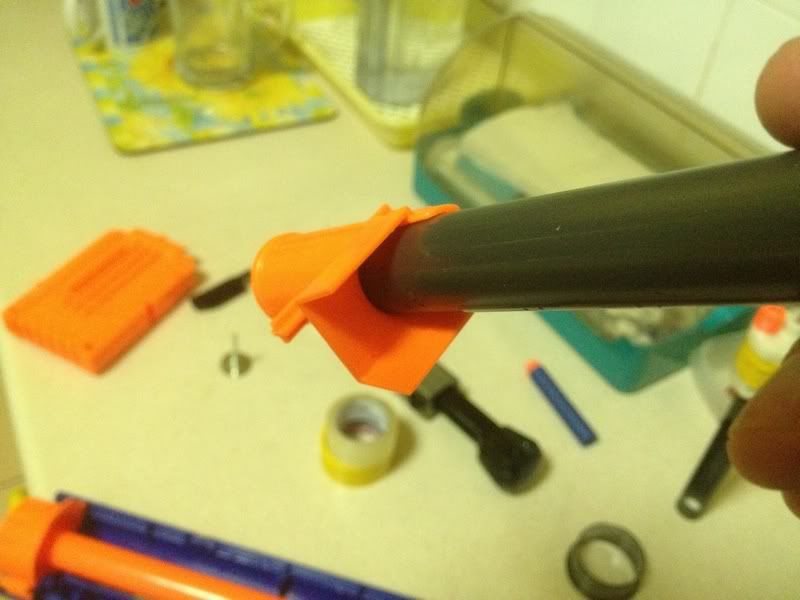
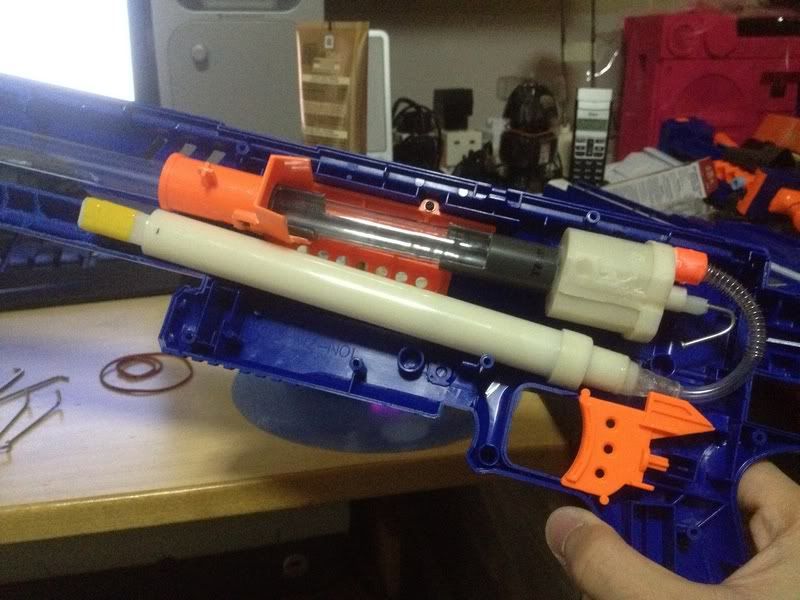
It's a Rampage with an Air Tech 3000 air tank.

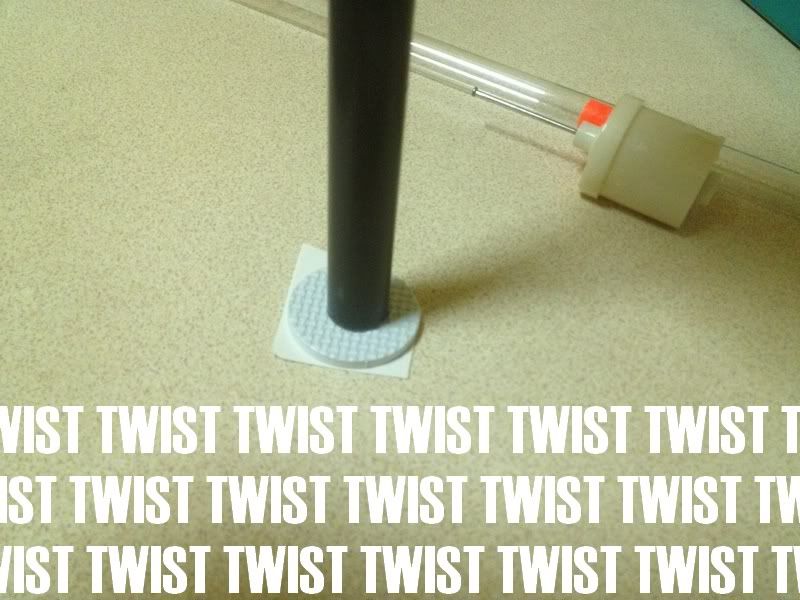
I know that this isn't the first Raider / Rampage with air tank internals, but mine has a twist...
I made it with an "auto loading" feature.

Back story:
I first saw Popatachi make this back in 2010:
Popatachi's original Raider 3K vid

Then I saw AJ / AdelaideNerf make one with a Mega Missile Tank:
AJ's Raider + Mega Missile Tank Integration vid
(Writeup: http://nerfhaven.com...showtopic=19961)

Finally, I saw Coop make one with an SM1500 tank (and a hopper):
Coop772's Raider + SM1500 Tank vid

Recently, I landed myself an extra Rampage shell after perfoming a Rampage-Raider retrofit (that I happily call the Rapage, tee hee) so I decided to try my hand at this.

I wanted to steer away from my usual usage of wyes, and I focused my mod idea based on Popatachi's and AJ's:
Popatachi's required a manual load of a dart in-between each shot while AJ's required you to perform a separate action to work the breech to feed the next dart from the clip.
However, Popatachi's retained more of the original stock Raider look by using the stock front grip...
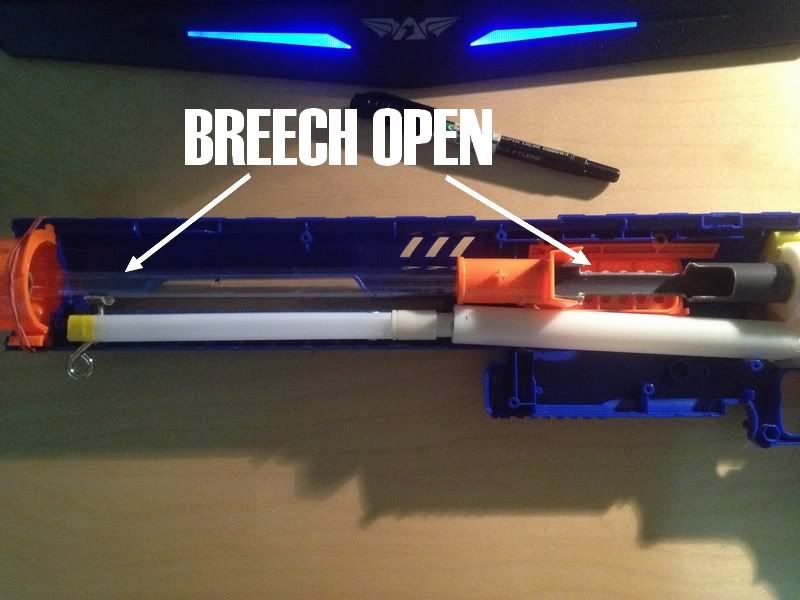
and I decided that I would try to come up with a version where I could maintain at least 90% of the stock appearance, while making it feed darts from a clip into the breech without the need for a "separate action".

Before I continue, I want to say that while working on this mod, hamoidar actually came up with essentially the exact same concept in the form of a homemade (with a stock airtank) that he named the "RAD-V1" and "RAD-V2".
Just to be clear, I claim no credit. It's just a case of 2 people having the same idea. Kudos to hamoidar!
Check out his writeup here:
http://nerfhaven.com...showtopic=23221
  • 0
Damn you, Screw!

#2 pSyk

pSyk

    Member

  • Members
  • 76 posts

Posted 29 October 2012 - 11:48 AM

--------------------------------------------------------------
OKAY so now on to the write-up.
--------------------------------------------------------------

Please understand that this mod was made based on an idea and a concept that I had, and thus, the parts that I used will probably not be easily / readily available to most of you.
I used a PETG + Singaporean 13mm UPVC setup for the breech; You should just swap those out with brass.

Things you'll need:

- Raider / Rampage Shell (Including the front orange muzzle, trigger, front grip, dart-door area and metal priming bar)
- N-Strike Clip (of any capacity)
- Airtank of your choice (I used an AT3K tank)
- Lazer Tag Team Ops Master Blaster Pump (other suitable pumps for this particular application: Hornet, Magstrike, RF20 because they're all narrow)
- 13mm UPVC (for the "outer layer" of the breech; swappable with brass.)
- PETG (for the "inner layer" aka barrel segment of the breech; swappable with brass too.)
- a small bit of foam furniture padding
- some foam backer rod / spare foam dart blanks
- Superglue
- Pipe /tube Cutters
- Hotglue + Hotglue gun
- Rule / Ruler
- E-tape
- Some vinyl tubing to connect the pump to the tank
- 2 pairs of pliers
- Standard screwdriver set
- Dremel + Sanding Drum + Cutting Bit + Drill Bit
- Hacksaw (Specifically to cut down the metal priming bar)
- Sharpie / Marker
- Random Screw + matching Nut (You'll see later)

Also in this mod, I applied Taerkitty's LBB Lever Trigger mod.
I'm not gonna explain it but you need to understand it if you don't.
Go read-up, and come back later:
http://www.nerfrevol....php?f=8&t=1876

And for that, you'll also need:
- 1/2 inch CPVC (for the lever trigger mod)
- A "large" sized clip (for the lever trigger mod)
- Random spacer for the air tank's firing pin

Lastly, for my PETG, I applied makeitgo's PETG tightening rings method:
http://nerfhaven.com...showtopic=22049

The only difference is, the spring I had fit the ID of my PETG, while his fit around the OD.

So, add this to the list of stuff you'll need if you're using a PETG breech setup:
- suitable sized spring
- lighter
  • 0
Damn you, Screw!

#3 pSyk

pSyk

    Member

  • Members
  • 76 posts

Posted 29 October 2012 - 11:50 AM

--------------------------------------------------------------
LET'S BEGIN
--------------------------------------------------------------

Start off by making tightening rings on one end of the PETG.
Posted Image

I used a 14-inch length of PETG. The 13mm UPVC sleeves perfectly (with a perfect seal) over the PETG, and so I made use of that to keep the PETG "straight".
Posted Image

Note that I inserted the spring to the location where the tightening rings will be around the front half of a stock-length dart.

Bust out the lighter, let the flame kiss the PETG for abit, then sleeve the 13mm UPVC over it as it cools down to keep it perfectly straight.
Posted Image

BAM, you'll get this:
Posted Image

Now I know I said that the UPVC and PETG nest so perfectly that it creates a perfect seal but I'm quite anal about air seal standards so...
I wanted to make extra sure:
Posted Image

That foam furniture padding is meant to be stuck on the bottom of the legs of furniture.

Now check the next 2 pics and you'll know what to do:
Posted Image

Posted Image

Posted Image

Then take that small circle and do the same thing to it, but this time, with the PETG:
Posted Image

And sleeve that ring around the output lip of the tank:
Posted Image
  • 0
Damn you, Screw!

#4 pSyk

pSyk

    Member

  • Members
  • 76 posts

Posted 29 October 2012 - 11:52 AM

Next, get your ruler, the N-Strike clip, and your 13mm UPVC because it's measurement time.
I deliberately marked a 1-inch space inbetween the tank and the clip:
Posted Image

Then measured the length of the clip:
Posted Image

and then lined the 13mm UPVC up with the blaster shell and marked it halfway past the dart-door area:
Posted Image

Next, cut the 13mm UPVC to fit the clip (it's a breech... so you know what to do), and then attach it to the tank via Superglue: (Please ignore the yellow e-tape around the tank)
Posted Image

Posted Image

MAKE SURE YOU LET THAT CURE COMPLETELY. Apply a second layer of superglue if you want. I did.

--------------------------------------------------------------
Now, we're done with the tank and breech so let's move on to the shell work.
--------------------------------------------------------------

Get the front grip and cut along where I marked out.
No exact measurements; do whatever suits your application. Simple logic: The more you cut, the longer the draw.
This is completely dependant on the length of the pump stroke.
Posted Image

Posted Image

Then, wrap e-tape around a short stub of 13mm UPVC, and superglue it into the back of the orange muzzle piece:
Posted Image

Grab the dart door area:
Posted Image

And dremel the insides till the breech area fits snug: (tip: GO SLOW)
Posted Image

Edited by pSyk, 29 October 2012 - 11:58 AM.

  • 0
Damn you, Screw!

#5 pSyk

pSyk

    Member

  • Members
  • 76 posts

Posted 29 October 2012 - 11:54 AM

You might need to do this if your pump shaft OD is a little wider:
Posted Image

Set all of those aside, and get your shell.
I'll only be showing you pictures of the shell on one side; make sure you do the same to the other half.
I hate this part the most... I never liked shell work but... yeah.

From this:
Posted Image

To this:
Posted Image

Then from this:
Posted Image

To this:
Posted Image

And finally, this:
Posted Image

On the other half, remove stuff from this:
Posted Image

To this:
Posted Image

Now comes the most boring part... get this:
Posted Image

To look like this:
Posted Image
  • 0
Damn you, Screw!

#6 pSyk

pSyk

    Member

  • Members
  • 76 posts

Posted 29 October 2012 - 11:56 AM

Then, you need to widen the slot on the bottom of the shell to accomodate the extended draw.
This also is dependant on the length of your pump stroke.
Posted Image

Posted Image

We're almost done with the shell work... This is the final part, and you need to cut out a slot space:
Posted Image

Posted Image

--------------------------------------------------------------
Take a breather from all that shellwork. Now we're going into the internal setup of the mod.
--------------------------------------------------------------

Measure your new draw / pump stroke length.
Mine, as you can see, is about 6.5 inches.
Posted Image

So grab your pump shaft, measure up, and cut down.
Posted Image

I wanted to make mine sit in the shell like this:
Posted Image

Once I had that in, I inserted the pump completely, and once again, measure up and cut down.
Posted Image

This is how I envisioned the internal setup to be.
See the 3K firing pin bent in such a way? That's what my 2 pairs of pliers were for.
Posted Image

Now is a good time for you to take cue from the picture above, and connect the tank to the pump.
  • 0
Damn you, Screw!

#7 pSyk

pSyk

    Member

  • Members
  • 76 posts

Posted 29 October 2012 - 11:59 AM

Next, I used the hacksaw to cut the metal priming rod down till about this length:
Posted Image

Then cut a slot to accomodate the diagonal part of the rod (yes, I chopped a small part of the rod off first, you'll understand why in a later part)
Posted Image

Now get a small segment of 13mm UPVC, and attach it (via a screw and a nut) on to the opposite side of the slot you just cut out from the pump:
Posted Image

Adjust the height of the 13mm UPVC,make sure it lightly (keyword: LIGHTLY) touches the PETG when you have the pump in place:
Posted Image

I don't have a pic of this, but basically I inserted the cut down metal rod and I filled the shaft with Hotglue so that the screw (with the 13mm UPVC segment) and the rod were locked in place, and re-attached the small chopped off piece of the pump rod.
I also plugged the pump.

Here we begin work on the lever trigger.
Do this to the clip arm.
Posted Image

The idea is to have it sit in the shell like this:
Posted Image

So measure up, drill a slot in the trigger and thread it through:
Posted Image

Make sure you measure up correctly, there's very little room for mistakes.

Now break out your CPVC.
The placement of the CPVC for the lever trigger should be like this: (Pardon my crappy drawing, but you get the idea.)
Posted Image

Fire up your hotglue gun, load up some hotglue, and while it's heating up, take a deep breath and read this first.

This is how I planned my "route":
Lather the entire upper-back area of the shell with hotglue...
Put in the back CPVC ring,
Slide the clip arm into the air tank's firing pin area,
hook the clip arm into the back CPVC ring,
lay down the front half of the CPVC ring to complete the lever trigger setup WHILE laying down the tank + breech + dart-door piece setup, ensuring that the breech opening is facing the correct direction.
Note that I used some old, cut-up foam blanks (or FBR) as a "spacer" to help me keep the air tank in line with the dart-door piece.

Take another deep breath, focus on what you need to do in the correct order, and GO FOR IT.
Posted Image
  • 0
Damn you, Screw!

#8 pSyk

pSyk

    Member

  • Members
  • 76 posts

Posted 29 October 2012 - 12:01 PM

--------------------------------------------------------------
On to the "auto-loading" feature.
--------------------------------------------------------------

With the breech fully closed and the pump fully inserted, mark out, on the barrel, where the 13mm UPVC segment is.
Posted Image

Also, in that picture you can see that I attached some yellow e-tape to the end of the pump rod...
That's where I re-attached the small piece of the pump rod.

Do the same thing, with the breech opened and the pump fully extended:
Posted Image

Cut out another 2 short stubs of 13mm UPVC and attach them to where you marked out:
Posted Image

Posted Image

And finally, you'll get something like this:
Posted Image

So the idea for my mod is that when you fully extend the pump, it opens the breech fully, allowing the clip to feed a dart in.
Bringing the pump back will close up the breech. As long as you do not perform a full pump stroke, it will never completely open the breech, and thus, double-feeding should not occur.
This way, you can pump up the tank to a higher pressure without any problems of double-feeding.
  • 0
Damn you, Screw!

#9 pSyk

pSyk

    Member

  • Members
  • 76 posts

Posted 29 October 2012 - 12:04 PM

--------------------------------------------------------------
Finally, the part that you've all been waiting for, the video demo.
--------------------------------------------------------------

Initial demo video (Breech / Auto-loading Action):
http://www.youtube.com/watch?v=zYKRwoGCiP8
(The final demo will be in the next post due to the limitation, sorry!)

For fun, the money shot:
Posted Image

And this is what the blaster looks like with the pump fully extended (Breech fully open)
Posted Image
  • 0
Damn you, Screw!

#10 pSyk

pSyk

    Member

  • Members
  • 76 posts

Posted 29 October 2012 - 12:06 PM

Finished demo video + Firing demo:


Phew! I'm finally done posting everything here!

I hope you guys enjoyed this write-up.
This, like I mentioned, started off as an idea and a concept, and by sharing this concept with you and showing you that it works, you should be able to make / mod one that is better than this! :)
  • 0
Damn you, Screw!

#11 Boot

Boot

    Member

  • Members
  • 90 posts

Posted 29 October 2012 - 12:55 PM

College life has kind of taken over my life in past months, and so I haven't been very active on this site for a while, but this is just too good to leave un-complimented!

The staggered breech is brilliant, I worked on a similar project a while back, and the biggest difficulty was always allowing a single handle to operate the pump and breech while simultaneously allowing for multiple pumps without double-feeding. I ended up working with a split handle (so that you pumped and then loosened your grip to continue to pump), but this looks significantly better, keeping the stock aesthetic, and also would probably be more reliable in an actual nerf war setting.

I think a nice improvement would be to put a small buffer at the point where the breech cannot extend any further without chambering another dart. A small increase in friction at that point would make the blaster easy to operate by touch alone, without having to look at the breech (although my guess is that once you get used to it double-feeding gets pretty rare).

Great job!
  • 0
QUOTE
If you try to shoot over 45 feet with a magstrike accurately you fail

I beg to differ

#12 That1GUy

That1GUy

    Member

  • Members
  • 7 posts

Posted 29 October 2012 - 01:12 PM

Supa sexy bro
  • 0

#13 hamoidar

hamoidar

    Member

  • Members
  • 367 posts

Posted 29 October 2012 - 01:25 PM

This is amazing! It operates similar to my RAD-V1, but is so much simpler/cheaper. Do you think this could be done to a raider? Fantastic job!
  • 0
NerfHaven > Your control panel > Profile > Change Signature > Inserts dumb sig > What! No pictures! > Inserts next best thing: http://nerfhaven.com...howuser=114052' class='bbc_url' title='External link' rel='nofollow external'>Best thing on Nerfhaven!

#14 pSyk

pSyk

    Member

  • Members
  • 76 posts

Posted 29 October 2012 - 01:53 PM

College life has kind of taken over my life in past months, and so I haven't been very active on this site for a while, but this is just too good to leave un-complimented!

The staggered breech is brilliant, I worked on a similar project a while back, and the biggest difficulty was always allowing a single handle to operate the pump and breech while simultaneously allowing for multiple pumps without double-feeding. I ended up working with a split handle (so that you pumped and then loosened your grip to continue to pump), but this looks significantly better, keeping the stock aesthetic, and also would probably be more reliable in an actual nerf war setting.

I think a nice improvement would be to put a small buffer at the point where the breech cannot extend any further without chambering another dart. A small increase in friction at that point would make the blaster easy to operate by touch alone, without having to look at the breech (although my guess is that once you get used to it double-feeding gets pretty rare).

Great job!

Actually, the UPVC does touch the side walls of the shell towards the front, so I do face a small "bump" each time. If I pump fast, that bump is easily overlooked though. But good point. Thanks man!

Supa sexy bro

Thanks.

This is amazing! It operates similar to my RAD-V1, but is so much simpler/cheaper. Do you think this could be done to a raider? Fantastic job!

It really does, that's why I mentioned it in the write-up!
Yes, I do agree, it's simpler to make... But there's a certain appeal of homemades that stock shells just don't have. You know? :)
And yes, this can definitely be done to a Raider. I succeeded in retrofitting a Rampage internals into a Raider shell, so I can confidently say that it's possible. Now set forth and make your own "auto-loading" Raider! hahahaha... Can't wait to see your results if you mod one like this.
  • 0
Damn you, Screw!

#15 Mully

Mully

    Member

  • Members
  • 342 posts

Posted 29 October 2012 - 02:16 PM

This is completely and totally amazing:)
Like seriously, this is like the radv1, just built into a Rampage shell.
Very impressed:)

Mully
  • 0
S.C.U.N.

#16 hamoidar

hamoidar

    Member

  • Members
  • 367 posts

Posted 29 October 2012 - 03:41 PM

It really does, that's why I mentioned it in the write-up!
Yes, I do agree, it's simpler to make... But there's a certain appeal of homemades that stock shells just don't have. You know?
And yes, this can definitely be done to a Raider. I succeeded in retrofitting a Rampage internals into a Raider shell, so I can confidently say that it's possible. Now set forth and make your own "auto-loading" Raider! hahahaha... Can't wait to see your results if you mod one like this.

Oh, whoops, I need to read things more thoroughly before posting. Thanks for the credit! I'm kind of thinking about making one now, of course, I should really finish my direct propulsion blaster first. Again, great job!

EDIT: just realized that this is my 300th post!!!!! :D

Edited by hamoidar, 29 October 2012 - 03:44 PM.

  • 0
NerfHaven > Your control panel > Profile > Change Signature > Inserts dumb sig > What! No pictures! > Inserts next best thing: http://nerfhaven.com...howuser=114052' class='bbc_url' title='External link' rel='nofollow external'>Best thing on Nerfhaven!

#17 zx532

zx532

    Member

  • Members
  • 216 posts

Posted 29 October 2012 - 04:09 PM

Couple things, first off, I like the internal pump, very nice
second, That is a genius lever trigger!

(in all, beautiful blaster)
  • 0
Progress: Just a long line of people saying "See? I told you it could be done"

#18 cheyner

cheyner

    Member

  • Members
  • 240 posts

Posted 29 October 2012 - 04:19 PM

You never cease to amaze pSyk.
I love the use of the lever trigger, I'm sure there is a very proud Kitty somewhere.

Edited by cheyner, 29 October 2012 - 04:19 PM.

  • 0

Beaver's post claiming Kane's post claiming Demon Lord's post is correct is correct is correct.


Canadian Nerfers-R.I.P.

#19 pop tart

pop tart

    Member

  • Members
  • 58 posts

Posted 29 October 2012 - 04:33 PM

This is so cool. I really like the look of the priming handle/pump grip extending past the front of the blaster.

Edited by pop tart, 29 October 2012 - 04:33 PM.

  • 0

#20 therealnerfjunkies

therealnerfjunkies

    Member

  • Members
  • 122 posts

Posted 29 October 2012 - 06:22 PM

I really like it pSyk. Since it extends, it would be cool for barrel taps. :) This would work with stefans right? Really cool.
  • 0
"You forgot the one rule of making a remake. Don't fuck with the original."

#21 pSyk

pSyk

    Member

  • Members
  • 76 posts

Posted 29 October 2012 - 06:50 PM

Mully: thank you.

zx532: all credits go to Taerkitty for that design!

cheyner: ever since I first applied the use of the lever trigger to one of my previous mods, it's always been a "go-to" mod for me when it comes to any air-tank application.

pop tart: So do I! And thanks.

I really like it pSyk. Since it extends, it would be cool for barrel taps. :) This would work with stefans right? Really cool.

Actually, having it fire off stefans was one of the things I had on the checklist when I was dreaming this concept up.
It works with stefans and stefan clips, however, you have to make sure that your stefan clip is made in a way that the stefans are loaded to the front half of the clip, not in any other position. Only in this way will you be able to pump the tank to higher pressures without double-feeding.
  • 0
Damn you, Screw!

#22 popatachi

popatachi

    Member

  • Members
  • 206 posts

Posted 29 October 2012 - 07:50 PM

Totally awesome Psyk! Great mod and tweak for this blaster!
  • 0

#23 pSyk

pSyk

    Member

  • Members
  • 76 posts

Posted 31 October 2012 - 10:44 PM

Totally awesome Psyk! Great mod and tweak for this blaster!


I know that the question you posed to me was not in this thread; however, I thought that everyone would benefit from this:
http://www.youtube.com/watch?v=ZjFuejz0Uzo
  • 0
Damn you, Screw!

#24 Chaos-blades

Chaos-blades

    Member

  • Members
  • 66 posts

Posted 01 November 2012 - 06:20 AM

Very nice, hadn't really thought about doing this but once I saw it (like many things) it made me wonder why I hadn't thought of it earlier.
  • 0
- "I'll have a Farmer's Union Iced Coffee thanks"
- "sorry we don't have Farmer's Union, we've got Oak if you like"
- "Looks like it'll be nothing for me then"

#25 Samz146

Samz146

    Member

  • Members
  • 27 posts

Posted 02 November 2012 - 12:34 AM

Very clean in modding and looks!
Not only have you made me want to madly buy a rampage, but also very jealous of that pinpoint.
yay USA T.T
  • 0


0 user(s) are reading this topic

0 members, 0 guests, 0 anonymous users