A while ago I made a clip-accepting breech for a Titan. I realise this type of blaster would be banned in the majority of warring communities, but hey, we're allowed to have a little fun from time to time so long as no one gets hurt!!
I won't go in to an in-depth guide, as the pic's are self-explanatory.
Tools:
Basic tool kit
Dremel/rotary tool
Butane soldering iron
Hot glue gun
Materials:
Titan
Recon barrel attachment
Raider shell and magwell
Replacement ball/sports pump
Vinyl Tubing
Aluminium sheeting
25mm conduit
20mm conduit
25mm pvc
PETG
Start with cutting a breech out of 20mm electrical conduit. Approximately 13cm long. The black e-taped end sits inside the air release post of the Titan. The red e-taped end sits inside the recon barrel adapter.

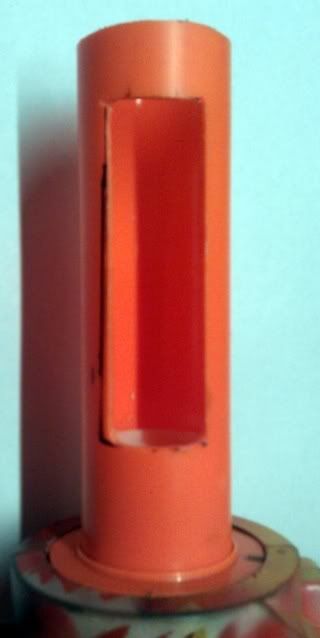
The rocket post - cut-down so that it doesn't protrude from the Raider Shell, and a slot cut for the clip to fit in to.
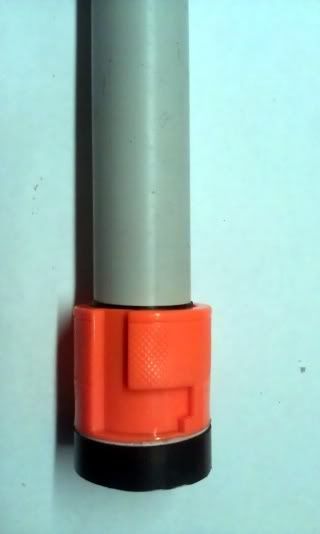
The Recon barrel attachment adapter with the 25mm conduit attached.
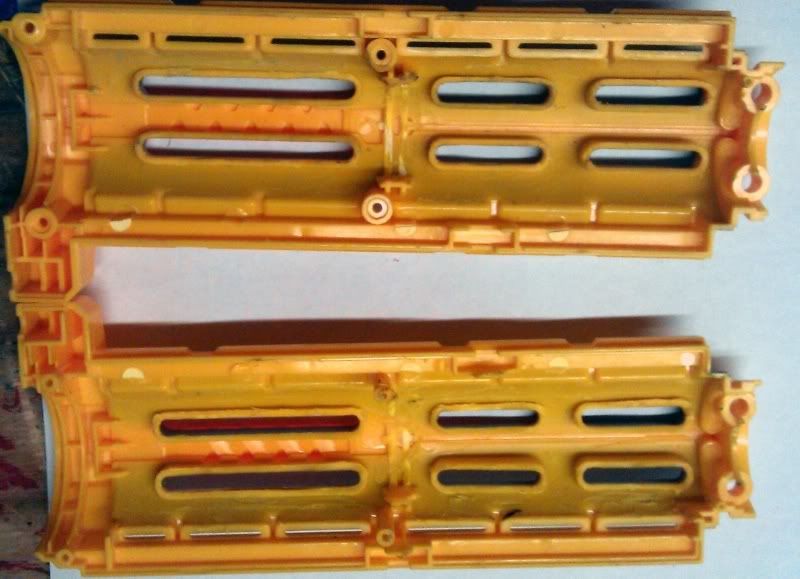
The inside of the Recon barrel extension. Remove most of the internal plastic to allow the 25mm conduit to fit.
Completed Raider middle section. Note the 25mm conduit spacer section that extends inside the Recon barrel extension. Essentially, this is an extension of the breech. The 20mm conduit/petg barrel runs inside of this, and the Recon barrel extension slides along it.

The Recon barrel extension. 20mm conduit barrel extends out the front, with faux suppressor. The other end houses the 2ft long piece of petg.

I used the barrel extension adapter mounted to the Raider - this makes the barrel completely secure, unlike a couple of other breeches for the Titan that I've made in the past. You twist the Recon barrel extension, and then slide it forwards and then back in to position to chamber the next round.
Unit Disassembled:
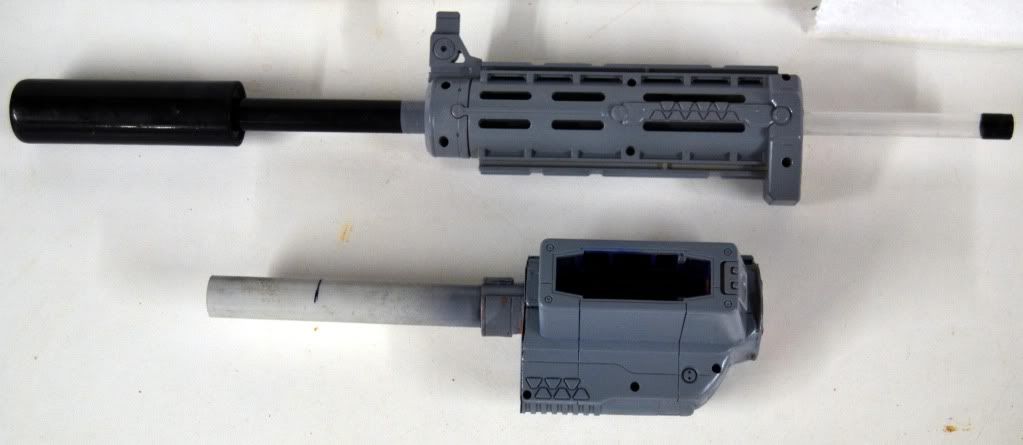
The pic's should be pretty self-explanatory.
But, just to add a bit more info:
Start by cutting the Raider shell as seen in the pic. Remove any internal plastic that may be in the way. The Rocket post needs to fit snugly inside the Raider shell.
Cut the Rocket post so that the end is almost flush with the forward end of the Raider shell. Cut the slot to allow the clip to enter in to the breech. Align the clip slot with the Raider magwell, and hot glue the Rocket post to the Raider shell.
Cut the breech out of 20mm conduit. Cut the end off the Titan air-release, and dremel it out to allow the 20mm breech to fit inside. If you make it too big, you'll need to add a bit of e-tape, as seen in the pic.
On the other end the breech, add a little bit of e-tape so that it is a snug fit inside some 25mm conduit. Cut a small space of 25mm conduit, approx 20cm long. Glue this on to the forward end of the breech.
Cut the Recon barrel attachment adapter as shown in the pic. Glue this to a spacer made out of 25mm pvc, approx 10mm long.
So, what you have so far is:
20mm breech. The front end of the breech is nested and glued to a 20cm long piece of 25mm conduit. At the same end, slide the recon barrel adapter and 25mm pvc spacer in to position, and glue to the 25mm conduit. Then, glue the pvc to the front of the Rocket post. The rear end of the breech should be flush with the end of the thread of the Rocket post.
Obviously, you'll need to do some fairly accurate measuring for this to all align properly.
Lastly - gut the internals of the Recon barrel extension, to allow the 25mm conduit to fit nicely. Widen the front of the Recon barrel, so that 20mm conduit fits snugly.
Make your barrel out of a 2ft long piece of petg, and nest that inside some 20mm conduit. I used a piece approx 45cm long. You'll need to trim the 20mm conduit length so that the barrel extension connects properly, and it doesn't interfere with the breech.
Once everything has been test-fitted, glue the barrel to the barrel extension - and you're essentially finished.
All that's left is to cover the holes at the front and rear of the Raider shell. Also, you can make the faux suppressor if you wish. I just used a piece of 25mm pvc.
Apart from the breech, I did the usual mod's to the Titan.
Replaced the stock pump with an aftermarket sports pump located where the Hornet would usually attach - using aluminium sheeting and some machine screws to secure it in place.
Replaced the faux gauge with an actual pressure gauge.
Cosmetic modifications to the shell, including a nerf tac-rail from the gutted Raider shell.
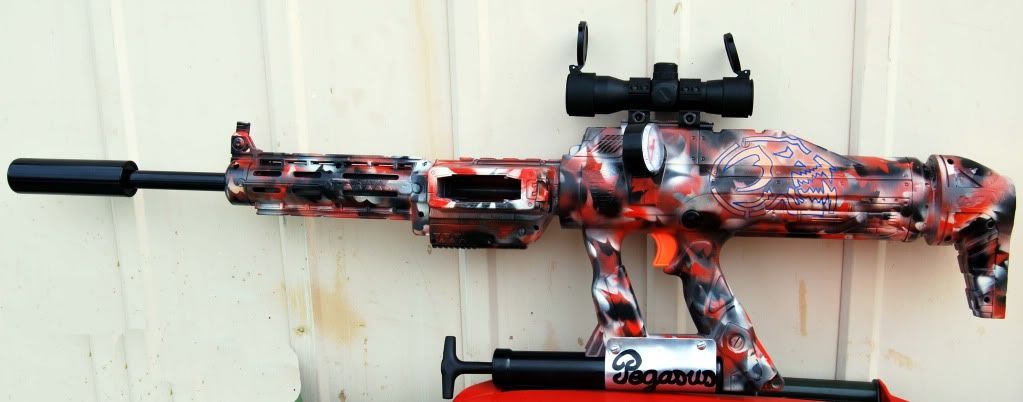
And this is the finished product with some paint.
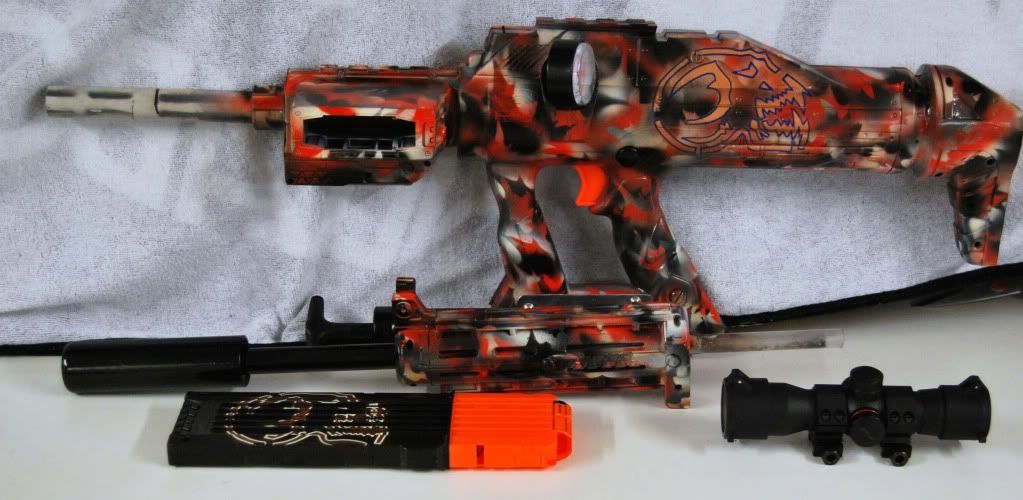
Kit broken down:
Unit fully assembled:
Ranges - well, quite phenomenal really, and pretty standard for a plugged Titan.
Using custom stinger darts, weighted to around 2.4 grams, flat range of approximately 250ft, and angled range of approx 450ft.
Cheers,


