Jump to content


Photo

Retaliator/Recon Pump Grip (write up included)

Two different pump grip styles

12 replies to this topic

#1 Blood Angel

Blood Angel

    Member

  • Members
  • 67 posts

Posted 03 July 2012 - 01:45 AM

(WARNING PICTURE WRITE UP)

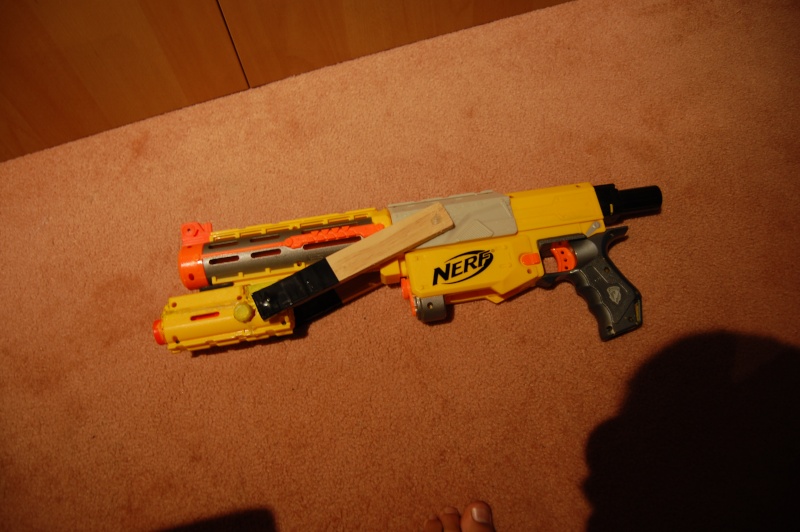
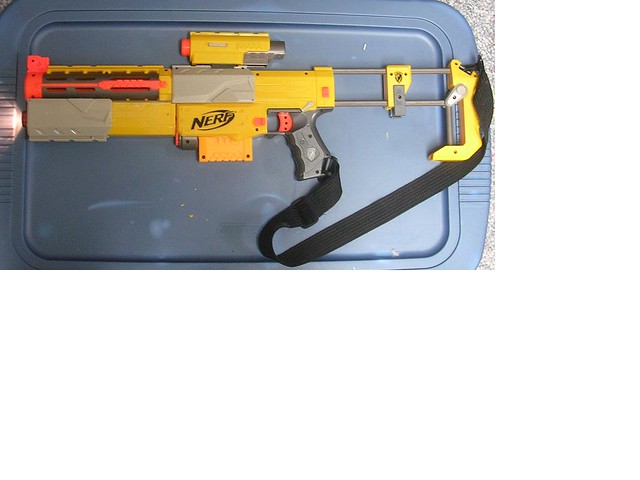
In preparation for Bay Area Foam Modding - War #3, I decided to go with a the sonic series Recon Pump grip and Recon pistol (sidearm).
I would have put up a write up for it, but I made SOOOOO many mistakes that it would have been a waste of your time and mine.
But here is how it turned out:

Posted Image

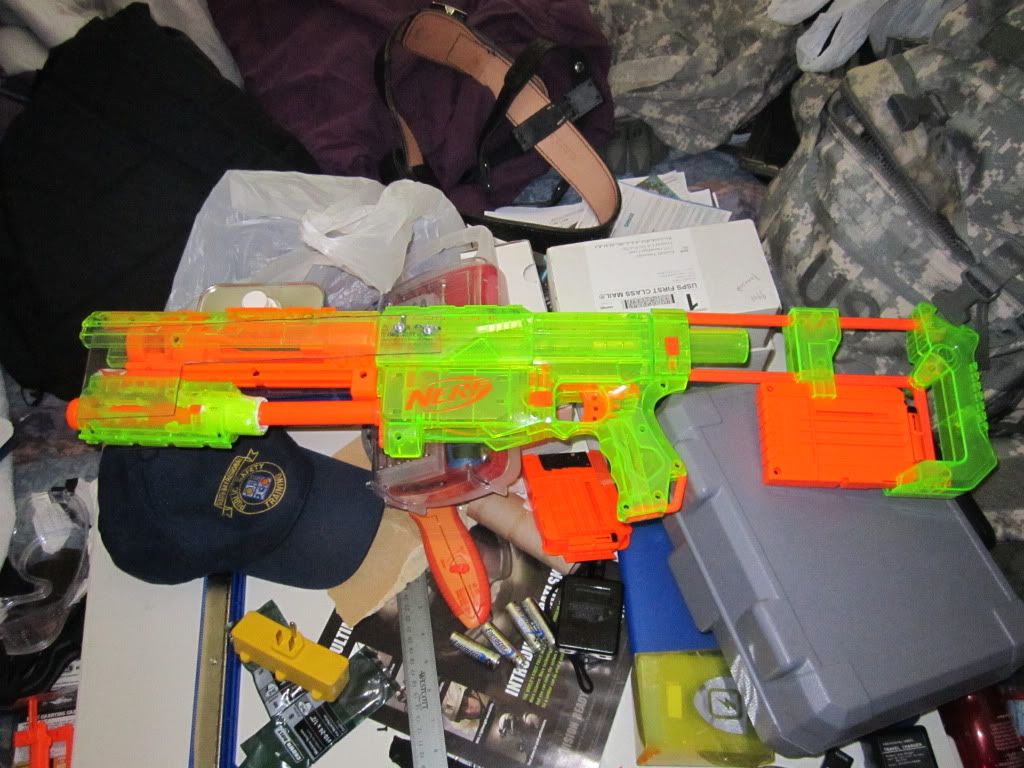
Then came the ELITE series blasters (drool) they were too good to pass up. I bought two: 1) turn into a pump grip carbine 2) pistol (sidearm).

My second pump grip mod turned out very nice. It is much lighter, sleeker, and looks awesome.

I made sure to takes note, so I could share the design with you.

Materials:

Nerf base-
(1) Front barrel from Nerf Longstrike
(1) Multi-Position Stock from Nerf Raider (optional)
(1) *Top Scope from Super Soaker Shotblast (optional - you may use whatever sight you want)
(1) *Vertical Front Grip from Nerf Elite series Retaliator (optional - you may use whatever rail accessory
you want to be your priming proxy)

Mod base-
(8) 3/8 x .171 x 1/4" Nylon Spacer - OSH ~ $0.69 each
(5) #8-32 x 2-1/2" Machine Screw Round Head Combo - OSH/Home Depot ~ $1.09-$1.19 per bag of 4 (comes with nuts)
(1) #8-32 Wing Nut - OSH ~ $1.09 per bag of 4 (optional - you can use the standard nut that comes in the bag)
(1) 12" x 24" x .093 Lexan Polycarbonate Sheet - Home Depot ~ $12.98
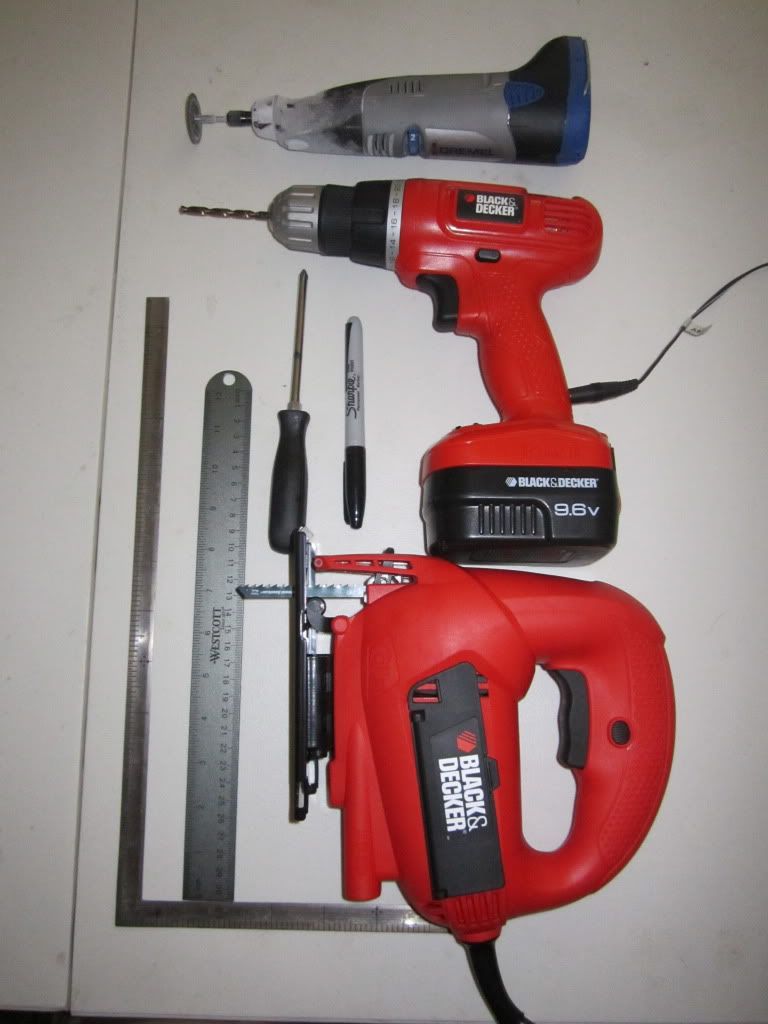
Tools:

Dremel with attached cutting wheel
Jigsaw with attached cutting blade
Drill with 3/16 drill bit
#8-32 sized screw driver
Sharpie marker
Ruler(s)
Posted Image

Optional tools include Super Glue/Loctite or glue of choice to seal nuts into place on screw.

Safety:
Eye goggles for dremel and jigsaw
Face mask for dremel

STEP 1) You need to take the front barrel of the Nerf Longstrike and get rid of the blocks that prevent rail
accessories from sliding all the way back to the base of the barrel. You can do this using the dremel with
attached cutting wheel.

Posted Image
Posted Image

Once the blocks have been removed the vertical grip from the Nerf Retaliator should be able to slide all the
way back like so:
Posted Image

Attach the barrel and vertical grip and we shall move on,

STEP 2) This is the hardest part. You need to cut the arms to connect the vertical grip to the priming handle.
Lucky for you I already did some measurements and made a nicely labeled picture for you. The overall measurement
per piece is 12.5" x 4".

Posted Image

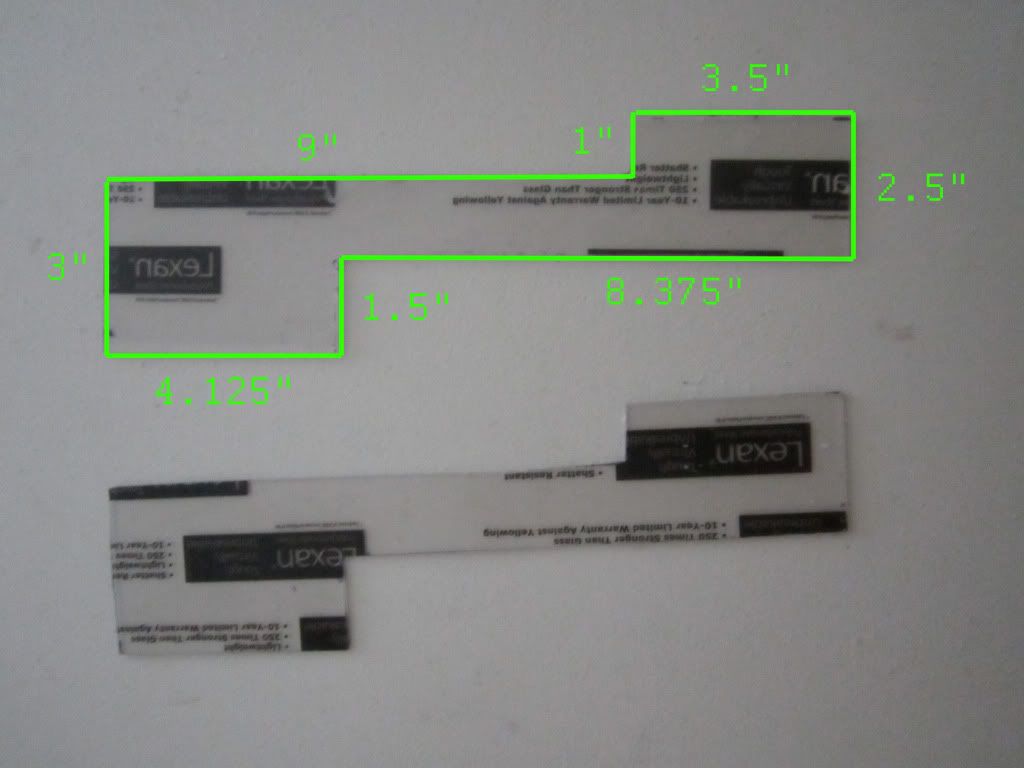
Once you have two of these the hard part is over.

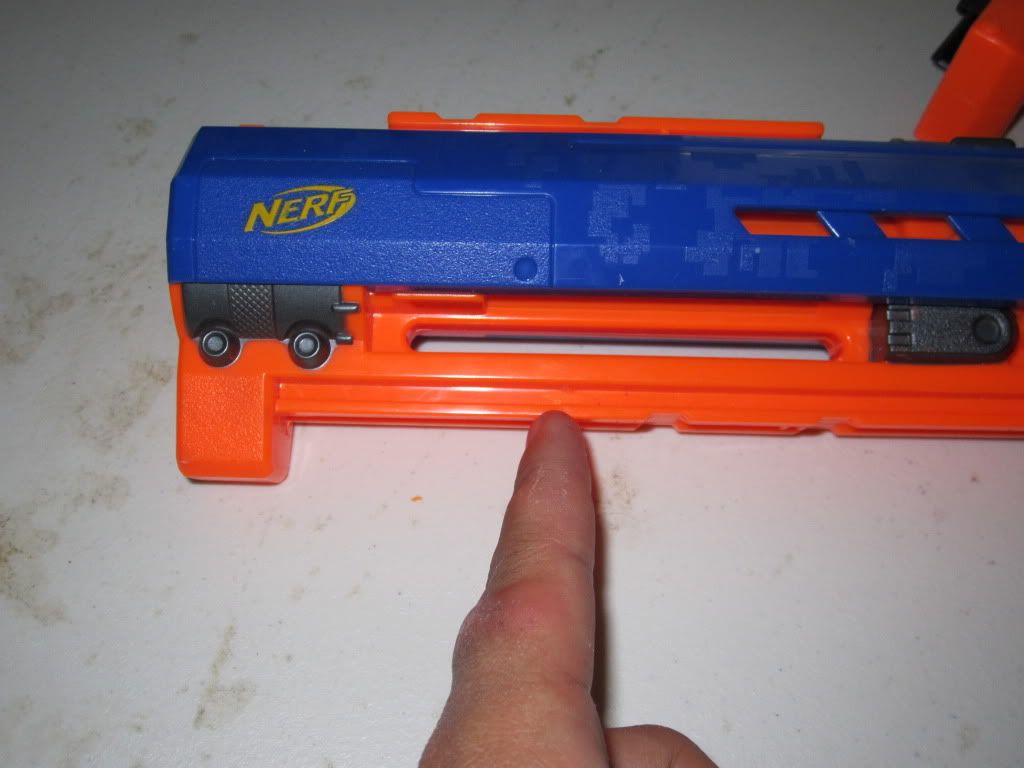
STEP 3) This is basically drilling holes to match your priming arms from the vertical grip to your blaster's
priming handle. You will simply remove the screws from out of the vertical grip and Nerf Longshot top sight
and drill holes straight through using the 3/16 drill bit and drill.

Posted Image

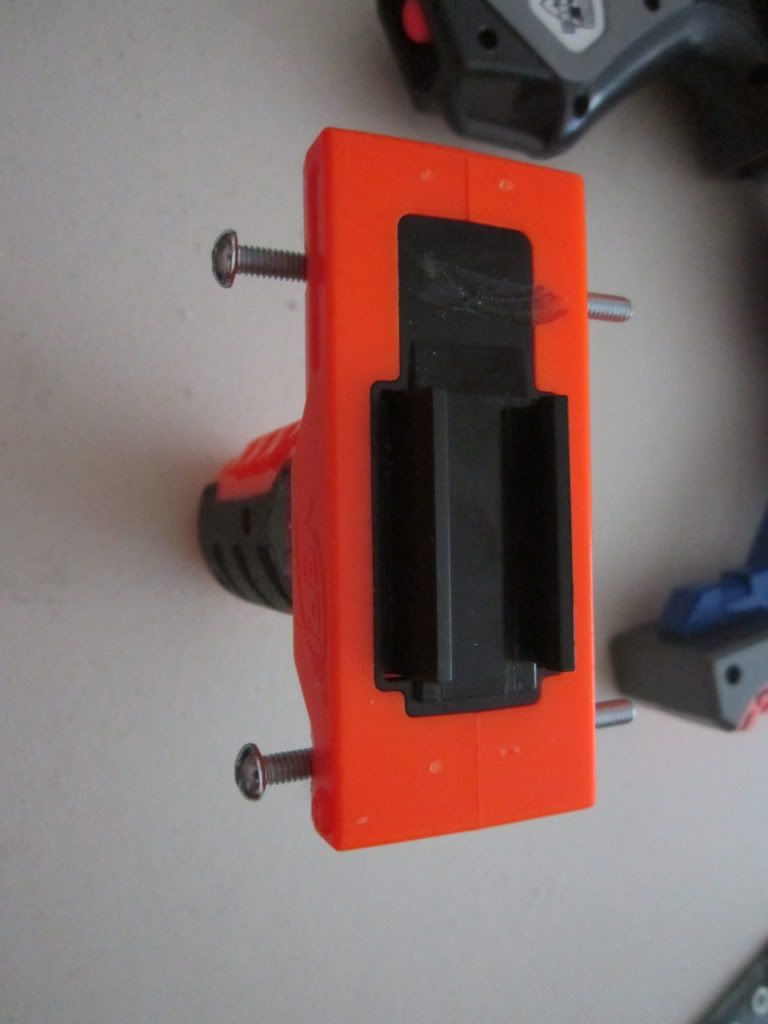
Match up the Polycarbonate sheet up with the drilled holes and then drill holes in the polycarbonate. I would
suggest marking the polycarbonate, first using a sharpie marker.

Then drill a hole through the center point of the rail, just in front of the Nerf Longshot top sight and again
create matching holes in the polycarbonate.

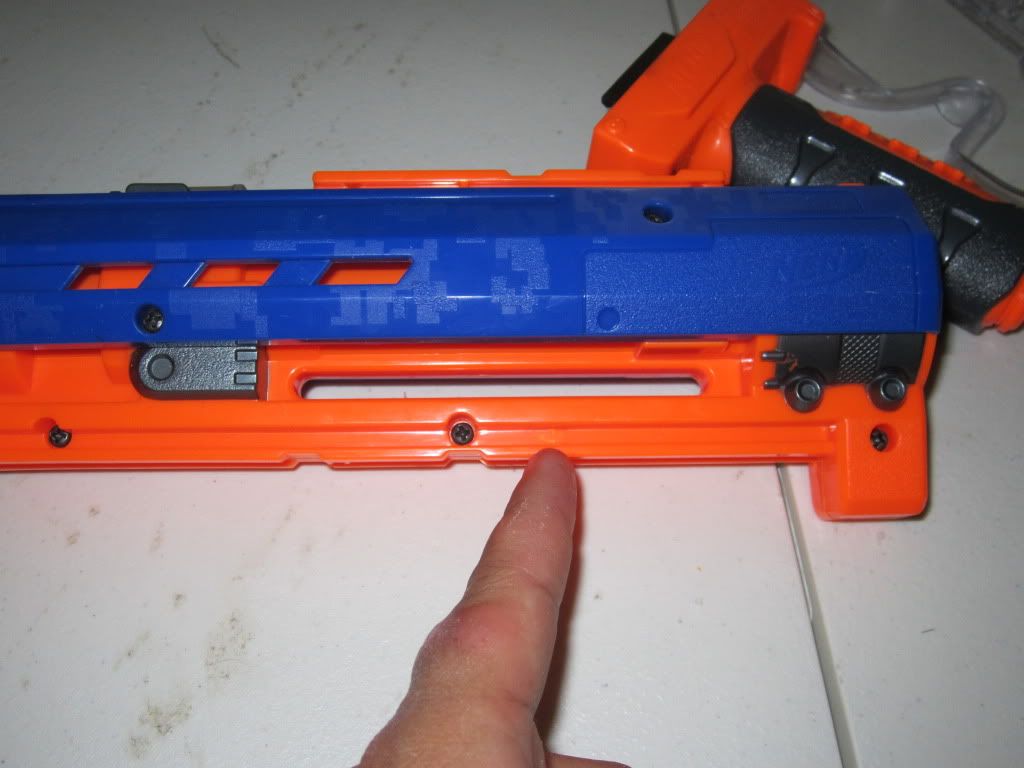
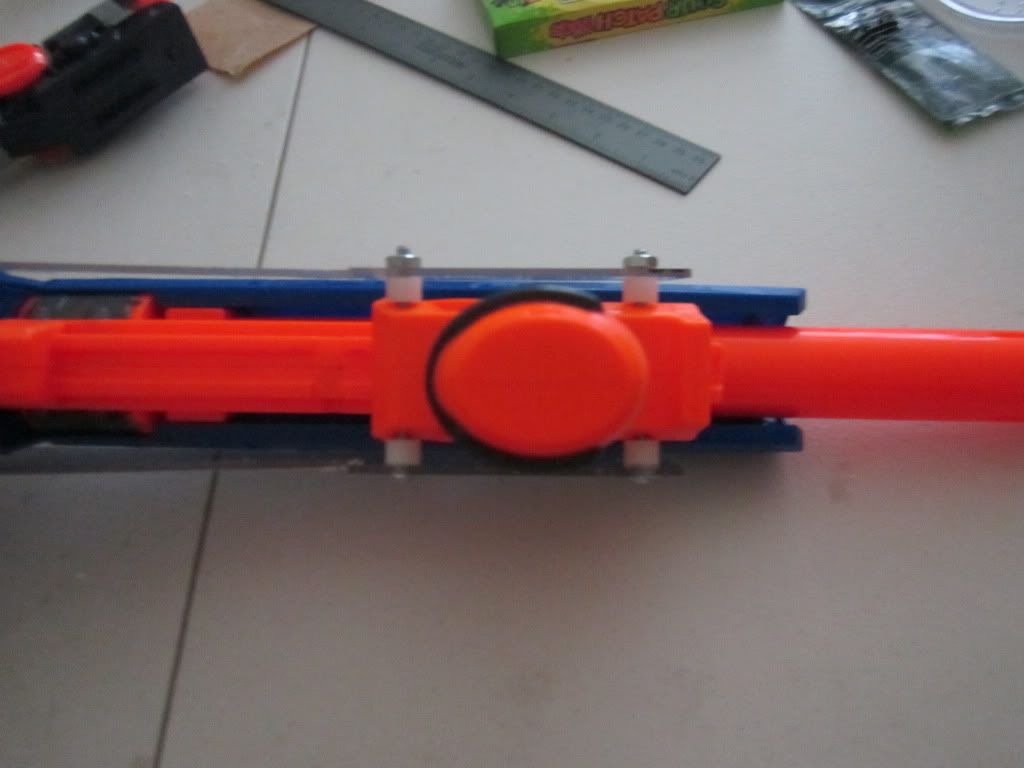
Once the holes are drilled, put a machine screw through and sandwich the blaster parts with 1/4" nylon spacers.
Use the nuts provided in the bag to enclose and tighten the frame. Should look like this:
Posted Image

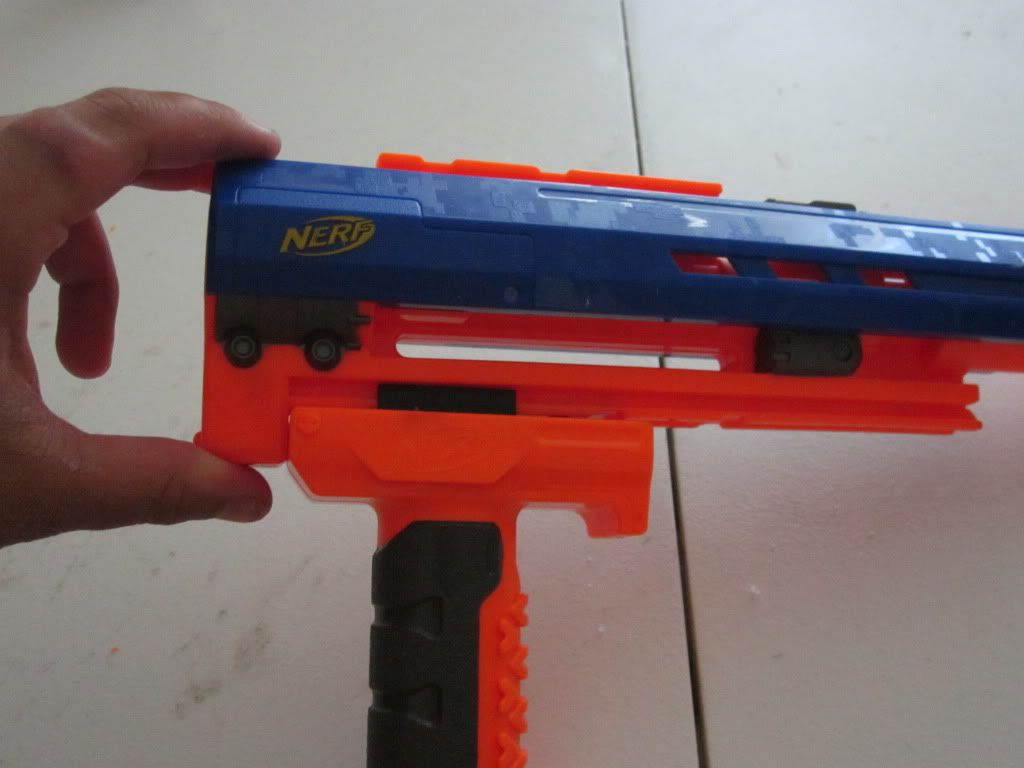
All the pieces in place:
Posted Image

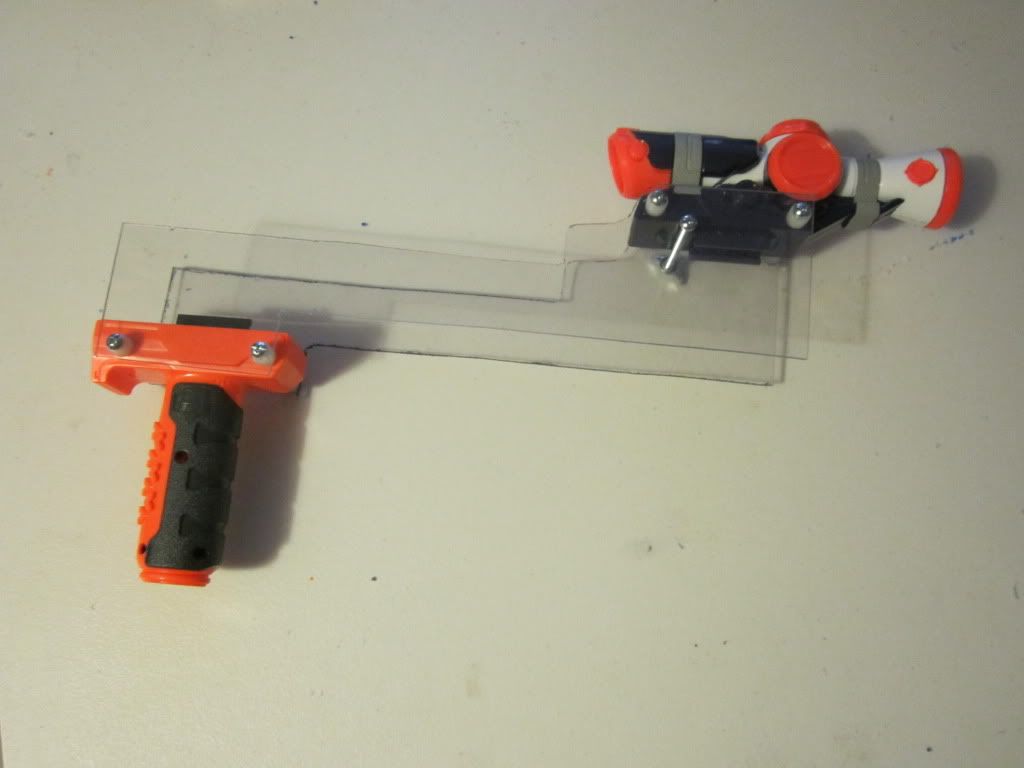
And with the blaster it should look like this:
Posted Image
Posted Image
Posted Image

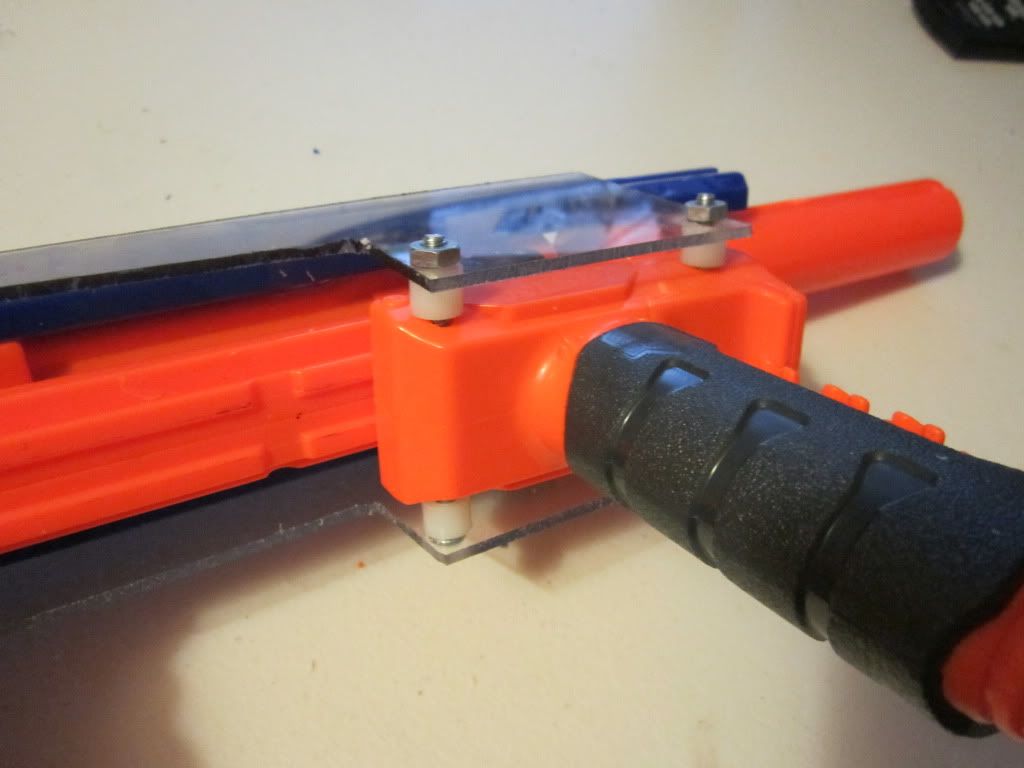
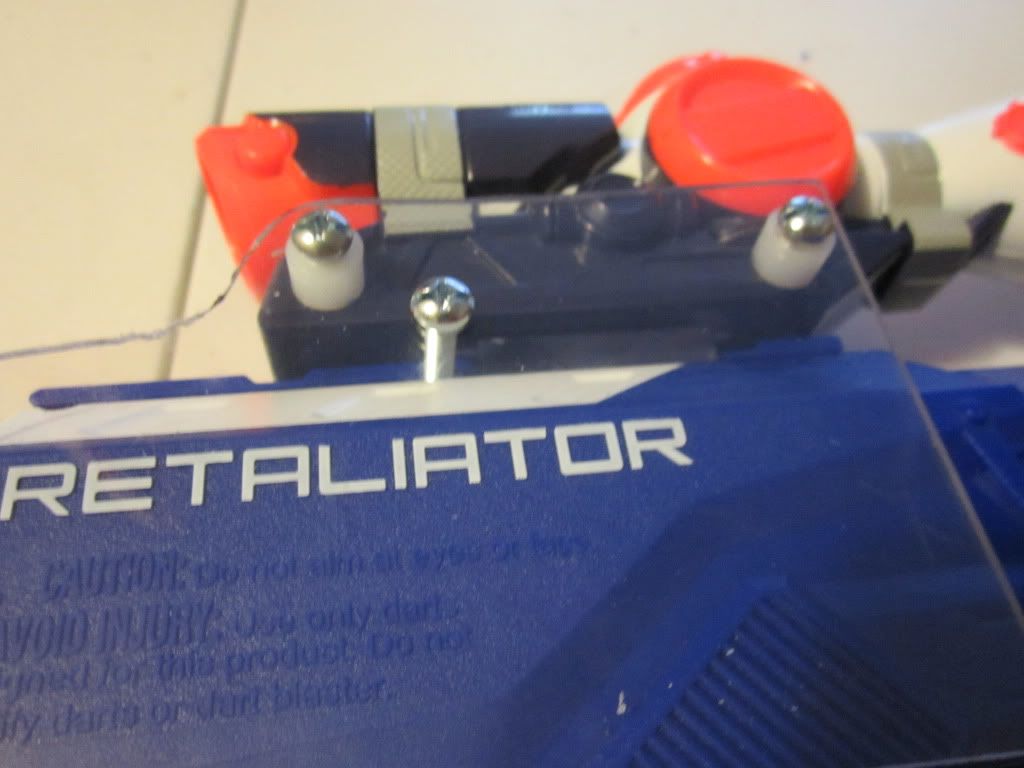
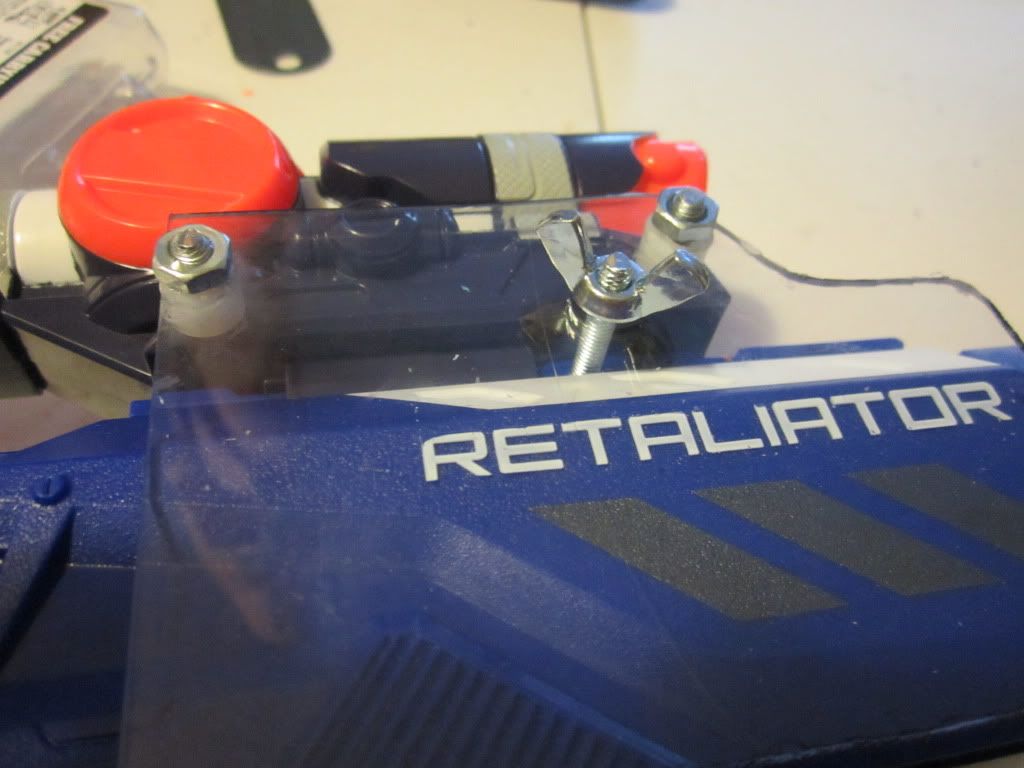
I used a wing nut to close off the priming handle, just in case I need to disassemble it quickly.
Also, if you look closely I used the dremel to round out some parts of the priming arms.

------------------------------

And that's pretty much all there is to it. Its a pretty simple mod that goes a long way. When it is
finished it looks something like this:

Posted Image
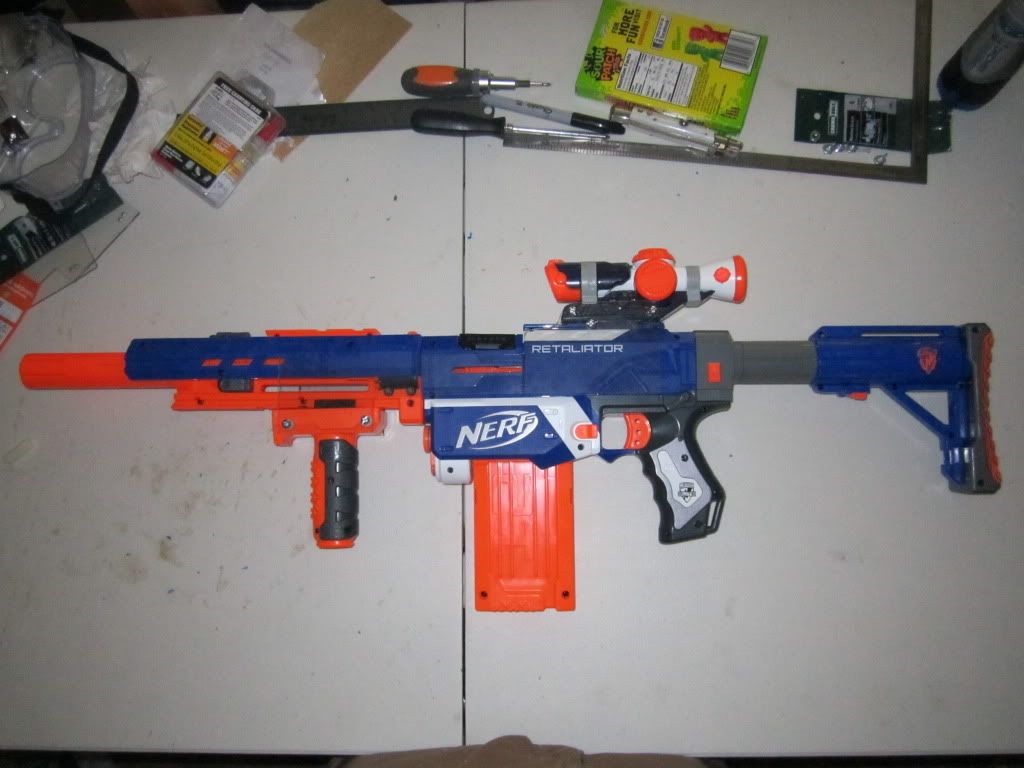
Retaliator pump grip open

Posted Image
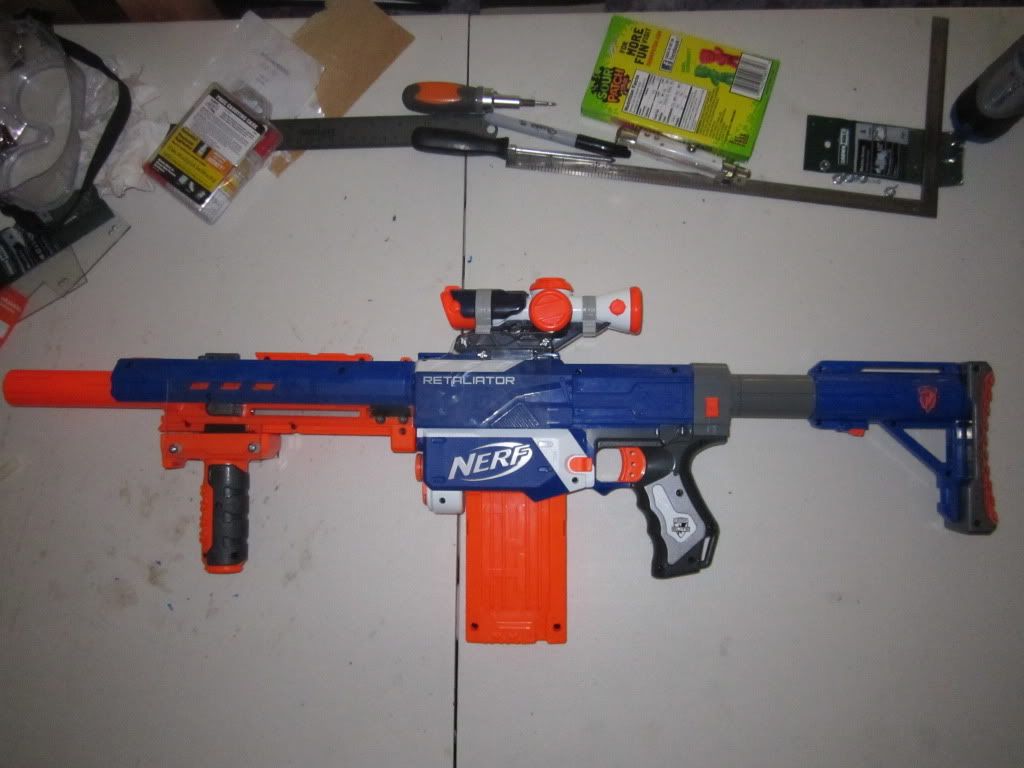
Retaliator pump grip closed

I know its hard to see from the picture, but look hard and you can see the polycarbonate arms. I guess the
point of the mod is that you want to keep it as low profile as possible. So in a way, its good that the mod is
difficult to see.

Edited by Blood Angel, 09 August 2012 - 01:24 PM.

  • 0

#2 Seprest

Seprest

    Member

  • Members
  • 41 posts

Posted 03 July 2012 - 02:46 AM

Very nice! I'll definitely be doing this as a holdover until an Elite Alpha Trooper comes out! Is drilling holes through the scope necessary? It looks to me like the arms are already attached directly to the priming handle through the tactical rail. If this is for stability, would it be possible to just drill a second hole through the tactical rail instead of messing with sites? Note I don't actually have my hands on a blaster yet.


Good job on finding a meaningful use for the forward grip!


  • 0
4 - HvZ Games Played

22- Mods completed

#3 Briguy52

Briguy52

    Member

  • Members
  • 22 posts

Posted 03 July 2012 - 10:09 AM

If we were to add additional washers/spacers between the polycarbonate 'arms' and the actual blaster shell, would this accommodate the Retaliator/Recon faux barrel attachment? I would assume that the N-Strike rail on the bottom of both barrels (ie Longstrike and Recon) are the same length, but I don't have either at the moment to double check.
  • 0
If you had the whole world to explore, why would you stay in your nest?

#4 Blood Angel

Blood Angel

    Member

  • Members
  • 67 posts

Posted 03 July 2012 - 10:22 AM

Very nice! I'll definitely be doing this as a holdover until an Elite Alpha Trooper comes out! Is drilling holes through the scope necessary? It looks to me like the arms are already attached directly to the priming handle through the tactical rail. If this is for stability, would it be possible to just drill a second hole through the tactical rail instead of messing with sites? Note I don't actually have my hands on a blaster yet.


Good job on finding a meaningful use for the forward grip!


Yes and no. You can get by with just the one hole through the priming handle or drill a second hole as you suggested. I drilled through the sight for two reasons.

1) I only wanted a single screw (on wing nut) keeping the pump arms in place for quick disassemble. (In case of jams or HvZ weapon switch)
2) The stability of the polycarb flaps comes from the 4 nylon spacers. It holds the arms right at the correct 2.25" space apart you need it to be.

Other than those reasons, I just like the look of it. My first design was to have a screw that pushes the sight backwards to prime the blasters and a screw behind the priming sight rail to close the action. It ended up being a failed design and I decided to do it this way.

If you are going to just have one or two holes through the priming handle, I would suggest finding spacers that will keep the polycarb arms at the 2.25" space apart that the need to be. You can also use a few nuts to keep them in the proper spacing, but you risk a very slow disassemble either way.
  • 0

#5 Blood Angel

Blood Angel

    Member

  • Members
  • 67 posts

Posted 03 July 2012 - 10:42 AM

If we were to add additional washers/spacers between the polycarbonate 'arms' and the actual blaster shell, would this accommodate the Retaliator/Recon faux barrel attachment? I would assume that the N-Strike rail on the bottom of both barrels (ie Longstrike and Recon) are the same length, but I don't have either at the moment to double check.


They are not the same length. The longstrike barrel rail is a good 1" longer than the recon barrel rail. You can use the recon barrel, but a small, teenie, tiny part of the rail guild catch will hang just off the rail. It will stick out just ever so slightly poking at your OCD.

Like these other models:
Posted Image
Posted Image
You can see the it s sticking just off the rail. It also makes the front part jet out past the muzzle (which I also dislike).

If you are OK with that then, by all means go ahead and use the recon/retaliator barrel. I just happened to have extra stuff laying around. I wanted a carbine type look for my recon. FYI the NERF Retaliator has SPIRAL porting inside its faux barrel.
  • 0

#6 zx532

zx532

    Member

  • Members
  • 216 posts

Posted 03 July 2012 - 01:43 PM

If you want to use the recon barrel without it sticking out like that. All you have to do is cut off the back part of the flashlight attachment (the silvery grey part)
  • 0
Progress: Just a long line of people saying "See? I told you it could be done"

#7 proplus

proplus

    Member

  • Members
  • 85 posts

Posted 06 July 2012 - 12:27 PM

very clean, is the guide sturdy?
It looks like the tac rails create alot of friction when the grip is bent at an angle.
  • 0
"the peinus itself is a handle"

- Kane the medeocre

#8 Seprest

Seprest

    Member

  • Members
  • 41 posts

Posted 06 July 2012 - 10:26 PM

 I didn't see it mentioned, but I know I will be taking the front barrel apart so I can remove the nub and spring that normally keep attachments in place, so that there is less resistance when priming. 

Edited by Seprest, 06 July 2012 - 10:27 PM.

  • 0
4 - HvZ Games Played

22- Mods completed

#9 Y-Brik

Y-Brik

    Member

  • Members
  • 199 posts

Posted 07 July 2012 - 12:33 PM

If you have a spare Recon shell (and who doesn't with the PTs breaking all the time), this method works out well. Use coathanger wire to link the slides, and a tac rail bracket to affix the pump to the barrel
Posted Image
More pix here
  • 0

As I said I have not not alot of testes yet but I will be once I finish the mod.

Why I am boycotting Hasbro

#10 Blood Angel

Blood Angel

    Member

  • Members
  • 67 posts

Posted 08 July 2012 - 05:19 PM

very clean, is the guide sturdy?
It looks like the tac rails create alot of friction when the grip is bent at an angle.


The vertical handle slides smoothly down the rails. The whole action in general is very clean.
There is not a lot of friction, but if you are super worried about that, you can always grind
down the rails a little using a dremel or add a lubricant to the rails where the vertical handle
will slide up and down.

But I personally dont think there is anywhere near a need to do so.
  • 0

#11 Blood Angel

Blood Angel

    Member

  • Members
  • 67 posts

Posted 08 July 2012 - 05:22 PM

If you have a spare Recon shell (and who doesn't with the PTs breaking all the time), this method works out well. Use coathanger wire to link the slides, and a tac rail bracket to affix the pump to the barrel
Posted Image
More pix here


That is awesome. I like how compact it still is, and how it has the light and red dot. It makes the alpha troop look kind of useless at that point.
  • 0

#12 Blood Angel

Blood Angel

    Member

  • Members
  • 67 posts

Posted 13 July 2012 - 01:25 PM

 I didn't see it mentioned, but I know I will be taking the front barrel apart so I can remove the nub and spring that normally keep attachments in place, so that there is less resistance when priming. 


It wasn't mentioned, if you look closely at my photos I cut the nub off the foregrip instead of removing the nub and spring inside the barrel.

I did this for two reasons.

1) Unscrewing and screwing back together the barrel takes longer.
2) The nub on the foregrip gets caught on the front lip of the rail when putting it on initially.
  • 0

#13 Y-Brik

Y-Brik

    Member

  • Members
  • 199 posts

Posted 23 July 2012 - 11:44 PM

That is awesome. I like how compact it still is, and how it has the light and red dot. It makes the alpha troop look kind of useless at that point.

Close, but there's also something to be said for original design. Jams did occur, I ended up selling this and getting a Raider when I realized that's what I was basically building (The AT wasn't out yet, and quite frankly I hate the ergonomics of it)

Perfect? No. Useful and fun? Definitely.
  • 0

As I said I have not not alot of testes yet but I will be once I finish the mod.

Why I am boycotting Hasbro


0 user(s) are reading this topic

0 members, 0 guests, 0 anonymous users