Jump to content


Photo

Grease gun homemade

easy homemade using a grease gun as the powerplant

12 replies to this topic

#1 zipx

zipx

    Member

  • Members
  • 30 posts

Posted 03 June 2012 - 01:34 AM

Lurk status = off

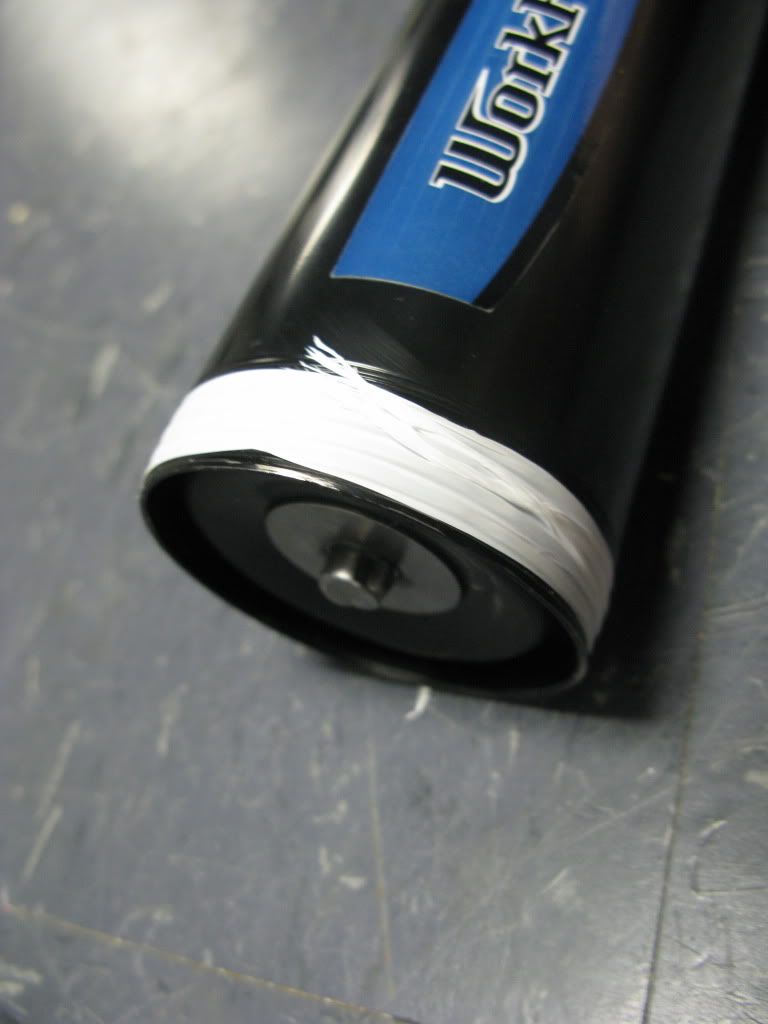
This is a write-up for a modification to turn a spring powered workforce grease gun into a modular powered homemade nerf gun. The grease gun is a metal plunger system with a spring inside and a perfect seal that is used to push grease out a nozzle. The plunger rod is released by pushing the tab on the read of the grease gun. The grease gun costs less than $20 at home depot (all the materials are from here, no specialty materials required) and is hilariously durable, a feature that I definitely need.

Here are most of the materials, give or take a few
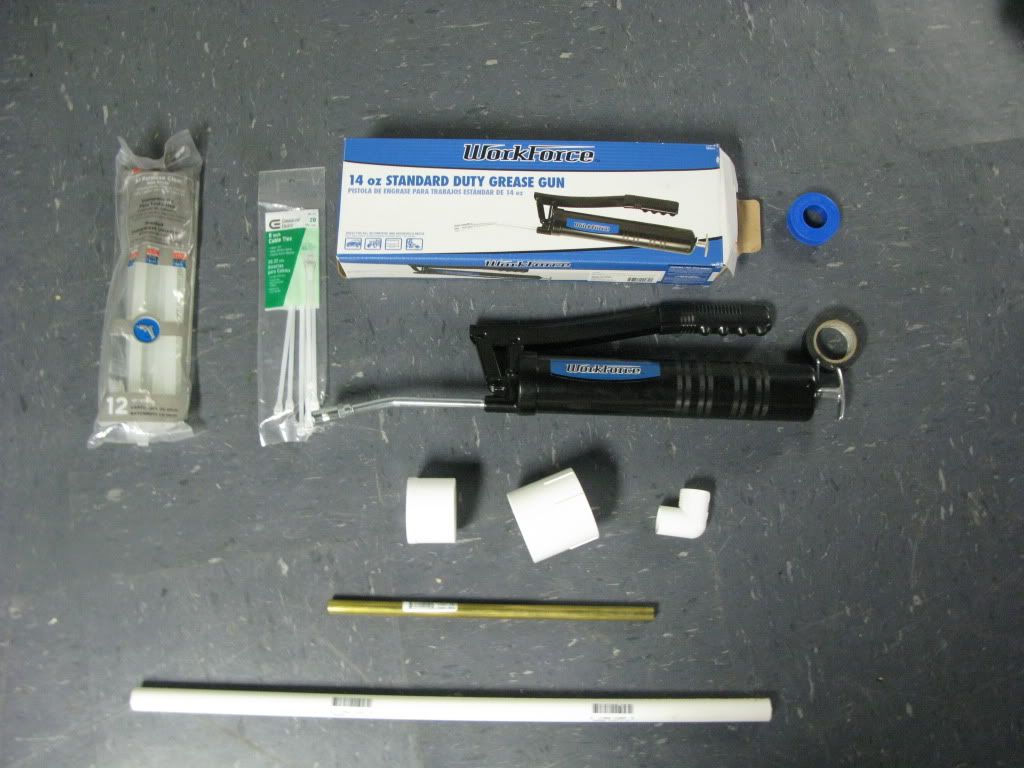
Posted Image
Materials:
Workforce 14oz standard duty grease gun
Teflon tape
Hot glue
Half threaded half unthreaded 2in coupler
Barrel of choice

And either
2in plug
1/2in elbow
Epoxy putty

Or
2in to 1in threaded reducer
2in coupler
Electrical tape
Nail or bolt over 1.5 in

Stage 1: Prepare the power plant
This step will be preparing the grease gun to become a powerful nerf powerplant.
First, unscrew the front part of the grease gun from the body.
Posted Image
Also, this is un-needed in this project, but it comes with a free valve you can use for other things!
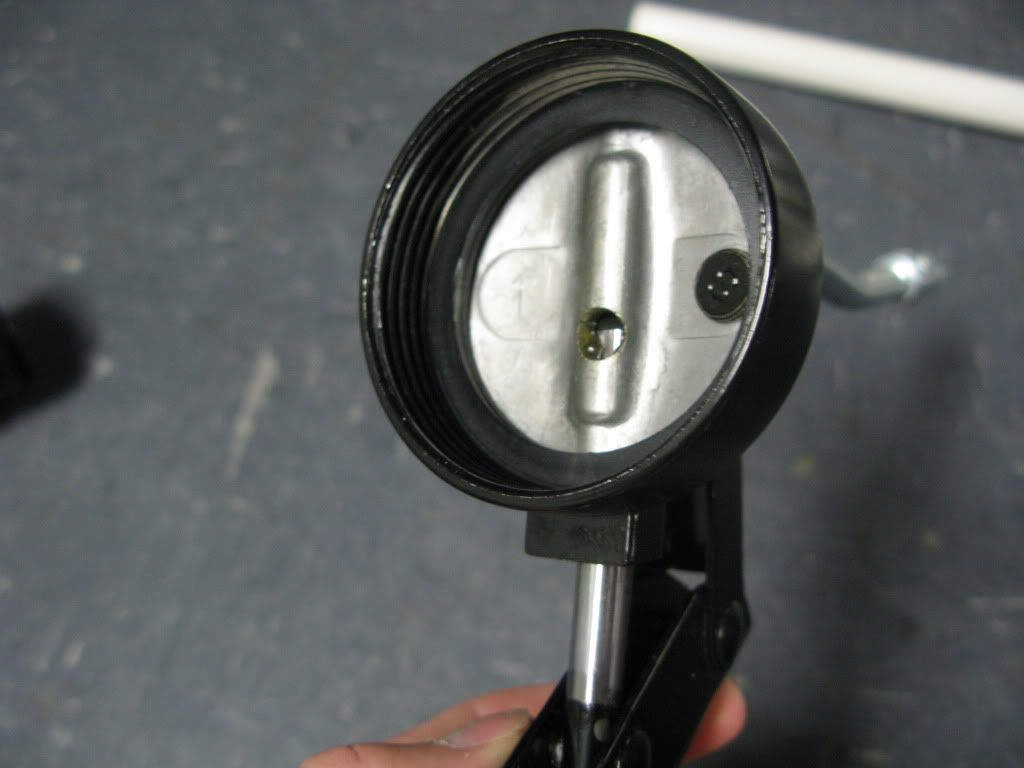
Posted Image
Second, the grease gun forms a very significant vacuum behind the plunger when it is fired, so we need to create a pathway to let the air flow in behind the plunger rod when the blaster is fired.
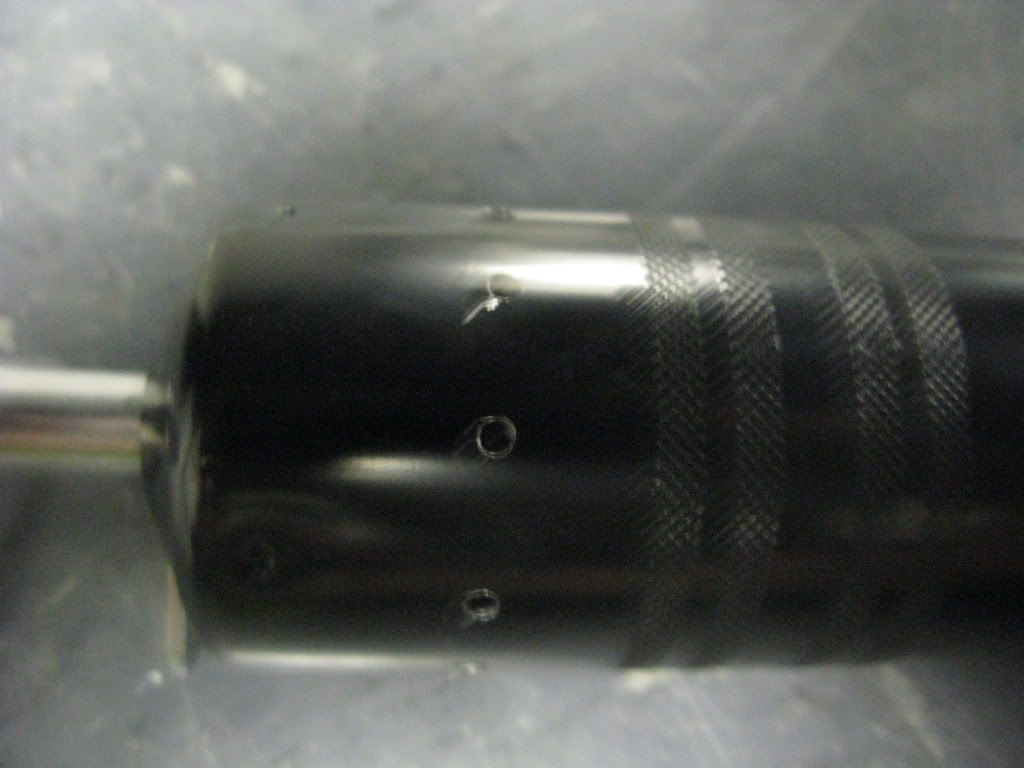
Posted Image
Drilling some holes in the rear of the blaster accomplishes this. I just took a smaller drill bit and drilled a ring of holes 1.5in away from the back end all around the blaster. The bigger and more holes there are the better the performance, but the weaker the structural integrity, so use you judgment here.

Stage 2: Connecting power plant and barrel

Option A:

Connect the 2in coupler to the threaded part of the grease gun. They have the same threads, how convenient…
Posted Image

Make a mark where the edge of the grease gun goes into the coupler, then draw a rectangle approximately the width of the 1/2in elbow from the mark to the edge of the unthreaded end.
Posted Image

Cut out the rectangle.
Posted Image

Insert the plug into the coupler and test the fit of the elbow.
Posted Image
Make a mark approximately where the plug would need to be cut to fit the elbow.

Cut out the marked section.
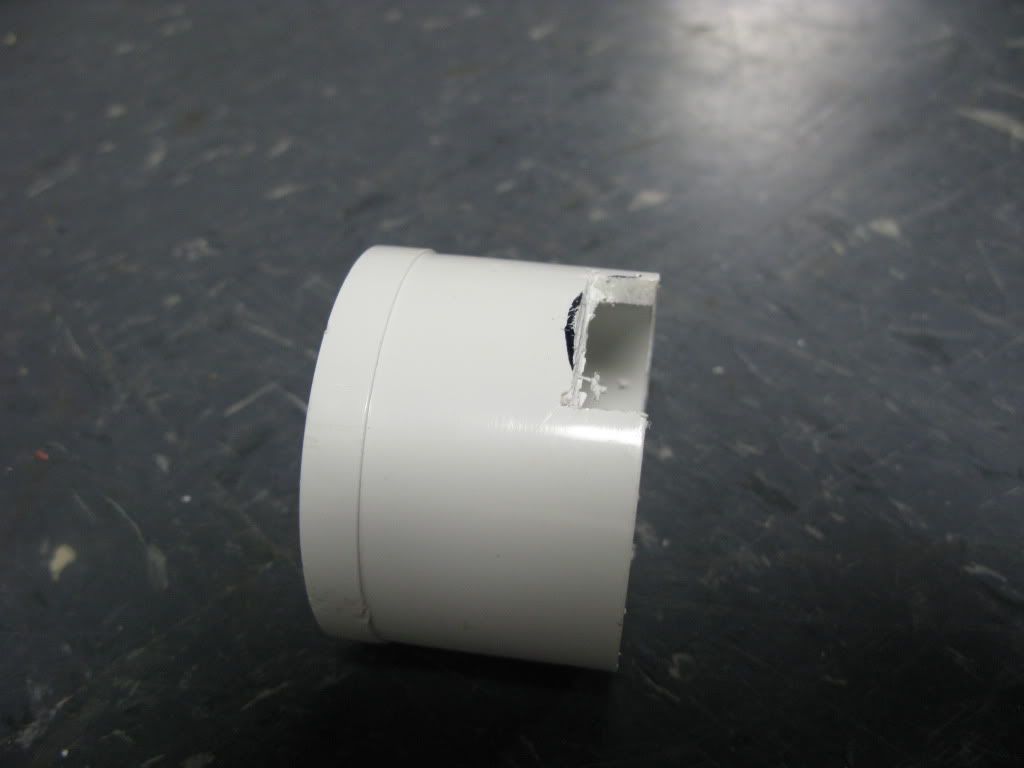
Posted Image

Make sure that everything fits.
Posted Image

At this point you are going to want to put a barrel in the elbow and connect the unglued assembly to the grease gun.
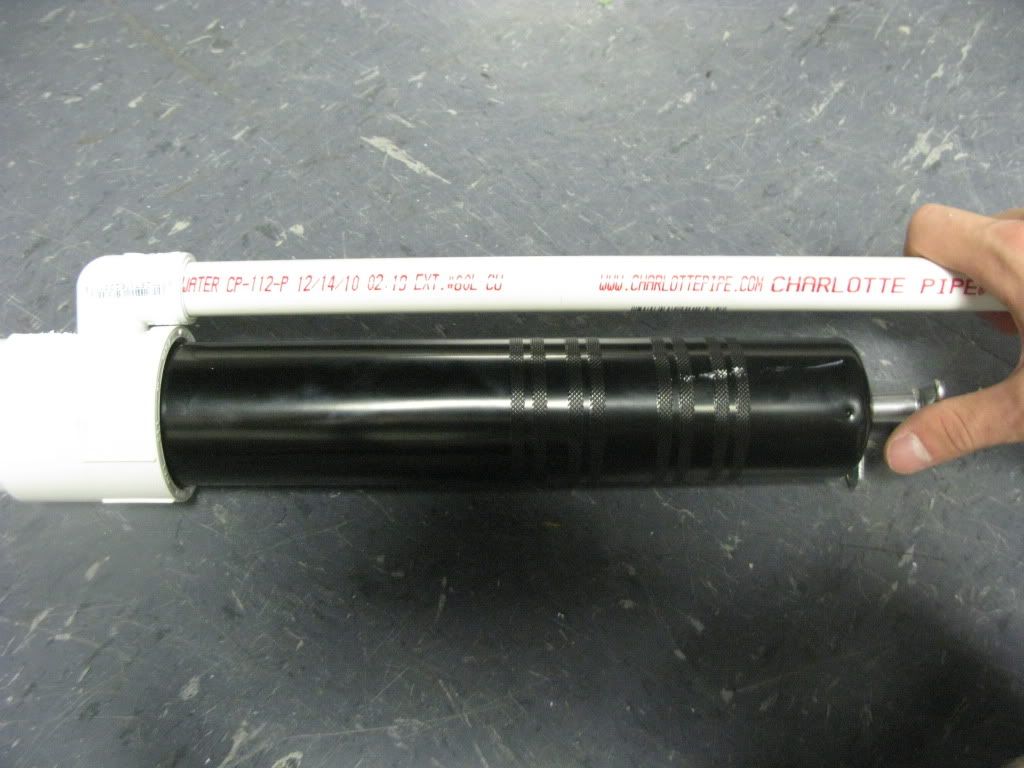
Posted Image
Align and straighten the barrel to where you want it to be in the end blaster.


Use a hot glue gun to spot glue the elbow in place to the coupler (only glue the elbow to the coupler).
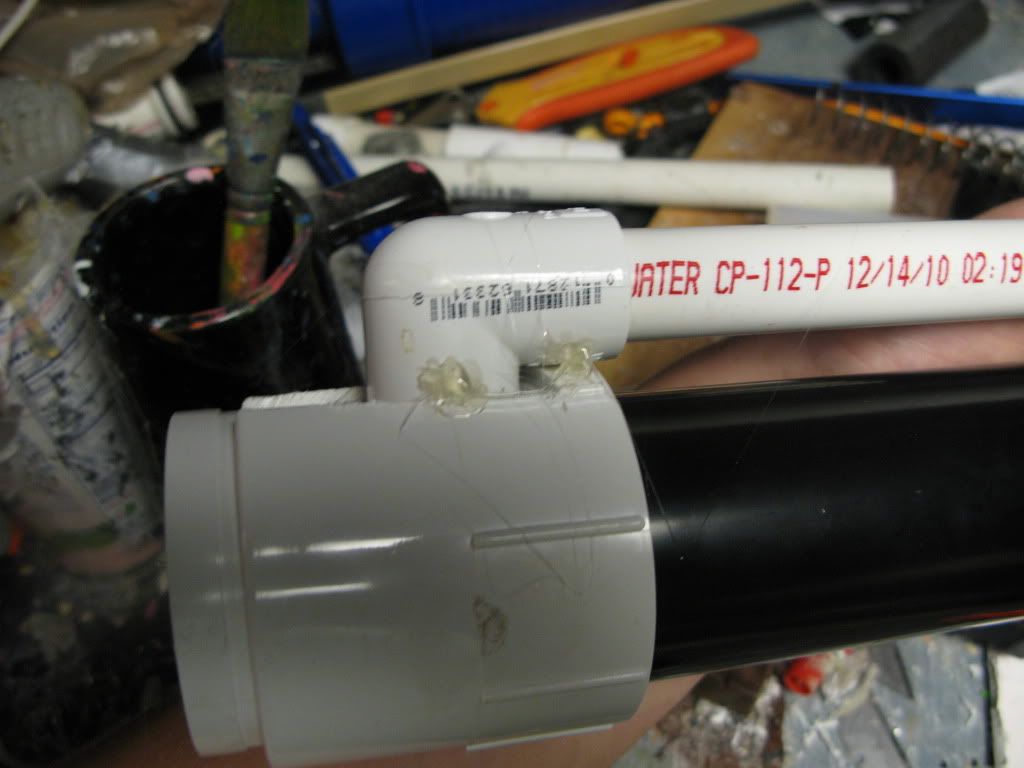
Posted Image

Then once the hotglue has dried, remove the barrel, take the assembly off the Grease gun, and remove the plug.
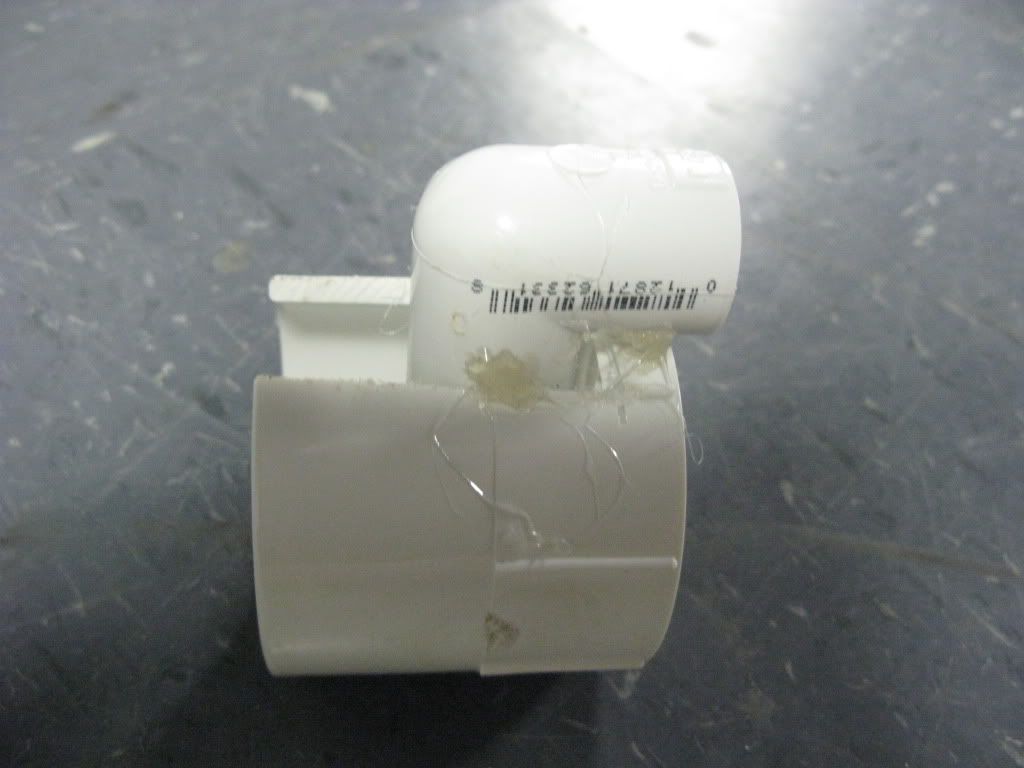
Posted Image

Mix some epoxy putty and use it to glue the elbow to the coupler. Make sure not to put any behind the elbow though, because the plug still needs to fit there.
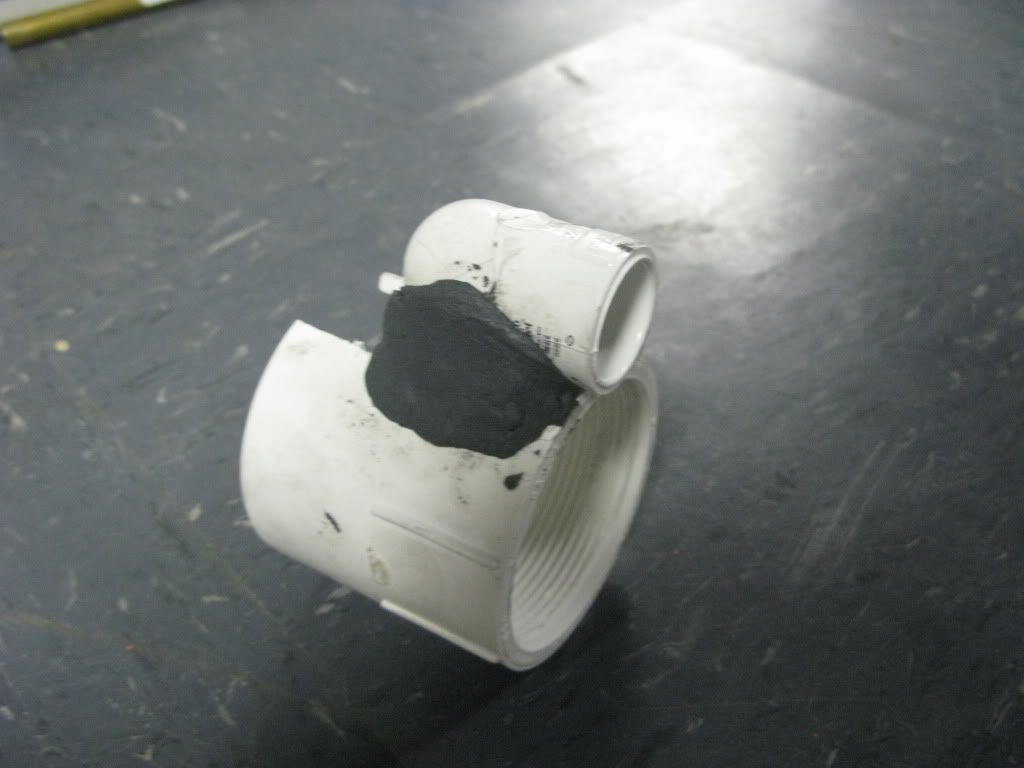
Posted Image

While that’s curing, we need to get rid of most of this dead space.
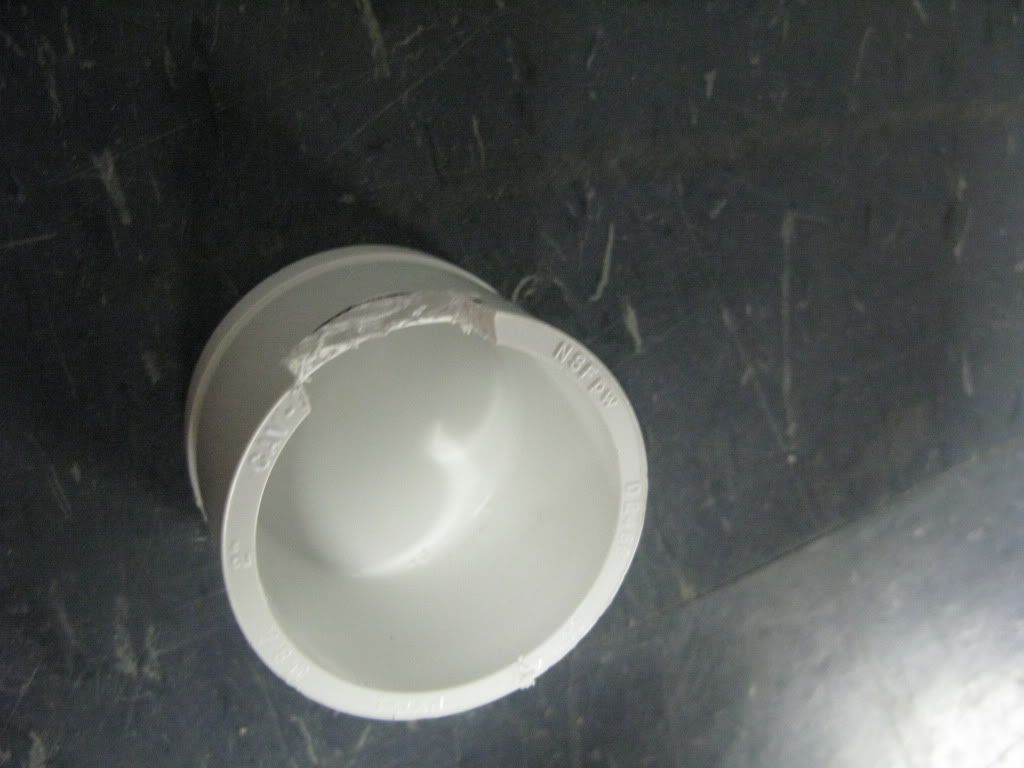
Posted Image

Fill the plug with aluminum foil, than use something to compact it. Repeat this until the plug is filled to just below the beginning of the cut-out portion.
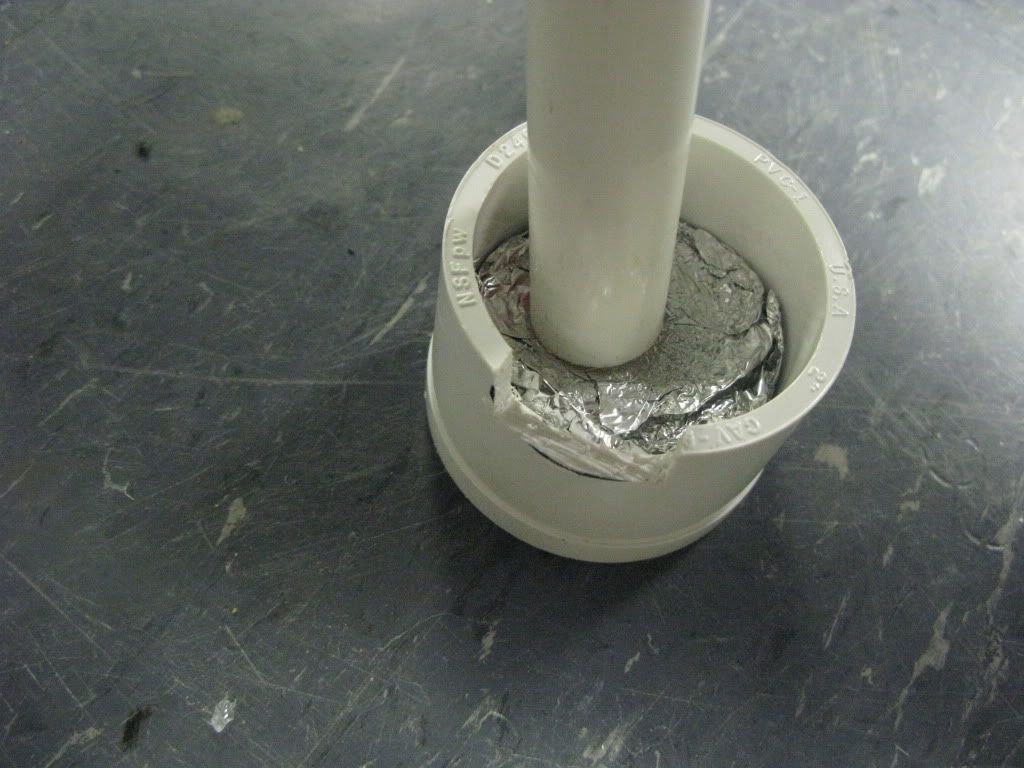
Posted Image

Then, cover the aluminum foil in a thin layer of hotglue to prevent any air from escaping. Be especially carful to get the edges.
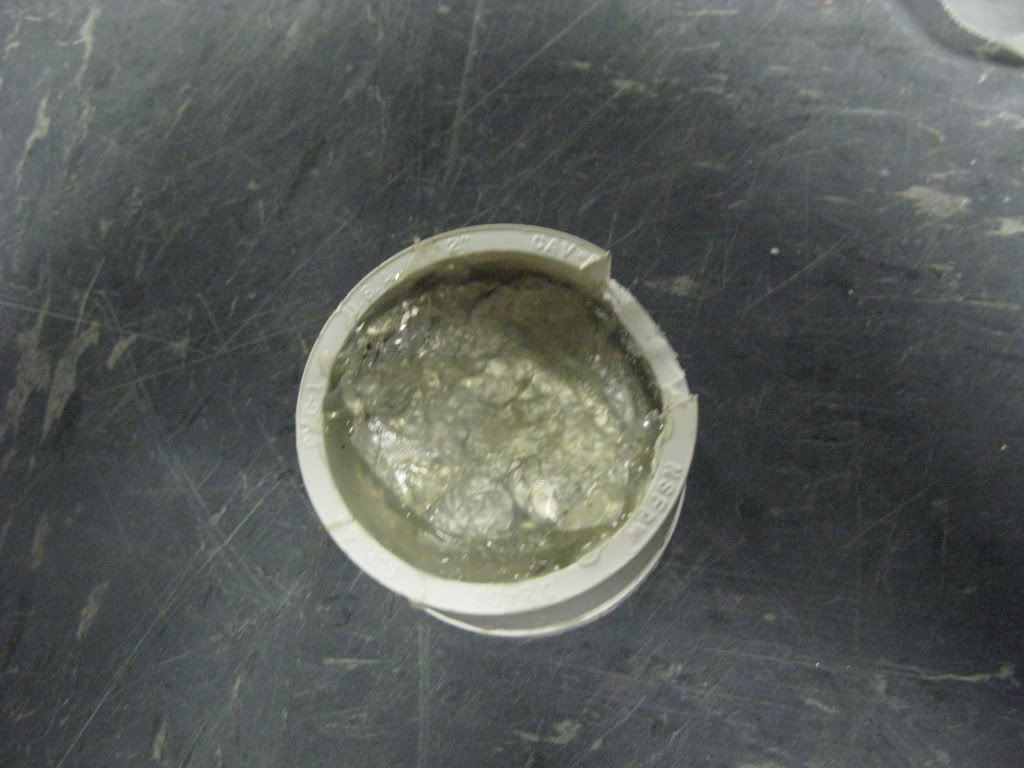
Posted Image

Once this is dry, fit the plug and the coupler assembly together.
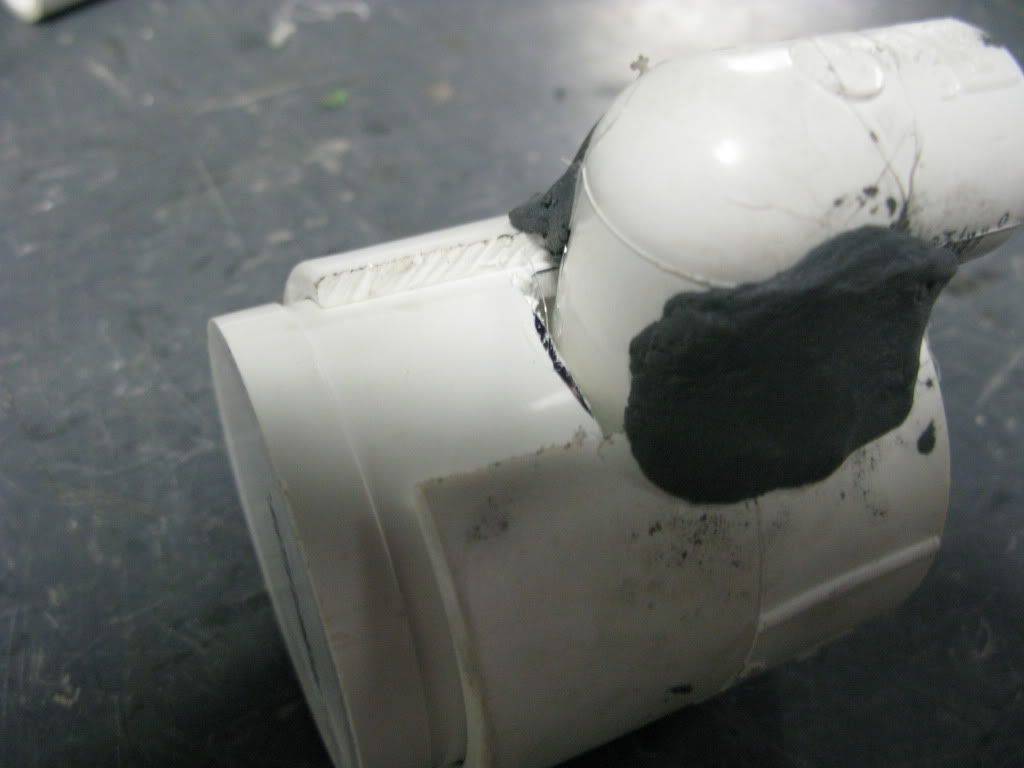
Posted Image

Cover the gap between the plug and elbow with a healthy amount of hotglue and seal the edge of the plus with hotglue.
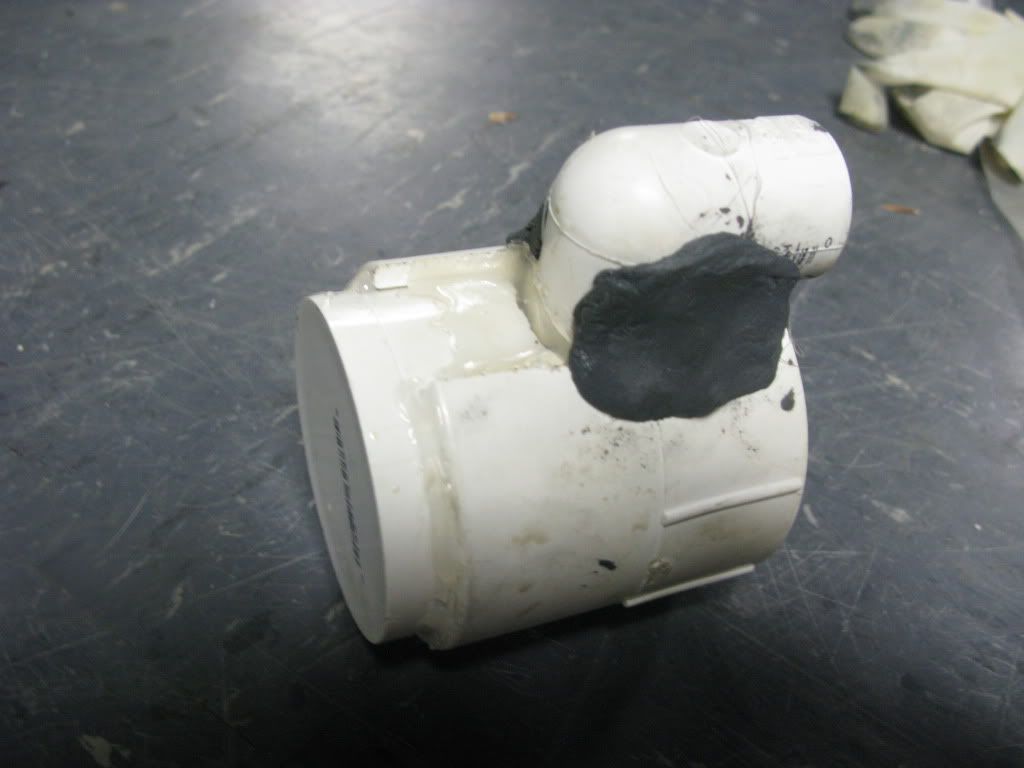
Posted Image

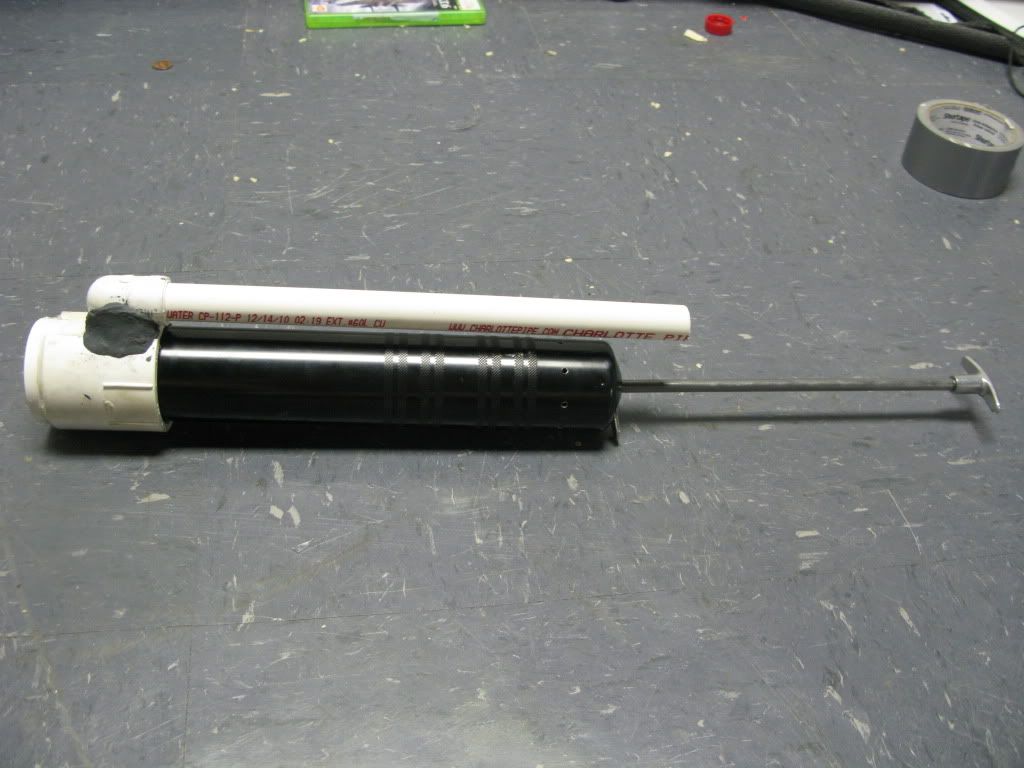
Finished Product with barrel-
Posted Image

Continue to post 2

Edited by zipx, 03 June 2012 - 12:15 PM.

  • 0
AKA: pop-tart.

#2 zipx

zipx

    Member

  • Members
  • 30 posts

Posted 03 June 2012 - 01:36 AM

Post 2
Option B:

So, you like the idea of the grease gun nerf gun, but the turnaround thing is to unstable for you. You like things a little more straight forward (no pun intended) then this option is for you.

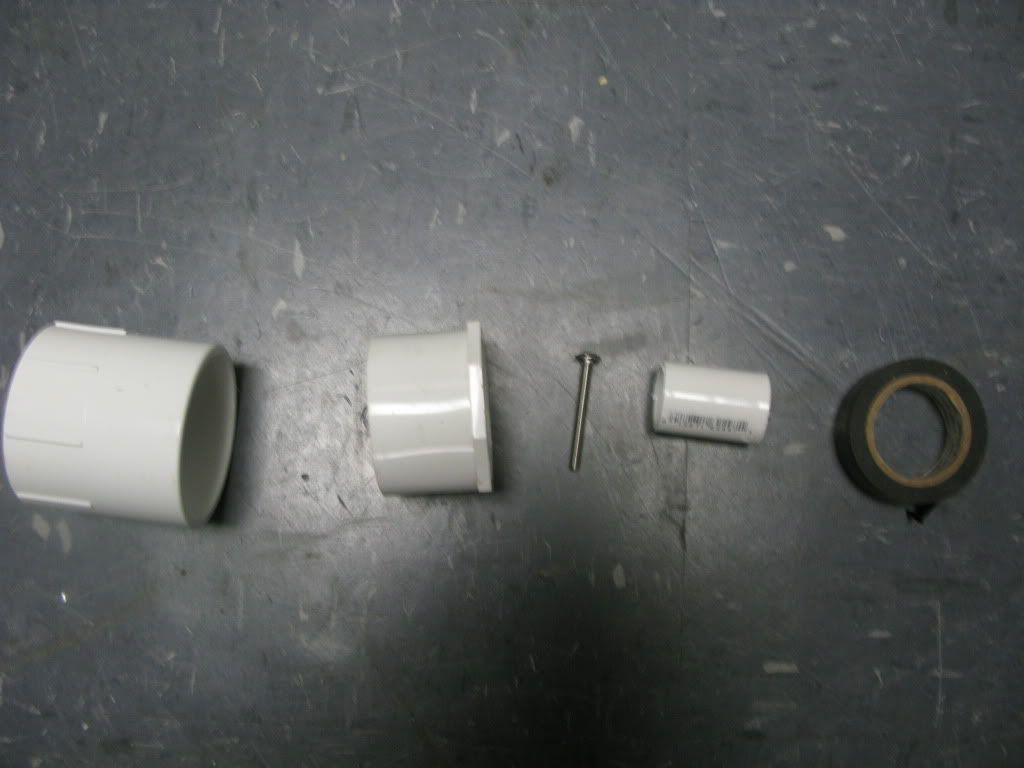
The material you will need:
Posted Image

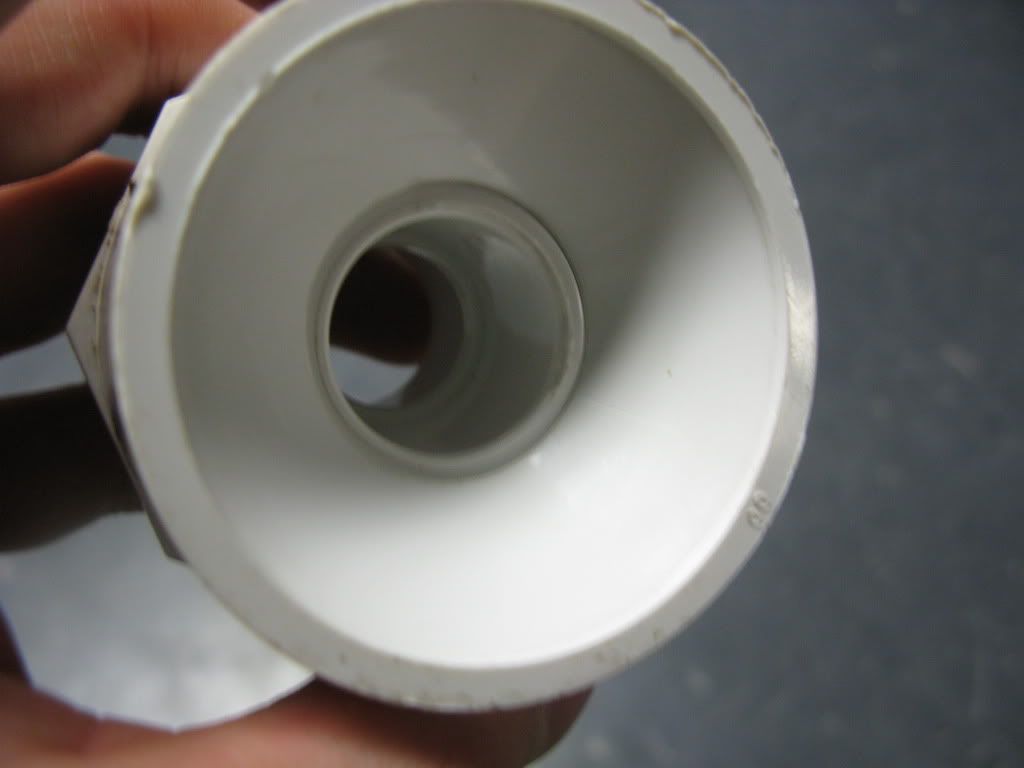
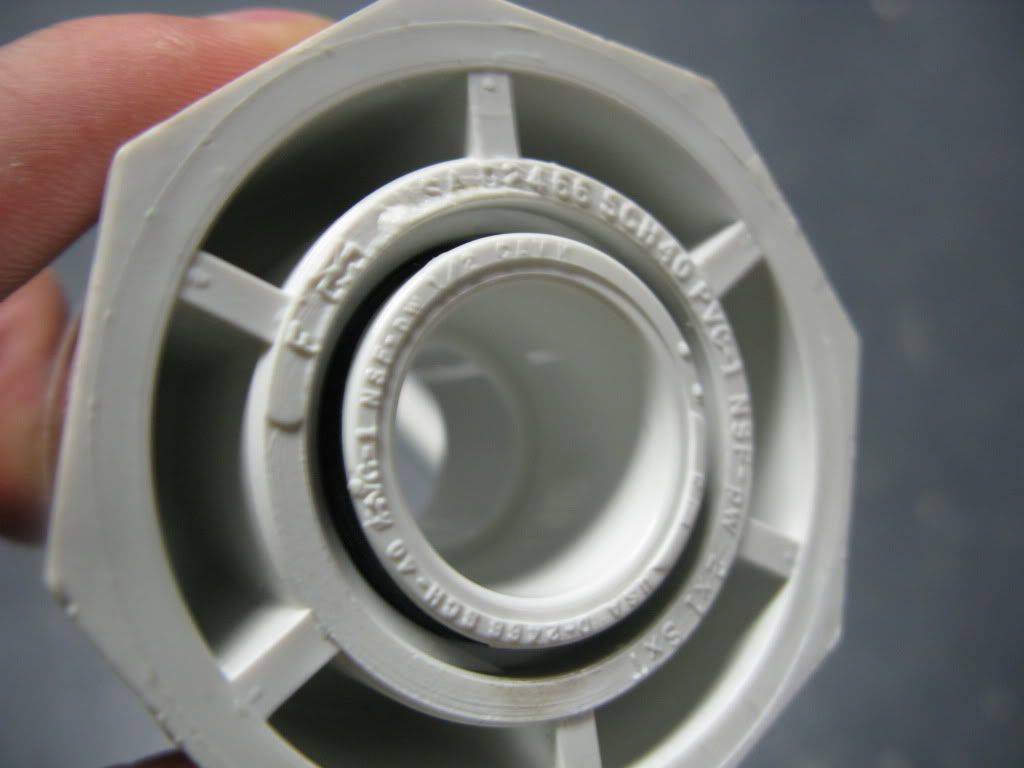
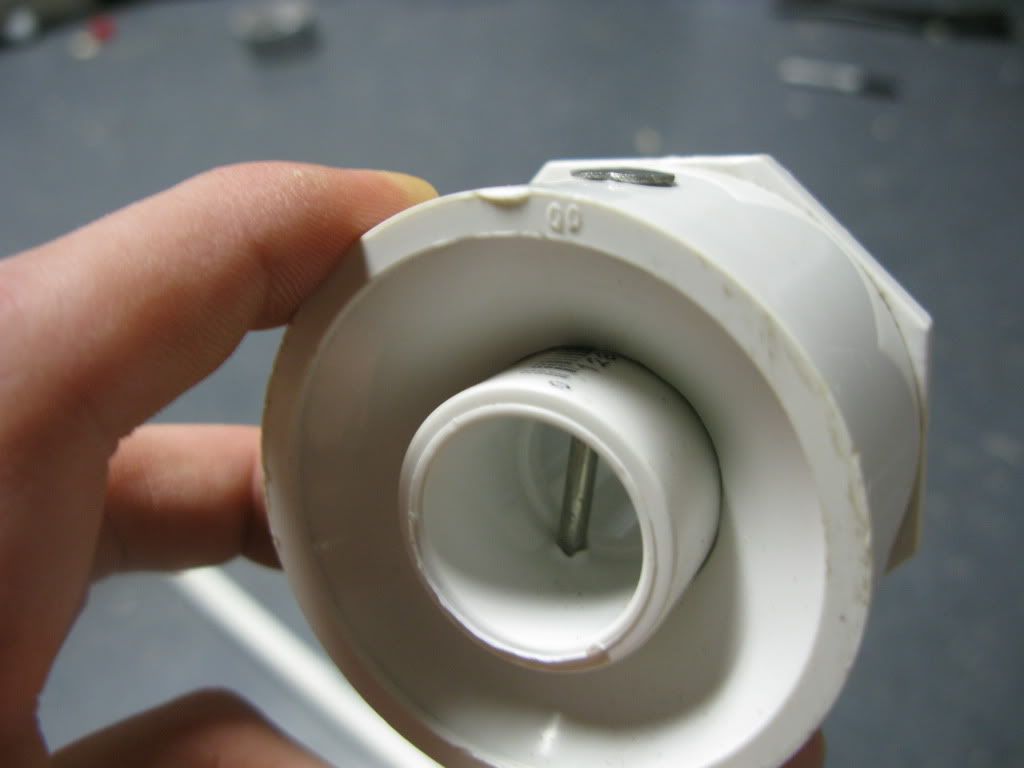
Take ½ in coupler and fit it en the reducer. Notice that there is a ridge preventing the coupler from fitting through, use a dremle to widen this hole so the ½ in coupler can fit through.
Before:
Posted Image

After:
Posted Image

Once the 1/2in coupler fits inside the reducer wrap one end of the ½ in coupler with electrical tape (I used about 3 wraps) until it fits snugly in the threads.
Posted Image
Posted Image

Once this is done, take a drill bit slightly smaller than whatever nail or bolt you have and drill it the about half way down the side of the reducer assembly. (drill in about the length of your nail or bolt)
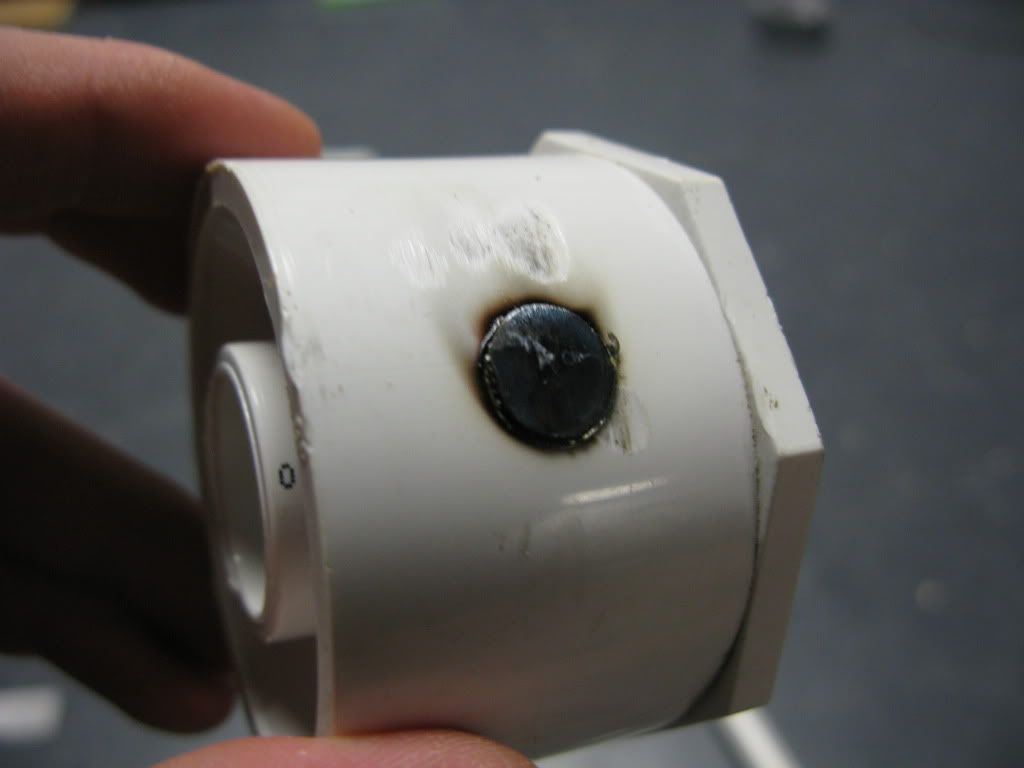
Drive the nail or bolt into the hole and through at least one side of the reducer and one side of the ½ in coupler.
Posted Image

Use whatever at hand (dremle, file, bench grinder) to grind the nail or bolt head to where is close to flush with the outside wall of the reducer.
Posted Image

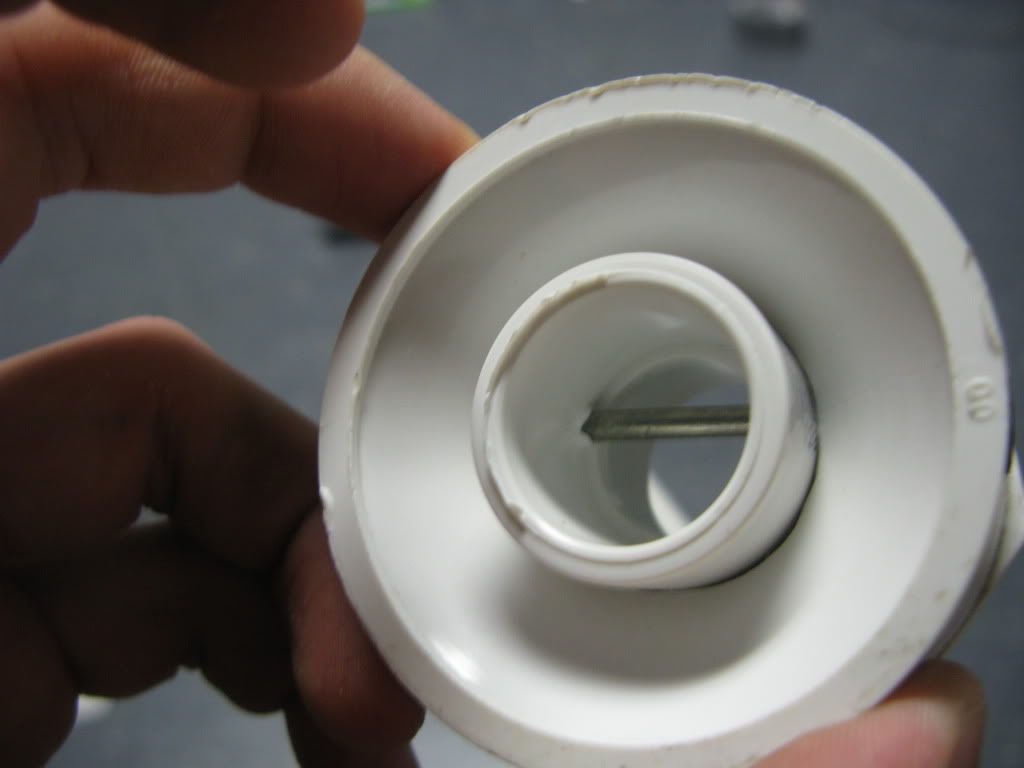
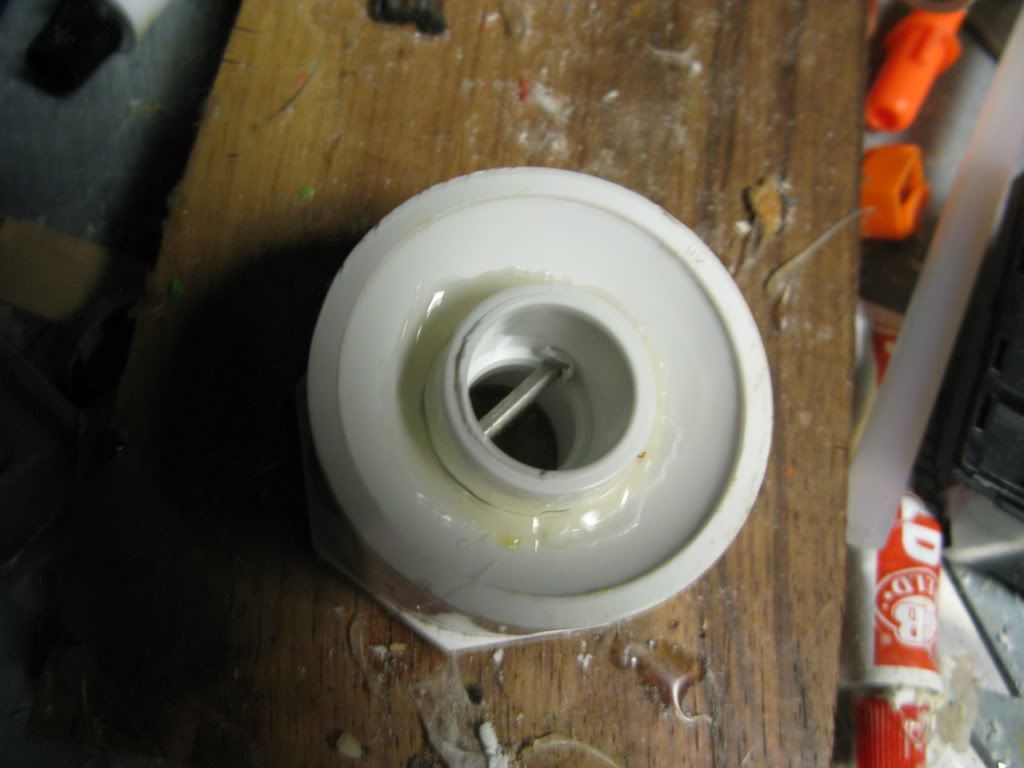
Flip the reducer over and notice the gap crack between the Coupler and the reducer.
Posted Image

Fill this with hotglue.
Posted Image

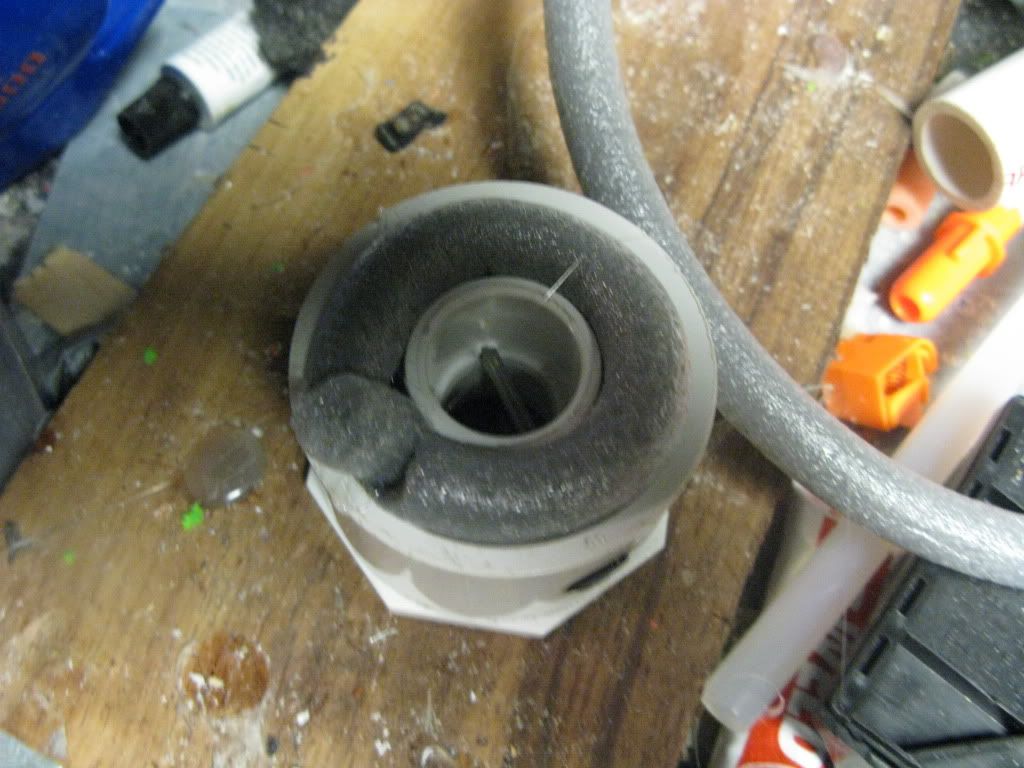
To fill the, deadspace take some of that extra poopy foam back rod (I know you have some somewhere) and glue it in a ring around the coupler.
Posted Image

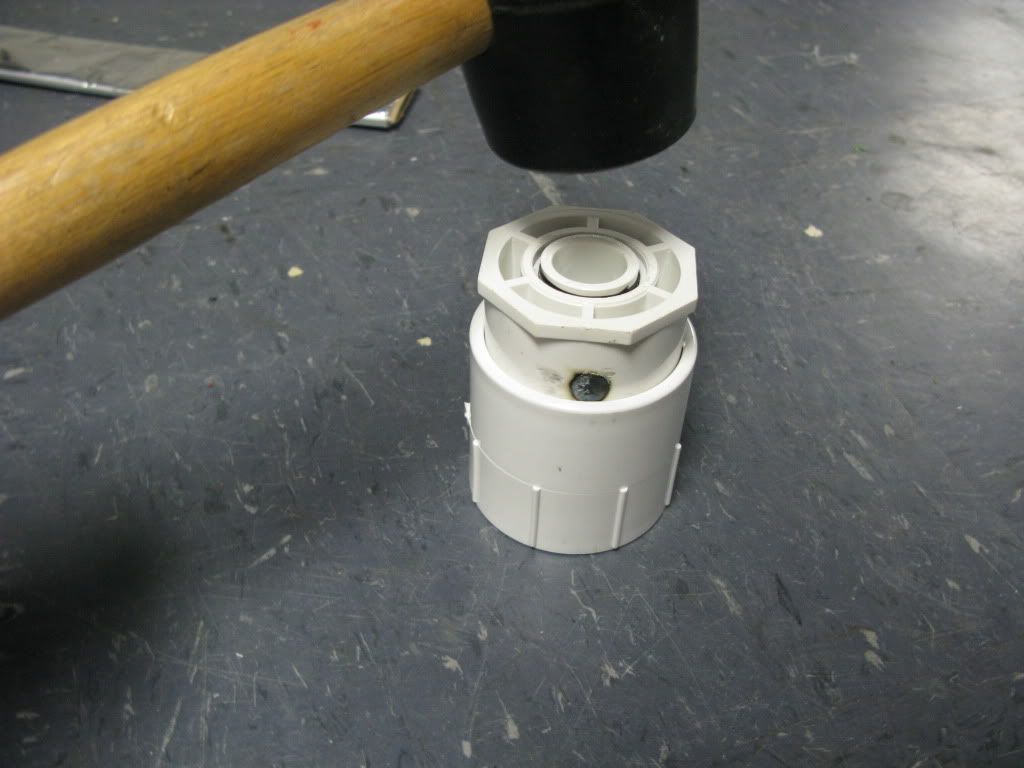
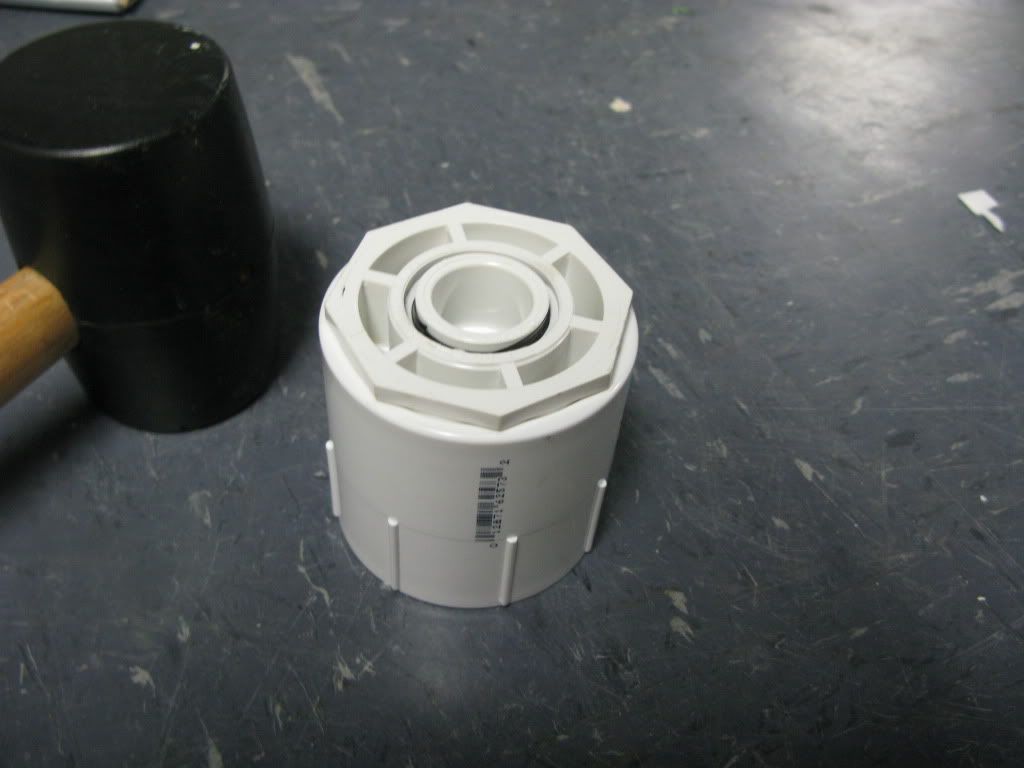
Take the reducer assembly and insert it by whatever means necessary into the smooth end of the 2 in coupler.
Posted Image
Posted Image

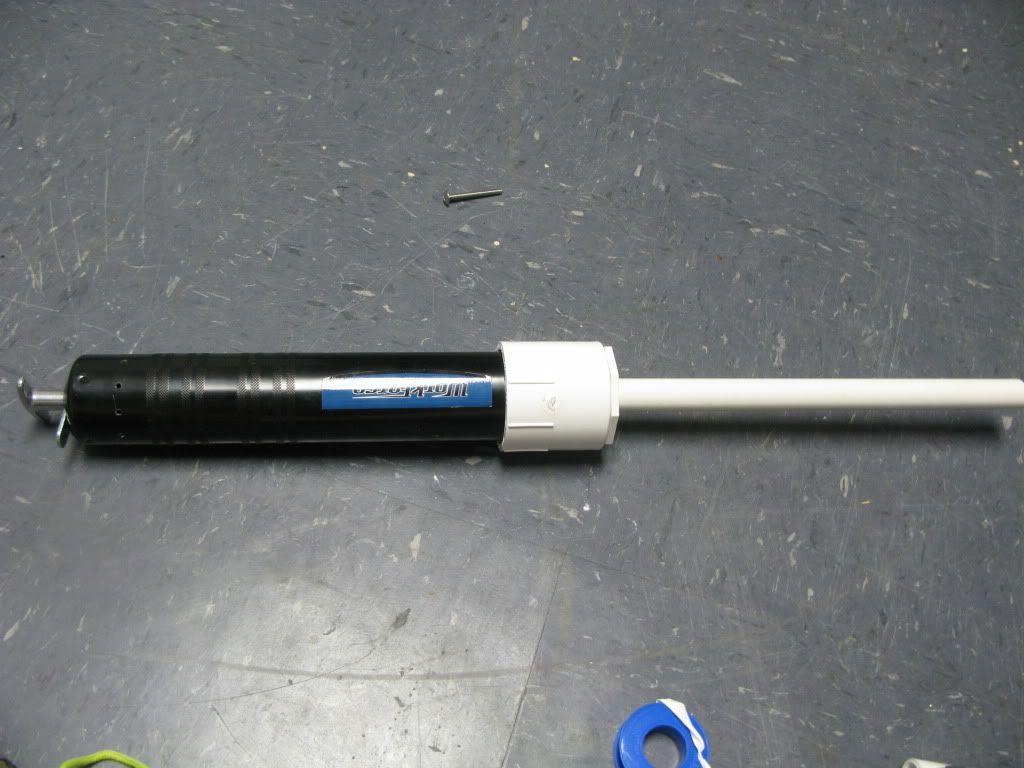
Finished product with barrel-
Posted Image

FOR BOTH VERSIONS:
When you are done creating the coupler assembly, wrap the threads of the grease gun in Teflon tape to create a seal. This will make the screws very tight and you might need to use a vise to unscrew the assembly.
Posted Image

Stage 3: Attach a handle
Do one of Carbons SNAP handles

Final thoughts:
Things I like-
-lot of plunger volume, 32.88 in2
-metal body
-modular
-no having to make a clothespin trigger
-just awesome
-it has a metal shine

Things I don’t like-
-fair amount of deadspace
-trigger creates slight bit of friction

Ranges:
I have not had the chance to test it with good darts, but I would guess 90-110ft
  • 0
AKA: pop-tart.

#3 HasreadCoC

HasreadCoC

    Member

  • Members
  • 274 posts

Posted 03 June 2012 - 09:19 AM

So, wait, how does it catch, and how do you fire it? Also, how strong is the stock spring?
  • 0

I'm the only respectable person here. The rest of the NIC are pretty much just child molesters.


AKA: ObiWonTwo on Nerfrevolution, and most of the rest of the internet for that matter.....

#4 jackrabbit

jackrabbit

    Member

  • Members
  • 53 posts

Posted 03 June 2012 - 10:54 AM

So, wait, how does it catch, and how do you fire it? Also, how strong is the stock spring?


Read this, it will answer the first half of your question.

Final thoughts:
Things I like-
-lot of plunger volume, 32.88 in2
-metal body
-modular
-no having to make a clothespin trigger
-just awesome
-it has a metal shine

Things I don’t like-
-fair amount of deadspace
-trigger creates slight bit of friction


Edited by jackrabbit, 03 June 2012 - 10:58 AM.

  • 0
Like a good neighbor my dog shits in your yard.
Like a good neighbor I watch your wife bath.
Like a good neighbor plant the drugs in your car.
Like a good neighbor pick your kids up in my white van.
"Allstate Oh Hell No"
Copyright 2010-2011 Allstate Insurance Company. All rights reserved.

#5 evilbunnyo

evilbunnyo

    Member

  • Members
  • 404 posts

Posted 03 June 2012 - 11:02 AM

So, wait, how does it catch, and how do you fire it? Also, how strong is the stock spring?


From the pictures it looks like there is some sort of catch already built int. Where the plunger rod is in one of the pictures is a little metal piece that seems to be a catch from the original handle.
  • 0
Silence is golden but duct tape is silver

#6 zipx

zipx

    Member

  • Members
  • 30 posts

Posted 03 June 2012 - 11:21 AM

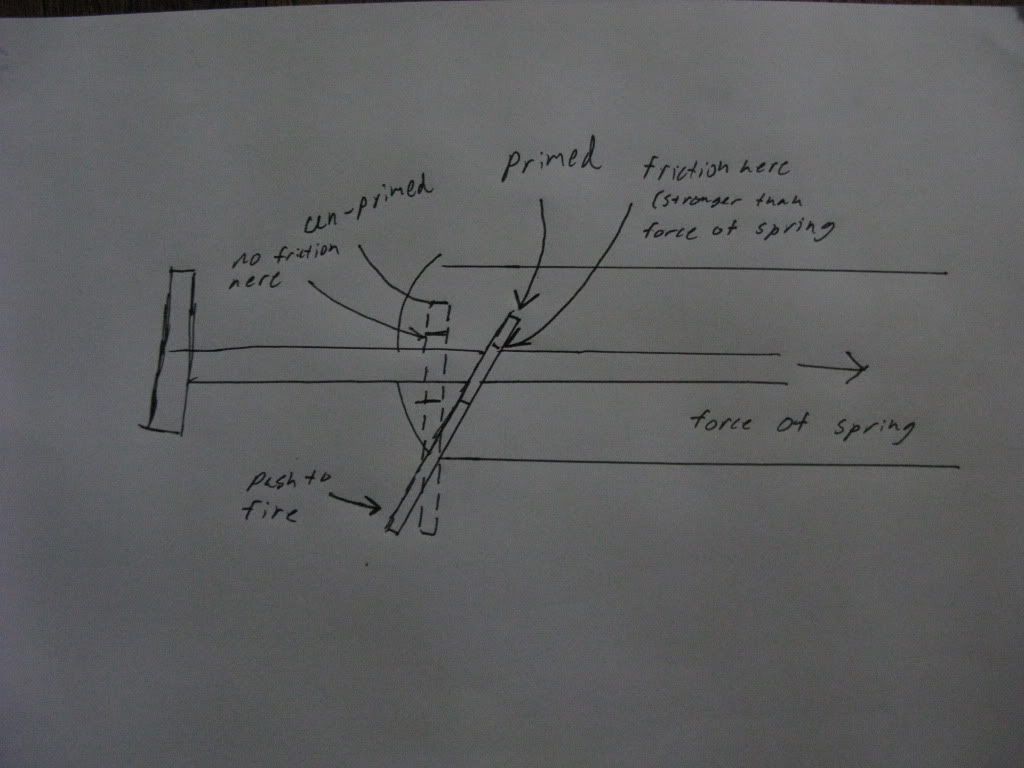
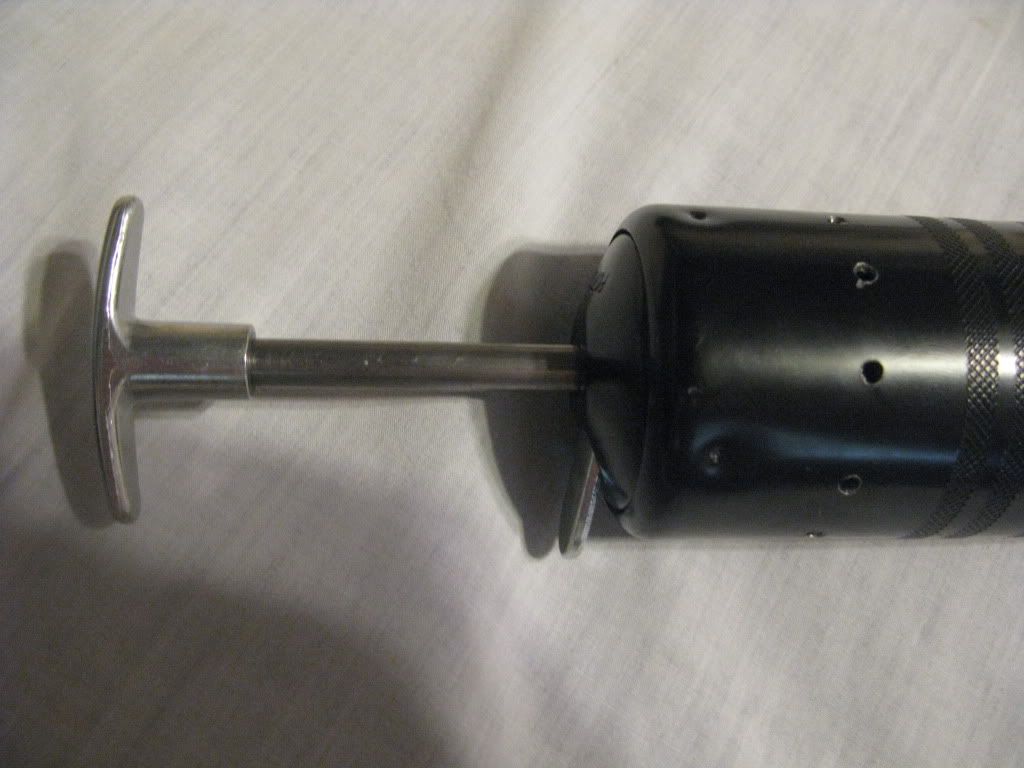
Hopefully this picture and diagram will clear things up slightly.

Posted Image

Posted Image

HasreadCoC: I would say it has about the strength of a [k25].

Edited by zipx, 03 June 2012 - 11:23 AM.

  • 0
AKA: pop-tart.

#7 Crater

Crater

    Member

  • Members
  • 91 posts

Posted 03 June 2012 - 11:40 AM

Great photos, much better than many I see on here. If I can get my hands on one of these grease guns, this will probably be my first homemade. It looks easy enough/non-intimidating to make. Have you tried attaching a hopper to it yet?
  • 0
Crater is a combination of a box and a dent in the ground. (Thanks Tangerle)

I'll stand on my head and gargle peanut butter for 70 dollars.


#8 zipx

zipx

    Member

  • Members
  • 30 posts

Posted 03 June 2012 - 11:58 AM

Great photos, much better than many I see on here. If I can get my hands on one of these grease guns, this will probably be my first homemade. It looks easy enough/non-intimidating to make. Have you tried attaching a hopper to it yet?


I have not tried attaching a hopper to it yet because I ran out of wyes, but when I do I will most likely pot it into another half threaded 2 in coupler to reduce deadspace. That's the beauty of this blaster, because the front end is threaded you can change it relativity easily, allowing you to have a hopper specific front part that would have significantly less deadspace than just attaching a hopper to the couplered end.

Edited by zipx, 03 June 2012 - 11:59 AM.

  • 0
AKA: pop-tart.

#9 HasreadCoC

HasreadCoC

    Member

  • Members
  • 274 posts

Posted 03 June 2012 - 12:24 PM

Ah, thank you, that clears things up nicely, it basically catches like a hardware clamp, or a bit like a Mattel Ultimator.

I do worry with such things though, as they are not always reliable, and if they get bent out of shape a bit they will not work at all, but so long as you use the stock spring you shouldn't have to worry.

All in all, a very interesting find, and a fun build.
  • 0

I'm the only respectable person here. The rest of the NIC are pretty much just child molesters.


AKA: ObiWonTwo on Nerfrevolution, and most of the rest of the internet for that matter.....

#10 hamoidar

hamoidar

    Member

  • Members
  • 367 posts

Posted 04 June 2012 - 09:10 PM

Very cool! I think that the first option is probably the most usable of the two, since it is only half the length, and the trigger in a easier to reach position. Also instead of using all the hot glue and tin foil for the 2in plug, you could simply use a piece of 2in PVC with a hammer-in plug. You can buy the plugs at home depot or lowes. Overall, nice work.
  • 0
NerfHaven > Your control panel > Profile > Change Signature > Inserts dumb sig > What! No pictures! > Inserts next best thing: http://nerfhaven.com...howuser=114052' class='bbc_url' title='External link' rel='nofollow external'>Best thing on Nerfhaven!

#11 Crusher9051

Crusher9051

    Member

  • Members
  • 70 posts

Posted 05 June 2012 - 07:55 AM

Is it hard to pull the trigger because of the angle its at?
  • 0
Zip: 54751

#12 HasreadCoC

HasreadCoC

    Member

  • Members
  • 274 posts

Posted 05 June 2012 - 01:16 PM

Very cool! I think that the first option is probably the most usable of the two, since it is only half the length, and the trigger in a easier to reach position.

That would be true, except that you must prime away from yourself, or else turn the whole blaster around, prime, then turn it back around again before firing. It might be a good platform to build a pump action bullpup blaster from though.
  • 0

I'm the only respectable person here. The rest of the NIC are pretty much just child molesters.


AKA: ObiWonTwo on Nerfrevolution, and most of the rest of the internet for that matter.....

#13 zipx

zipx

    Member

  • Members
  • 30 posts

Posted 05 June 2012 - 02:26 PM

Yes, the first option is better for a hopper and setting up a trigger and stock, but I cant stand priming forwards and I like having a straight barrel, so I like to use the second option. Right now I am working on an RSCB, a stock, and a trigger for the second option. The stock is harder than I expected, and all the trigger options that would reverse the direction of the trigger pull are way to complex and unstable, so I think I am just going to leave it a push trigger

hamoidar: The tab that functions as the trigger is not hard to depress, It is easier than a clothes pen trigger on a SNAP.
  • 0
AKA: pop-tart.


0 user(s) are reading this topic

0 members, 0 guests, 0 anonymous users