Jump to content


Photo

Darthrambo's BBT20A guide


9 replies to this topic

#1 Darthrambo

Darthrambo

    Member

  • Members
  • 116 posts

Posted 06 April 2012 - 04:13 PM

Posted Image
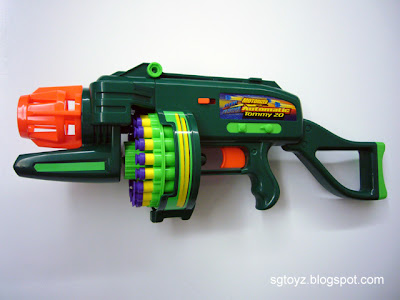
The reason why I'm doing this is because I think that this is a really under-rated blaster. It's small, full auto, 20 rounds and with a volt mod good ranges and great rate of fire.

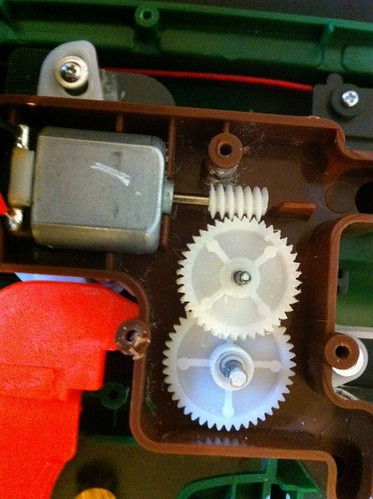
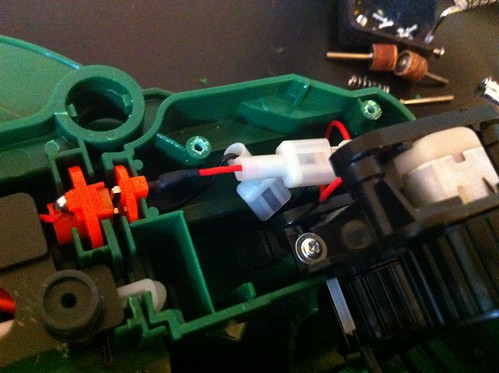
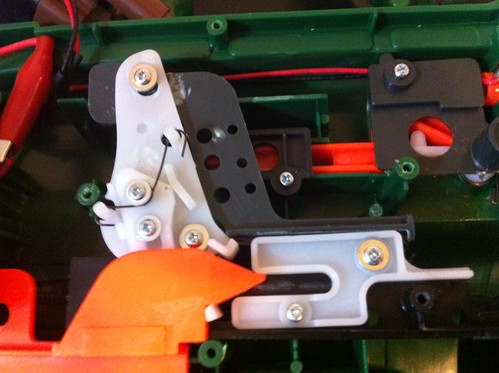
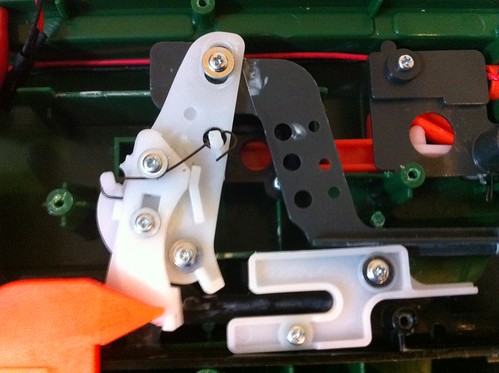
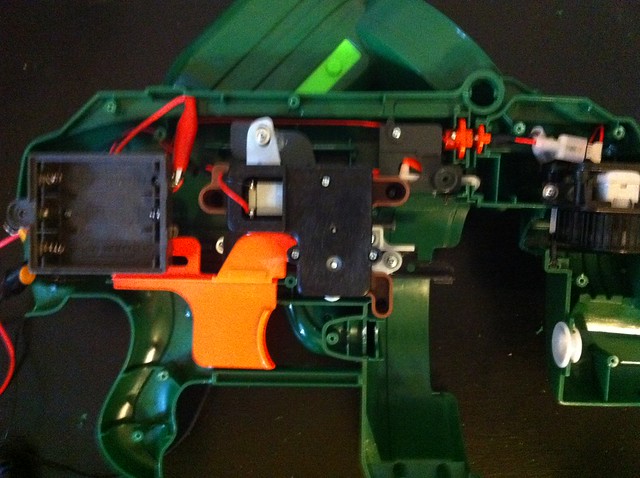
Internal pics:
Posted Image
Posted ImagePosted Image
Posted ImagePosted ImagePosted Image
Mods Covered
-How to get the damn thing open
-Volt mod
-Thermistors
-Motor/flywheel upgrade
-Drum Swap
-Nerf dart comparability


Getting it open:
Posted Image
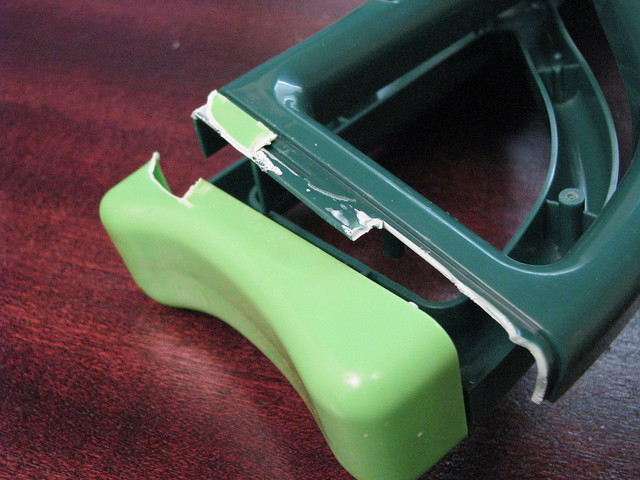
-The stock butt plate
This is the only thing glued on. If you are going to cut the stock off just make that the first thing you do and you wont have to deal with it.
If you want to keep it you can hold the piece in boiling water till the glue softens enough to pry it off but wedging a thin flat head into the crease.

-Motor housing rod
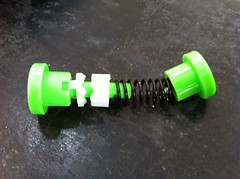
Posted Image
Be careful not to lose any of the pieces from this assembly. Nothing is going to shoot out or anything but all those little round pieces in there that and drop and roll away. Remove this first so you can separate and work on the front and back parts of the gun individually.

*when unscrewing there is 1 screw under the sticker on the here
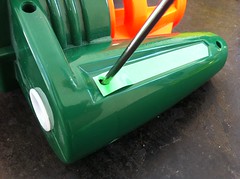
Posted Image

When you get it open get rid of the orange thing, it's to keep kids from shoving their finger in there and actually can cause really bad misfires
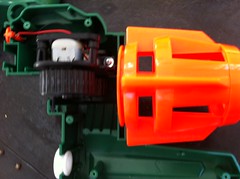
Posted Image


Volt Mods:
Posted Image
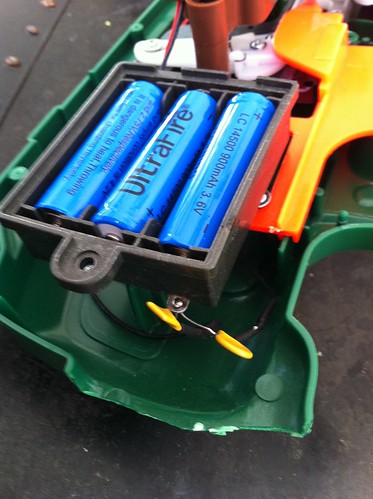
There are several ways of doing this. The best way by far IMO is to just get 3 AA Li-Ion batteries like Ultrafires or Trustfires.
Other cheaper ways include;
-larger battery trays
-9V connector(s)
-RC battery connectors

Range and RoF are both totally dependent on voltage.

If you want to use a large battery pack like RC batteries you might want to consider leaving the stock on and using it to hold the pack.

There is space for more batteries in the shell but be careful if you are moving the stock one, it has the switches for the flywheels and the pusher on its screw posts.
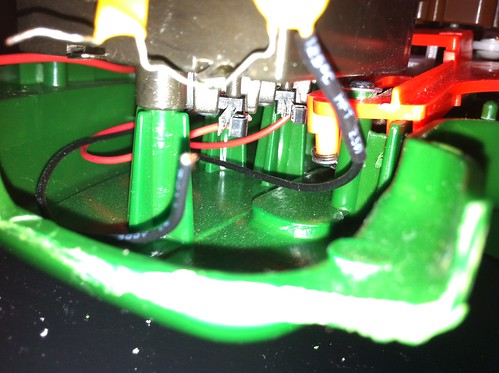
Posted Image

Thermistors:
Posted Image
These things are meant to protect the motors from overheating. The longer the circuit is active the hotter they get. The hotter they get the more resistance they give to the circuit until it shuts down completely. these things seem to not give very much resistance until they totally shut down the blaster.
2 of them coming off the back of the battery tray.
The round one is for the flywheels, the square one is for the pusher.
For some reason the flywheel one has always totally killed that circuit before the pusher even seems to be effected at all.

Remove these are your own risk. A good way around them is to just install an on off switch that circumvents the thermistor.


Flywheel/Motor upgrade:
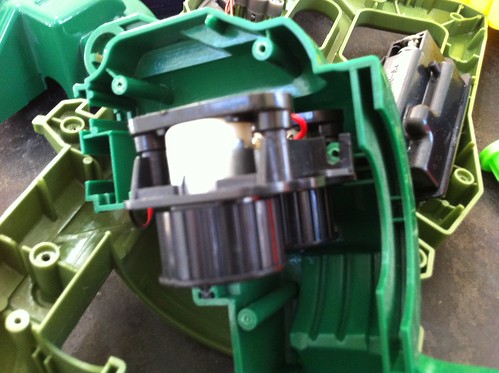
Posted Image
The URB motor set up fits right into the slot in the T20A.
The URB beats the rayven in stock feet per sec, AND that is with the rayven running with 33% more power.

To install them all you need to do is clip this contact thing from the T20A motors and put them on the URB motors and slide them into place.
Posted Image

***If you do this because of the smaller diameter of the flywheels it will no long shoot buzzbee darts.

Drum Swap:
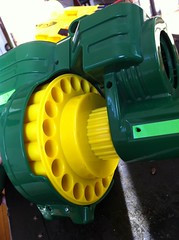
Posted Image
All you need to do is cut off the flat part on the end of this metal peg and you have yourself a swappable drum. That or if you are pretty strong you can just pull it with some pliers.
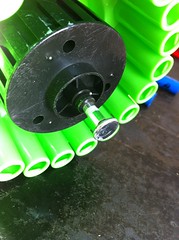
Posted Image
OK so believe it or not normal tommy 20 drums don't even need to be modded to be swappable. The only downside is those can't be manually advanced.


Nerf Dart compatibility:
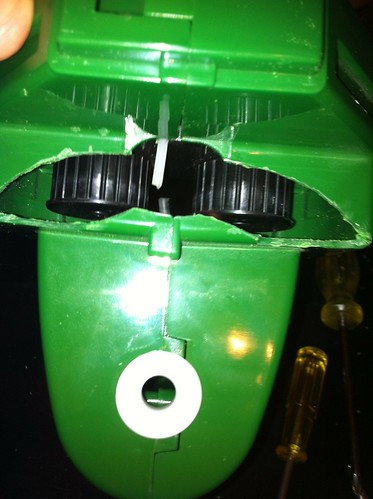
Posted Image
Nerf darts are slightly longer than BB darts so you are going to need to chop off the wall between the darts and the wheels.
With the stock drum you can probably even get away with sanding down the wall if you really wanted to as long as you have the darts pushed all the way back.
With the tommy 20 drum you will have to cut it off, the darts sit farther up for some reason.

Putting 1 or 2 layers of etape around the flywheels will allow the blaster to fire streamlines

A few things:
1 When putting it back together if the main part of the shell doesn't want to close, pull the trigger to set it into position. When it's opened the mech that keep it from jamming between shots can get out of alignment pretty easy.

2 This blaster is completely dependent on the volt mod. Without it it's not worth messing with.

3 The gun torques from the drum turning. At higher voltages this can actually get so bad that it can cause some funky tail spin on the darts. To avoid this hold the blaster firmly.

4 Some people like to chop off the front "grip". The reason why I kinda like having it on is to get a better grip and stop the fore mentioned tail spin.

Edited by Darthrambo, 07 April 2012 - 08:39 PM.

  • 0

#2 Hammy

Hammy

    Member

  • Members
  • 104 posts

Posted 06 April 2012 - 07:52 PM

Rate Of Fire?
Ranges?
  • 0

#3 ShaNayNay

ShaNayNay

    Member

  • Members
  • 254 posts

Posted 06 April 2012 - 09:13 PM

Nice writeup, I've been thinking about getting one of these since my semi-auto T20 really isn't that good at all. What I love so much about these guns is how easy it is to do heavy modding to them.
Oh, and not to back seat mod or anything, but there's a bunch of typos. Just letting you know in case you want to fix them.

Any like said in the post above, do you have any ranges?
  • 0

New Jersey is fuckin weird


#4 Darthrambo

Darthrambo

    Member

  • Members
  • 116 posts

Posted 07 April 2012 - 02:18 AM

Any like said in the post above, do you have any ranges?


Both range and rate of fire are completely dependent on how much voltage you use
  • 0

#5 Hammy

Hammy

    Member

  • Members
  • 104 posts

Posted 07 April 2012 - 04:33 AM

Then ROF and Ranges, with your configuration of batteries.
From the pictures, it looks like your using three 3.6 V Lithium Ion batteries.

Edited by Hammy, 07 April 2012 - 04:34 AM.

  • 0

#6 hamoidar

hamoidar

    Member

  • Members
  • 367 posts

Posted 07 April 2012 - 11:05 AM

Nice, I just got my hands on one of these today, and I will definitly use this guide. A few more pictures of the motor replacement process would be nice. I can do it, but someone with less electrical experience would probably have some trouble.
  • 0
NerfHaven > Your control panel > Profile > Change Signature > Inserts dumb sig > What! No pictures! > Inserts next best thing: http://nerfhaven.com...howuser=114052' class='bbc_url' title='External link' rel='nofollow external'>Best thing on Nerfhaven!

#7 ShaNayNay

ShaNayNay

    Member

  • Members
  • 254 posts

Posted 07 April 2012 - 12:23 PM

Hey, as I recall there are no pictures online of the internals of this thing. Since you have taking it apart previously, would you be willing to take some pictures of it's internals? I'd love to see how the gun is automatic as well as a revolver. However if you don't, it's fine
  • 0

New Jersey is fuckin weird


#8 Darthrambo

Darthrambo

    Member

  • Members
  • 116 posts

Posted 07 April 2012 - 02:45 PM

Hey, as I recall there are no pictures online of the internals of this thing. Since you have taking it apart previously, would you be willing to take some pictures of it's internals? I'd love to see how the gun is automatic as well as a revolver. However if you don't, it's fine

Yeah I remember when I first did my double clipped T20A I tried looking for pics for the internals of this thing was like the first time the internet has failed me. I'll get on that.

The motor replacement doesn't require anything that would really need explaining. the housing just slides into the same slot as the ond one and the red wire goes to the red wire, black to black. I'll take a pic of it when I do the internals.


After messing around with voltage I had the first thing burn out. I'm kinda shocked to see that it was the first gear in the gear box. The reason this happened is because the bushing was too loose and this allowed the gear to grind. This happened at 14.8v but never happened on my "darthramballs" at the same voltage.
The gear boxes could be slightly different in different models. The one that had gear grinding has brown posts and the one that did not had black posts.

Edited by Darthrambo, 07 April 2012 - 09:51 PM.

  • 0

#9 Darthrambo

Darthrambo

    Member

  • Members
  • 116 posts

Posted 10 April 2012 - 08:26 AM

Just did a range test and darts were landing in the 65-70ft
There was some wind and it was a rough measurement since I only had a 10ft tape and little patients.

This was done at ~12v(3 hot ultrafires) using stock buzzbee darts

This is about what I expected based on jerms fps for this blaster. The URB may have got 3rd place FPS but it was using 4.5v vs the PS48 and beltblast that use 6v. With equal power they are probably pretty even.

All in all pretty impressive for a blaster most consider to be worthless.
  • 0

#10 Hammy

Hammy

    Member

  • Members
  • 104 posts

Posted 10 April 2012 - 10:42 AM

Thanks
  • 0


2 user(s) are reading this topic

0 members, 2 guests, 0 anonymous users