Jump to content


Photo

Vulcan "Overhaul"


8 replies to this topic

#1 ilikefish58

ilikefish58

    Member

  • Members
  • 86 posts

Posted 03 March 2012 - 12:10 AM

WARNING - PICTURE HEAVY

So this has been up at Nrev for a while, but now that its pretty much complete, I suppose I'll share the love.

First off, this has been in the works for over a year and its great to finally have something to show for it. Major, MAJOR props to torukmakto4 of the humansvszombies forums. Without his advice and expertise, this would never have gotten done. Really, if you have any questions about electric blasters, give him a shout, he probably knows the answer.

That being said, this is the way I went about "overhauling" my vulcan. This is not necessarily the "right" way to do it, and it certainly isn't the "BEST" way, but it works. Like I said, this was done over a long period of time, so some pictures are missing. I'll do my best to explain what I did in the blanks, but if you have any questions, by all means, ask away.

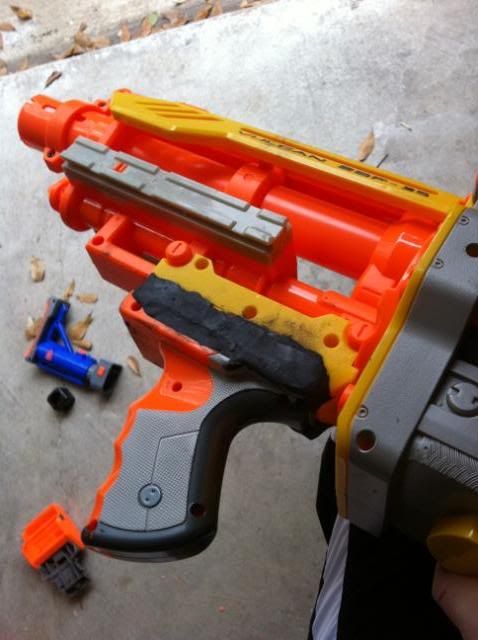
Right now, the blaster is completely functional, but those that have seen some of my other stuff know that I like to be as clean as possible. I'll edit in a section on making it aesthetically pleasing along with finished pictures later.

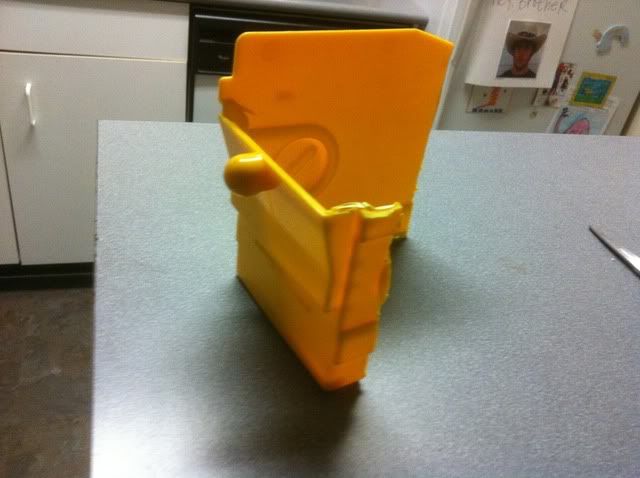
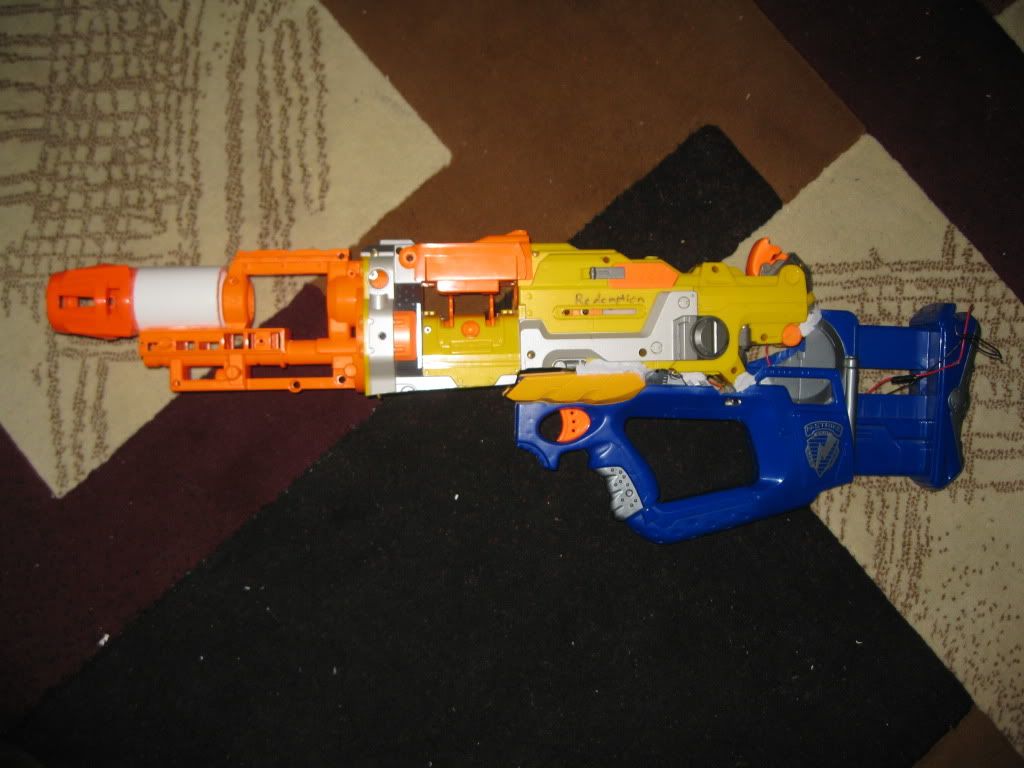
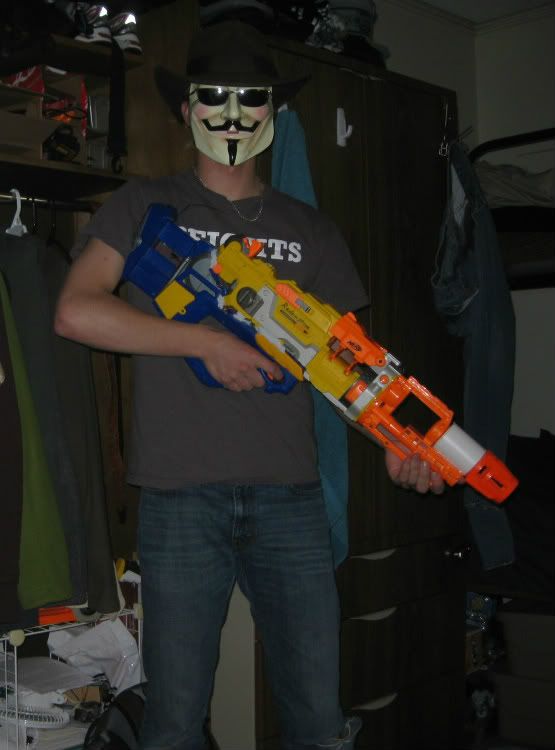
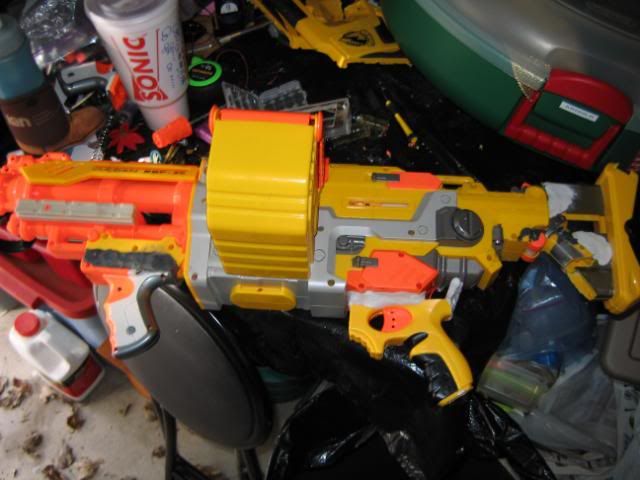
Right now, the blaster looks like this:
Posted Image

And fires like this:
http://www.youtube.com/watch?v=ogCRVF94jAw


So, without further ado, I used:
-1 vulcan
-1 firefly
-1 raider front pump handle
- hot glue + glue gun
- epoxy putty
- soldering iron and solder
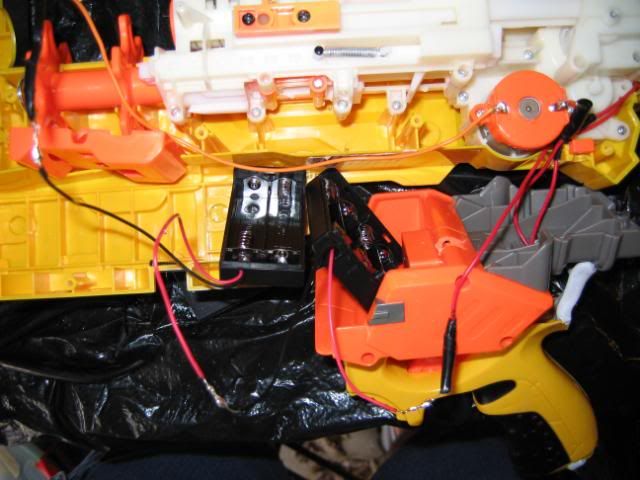
- 4 AA battery holder
- 2 AA battery holder
- saw and/or dremel
- some sort of tool you can use to strip wires (I used needle nosed pliers with a wire cutting part)
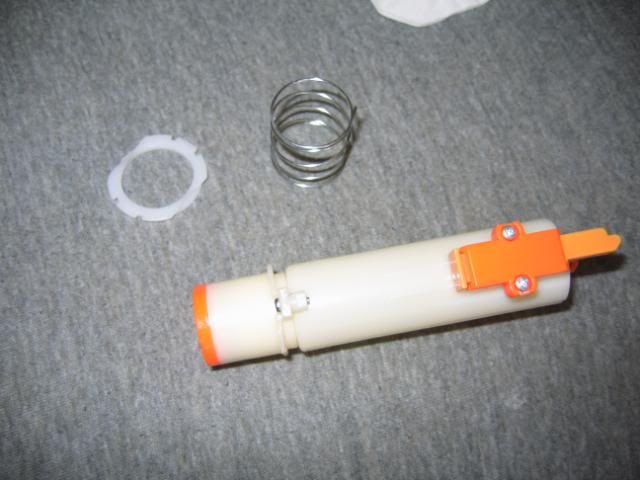
- Replacement spring (OMW) I used their 2x spring.
- Drill with 1/4" and 3/8" normal bits (NOT SPADE)

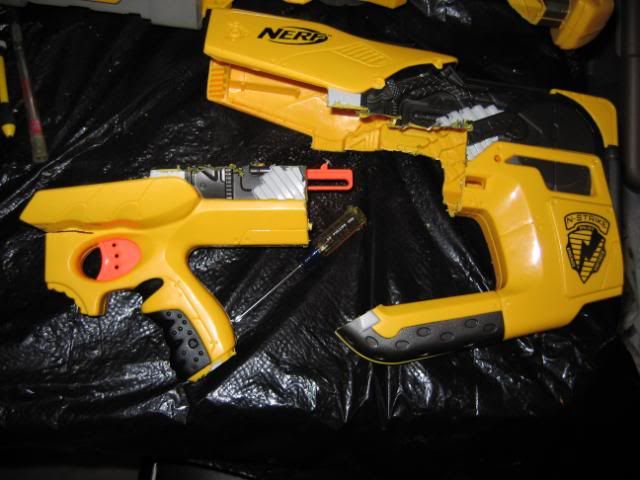
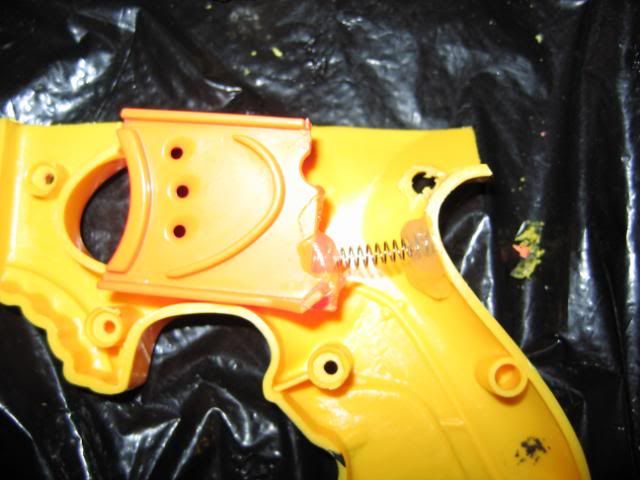
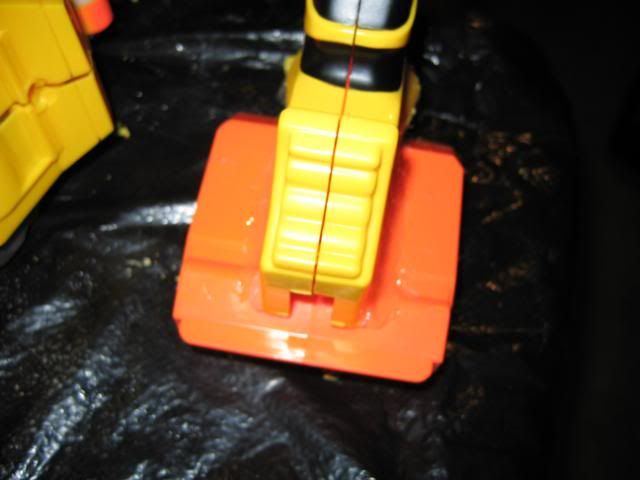
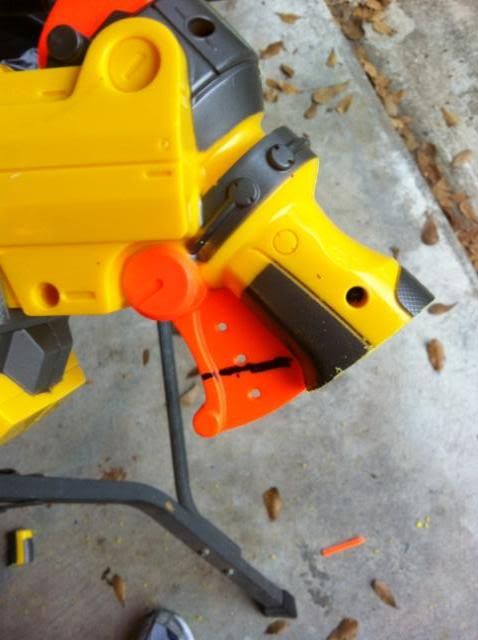
The first thing I did was to cut part of the handle off. I was originally planning on using an lsfg trigger there, which is why I did it this way.
Posted Image

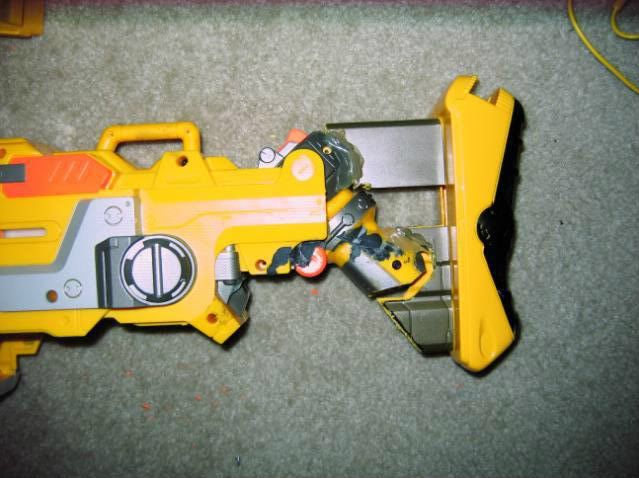
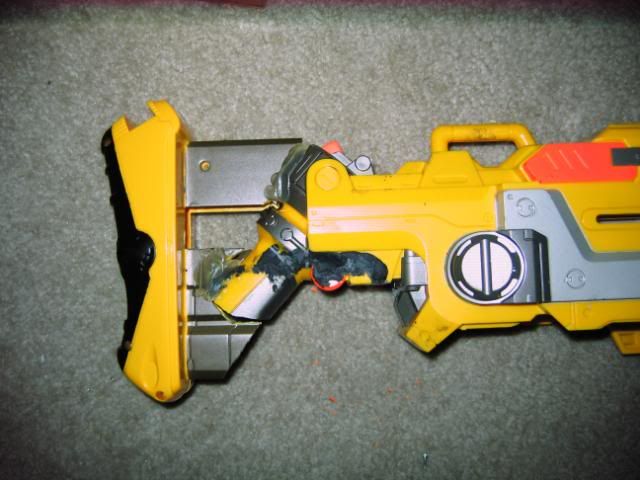
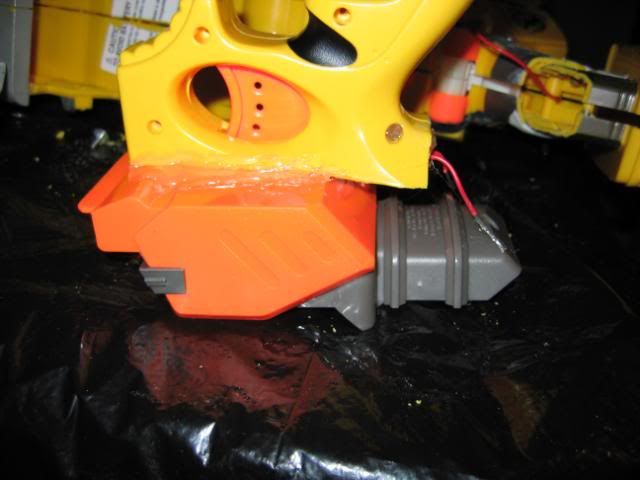
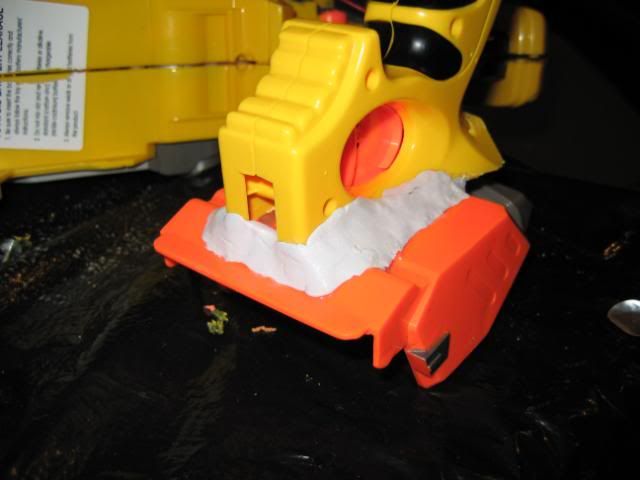
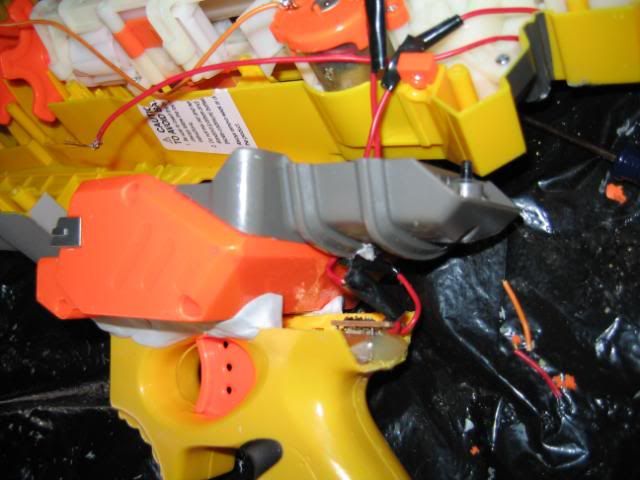
The next thing I did was to add the raider pump handle to the front of the vulcan to act as a foregrip. You could probably use any handle you want for this. You could probably even get away with leaving it off. I shaved down the handle until it fit smoothly with the shell of the vulcan.
Posted Image

Then I hot glued it on.
Posted Image

Then I epoxy puttied over the hot glue.
Posted Image

This will be a common theme throughout this writeup. I hot glue things on to temporarily hold them in place and then epoxy putty over it to actually give structural integrity.

Now you need to open the blaster up. You shouldn't really have any trouble with this. You'll have to take off the cover that holds the belt in place first. Well, second if you take off the ammo can first like you should.
Here is a great thread on the haven by Split about what you'll be looking at when you open the blaster. From this point on anything that I denote with 'xxxxx' is referring to the name Split called the piece.

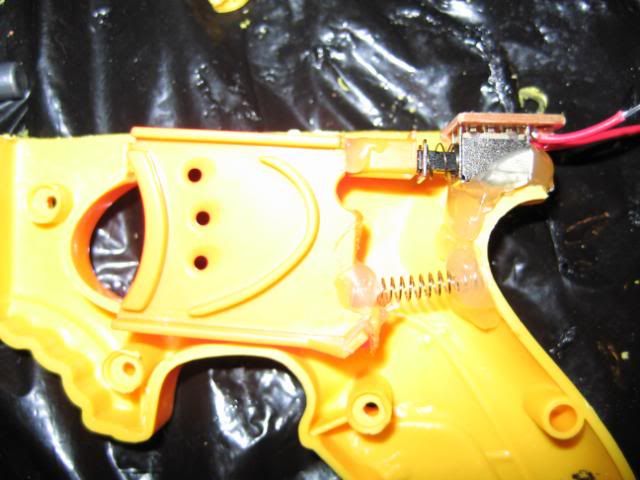
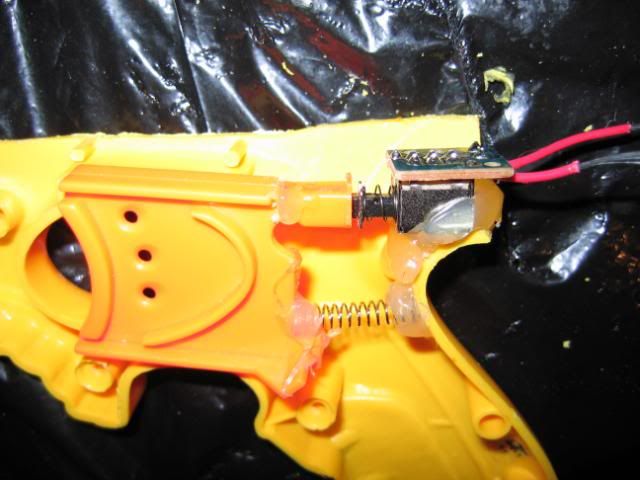
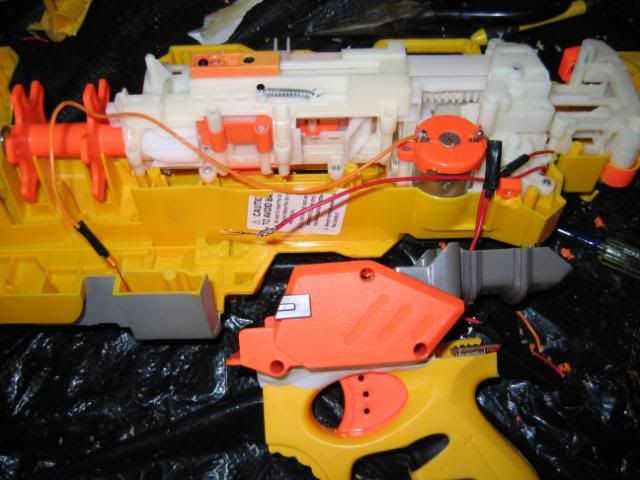
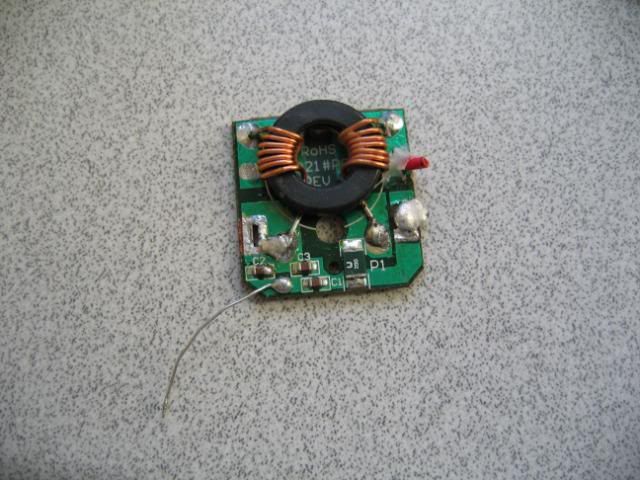
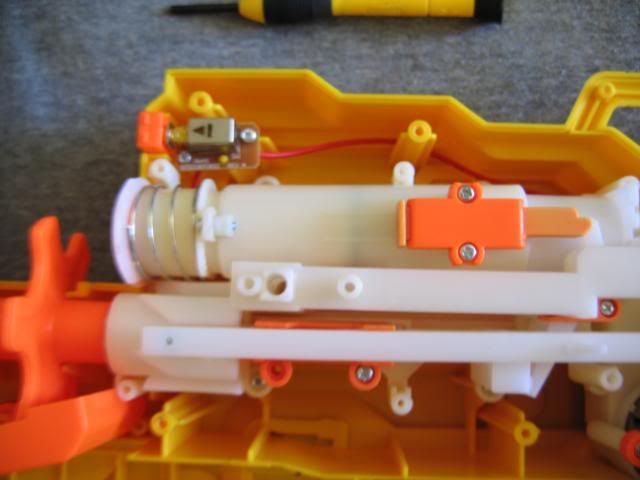
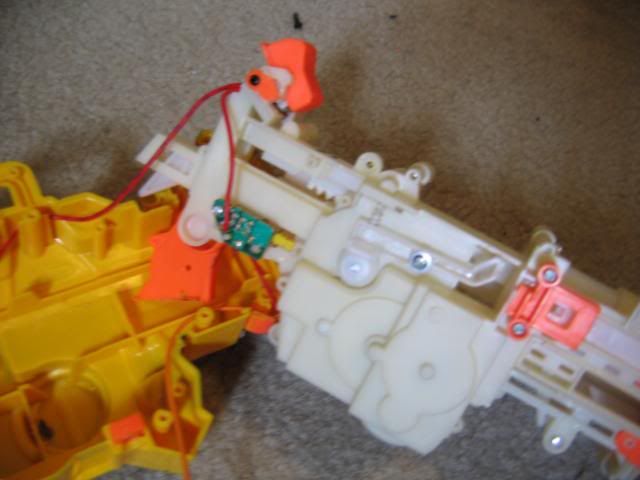
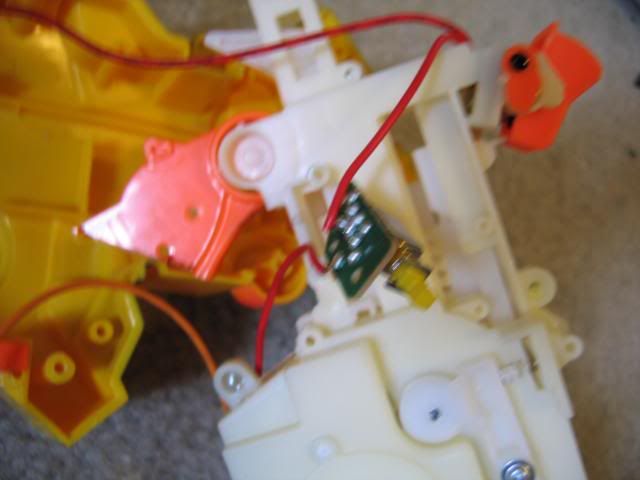
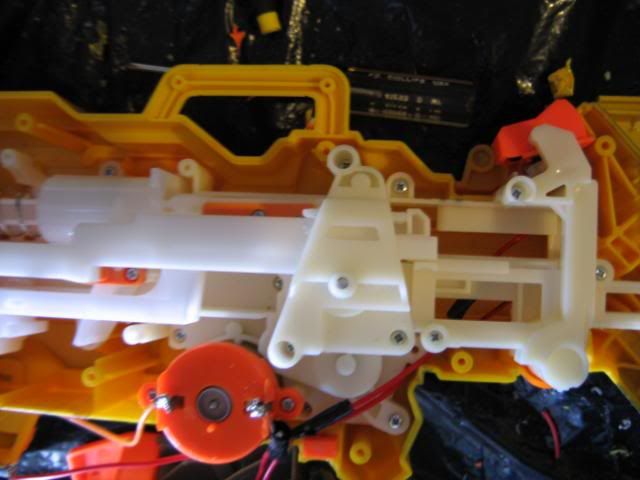
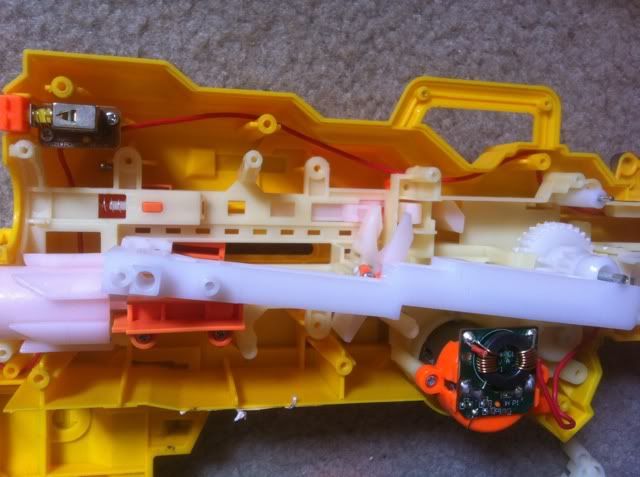
The first thing to do is kill the thermistor, which is the cause of most overheats and such. It is located on the PCB attached to the motor, which is an unnecessary RF noise suppression circuit. I unscrewed the motor and pulled it out so I could work with it a bit easier. I desoldered the PCB and pulled it off of the motor, then soldered the wires directly to the motor. Do your best to remember which wire goes to which side. Then, slide the motor back into place and screw it back in.
Posted Image

Posted Image

The next few steps all deal with the action itself. The easiest way to do this is to do everything while the entire action is removed, but I only have pictures of doing each step individually, most with the action not entirely removed, since I did them all at separate times.

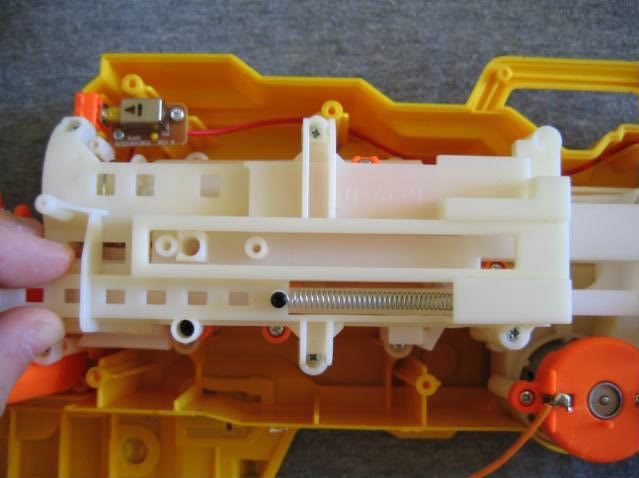
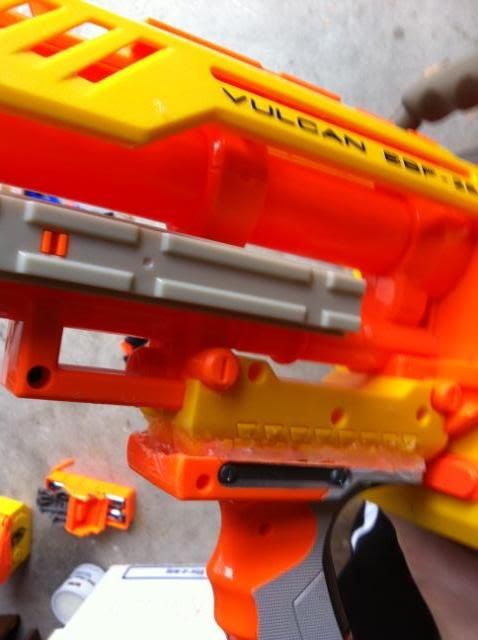
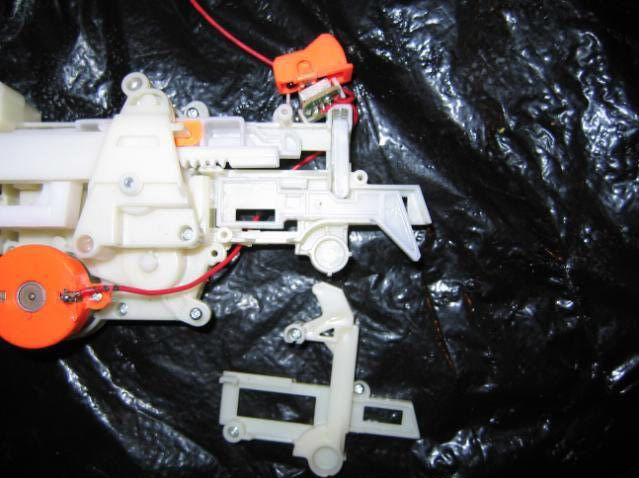
First we're going to remove the AR. This is what we're looking at.
Posted Image

Unscrew the orange piece in the middle of the 'internals top cover'. The little rectangular one with two screws.
Posted Image

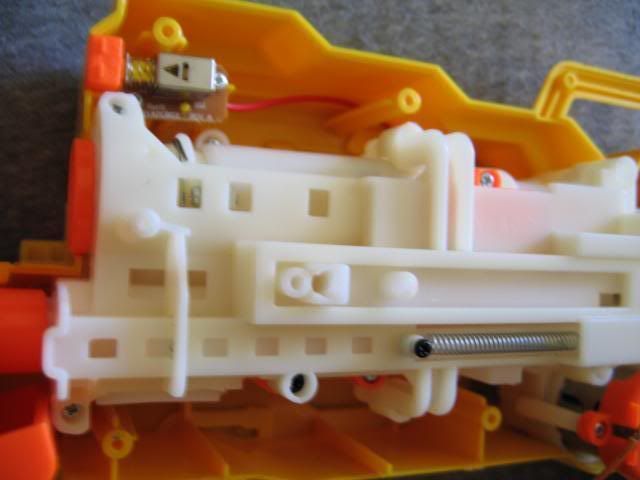
Now remove the 'internals top cover.' It has six screws. Take a good look at where the screwports are and you can probably figure out which ones they are. Or look at Splits picture from the link. As you remove it, you'll have to unhook the little extension spring.
Posted Image

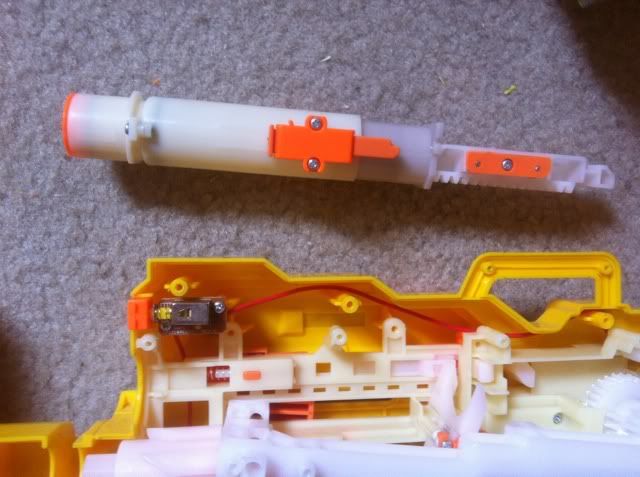
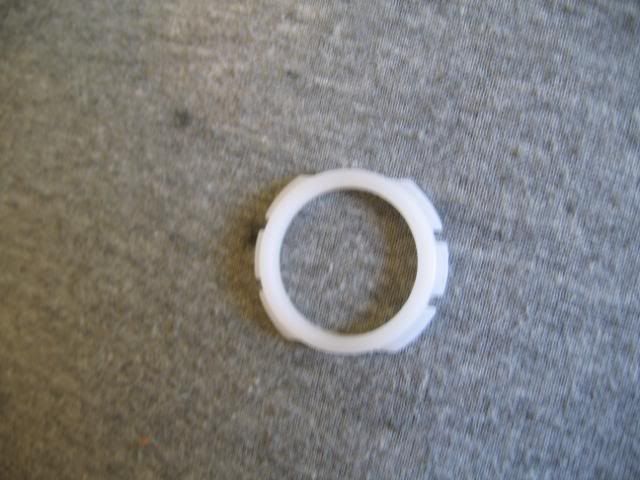
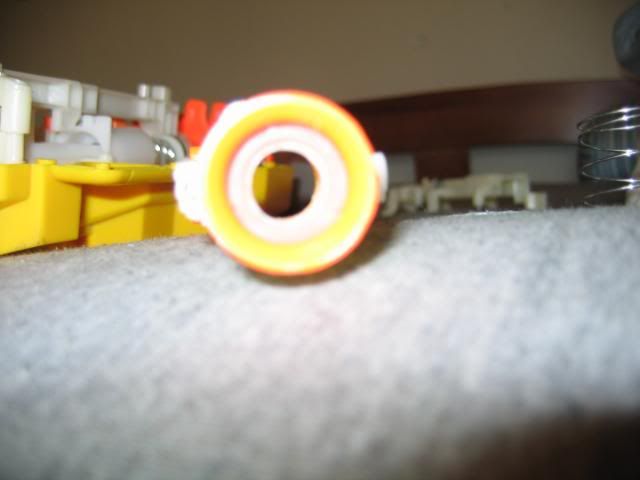
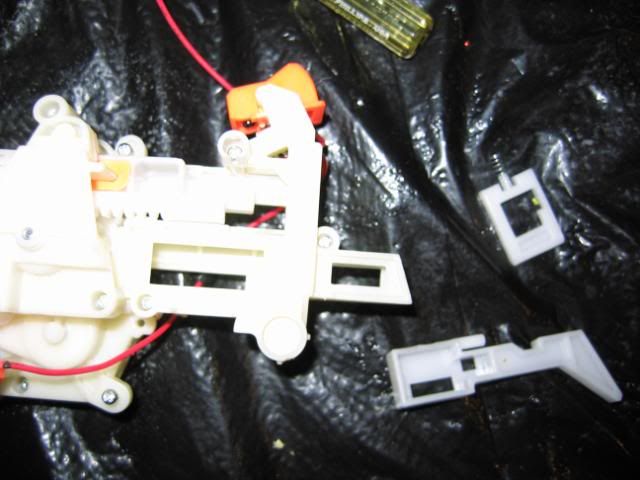
So now we're looking at this. As you can see, there is a spring and a white piece at the front holding the spring there.
Posted Image

Take the white piece and the spring out. You can actually remove the plunger tube from this position with a little gentle twisting and pulling.
Posted Image

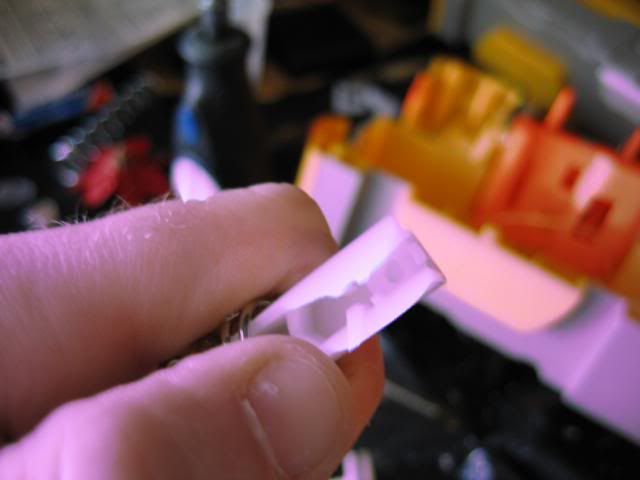
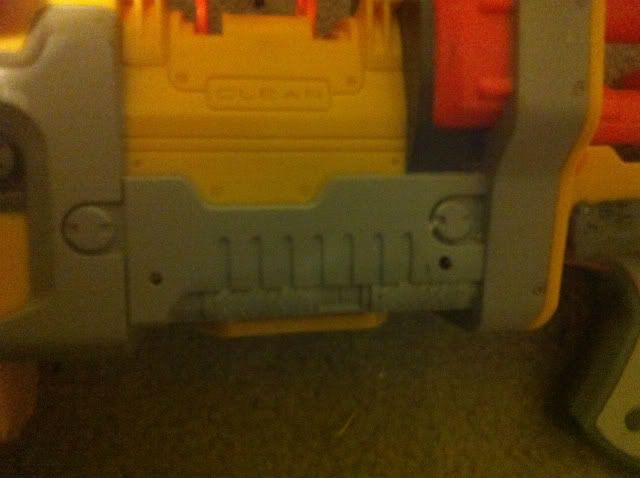
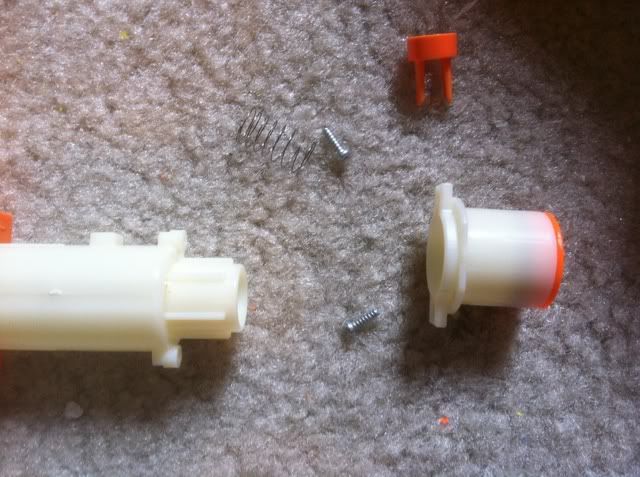
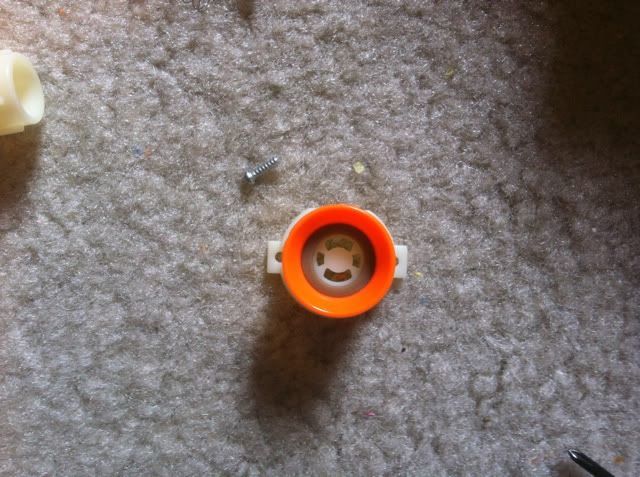
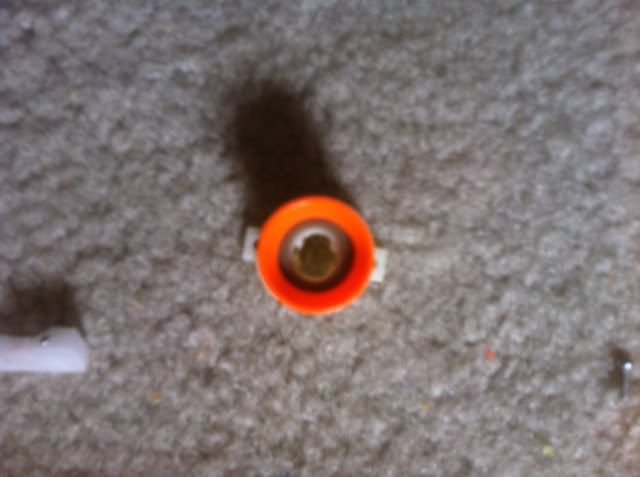
Using a regular 1/4" drill bit (NOT SPADE), CAREFULLY drill a hole into the center of the white face at the front of the plunger tube. You do NOT want to jack up the grey part or the orange part around it. After the 1/2" hole is drilled, carefully expand it to 3/8". The AR should be able to be punched out from here and it should look something like this. It will take some effort. Don't damage your plunger tube (or yourself) in the process.
Posted Image

3-2-12 Edit: I finished a contract vulcan today, and when the two screws at the top of the plungertube were unscrewed, it popped right off, allowing me to remove the AR with no trouble. I went ahead and drilled through the front of it for better airflow. In my vulcan from the majority of this writeup, that part was glued on and I was unable to get it off, so I guess before you do anything, see if you can just unscrew it.
Posted Image
Posted Image
Posted Image

Some of the next few pics are pretty awful. Forgive me. My camera was really giving me a hard time. Macro was acting up and all sorts of weird things were going on. The pictures are also a little out of order, so, for example, if you see the trigger still on after I said cut it off, don't worry about it.

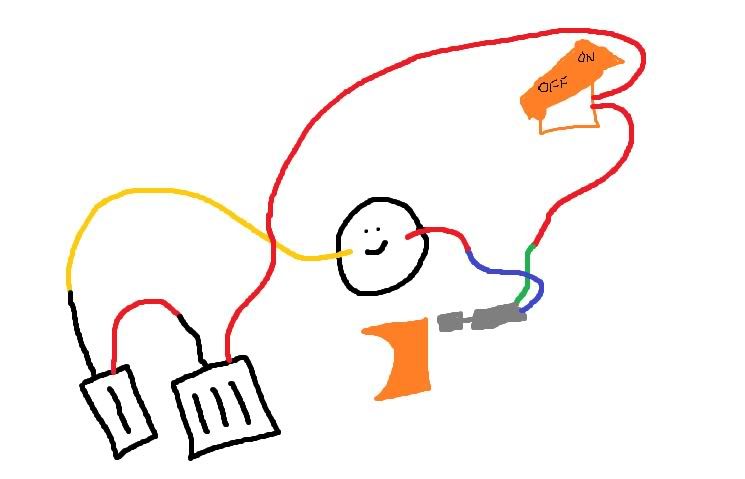
ANYWAY, by relocating the trigger to a more ergonomic configuration, we have to use a completely electric system. If you've messed with vulcan in stock form at all, which you presumably have, you know that when you're reloading, sometimes the cogs don't do a full rotation after the blaster runs out. To fix this in stock form, you simply pull back the manual priming bar and prime it manually, dry fire it, then reload. HOWEVER, by taking the ability to manually fire out of the system, we need to remove the catch, so that you can pull the priming bar to rotate the cogs and simply release it without the blaster catching.

So first, I cut off the remains of the original trigger.
Posted Image

Now I needed to remove the catch cover, which is located at the rear of the blaster, right under the on/off switch.
Posted Image

I removed both the catch and the manual firing mechanism underneath it, as neither are needed, and replaced the catch cover.
Posted Image

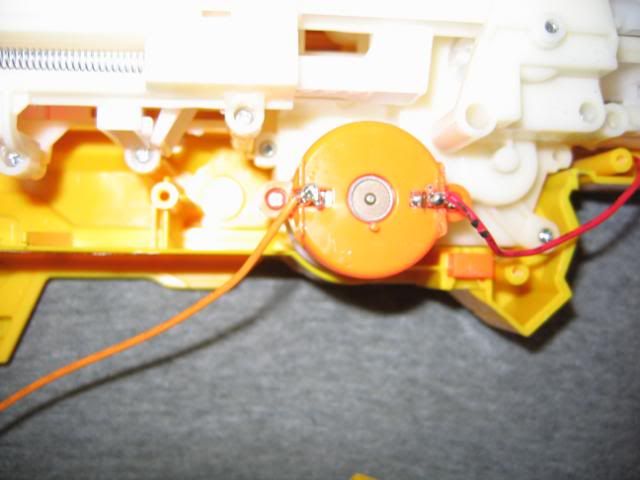
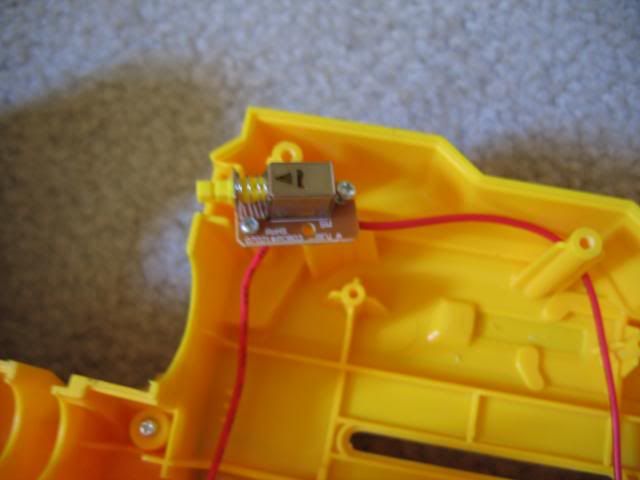
Next, I removed the entire action. I unscrewed the five screws on the 'internals bottom cover' and carefully lifted it out. There is a PCB with a push to on switch near where the original trigger was.
Posted Image

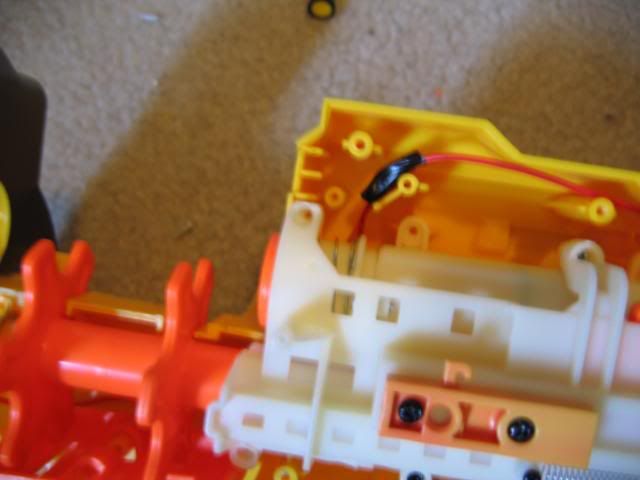
I unscrewed the switch and desoldered it. I stripped the ends of the wires, twisted them together, soldered them together, then wrapped them in e-tape.
Posted Image

Posted Image

Posted Image

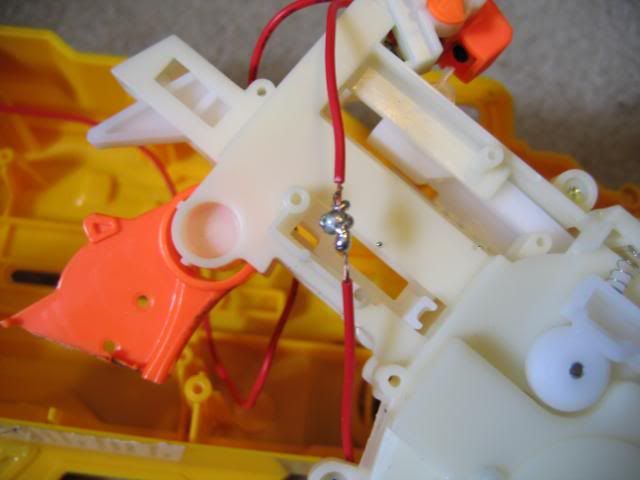
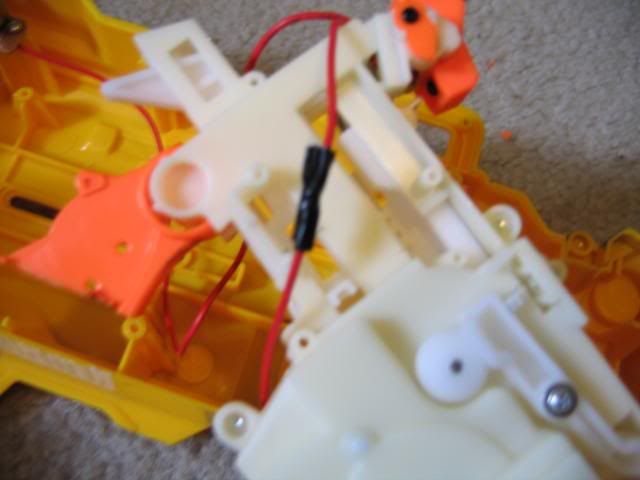
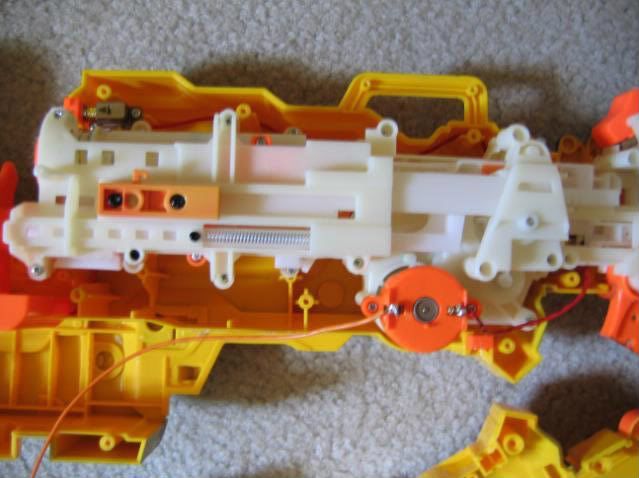
Next I unscrewed the push to on switch at the belt cover, desoldered it, stripped the ends of the wires, twisted them, soldered them, wrapped in e-tape. You can actually take this end of the wire, cut off the little springy thing where the battery tray went and relocate it back next to the wire coming from the on off switch going to the motor.
Posted Image

Posted Image

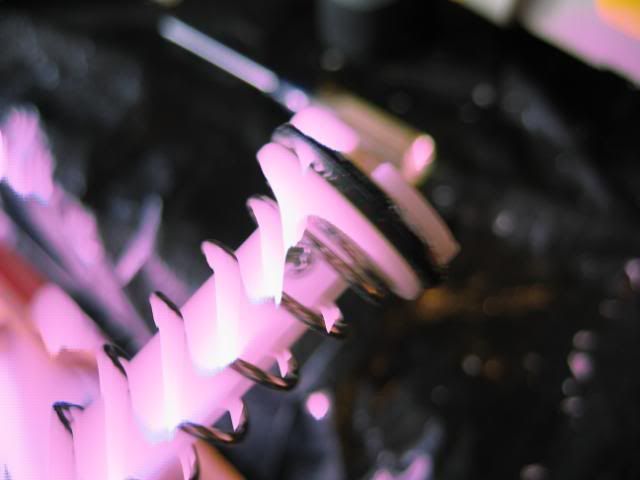
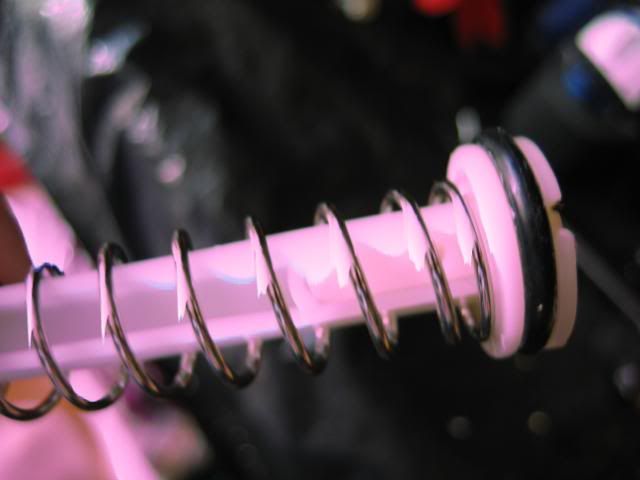
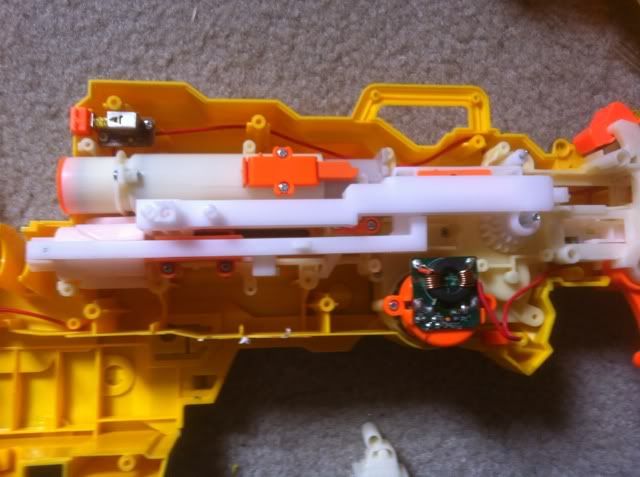
Next, I replaced the spring. I feel that this would probably be easier with the action removed, but I did it with the action in the blaster. This is also the part where the camera crapped out on me so the pictures are crazy.

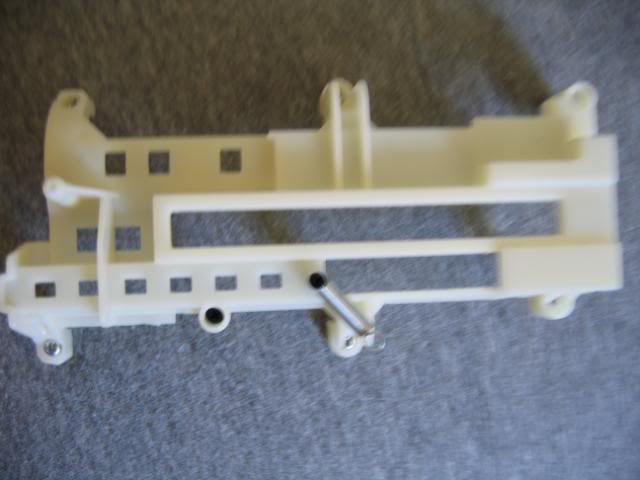
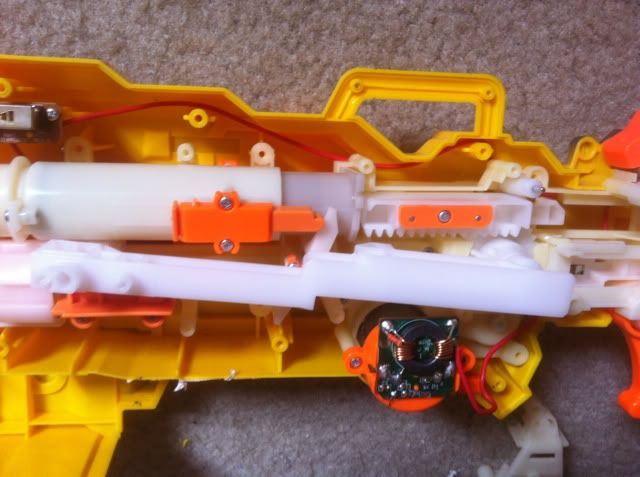
I removed the 'gear train cover'.
Posted Image

3-2-12 Edit: Due to lack of picture quality, I am adding in pictures and descriptions from a contract vulcan to better explain this part.

This is what you'll be looking at.
Posted Image

Remove the rotation arm mech.
Posted Image
Posted Image

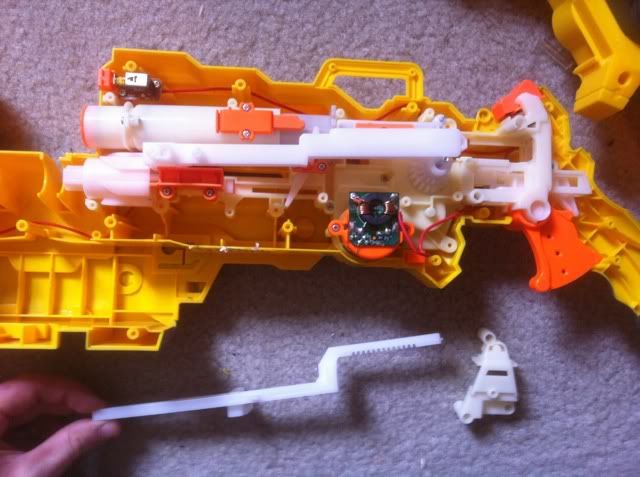
After that, you'll be able to take out your plunger tube and plunger.
Posted Image

PICTURE LIMIT

Edited by ilikefish58, 03 March 2012 - 12:15 AM.

  • 0

#2 ilikefish58

ilikefish58

    Member

  • Members
  • 86 posts

Posted 03 March 2012 - 12:12 AM

Posted Image

So now you have your plunger. On one side the head is screwed in at the tip.
Posted Image

To replace the spring, pull the spring down and unscrew it. The head will slide out from the opposite side of the screw. Push the spring down and slide the head off. Now you can remove the stock spring and swap in your OMW spring.
Posted Image

Posted Image

Now, replace the plungerhead, place the plunger back into the action, then replace the plunger tube and plunger. Note that the spring stop has to fit in a certain way. Then slide the rotation arm mech back into place and reposition the manual cocking mech. Then replace your gear train cover. Now, slide your plunger tube back on. NOTE THAT IT ONLY GOES ONE WAY. It is not perfectly round. there is one flatter side near the front. The flatter side faces downward. With the plunger tube in place, you can screw the action back into the shell, if you chose to do it with the action out of the shell.

Now get the smaller spring and the white piece that go on the plunger tube. Note that the white piece is larger on one face than the other.
Posted Image

Put the spring back onto the sealing mechanism first, then the white piece, with the larger face to the back (inside) of the blaster.
Posted Image

Now the 'internals top cover' can be screwed back in. Then screw the orange piece with the two screws on top of it. Remember to hook the extention spring back to the 'cog spring' or the cogs won't rotate when fired. The orange piece isn't on in the picture. Make sure you don't forget it.

Posted Image

We're done with the action! Woohoo!

So, now we're going to cut the rear off of the firefly. I thought I had pictures of this, but I cannot find them. Then, cut a notch into the firefly stock, roughly in the shape of the vulcan handle. Align the stock and the handle as good as you can (do try to get it as centered as possible), then hot glue the stock on.
Posted Image

Posted Image

Epoxy putty on top of the hot glue. I have no pictures, but you can see it in the first picture of the writeup.

Now, cut the trigger area off of the firefly.
Posted Image

This is where I realized that I had probably made a bad decision by going with a firefly handle. While the handle is nice and comfy (at least to me - but I have little fairy elf hands), the trigger return spring is an unconventional extension spring. Cut it all off here.
Posted Image

As you can see, I had to rig up a return spring by taking a random spring and hot gluing it to the back of the handle and to the trigger. I used as much hot glue as I could to make sure it was at least semi-stable.

Now you need a push to on switch. Ace sells them, if you want a higher spec'd switch, but I used one of the ones* I hopped out of the circuit earlier. (* I am a liar. I could easily have used one of those, but I conveniently left them in my apartment at college, so I used one from my stampede.) I lined it up with the trigger and hot glued it in place. I don't know if it will affect anything, but I tried to keep the hot glue away from the PCB, just in case. I also hot glued the switch itself to the trigger, so that it (hopefully) won't slip.
Posted Image

Posted Image

Next, I took the battery tray cover and lined the handle up as straight as I could. Then I hot glued it down.
Posted Image

Posted Image

Can you guess whats next? Yep, E-putty.
Posted Image

Next, I carefully drilled a hole into the battery cover for the wires to go through. I cut the wire coming from the on/off switch to the motor and soldered the new push to on trigger into it.
Posted Image

Posted Image

Next, I wired in the battery trays.
Posted Image

Here is a super awesome MS Paint drawing of the wiring.
Posted Image

Its a good idea to test the wiring with low power batteries while the blaster is still open. If you hear any grinding at all, reverse the positive and negative wires to the battery trays. For batteries, I used 3.7V AA sized trustfires.

Aaaand I think thats it. Screw it back together and you should have a functioning, much more ergonomic, albeit not pretty, Vulcan.
Posted Image

RANGES:
Stock: I'm sure it is pretty much agreed upon that a stock vulcan will shoot about 25'-30'

Modded: I fired a partial belt, flat, at about 5ish ft from the ground (shoulder height - I'm about 6'1"), with stock whistler darts
There were 1 or 2 darts at around 30'
The majority of the darts were at 45'
There were 3 or 4 darts at 50'-52'
I would say that I would expect around 45ish feet.

Batteries:
I used 3.7V AA trustfires. Here is the battery charger that works with them.

IMPORTANT: From redoing portions of this mod for contracts, I've learned that you should do the spring replacement first. While the plunger tube is out, kill the AR. You save time and effort doing it that way.

IMPORTANT NOTE FOR THOSE WANTING TO USE LONGER BELTS:
If you plan on using an extended belt like I am, note that you WILL need a belt catcher of some form on the opposite side of the blaster from the ammo can. You will probably also need a larger ammo can. The belt catcher is needed because the weight from an extended belt puts to much stress on the cogs and they will start slipping and not rotating.

So for the vulcan to reliably use longer belts (75+), you need a belt catcher and a larger ammo box. A lot of people use military surplus ammo boxes for 7.62mm rounds, but I didn't want to go that route. I decided to try to take a cardboard box and convert it.

First put the stock ammo box in the vulcan. Mark where the lip at the front of the vulcan is on the ammo box like so.
Posted Image

Then, cut the ammo box down that line, across the bottom. Leave most of the other side there.
Posted Image

Hot glue and e-putty those bad boys together.
Posted Image

Wow. That was easy. Leave that off the vulcan for now (make sure you paint an insulting statement on it). Reference to insulting statement=
Posted Image

I decided to use a trash can as my belt catcher.
Posted Image

I drilled two holes in the side of the vulcan where the ammo comes out. Drill them low enough that they're going through the battery cage and not, like, into the gears and stuff.
Posted Image

Measure that distance, then drill two matching holes in the trash can, using that measurement. Also, cut the little lip off of the side of the trash can that will be facing the blaster.
Posted Image

Screw the trash can onto the vulcan shell.
Posted Image

BOOM! The vulcan can now shoot through long belts without jamming. Make sure you paint something fitting onto the trash can too.

[5-9-12 edit]
I decided to use a plastic ammo box instead of the cardboard one I did here for durability purposes. I attached it the same way I attached the trash can. Also, I finally finished painting it. Can't fit any more images in here. Final pics are in the mods/paintjob thread here

DONE

Edited by ilikefish58, 09 May 2012 - 11:47 AM.

  • 0

#3 the mod man

the mod man

    Member

  • Members
  • 79 posts

Posted 03 March 2012 - 10:33 AM

Great writeup, and gun! Gotta love picture heavy writeups.

Edited by the mod man, 03 March 2012 - 10:34 AM.

  • 0
Draconis:"Youtube is a cesspool of coagulated troll urine, created by the inane electronic babble of people with no better use of time than to comment on videos silly people post."

#4 Ranger Dave

Ranger Dave

    Member

  • Members
  • 27 posts

Posted 05 March 2012 - 07:30 PM

I've been working on my own vulcan for a couple of months now so its good to see that other people haven't completely forsaken it as well. I hadn't thought of removing the circuitry on the motor but i might try that as well when i start using trustfires in my gun again. The first time i used trusfires i set the batteryholder on fire because of a short circuit. I love your write up and i will be trying some of these things on my second vulcan. Best vulcan mod in a long time. Keep up the good work mate!


Edit: I'm still waiting on the OMW vulcan spring and the batteries but so fat my vulcan is coming along quite nicely. I really like the way that the vulcan and firefly bodies look together. Thanks again for the awesome write up.

Posted Image

Posted Image

Edited by Ranger Dave, 27 March 2012 - 05:52 PM.

  • 0
~RANGER DAVE Grenadier for Dragon Army
"Where do I put my but?"

#5 RedFear

RedFear

    Member

  • Members
  • 58 posts

Posted 06 March 2012 - 04:35 AM

That setup looks a bit unwieldly with the giant cardboard box on one side and the trash can on the other. have you considered getting smaller boxes, possible cloth/wire boxes? by the way, has this had any problem with the added spring tension from the omw spring?

Edited by RedFear, 06 March 2012 - 04:36 AM.

  • 0

#6 Ozymandias

Ozymandias

    Member

  • Members
  • 201 posts

Posted 06 March 2012 - 12:29 PM

That setup looks a bit unwieldly with the giant cardboard box on one side and the trash can on the other. have you considered getting smaller boxes, possible cloth/wire boxes? by the way, has this had any problem with the added spring tension from the omw spring?


As far as box weight goes, HvZers have been using M1919 Browning machine gun ammo boxes for quite some time.
  • 0
If you wish to post anything HvZ related, here ya go.

"...if you've ever suffered the effects of a fucking faggot retard overpopulation, you'll understand what devistaiting effects it can have on one's psyche." - Talio

#7 RedFear

RedFear

    Member

  • Members
  • 58 posts

Posted 07 March 2012 - 12:08 AM

i just think that a large cardboard box wouldn't be too practical. i like the machine-gun ammo box on the vulcan more.
  • 0

#8 ilikefish58

ilikefish58

    Member

  • Members
  • 86 posts

Posted 09 March 2012 - 08:03 PM

I only used the cardboard box because I didn't want to go find a machine gun ammo box and I figured it would save some weight. The whole thing is VERY light and handles well. I went with the trash can instead of a bag because I didn't want it to swing when making quick turns in HvZ. Just a personal preferance thing.

As far as the spring goes, its holding up very well. I'm only using the 2x spring, but the aforementioned torukmakto4 is running the 2.5x spring, and he hasn't seemed to have a problem with it either.
  • 0

#9 TagMaster247

TagMaster247

    Member

  • Banned
  • 103 posts

Posted 10 March 2012 - 11:56 PM

It'll at least make you stronger. :) That's pretty sick! Great job! I'd hate to see that against me.


0 user(s) are reading this topic

0 members, 0 guests, 0 anonymous users