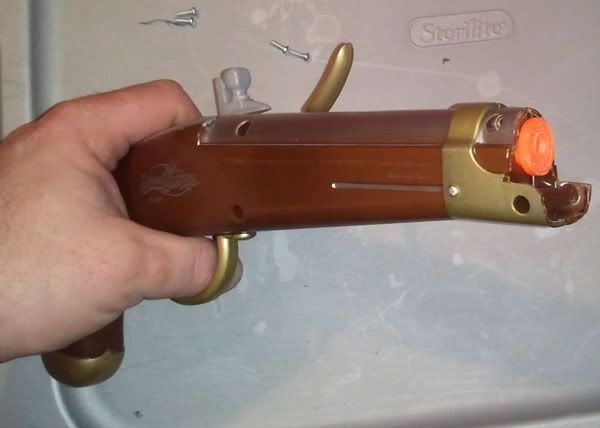
This write-up will show you how to take this seldom-seen blaster and turn it into something that you could use to at least hold your own with during a pistols round, or as a sidearm/holdout pistol. Here is what we are starting with:
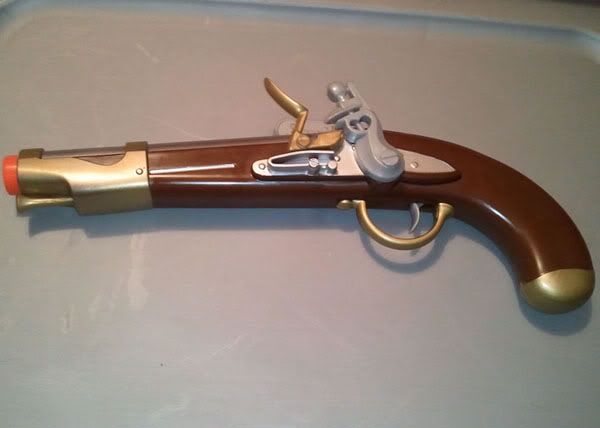
The stock range isn't bad - I was showing an average flat range of 19', with the furthest dart in my test group going 22', and the closest still flying a respectable 17'. Not bad for a stylish and inexpensive blaster (I've gotten two so far at Cracker Barrel, paying $8.99 each.) We can do better though!
Materials Needed:
Buzzbee Flintlock Pistol (no, really - this is kind of important!)
1/2" CPVC endcap (or 1/2 of a 1/2" CPVC coupler*)
Amazing Goop
replacement or additional spring(s)**
* My local hardware stores all only seem to stock the barrel-shaped CPVC couplers, which are much more difficult to cut in half. I would rather spend $0.50 to buy two endcaps and then drill them out than to buy one $0.25 coupler and fail miserably at cutting it in half.
** I wasn't able to find a stronger replacement, or a single spring that would fit inside the stock spring, as the size requirements for the spring are pretty tight - it has to fit on the plunger rod, be able to fit it over or past the cocking nub on the plunger rod, and fit inside the plunger tube. I ended up finding two smaller springs that fit the bill, and stack to provide decent extra power. At my local ACE, they are labeled as #10 springs, but I don't know what brand they are or any other specs on them.
Tools used
#0 Phillips head screwdriver
3/16 flat head screwdriver
needle-nose pliers
X-Acto knife
Dremel rotary tool (cutting wheel, various grinders)
power drill (bits ranging up to 5/16")
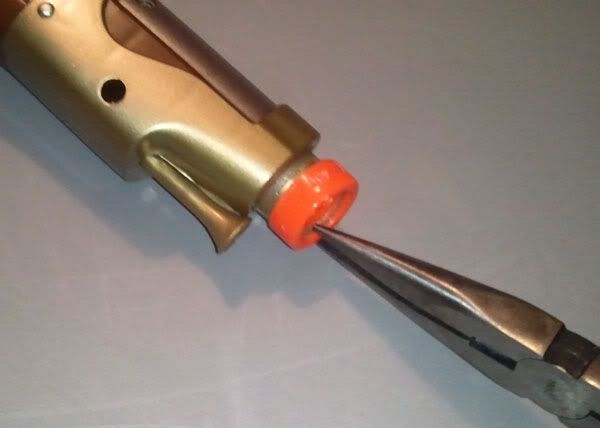
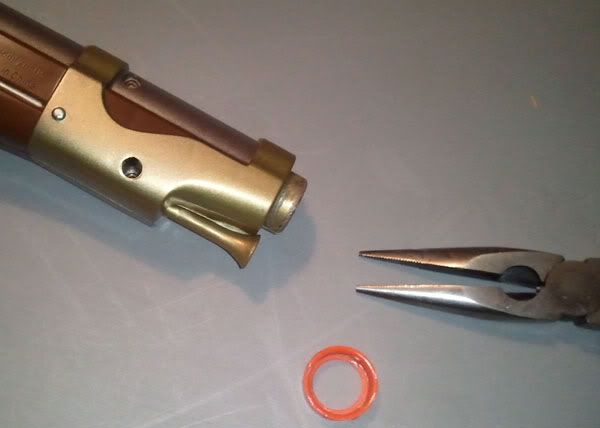
First things first, we need to get this thing open. The flintlock has an orange ring around the front of the barrel which you need to pry off. I used my needle-nose pliers and just wiggled and twisted until it came off. You can be a little rough here, as we won't be keeping the stock barrel, the very front of the shell or the orange ring, so just get it off. (Mine wasn't glued very well, so it pretty much came off without much effort.)
Now unscrew the 6 screws. They are easy to find, and easy to unscrew using a standard #0 Phillips head screwdriver. There aren't really any parts that try to pop out when you open the blaster (not with the stock springs anyway), so once you have the screws undone, you should be able to just pull it open. The internals tend to stick to or be attached to the left side of the shell (if you are holding the blaster by the handle and pointing it downrange).
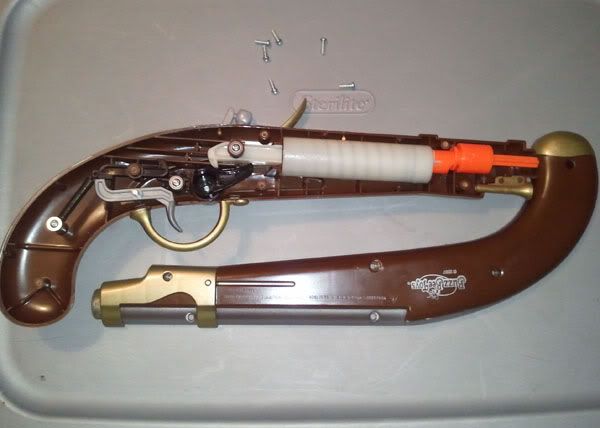
Carefully pull out the plunger tube and remove the plunger rod.
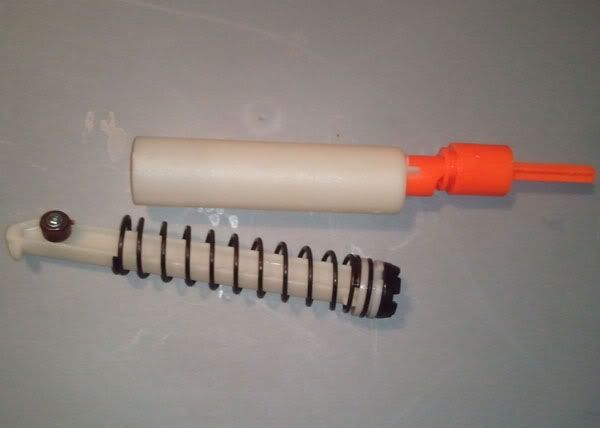
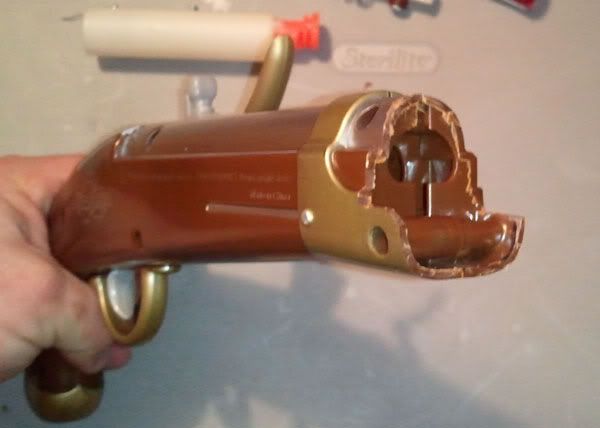
Using your Dremel and cutting wheel, remove the main barrel to the point shown below. (You could also use a hacksaw, pipe cutter or some other means, but the Dremel is usually fastest and easiest)
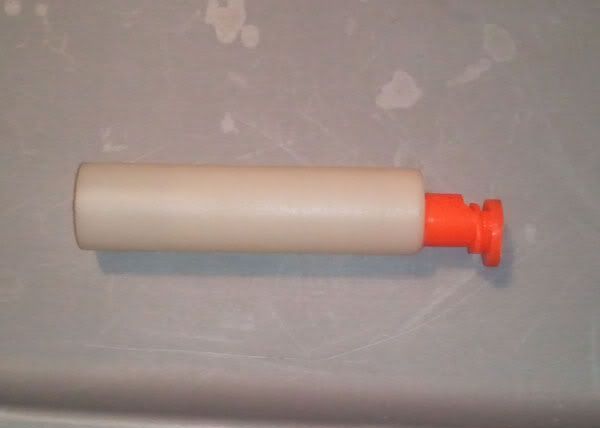
You should now have a face at the end of your plunger tube that looks like the image below. Make sure this face is straight, level, sanded down and cleaned up as shown. (Clean any rough edges up with your X-Acto blade and/or your Dremel grinding bits.)
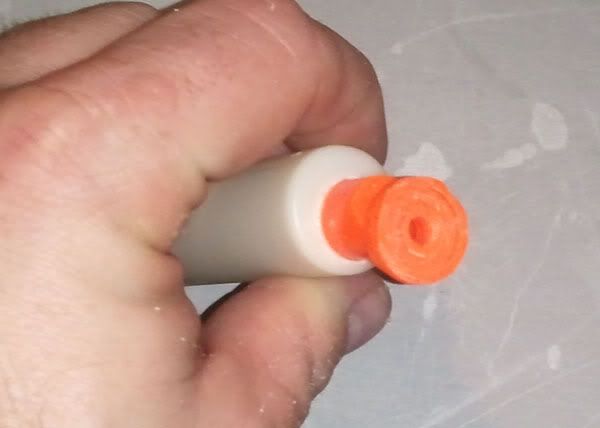
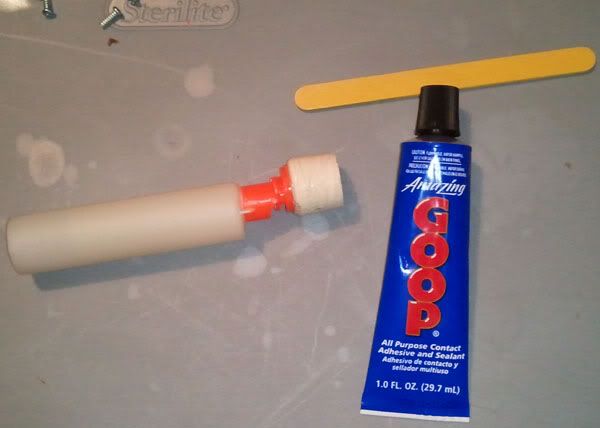
Take your CPVC endcap and sand/grind down any raised lettering on the top face to smooth it down and have it level for gluing. Then drill a hole in the center of the top face with a 5/16" drill bit. (I found it much easier to start with much smaller bits, then step up one or two sizes at a time until I got to the 5/16" bit. This allowed me to have better control over the centering of the hole, and made it much easier to hold the endcap steady while drilling.) Clean up any rough edges with your X-Acto blade and/or your Dremel grinding bits.
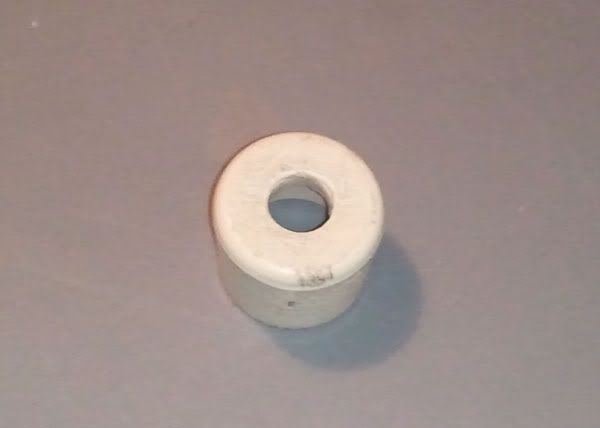
Using the Amazing Goop, and following the directions on the package, glue the CPVC endcap to the prepared plunger face, centering the hole in the endcap over the hole in the plunger face.
Using your Dremel and cutting wheel, cut the front of the shell off just in front of the brace forward of the two screw posts at the front end. (See the two images below to see where I made my cuts.) Use your X-Acto blade and/or Dremel grinding bits to clean up any rough areas.
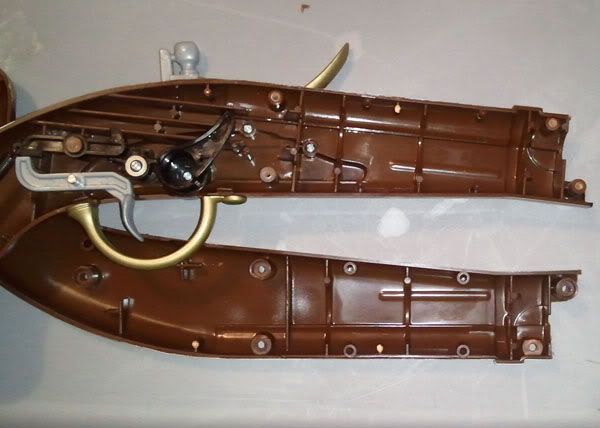
Place the plunger tube back into the blaster, checking the fit. If anything does not fit properly, shave off a bit more of the shell until it fits correctly.
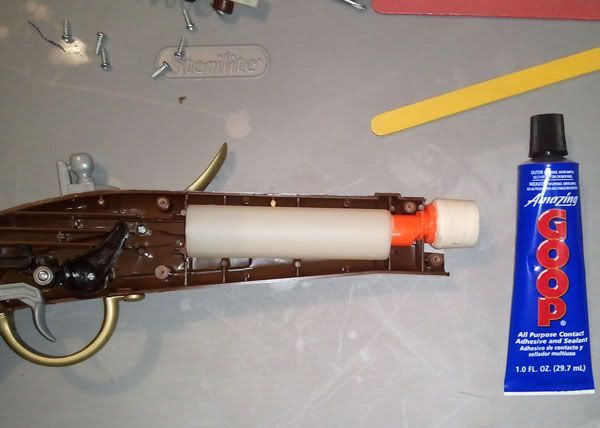
Make sure you close up the shell at this point to check the fit on both sides. (You don't need to screw it together yet - just make sure it will close properly.
Get your springs and plunger rod together, and take out the small screw on the cocking nub, removing the little brown plastic ring as well. (Do not lose these!)
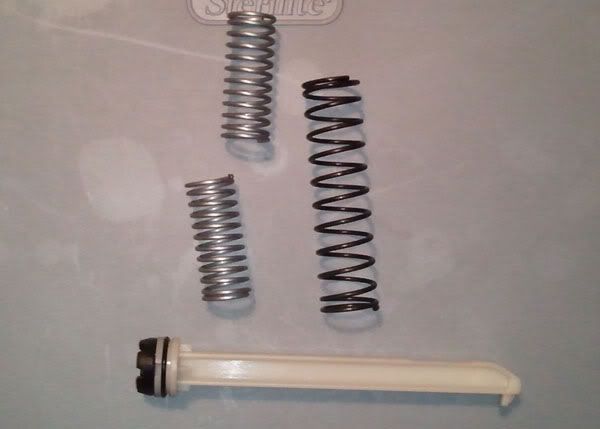
Get your replacement spring or spring combination onto the plunger rod. (This probably involves removing the stock spring, at least temporarily.)
I had to use a 3/16 flathead screwdriver to pry open the end of my smaller springs to get the first loop past the cocking nub, then it was a simple task to twist the rest of the spring past the nub. I stacked the two #13 springs onto the plunger rod.
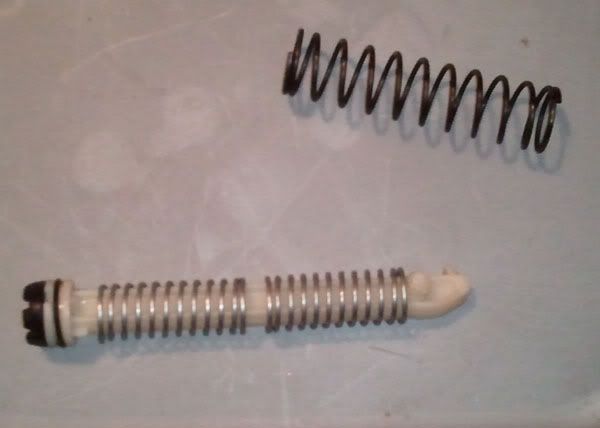
The stock spring then slid over these with just a little twisting.
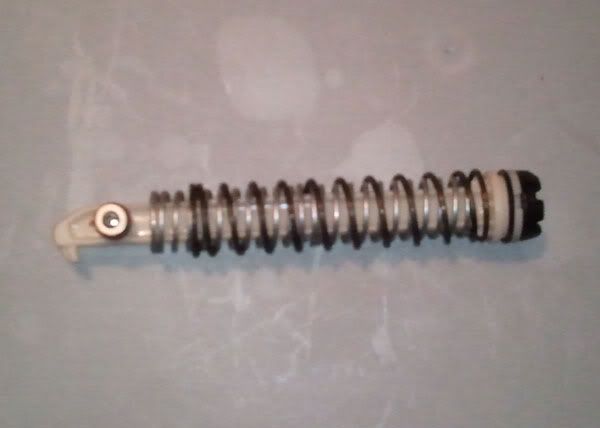
This assembly was then slid back into place in the plunger tube, and the blaster was put back together and screwed shut.
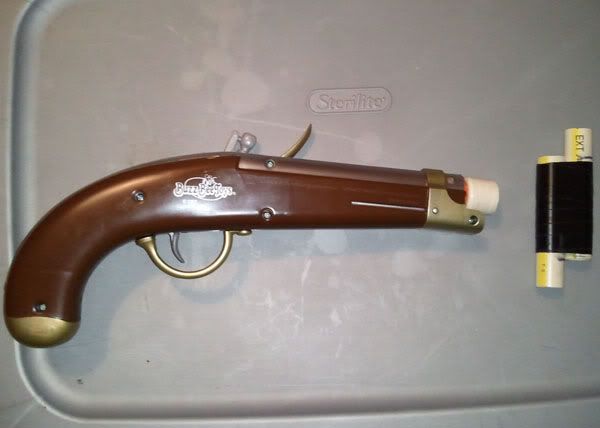
After all this, I found it would accidentally fire while cocking, or while aiming, so I had to put in a stronger catch spring. I found a small extension spring at Ace that fit the bill, but I forgot to note down what spring# it was. The added strength was all that was needed to keep the misfires from happening.
Firing from my 3" barrels, the ranges showed a nice improvement, with stock darts averaging 27' and getting up to 30' at best. With slugs, I was seeing and average of 32', with the best shot going 35'. And obviously the rate of fire is improved a bit with the ability to use speed loaders. (With 3" barrel speed loaders, you can carry quite a few on you with little trouble, meaning you can carry plenty of pre-loaded ammo in a pistol round if you wanted.) And of course, you can still cock it one-handed. (Provided your thumb is strong enough!)
All together, this mod cost $10.88 ($8.99 blaster, $1.54 springs, $0.25, $0.10 worth of Goop), and took me about an hour and a half. (I am rather slow and meticulous, someone else could probably do this faster.)
I would like to apologize. I'm sorry my images are clear, sharp, in-focus, well-lit and - yes - taken with my cell phone. I have a better camera, but I figured I'd use an "awful" camera to make my "awfuls" entry - and show folks that if you take your time, use decent lighting and steady the camera well, you can take good pics with a cell phone.


