Jump to content


Photo

Fallopian mk 2

Phallus too?

20 replies to this topic

#1 Zorns Lemma

Zorns Lemma

    Sir Scrt

  • Moderators
  • 1,277 posts

Posted 11 December 2011 - 10:40 PM

The Fallopian 2 is an internal pump action platform. It was derived from looking at a PAS and the FAL-1 and trying to relocate where the floating tubes occur.

Advantages:
1. Easy to construct
2. Designed to seal better (with only 1 locking seal compared to 2 in the FAL-2)

Disadvantages:
1. Longer blaster (slightly longer without barrel, much longer with barrel)
2. Draw ratio limitations*

There will be a lot of similarity with the Rainfire, although this wasn't inspired or based upon it. There is just so much you can do with tubes inside tubes. A pretty crucial difference is that the catch does not move.

There is also high similarity with Beaver's plunger-prime system. The FAL-2 is also plunger-prime. However, the plunger tube is "free floating" as opposed to anchored around another pipe.

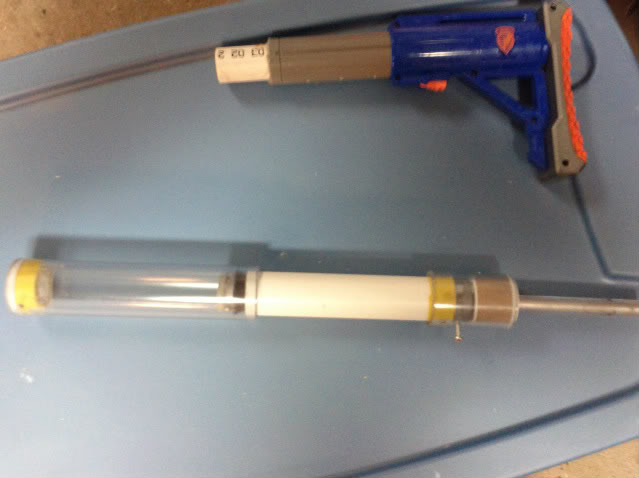
Demo blaster:
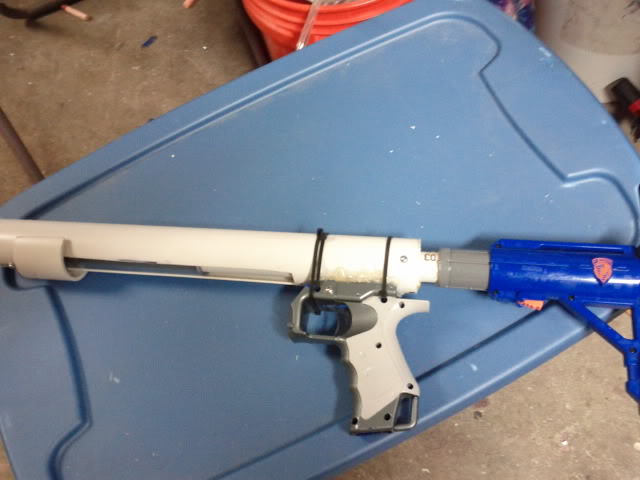
1420585665-308206-1-IMG_20111209_045031.
This blaster is 16" long without stock or barrel. It features a full-length plunger rod as opposed to a demi-rod, thus adding around 4" of length (with stock) that could've been removed by moving the stock and handle forward relative to the catch.
It has 10" of spring and 5.25" of draw. Obtaining 6.5" of draw would require 2.5" of compression (nb: not necessarily precompression) spacer to be added behind the spring and an elongation of the blaster by slightly over 2.5".

Plunger Rod and *draw considerations

Due to how the lip of the plunger tube must stop before hitting the catch spring, and then must also extend forward to no more than past the lip of the plunger rod seal, we have this essential equality:
 

[Draw] <= .5 * [Distance from back of plunger head to spring rest]


In the blaster mentioned, there is .5" of space from the seal to where the spring starts, the spring is 10", and the spring rest is precisely the front catch plate. Thus I am able to obtain 5.25" of draw, and also why moving that up to 6.5" requires the given spacer.

Once this little bit is understood, the rest of the blaster is extremely simple. Here is my plunger rod:
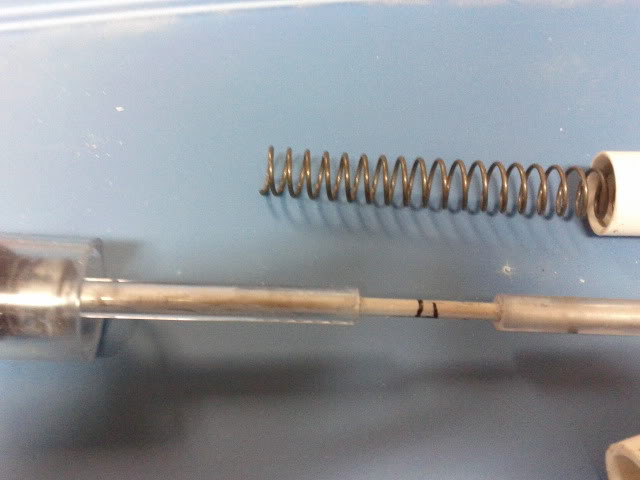
1420585665-308206-2-IMG_20111208_234527.

Notice that bit of tube between the rod and the back of the skirt seal. The rod itself is a unidirectional design consisting of 3/8" ID 1/2" OD tube over 3/8" OD aluminum rod. Since the catch surface is semicircular, the 1/8" depth catch contributes enough surface area to make the blaster immune to "drop-firing"

The markings on the rod are to help me measure where the plunger tube will end (it is the one on the left) and where the inner tube support will end (the one on the right). Notice the bit of overlap between the two: this allows the plunger tube to remain support at all times.

Finally, the length of your plunger rod should be enough to just barely pass the end of the catch. The simplest construct method is to over-estimate by a few inches and trim the excess later.
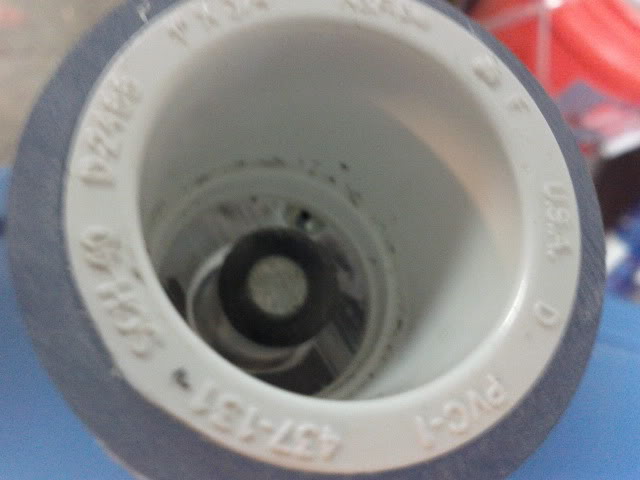
1420585665-308206-3-IMG_20111208_234447.

Floating the plunger tube

The best thing ever: 1" PVC nests nicely inside 1.25" PVC which nests nicely inside 1.5" thinwall PVC. The middle pipe will be our plunger tube, and the other two the inner and outer float supports.
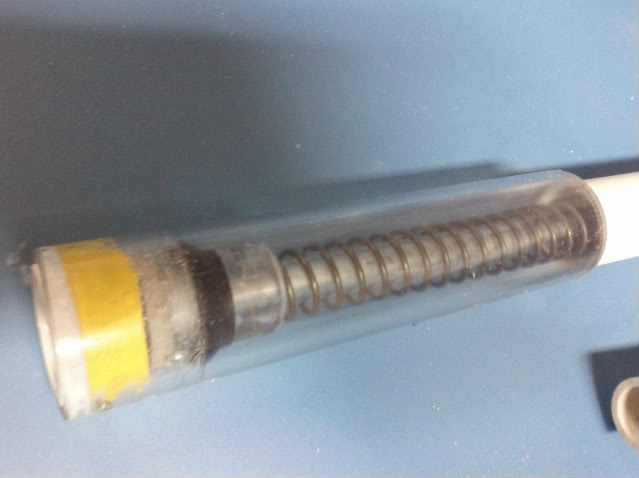
1420585665-308206-4-IMG_20111208_234509.


The plunger tube is of length
 

[Length PT] = [Length space before sealing point] + [Buffer space (~1/8")] + [Draw]


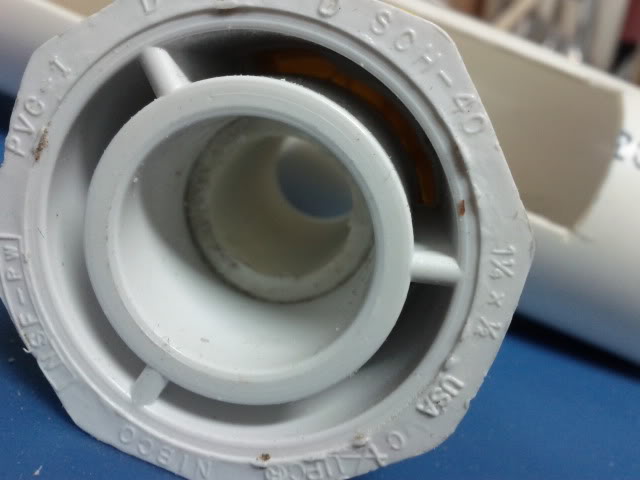
"Space before sealing point" in the front consists of the bushing and the space in front of the plunger head (I have a neoprene square cross-sectional o-ring to act as impact dampening). The buffer space is the gap you want to leave between the actual point of seal and where you want the plunger tube to stop moving. If this is 0, there is a chance of your seal just falling out of the plunger tube.

A large portion of "space before sealing point" is a 1"->1/2" bushing which forms the female receiver of the locking seal. It will make more sense later.


I realized there was some confusion here so this is a diagram of what I meant:
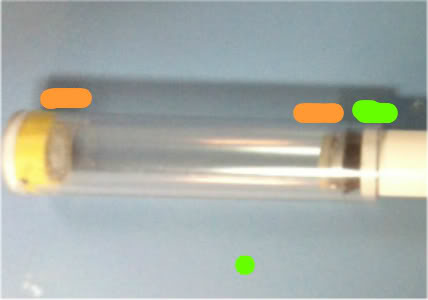
1420585665-308206-5-MG_20111208_234636-1

The orange parts are what I consider "space before sealing point" and the neon green is "buffer space" The orange space has no multiplicative length effects (i.e. adding 1" there will just be a flat 1" length addition to your blaster) and does not affect draw. The green space will affect draw and thus is under a 2x multiplier.

...

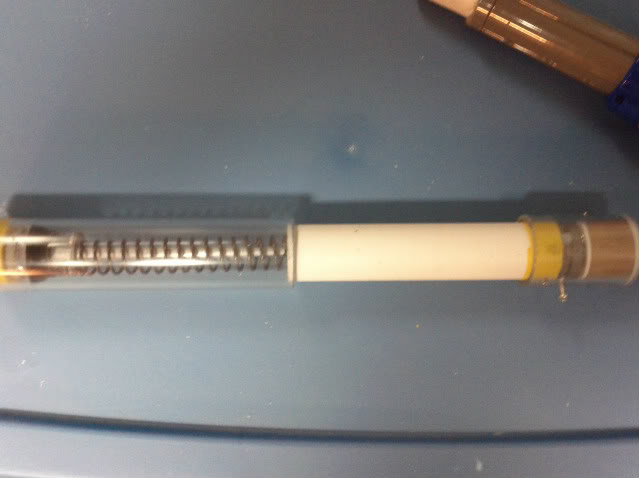
Here is the full internal mechanism:
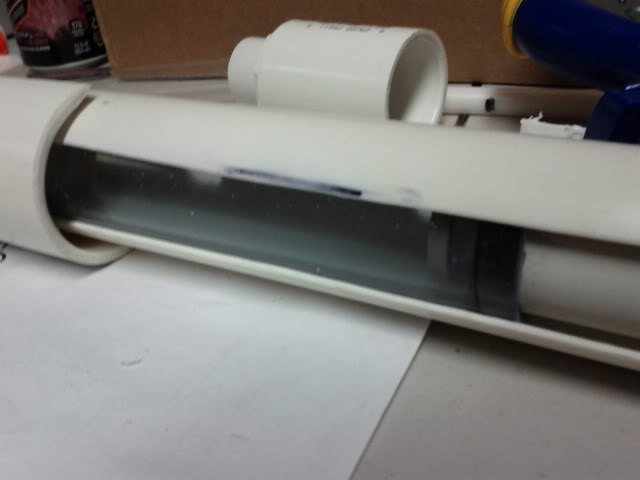
1420585665-308206-6-IMG_20111208_234605.

The clear pipe is 1-1/4" PVC. The white pipe is 1" PVC, with a lip beveled to fit around the plunger head seal. The yellow section is electrical tape binding a 1/2" delrin spring rest to the 1" pvc (there is also super glue). As the is no real stress on these parts a high strength bond is not critical. The grey sections are 1/4" polycarbonate pieces finishing up the rainbow catch. The bit of brown at the back is teflon tape around a 1"->3/4" bushing.

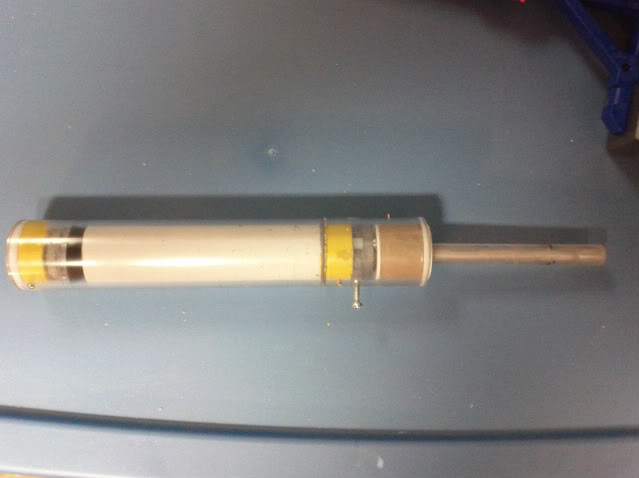
Here is the system priming:
1420585665-308206-7-IMG_20111208_234623.
And primed:
1420585665-308206-8-IMG_20111208_234636.

Outer shell

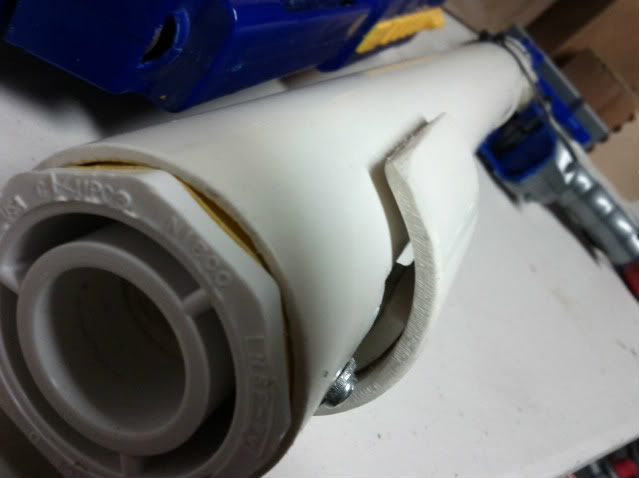
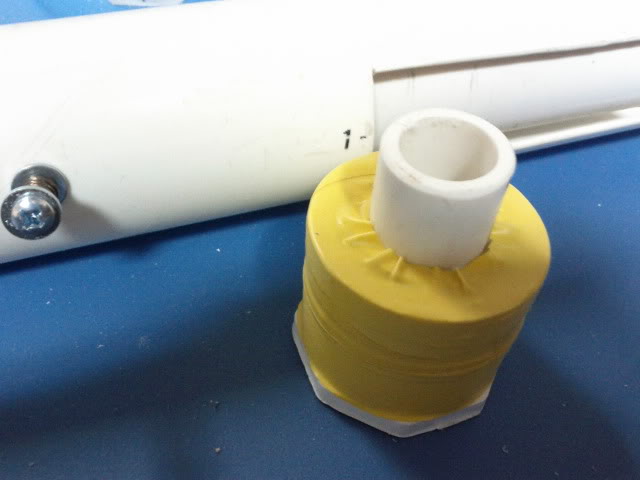
The outer float support is the outer shell. I used a piece of leftover rainbowpump priming shroud and just reappropriated it. The cuts should be pretty obvious. The only thing left is a barrel adapter. I took two 1-1/4"->1/2" bushings and cut them down to make 1 super long bushing and then ran some 1/2" PVC halfway through. This PVC stub is the male counterpart to the female receiver on the plunger tube.
1420585665-308206-9-IMG_20111209_010853.
1420585665-308206-10-IMG_20111209_010918

Finally, you will want to drill a hole for the rainbow catch, mount the male barrel receiver to the outer shell with adhesives or fasteners and mount the catch/spring rest/stock section of the internal mechanism.

You will also need to mount a handle and create a trigger.

The priming handle is 2" PVC attached to a section of 1.5" PVC coupler attached to 1.5" thinwall PVC attached to the female barrel receiver on the plunger tube. You may discover superior methods.

Miscellaneous

Completed blaster, priming
1420585665-308206-11-IMG_20111209_045148

Completed blaster, primed
1420585665-308206-12-IMG_20111209_045157

Porn shot:
1420585665-308206-13-IMG_20111209_045058

Edited by CaptainSlug, 01 November 2017 - 07:41 AM.

  • 0
"In short, the same knowledge that underlies the ability to produce correct judgement is also the knowledge that underlies the ability to recognize correct judgement. To lack the former is to be deficient in the latter."
Kruger and Dunning (1999)

#2 BOSS9

BOSS9

    Member

  • Members
  • 137 posts

Posted 11 December 2011 - 11:51 PM

Wow, great job. I love the floating plungertube, reminds me of Louiec3's 5k. I finished a prototype functionally similar yet internally different a couple weeks ago. Mine is a scaled down prototype using 1" PETG as the plungertube with 1" and 1.25" PVC doing some magic over that. I'll get a "write-up" (post-build) up ASAP.
  • 0

#3 Ice Nine

Ice Nine

    Prince Dangus

  • Administrators
  • 1,460 posts

Posted 12 December 2011 - 12:42 AM

I love the floating plungertube, reminds me of Louiec3's 5k. I finished a prototype functionally similar yet internally different a couple weeks ago. Mine is a scaled down prototype using 1" PETG as the plungertube with 1" and 1.25" PVC doing some magic over that. I'll get a "write-up" (post-build) up ASAP.


I see where you're confused. The 5000 is an airgun, and this is a springer. They are entirely distinct mechanisms, dude. You should have read the writeup more carefully.

I totally believe all the things that came after it, by the way.
  • 0

Unholy Three: DUPLUM SCRTA, DUPLUM PROBLEMA (2009)

But Zeke guns tend to be like proofs by contradiction

Theoretically solid but actually non-constructive

Rnbw Cln


#4 KatanasPWN

KatanasPWN

    Member

  • Members
  • 81 posts

Posted 12 December 2011 - 12:55 AM

He meant louiec3s replacement internals for a 5k
http://www.nerfrevol....php?f=9&t=2931
  • 0
Welcome to hell, I'll be your waiter this evening.

#5 Daniel Beaver

Daniel Beaver

    HQRSE CQCK

  • Moderators
  • 2,099 posts

Posted 12 December 2011 - 02:10 AM

I totally believe all the things that came after it, by the way.


Kinda like that Tornadobow that you could totally prime without having to open up the shell?
  • 0

#6 HasreadCoC

HasreadCoC

    Member

  • Members
  • 274 posts

Posted 12 December 2011 - 12:36 PM

Wow, great job. I love the floating plungertube, reminds me of Louiec3's 5k. I finished a prototype functionally similar yet internally different a couple weeks ago. Mine is a scaled down prototype using 1" PETG as the plungertube with 1" and 1.25" PVC doing some magic over that. I'll get a "write-up" (post-build) up ASAP.

For the record, I knew what you were talking about, as would most anyone who had read that writeup / took a few seconds to think about your post.

And yes, it is somewhat reminiscent of that design, it always seems unstable looking to me in pictures compared to standard stationary PT's, but as I've never built a homemade with this design I can't be sure of any real comparison.
  • 0

I'm the only respectable person here. The rest of the NIC are pretty much just child molesters.


AKA: ObiWonTwo on Nerfrevolution, and most of the rest of the internet for that matter.....

#7 hamoidar

hamoidar

    Member

  • Members
  • 367 posts

Posted 12 December 2011 - 01:34 PM

Good job, the floating plunger tube gives the gun a very clean look. A little more explanation of the catch would be nice. :D
  • 0
NerfHaven > Your control panel > Profile > Change Signature > Inserts dumb sig > What! No pictures! > Inserts next best thing: http://nerfhaven.com...howuser=114052' class='bbc_url' title='External link' rel='nofollow external'>Best thing on Nerfhaven!

#8 Zorns Lemma

Zorns Lemma

    Sir Scrt

  • Moderators
  • 1,277 posts

Posted 12 December 2011 - 03:31 PM

Good job, the floating plunger tube gives the gun a very clean look. A little more explanation of the catch would be nice. :D


The catch is a standard rainbow catch. Since the plunger rod goes all the way through it, even if you build a highly misaligned catch, it should still at least function.

There's lots of good stuff in this thread about rainbow catch alternatives if you don't have polycarbonate or a scroll saw. In fact, this entire blaster could be build with just a drill and a dremel (a tap set is also technically optional since plastic is soft enough to "self-tap" but would be highly recommended).
http://nerfhaven.com...showtopic=20330
  • 0
"In short, the same knowledge that underlies the ability to produce correct judgement is also the knowledge that underlies the ability to recognize correct judgement. To lack the former is to be deficient in the latter."
Kruger and Dunning (1999)

#9 bennorco

bennorco

    Member

  • Members
  • 126 posts

Posted 13 December 2011 - 05:06 PM

I love the name, oh, and nice blaster also!

Edited by bennorco, 13 December 2011 - 05:07 PM.

  • 0
Buy this stuff^

#10 shardbearer

shardbearer

    Member

  • Members
  • 177 posts

Posted 13 December 2011 - 09:18 PM

This is amazing.

Any reason you used a full length plunger rod instead of what you used on the first Fallopian? Just for simplicity?

And this could be made just as easily with a RCT, for those of us without polycarb.

How do you get the plunger tube out? Can you disconnect the priming handle from the plunger tube and slide it out the front?

Edited by shardbearer, 13 December 2011 - 09:19 PM.

  • 0

#11 Zorns Lemma

Zorns Lemma

    Sir Scrt

  • Moderators
  • 1,277 posts

Posted 13 December 2011 - 10:31 PM

1. This is amazing.

2. Any reason you used a full length plunger rod instead of what you used on the first Fallopian? Just for simplicity?

3. And this could be made just as easily with a RCT, for those of us without polycarb.

4. How do you get the plunger tube out? Can you disconnect the priming handle from the plunger tube and slide it out the front?


1. Thank you, I take donations in horse/wolf porn

2. Mostly I didn't want to relocate the priming handle forward and have to build a lower receiver type thing ala FAL-1. This meant I would have the space anyways in the stock for a full length plunger rod.

3. RCT = Ring catch tee? If so, having to build it in a 1.5" T might be awkward on the ergonomics size. Although maybe a 1" T will fit inside 1.5" thinwall nicely, and you can put that around the 1" rear float support...

4. The front bushing in the yellow etape and 1.5" thinwall is held via screws so I can pull that out, and then unscrew the pump grip and slide everything out the front, yes.

Edited by Zorn's Lemma, 13 December 2011 - 10:31 PM.

  • 0
"In short, the same knowledge that underlies the ability to produce correct judgement is also the knowledge that underlies the ability to recognize correct judgement. To lack the former is to be deficient in the latter."
Kruger and Dunning (1999)

#12 shardbearer

shardbearer

    Member

  • Members
  • 177 posts

Posted 14 December 2011 - 06:14 PM

2. Mostly I didn't want to relocate the priming handle forward and have to build a lower receiver type thing ala FAL-1. This meant I would have the space anyways in the stock for a full length plunger rod.

3. RCT = Ring catch tee? If so, having to build it in a 1.5" T might be awkward on the ergonomics size. Although maybe a 1" T will fit inside 1.5" thinwall nicely, and you can put that around the 1" rear float support...


I would have made it with the short plunger rod but kept the handle where it is. That way you can have a detachable stock, but whatever if you dont care about that.

And sorry, it's RCB, Ring Catch Blaster. But they do use tees, and the catch isn't a whole blaster, so RCT works just as well. They are usually made with a 3/4" tee that fits perfectly inside 1 1/4" with a bit of e tape, and act as a handle (with a pipe in the bottom) in addition to housing the catch.

Edited by shardbearer, 14 December 2011 - 06:38 PM.

  • 0

#13 Zorns Lemma

Zorns Lemma

    Sir Scrt

  • Moderators
  • 1,277 posts

Posted 04 January 2012 - 05:03 PM

I would have made it with the short plunger rod but kept the handle where it is. That way you can have a detachable stock, but whatever if you dont care about that.

And sorry, it's RCB, Ring Catch Blaster. But they do use tees, and the catch isn't a whole blaster, so RCT works just as well. They are usually made with a 3/4" tee that fits perfectly inside 1 1/4" with a bit of e tape, and act as a handle (with a pipe in the bottom) in addition to housing the catch.


Ah I see. Yes you can do it with the short plunger rod and have a fully internal mechanism. But since I have a stock anyways, as you guessed, to keep it simple I used the full rod.

One advantage of using a short rod is that you can shorten the blaster by moving the handle forward and the stock "back"

The plunger tube is of length

[Length PT] = [Length space before sealing point] + [Buffer space (~1/8")] + [Draw]


"Space before sealing point" in the front consists of the bushing and the space in front of the plunger head (I have a neoprene square cross-sectional o-ring to act as impact dampening). The buffer space is the gap you want to leave between the actual point of seal and where you want the plunger tube to stop moving. If this is 0, there is a chance of your seal just falling out of the plunger tube.

A large portion of "space before sealing point" is a 1"->1/2" bushing which forms the female receiver of the locking seal. It will make more sense later.


I realized there was some confusion here so this is a diagram of what I meant:
Posted Image

The orange parts are what I consider "space before sealing point" and the neon green is "buffer space" The orange space has no multiplicative length effects (i.e. adding 1" there will just be a flat 1" length addition to your blaster) and does not affect draw. The green space will affect draw and thus is under a 2x multiplier.


Some more notes for everyone else:
<Zorn> you can get 6.5" easily
<Zorn> by not being stupid like me haha
<Zorn> i forgot that the distance from the back of the plunger head to the front of the spring rest is 2x draw
<Zorn> so if you fill it all with spring, you need 13" of spring to have 6.5" of draw
<Zorn> but you can use 10" of spring and 3" of just pvc in the back (which doesn't move and doesn't add weight to the plunger rod)

1/2" pvc will fit around the plunger rod and inside the 1" pvc in the back with some etape to buff up the OD. 3/4" pvc might just barely fit inside 1" pvc if you are lucky. using 1" thinwall pvc opens up a lot more options.

Edited by Zorn's Lemma, 04 January 2012 - 05:15 PM.

  • 0
"In short, the same knowledge that underlies the ability to produce correct judgement is also the knowledge that underlies the ability to recognize correct judgement. To lack the former is to be deficient in the latter."
Kruger and Dunning (1999)

#14 ChaosPropel

ChaosPropel

    Member

  • Members
  • 586 posts

Posted 05 January 2012 - 07:07 PM

I don't believe you mentioned it in the OP, but how are you attaching the priming handle to the plunger tube? I'm assuming screws of some sort? Where?

Thanks.
  • 0
Preheat oven to 350 degrees F (175 degrees C).

#15 Zorns Lemma

Zorns Lemma

    Sir Scrt

  • Moderators
  • 1,277 posts

Posted 05 January 2012 - 11:36 PM

I don't believe you mentioned it in the OP, but how are you attaching the priming handle to the plunger tube? I'm assuming screws of some sort? Where?


Hot glue and zip ties. B)
  • 0
"In short, the same knowledge that underlies the ability to produce correct judgement is also the knowledge that underlies the ability to recognize correct judgement. To lack the former is to be deficient in the latter."
Kruger and Dunning (1999)

#16 ChaosPropel

ChaosPropel

    Member

  • Members
  • 586 posts

Posted 06 January 2012 - 07:03 AM

Hot glue and zip ties. B)

Really? On the priming handle? I'm not seeing any zip ties....I think you mit be talkng about the main handle?
  • 0
Preheat oven to 350 degrees F (175 degrees C).

#17 Zorns Lemma

Zorns Lemma

    Sir Scrt

  • Moderators
  • 1,277 posts

Posted 06 January 2012 - 05:24 PM

Really? On the priming handle? I'm not seeing any zip ties....I think you mit be talkng about the main handle?


My mistake.

I use hot glue on the semicircular pieces because some of them don't actually concentrically nest. Then I run set screws into the female bushing at the front of the PT. The screws are offset to better distribute stress.
  • 0
"In short, the same knowledge that underlies the ability to produce correct judgement is also the knowledge that underlies the ability to recognize correct judgement. To lack the former is to be deficient in the latter."
Kruger and Dunning (1999)

#18 ChaosPropel

ChaosPropel

    Member

  • Members
  • 586 posts

Posted 06 January 2012 - 09:21 PM

Is no-etape on the 1" PVC where it nests inside the plunger tube (front 1 1/4" PVC piece) OK? No stability issues?

Also, when we were talking on IRC, you mentioned that you just super-glied the 1" PVC into the back 1 1/4" PVC piece, with no screws, since it's not taking any pressure. Is it still removable? Should I just use screws?

Also, the spring rest piece isn't nested INSIDE the 1" PVC, right? I'm ssuming it's just directly behind the end of the 1" PVC? Like a normal Rainbow catch? It doesn't look like it in the pics.

Edited by ChaosPropel, 06 January 2012 - 09:22 PM.

  • 0
Preheat oven to 350 degrees F (175 degrees C).

#19 Zorns Lemma

Zorns Lemma

    Sir Scrt

  • Moderators
  • 1,277 posts

Posted 07 January 2012 - 08:37 PM

Is no-etape on the 1" PVC where it nests inside the plunger tube (front 1 1/4" PVC piece) OK? No stability issues?

Also, when we were talking on IRC, you mentioned that you just super-glied the 1" PVC into the back 1 1/4" PVC piece, with no screws, since it's not taking any pressure. Is it still removable? Should I just use screws?

Also, the spring rest piece isn't nested INSIDE the 1" PVC, right? I'm ssuming it's just directly behind the end of the 1" PVC? Like a normal Rainbow catch? It doesn't look like it in the pics.


1. The plunger tube is contained by the outside and the inside so default PVC fits should be good enough.

2&3. The spring rest is regular 1-1/4" sized rainbow plate. It is superglued to the 1" PVC. Then the two are wrapped in a single layer of etap for snug fit in the back 1-1/4"
  • 0
"In short, the same knowledge that underlies the ability to produce correct judgement is also the knowledge that underlies the ability to recognize correct judgement. To lack the former is to be deficient in the latter."
Kruger and Dunning (1999)

#20 ChaosPropel

ChaosPropel

    Member

  • Members
  • 586 posts

Posted 08 January 2012 - 08:10 AM

So the spring rest is just superglued onto the 1" PVC? No screws of anything? What's taking the force that the spring puts on it, then?
  • 0
Preheat oven to 350 degrees F (175 degrees C).

#21 Zorns Lemma

Zorns Lemma

    Sir Scrt

  • Moderators
  • 1,277 posts

Posted 09 January 2012 - 04:40 AM

So the spring rest is just superglued onto the 1" PVC? No screws of anything? What's taking the force that the spring puts on it, then?


The spring rest is secured to the 1-1/4" PVC in the rear via set screws. I think there is also another screw that goes through the 1.5" thinwall into the 1-1/4" and into the spring rest (not sure, because lining the holes up would be a shitty job so maybe I got lazy....)
  • 0
"In short, the same knowledge that underlies the ability to produce correct judgement is also the knowledge that underlies the ability to recognize correct judgement. To lack the former is to be deficient in the latter."
Kruger and Dunning (1999)


0 user(s) are reading this topic

0 members, 0 guests, 0 anonymous users