Jump to content


Photo

Superheated Proton Pistol

Cosmetic and Safety Removal Mod

9 replies to this topic

#1 Crotalus

Crotalus

    Member

  • Members
  • 16 posts

Posted 16 October 2011 - 05:17 PM

This is a simple cosmetic and safety removal mod for the Nerf Vortex Proton pistol.

Posted Image
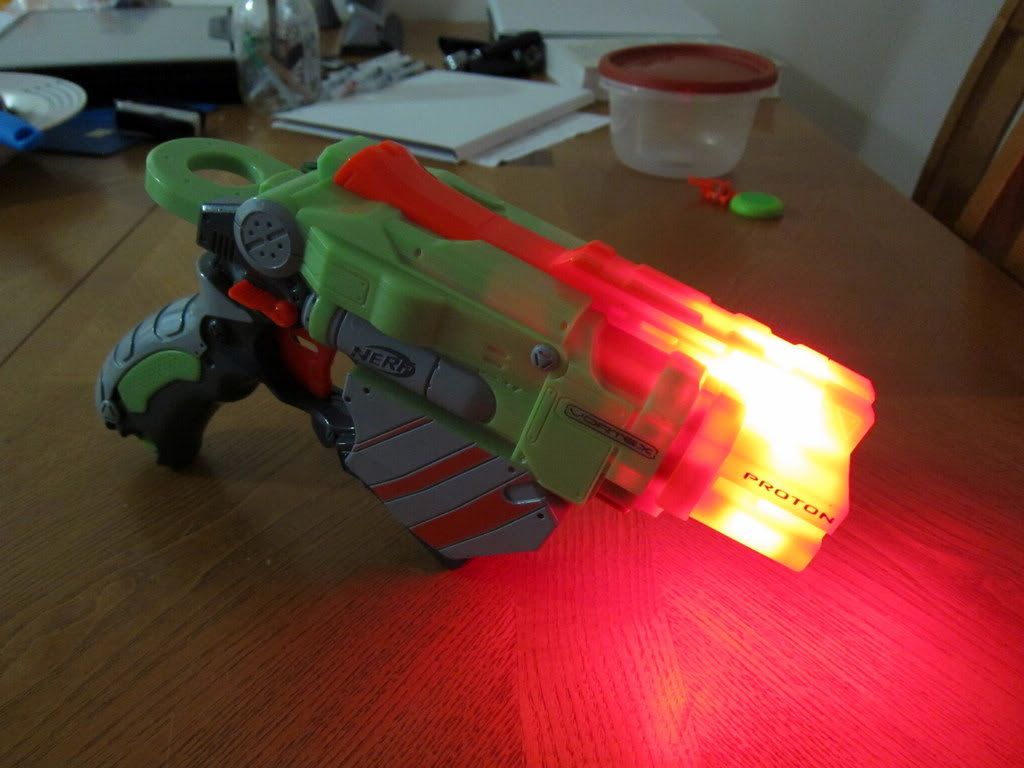
My camera is over-exaggerating the lighting effect; it's about 25% less bright than it seems.
Posted Image
The Proton pistol is styled as an energy weapon; the lighting effect emphasizes this.
Posted Image
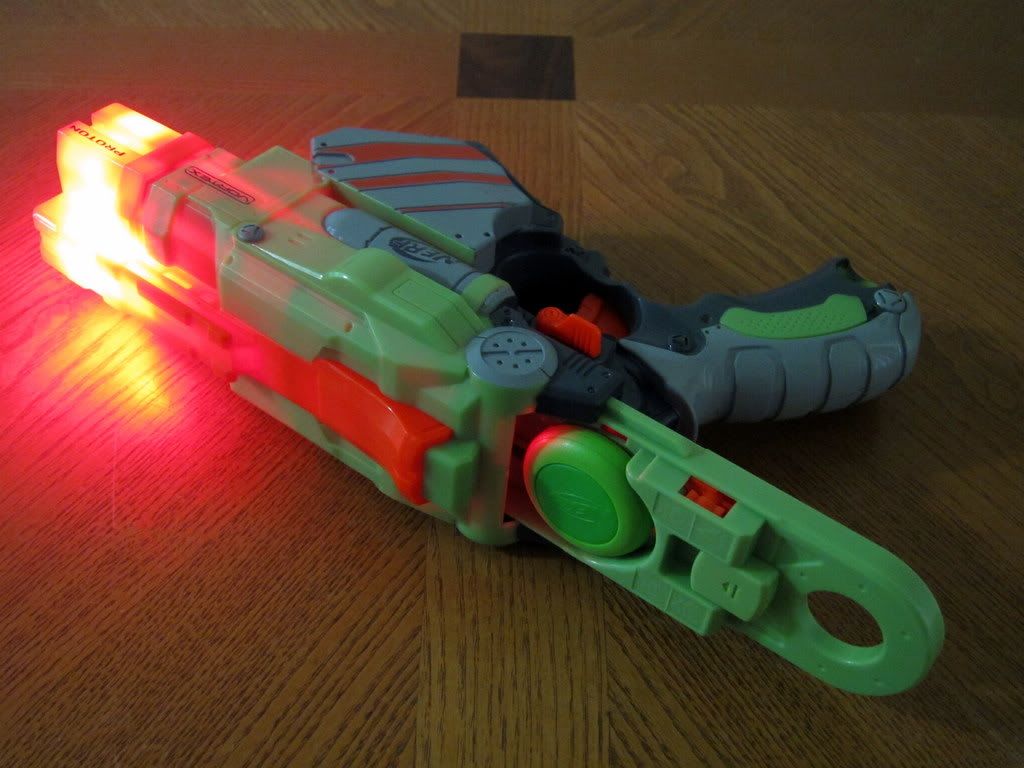
The lighting effect is also visible from the rear breech. This adds a nice touch.
Posted Image
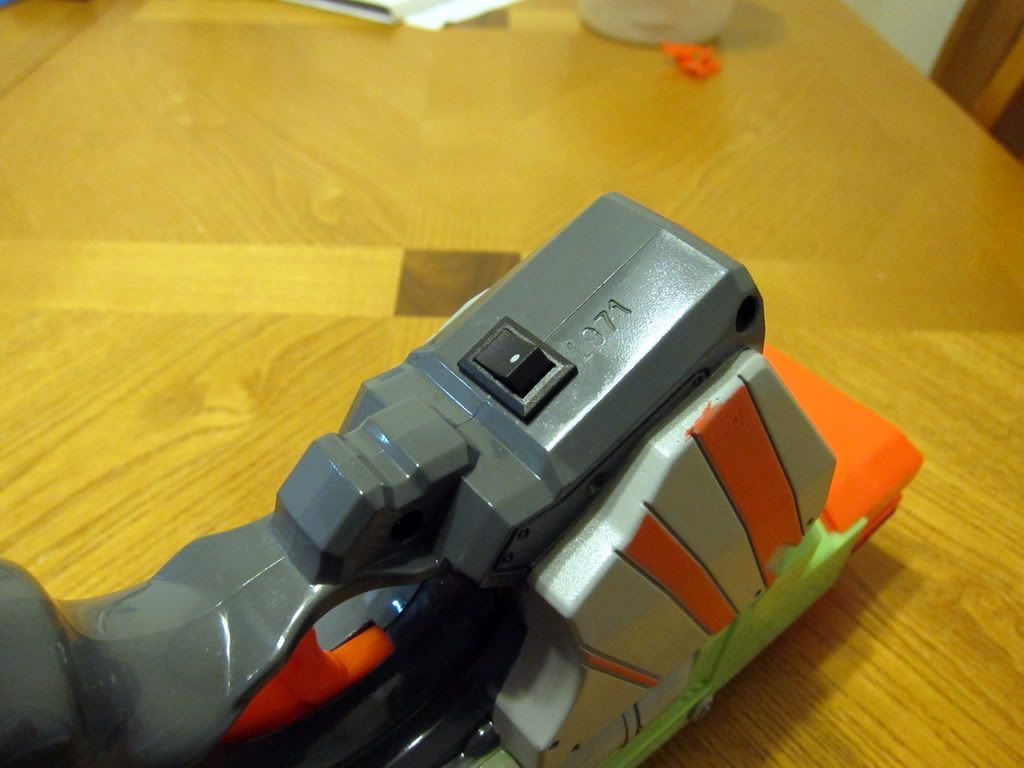
The lighting effect is turned on and off with a small rocker switch in front of the trigger.

DISASSEMBLY

Pistol Frame
Front Cowling
The frame of the Proton pistol is held together with twelve screws. Ten screws are located on the side of the pistol while the other two are on the front of the pistol. Remove these screws with a size 0 Philips head screwdriver to avoid stripping the screws.

Opened Frame
Remove the front cowling of the pistol and carefully pry the frame apart. You don't have to worry about any secret pegs, springs, or glued joints; the frame should easily separate with a bit of patience.

Spring Module
Remove the spring module. It is attached to the frame with two screws. Fortunately, the Proton pistol seems like it was designed with modification in mind.

SAFETY REMOVAL

Fire Control 1
Fire Control 2
Carefully remove the covering of the fire control module. Some spring might pop out of the module if you aren't careful. It is held together by six screws; two of which are not black. In the picture, the trigger and one of the safeties is removed. Notice how sturdy the mechanism is; the Proton pistol doesn't rely on tiny pathetic nubs of plastic to retain the spring. It's likely much more resistant to wearing than most N-Strike blasters.

Fire Control Safeties
Along the top of this picture you will see three components. The leftmost T-shaped component is responsible for the slick reloading action of the Proton pistol. Keep this component. The middle component prevents the weapon from firing at certain points of the reloading process. Although it is not necessary, I prefer to keep this component. The rightmost component prevents the weapon from firing if there is no disk loaded into the pistol. This component is unnecessary; removing it will allow you to fire non-standard ammunition.

Upper Rail Safeties
In this picture you can see two components removed from the frame and upper rail. These components prevent the weapon from firing if there is no disk loaded into the pistol. Remove these components to provide room for the internal LED wiring.

INTERNAL LED WIRING

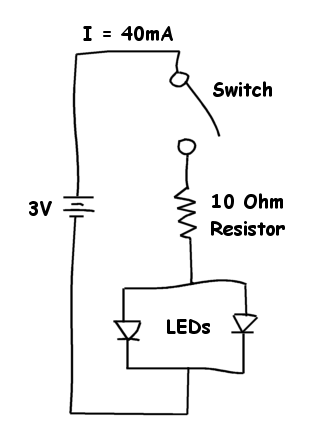
You will need two 5mm ultra-bright LEDs (~3V, ~20mA), a ~10 Ohm resistor (brown-black-black-gold), two AAA batteries, a small toggling switch, a battery case, wire, and solder. The battery case shown was scavenged from the "Red-Dot Sight" module of the Nerf N-Strike Recon. Use fine grade sandpaper to sand the LEDs; the LEDs will provide a diffuse light that allow it to blend very well with the orange plastic. Use a soldering iron to build the circuit and use a glue gun to glue the wiring into place. If you cannot find a battery case you can try soldering the wires directly to the batteries, wrapping them in foam, and stuffing them into the pistol grip.
Posted Image

Wiring 1
Wiring 2
Wiring 3
Wiring 4
Wiring 5

Shaved Peg
You need to remove a small portion of this peg to give the wires enough room to squeeze through the upper rail.

Lower LED
Be very careful with the LED mounted under the front cowling. The slide will interfere with the LED if it is not mounted forward enough.

RANGE

~60 feet. Theoretically better with safety removal, but probably unnoticeable.
~2 ricochets in a 3 feet wide hallway.
  • 0

#2 agc2k

agc2k

    Member

  • Members
  • 113 posts

Posted 16 October 2011 - 05:34 PM

Awesome! I will have to do this with my proton.
  • 0

#3 Crotalus

Crotalus

    Member

  • Members
  • 16 posts

Posted 16 October 2011 - 05:36 PM

I choose to use red LEDs. If you want to use other colors, test them out with the orange plastic first. Certain colors like blue and green aren't as visually appealing when they glow through the orange plastic. However, you can mount these LEDs so they shine like a flashlight through the barrel instead of glowing through the cowling. This effect is very striking regardless of the color you use.
  • 0

#4 roboman

roboman

    Member

  • Members
  • 489 posts

Posted 16 October 2011 - 10:41 PM

That looks really nice! I applaud the cleanliness and I like the glowing effect.
  • 0

Youtube

LS and Retaliator boltsleds are currently available at https://www.facebook.com/RoboM8/


#5 KitAdrian

KitAdrian

    Member

  • Members
  • 39 posts

Posted 16 October 2011 - 11:57 PM

Very slick!!

One suggestion I would make is to consider the implementation of a momentary or rocker switch that is pressed by the flinger arm when the blaster is primed. It would add that extra bit of flair.
  • 0

#6 Marcodevil

Marcodevil

    Member

  • Members
  • 3 posts

Posted 17 October 2011 - 02:13 AM

Seems like a stock blaster, very cleanly done. I will give it a try.
  • 0

#7 Crotalus

Crotalus

    Member

  • Members
  • 16 posts

Posted 17 October 2011 - 02:39 AM

Very slick!!

One suggestion I would make is to consider the implementation of a momentary or rocker switch that is pressed by the flinger arm when the blaster is primed. It would add that extra bit of flair.


That is a great idea; I will try that. I think I will mount it in parallel with the rocker switch so the light can stay permanently on or only when primed.
  • 0

#8 Exo

Exo

    Member

  • Members
  • 391 posts

Posted 17 October 2011 - 09:28 AM

Well, If you really wanted to get fancy, youu could add one of my ammo counters. Just kidding.
What you could do is you could put a capacitator and a resistor somewhere in the circuit, most likely near the lights, then as the switch is turned on, the capacitator charges, then slowly drains through the resistor, so the lights have a slower lightup and lightdown, so it will look like the gun is heating up, then cooling down, and it would all be timed based on primed. You could probably hook it up to the momentary rocker switch, so that way when the gun is primed, it heats up, then after it fires, the rest of the juice in the capacitator runs out, but it isn't being supplied any more, so it looks like it's cooling down.

You seem to know enough about electrics/onics that that whole explanation was unneccesary, but just to avoid those annoying questions.

Looks cool, nice job on LEDing something other than a Longshot.
  • 0

#9 trvstw

trvstw

    Member

  • Members
  • 3 posts

Posted 17 October 2011 - 05:14 PM

After seeing this, I am considering doing it with my vigilon or Praxis, but with a pressure switch behind the trigger.
  • 0

#10 structure

structure

    Member

  • Members
  • 15 posts

Posted 25 October 2011 - 11:11 PM

You may also want to consider putting glow-in-the-dark paint on the vortex discs. Even though they're red LEDs, them being on all the time would probably "charge" the discs pretty well, like the Firefly.
  • 0
:D


0 user(s) are reading this topic

0 members, 0 guests, 0 anonymous users