Jump to content


Photo

FAL-1: The Fallopian mk 1

Compact coaxial pump-action rodless springer

9 replies to this topic

#1 Zorns Lemma

Zorns Lemma

    Sir Scrt

  • Moderators
  • 1,277 posts

Posted 31 August 2011 - 09:44 PM

1420585665-304155-1-IMG_20110803_061224.

ABSTRACT

Design goals:
- Compact pump action springer capable of shooting dart out of at least a 12 dart hopper clip with standard priming motion
The current iteration of homemade pump action blasters of the +bow, SNAP, and rainbow variety, up to and including the shortened pumpSNAP by snakerbot are all rather lengthy and bulky. The largest immediate impacts concerning a nerf war is portability and accuracy - a lengthened barrel amplifies any angular error from the intended path. Various attempts to circumvent this with pull strings and backwards plungers (Carbon's SNAP-4bp and taerkitty's adaptation) have non-intuitive and unergonomic priming motions.
The idea was to create a springer with the same over size (including barrel) of the backwards-plunger variants while maintaining the intuitive and more ergonomic motions of the forward facing varieties.

Critical design elements:
- Coaxial pump action mechanism that travels around the barrel/hopper
- Unidirectional "rodless" rainbow catch mechanism
The two largest factors of concern here are a shortening of the plunger rod such that when primed no part of it extrudes from beyond the catch, and to relocate the pump action system coaxially and internally (as opposed to any adaptation based of external rails).

Flaws:
- Poor materials planning leading to sealing issues [implementation flaw]
- Forward design difficult to produce [both design and implementation flaw]
* Can be solved with better prior planning
* Circumvented using casted pieces
- Obvious further issues with ad-hoc implementation
* Prolific abuse of electrical tape
* Plunger head implementation atrocious
* Poor spring choice
* Trigger system terrifying
This blaster pictured is a prototype and made with a nonoptimal selection of materials. In particular, the plunger head is unnecessarily hefty and could be shortened by over 60%. Also, on the actual blaster I have, the barrel-sealing piece was initially beveled too much and I had to splice in a new one. The adhesive used in the splicing was insufficient to hold up and broke 4 rounds into Apocalypse 2011. Proper construction initially would obviously bypass this.

There will be no materials list as anyone who understands how the blaster functions could come up with a better one. This is also not a true writeup as anyone who understands how the blaster functions could implement the design in more optimal (suboptimal?) fashion.


Priming Pump

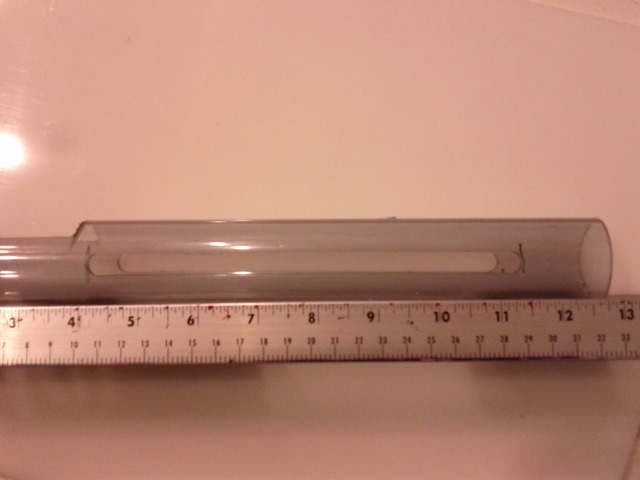
I started with a section of failed RBP plunger tube and cut channels on both the top and bottom. In hindsight I shouldn't have cut the top channel all the way through. Originally I did so to facilitate addition of the wye, but discovered you could actually just "pop" it in.
1420585665-304155-2-05052011352.jpg
1420585665-304155-3-05052011353.jpg
1420585665-304155-4-05052011354.jpg


The priming arm free floats in a piece of tube of exact ID (ID > 1.66", the OD of 1-1/4" PVC). The priming arm is then connected to a piece of tube of exact OD (OD = ID of previous tube, OD > 1.66"). To join the two, I used some internal coupler and some electrical tape.
1420585665-304155-5-05052011355.jpg
1420585665-304155-6-05052011357.jpg
The tubes in question are I believe 2"x1.6875" and 1.675"x1.5" This is probably wrong. It doesn't matter.

Thus, the priming pump now has a mechanism by which to seal with the inside of the plunger tube, by way of the aforementioned tubes of exact ID and OD.

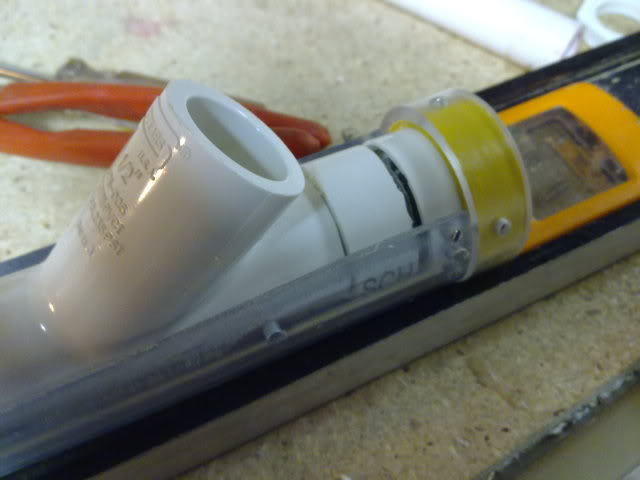
To seal with the barrel, simply add a section of 1/2" PVC coupler.
1420585665-304155-7-05052011356.jpg
1420585665-304155-8-05052011358.jpg

In these steps you can see why you should have left a ridge on the pump tube so it gets better grip on the internal coupler. Also not picture, a lot of set screws.

Barrel

Stick some PVC into the back of your wye. Then fit some more pipe/tube over it to stabilize it inside the 1-1/4" PVC.
1420585665-304155-9-05052011359.jpg
1420585665-304155-10-05052011360.jpg
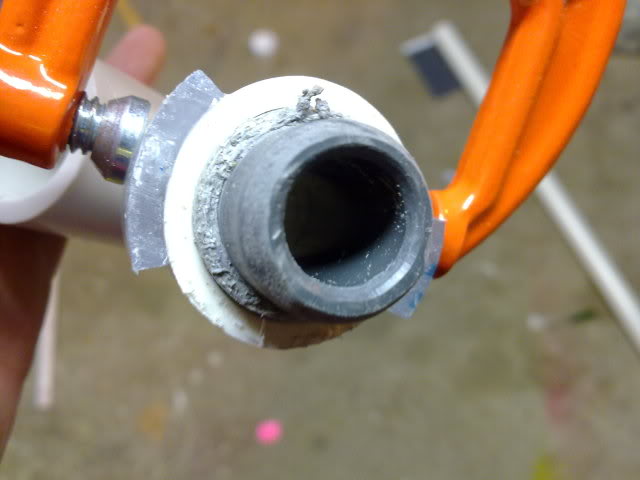
I used 3/4" thinwall. And duct tape. This is clearly not the best way.

Take some scrap from the channels you cut in the 1-1/4" PVC and put it over the aforementioned pipe/tube to create a rail along which the pump can stabilize. Superglue is sufficient for this stage.
1420585665-325445-14-IMG_20130117_202159

Now grab the tube of specific ID and work some magic. I used electrical tape. I probably could've used sections of internal coupler and then the tube of specific OD to achieve this way better.
1420585665-304155-11-05052011361.jpg

Not pictured: a lot of set screws

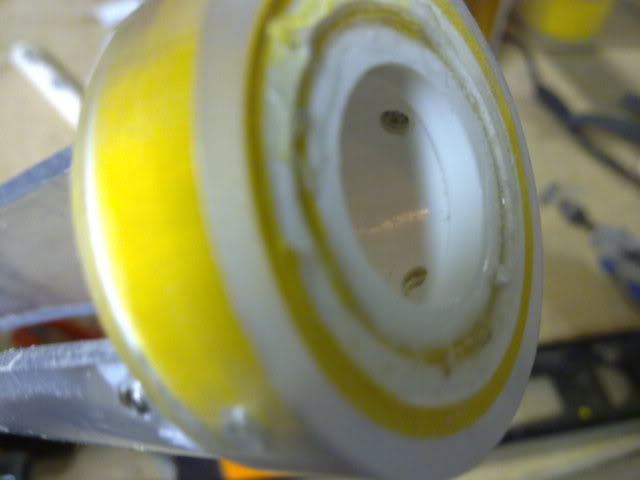
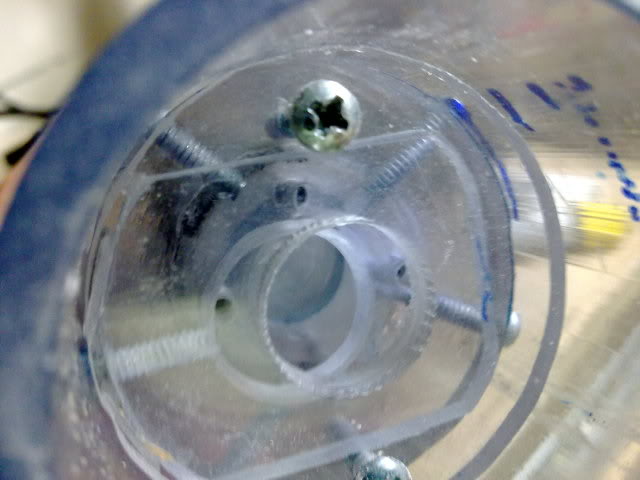
Pictured: how the sealing mechanism works*
1420585665-304155-12-IMG_20110803_005944
1420585665-304155-13-IMG_20110803_005957
1420585665-304155-14-05052011362.jpg
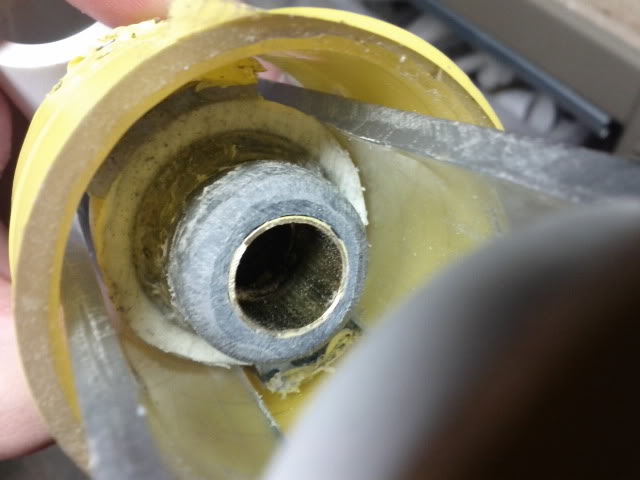
*see that brass? Yea that's from splicing new SCH80 in. I forgot brass sucks donkey nuts.
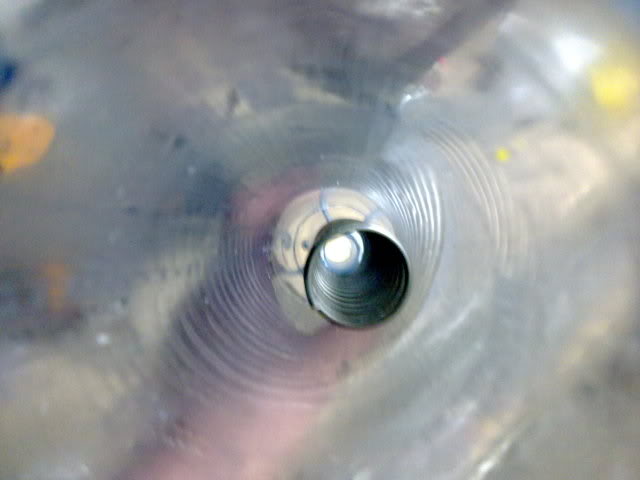
Plunger

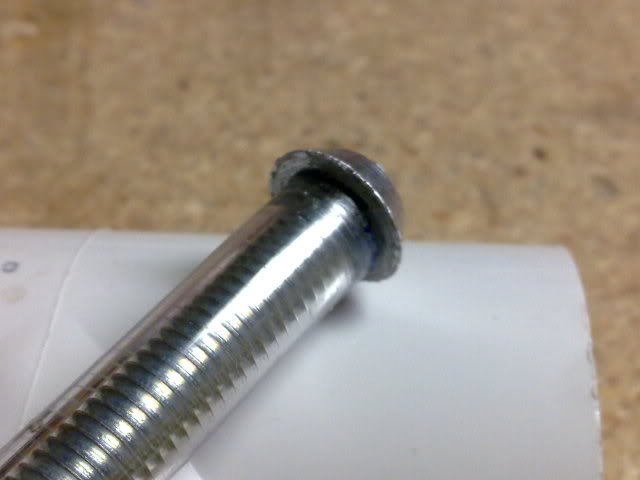
To achieve the unidirectional catch notch I went with something inspired by the 2-11 but prefabricated. McMaster sells these security nuts that double as awesome beveled washers: http://www.mcmaster....lnord/90013a200
1420585665-304155-15-90013A200L.GIF

I took this and put it on the end of some appropriate threaded rod. I then found some vinyl tubing to prevent the rod's thread from destroying everything.
1420585665-304155-16-06242011446.jpg

The plunger head is an abomination and we shall not speak of it. I was lazy.
1420585665-304155-17-05062011363.jpg

Catch and Spring Rest

Make a rainbow catch that fits the plunger tube you are using (2" PVC). Make the holes however large to accommodate your catch "notch." Make sure that when you cut the sliding piece that it isn't so short that at rest it goes past the halfway point. I kept it 1/8" above the center axis and beveled the inside lip so the plunger rod would have no issues catching.
1420585665-304155-18-06242011447.jpg
1420585665-304155-19-06242011445.jpg
1420585665-304155-20-06242011448.jpg

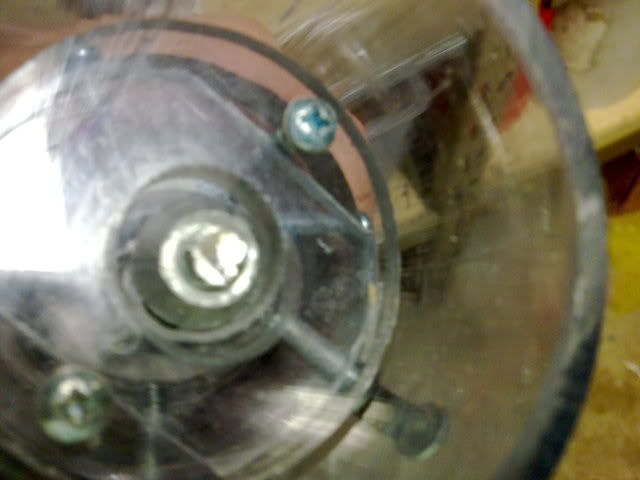
In terms of the spring rest (front piece of the catch system), you also want to creatively attach some tube to support the spring. I did it by nesting tubes in tubes for a flat surface, a lot of MEK, and then set screws from the back of the catch. A smarter way would be to drill the front hole larger and then slide the tube in and secure it with normal-oriented screws rather than coaxial-oriented screws.
1420585665-304155-21-06242011443.jpg

[ some magic happens here ]

1420585665-304155-22-06242011444.jpg

Handle and Trigger

I used SNAP-style demicouplers to grip the plunger tube. Then I countersunk in wood screws to attach blocks (visually a SNAP handle, but the handle is 3/4" long. Using these blocks as attachment points, I added some polyethylene sheet. Then I screwed everything else in. The mechanism is a tiny lever trigger in the back, using a non-threaded spacer as a fulcrum. This then attaches to a horrendously long slide trigger that goes in front of the handle. You pull the visible trigger and the bar pushes back the lever which pushes up the catch. A all contact points (trigger bar, both sides of secondary lever trigger) to prevent wood getting destroyed, I added some teflon tape.
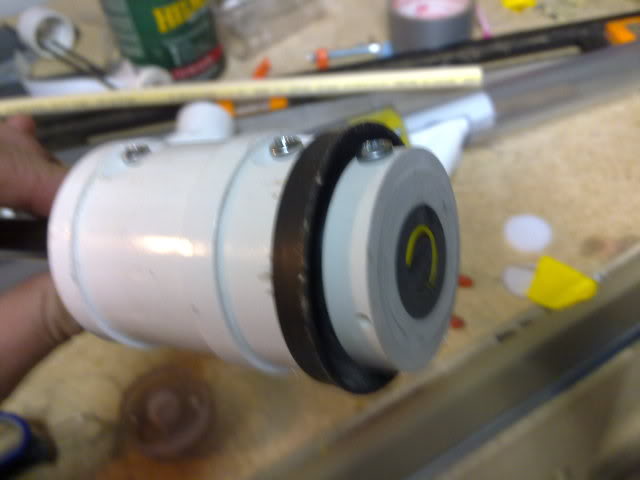
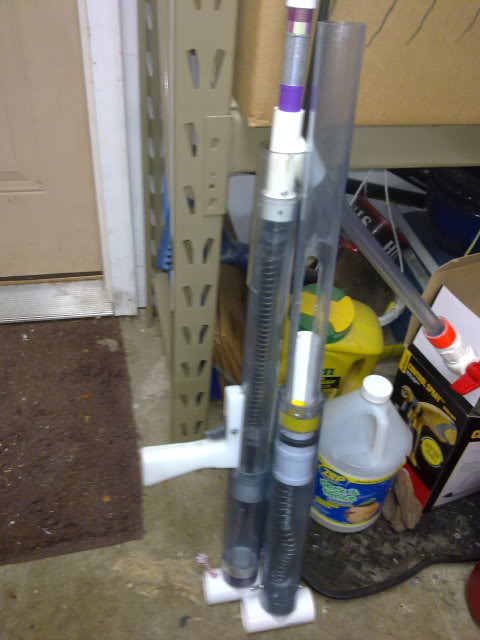
Final Product

With a barrel on, this is the same length as a rev 2 Rainbowpump without barrel. This would be shorter if your plunger head wasn't retardedly 2" longer than necessary. Further optimization in the front (using resin cast pieces?) could reduce another inch or so. Shortening the draw (5.5" on a 2" plunger tube is excessive) could also optimize the design.

1420585665-304155-23-06242011449.jpg

Edited by CaptainSlug, 01 November 2017 - 07:52 AM.

  • 0
"In short, the same knowledge that underlies the ability to produce correct judgement is also the knowledge that underlies the ability to recognize correct judgement. To lack the former is to be deficient in the latter."
Kruger and Dunning (1999)

#2 snakerbot

snakerbot

    Maker of Things

  • Members
  • 310 posts

Posted 31 August 2011 - 10:08 PM

I was pretty excited seeing the progress shots you posted in the pictures thread. The final product doesn't disappoint, and it looks very nice. I do have two questions though:

1. How smooth is the priming motion? It seems like there are a lot of friction points in there. The rodless plunger probably doesn't help either.

2. Have you considered using a skirt seal or something on the back of the priming arm instead of finding tubing of a precise OD? That might seal better and be easier to find.
  • 0

#3 Curly

Curly

    Member

  • Members
  • 201 posts

Posted 01 September 2011 - 10:47 AM

Very intuitive. Most homemades still use a 1.25" PVC plunger tube, making a longer draw (therefore, a longer blaster) necessary. When you bump up the plunger tube size the draw can decrease, improving ROF and compactness. You've done both very well, bravo.

If you used a smaller plunger head it would also run faster.
  • 0

#4 Zorns Lemma

Zorns Lemma

    Sir Scrt

  • Moderators
  • 1,277 posts

Posted 01 September 2011 - 12:22 PM

1. How smooth is the priming motion? It seems like there are a lot of friction points in there. The rodless plunger probably doesn't help either.

2. Have you considered using a skirt seal or something on the back of the priming arm instead of finding tubing of a precise OD? That might seal better and be easier to find.


1. On the SC40 I used to support the spring (hard to see in pictures), I beveled both the inside and the outside (and also bore out the ID to over 5/8"). So the priming is actually very smooth as nothing gets caught anywhere. This can be further improved through the use of endcaps or tubes to also go around the outside of the spring (in fact I should've used endcaps on the plunger head).

2. I thought about it and realized it would be a lot of mess in this version because of the huge hole in the front when you prime and how the whole blaster is just exposed. There would be a lot of lube flinging around. But this could actually allow you to adopt the design much easier to something that doesn't use a 2" plunger tube since you don't have to deal with 3 layers of tubes that must nest and seal. I plan on actually using this in mk 2 which should be much more sized down...
  • 0
"In short, the same knowledge that underlies the ability to produce correct judgement is also the knowledge that underlies the ability to recognize correct judgement. To lack the former is to be deficient in the latter."
Kruger and Dunning (1999)

#5 blitz

blitz

    Member

  • Members
  • 285 posts

Posted 01 September 2011 - 03:25 PM

Uh, wow.

It's uh, really complicated.

And, uh, has a lot of pipes n' shit.

And, uh, what spring did you use?

Overall, this is pretty cool. Me likey.
  • 0
Blitz, member of the FNBS
"sexual innuendo no intendo"

#6 shardbearer

shardbearer

    Member

  • Members
  • 177 posts

Posted 01 September 2011 - 08:45 PM

Whoa. Complicated. Awesome. Took me 10 minutes to decode the design. You might want a paragraph with a general explanation of how it works or post the video in this thread.

And whats with the ridiculously long priming handle? And the name?


What if you put a 180° bend where the hopper is, rearrange the trigger, and make what is now the priming handle the stock. One handed primable bullpup!

Edited by shardbearer, 01 September 2011 - 09:18 PM.

  • 0

#7 taerKitty

taerKitty

    Member

  • Members
  • 883 posts

Posted 01 September 2011 - 11:26 PM

No names, but I was talking to some people online and they had problems understanding the priming. This is what I think it is, which I'm posting so Zorn can cluebat me if I'm off, because that's what I told these other people, so no point having misinformation out there.

The wye is stationary relative to the PT.

The front of the PT slides back and forth, pushing the plunger back.

The pump action fore-end is connected to the front of the PT.

To prime, the fore-end is pulled back, pushing the front of PT against the plunger head, and pushing the PH back until the catch engages.

To ready to fire, the fore-end is pulled forward until the front of the PT is such that the beveled piece of PVC off the back of the wye is seated in the front of the PT.

Is this more-or-less right, Zorn?
  • 0
Fugly is a feature.

#8 Zorns Lemma

Zorns Lemma

    Sir Scrt

  • Moderators
  • 1,277 posts

Posted 01 September 2011 - 11:53 PM

Whoa. Complicated. Awesome. Took me 10 minutes to decode the design. You might want a paragraph with a general explanation of how it works or post the video in this thread.

And whats with the ridiculously long priming handle? And the name?


I was too lazy to cut the priming handle down. I'm also probably going to put some sort of bushing in it to ride along the barrel. Its termed the fallopian because 1) this sport has too much feigned masculinity and 2) because the construction of it involves uses a lot of tubes and "floating" the priming handle via the front bushing.

Taerkitty pretty much nailed it. The priming handle comes back, around the wye to push the plunger head backwards. Everything else is stationary relative to the handle. The wye is held there throu the nifty etape mess and some screws.
  • 0
"In short, the same knowledge that underlies the ability to produce correct judgement is also the knowledge that underlies the ability to recognize correct judgement. To lack the former is to be deficient in the latter."
Kruger and Dunning (1999)

#9 BOSS9

BOSS9

    Member

  • Members
  • 137 posts

Posted 02 September 2011 - 12:01 AM

The front of the PT slides back and forth, pushing the plunger back.


I'm 99% sure I get how it works (after revisiting the thread a few times) and I think your explanation is correct, yet potentially misleading. I know you're talking about the section inside the PT, but just for clarification, the whole plunger tube is fixed in place. what you refer to as the front of the plunger tube is sliding inside the plunger tube. Similar to the longshot black piece, but the "bolt" is a wider tube around the barrel assembly. hope this helps (although the longshot comparison may be unproductive).

EDIT: Zorn beat me, a video is all anyone ever needs!
DOUBLE EDIT: Forgot to mention how amazing this is, awesome job!

Edited by BOSS9, 02 September 2011 - 12:04 AM.

  • 0

#10 Zorns Lemma

Zorns Lemma

    Sir Scrt

  • Moderators
  • 1,277 posts

Posted 02 September 2011 - 03:03 PM

Similar to the longshot black piece, but the "bolt" is a wider tube around the barrel assembly. hope this helps (although the longshot comparison may be unproductive).


The original idea was to craft a homemade set of Longshot internals. By the time I got around to it, raider drums were out of vogue, and brass breeches were far inferior in reliability to a hopper.

This design could certainly be adapted back into a breeched blaster. The use of brass on the inner seal would allow drastic reduction in overall blaster diameter and the end result would be something akin to a Longshot bolt, except with separation of the priming elements and sealing elements.
  • 0
"In short, the same knowledge that underlies the ability to produce correct judgement is also the knowledge that underlies the ability to recognize correct judgement. To lack the former is to be deficient in the latter."
Kruger and Dunning (1999)


0 user(s) are reading this topic

0 members, 0 guests, 0 anonymous users