Jump to content


Photo

S.C.U.N.B.A.G - A Homemade Airgun

Looks can be deceiving

17 replies to this topic

#1 roboman

roboman

    Member

  • Members
  • 489 posts

Posted 20 August 2011 - 05:28 PM

EDIT: Just realized this was my 200th post. Yay!

Well, to start it off, here's an intro video, just to give a general idea of what I built.

http://www.youtube.com/watch?v=FUA1BXbD9nA

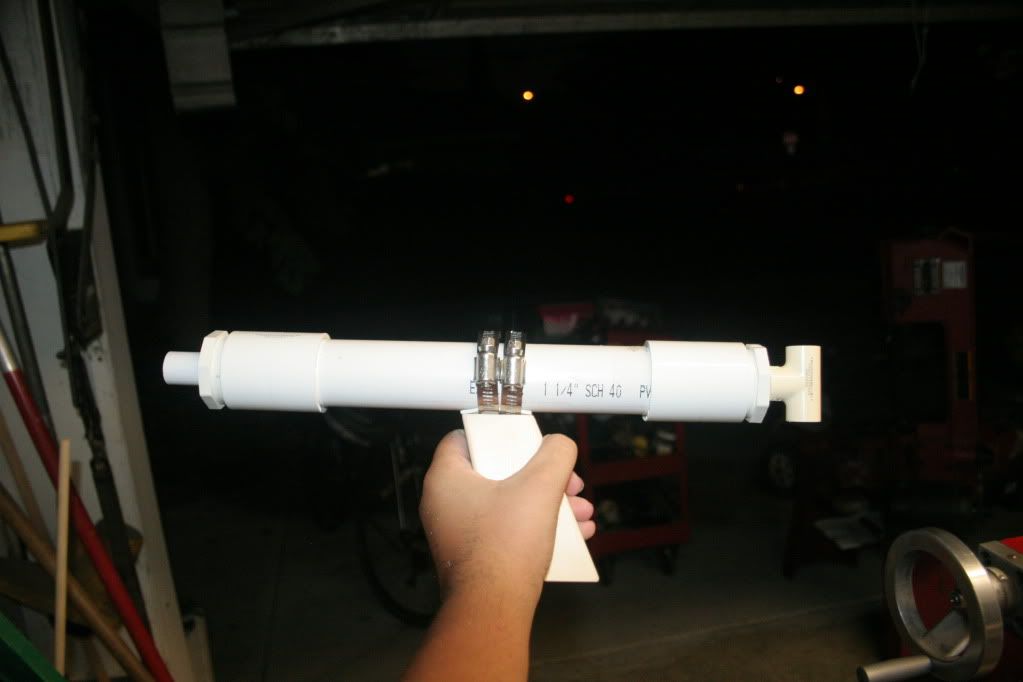
As you can plainly see, this is not your ordinary springer. I present the SCUNBAG - SoCal's Uber-New Bodacious Air Gun.
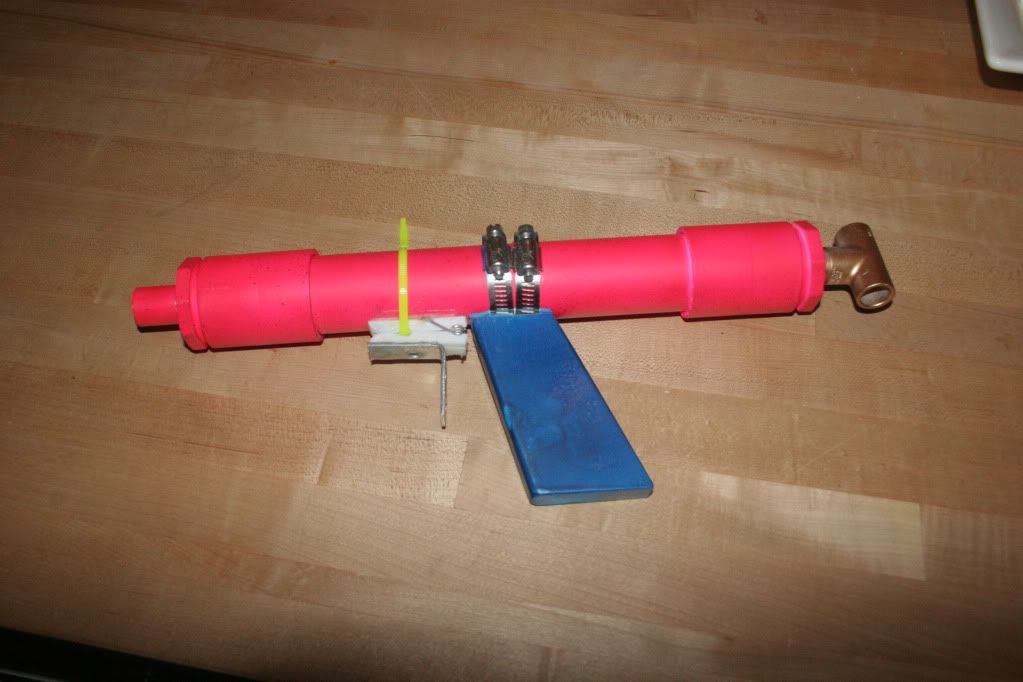
Posted Image
(The zip tie was just to keep the trigger from moving while the epoxy dried)

-------------------------------------------------------------

(Skip this part if you just want to build the blaster)

First, a little background on the design. I discovered NerfHaven about a year before Carbon posted his first SNAP. Unfortunately, I was 10-ish at the time, and didn't want to lie about my age, fearing the wrath of Vacc. My first homemade, and second gun in my arsenal was a SNAP-1 MK II. It lasted quite a while, and I had plenty of fun with it. Eventually, I moved on to bigger and "better" things, and got my first AT2K a couple of years later. I fell in love with airguns through this, and was dismayed to discover that most, if not all wars ban homemade airguns. That same year, I went to my first war - Armageddon X. After that day in Glendora, I was permanently hooked on Nerfing.

Fast-forward three years to the start of the Homemades Contest. VACC's "side bet" for airguns intrigued me, and I started coming up with designs, many of which were quite complicated, and could only be completed with the help of large, expensive tools (which, of course, I have access to). This was simply no good - a design doesn't benefit the community, unless others can build it and learn from it. For a couple months, I forgot about the contest, and remembered about it right before the initial deadline. I was scrambling to come up with something, until I saw that Ryan had extended the deadline. This gave me time to come up with a really robust, simple to build system.

Since a SNAP was the first homemade for me, along with many other members, I figured I might as well go "back to basics" with a simple homemade airgun for the contest, that could easily be expanded (like the original SNAP).

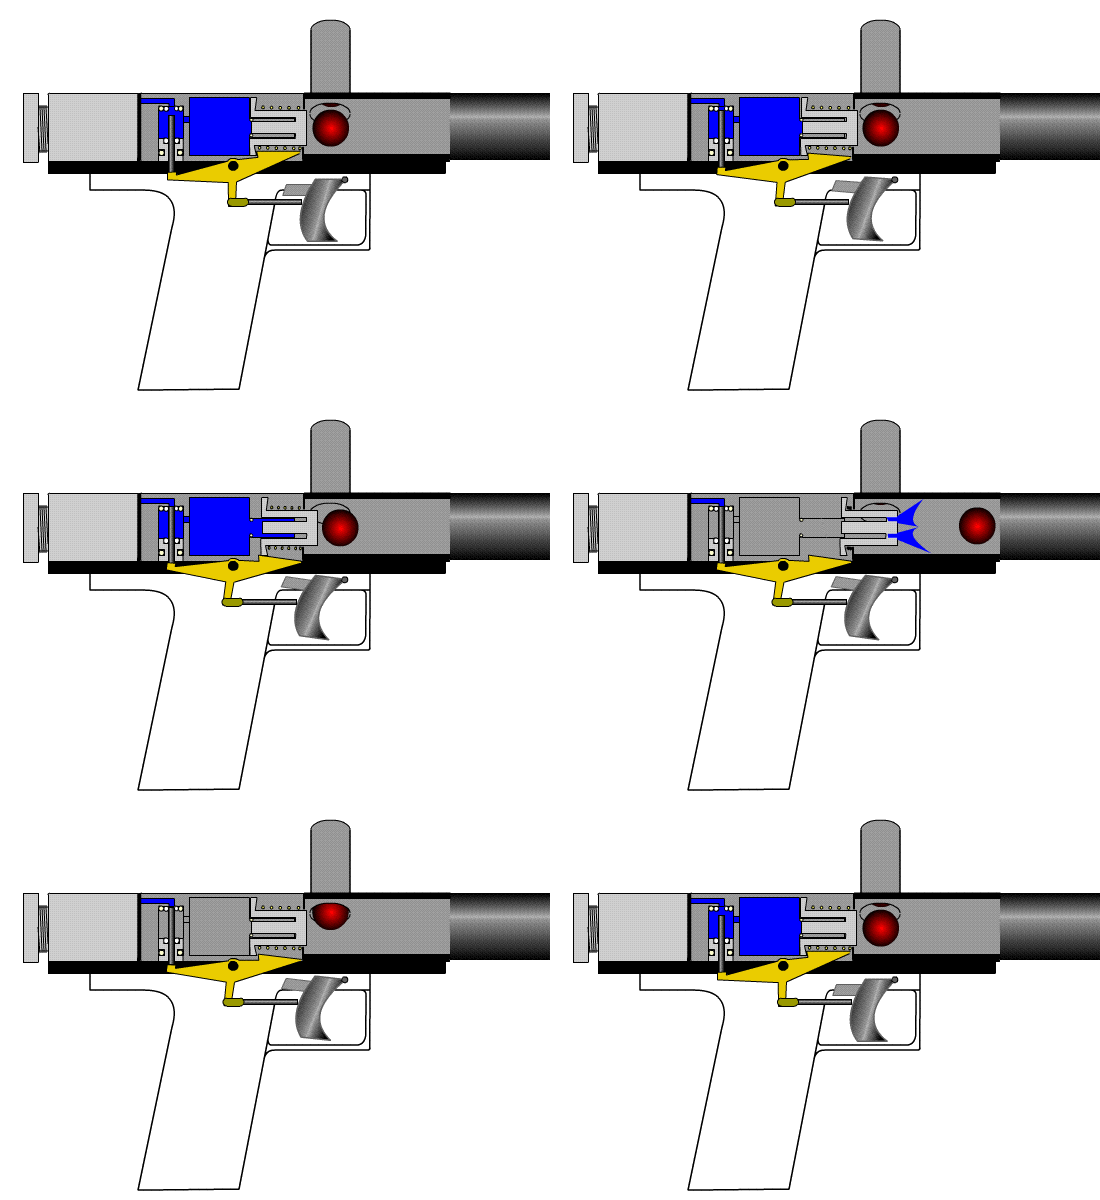
At first, I was experimenting with backpressure tanks, which turned out to be finicky on a small-scale. Stuck with absolutely nothing and a week left in the contest, I turned to ZDSPB for some inspiration. The "Automag" design (see below) caught my eye, since it looked relatively simple to build, and could easily fit into a SNAP form-factor. I designed and built a functioning prototype in a day. </lots of text>
Posted Image
"Automag" design

(Stop skipping here, if you didn't read the above paragraphs)

------------------------------------------------------------

Materials list:

Pipe (You won't need nearly this much)

1'- 1 1/4" Sch. 40 PVC
1'- 1" Sch. 40 PVC
1'- 3/4" Sch. 40 PVC
1'- 1/2" CPVC

Fittings

2x - 1 1/4" Slip x Slip female coupler
2x - 1 1/4" x 1/2" Slip bushing
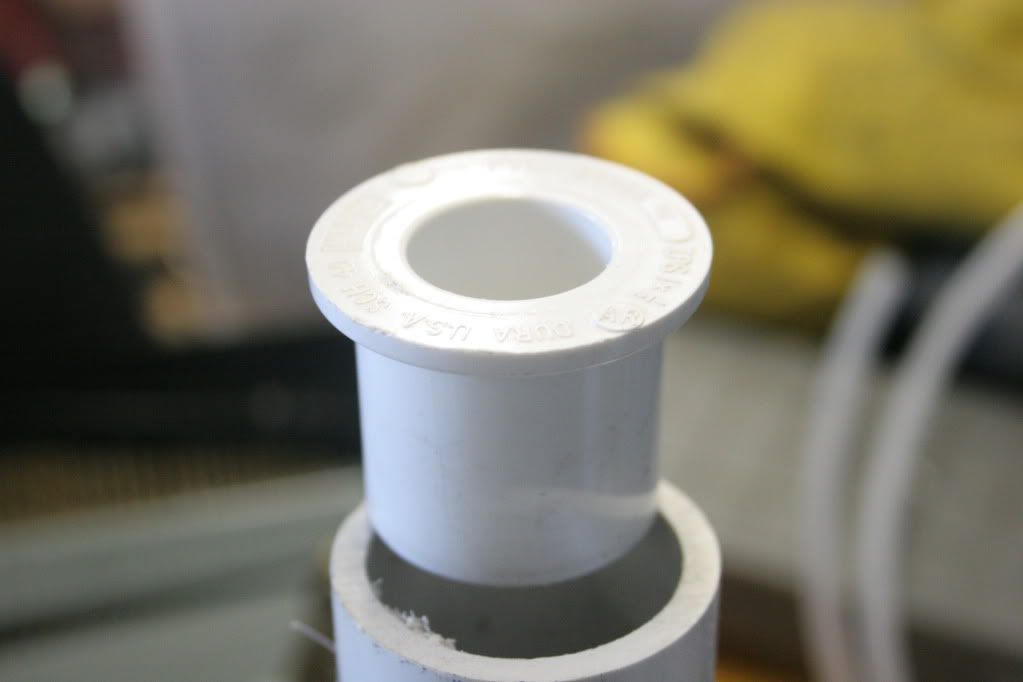
2x - 3/4" x 1/2" Slip bushing (IMPORTANT: See pic below)
2x - 3/4" Endcap
1x - 1/2" CPVC Tee

Other Stuff

1' - 7/16" K&S brass tube
1' - 1/2" K&S brass tube
1' - 17/32" K&S brass tube
1' - 21/32" K&S brass tube

1x - 5/8" x 7/16" O-ring

Check Valve (I used 7757K41)
Pump of some sort (Venom's homemade 2K pump would work well. My attempt at a simple homemade pump failed, so I ended up using a shortened 2K pump.)

Ace #156 spring

2x - 1 3/4" Hose Clamps (Smaller would probably work, I just happened to have these)
Thin (.050-.080") PVC or Aluminum sheet
#8 x 1/2" wood screws
1"x2"x12" dimensional lumber
Clothespin trigger (See Carbon's SNAP-1 MK II writeup)

Epoxy Putty
E-Tape/Masking Tape
Epoxy
PVC Primer/Cement
Super Glue

(If I forgot anything, let me know)

Required Tools
Dremel
Hacksaw
Pipe cutters

Optional Tools (Really, really handy)
Belt Sander
Miter Saw
Arbor Press
Horizontal Bandsaw
Metal Lathe
Posted Image
3/4"x1/2" Bushing (They fit really nicely in 1" Sch. 40 PVC)

Let's start building!

Step 1:
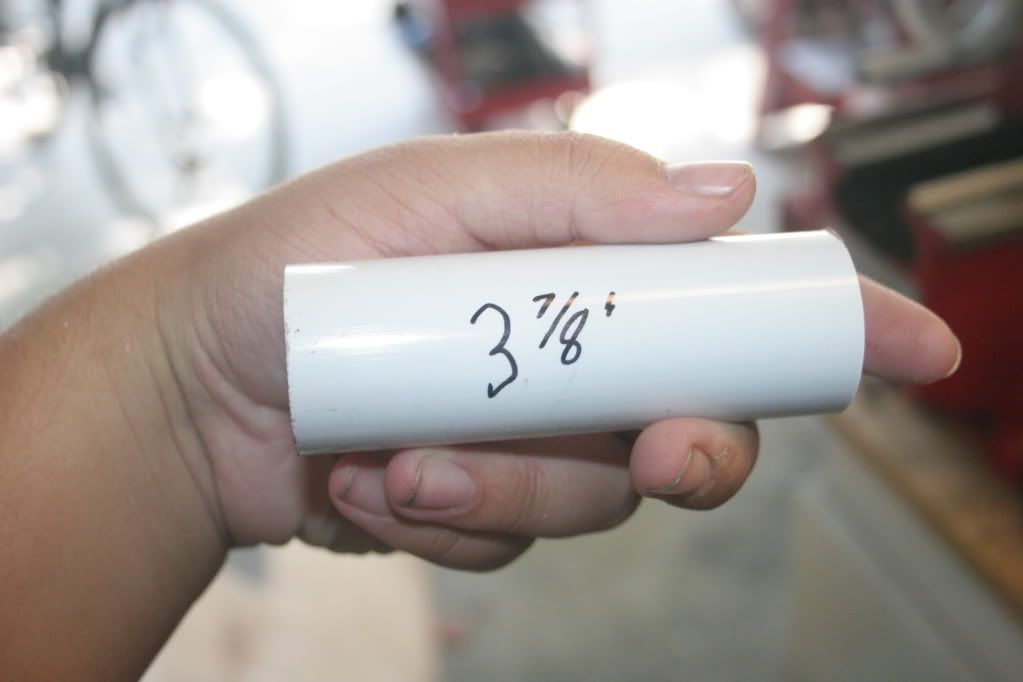
Cut a piece of 1" PVC 3 7/8" long. This will become the main tank. With the bushings installed, the volume is similar to that of a 2K tank.
Posted Image

Step 2:
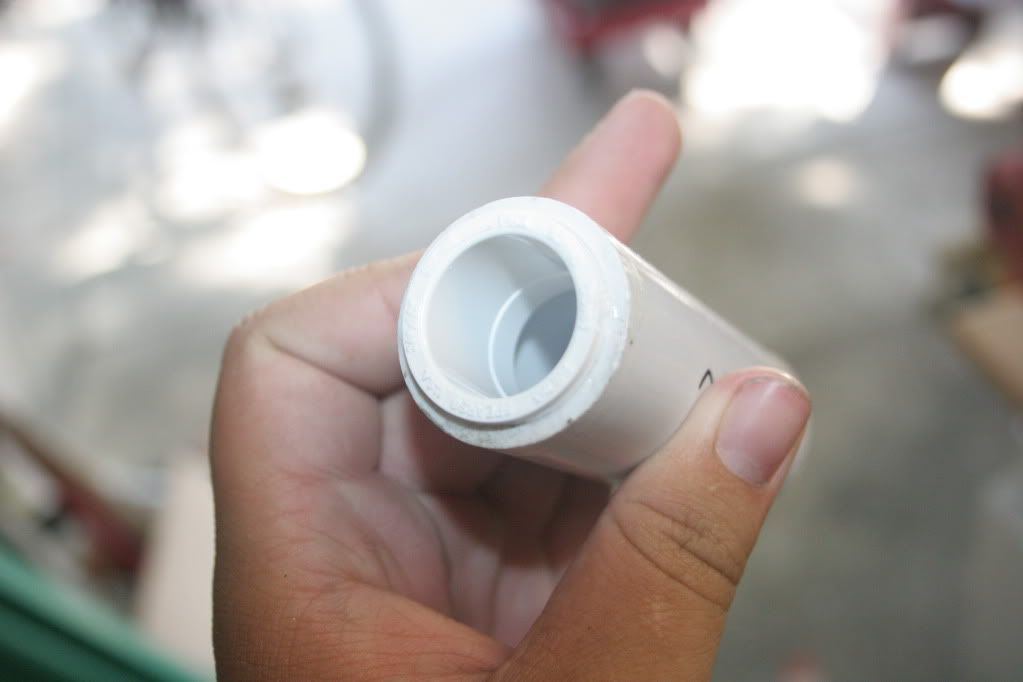
Install a 3/4" x 1/2" bushing in one end. Depending on your pipe, this could be quite difficult to do, and may require some creative dremeling to get it to fit nicely. Solvent weld it in. This will become the firing tank.
Posted Image

Step 3:
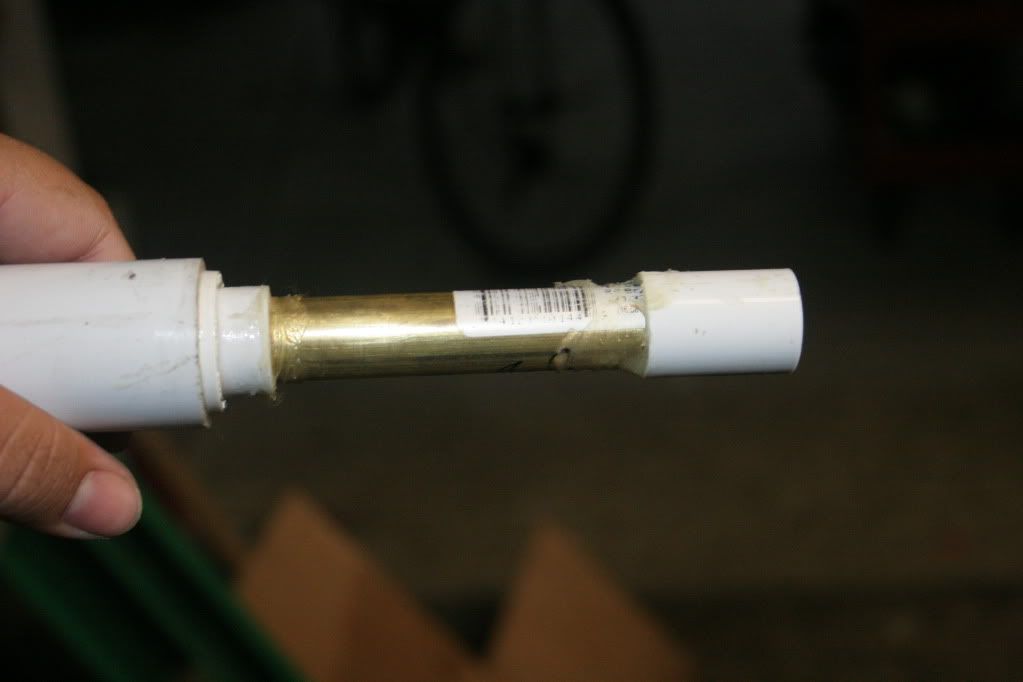
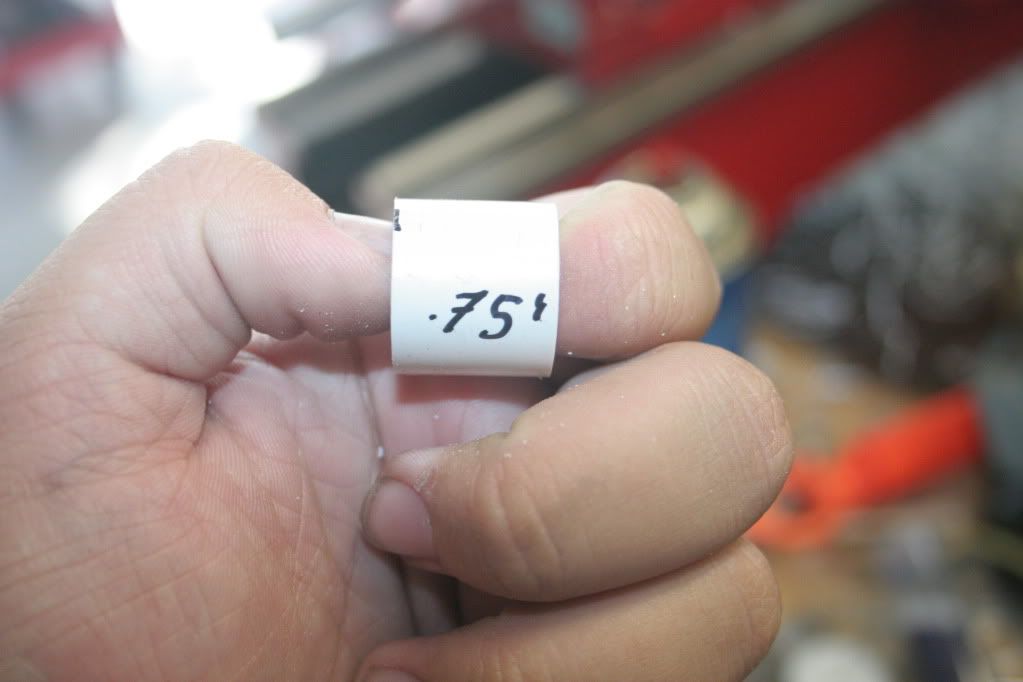
Cut a .75" long piece of 1/2" PVC. Solvent weld it into your other 3/4"x1/2" bushing.
Posted Image

Posted Image

Step 4:
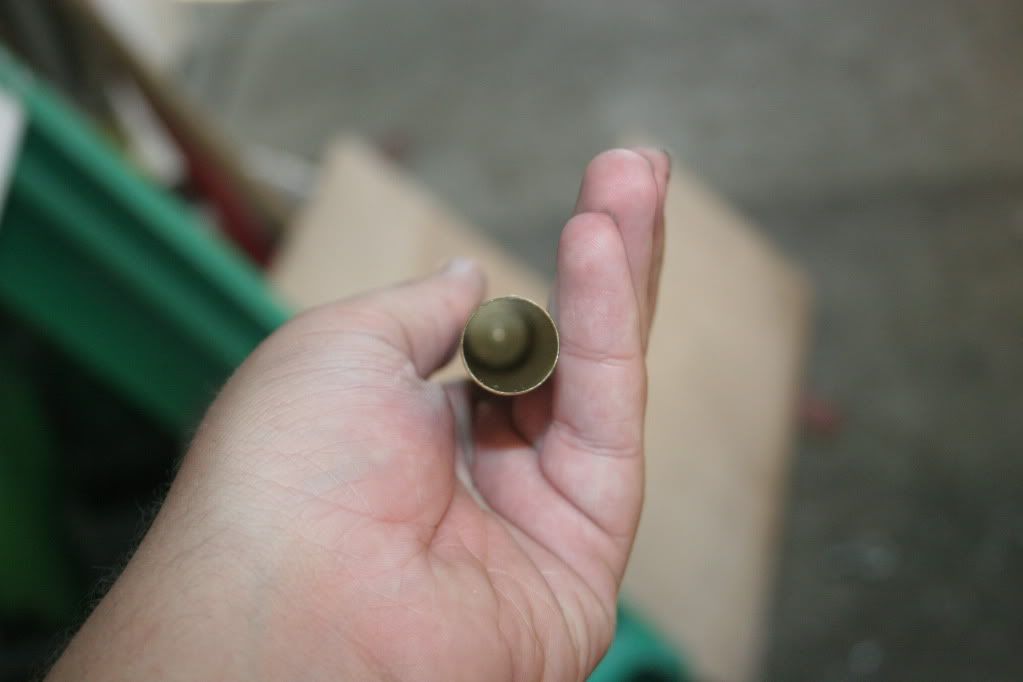
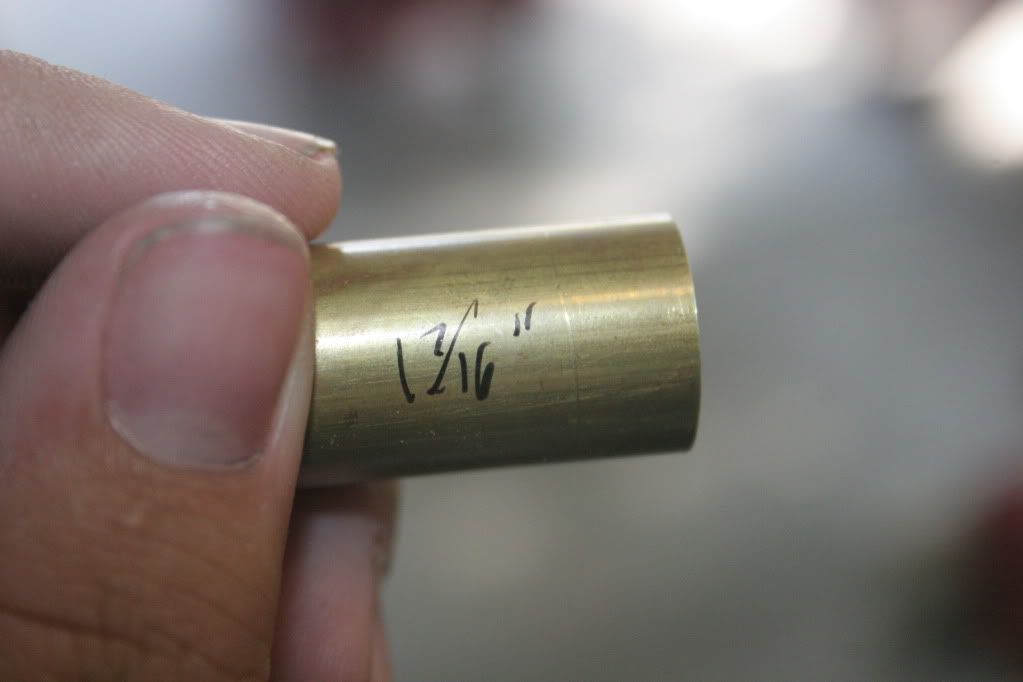
Cut a 1 7/16" long piece of 21/32" brass tubing.
Posted Image

Step 5:
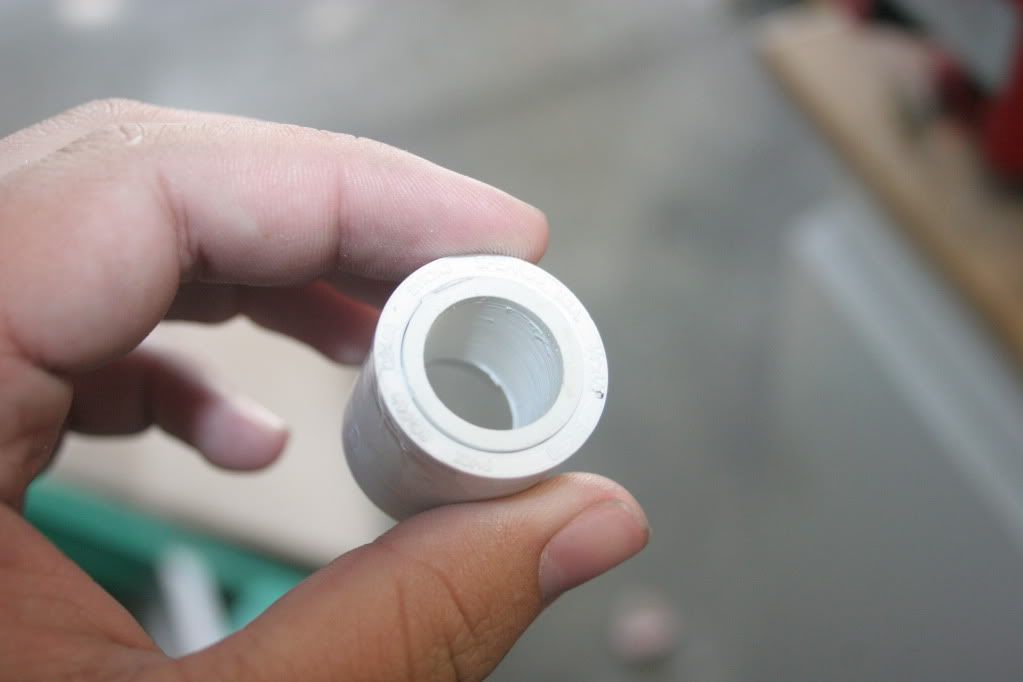
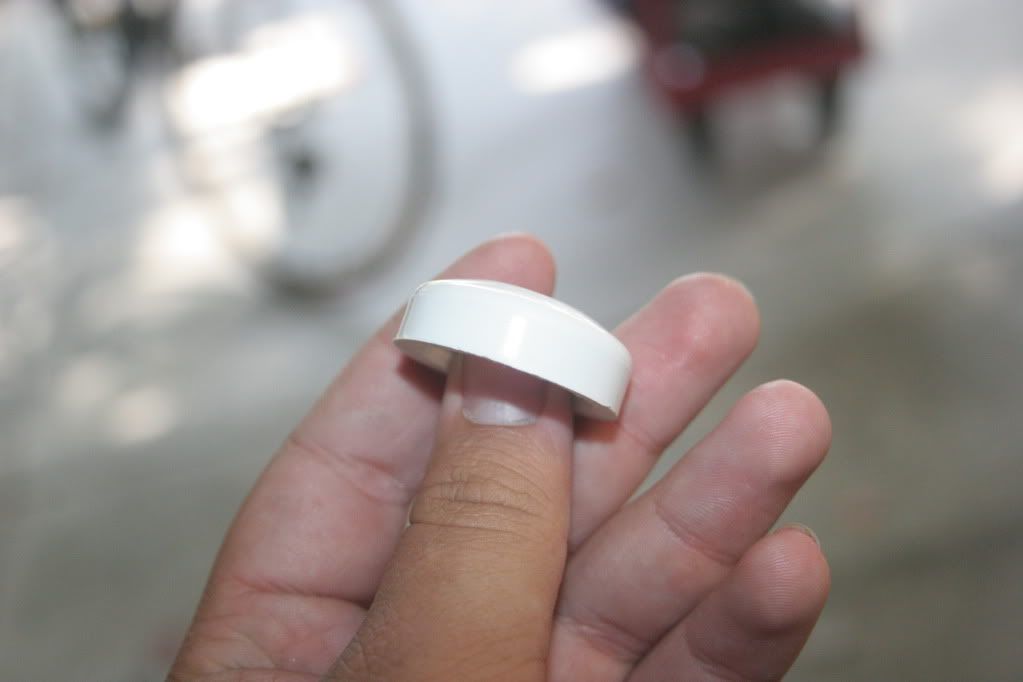
Cut the end off of a 3/4" endcap, leaving about 1/4" of the slip section before the little lip on the inside of the cap, so you can still install it on a piece of PVC.
Posted Image

Step 6:
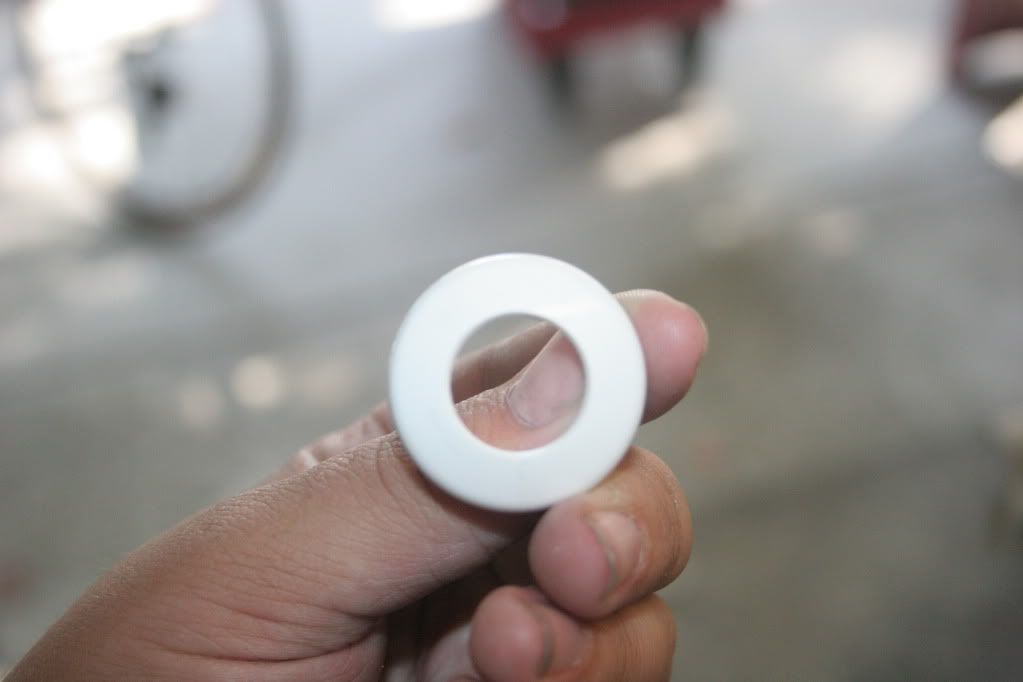
Drill a ~3/4" hole in the center of that endcap slice. The actual dimension is not particularly important, it just has to be around 3/4".
Posted Image

Step 7:
Cut a ~1 5/8" long piece of 7/16" brass tubing, and wrap E-tape or masking tape around it, so that 1/2" CPVC is snug on it.
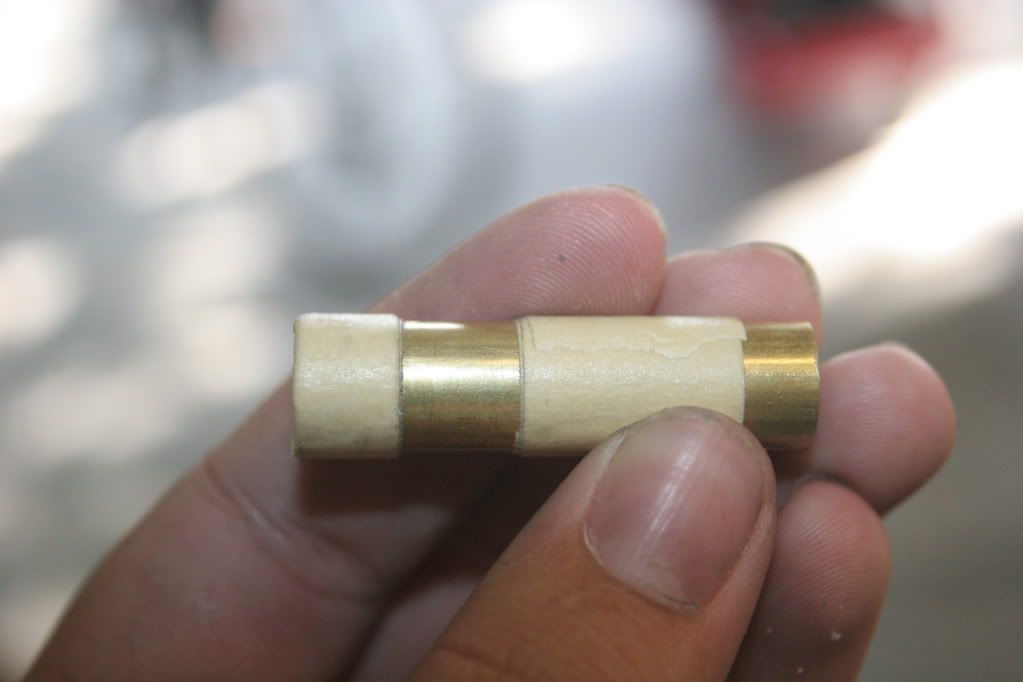
Posted Image

Step 8:
Cut a 1/8" long segment of 1/2" CPVC and press it onto the end of the brass tube, leaving about 1/4" between the segment and the end of the tube. Sand the CPVC to slide smoothly inside 21/32" brass tube. Place the 5/8"x7/16" O-ring against the segment.
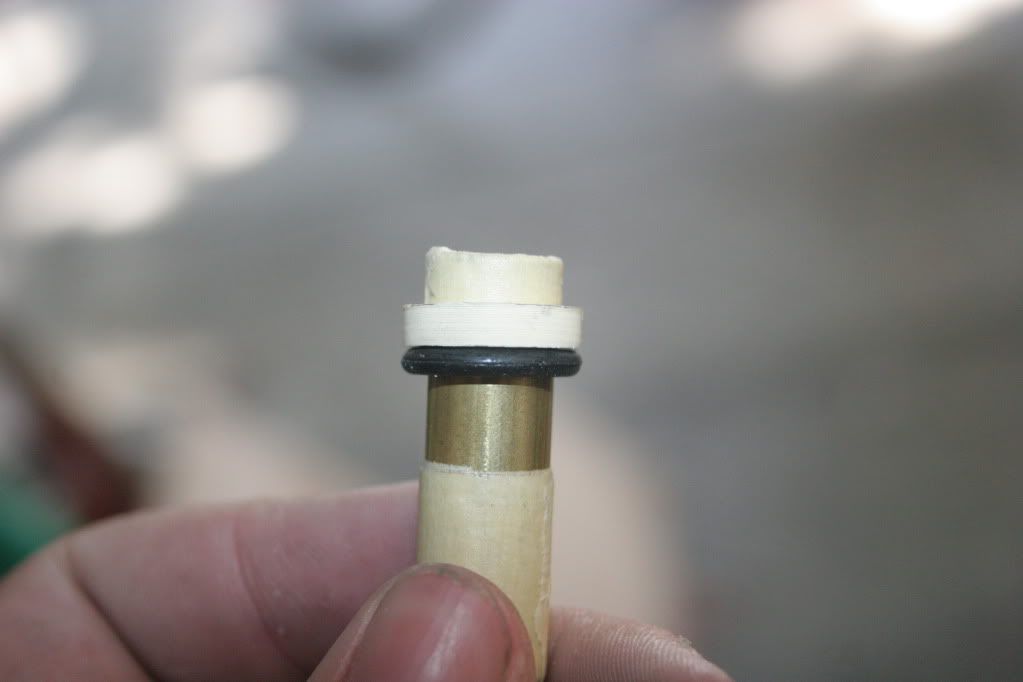
Posted Image

Step 9:
Cut another segment of 1/2" CPVC long enough that it covers the rest of the brass tube, with the O-ring in place. Sand to slide smoothly inside 21/32" brass tube. Slide it onto the tube, and check to make sure that everything lines up correctly before using super glue to secure both segments. Make sure not to get glue on the O-ring.
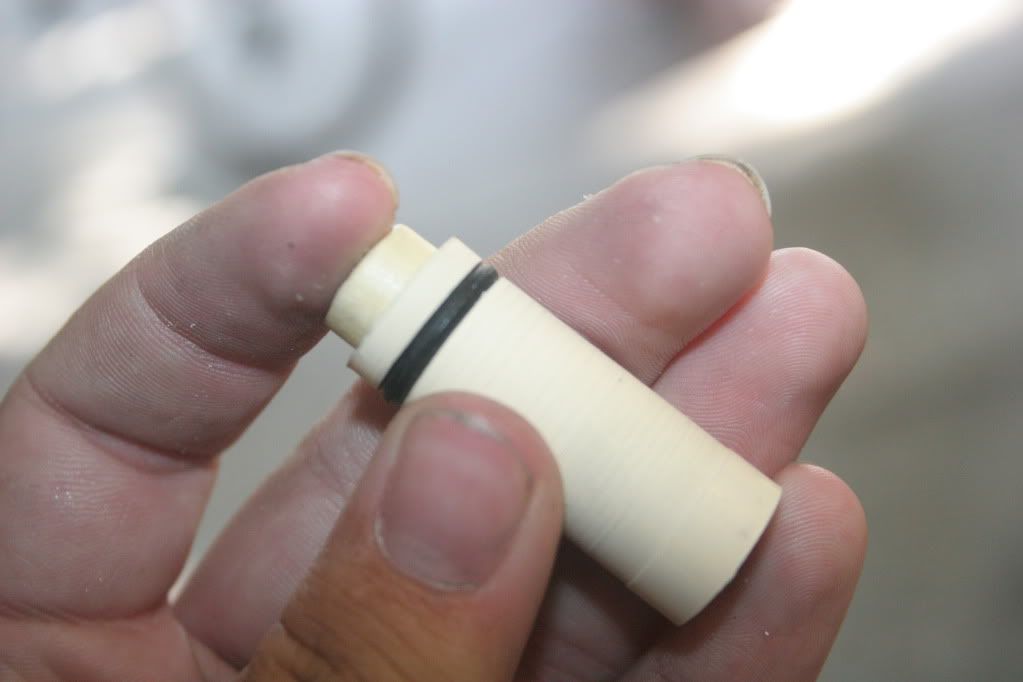
Posted Image

Step 10:
Use epoxy putty to plug the ends of the 7/16" brass, and build up a small cone on the O-ring end of the tube.
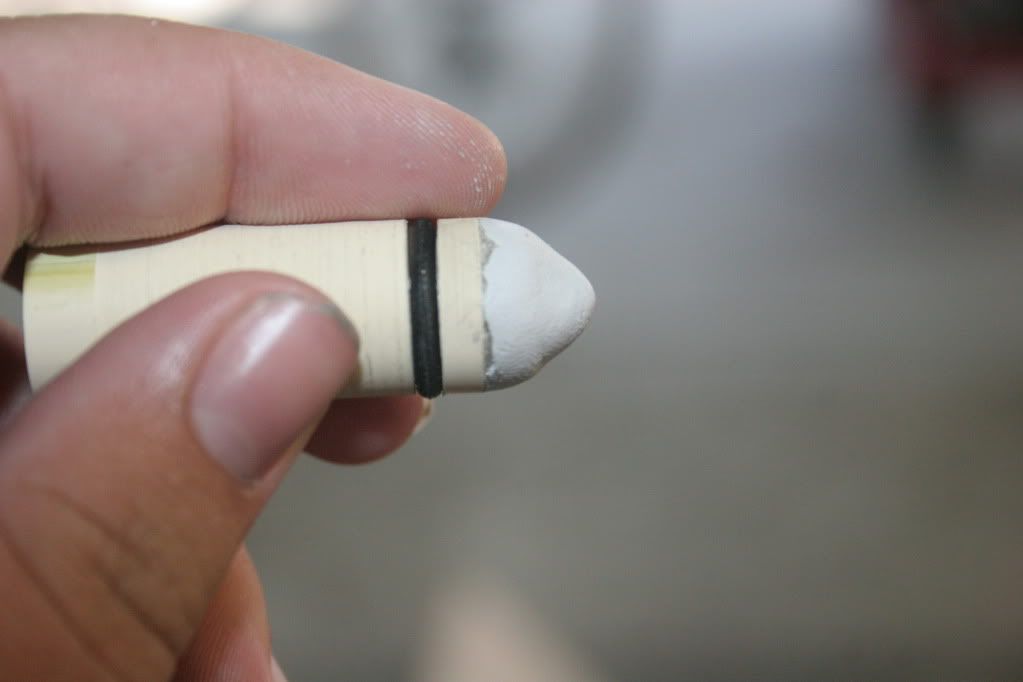
Posted Image

Step 11:
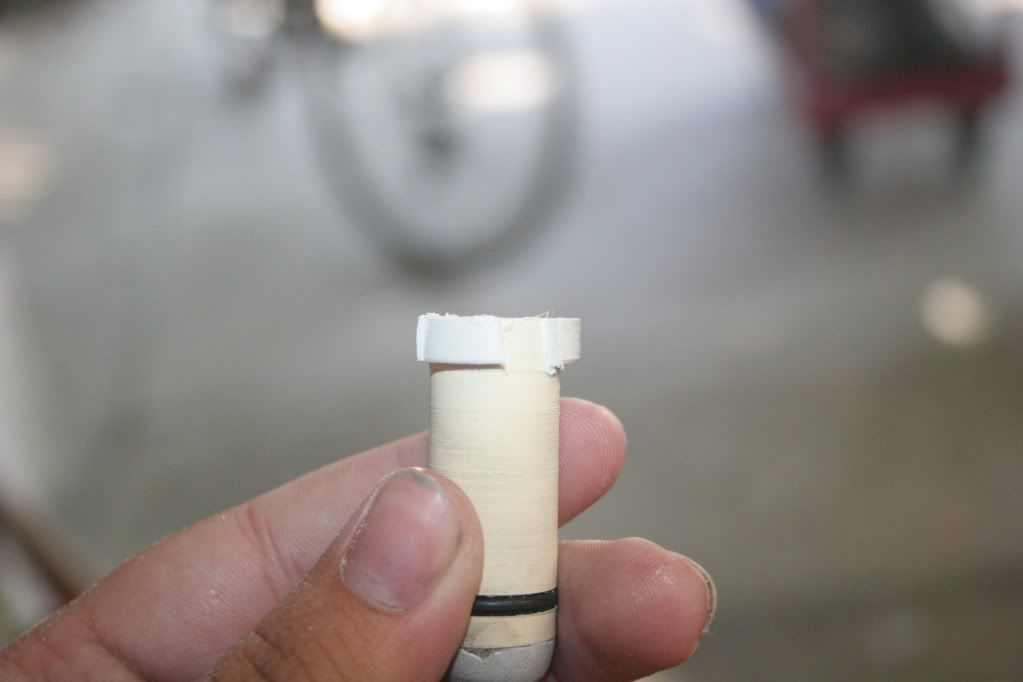
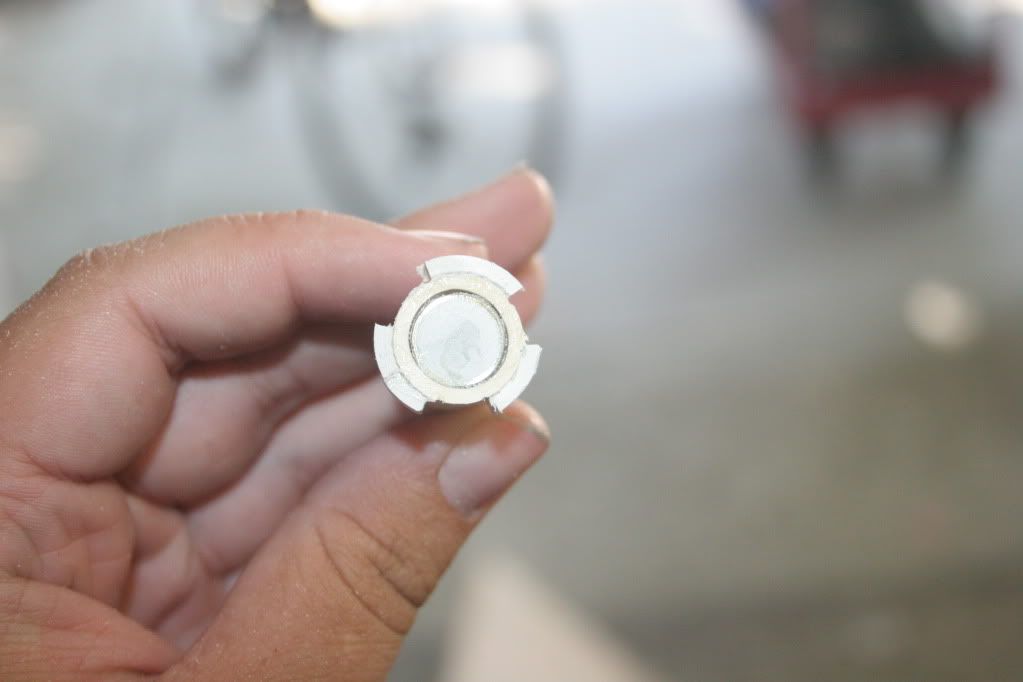
After the E-putty dries, cut a section of 1/2" PVC and sand the inside to fit snugly over the end of the 1/2" CPVC. Super glue it on, and cut out three sections of it with a dremel, like so:
Posted Image

Posted Image
The completed assembly is called the piston.

Step 12:
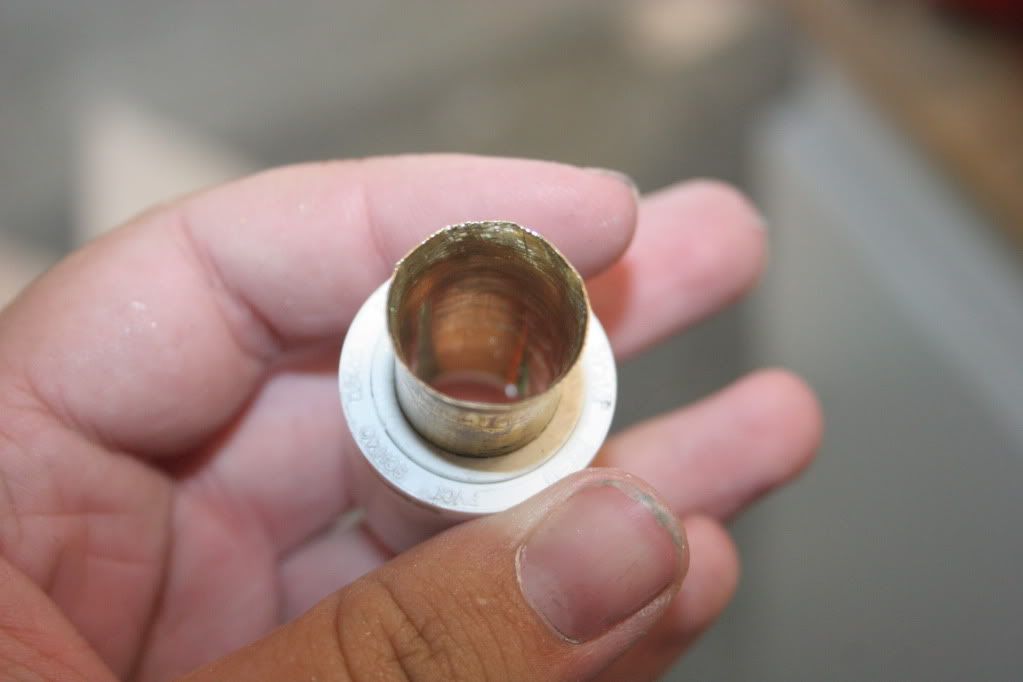
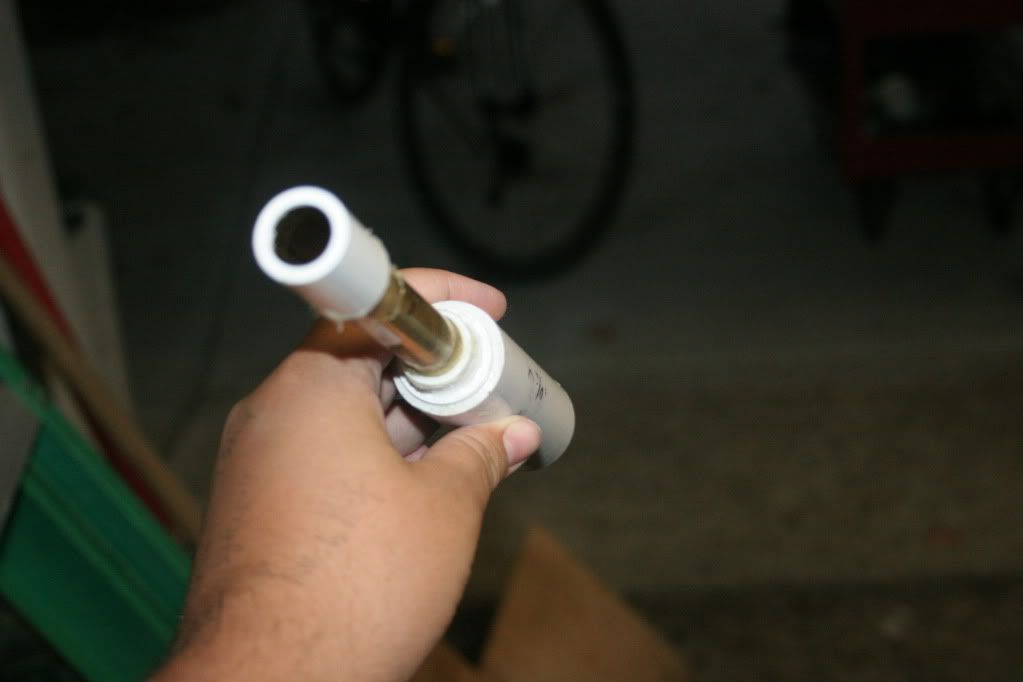
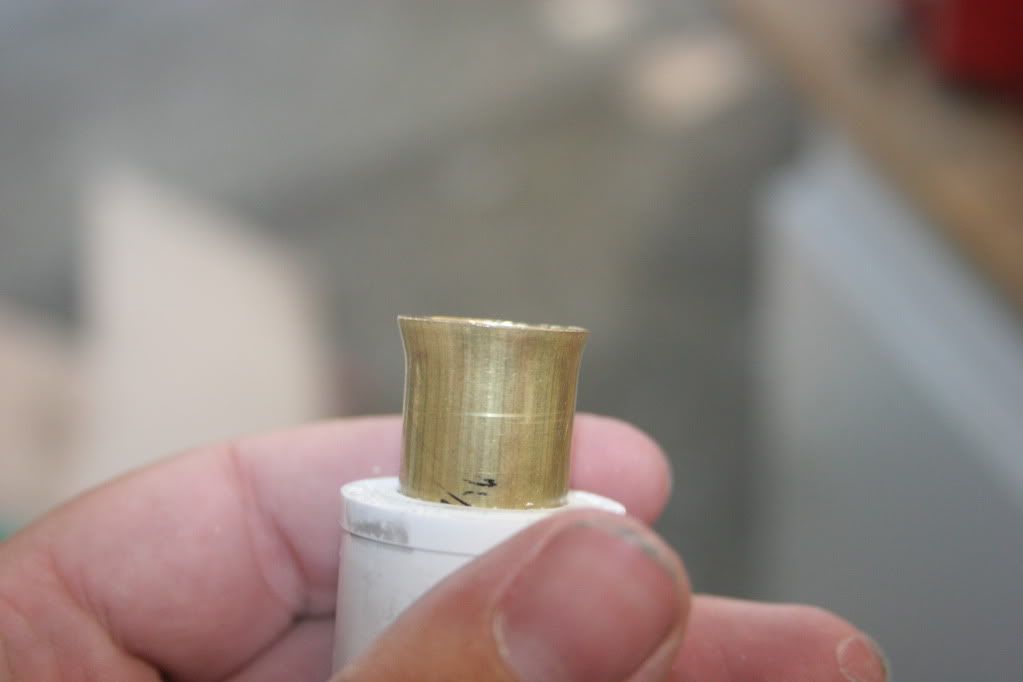
Insert the piece of 21/32" brass from step 4 into the bushing/PVC combo from step 3, sanding out the 1/2" PVC as needed. Use epoxy to secure it. Flare the end of the tubing to the point that it fits in the hole in the 3/4" endcap from earlier, but allows some slop, to account for any mistakes made later on. This assembly is called the front tank bushing.
Posted Image

Posted Image

Step 13:
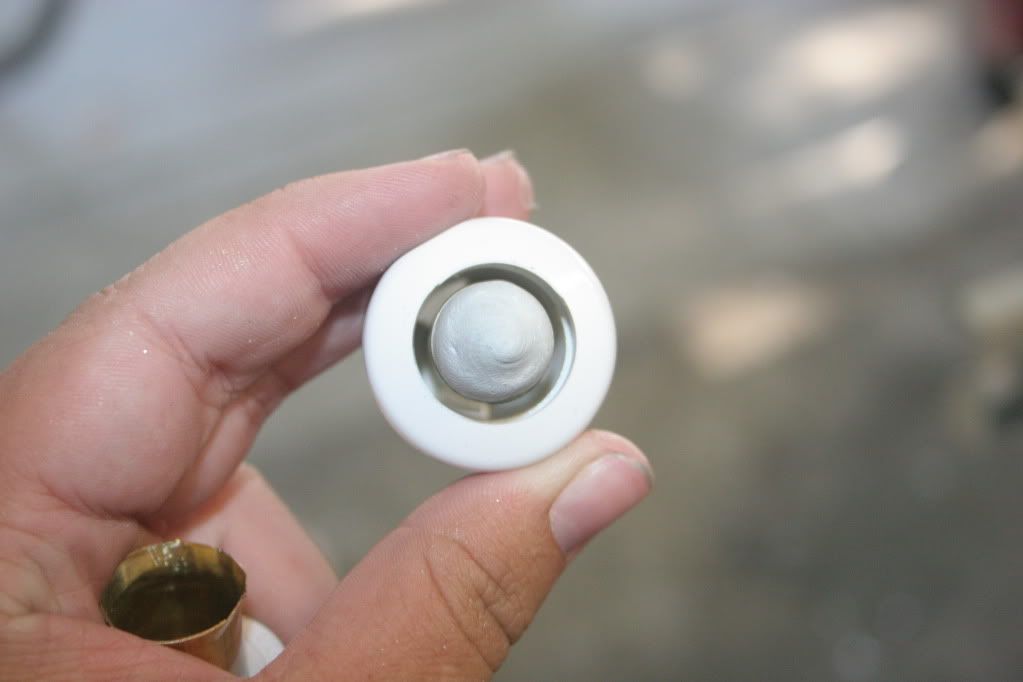
Cut a segment of 3/4" PVC 1 5/8" long, and install the endcap from step 5. Glue the piston in this assembly, so the O-ring is approximately flush with the end of the endcap. The completed assembly is called the bolt.
Posted Image

Step 14:
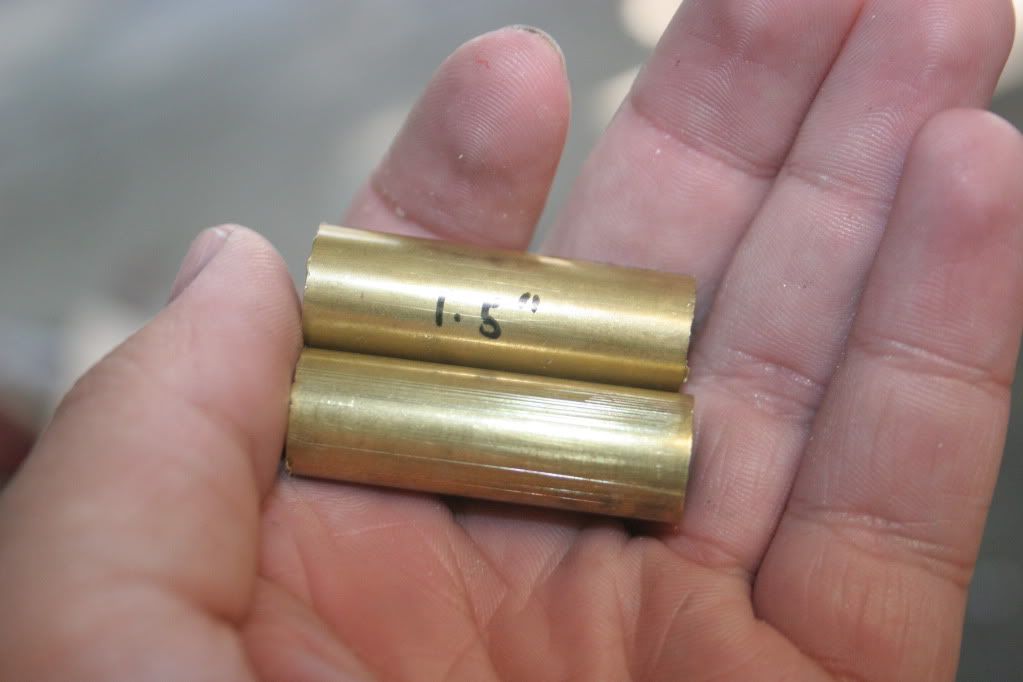
Cut a piece of 17/32" brass tubing and a piece of 1/2" tubing 1.5" long.
Posted Image

Step 15:
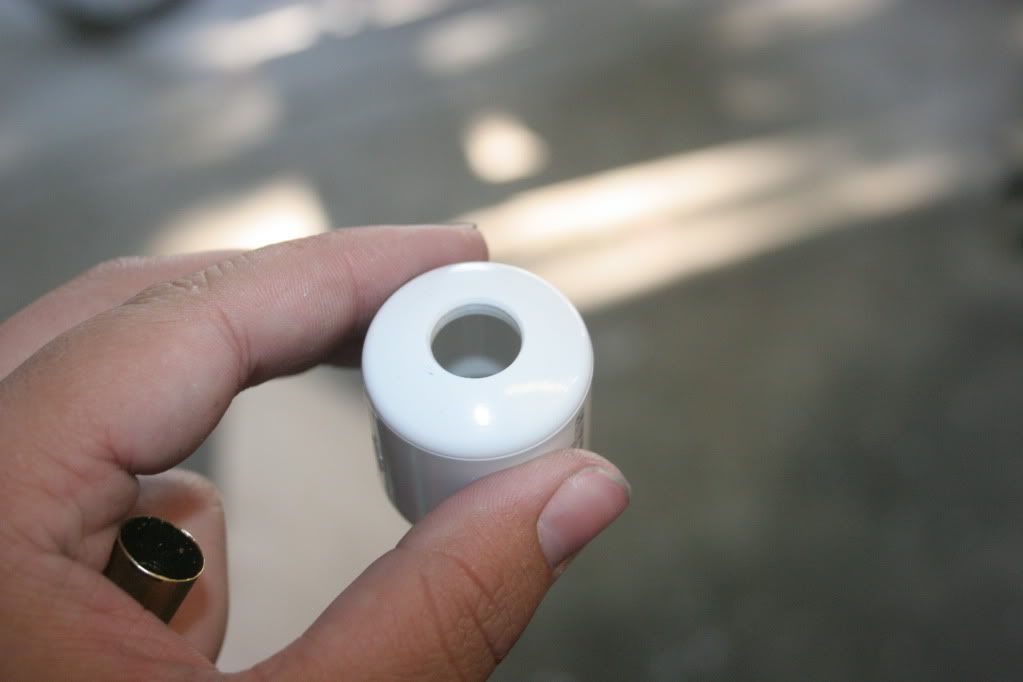
Drill a 1/2" hole in the end of the other 3/4" endcap, and glue the piece of 1/2" tubing inside, so that the end is flush with the inside of the cap. Press this assembly onto the assembly from step 13, but do not glue it, in case you need to make adjustments later.
Posted Image

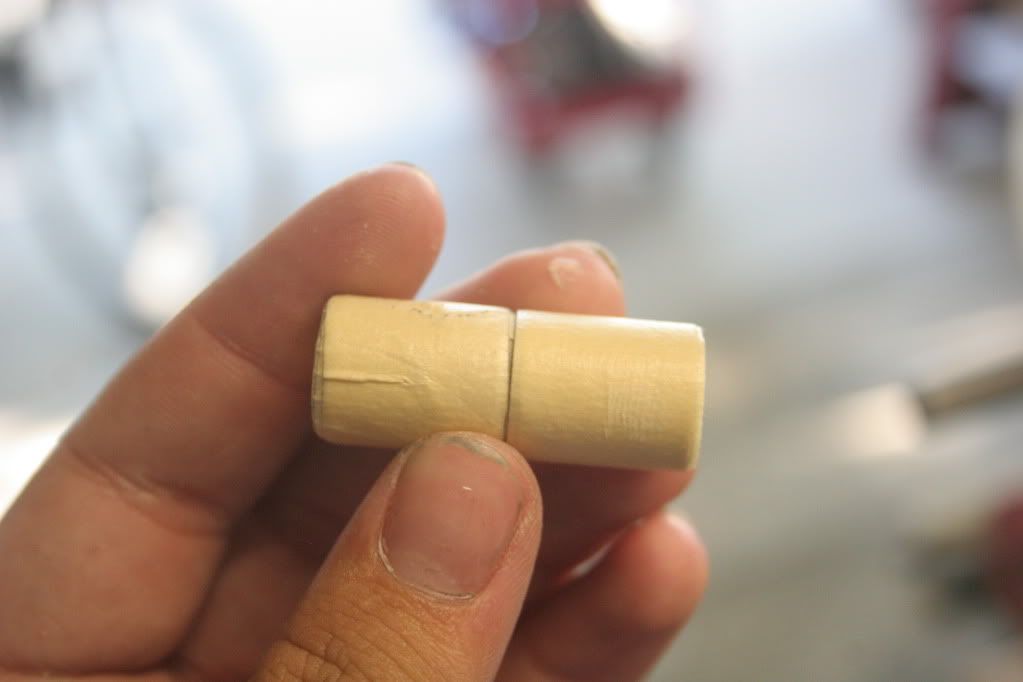
Step 15:
Wrap the piece of 17/32" brass tubing in e-tape or masking tape, so that it is snug inside of 1/2" PVC.
Posted Image

Step 17:
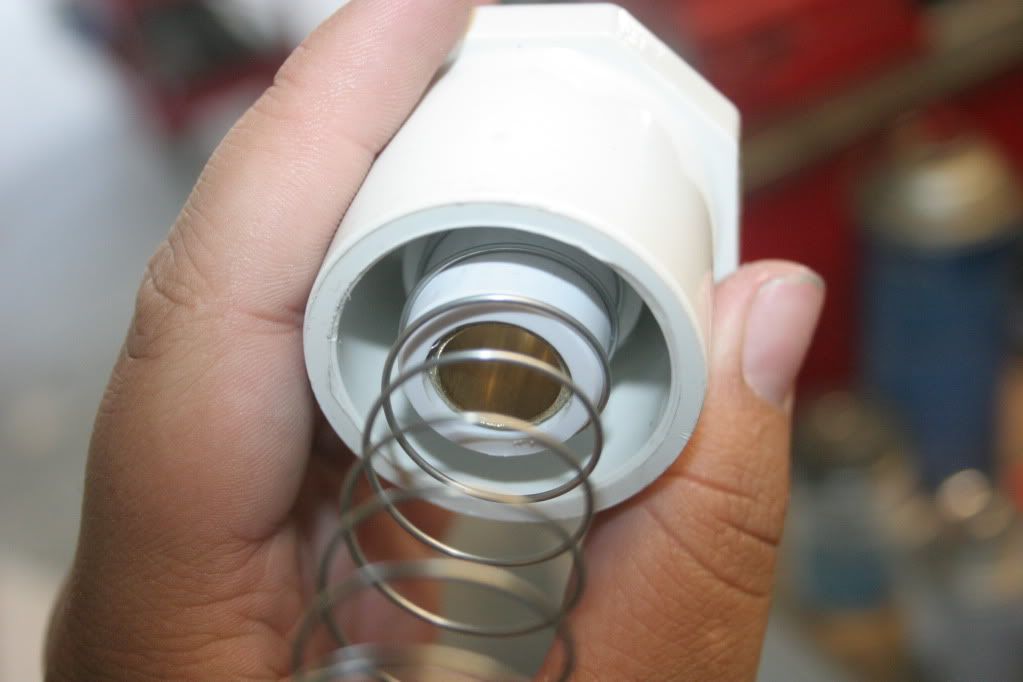
Cut a segment of 1/2" PVC long enough that it can sit flush with the back end of a 1 1/4" PVC bushing and protrude about 3/4" from the front. Solvent weld it into a 1 1/4" bushing, after dremeling out the bushing so that the PVC can slide all the way through. Insert the 17/32" brass tube into the 1/2" PVC, making sure that it is flush with the end.
Posted Image
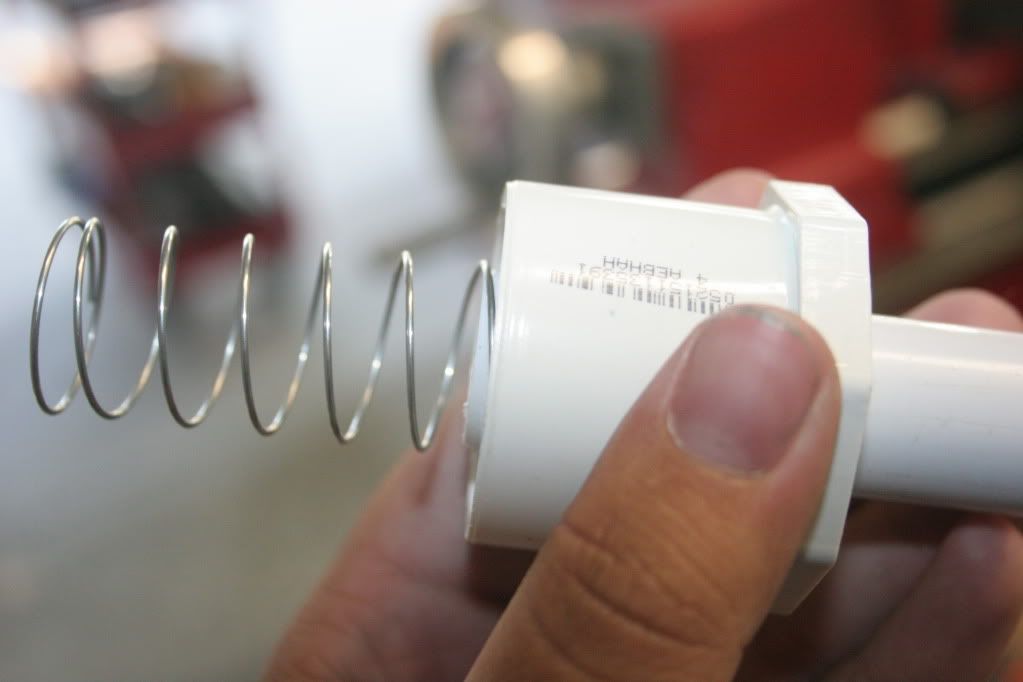
(Ignore the spring, evidently I didn't take a picture without it.)

Posted Image

Posted Image

Step 18:
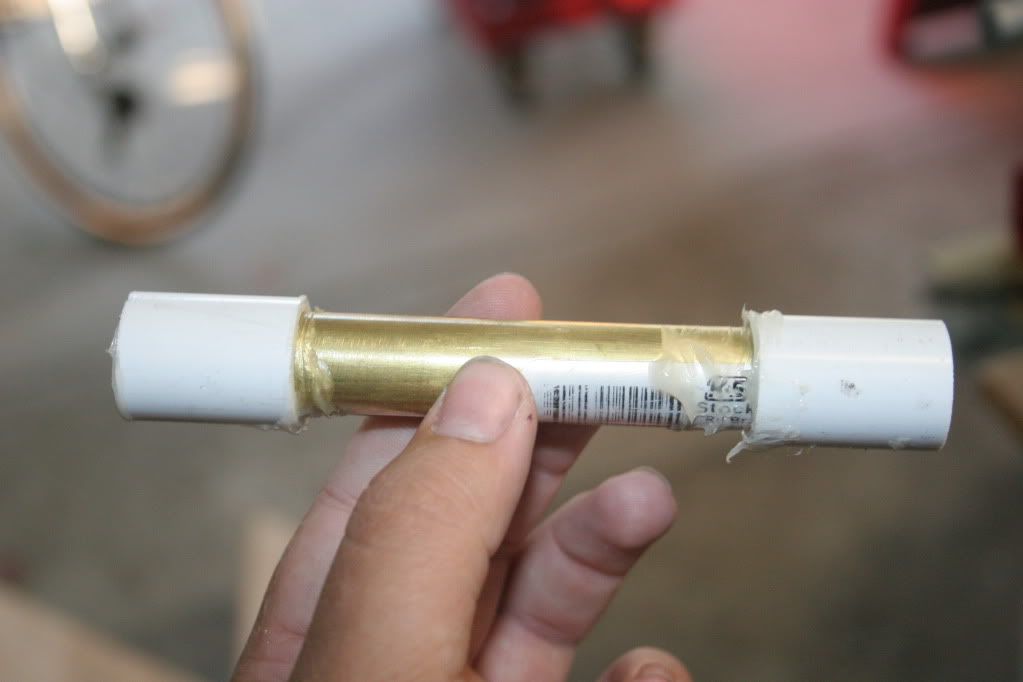
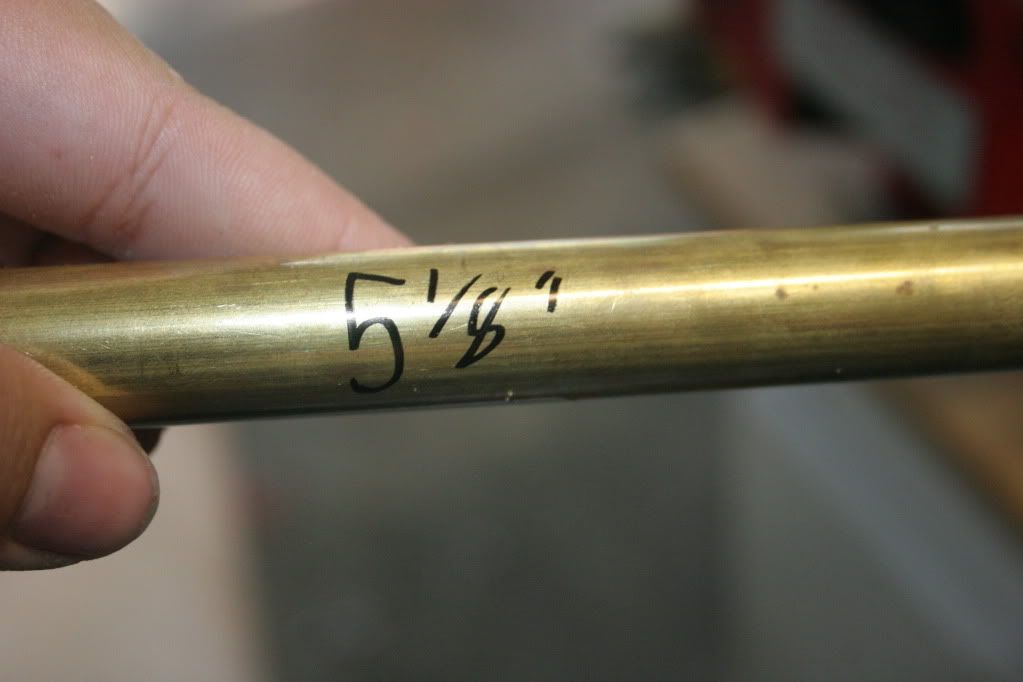
Cut a section of 21/32" brass tubing 5 1/8" long. This will become the pump tube.
Posted Image

Step 19:
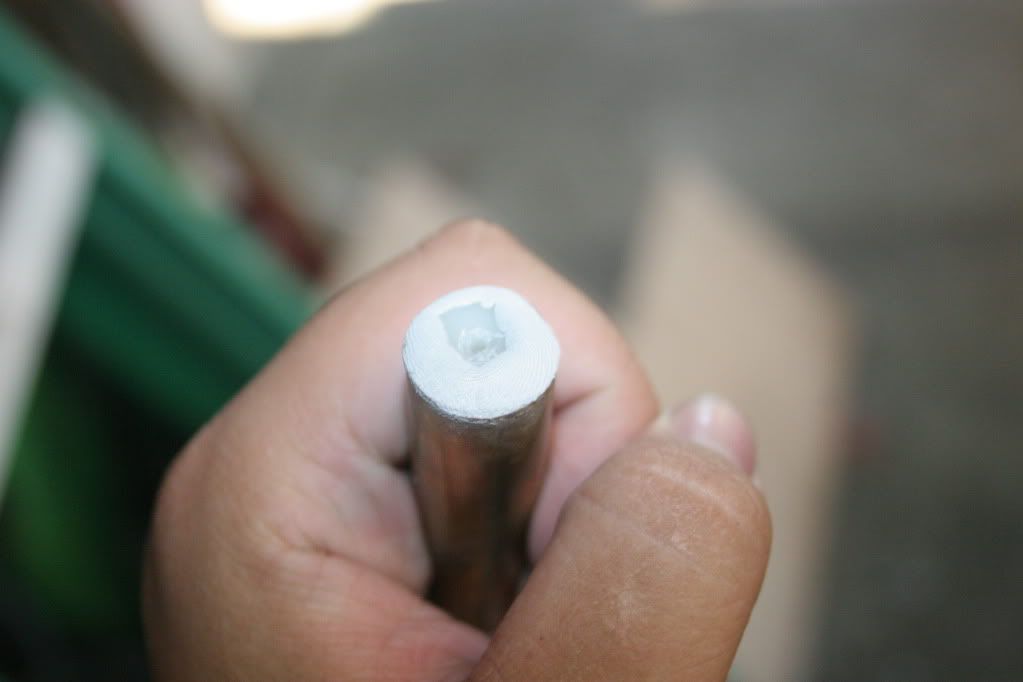
E-putty a check valve into one end of the tubing. Cut both hose barbs off, and make sure the arrow is pointing towards the end of the tube.
Posted Image

Posted Image

End of post #1 (picture limit)

Edited by roboman, 16 March 2013 - 03:36 PM.

  • 0

Youtube

LS and Retaliator boltsleds are currently available at https://www.facebook.com/RoboM8/


#2 roboman

roboman

    Member

  • Members
  • 489 posts

Posted 20 August 2011 - 05:30 PM

Step 20:
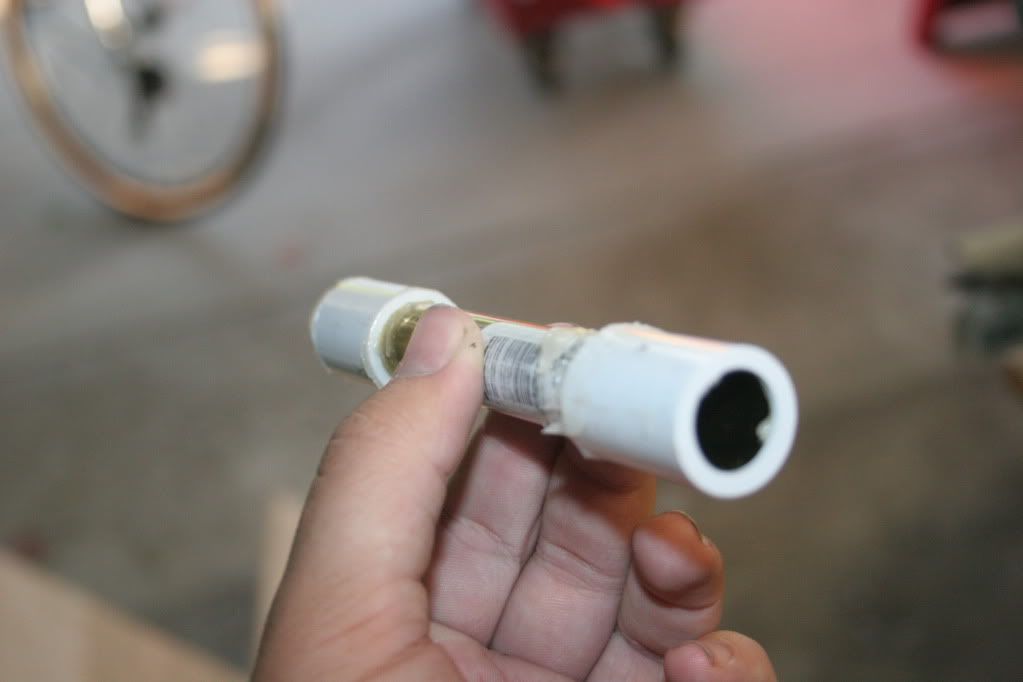
Cut two segments of 1/2" PVC and dremel them out to fit over the 21/32" brass tubing snugly. Epoxy them onto the tubing.
Posted Image

Posted Image

Posted Image

Step 21:
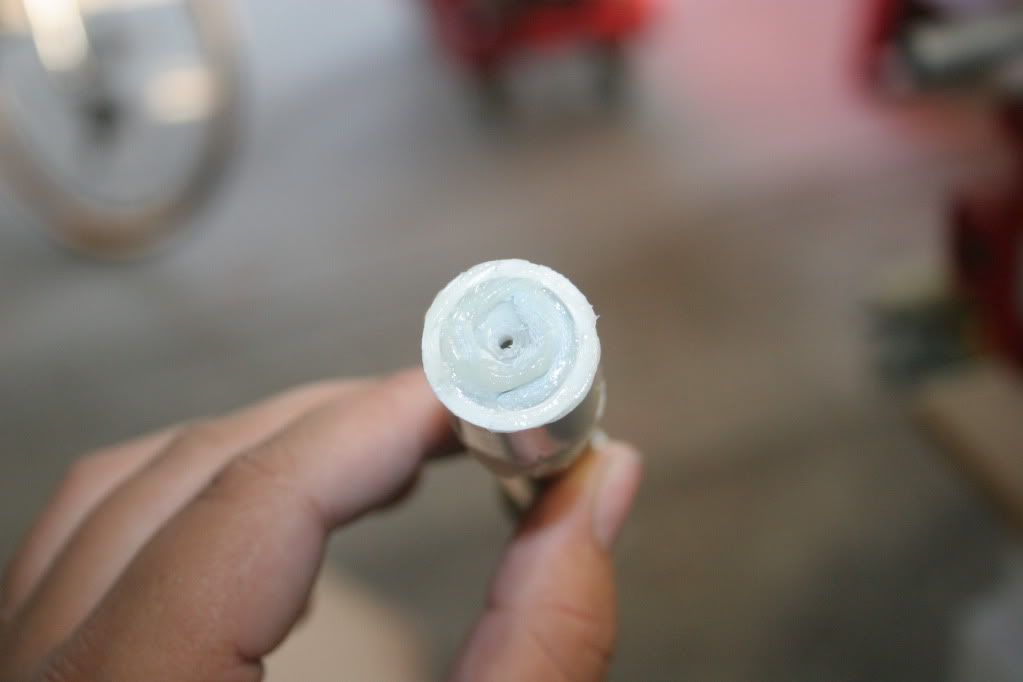
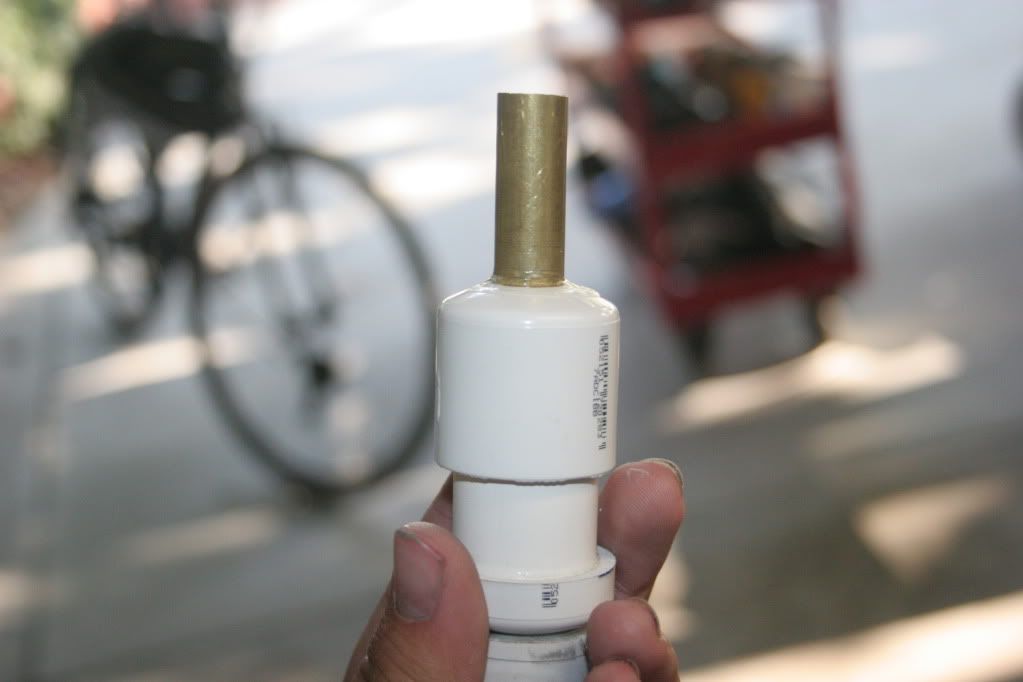
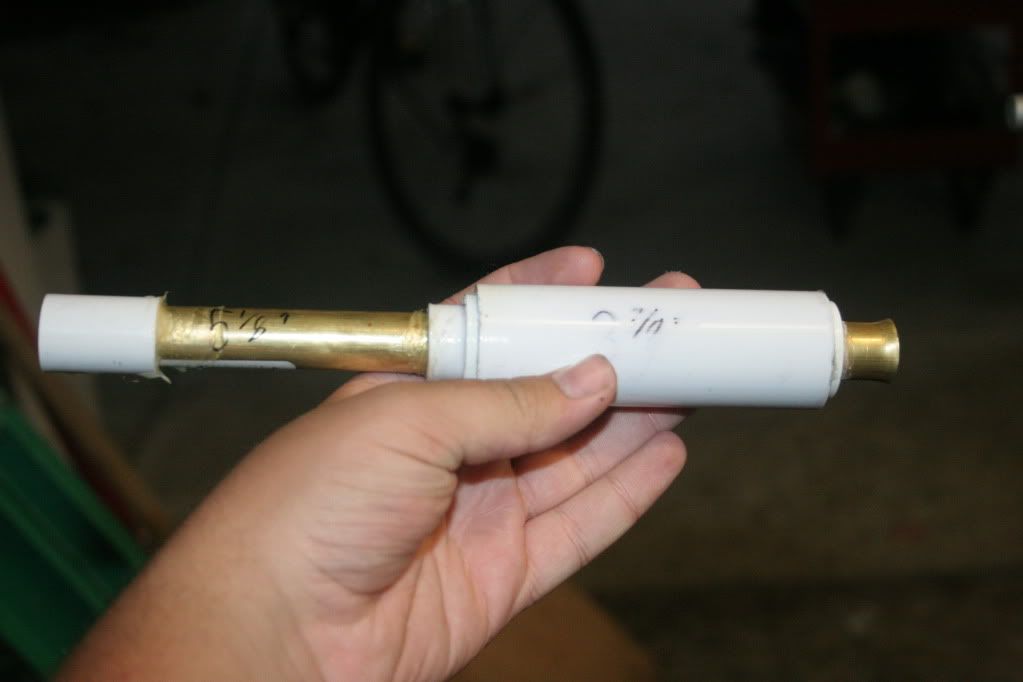
Solvent weld the end with the check valve into a bushing in the 1" piece from step 2. Solvent weld the other bushing + brass combo from step 12 into the other end of the tube.
Posted Image

Posted Image

Step 22:
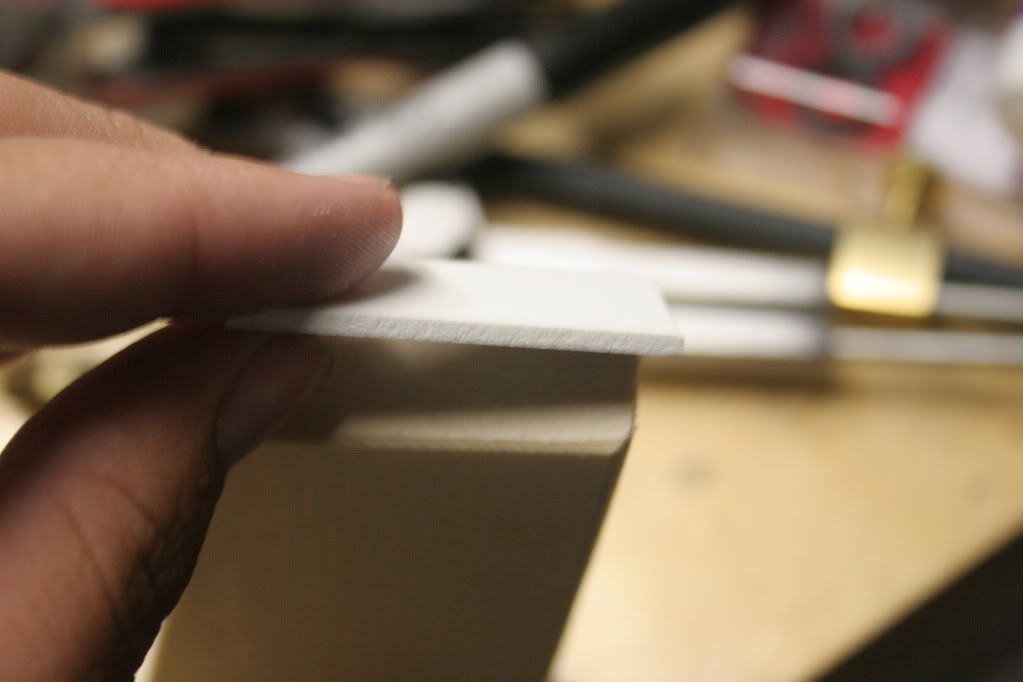
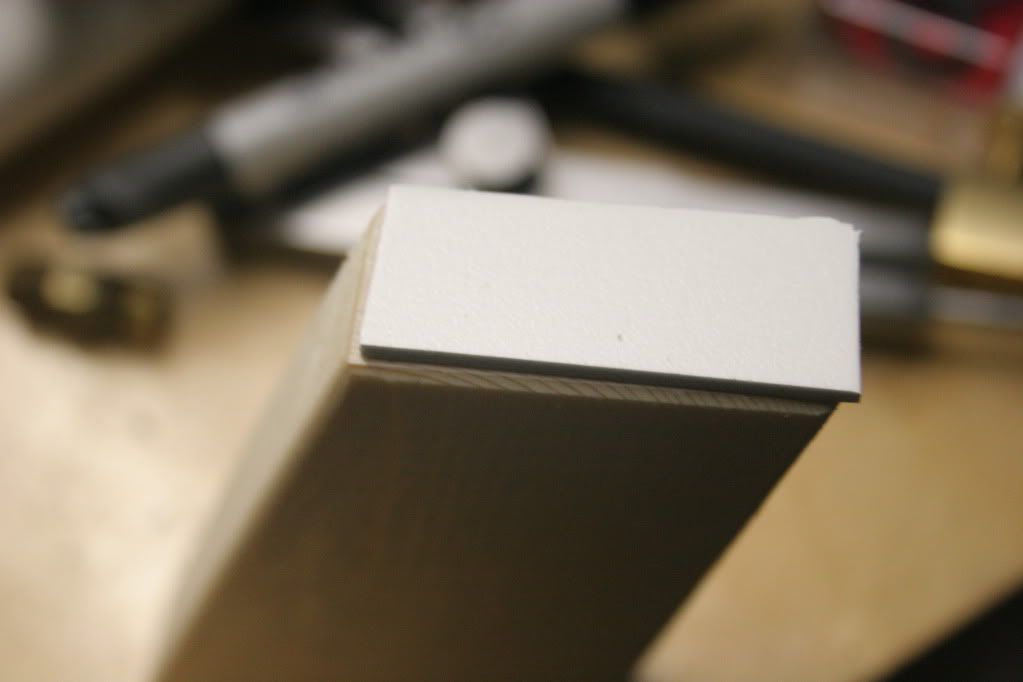
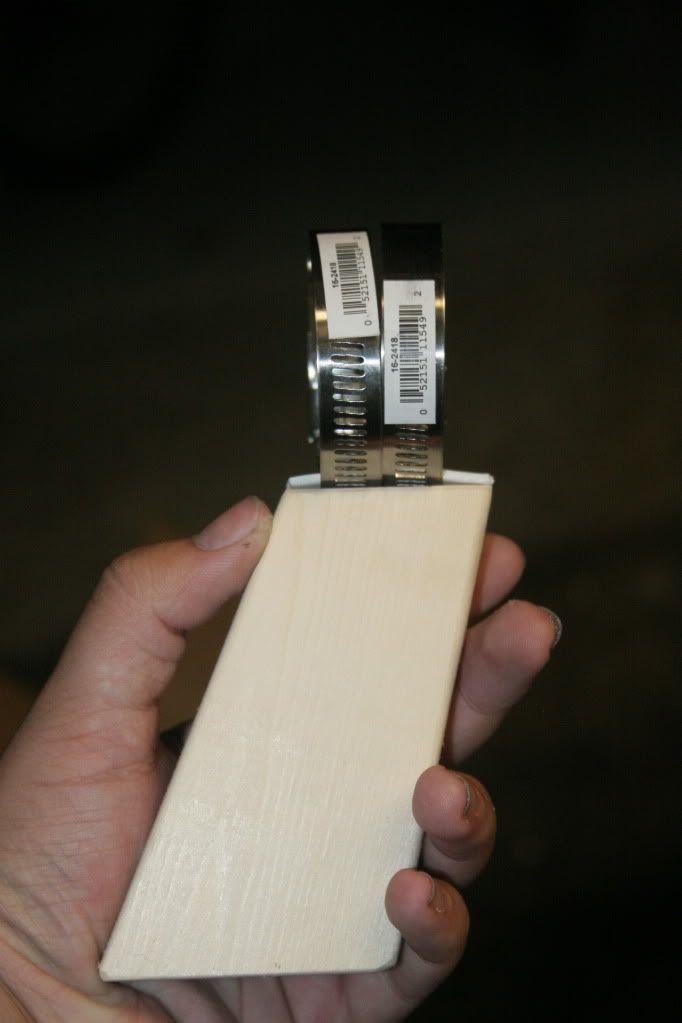
Cut a grip from the 1"x2" dimensional lumber to your taste. Mine is quite simple, but effective. Cut a strip of PVC or aluminum sheet that matches the top of your grip, and draw/scribe a line down the center.
Posted Image

Posted Image

Step 23:
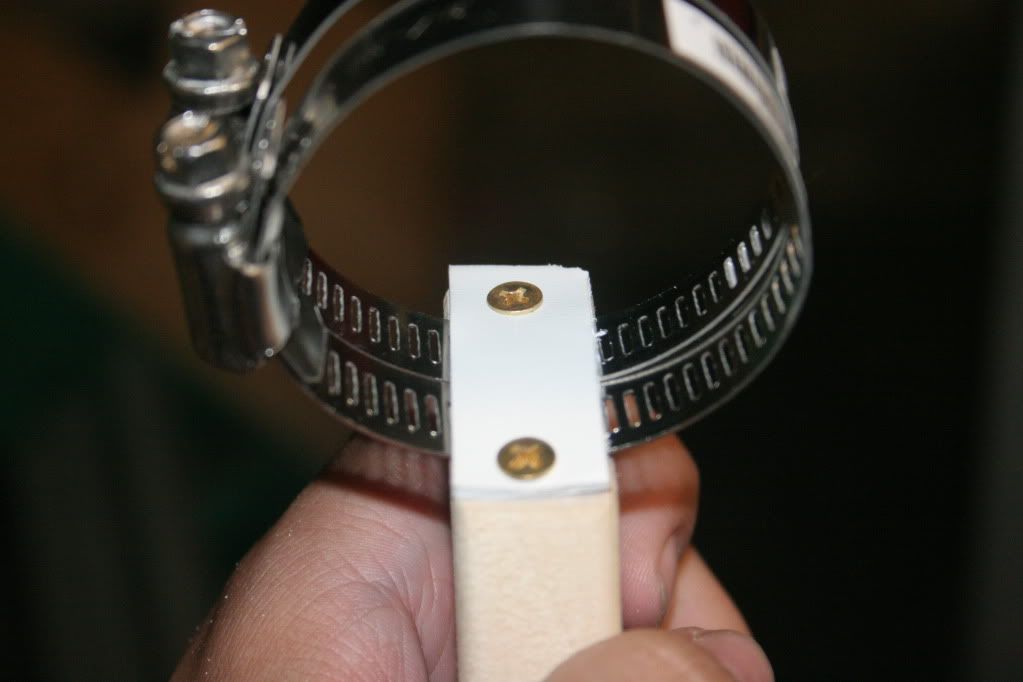
Use two wood screws to attach the plate to the top of your grip. Leave room for two hose clamps between the screws.
Posted Image

Posted Image

Step 24:
Place this:
Posted Image
Over the shorter end of this:
Posted Image

Step 25:
Slide everything into an appropriately-sized piece of 1 1/4" PVC. I'm not sure how long mine was, I think it was around 8 or 9 inches, without the couplers or bushings.
Posted Image
The spring shown in step 17 can be installed now.

As you can see, the other end of the pump tube gets inserted into another 1 1/4" bushing, dremeled out to allow the pipe to slide through it fairly easily. A 1/2" CPVC Tee was attached to a stub of 1/2" CPVC, which was hot glued over a 2K pump shaft. The tee is not really necessary, but cleans everything up nicely.

Step 26:
Attach a clothespin trigger in an appropriate location, as you would for a typical SNAP. The exact location of the pin varies, based on how you built your blaster. Mine was located 2.8" from the front of the 1 1/4" pipe. The grip goes just behind the trigger, leaving about 1/4" of space between the back of the clothespin and the front of the grip. I used epoxy to secure my trigger.
Posted Image
Paint as you desire (fluorescent pink paint makes everything work better).
Attach an appropriate barrel (mine is 11" long).

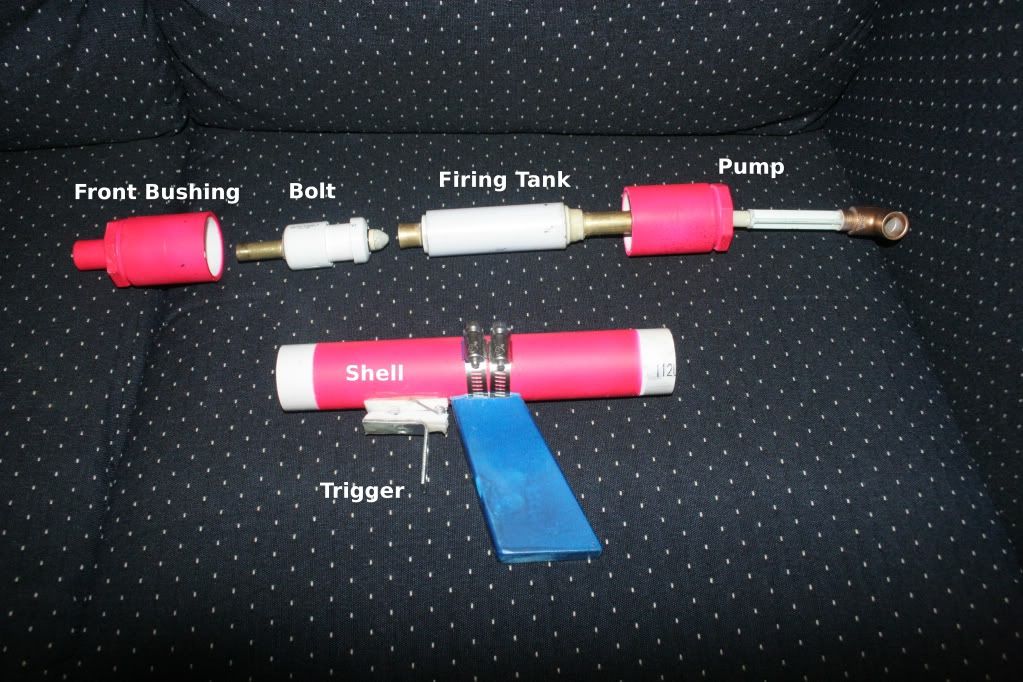
For reference, this picture shows how the parts go together. Posted Image
As you can see, I used a 2K pump in lieu of a homemade one, because my homemade pump was drawing too much of a vacuum, and I didn't really want to troubleshoot it, at the time.

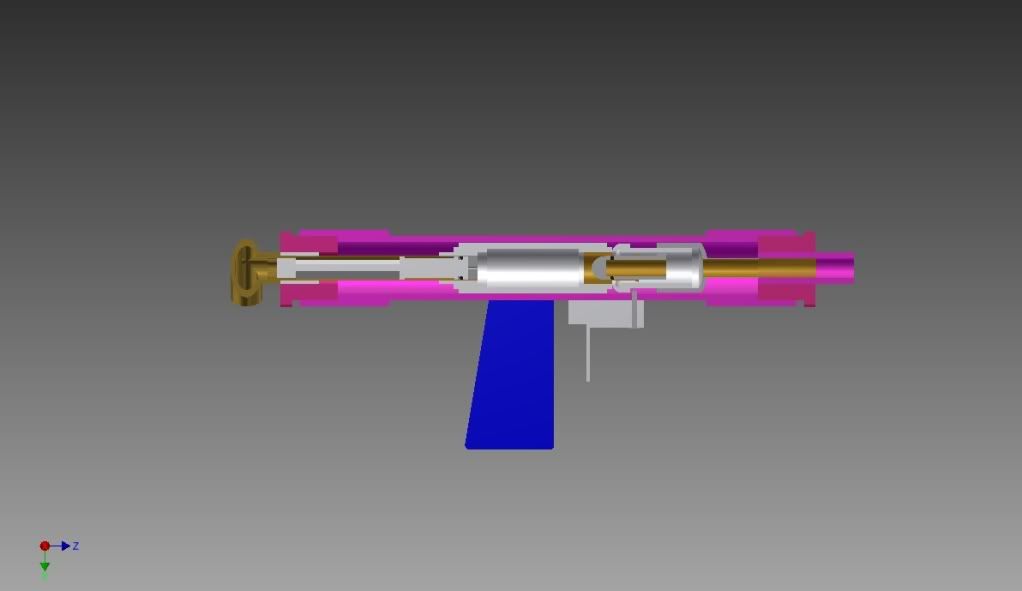
This might help those of you confused by the design.
Posted Image
I CADed that just now, and it's almost entirely correct, except that the pump head is buried inside the check valve. This is obviously not the case in the real blaster.

Here's an animation of the CAD, for those of you who couldn't understand the other stuff.
CLICK ME FOR THE VIDEO

Try it out!

Here's a firing video of mine. As you can see, I didn't secure the front bushing at the time of the video, so it popped off a little bit. That shot went about 130'. Looking at the video, it would appear that there was a slight angle to the shot. In my tests, it shot just a little over 110' with 2 BB glue domes.

http://www.youtube.com/watch?v=vXIPJr4CvXk

I think there's a slight leak in mine. I'm not really sure why.

EDIT: I forgot to mention some of its features.
It can be made semi-automatic, however, mine is not. I wanted to keep it looking like a SNAP, and I dropped my brass too much, so there's a whole bunch of friction. Due to this, I have to reset the "bolt" manually after every shot. Semi-auto conversion would be quite easy - you would only need to add a valve like 6790T43 between an auxiliary tank and the firing tanks, so that it is actuated when you pull the trigger, as shown in the GIF above.

This particular manifestation of the "Automag" design is very compact, solid, and rugged. The 1 1/4" PVC "shell" protects the internals from drops. It's also a nice "face shield," should something decide to pop. (PVC technically isn't designed to do this, but hey, it certainly works well.)

With a longer stroke, you could easily make this system compatible with N-strike magazines. One would only need to add a breech and a magwell.

This is most definitely hopper-able, but I don't have any wyes to show that. I'm sure it would benefit from a slightly larger firing tank, in that case, but it would be a very powerful, quick-firing blaster with a hopper.

The prototype does not have an OPRV. The valve's flow is limited so that you simply cannot put enough pressure in the tank to make a large difference, in terms of range, after a certain point. I intend to add one eventually. It would not be a difficult task.

Eventually, I'll make a semi-automatic version, along with an accompanying writeup.

I'll see about getting some CADs up tonight, but that may or may not happen.

Edited by roboman, 16 March 2013 - 03:38 PM.

  • 0

Youtube

LS and Retaliator boltsleds are currently available at https://www.facebook.com/RoboM8/


#3 evilbunnyo

evilbunnyo

    Member

  • Members
  • 404 posts

Posted 20 August 2011 - 05:41 PM

So this is what you showed me in the irc. Looks nice and the writeup seems easy enough to follow so I might attempt this type of air gun.
  • 0
Silence is golden but duct tape is silver

#4 roboman

roboman

    Member

  • Members
  • 489 posts

Posted 20 August 2011 - 05:42 PM

So this is what you showed me in the irc. Looks nice and the writeup seems easy enough to follow so I might attempt this type of air gun.


Indeed, it is. I'm glad you found the writeup simple. It should cost $30-40, depending on what you already have. Let me know if you see anything confusing or difficult to follow, and I'll try to help you out as much as possible.
  • 0

Youtube

LS and Retaliator boltsleds are currently available at https://www.facebook.com/RoboM8/


#5 k9turrent

k9turrent

    Member

  • Members
  • 829 posts

Posted 20 August 2011 - 05:49 PM

Posted Image
  • 0
QUOTE View Post

That's about it. And thanks Angela who helped me with these pictures.. It looks huge in her hands.


HOLY CRAP!

FU ALL

#6 roboman

roboman

    Member

  • Members
  • 489 posts

Posted 20 August 2011 - 05:52 PM

Heh, thanks! I take it you like it?
  • 0

Youtube

LS and Retaliator boltsleds are currently available at https://www.facebook.com/RoboM8/


#7 KoRnEd

KoRnEd

    Member

  • Members
  • 209 posts

Posted 20 August 2011 - 06:12 PM

Of course the highest quality of production from you Robo. If I haven't said this a lot lately, your work is amazing. Something interesting though, is that pump looks awkward to pump in the video, as you raised 2 fingers in the air in a sort of peace sign. You should be able to fix that by adding Cpvc in the T on the end.
  • 0

20:07 tiredKitty living in NYC, you could spend a lot of time in Chinatown and only speak the mother tongue
20:07 tiredKitty Not a good idea, btw.

I have identified the problem: "maverick"


#8 roboman

roboman

    Member

  • Members
  • 489 posts

Posted 20 August 2011 - 06:14 PM

Of course the highest quality of production from you Robo. If I haven't said this a lot lately, your work is amazing. Something interesting though, is that pump looks awkward to pump in the video, as you raised 2 fingers in the air in a sort of peace sign. You should be able to fix that by adding Cpvc in the T on the end.


Thanks! It's really not that awkward, my hand is just messed up. But, yeah, I'll keep that in mind.

Edited by roboman, 21 August 2011 - 01:28 PM.

  • 0

Youtube

LS and Retaliator boltsleds are currently available at https://www.facebook.com/RoboM8/


#9 Buffdaddy

Buffdaddy

    Do not buy from this member

  • DO NOT TRADE
  • 824 posts

Posted 20 August 2011 - 06:36 PM

YAY, MORE AIRGUN AWESOMENESS!!!!!!

The only real turnoff I can think of is having to buy brass (I know plenty of people who instantly go "AAAAAHHHH" and the thought of it), but in all reality, people should have at least some spare.

This makes me wonder now, going back to the original picture showing how it works, isn't that basically how a Stampede works, just with a motor instead of air pressure? Just imagining possibilities...

In any case, glad to see you got it posted in time!
  • 0

#10 roboman

roboman

    Member

  • Members
  • 489 posts

Posted 20 August 2011 - 06:53 PM

YAY, MORE AIRGUN AWESOMENESS!!!!!!

The only real turnoff I can think of is having to buy brass (I know plenty of people who instantly go "AAAAAHHHH" and the thought of it), but in all reality, people should have at least some spare.

This makes me wonder now, going back to the original picture showing how it works, isn't that basically how a Stampede works, just with a motor instead of air pressure? Just imagining possibilities...

In any case, glad to see you got it posted in time!


Heh, yeah, it is a lot of brass. It shouldn't be too bad, since 1' of each size of brass is enough to make 2 or three of these, at least.

Errm, it's not entirely how a stampede works. A stampede uses a motor to retract a bolt, which compresses a piston. This then gets released, compressing air and shooting a dart. Mine uses a little piston inside a tube that blocks the flow of air until the piston is released, which lets the air out of the tank. The spring in the front re-cocks it after each shot, assuming yours doesn't have a TON of friction like mine does. It could definitely have potential for a semi-automatic LS or Stampede, if you're into that kind of thing.

Thanks! I'm glad I got it done in time, too.
  • 0

Youtube

LS and Retaliator boltsleds are currently available at https://www.facebook.com/RoboM8/


#11 Daniel Beaver

Daniel Beaver

    HQRSE CQCK

  • Moderators
  • 2,099 posts

Posted 20 August 2011 - 07:06 PM

Cool, looks a little more doable that some other air tank designs. FRONT MOUNT THAT PUMP!
  • 0

#12 roboman

roboman

    Member

  • Members
  • 489 posts

Posted 20 August 2011 - 07:08 PM

I'll definitely front mount it in later revisions. I just wanted this one to look like a SNAP. :P
  • 0

Youtube

LS and Retaliator boltsleds are currently available at https://www.facebook.com/RoboM8/


#13 Curly

Curly

    Member

  • Members
  • 201 posts

Posted 20 August 2011 - 08:17 PM

That's a damn dirty trick. The guy holding a Longshot or something at a war will definitely take priority, giving you an edge. I think BuffDaddy has some competition, even with an entire arsenal submitted. It fills pretty fast too, faster than most Nerf guns.
  • 0

#14 Buffdaddy

Buffdaddy

    Do not buy from this member

  • DO NOT TRADE
  • 824 posts

Posted 20 August 2011 - 08:53 PM

That's a damn dirty trick. The guy holding a Longshot or something at a war will definitely take priority, giving you an edge. I think BuffDaddy has some competition, even with an entire arsenal submitted. It fills pretty fast too, faster than most Nerf guns.


WHAT??? BLASPHEMY!!!!!

Back on topic, I think the easiest option for solving the pump problem (assuming you at least got it airtight) would be to have a tiny tee at the front of the pump tube, and mount the check valves there. Essentially, arranged like a Supersoaker pump.

Also, now that I've looked at it more, you essentially replicated the triggering mechanism for the Marshmallow Blaster. Different parts, but same essential function.

Those 3/4" caps are a thing of beauty, aren't they?
  • 0

#15 roboman

roboman

    Member

  • Members
  • 489 posts

Posted 20 August 2011 - 09:07 PM

WHAT??? BLASPHEMY!!!!!

Back on topic, I think the easiest option for solving the pump problem (assuming you at least got it airtight) would be to have a tiny tee at the front of the pump tube, and mount the check valves there. Essentially, arranged like a Supersoaker pump.

Also, now that I've looked at it more, you essentially replicated the triggering mechanism for the Marshmallow Blaster. Different parts, but same essential function.

Those 3/4" caps are a thing of beauty, aren't they?


Yeah, but I only had 1 check valve. I would've done that, had my order arrived the other day, rather than today.

Interesting, I've never really taken a look at the Marshmallow blasters.

Yeah, I love them so much.
  • 0

Youtube

LS and Retaliator boltsleds are currently available at https://www.facebook.com/RoboM8/


#16 nick4563

nick4563

    Member

  • Members
  • 4 posts

Posted 18 October 2011 - 08:08 PM

So the bolt moves and the piston is stationary? And airflow occurs when the bolt is forward of the piston unblocking itself? I read though the write up and watched all of your videos but still dont quite get that detail... Amazing by the way, the best potential for N-strike compatible semi auto-ness I've seen in the homemade world yet!

Edited by nick4563, 18 October 2011 - 09:03 PM.

  • 0

#17 roboman

roboman

    Member

  • Members
  • 489 posts

Posted 18 October 2011 - 09:22 PM

A bit of a necro, but I don't really mind. When assembled, the bolt and piston are a single piece, and move together. This assembly is the only moving part in the blaster. When released, the bolt slides forward due to the pressure behind it, until it reaches the point that it exits the brass tube, letting out air into the barrel.

In order to make it compatible with N-Strike clips, you'd simply have to extend the stroke of the bolt assembly, and make the brass tube on the end part of a breech (probably something similar to an Angel breech).
  • 0

Youtube

LS and Retaliator boltsleds are currently available at https://www.facebook.com/RoboM8/


#18 nick4563

nick4563

    Member

  • Members
  • 4 posts

Posted 19 October 2011 - 02:00 PM

I now understand how the piston releases the air, thank you very much!
  • 0


0 user(s) are reading this topic

0 members, 0 guests, 0 anonymous users