Jump to content


Photo

Lanard Shotgun Mod

Three shots! Bam! PICTURE HEAVY!

25 replies to this topic

#1 Noodleownz

Noodleownz

    Self-Fondler

  • Members
  • 510 posts

Posted 04 August 2011 - 09:58 PM

Alright, so I haven't really seen a write-up for keeping the 3-shot spread feature on the Airzone/Lanard Tripleshot/Quadshot. While this isn't very difficult, I felt like I should make a write-up for this, to hopefully help people through the process of doing this. Now... onto the mod.

Disclaimer:

I’m in no way responsible if your blaster breaks. When performing this mod, you agree to and acknowledge the risk of breaking your blaster.


Materials/Tools Needed:

-Hot Glue Gun/Hot Glue
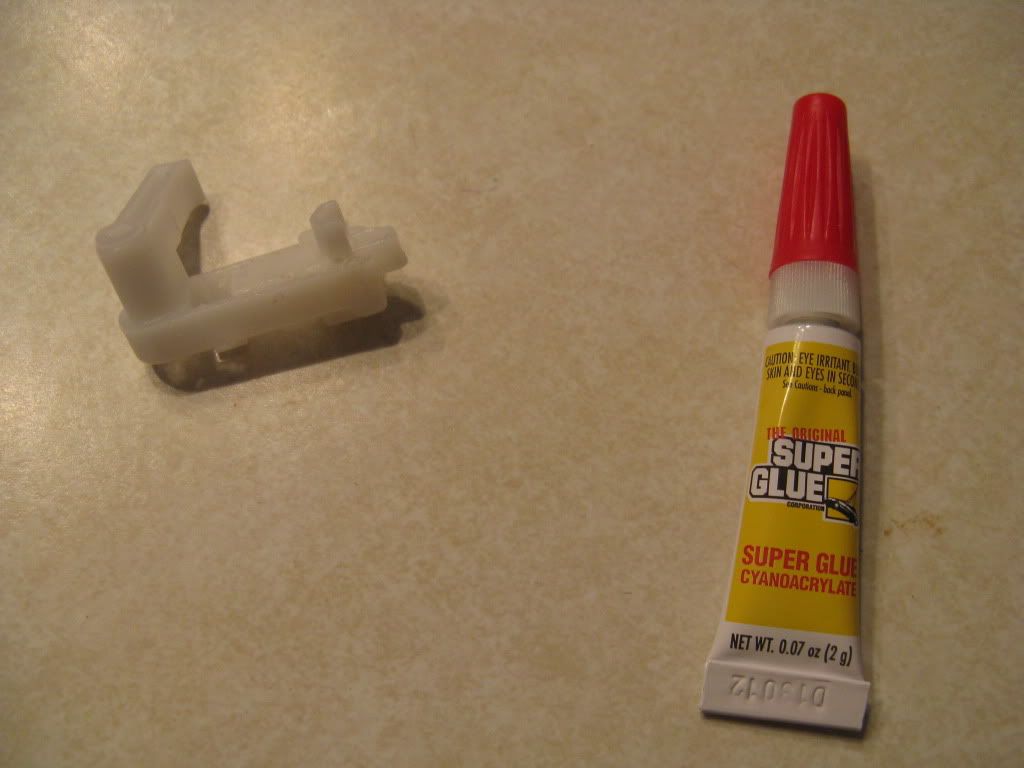
-Superglue
-Dremel with cutting attachment/sanding attachment
*- You can use another device to cut it off, I just happened to use a dremel.
-Phillip's Head Screwdriver
-Torx Head Screwdriver
-Rubber Mallet
-Silicone Grease
-Craft Foam
-Scissors
-Pencil/Pen

Optional:
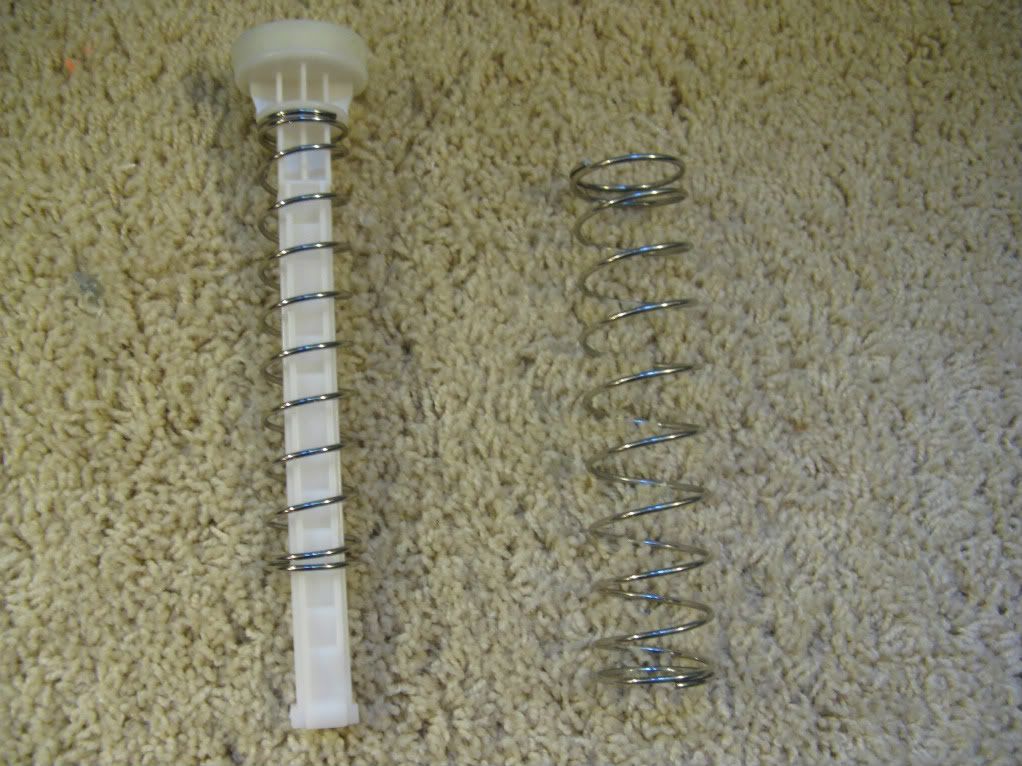
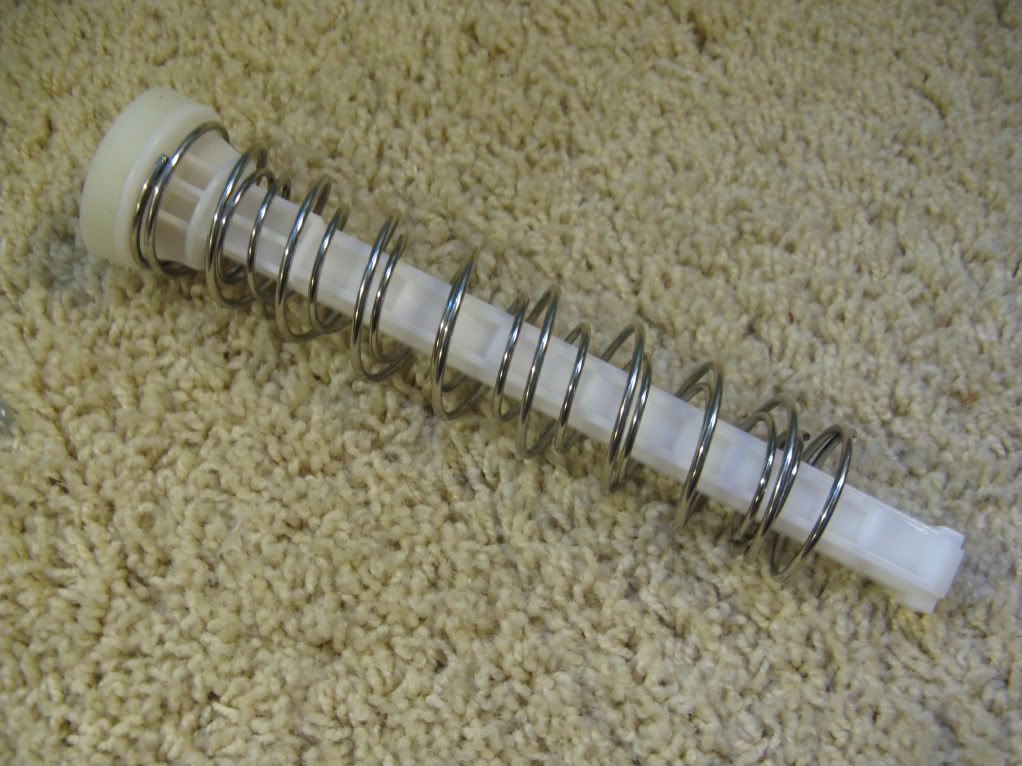
-Replacement/Additional Spring
-Rebarrel the blaster

*PROTIP:
-Keep the screws in a Ziploc bag
-Screw Size:
-2 longest screws go in the pump grip
-2 shorter screws go in the handle
-Shortest screw goes underneath the pump grip
-Regular-sized screws go in the other screw ports

TURRET

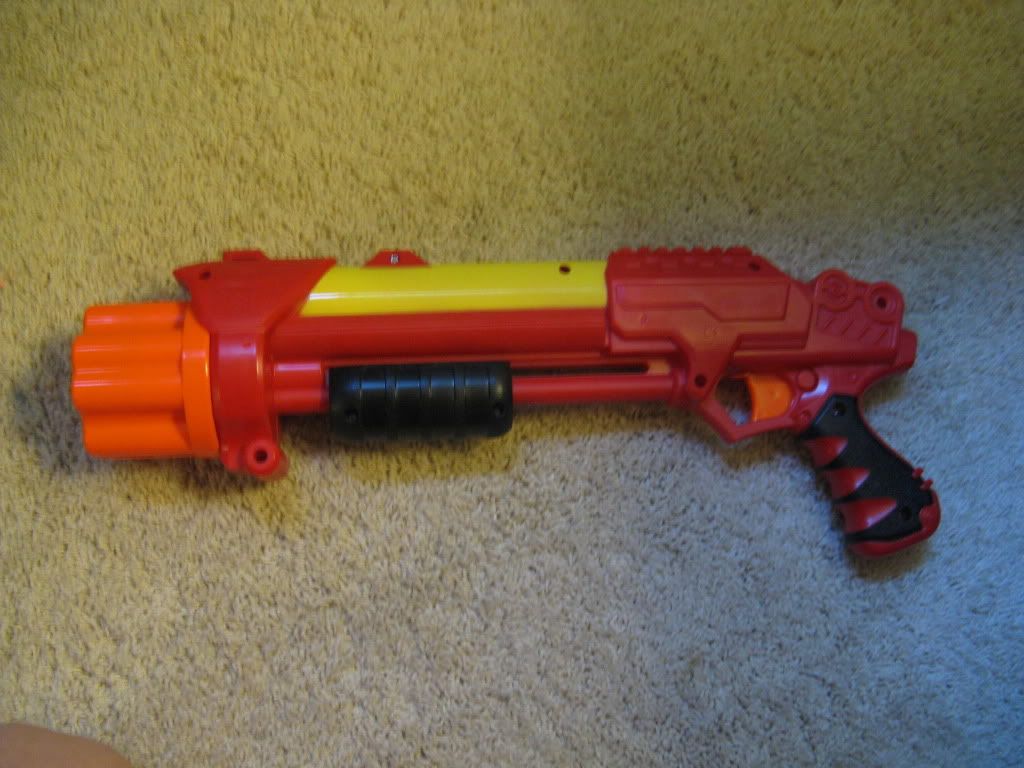
First, you want to acquire a tripleshot from your local TRU. Easy enough. And before someone asks, NO, I don't have access to these red/yellow tripleshots. I got it in a trade with mysterio:
Posted Image

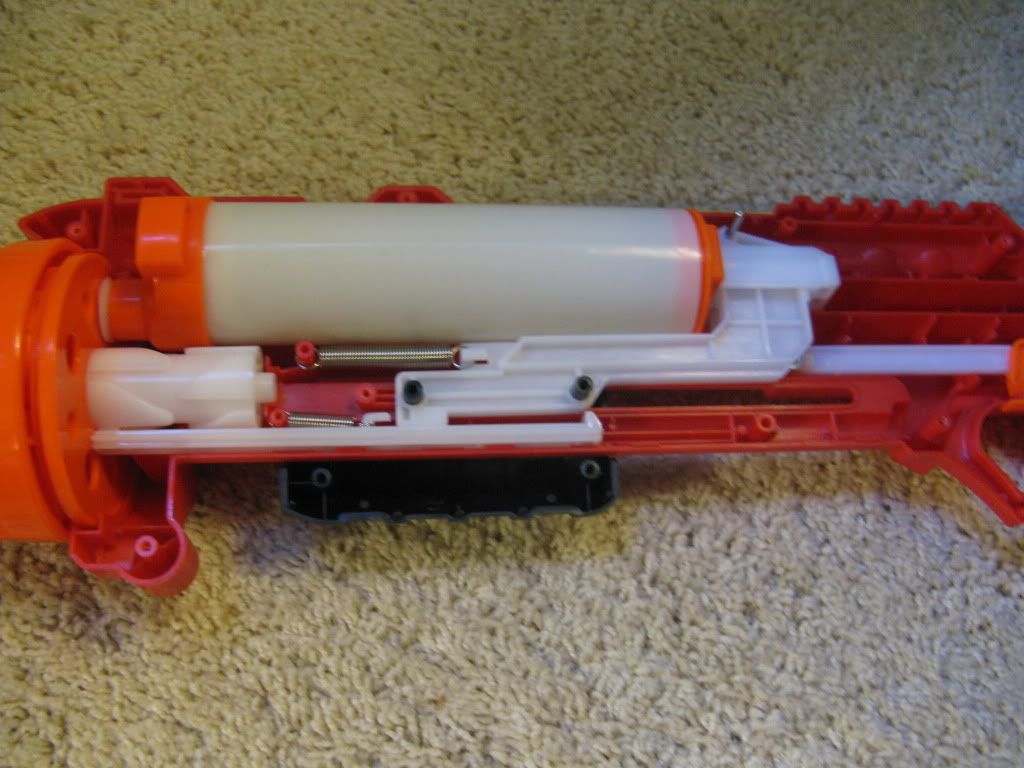
Next, unscrew your blaster. Use this picture as a reference, if a piece moves/pops out while performing the modification. Your internals should look like this:
Posted Image

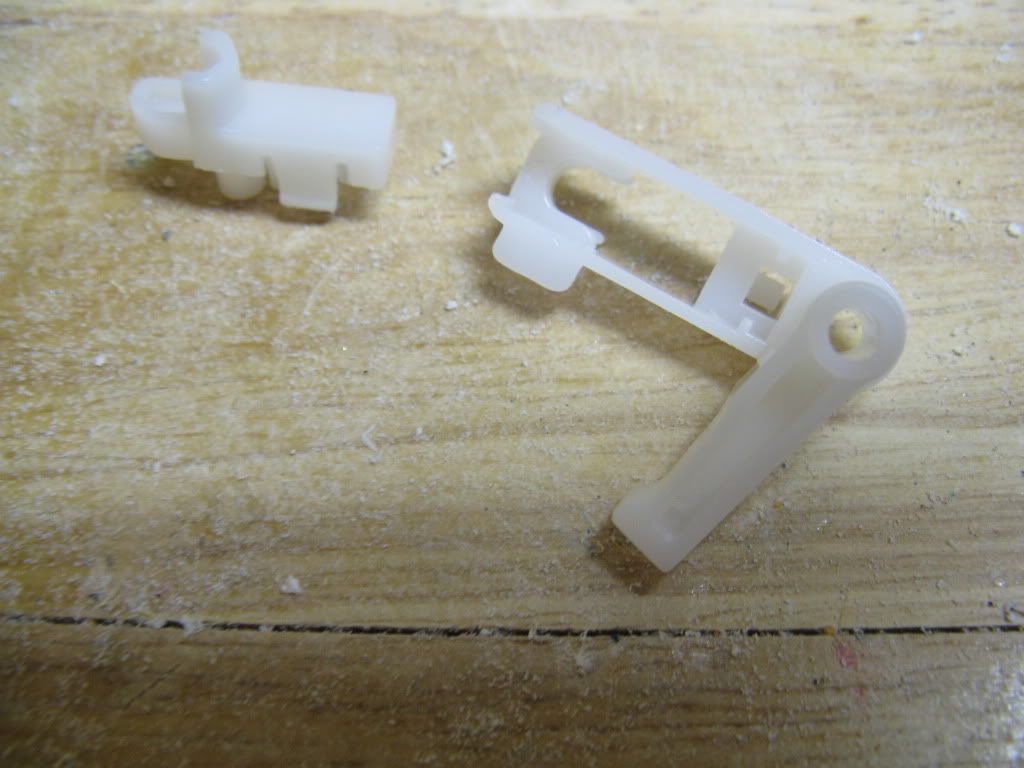
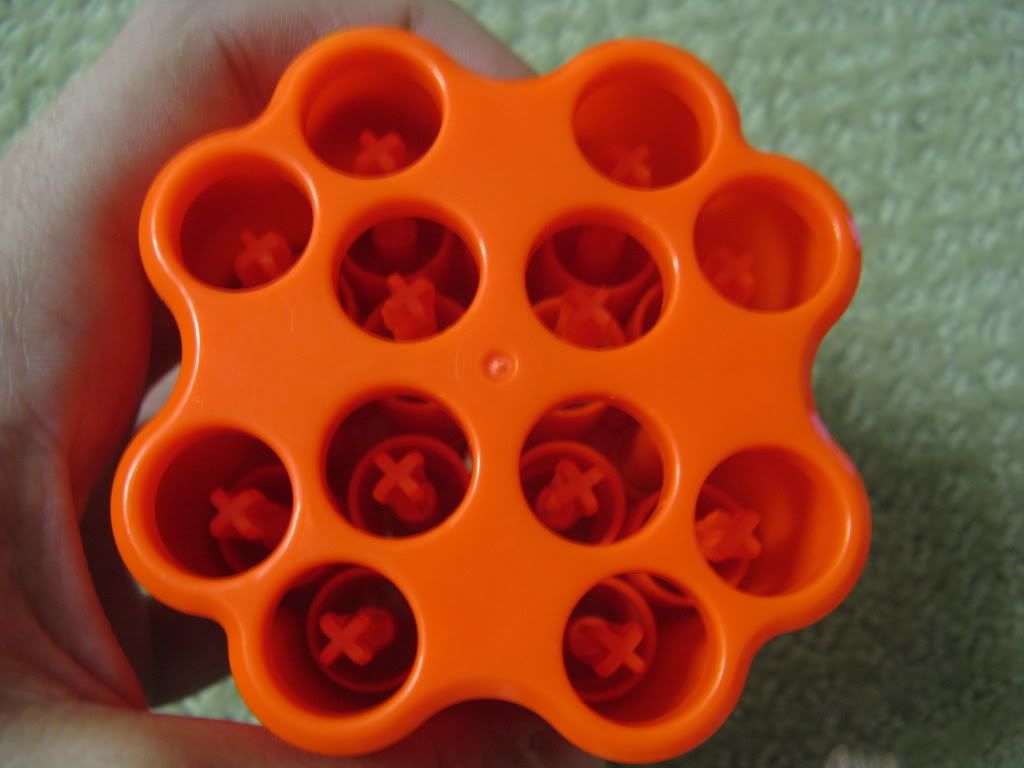
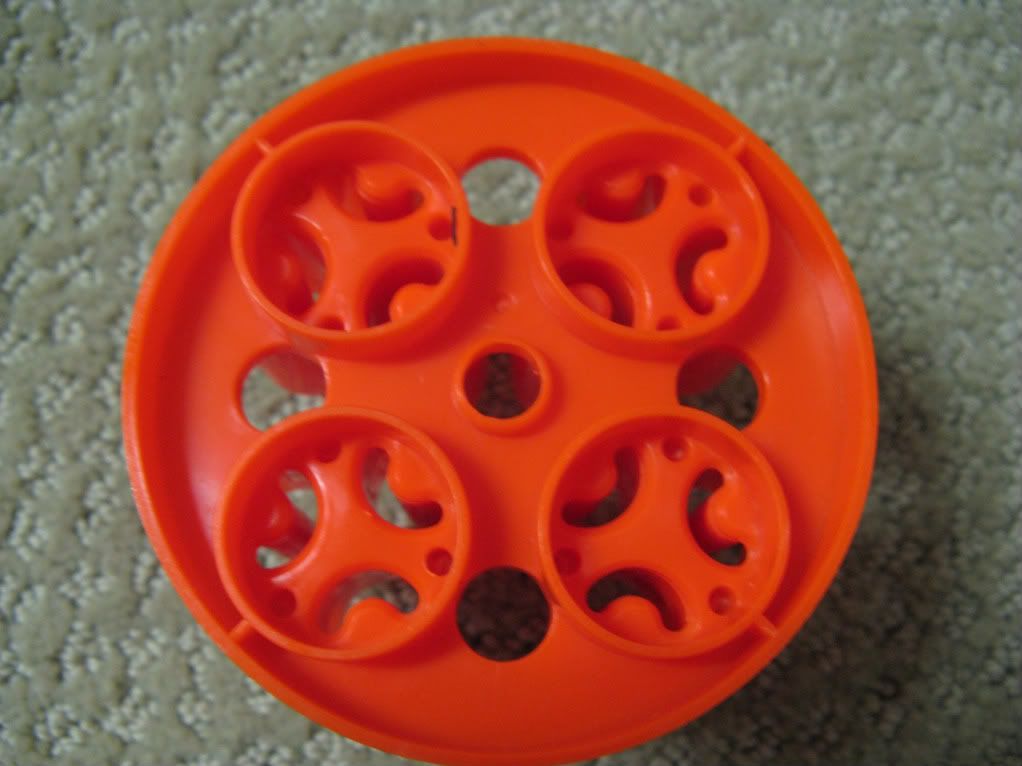
Take the turret out of the blaster. You shouldn’t have any trouble doing this. Here’s what it looks like.
Posted Image

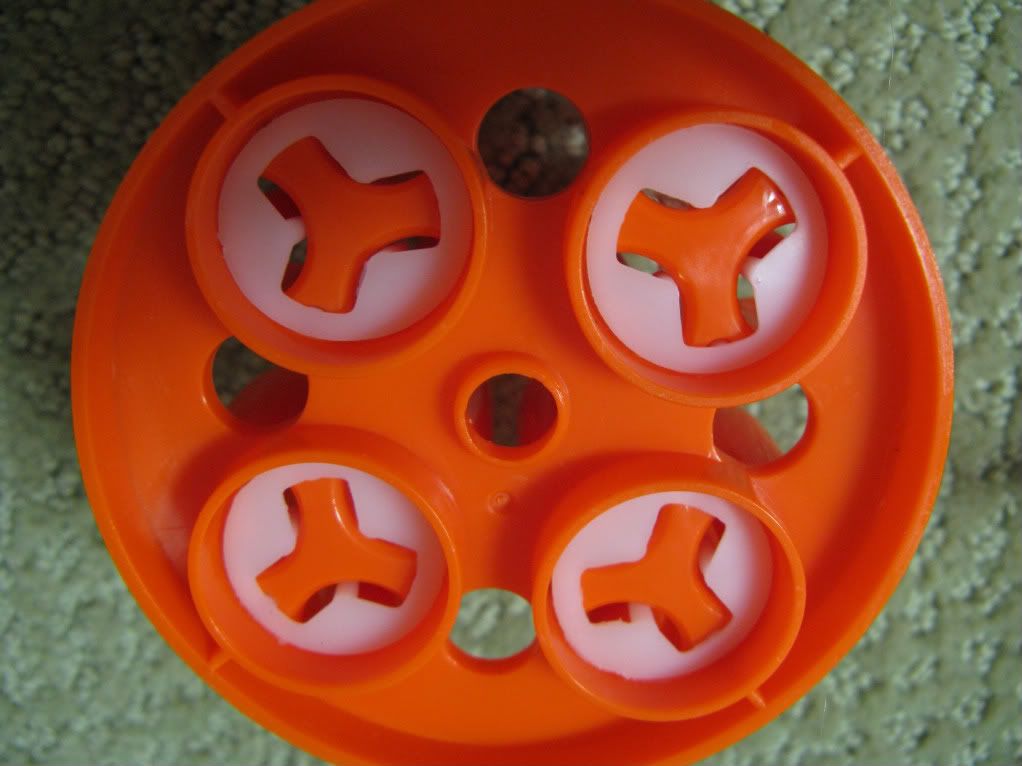
Once you have your turret, unscrew the four screws in the back with your screwdriver.
Posted Image

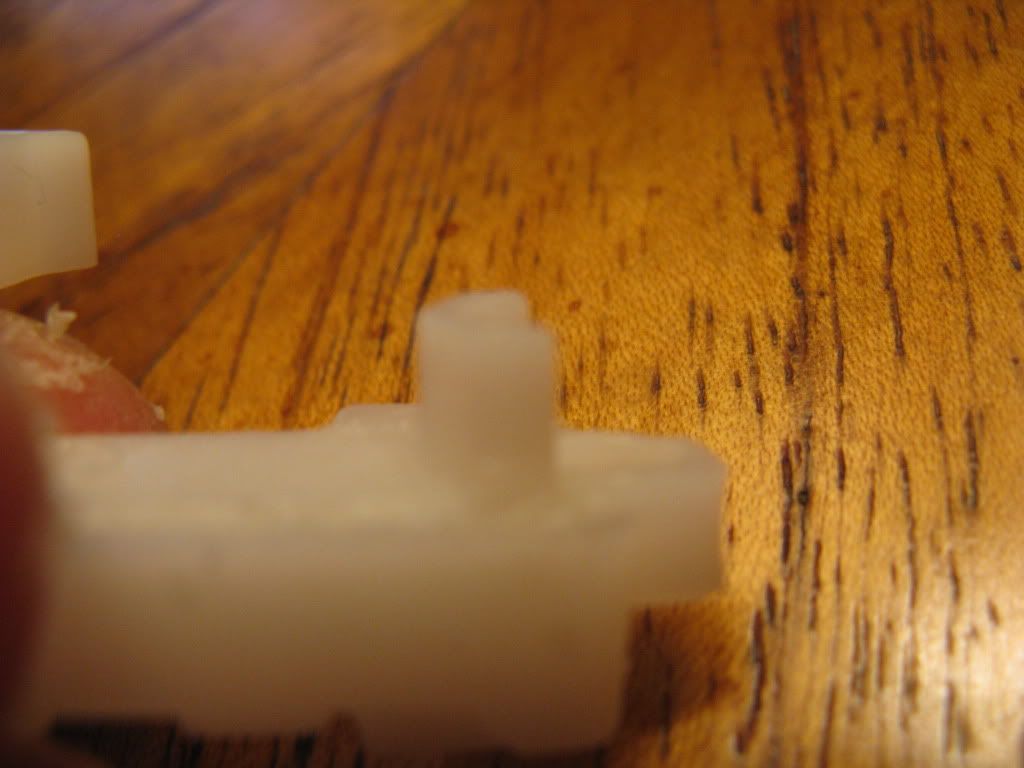
Now pull the turret apart. There will be three parts to it. You need EACH part of the turret.
Posted Image
Posted Image

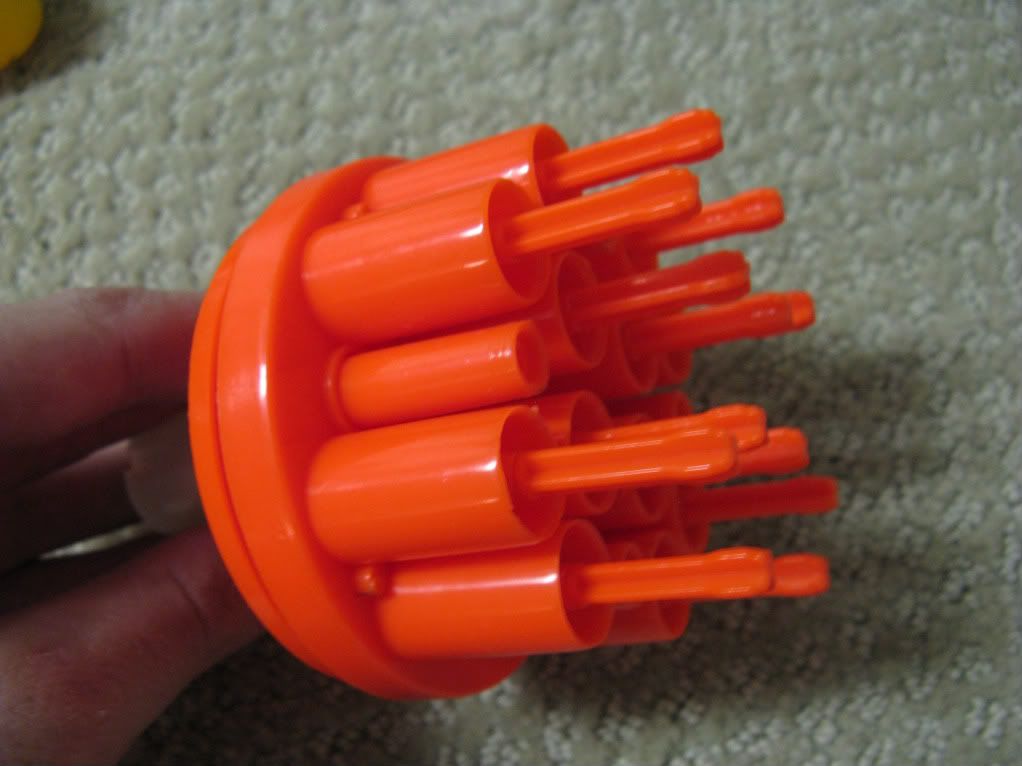
You’ll encounter 4 rubber white pieces. Take those out and throw them in the trash, they aren’t necessary.
Posted Image
Posted Image

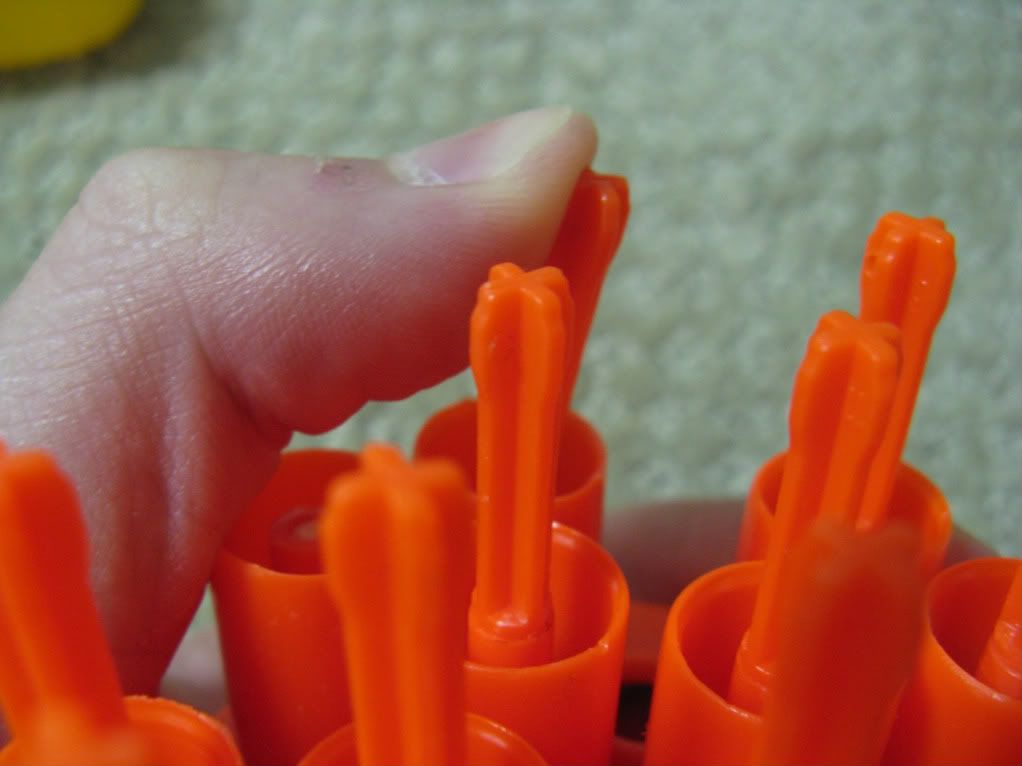
Snap the top parts of the Air Restrictor off with your thumb. Yes, they are THAT easy to break off. This will allow us to then hammer out the lower part of the AR.
Posted Image

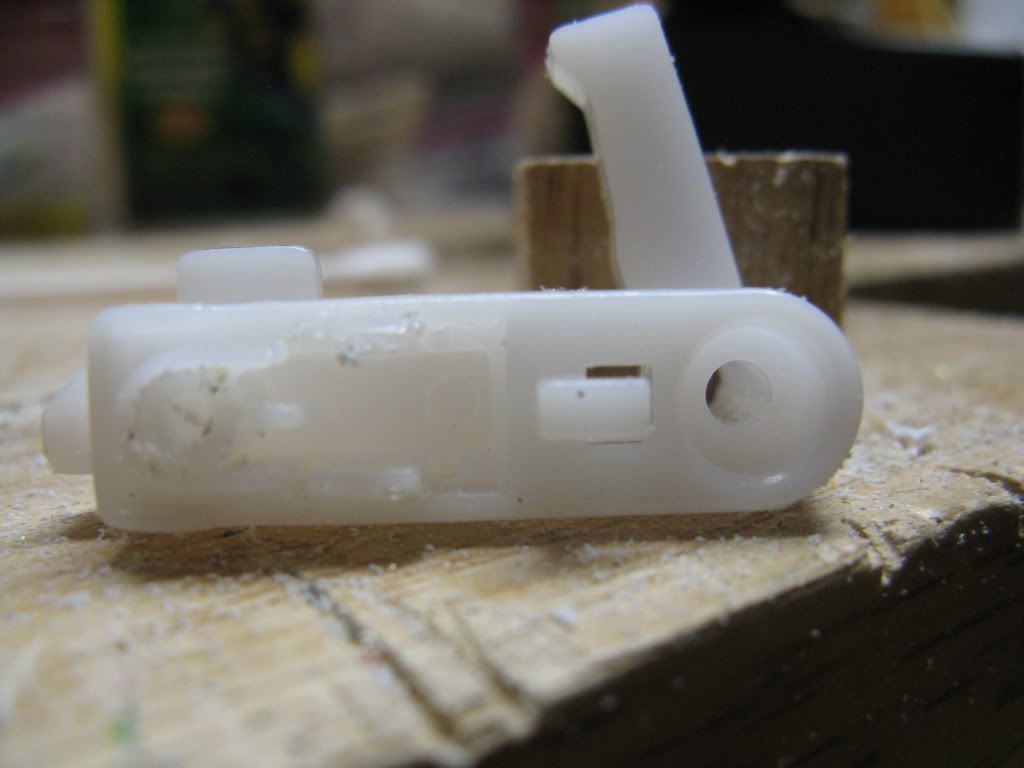
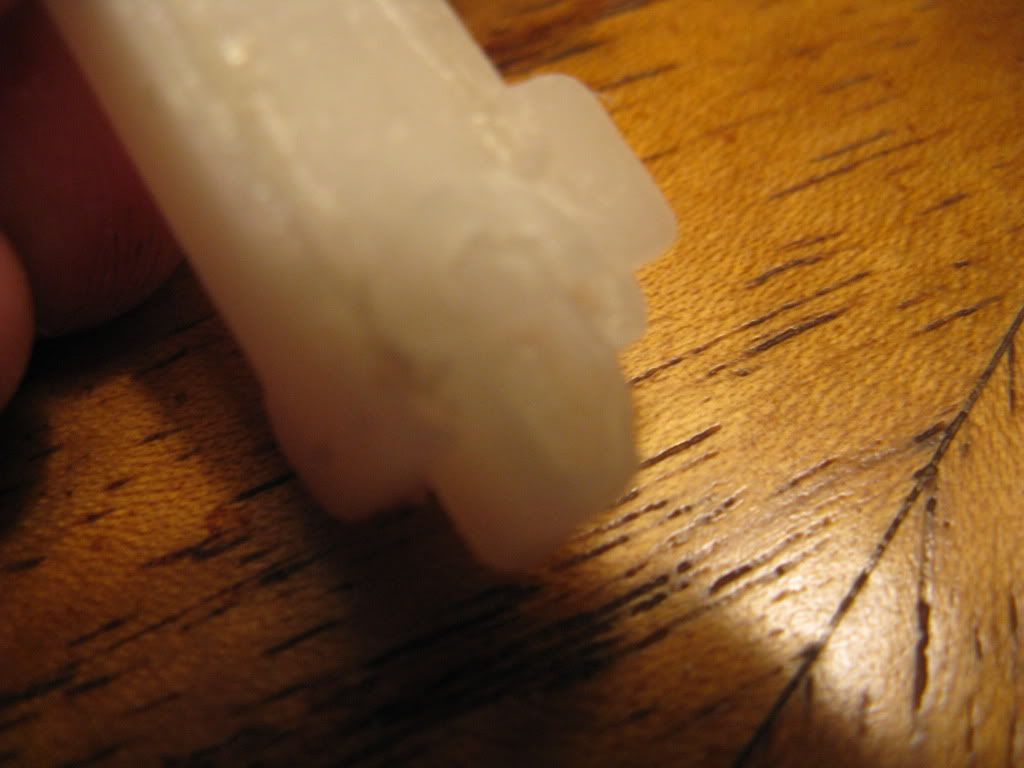
This is what the AR's will look like after you snap the top piece of them off:
Posted Image

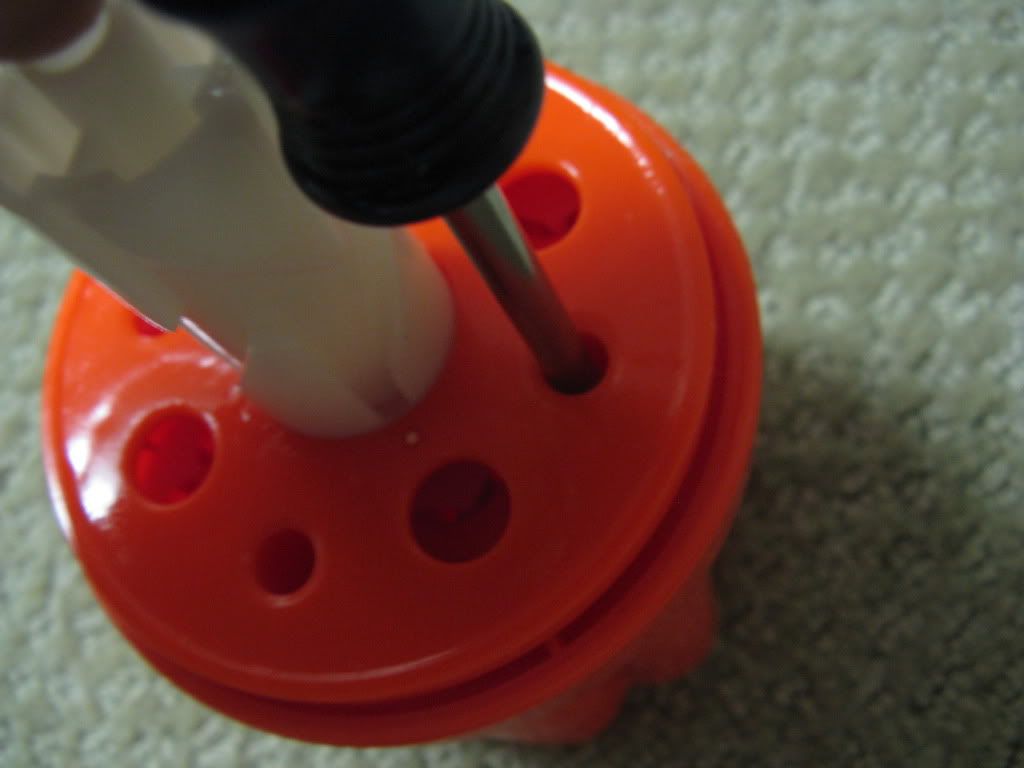
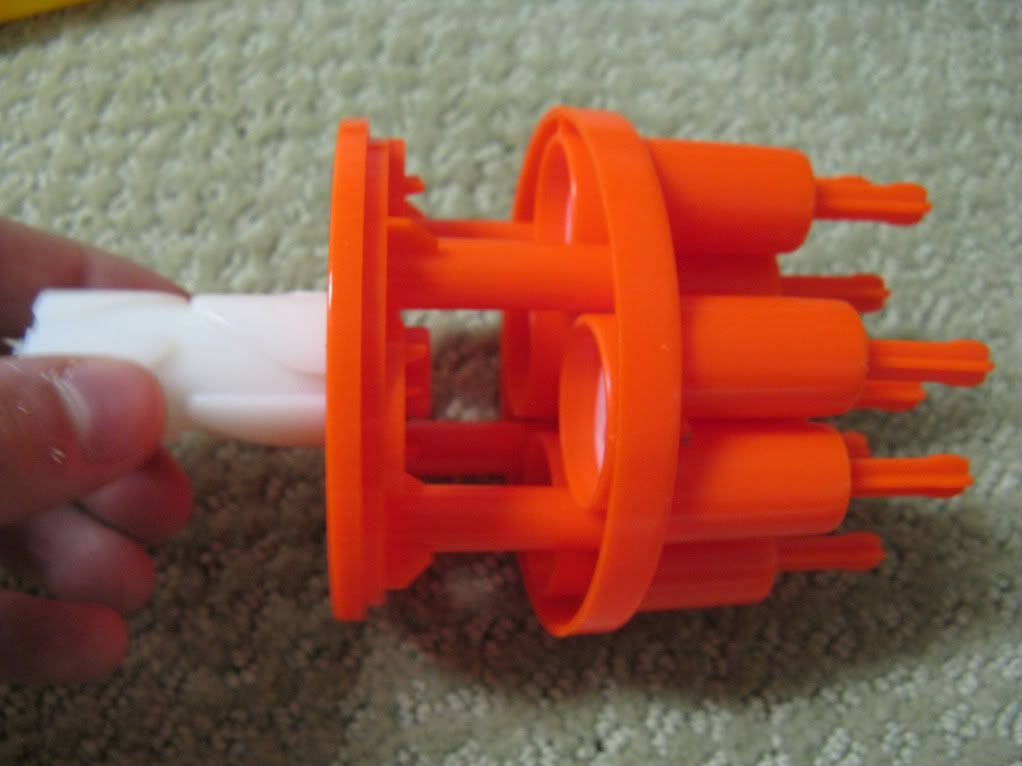
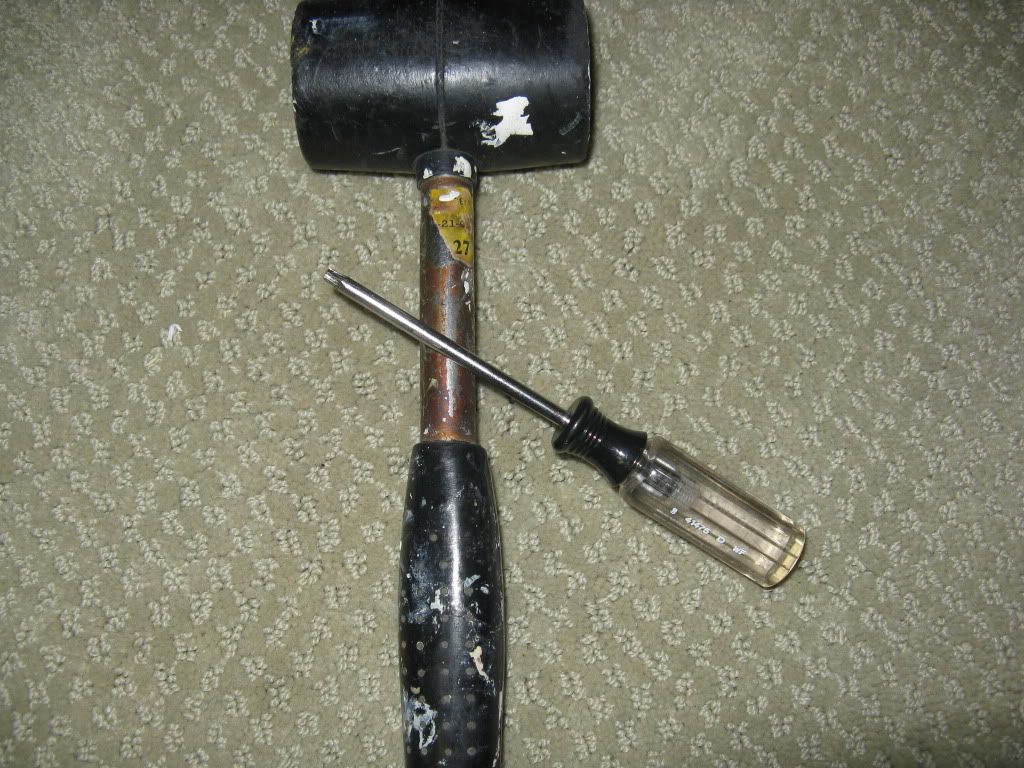
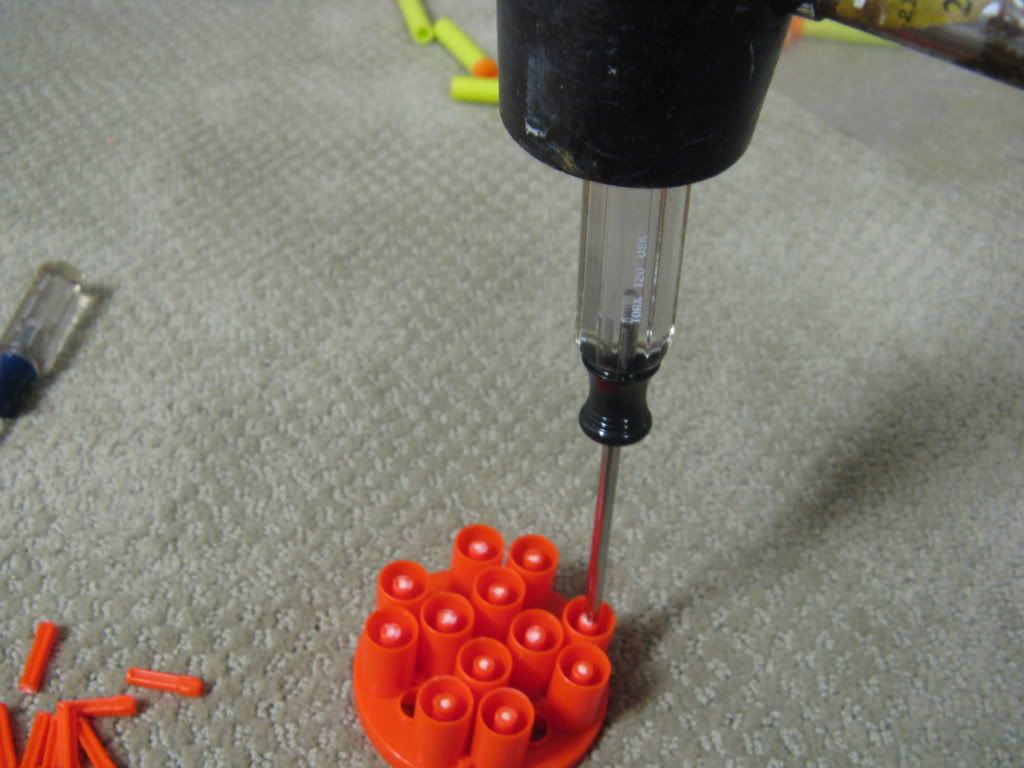
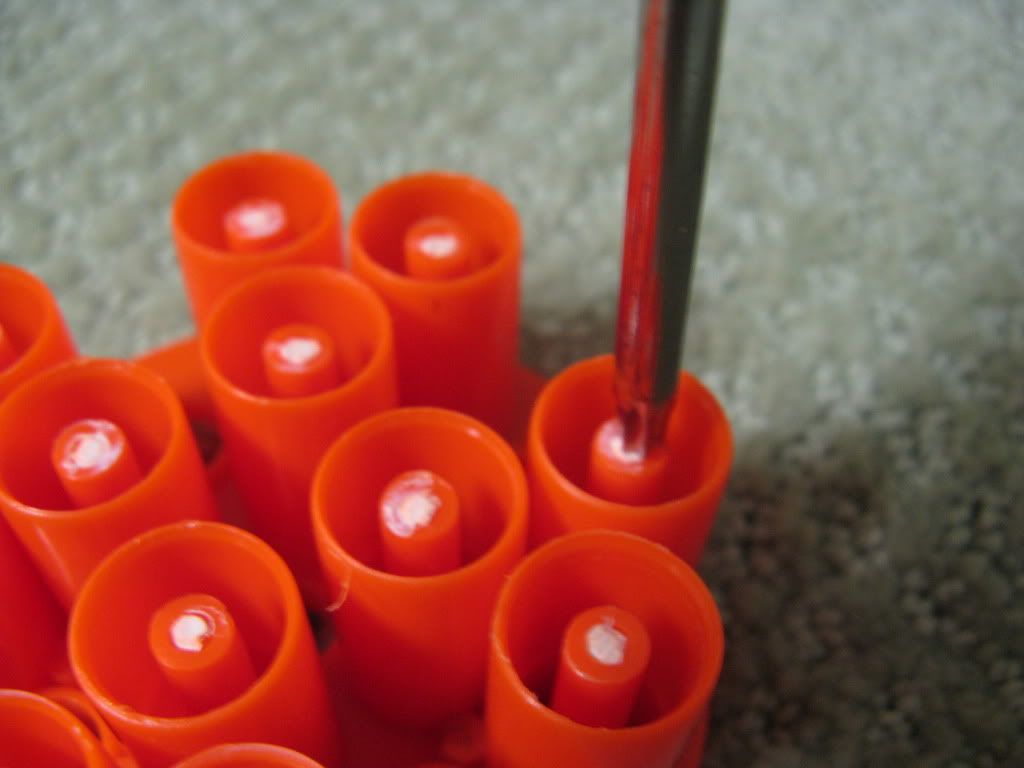
Once the aforementioned step is completed, get your Torx head screwdriver/rubber mallet ready. Then, place the hex head on the AR, and hit the screwdriver a few times with the rubber mallet. After a few hits, the post should pop out. Rinse and repeat, 11 times.
Posted Image
Posted Image
Posted Image
Posted Image
Posted Image

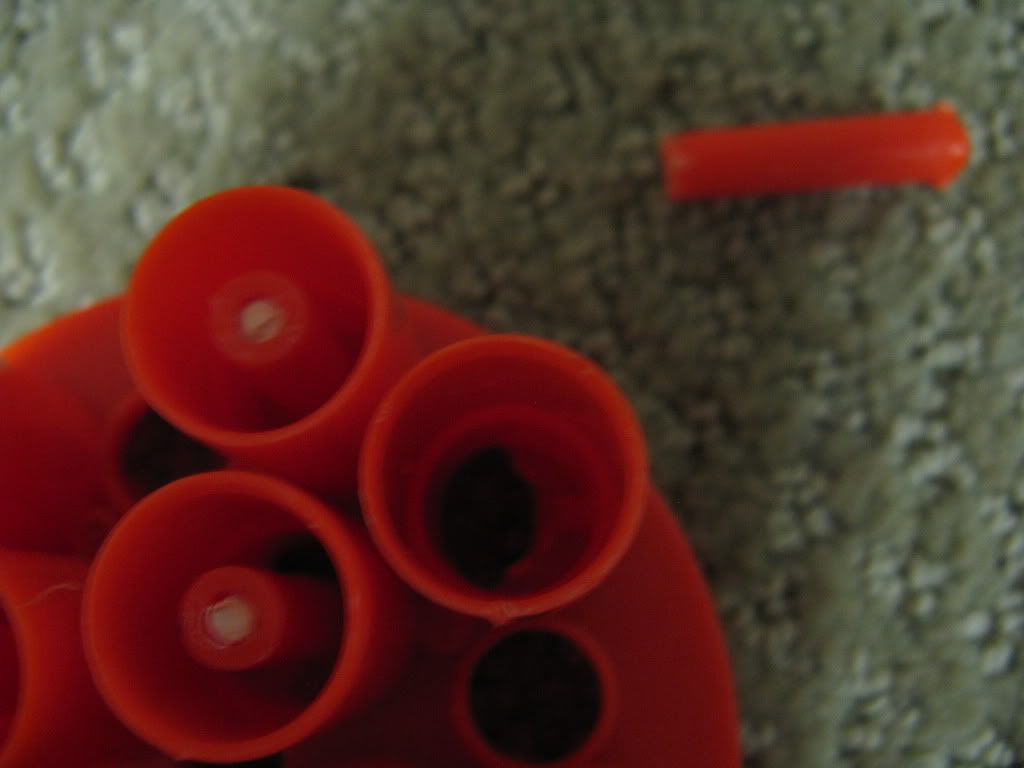
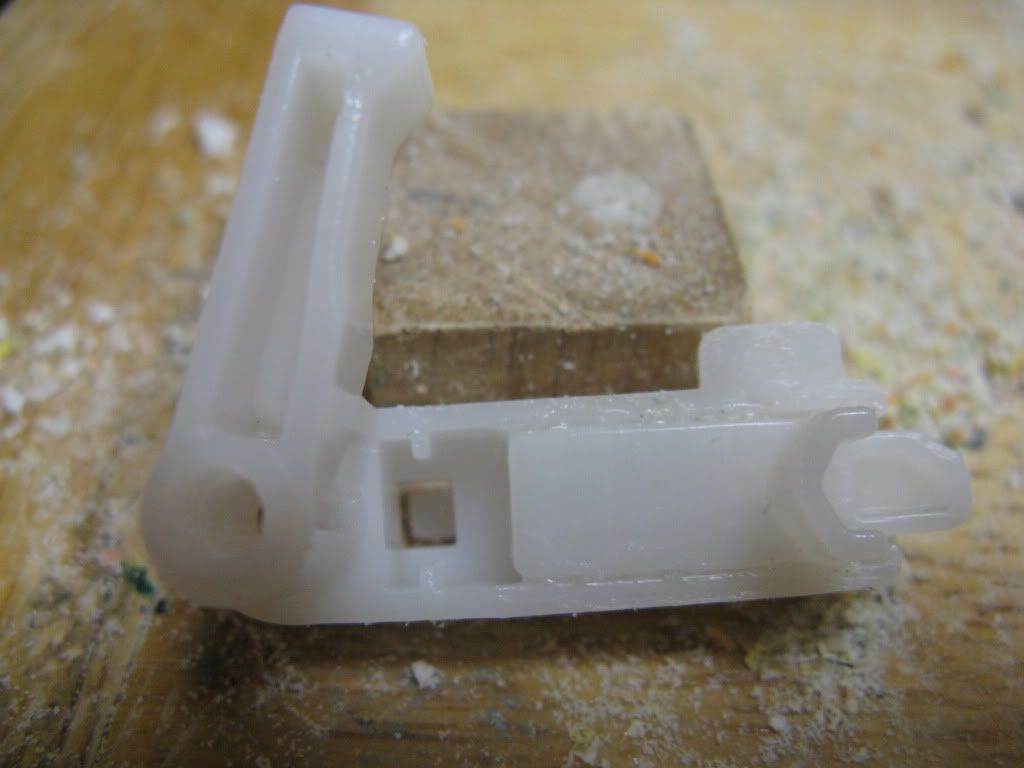
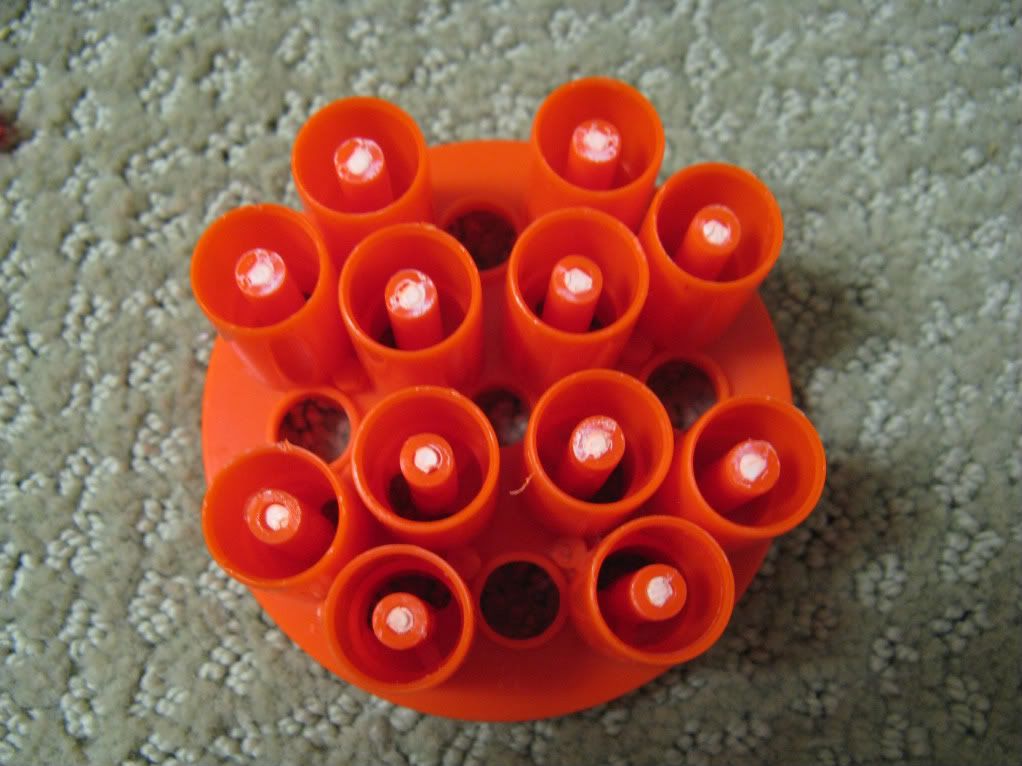
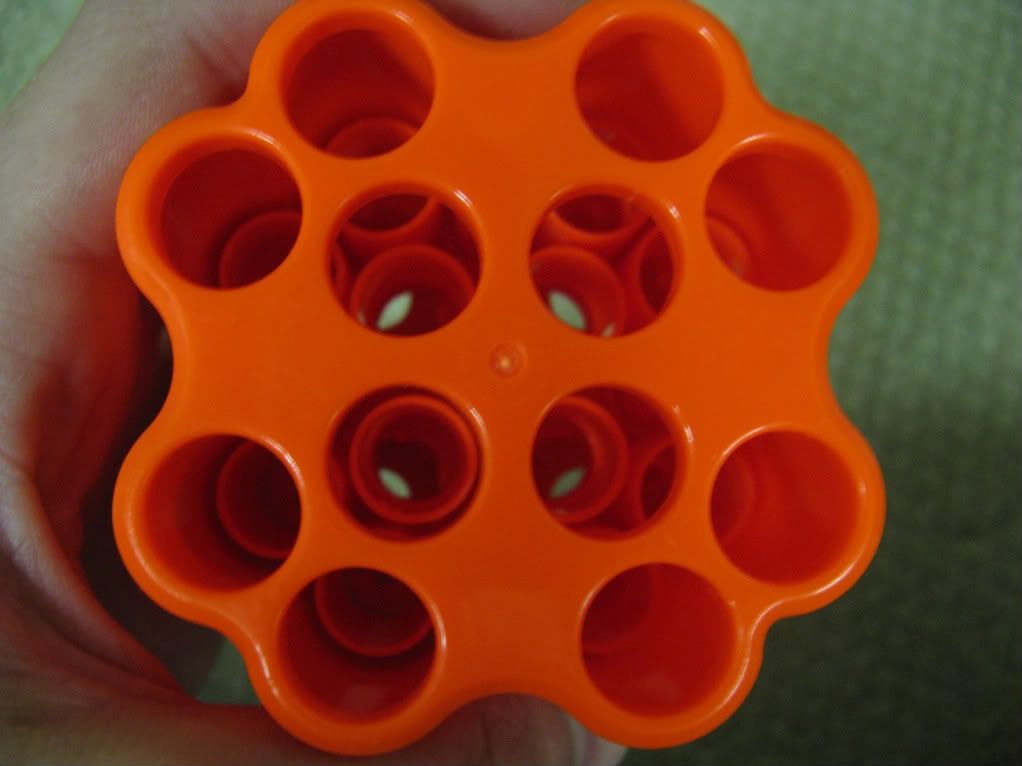
Finally, your done with that boring step! Your turret should now look like this:
Posted Image

Screw it together with the 4 screws you originally took from the turret, and toss it aside. We have more work to do!

PLUNGER HEAD
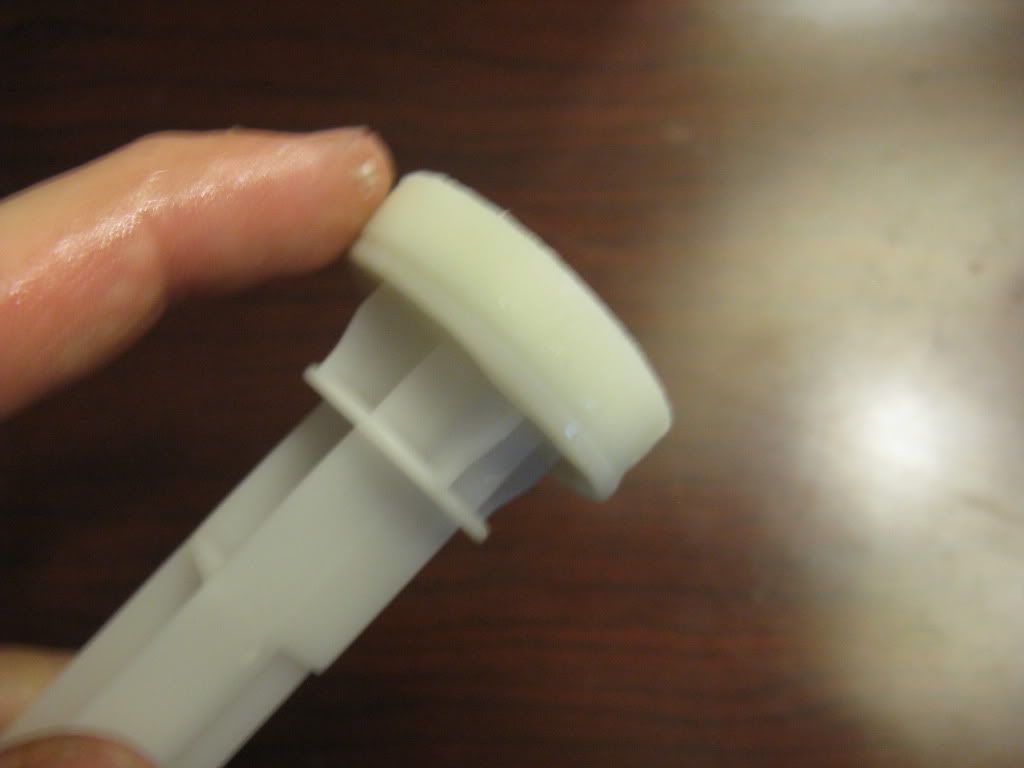
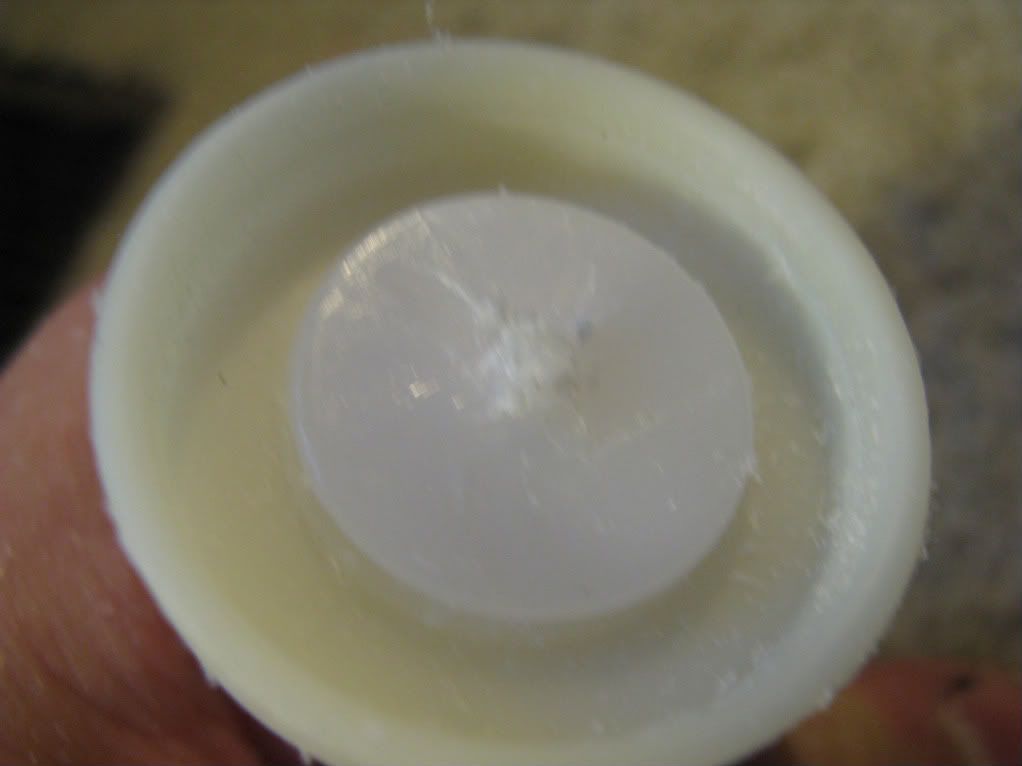
Take the plungerhead out of the plunger tube and lets get to work! It should look like this:
Posted Image

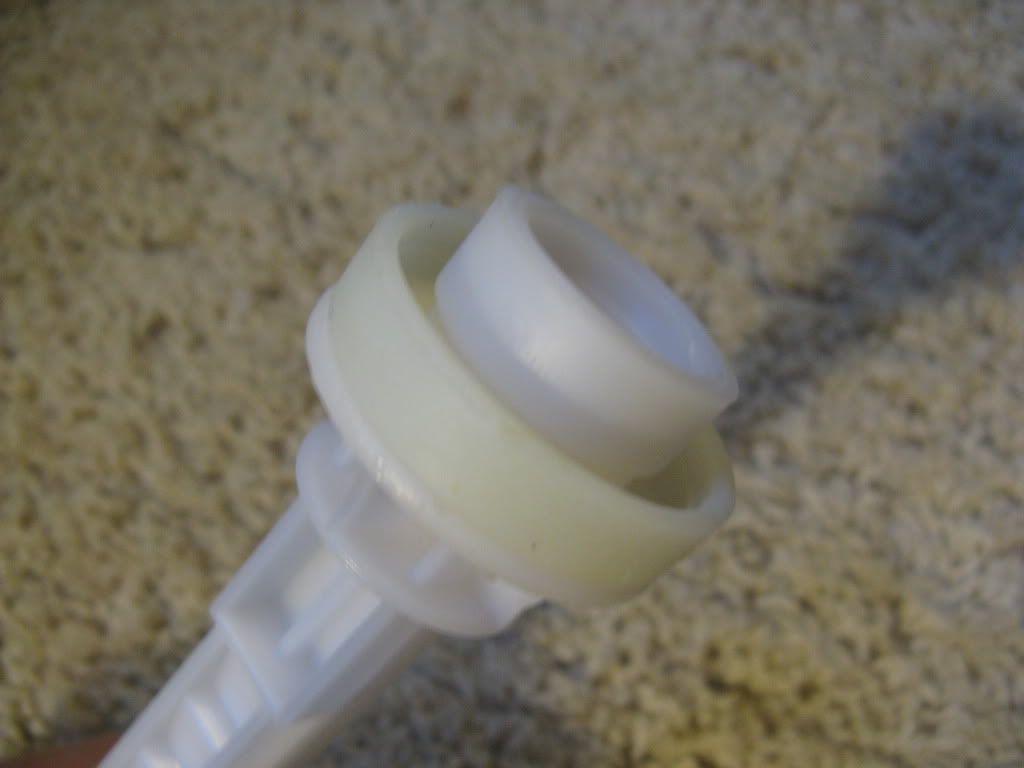
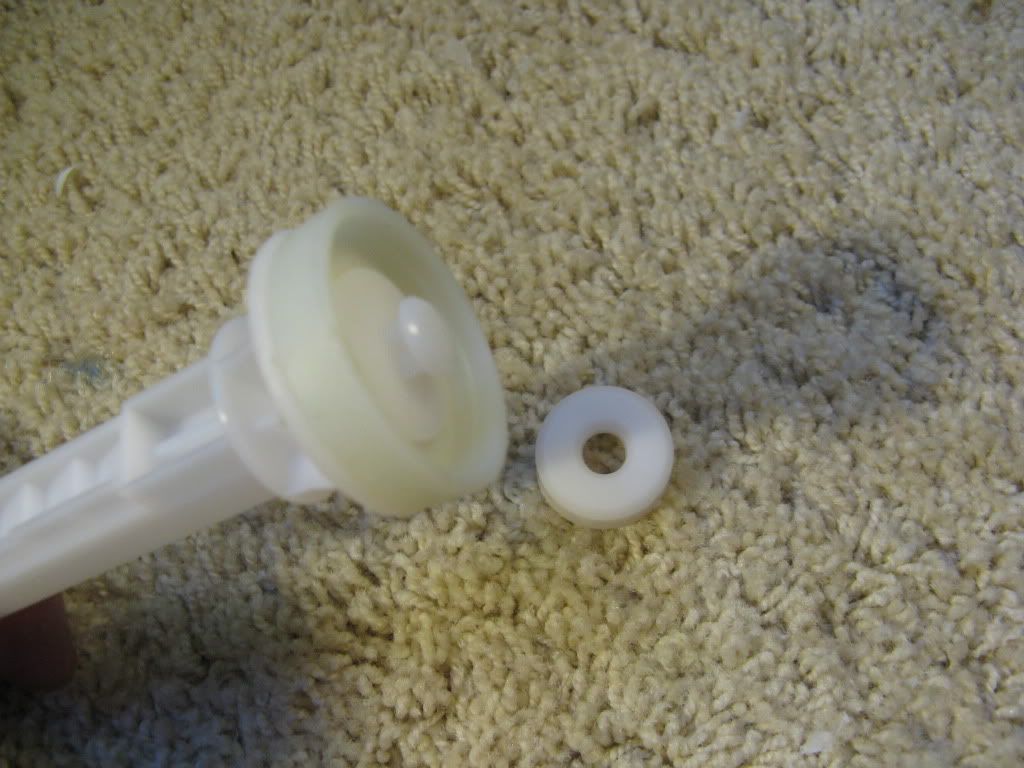
Next, take off the white rubber piece. It should just “pop” off. Save it for another blaster, it acts as a great o-ring/seal:
Posted Image

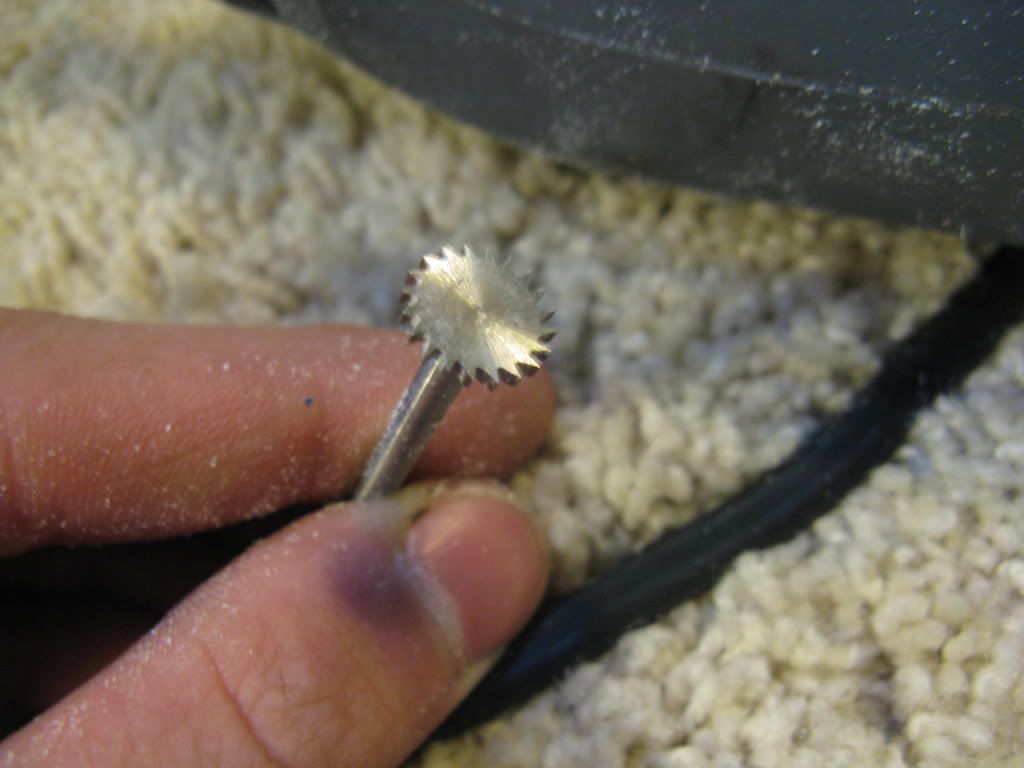
Remember when I said you need a dremel*? Get your dremel and cutting attachment set up:
Posted Image

Here’s a close-up of the cutting attachment I used:
Posted Image

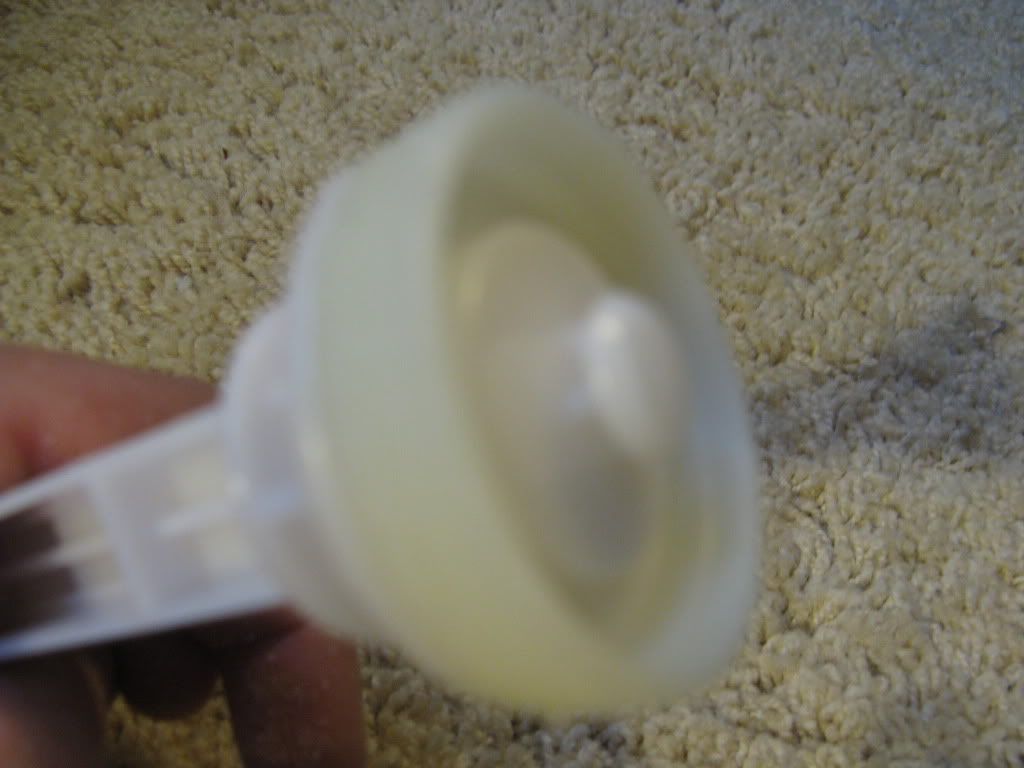
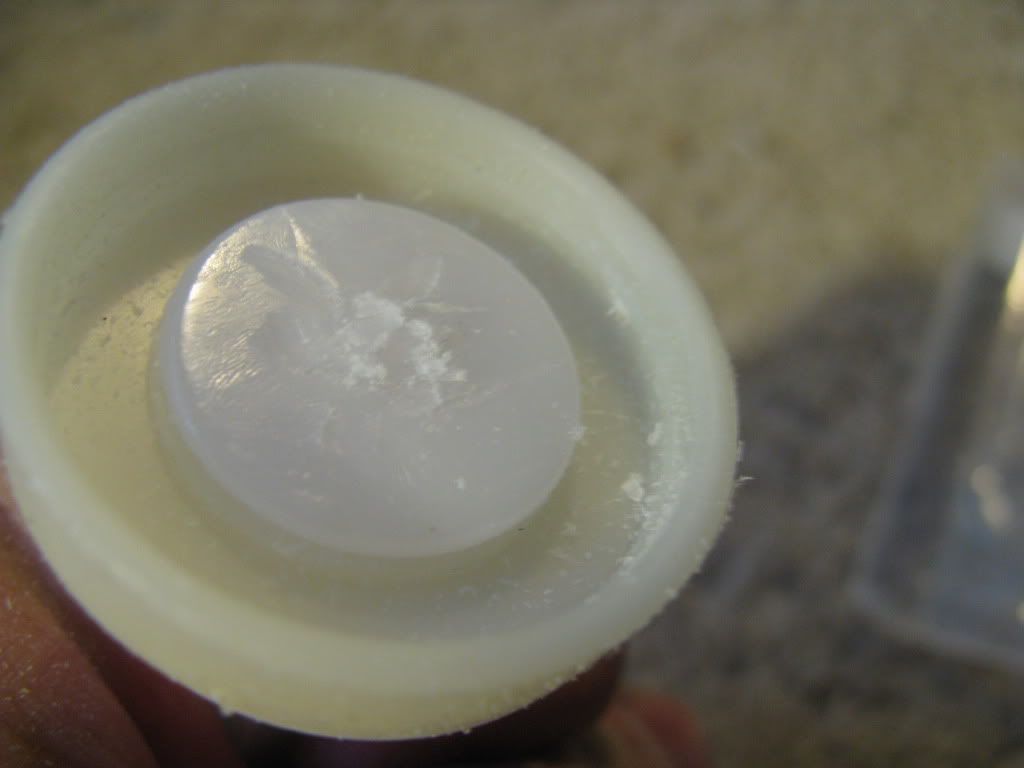
Take your plunger head, and cut off the gasket-looking piece that extends from it. After you cut it should look like this:
Posted Image
Posted Image

Sand the excess part of the gasket piece off with your dremel’s sanding wheel:
Posted Image

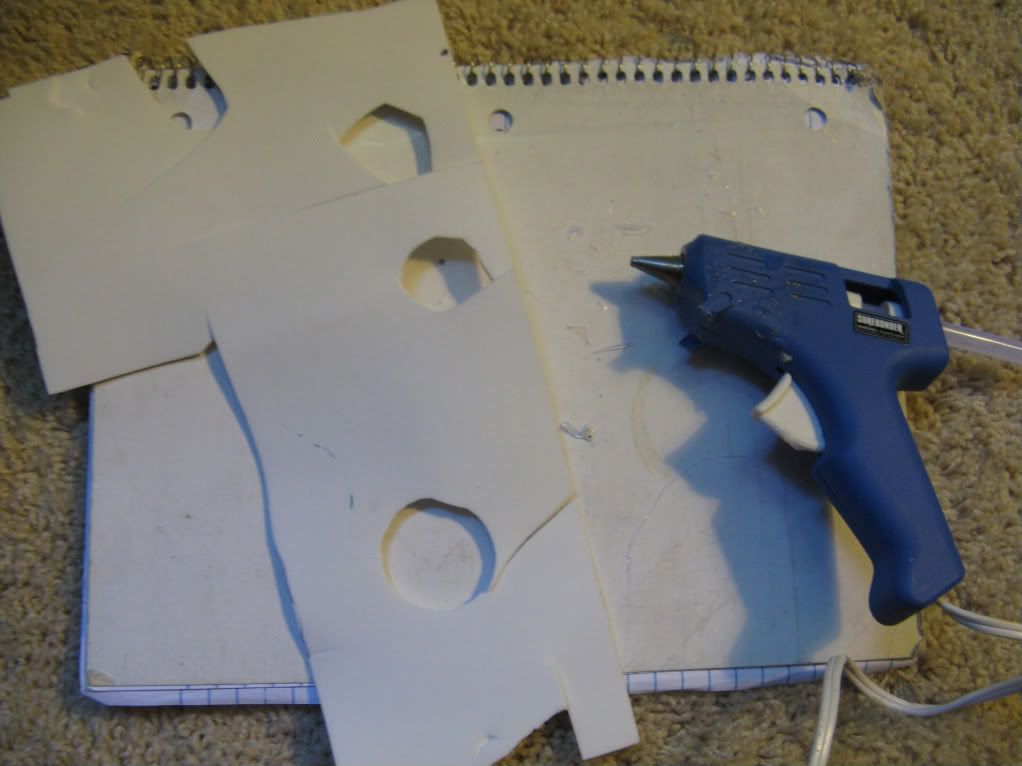
Now, get your craft foam and hot glue gun ready (I used a high-temp hot glue gun). Plug in the glue gun and let it warm up while we do the next step:
Posted Image

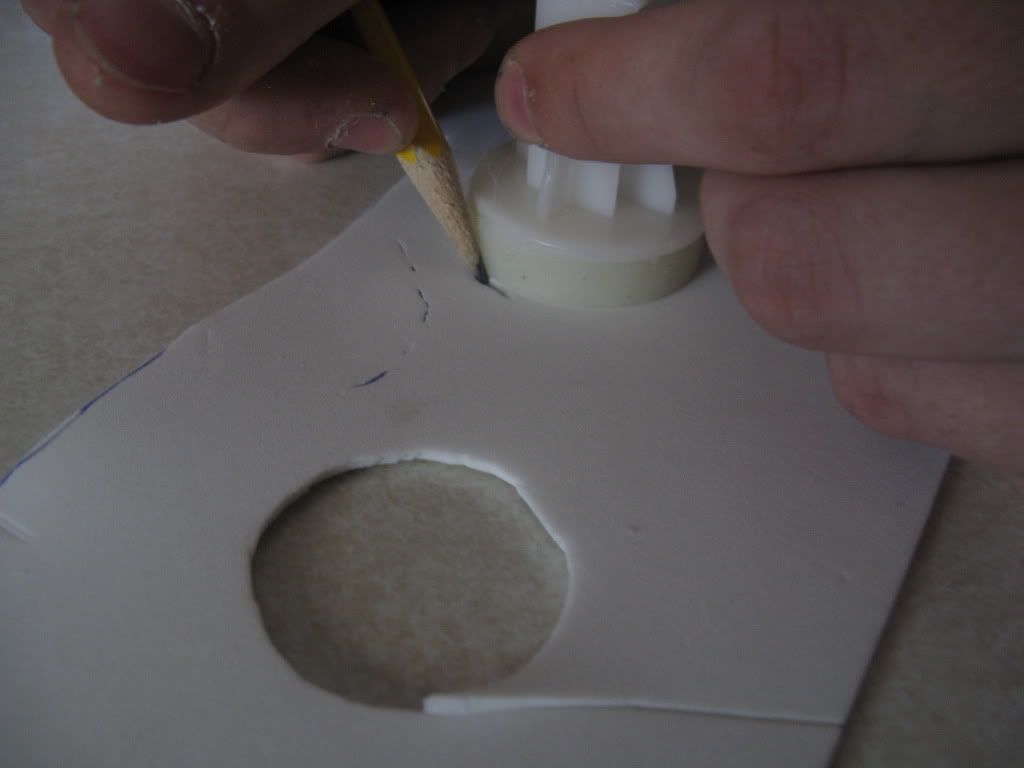
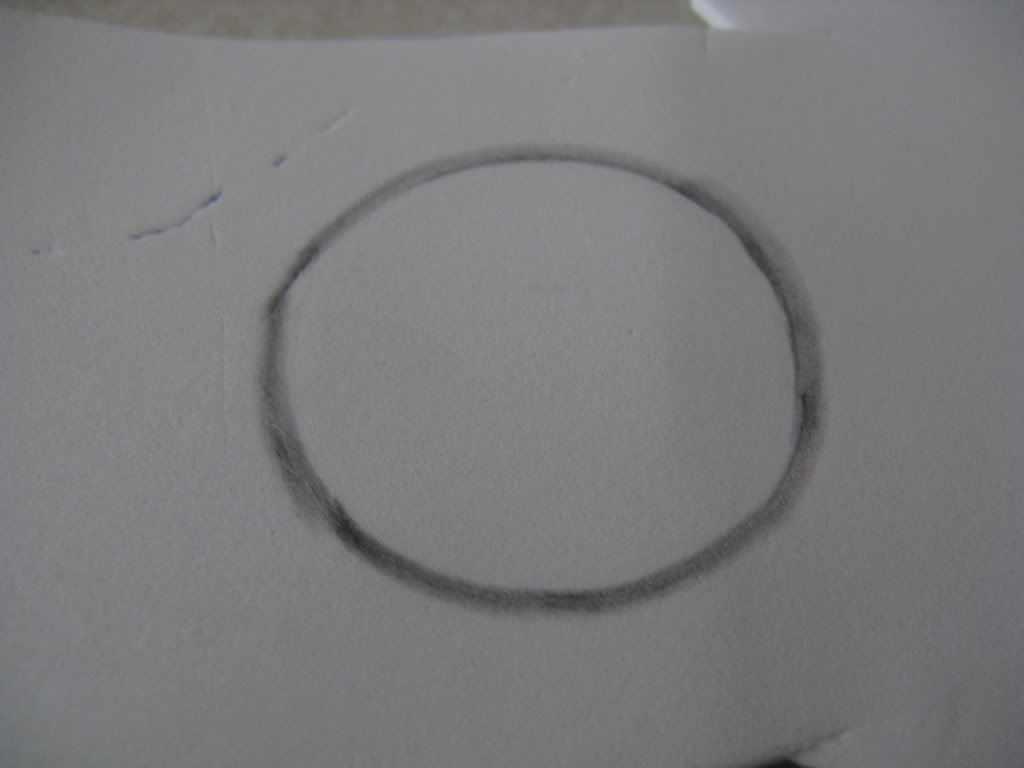
Lay your craft foam on a flat surface, and put your plunger head directly on it. Trace the outside of your plunger head with a pencil. Your trace mark should look like this. Cut this circle out:
Posted Image
Posted Image

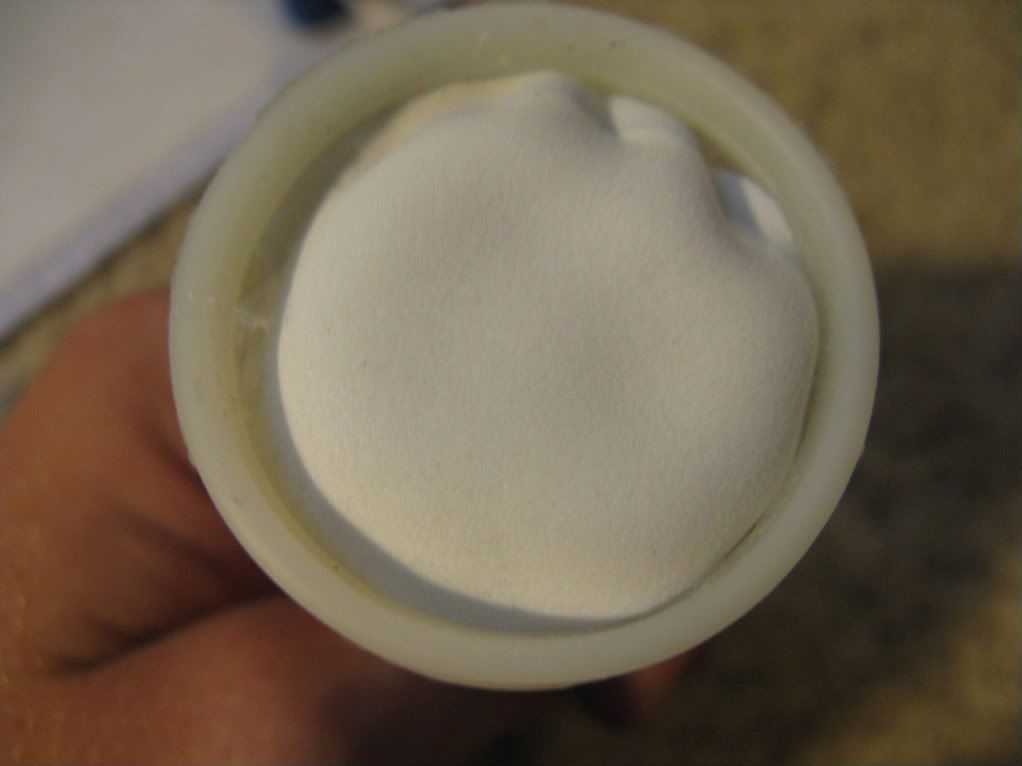
Ah yes, our hot glue gun has warmed up! Put the hot glue on the plunger head, and slap the craft foam on. I tucked the corners of my craft foam in the plunger head. Here’s what the end product should look like:
Posted Image

Edited by Noodleownz, 05 August 2011 - 11:18 AM.

  • 0
It's Nerf or Nothin'!

#2 Noodleownz

Noodleownz

    Self-Fondler

  • Members
  • 510 posts

Posted 04 August 2011 - 09:59 PM

EXTRA SPRING POWER(optional)
I added a silver longshot spring (pictured on the right) to my tripleshot, to help boost power (special thanks to Titanium for selling me the LS spring). All you have to do is slide the LS spring on the plunger rod, over the stock spring, and you’re set. Here’s what your beefed-up spring combo will look like:
Posted Image
Posted Image

CATCH MECHANISM
The final step of this modification. There’s a few steps we must follow in order to get to the desired product, but have no worries, these steps aren’t too difficult.

First, take your stock catch piece out of the blaster. It should look like this:
Posted Image

After that, unscrew the little spring off your catch piece. You will no longer need it:
Posted Image

Now take your catch piece apart, this will result in you having 2 pieces:
Posted Image

Take your superglue (I find that the cheapest superglue works best, got mine at Menards). Superglue the smaller piece of the catch to the bigger piece, and you should end up with this:
Posted Image
Posted Image
Posted Image

We’re almost done! See that raised plastic piece? We will need our dremel’s cutting attachment to take care of that for us. Why would we cut it, you might ask? After you cut this piece, you can de-prime your tripleshot!
Posted Image

After the piece is cut-off from the catch, it will look like this:
Posted Image

Finally, re-position the catch spring, as shown in Badwrench's write-up:
Posted Image

CONCLUSION
Take your silicone grease (I got mine at Home Depot), and put a generous amount on the plunger head:
Posted Image
Posted Image

Close your blaster up, and you’re ready to go out and shoot some foam!
Posted Image

Thoughts on this blaster: I love the 3-shot dart spread, and it’s really fun to use. This kicks butt indoors, and it would probably work OK outdoors.

RANGES

READ: All of these ranges were measured with the blaster being flat (parallel) to the ground. This is how ranges are truthfully measured. Obviously, this blaster gets a ton more range if you angle it a bit.

Nerf Micros
21'
21'
22'
Average: 21.3 feet

Buzzbee Micros
27'
30'
32'
Average: 29.6 feet

Nerf Streamlines
27'
30'
31'
Average: 29.3 feet

Nerf Whistlers/Sonics
30'
31'
38'
Average: 33 feet

Nerf Taggers
24'
27'
26'
Average: 25.6 feet

This is my first write-up, comments?

Edited by Noodleownz, 05 August 2011 - 09:33 AM.

  • 0
It's Nerf or Nothin'!

#3 Noodleownz

Noodleownz

    Self-Fondler

  • Members
  • 510 posts

Posted 04 August 2011 - 10:05 PM

Reserved for anything I may wish to add.

Edited by Noodleownz, 04 August 2011 - 10:07 PM.

  • 0
It's Nerf or Nothin'!

#4 Curly

Curly

    Member

  • Members
  • 201 posts

Posted 04 August 2011 - 10:35 PM

First writeup pushing 400 posts? I guess it's never too late to start!

I would have tried 2 barrels in attempt to make it gobble less darts. The large plunger tube makes me wonder if it can be practical, even though you lose the range. The writeup itself was on-par, keep it up.
  • 0

#5 thesoxfan1234

thesoxfan1234

    Member

  • Members
  • 62 posts

Posted 05 August 2011 - 10:15 AM

That's awesome! Add some more spring power and brass up the turret and your set!
  • 0
16:57 Snake51886: Demon Lord is the goddamn king of parkour!

-thesoxfan1234

#6 ScoutsIX3

ScoutsIX3

    Member

  • Members
  • 18 posts

Posted 05 August 2011 - 10:36 AM

Good, clear writeup. I only have one other comment. That screwdriver is a Torx screwdriver not a hex screwdriver.
  • 0

#7 HasreadCoC

HasreadCoC

    Member

  • Members
  • 274 posts

Posted 05 August 2011 - 10:49 AM

I'd like to see someone find a way to keep all three barrels per-shot, replace the barrel material with something like PETG or CPVC, and the replace the plunger tube with something crazy like an over sized Rainbow or Titan tank or Cobra so that ranges would be decent, allowing for a very war practical shotgun, maybe even rear-loading.
  • 0

I'm the only respectable person here. The rest of the NIC are pretty much just child molesters.


AKA: ObiWonTwo on Nerfrevolution, and most of the rest of the internet for that matter.....

#8 Curly

Curly

    Member

  • Members
  • 201 posts

Posted 05 August 2011 - 11:05 AM

I'd like to see someone find a way to keep all three barrels per-shot, replace the barrel material with something like PETG or CPVC, and the replace the plunger tube with something crazy like an over sized Rainbow or Titan tank or Cobra so that ranges would be decent, allowing for a very war practical shotgun, maybe even rear-loading.

What you mentioned is very difficult to do properly. If you want a Cobra or Titan, use a Cobra or titan. If you're really bent on keeping the turret, do this. It's far less effort, and doesn't require the sacrifice of an entire Quadshot. I wouldn't be terribly surprised if this hit 70' with makeitgo's MAN spring and barrels. As far as rear-loading, the turret cannot have it and seal. I'd make a triple ram-rod out of wood, and tie it to the gun.
  • 0

#9 Noodleownz

Noodleownz

    Self-Fondler

  • Members
  • 510 posts

Posted 05 August 2011 - 11:16 AM

First writeup pushing 400 posts? I guess it's never too late to start!

I would have tried 2 barrels in attempt to make it gobble less darts. The large plunger tube makes me wonder if it can be practical, even though you lose the range. The writeup itself was on-par, keep it up.

Thanks for the props, I appreciate it.


That's awesome! Add some more spring power and brass up the turret and your set!

Thanks dude. Yeah, I plan on adding a pas spring to my combo, hopefully allowing me to achieve even better ranges! Also, 17/32 actually doesn't fit in the barrel stubs, so I'll need to figure something out.

Good, clear writeup. I only have one other comment. That screwdriver is a Torx screwdriver not a hex screwdriver.

Good to know, I'll fix the name of that tool in the write-up, thanks.

I'd like to see someone find a way to keep all three barrels per-shot, replace the barrel material with something like PETG or CPVC, and the replace the plunger tube with something crazy like an over sized Rainbow or Titan tank or Cobra so that ranges would be decent, allowing for a very war practical shotgun, maybe even rear-loading.

Try it out for yourself, and tell us how it goes.

Edited by Noodleownz, 05 August 2011 - 11:17 AM.

  • 0
It's Nerf or Nothin'!

#10 VelveetaAvenger

VelveetaAvenger

    Member

  • Members
  • 630 posts

Posted 05 August 2011 - 11:32 AM

That's so weird, do most people have the smaller diameter springs in these blasters? Both my shot gun and hand cannon had springs the exact same diameter as the longshot spring, so I never understood how people were using both.

Any plans for new barrels? Doubling the range is pretty good, but you could probably push it further with full length barrels instead of the stock half-stubs. (Edit: I always take forever to post and I was watching the rocket launch too. You could always cut out the stock stubs and use the sheath/cover to keep them all aligned if nothing fits in them.)

Good to see that the triple shot can get results though, if I ever get another this will be pretty fun to try.

Edited by VelveetaAvenger, 05 August 2011 - 11:54 AM.

  • 0
"I never saw Beastmaster, I just wanted to be cool..."

#11 kingjulien

kingjulien

    Member

  • Members
  • 36 posts

Posted 05 August 2011 - 11:56 AM

Top notch tutorial in my opinion. I have 2 of these, both of which I ended up singling because of seal issues. You have inspired me to try another one with a turret.

Also, one of the reasons, which I'm sure you know, that the range is so short is that the actual barrels are maybe 1 inches long. They are also fairly loose. I think it would be deffinatley worth Cpvc-ing if you can find any.

Another thing, the catch may slip so you can add a second spring above it pushing down to make it almost flawless.

I have wrapped about 3 lengths of electrical tape around my plunger head and I think it improves the seal. I can easily vacume load from a 10 inch cpvc barrel.
  • 0

#12 soloz1

soloz1

    Member

  • Members
  • 87 posts

Posted 05 August 2011 - 12:32 PM

Great first write-up, Noodle! But... http://nerfhaven.com...showtopic=20722 . This guy also kept the shotgunning concept and got 40' flat with Sonics. But it does require a belt sander to do efficiently.
  • 0

...Man, if I lived on Oahu, I would've dropped in on Pineapple by now. On Molokai. Via Kayak. ...Fuck, we're depending on you guys to defend us from 3DBBQ, get your shit together already.


#13 Noodleownz

Noodleownz

    Self-Fondler

  • Members
  • 510 posts

Posted 05 August 2011 - 01:22 PM

That's so weird, do most people have the smaller diameter springs in these blasters? Both my shot gun and hand cannon had springs the exact same diameter as the longshot spring, so I never understood how people were using both.

I've viewed your quadshot write up before, Velveeta, and if we're talking about the one you used in that write-up, then yours is a Lanard Quadshot (not an airzone tripleshot). I'm pretty sure the Lanard Quadshot has a bigger spring than the Airzone Tripleshot, and the aforementioned spring probably has close to the same OD as a LS spring.


Another thing, the catch may slip so you can add a second spring above it pushing down to make it almost flawless.

I haven't experienced any problems so far with my catch "slipping". Might consider this after I add my PAS spring though.

Great first write-up, Noodle! But... http://nerfhaven.com...showtopic=20722 . This guy also kept the shotgunning concept and got 40' flat with Sonics. But it does require a belt sander to do efficiently.

I was aware of that write-up before I made this one, actually. Problem is, he doesn't do a lot of thorough explaining, if any. Also, his mod requires a belt sander, which not everyone has. Finally, that mod requires cpvc/cpvc couplers. Though relatively easy materials to obtain, my mod allows the average "joe-schmo" with a screwdriver/hammer/dremel to get some more range out of his blaster, without having to spend money on hardware parts.

Edited by Noodleownz, 05 August 2011 - 01:32 PM.

  • 0
It's Nerf or Nothin'!

#14 BritNerfMogul

BritNerfMogul

    Member

  • Members
  • 560 posts

Posted 05 August 2011 - 01:43 PM

Old news is old Noodle

Posted ImagePosted Image

Snake has the finished version, gets around 50ft with a 4ft spread if memory serves me right. And that's with a recon spring and no internal re-enforcing.
  • 0

#15 Noodleownz

Noodleownz

    Self-Fondler

  • Members
  • 510 posts

Posted 05 August 2011 - 02:02 PM

*snip*

Care to share how you got the brass to go in the barrel stubs? I mean, it'd be the right thing to do, seeing as you didn't contribute anything to the community when performing those mods. Also, pictures of your tripleshot weren't needed at all in this thread, seeing as you've posted that blaster in the mod/pj thread, and OTHER threads. Take them out.

Edited by Noodleownz, 05 August 2011 - 02:11 PM.

  • 0
It's Nerf or Nothin'!

#16 Curly

Curly

    Member

  • Members
  • 201 posts

Posted 05 August 2011 - 02:07 PM

Care to share how you got the brass to go in the barrel stubs? I mean, it'd be the right thing to do, seeing as you didn't contribute anything to the community when performing those mods. Also, pictures of your tripleshot weren't needed at all in this thread, seeing as you've posted that blaster in the mod/pj thread, and OTHER threads.

Calm down, his decision to not make a writeup doesn't make him a bad person. I don't have a turret and brass on hand but he might have dremeled the stubs out for it. If not, he could have connected the brass with tape or the next brass size up.
  • 0

#17 Noodleownz

Noodleownz

    Self-Fondler

  • Members
  • 510 posts

Posted 05 August 2011 - 02:14 PM

Calm down, his decision to not make a writeup doesn't make him a bad person. I don't have a turret and brass on hand but he might have dremeled the stubs out for it. If not, he could have connected the brass with tape or the next brass size up.

Thanks for the input, curly. I was just a bit frustrated when Brit came in here saying "Old News Noodle", and posted pics of his Tripleshot in MY write-up. Believe it or not, I put a good amount of work into this, and don't want someone to trash it nonchalantly.
  • 0
It's Nerf or Nothin'!

#18 ChaosPropel

ChaosPropel

    Member

  • Members
  • 586 posts

Posted 05 August 2011 - 02:21 PM

Excellent writeup Noodle! One question: Are you using the stock PT-turret seal? Or did you upgrade it and I just missed it in the writeup? How is the seal?
  • 0
Preheat oven to 350 degrees F (175 degrees C).

#19 Noodleownz

Noodleownz

    Self-Fondler

  • Members
  • 510 posts

Posted 05 August 2011 - 02:23 PM

Excellent writeup Noodle! One question: Are you using the stock PT-turret seal? Or did you upgrade it and I just missed it in the writeup? How is the seal?

As of now, Chaos, I'm using the stock PT turret seal. I didn't replace it or modify it in any way, so that's why you aren't seeing it in this write-up. However, once I open up this tripleshot again to do some more work on it, a seal modification could definitely be on my list of things-to-do.
  • 0
It's Nerf or Nothin'!

#20 Merzlin

Merzlin

    Member

  • Members
  • 589 posts

Posted 05 August 2011 - 02:24 PM

Care to share how you got the brass to go in the barrel stubs? I mean, it'd be the right thing to do, seeing as you didn't contribute anything to the community when performing those mods. Also, pictures of your tripleshot weren't needed at all in this thread, seeing as you've posted that blaster in the mod/pj thread, and OTHER threads. Take them out.

This is a collaborative community; if you can't openly share ideas with others in a public thread, then maybe this community isn't right for you.

As far as I can tell, the modification (which is just a glorified air restriction removal and basic reinforcements) limits dart usage to stock darts. Is there any factor inhibiting your ability to replace the crude stock barrels so you can use stefans?
  • 0

#21 BritNerfMogul

BritNerfMogul

    Member

  • Members
  • 560 posts

Posted 05 August 2011 - 02:28 PM

TROLOLOLOLOL!

Noodle, sorry if it seems I was trying to steal your thunder. The only reason I posted was I thought everyone knew how to do this as it's not really difficult. Maybe I should have put that in my opening post...

Anyway, do what noodle did + add 17/32 brass = what I posted
  • 0

#22 Noodleownz

Noodleownz

    Self-Fondler

  • Members
  • 510 posts

Posted 05 August 2011 - 02:34 PM

Apology accepted Brit. Sorry if I blew my fuse too prematurely.

Merz: That comment wasn't needed whatsoever. Don't hate, appreciate. Also, I plan on messing around with a spare tripleshot turret, to see how sanding out the stubs go, so I can add 17/32" brass.
  • 0
It's Nerf or Nothin'!

#23 VelveetaAvenger

VelveetaAvenger

    Member

  • Members
  • 630 posts

Posted 05 August 2011 - 03:42 PM

I've viewed your quadshot write up before, Velveeta, and if we're talking about the one you used in that write-up, then yours is a Lanard Quadshot (not an airzone tripleshot). I'm pretty sure the Lanard Quadshot has a bigger spring than the Airzone Tripleshot, and the aforementioned spring probably has close to the same OD as a LS spring.


Ah, I understand now, a great personal mystery in my life has been solved!
  • 0
"I never saw Beastmaster, I just wanted to be cool..."

#24 meatballica

meatballica

    Member

  • Members
  • 130 posts

Posted 05 August 2011 - 05:24 PM

If I were you, I'd put half inch brass in the turret. Maybe, an inch or less and then put a 3 or 4 inch segment of 17/32 brass over it and do that to each barrel.
  • 0
"You've waged your war on nerves, but you can't crush the kingdom."

#25 Defaultsound

Defaultsound

    Member

  • Members
  • 3 posts

Posted 08 August 2011 - 01:58 AM

Thanks for the write up.

Boot and I recently got Lanards. He went the full whack and did a re-barrel etc. I was planning on exactly doing this, so it's nice to have a guide to follow now. Thanks. :lol:
  • 0


0 user(s) are reading this topic

0 members, 0 guests, 0 anonymous users