Jump to content


Photo

Rainfire

Pump action rainbow with slamfire

9 replies to this topic

#1 atomatron

atomatron

    Member

  • Members
  • 579 posts

Posted 13 June 2011 - 08:25 PM

The Rainfire, a pump action rainbow variant with integrated, optional slamfire.

Posted Image

With this build I attempted to address some of the problems that I saw with pump action homemades; unnecessary sheath/parts, no slamfire, no rainbow catch.

Materials

2" PVC
2" PVC Tee
1 1/2" PVC
1 1/2" PVC coupler
1 1/2" to 1/2" PVC bushing
1/2" polycarb sheet
1/4" polycarb sheet
1/8" polycarb sheet
[k26]
1/2" Nylon rod
String/rope
1 1/2" neoprene washer
1 1/4" neoprene washer
7/8" steel washer
1 1/4" steel washer
Assorted 6 32 machine screws (including set screws
(two of some sort of catch spring)
Wood (or other handle material)


Recomended tools

Scroll saw
Dremel, preferably with bits
Drill press
Screwdriver
1/16" allen wrench (for 6 32 set screws)
Goop


First,

cut a slot in the 1 1/2" PVC; 6 3/4" long, 3/4" wide
Posted Image

Then break out the scroll saw, making these with a dremel isn't recomended.

Posted Image
The front plate is 1/2" polycarb, the hole in the middle is 1/2" across, enough to fit the nylon rod through. the slot is 1/8" wide and 1 1/4" long. The round section needed to slide inside 1 1/2" on my blaster, if you use 1 1/4" or something else for the plunger tube, you will need to change that. the strait section is 1 1/4" long.

Posted Image
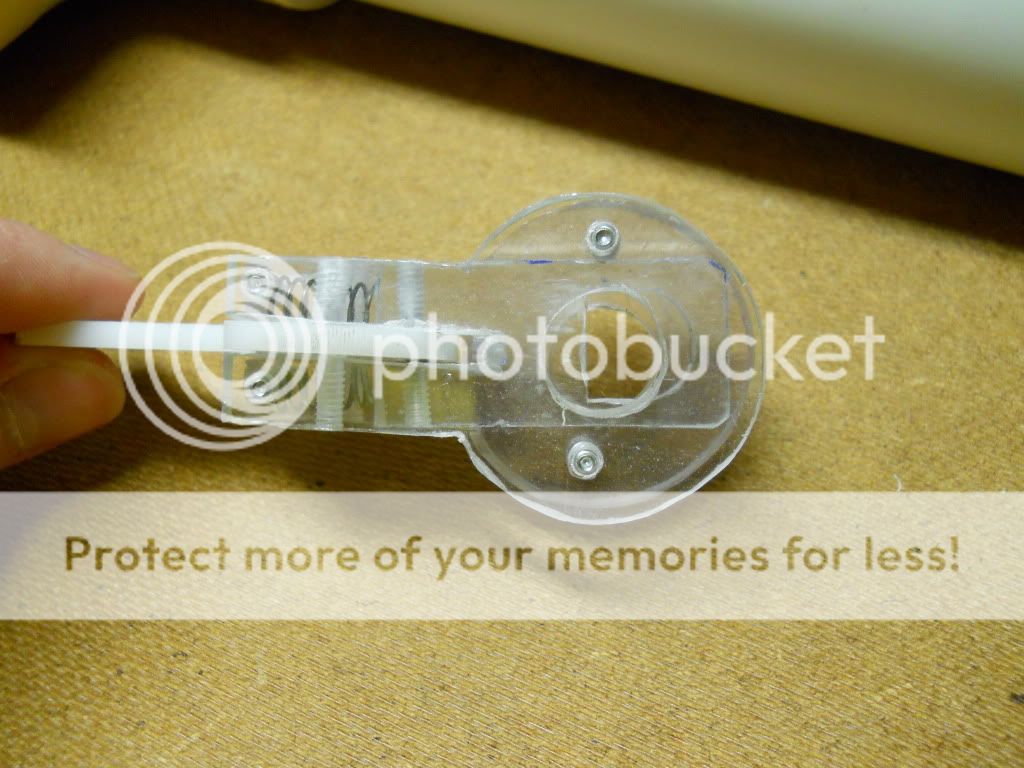
These parts are 1/4" polycarb, from left to right, the rear plate, stabilizer and the catch.
the rear plate has only the hole for the nylon rod and the part of it that follows the curve of the PVC. the stabilizer has the same dimensions as the front plate. The catch plate has the hole drilled and tapped about 1/4" from its bottom and the strain section is 1/2" shorter than the other parts, I made it a rectangle because it didn't need to be round anywhere.

Posted Image
The trigger is 1/8" polycarb (or in my case delrin) the only important bits are the ramp on the right, the drill hole, and where your finger goes.

Attach the trigger and catch with a set screw as shown:
Posted Image
Posted Image

And finish the catch system assembly with the front plate in front and the stabilizer in the rear with set screws again, put the catch springs in now as well:
Posted Image
Posted Image
Now the catch-trigger system is done.


Assemble the plunger rod

Posted Image
The spacer is 3 1/2" long, made from sliding 1/2" polyester onto the plunger rod and 5/8" polyester over that, there are other materials that will work just as well. The catch is 9" back from the front end and the plunger head(this pic is from before I updated the plunger head, it should be the 7/8" steel washer followed by the large then smaller neoprene washers and the bigger steel washer).

Posted ImageFinally drill a hole in the rear of the nylon rod for the string. This resets the direction after every shot as well as making it dry-fireable, it could be vertical instead of horizontal, just remember which way it needs to go.

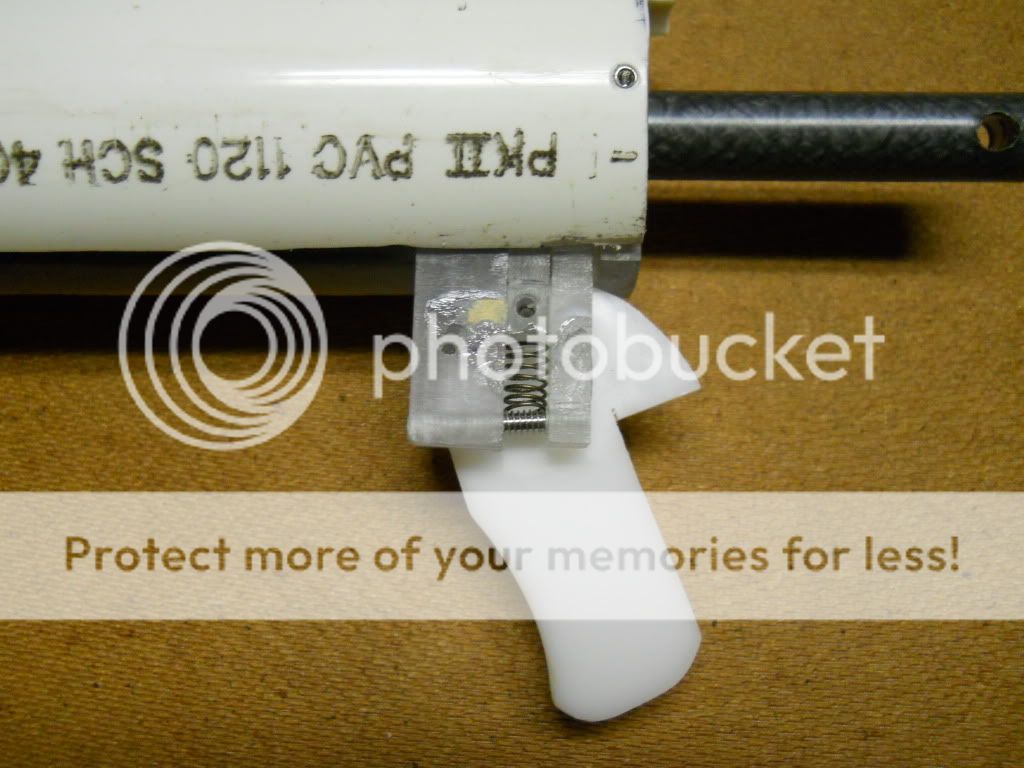
Now, back to the plungertube (1 1/2"PVC), on the end opposite the slot, goop and screw on the coupler and bushing, let dry and insert the plunger rod then the catch-trigger assembly, check to see how well the parts fit, sanding may be required.
Posted ImagePosted Image

Drill, tap and screw until the rear plate is in position at the very end of the plunger tube, locking all the parts in.

Test to see how well it functions.

It should function like so:
Posted Image
Push the catch-trigger assembly forward to prime it, pulling the trigger now should do nothing

Posted Image
Now pull back the catch-trigger assembly, either holding down the trigger or not.

Posted Image
Posted Image
If you hold down the trigger, the ramp on the trigger will be moved by the rear plate pulling the catch down, out of the catch notch, If you aren't holding down the trigger the ramp will force the trigger to turn instead of disengaging the catch.

FINISH IT

Posted Image
You will need (things) on top of the plunger tube to decrease the space between the 1 1/2" and 2" PVC, this helps keep it from wobbling as much but it still wobbles.


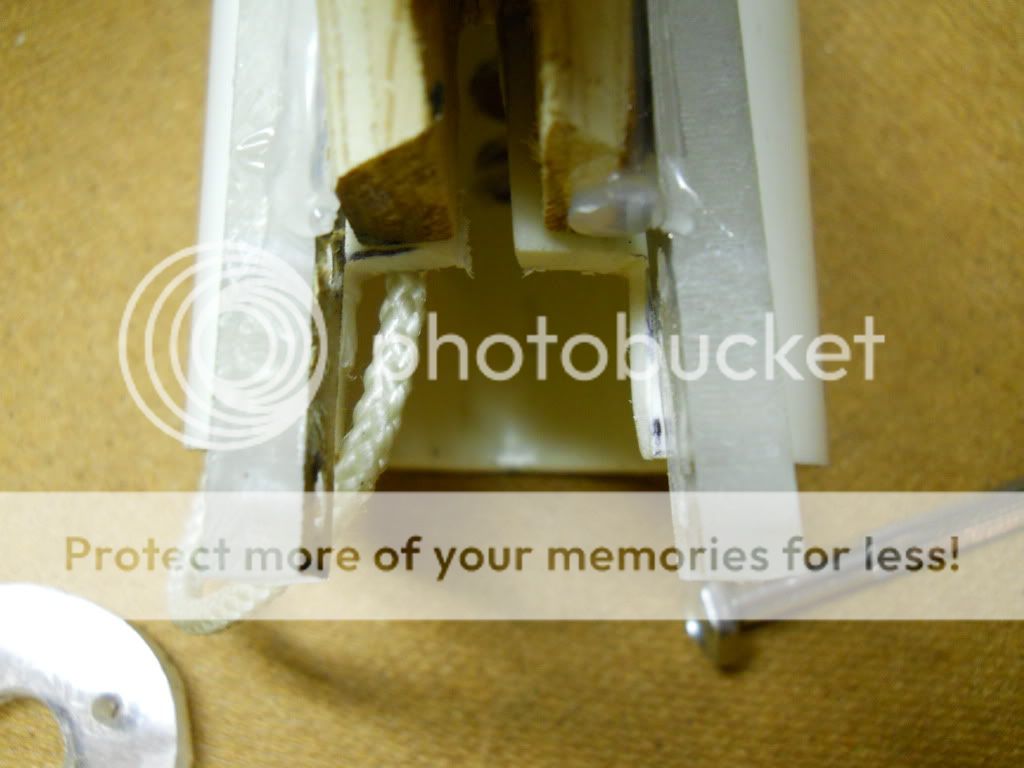
Cut the 2" to about 14" or so, whatever is comfortable. and attach the Tee, then make a handle and attach it like so:
Posted Image

Cut stuff out so the catch-trigger assembly will fit
Posted Image
Posted Image

(A polycarb handle might be a better choice, though harder to attach to the PVC)

Posted Image
Make something (out of mirror polycarb) to attach the catch-trigger assembly to the handle (sideplates, just like a +bow right?)

Posted Image
Deal with the string and attach the two sections together.

Rest
Posted Image

Primed
Posted Image

Ready to fire
Posted Image


Post questions and junk, I don't want to deal with PMs.
  • 0
Perche Germolgi. [Because it shoots]

Rainbow Clan

#2 snakerbot

snakerbot

    Maker of Things

  • Members
  • 310 posts

Posted 13 June 2011 - 08:45 PM

Maybe I'm just being thick, but I don't really get it. Do you prime it by pushing backward on the plunger tube?
  • 0

#3 WicketTheModder619

WicketTheModder619

    Member

  • Members
  • 247 posts

Posted 13 June 2011 - 08:48 PM

Wow, nice job man. I always loved your longshots, but a slam-fire rainbow! My only question is was it worth all of the extra work? I have seen Ryan fire his rainbows as if they were slam-fire.
  • 0
23:06 Buffdaddy: As long as they aren't doing it all night, don't care.

#4 atomatron

atomatron

    Member

  • Members
  • 579 posts

Posted 13 June 2011 - 09:19 PM

@snakerbot: Yes, this is what it looks like primed:
Posted Image


@Wicket: I'll say no, though this is probably a lot cheaper to make that those.
  • 0
Perche Germolgi. [Because it shoots]

Rainbow Clan

#5 Boot

Boot

    Member

  • Members
  • 90 posts

Posted 14 June 2011 - 08:23 AM

Very interesting design, it reminds me a lot of Split's (I think) RTP in concept, however (if I am understanding it correctly) I like your method of achieving slam fire a lot.

Great job taking components of standard springers and making a simpler, more compact blaster with even more features!

Edited by Boot, 14 June 2011 - 08:24 AM.

  • 0
QUOTE
If you try to shoot over 45 feet with a magstrike accurately you fail

I beg to differ

#6 Split

Split

    Member

  • Members
  • 1,771 posts

Posted 14 June 2011 - 03:43 PM

Wow, this is really cool. It's a lot like something I've been working on, plus slamfire, without an omnidirectional catch (just an updated RTP). I don't really keep up on the rainbow catch stuff, but is your catch design a standard design? I like it a lot more than the couple I've made and others I've seen.

I'd like to see an overview shot of the plunger rod and updated plunger head. One thing though, - What's keeping your plunger rod from turning? The strings in the back?
  • 0
Teehee.

#7 atomatron

atomatron

    Member

  • Members
  • 579 posts

Posted 15 June 2011 - 04:22 PM

Wow, this is really cool. It's a lot like something I've been working on, plus slamfire, without an omnidirectional catch (just an updated RTP). I don't really keep up on the rainbow catch stuff, but is your catch design a standard design? I like it a lot more than the couple I've made and others I've seen.

I'd like to see an overview shot of the plunger rod and updated plunger head. One thing though, - What's keeping your plunger rod from turning? The strings in the back?

The catch is non-standard.

Posted Image

Yeah it's the string.

When I took it apart I noticed some damage to the seal caused by the bolts I used to attach the front coupler on during the priming action.
Posted Image
Solution 1 use one really long bolt.
Solution 2 solvent weld the front coupler on instead of bolting.
  • 0
Perche Germolgi. [Because it shoots]

Rainbow Clan

#8 jwasko

jwasko

    PowerBeard

  • Moderators
  • 1,021 posts

Posted 15 June 2011 - 06:06 PM

Solution 1 use one really long bolt.
Solution 2 solvent weld the front coupler on instead of bolting.


Or you could eliminate the coupler by getting a smaller bushing and just shoving it in the end of the plunger tube (adding e-tape as necessary). A 1.25" to 0.5" bushing may work nicely, but I'm not 100% on that.

Only problem is, if you do that to this one, it will reduce the draw length and may (pretty sure) mess with the trigger. If making one start to finish, though, one can simply increase the length of the plunger tube by an inch or two.

By the way, very nice work on the design.
  • 0

-Jwasko, STILL Sole Surviving member of Steel City Nerf and Sober Sister of the Sex Dwarves
We NERF ON all day, and FUCK OFF all night


#9 atomatron

atomatron

    Member

  • Members
  • 579 posts

Posted 16 June 2011 - 01:42 PM

Or you could eliminate the coupler by getting a smaller bushing and just shoving it in the end of the plunger tube (adding e-tape as necessary). A 1.25" to 0.5" bushing may work nicely, but I'm not 100% on that.

Only problem is, if you do that to this one, it will reduce the draw length and may (pretty sure) mess with the trigger. If making one start to finish, though, one can simply increase the length of the plunger tube by an inch or two.

By the way, very nice work on the design.

If I remember correctly a 1 1/4" to 1/2" bushing is just a little to big, the next size down is 1" to 1/2" which would work, just with a lot of etape.

Only the draw length would be reduced, I know this because I put a 1 1/4" steel washer with a spacer behind (on this one), in front of the plunger head reducing the draw by about 1/2", it primes a little sooner, that's the only difference.

(don't do what I did, The 1" to 1/2" bushing bolted in is probably the best solution.)

Edited by atomatron, 16 June 2011 - 01:44 PM.

  • 0
Perche Germolgi. [Because it shoots]

Rainbow Clan

#10 atomatron

atomatron

    Member

  • Members
  • 579 posts

Posted 16 June 2011 - 09:20 PM

Here's a video.

link
  • 0
Perche Germolgi. [Because it shoots]

Rainbow Clan


0 user(s) are reading this topic

0 members, 0 guests, 0 anonymous users