

With this build I attempted to address some of the problems that I saw with pump action homemades; unnecessary sheath/parts, no slamfire, no rainbow catch.
Materials
2" PVC
2" PVC Tee
1 1/2" PVC
1 1/2" PVC coupler
1 1/2" to 1/2" PVC bushing
1/2" polycarb sheet
1/4" polycarb sheet
1/8" polycarb sheet
[k26]
1/2" Nylon rod
String/rope
1 1/2" neoprene washer
1 1/4" neoprene washer
7/8" steel washer
1 1/4" steel washer
Assorted 6 32 machine screws (including set screws
(two of some sort of catch spring)
Wood (or other handle material)
Recomended tools
Scroll saw
Dremel, preferably with bits
Drill press
Screwdriver
1/16" allen wrench (for 6 32 set screws)
Goop
First,
cut a slot in the 1 1/2" PVC; 6 3/4" long, 3/4" wide

Then break out the scroll saw, making these with a dremel isn't recomended.

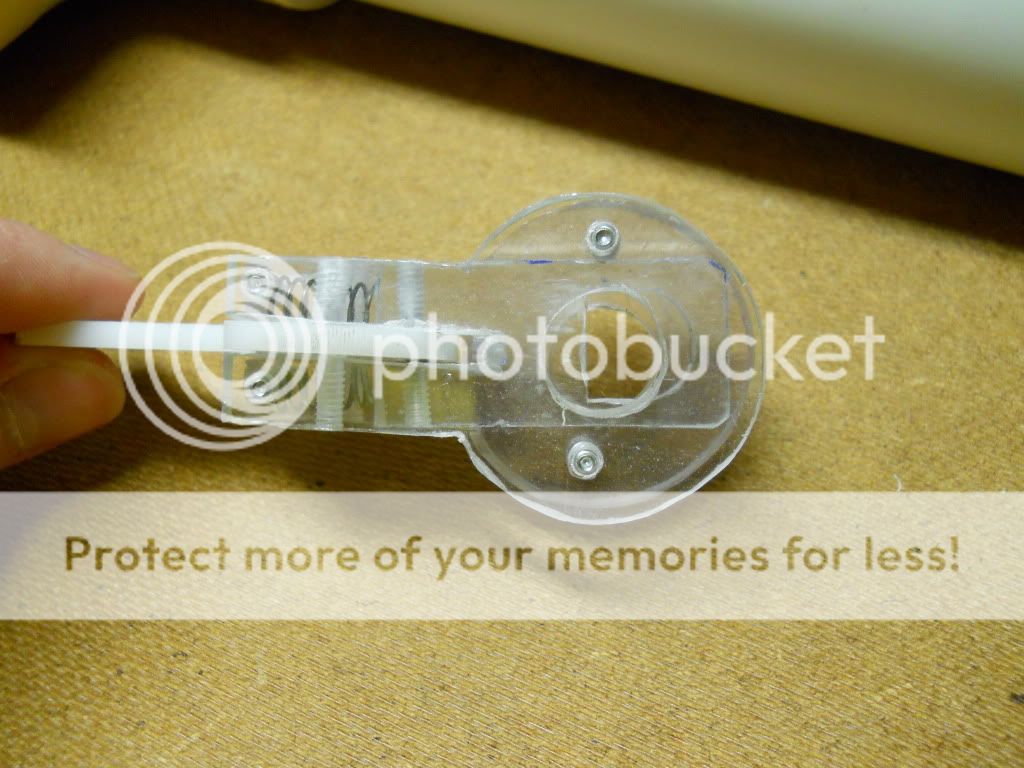
The front plate is 1/2" polycarb, the hole in the middle is 1/2" across, enough to fit the nylon rod through. the slot is 1/8" wide and 1 1/4" long. The round section needed to slide inside 1 1/2" on my blaster, if you use 1 1/4" or something else for the plunger tube, you will need to change that. the strait section is 1 1/4" long.

These parts are 1/4" polycarb, from left to right, the rear plate, stabilizer and the catch.
the rear plate has only the hole for the nylon rod and the part of it that follows the curve of the PVC. the stabilizer has the same dimensions as the front plate. The catch plate has the hole drilled and tapped about 1/4" from its bottom and the strain section is 1/2" shorter than the other parts, I made it a rectangle because it didn't need to be round anywhere.

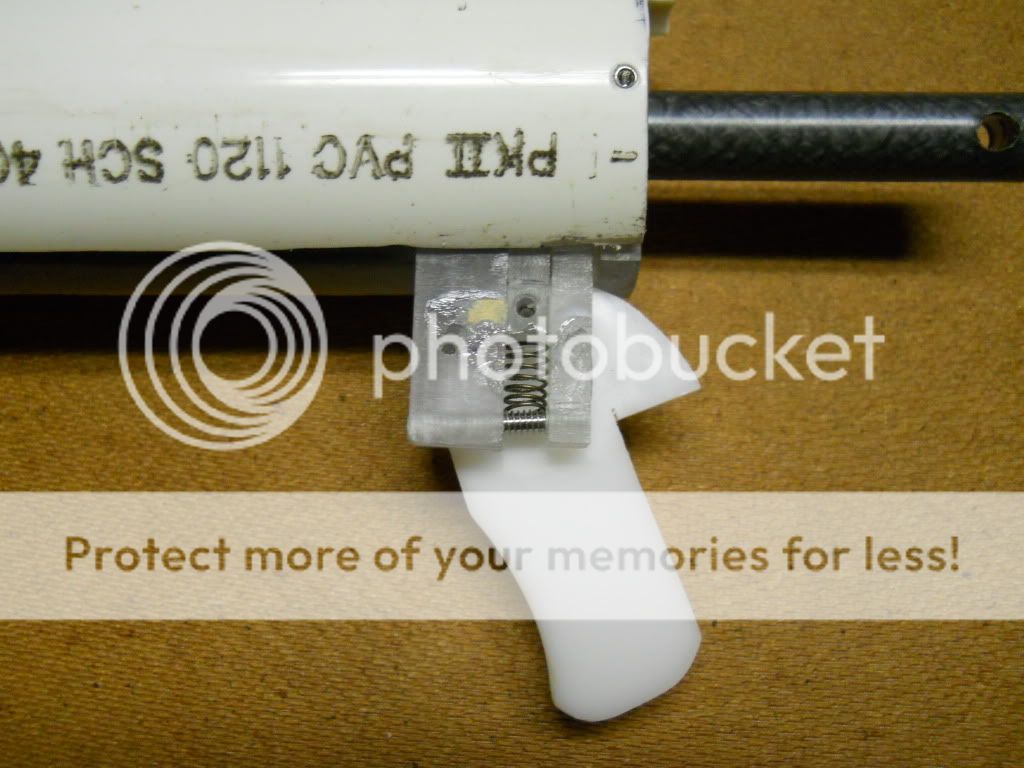
The trigger is 1/8" polycarb (or in my case delrin) the only important bits are the ramp on the right, the drill hole, and where your finger goes.
Attach the trigger and catch with a set screw as shown:


And finish the catch system assembly with the front plate in front and the stabilizer in the rear with set screws again, put the catch springs in now as well:

Now the catch-trigger system is done.
Assemble the plunger rod

The spacer is 3 1/2" long, made from sliding 1/2" polyester onto the plunger rod and 5/8" polyester over that, there are other materials that will work just as well. The catch is 9" back from the front end and the plunger head(this pic is from before I updated the plunger head, it should be the 7/8" steel washer followed by the large then smaller neoprene washers and the bigger steel washer).
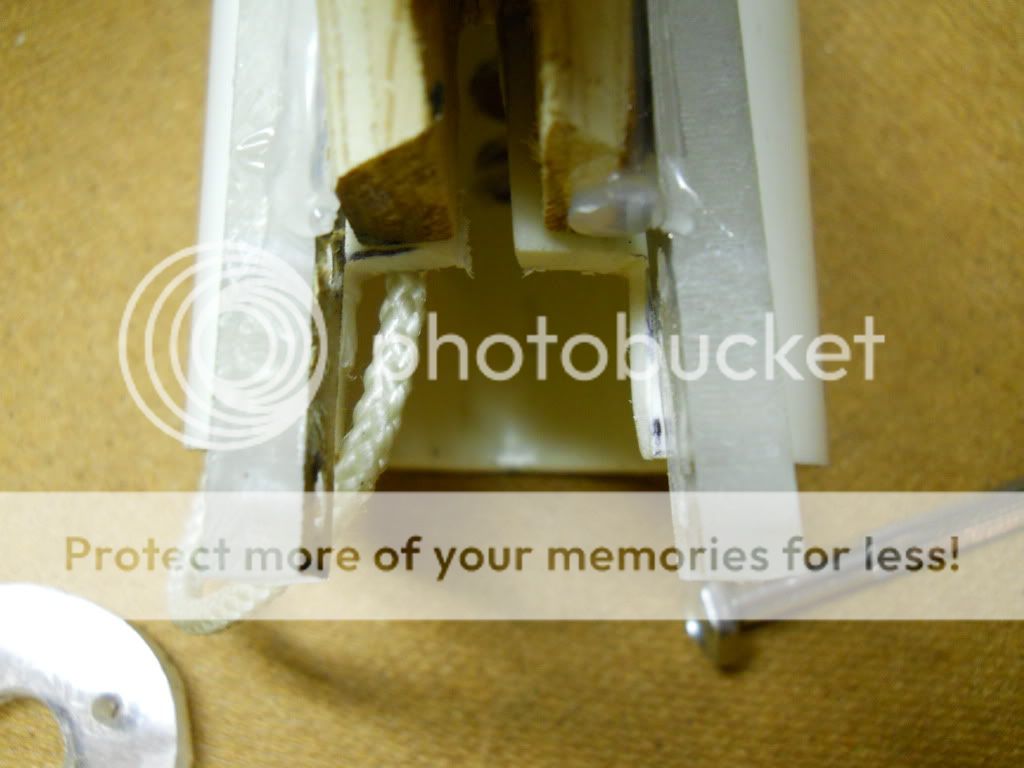
 Finally drill a hole in the rear of the nylon rod for the string. This resets the direction after every shot as well as making it dry-fireable, it could be vertical instead of horizontal, just remember which way it needs to go.
Now, back to the plungertube (1 1/2"PVC), on the end opposite the slot, goop and screw on the coupler and bushing, let dry and insert the plunger rod then the catch-trigger assembly, check to see how well the parts fit, sanding may be required.

Drill, tap and screw until the rear plate is in position at the very end of the plunger tube, locking all the parts in.
Test to see how well it functions.
It should function like so:

Push the catch-trigger assembly forward to prime it, pulling the trigger now should do nothing

Now pull back the catch-trigger assembly, either holding down the trigger or not.


If you hold down the trigger, the ramp on the trigger will be moved by the rear plate pulling the catch down, out of the catch notch, If you aren't holding down the trigger the ramp will force the trigger to turn instead of disengaging the catch.
FINISH IT

You will need (things) on top of the plunger tube to decrease the space between the 1 1/2" and 2" PVC, this helps keep it from wobbling as much but it still wobbles.
Cut the 2" to about 14" or so, whatever is comfortable. and attach the Tee, then make a handle and attach it like so:

Cut stuff out so the catch-trigger assembly will fit

(A polycarb handle might be a better choice, though harder to attach to the PVC)

Make something (out of mirror polycarb) to attach the catch-trigger assembly to the handle (sideplates, just like a +bow right?)

Deal with the string and attach the two sections together.
Rest

Primed

Ready to fire

Post questions and junk, I don't want to deal with PMs.


