Jump to content


Photo

Xploderz XRangers Trigger Mod

huge plungertubes...

7 replies to this topic

#1 pSyk

pSyk

    Member

  • Members
  • 76 posts

Posted 27 May 2011 - 11:28 PM

Sup, guys.

Before going through the write-up I just want to say that I'm not writing out the "parts list" for this, simply because this was done with a whole bunch of scrap / leftover materials that I had lying around.

Read through it first, so you'll understand what each part does, and then use your own materials and parts to make something even better than mine please :)

Alright... Long story short, this was supposed to be a little challenge between Ahtanie and myself, sort of like an exchange of ideas for the same mod and we decided that since the Xploderz range was recently released in our country, we'd make a trigger mod for it.

This is my take, and I don't know if Ahtanie will be doing an Xploderz mod (I mean cmon... have you guys seen his latest arsenal vid? he's nuts...)

First... grab your Xploderz XRanger out of the box
Posted Image

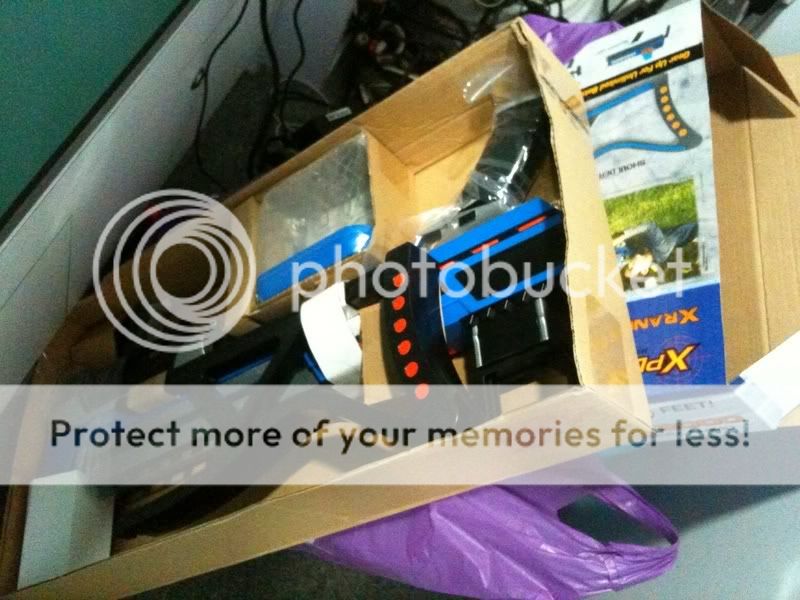
I didn't even play with my XRanger in it's stock form, simply because I knew what I wanted to do.
Let's get down to it.

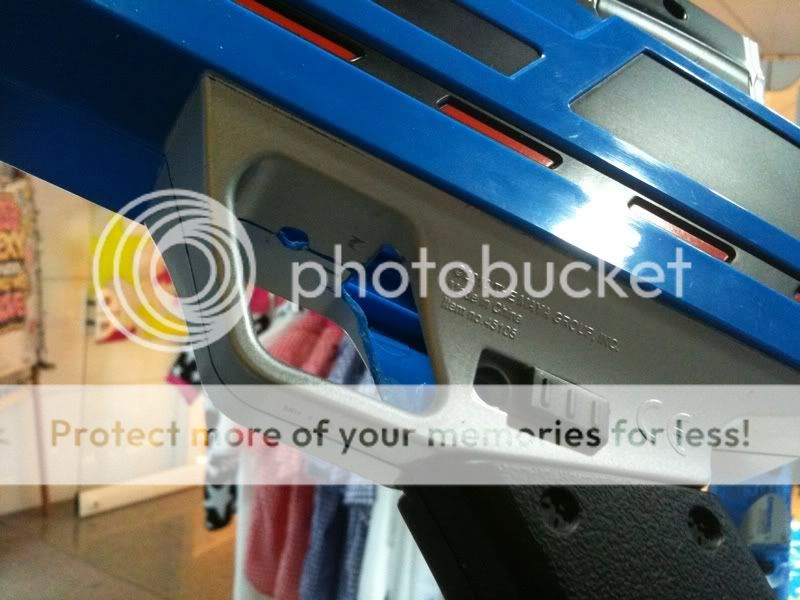
Measure and mark out where you're going to drill / dremel a hole for your new "catch notch".
Posted Image

After that, dremel a hole in the shell for the "catch notch" and drill / dremel a hole straight through the plunger tube / priming bar.
Posted Image

The holes should line up when you pull the plunger rod back:
Posted Image
Posted Image

Then, take a look at these:
Posted Image

These parts will make up your "catch mech".
Basically it's a medium-length screw, some washers, some nuts that can fits the screw, some vinyl tubing and some small springs. This spring was salvaged from the negative end of an D sized battery holder.

You just have to take note and make sure the screw is long enough to travel like a catch, but not too long that it would completely jam up inside the blaster shell. I basically used the vinyl tubing and a washer to "adjust the length" of the screw:

Posted Image

Now, have a look at these:
Posted Image

These parts will make up your "Trigger mech".
I got a scrap piece of PVC tube, a small L-bracket, some nuts, some screws, washers, and a AA sized negative end battery holder spring.

You don't have to cut your pipe into the same shape as mine, a complete half-pipe works fine.

Then, do this to the trigger area of the shell (there's no particular distance between the trigger and that screw hole you see):
Posted Image

and now, drill screw holes in your PVC pipe according to the holes made in your blaster shell:
Posted Image

------ To Be Continued In The Next Post! ------
  • 0
Damn you, Screw!

#2 pSyk

pSyk

    Member

  • Members
  • 76 posts

Posted 27 May 2011 - 11:31 PM

------ Continued From Above ------

The reason why you have the smaller screw hole right infront of the trigger? You'll understand in the next pic. This will be what your trigger mech will look like:
Posted Image

Regarding the "Return spring" area... you need to make sure you get a washer that is able to move freely along the threads of the screw, while being small enough not to fall through the screw head. Use a combination of 2 different sized washers if you need. The washers will sit on the INSIDE of the blaster shell.

And this is your catch mech.
Posted Image

After looking at the picture above, make sure that the spring stops just before the nut. This is to make sure that the spring doesn't get in the way of the catching process. I put some washers underneath the nut and wrapped some vinyl tubing around it to add a little more length to it, and to "smoothen out" the edges.

Once that's done, your trigger portion should work like this (ignore the extra bits on the blaster shell, I'll get to that later, but this is the main focus for now):
Rest:
Posted Image

Depressed:
Posted Image

This basically is your catch mech. Here's the video demo.


After it was working, I added these "guide rails":
Posted Image

Plunger rod in "forward" position:
Posted Image

Plunger rod in "primed" position:
Posted Image

and finally, my XRanger looks like this:
Posted Image

Yes, making it an internal RSCB is bloody easy. Seriously.

http://www.youtube.com/watch?v=kz5_sk7ulQA

This is a really simple mod.
With the stock seal, stock spring, a 6-stefan dart RSCB clip, a 1ft long barrel,
I'm getting an effective range of 60ft,with a maximum of about 75ft. :)

Go forth, and make your own.
And make one that looks better than mine, please.
Haha!
  • 0
Damn you, Screw!

#3 Strikemod

Strikemod

    Member

  • Members
  • 27 posts

Posted 28 May 2011 - 12:00 AM

As simple and elegant as white panties shining under a skirt on a sunday in the middle of a...

Definitely awesome man! How does the trigger pull feel with that huge spring on it?
  • 0
  • I like bums

#4 Boot

Boot

    Member

  • Members
  • 90 posts

Posted 28 May 2011 - 12:08 AM

Very interesting and innovative trigger setup. It is interesting how the actual catching component is part of the plunger rod. This is a significantly better setup than trying to use a traditional catch in this case since it allow the orientation and placement of the handle to remain unchanged. Very well done. What is all the more impressive is that it honestly looks great. I don't think it would be very easy to design a cleaner system. Also, great use of accessible components. Battery terminals do make great catch springs :lol: .

My only concern is with the torsional forces on the shell and plunger rod. Is the plastic strong enough to hold back the plunger without danger of breaking or warping (or is this not an issue with the stock spring)?

Anyway, great job.
  • 0
QUOTE
If you try to shoot over 45 feet with a magstrike accurately you fail

I beg to differ

#5 SlightlySane813

SlightlySane813

    Member

  • Members
  • 213 posts

Posted 28 May 2011 - 10:06 AM

Impressive, Props.

I am familiar with the R3L catch and to recreate it in the way you did is very creative.
  • 0
Also known as the French Canadian eh!

#6 Soothsayer

Soothsayer

    Member

  • Members
  • 663 posts

Posted 28 May 2011 - 11:06 AM

What's the diameter of the plunger rod?
  • 0

yeah I'm that guy who made that cool thing with the cool paint.


#7 Blue

Blue

    Member

  • Members
  • 2,222 posts

Posted 28 May 2011 - 12:17 PM

Very cool mod, I'm glad someone finally took the time to figure out how to add triggers to these guys. Is the release "smooth" like stock or does the screw thing cause noticeable friction?
  • 0

#8 pSyk

pSyk

    Member

  • Members
  • 76 posts

Posted 29 May 2011 - 09:09 AM

Sorry to everyone for the slow reply!
I'm an FNG for now and that limits myself to 2 posts per 24 hours.

So!

Strikemod: Thanks for the props. Haha. The trigger pull is rather alright. It's easier than squeezing off, say, a highly pressurized AT3k tank.

Boot: Yeah, battery terminals make great catch springs! :) As of now, this blaster is using only the stock spring so the force isn't too great. However, this can be reinforced by using say, a bigger ID washer or two.

SlightlySane: Yep the R3 catch is rather close to a Rainbow catch. I just thought of flipping it upside down considering the huge amount of space you can play with within the blaster.

Soothsayer: Plunger Rod? 21.3mm. If you need the other measurements...
Plunger Tube ID: 38.3mm (~1.5inch)
Plunger Tube OD: 40mm
Plunger draw is about 14cm.

Blue: Yeah the release is smooth. That sand brown sticker I stuck to the shell where the "track" lies? It's the type of sticker that's made of smooth plastic, and is generally used to make drawers move smoother... Although, I don't think that it would be much of a difference without that sticker. I put it there just so that it wouldn't scratch the blaster shell too much... That sticker's rather scratch-resistant. :)
  • 0
Damn you, Screw!


0 user(s) are reading this topic

0 members, 0 guests, 0 anonymous users