Jump to content


Photo

A new style Pump-action SNAP

High performance, dry fireable, easy to make.

17 replies to this topic

#1 Daniel Beaver

Daniel Beaver

    HQRSE CQCK

  • Moderators
  • 2,099 posts

Posted 18 April 2011 - 07:18 PM

Version 1.1, updated 19 April 2011

I've been working on a new SNAP with the following goals in mind:
- Performance on par with current top of the line blasters
- Ease of construction using localy obtainable materials and simple tools
- Pump action
- Dry fire safe
- Safe internal mechanisms

This build is aimed towards the inbetweeners who have already built a SNAP, and are ready to graduate to The School of Pump Action. The only powertools required are a dremel and a drill, and the materials ought to be obtainable at your hardware store. The design is very heavily based on my previous SNAP, which was an evolution of Carbon's SNAP 2. I retained the clothespin trigger because it is a proven design, and the large catchface doubles as a priming surface.

I was going to make second prototype of this blaster to work out the chinks, but school is keeping me away from building. So here it is:

Posted Image


The front coupler
Parts:
- 1-1/4" PVC coupler
- 1-1/4" to 1/2" PVC reducer
- Solvent weld or super glue

Solvent weld these two pieces together. This will slide onto the body of the blaster later on. You can also use an internal coupler, but this is far less of a hassle.

Posted Image


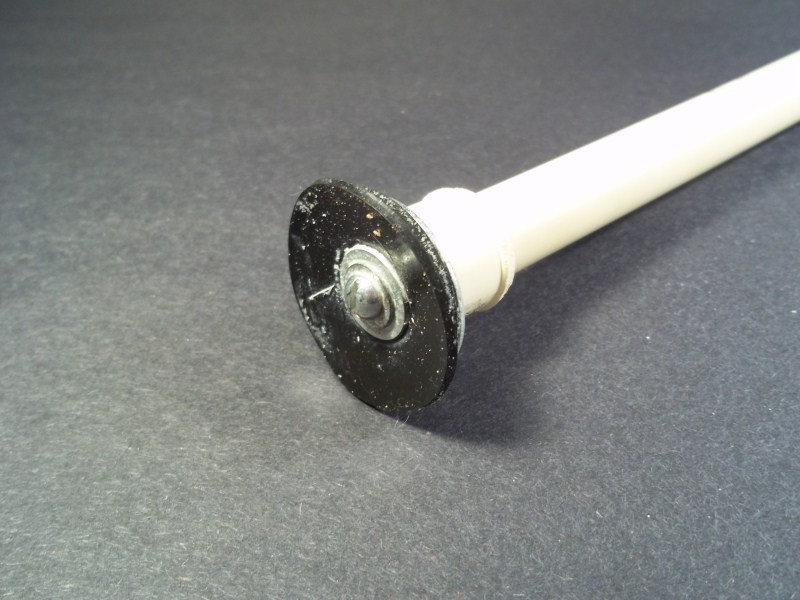
The plunger head
Parts:
- 1-1/2" rubber washer
- CPVC cap
- Miscellaneous other materials.
- Some type of adhesive (goop works)

People use all sorts of plunger heads for SNAPS, but the core feature of all of them is a 1-1/2" rubber washer. I use a secondary 1-1/4" rubber washer as padding (to resist shearing), with a metal washer underneath for support. Make sure to use some adhesive to secure the CPVC cap to the plunger rod, otherwise it will eventually come loose (but don't do it until the gun is finished!).
Posted Image


The catch assembly
Parts:
- 3/4" PVC endcap, preferably rounded on the end
- 1/2" PVC endcap
- 1/2" CPVC coupler
- 1/4" metal rod
- 1" metal washer with 5/8" opening

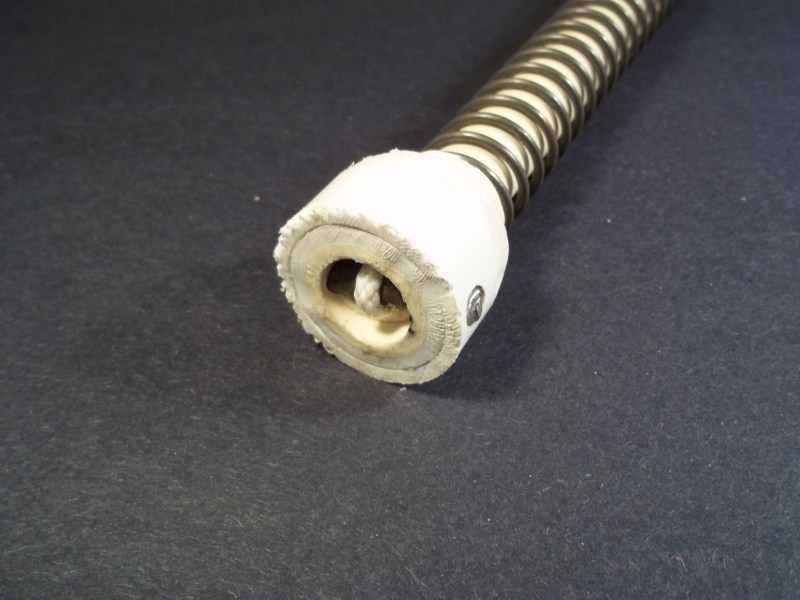
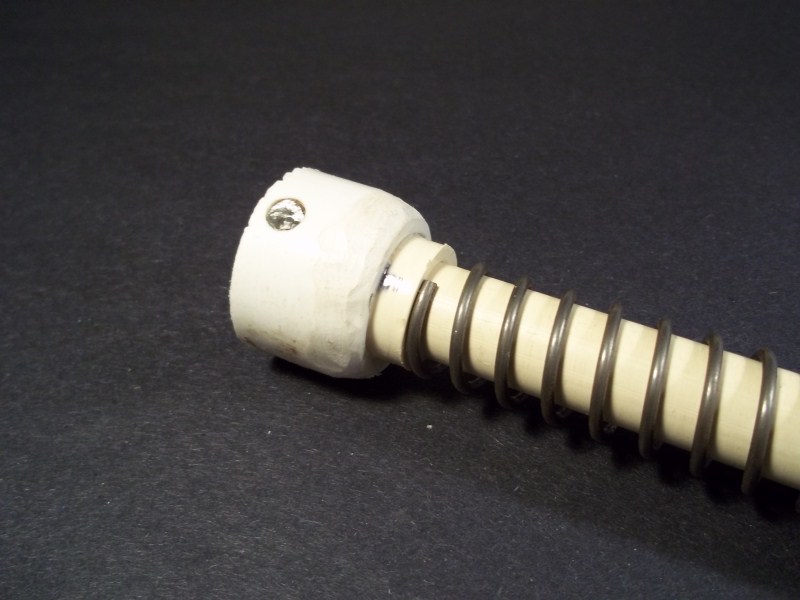
This is based on the Preeminent Plunger Head (You could also use the basic design of the Superlative Plunger Head). The key difference from pull-back SNAPS is that you need to attach CPVC to both ends, so you will have to open up the back of the 3/4" PVC with a drill or a dremel so that the CPVC coupler sticks out the end. You can then just friction-fit them together (with the persuation of a hammer). You also want to put a washer on the front of this, but I could not find one at local stores with a large enough center hole to fit the CPVC. These DO exist - my last couple of pump-action SNAPS used these. You may also have to shave down the back edges of the coupler if it is not very flat - there should be no resistance when priming.

The 1/4" metal rod is the main support piece for the dry-fire system. You could probably use a smaller diameter rod, but... there is an awful lot of force on this piece. Do not place the rod as far forward as I did, otherwise the CPVC may break (as mine did).
Posted Image

Posted Image


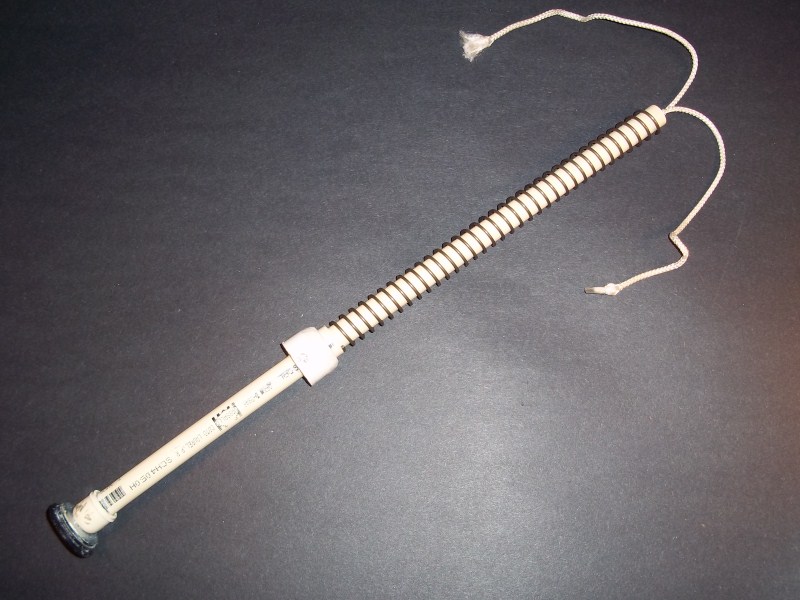
The rest of the plunger rod
Parts:
- string
- Spring

An overview. The rear section of CPVC is a stabalizer which keeps the spring from binding up like crazy, and which also acts as a sheath for the string. The string loops around the 1/4" metal rod in the catch, and both ends come out the back. Getting the string looped around the metal rod is a bitchy procedure: tape a small drill bit onto the end of the string, and drop it down the front (I hope you didn't glue that plunger head in yet), and then use some needle nose pliers to pull it through. Use some tape to tie off the ends of the string so it doesn't fray, and leave yourself plenty to work with.

I use a [k26] for this blaster. You can use whatever you want for yours - just make sure you think about how it will affect the dimensions of the blaster.
Posted Image


The slots
Parts:
- 1-1/4" PVC

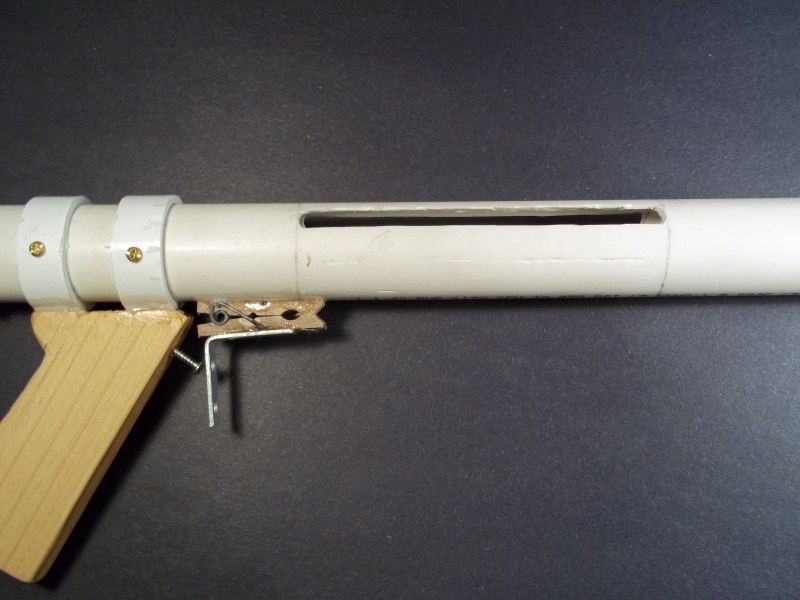
These are tricky. The slots need to be offset enough so that the priming rod clears the plunger rod (about 5/16th of an inch away from the centerline in the case of CPVC). The best method is to drill a pilot hole, then twist the drill sideways and push it through the other end. Once you have opened up four holes, you can just slide a dremel along the length of the body to cut out the slots. A diamond cutting disk works extremely well for this application. If this all sounds confusing to you, just look at the pictures and figure it out on your own.
Posted Image

Posted Image


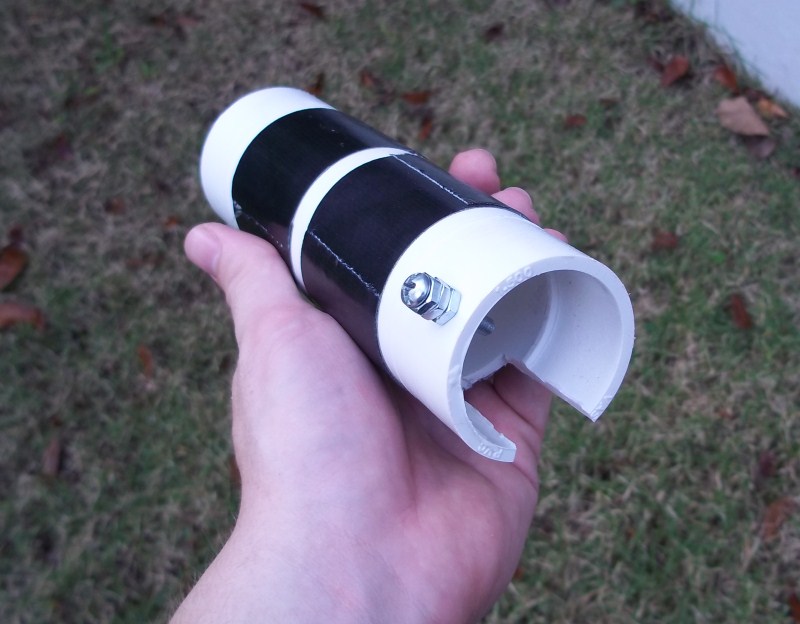
The grip
Parts:
- 1-1/2" thinwall PVC
- A big long bolt

The bolt pushes against the catch face to prime the blaster. The little square slot gives clearence to the clothespin, which will always overlap the grip somewhat. 1-1/2" thinwall PVC slides freely over 1-1/4" PVC, and is a great grip material.

Posted Image

The spring rest
Parts:
- 3/4" Endcap
- packing tape
- screws

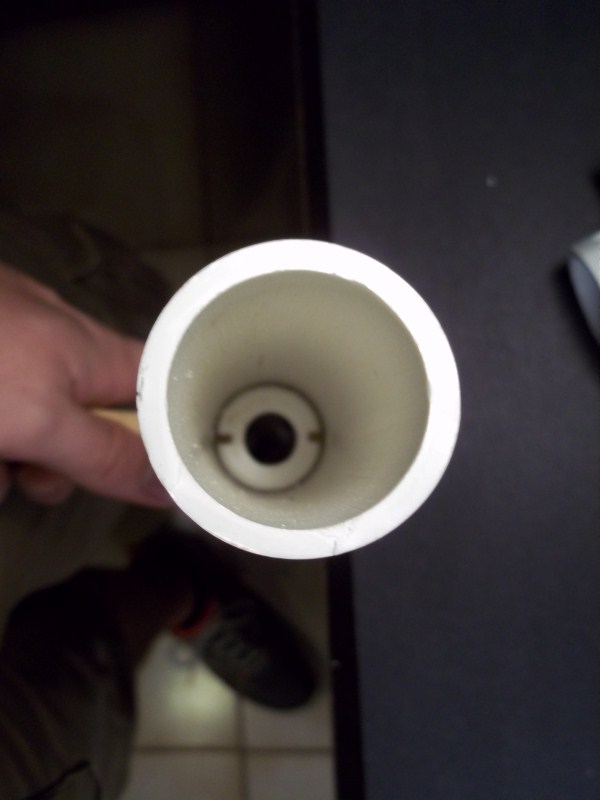
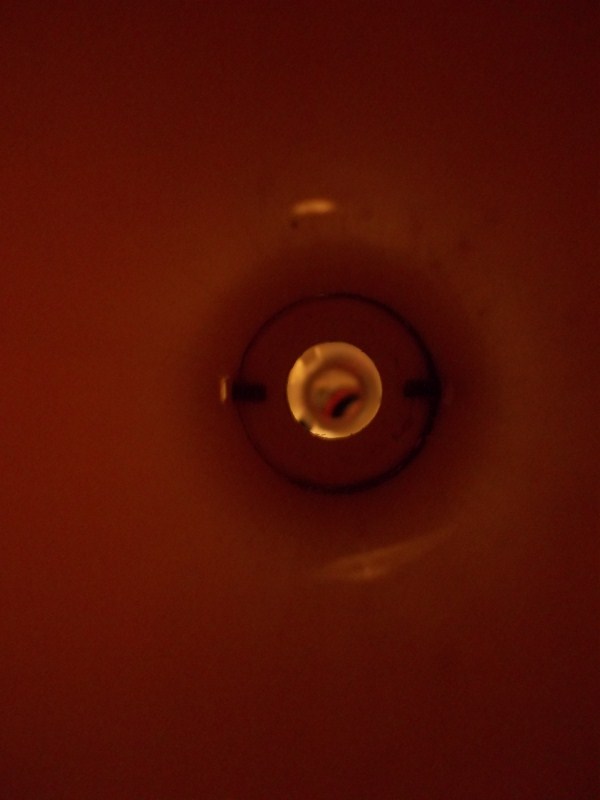
Use a 5/8" wood bit to drill a hole in the end cap, so that the CPVC stabilizer slides freely through it. Wrap a few layers of packing tape around it until it is snug in the barrel (packing tape is superior to e-tape, IMO). A couple of screws act as a rest for this piece. You might want to thread the string through this piece before you insert it, as it gets annoying to deal with otherwise.

Where to put the string stop? Simple: put the plunger rod and spring in. Slide the spring rest down the length of the plunger tube until the catch face is 1/2" away from the priming bar; drill holes and secure it (might take a few tries). You don't want any compression in your spring when the plunger head is all the way forward - we are trying to prevent the plunger rod from impacting the front of the blaster or the priming bar.
Posted Image

Posted Image


The string stop
Parts:
- 1-1/4" tee

This end of the mechanism is identical to the dry fire system used in the Rainbowpump. The string loops around the end, feeds through the holes, and is anchored by some figure 8 knots. Once the blaster is built, you will have to spend some time adjusting this so that the length is right. When you have the length right, the blaster will be noticibly quieter when you fire.
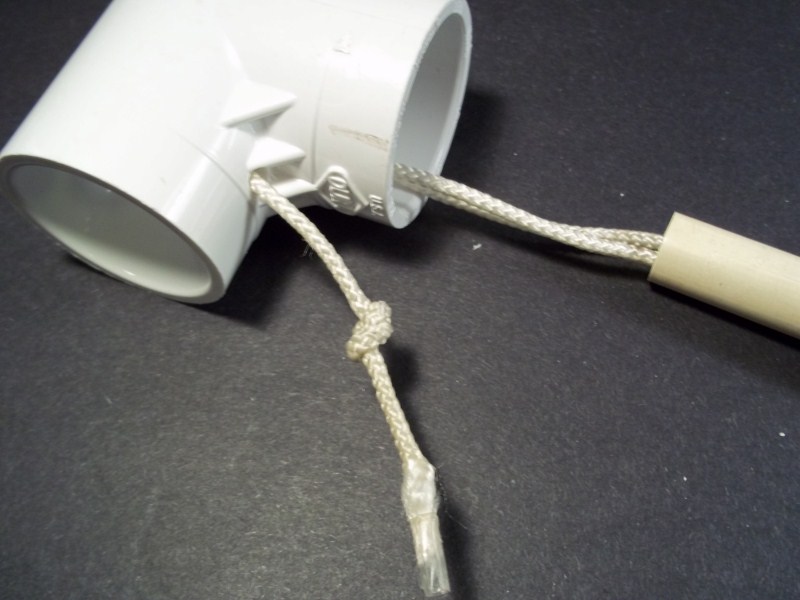
Posted Image


Dimensions

These are for a 5.5" draw length (I use a [k26] spring). If you are using an internal coupler on the front, make sure that you reference your dimensions against the back of the coupler. Your fittings might be a different size than mine as well.

Posted Image

The handle
Someone is going to ask about this, so I'll just post it. The handle is just a piece of wood I cut with a jigsaw and sanded. The two rings are cut off ends of a 1-1/4" PVC coupler. I do not recommend this style; just use a snap-on handle, or do what Rork did in the Snapbow mk5 writeup.
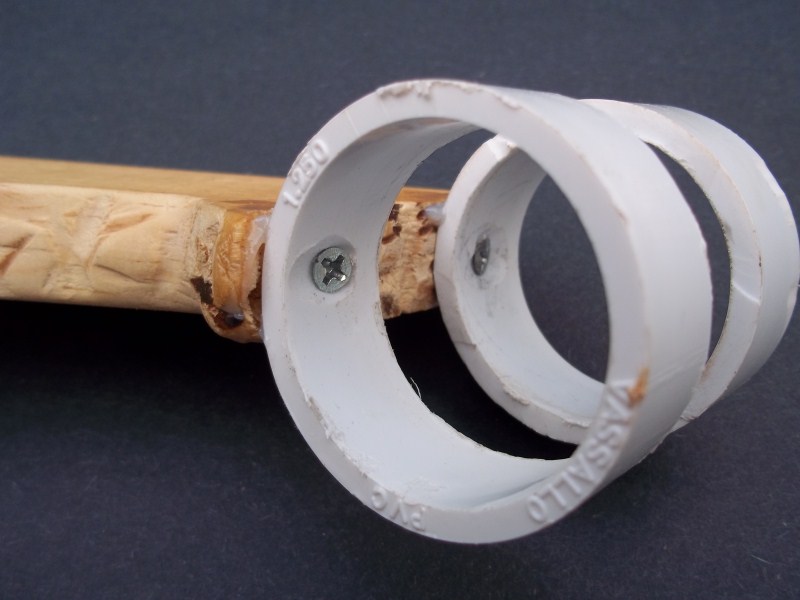
Posted Image


Finished blaster

Attach a clothespin trigger. Adjust the string stop, lube with some silicon grease and use some goop to glue the front coupler onto the blaster. Add hopper clip and loooong barrel (about 14" seems about right with a footlong clip). Ranges are typical for a [k26] powered SNAP: about 130" with domed darts and an 18" speedloader.

Posted Image

Edited by Daniel Beaver, 19 April 2011 - 05:28 PM.

  • 0

#2 WicketTheModder619

WicketTheModder619

    Member

  • Members
  • 247 posts

Posted 18 April 2011 - 07:30 PM

Beautiful. May I ask where you happened to find 1 and 1/2" thinwall pvc? If I can get my hands on some of that, I will have to make one of these.
  • 0
23:06 Buffdaddy: As long as they aren't doing it all night, don't care.

#3 Daniel Beaver

Daniel Beaver

    HQRSE CQCK

  • Moderators
  • 2,099 posts

Posted 18 April 2011 - 07:47 PM

Beautiful. May I ask where you happened to find 1 and 1/2" thinwall pvc? If I can get my hands on some of that, I will have to make one of these.


When I lived in Minneapolis, I got it at ACE hardware. Here in Puerto Rico, I get it at home depot. It is a somewhat rare item, but I have never failed to find it when I looked.

I suspect this will be the main hang-up for potential builders. I think 1-1/4" coupler should work in a pinch if you shave down the insides.

Edited by Daniel Beaver, 18 April 2011 - 07:48 PM.

  • 0

#4 ChaosPropel

ChaosPropel

    Member

  • Members
  • 586 posts

Posted 18 April 2011 - 07:53 PM

Absoulutely amazing. I know that LuckyNerfer on Youtube has already made many of these, and now that there's a good writeup to follow, I'll probably make this my next project! Thanks so much for posting this...great job with both the blaster and the writeup!
EDIT: I believe that 1 1/2" PVC couplers als o work as pump grips (2 glued together), but it is quite a loose fit.

Edited by ChaosPropel, 18 April 2011 - 07:54 PM.

  • 0
Preheat oven to 350 degrees F (175 degrees C).

#5 Daniel Beaver

Daniel Beaver

    HQRSE CQCK

  • Moderators
  • 2,099 posts

Posted 18 April 2011 - 07:59 PM

I believe that 1 1/2" PVC couplers als o work as pump grips (2 glued together), but it is quite a loose fit.

I'll try that next time I get out to the hardware store.
  • 0

#6 koree

koree

    Member

  • Members
  • 311 posts

Posted 18 April 2011 - 08:08 PM

I really like it, especially the way you've set up the priming bar.
  • 0

#7 LuckyLotto21

LuckyLotto21

    Member

  • Members
  • 20 posts

Posted 19 April 2011 - 03:58 PM

For the spring rest,I think you meant a 3/4 inch endcap. A 1 inch endcap won't fit. If you use 1 1/2 inch coupler they are thicker than 1 1/2 pvc, which makes them stronger, and more easily available. They are more costly though.
  • 0

#8 Y-Brik

Y-Brik

    Member

  • Members
  • 199 posts

Posted 19 April 2011 - 04:22 PM

Beautiful. May I ask where you happened to find 1 and 1/2" thinwall pvc? If I can get my hands on some of that, I will have to make one of these.

I got mine at Do It Best; they have online ordering with free shipping to your nearest store- go here. It's $4-ish for 10' with no shipping hassles or driving to numerous Ace's to search for the stuff.
  • 0

As I said I have not not alot of testes yet but I will be once I finish the mod.

Why I am boycotting Hasbro

#9 Daniel Beaver

Daniel Beaver

    HQRSE CQCK

  • Moderators
  • 2,099 posts

Posted 19 April 2011 - 05:24 PM

LuckyLotto21: Yeah, you're right about that. I also made the same mistake with the catch assembly. Both are fixed now.

EDIT: this new editor makes me want to hug langley.

Edited by Langley, 09 November 2011 - 01:01 PM.

  • 0

#10 Spud Spudoni

Spud Spudoni

    Member

  • Members
  • 321 posts

Posted 25 April 2011 - 07:39 PM

This may be a little late, but I think that the community may have the same questions. So, the 3/4 PVC Preemient catch piece is what is pushed back by the bolt? I may be wrong, if so, correct me. How stabe is this? Does it buckle at all from being primed only on one side?
Thanks
  • 0

industrial designer


#11 Daniel Beaver

Daniel Beaver

    HQRSE CQCK

  • Moderators
  • 2,099 posts

Posted 29 April 2011 - 03:25 PM

So, the 3/4 PVC Preemient catch piece is what is pushed back by the bolt?

Correct

How stabe is this? Does it buckle at all from being primed only on one side?

It is very stable. The forces exerted by the priming bar are no different from those exerted by the catch itself, the only difference is the direction of torque.
  • 0

#12 KaneTheMediocre

KaneTheMediocre

    Belligerent Asshole

  • Members
  • 613 posts

Posted 15 May 2011 - 02:32 AM

When I lived in Minneapolis, I got it at ACE hardware. Here in Puerto Rico, I get it at home depot. It is a somewhat rare item, but I have never failed to find it when I looked.

I suspect this will be the main hang-up for potential builders. I think 1-1/4" coupler should work in a pinch if you shave down the insides.


The amount and messiness of the work needed to shave down a 1-1/4" coupler to not only fit, but SLIDE over 1-1/4" PVC, is not at all worth it. You could use a 1.5" T, which is fairly oversize but workable. You also could slice the 1 1/4" coupler lengthwise, and stuff the saw cut with a spacer material (popsicle sticks, paper, cardboard, whatever). Stuffing the saw cut will slightly bend / increase the diameter of the coupler. I've done similar things to get a good slide over 1/2" PVC.
  • 0
RAINBOW CLAN FTW
I'm Purple

My Half-Baked MHA Site

#13 Daniel Beaver

Daniel Beaver

    HQRSE CQCK

  • Moderators
  • 2,099 posts

Posted 16 May 2011 - 10:13 AM

The amount and messiness of the work needed to shave down a 1-1/4" coupler to not only fit, but SLIDE over 1-1/4" PVC, is not at all worth it. You could use a 1.5" T, which is fairly oversize but workable. You also could slice the 1 1/4" coupler lengthwise, and stuff the saw cut with a spacer material (popsicle sticks, paper, cardboard, whatever). Stuffing the saw cut will slightly bend / increase the diameter of the coupler. I've done similar things to get a good slide over 1/2" PVC.


I'm working on a second version of this, using 1-1/2" couplers. You need to shave down the center ridge somewhat, but it is fairly easy to make them slide freely. Duct tape works surprisingly well for connecting them together, so much so that I'm going to skip adhesives.

EDIT: Here's what the hell I'm talking about. The pump grip is made from a row of 1-1/2" couplers. Only minimal dremel work required to achieve a smooth slide:

Posted Image

Edited by Daniel Beaver, 24 May 2011 - 05:46 PM.

  • 0

#14 Cannonball

Cannonball

    Member

  • Members
  • 357 posts

Posted 24 May 2011 - 07:01 PM

I'm currently working on putting together one of these and I have a few questions. I don't have the most experience with clothespin trigger homemades and the like, so here goes..

Is the 3/4 end cap on the catch supposed to be a little snug in 1 1/4 pvc or should I sand it down more?

also, for that pump grip, you're using 1 1/2 couplers, correct? I have a few of those and they slide freely over 1 1/4. did you cut them down the middle and then push them back together and tape them?

Thanks in advance, and sorry if these are stupid questions.
  • 0

#15 Daniel Beaver

Daniel Beaver

    HQRSE CQCK

  • Moderators
  • 2,099 posts

Posted 24 May 2011 - 07:29 PM

Is the 3/4 end cap on the catch supposed to be a little snug in 1 1/4 pvc or should I sand it down more?

Sand down the outside some more, it should be able to slide through the plunger tube with no friction at all.

also, for that pump grip, you're using 1 1/2 couplers, correct? I have a few of those and they slide freely over 1 1/4.

Correct. Looks like you got lucky, and have some that work without needing to dremel them.

did you cut them down the middle and then push them back together and tape them?

Not sure what you mean. They are simply taped together. You'll need to cut a slot for the clothespin trigger, but no other cutting is necessary.
  • 0

#16 Cannonball

Cannonball

    Member

  • Members
  • 357 posts

Posted 24 May 2011 - 07:44 PM

Ok, sanded it down as you said. works great. thanks.

The 1 1/2 couples I have slide way too freely. There is a considerable amount of space between the inside of the coupler and the 1 1/4. I guess I just picked up some freak couplers from Ace then if You had to sand down the inside of yours a bit. Thanks for the help!
  • 0

#17 aj1234119

aj1234119

    Member

  • Members
  • 29 posts

Posted 24 May 2011 - 08:30 PM

I've made one of these, and another simple way to make a pump grip that is just as effective but i think looks better and could be stronger because it does not use tape (personal preference) is to cut the 2 ends off a 1 and 1/4 coupler, and goop those inside 2'' PVC. You can make this with a hacksaw and goop without needing to dremel anything.
  • 0

#18 Streamline

Streamline

    Member

  • Members
  • 2 posts

Posted 29 October 2011 - 06:06 PM

How much do you think it would cost to make one of theese?
  • 0


1 user(s) are reading this topic

0 members, 1 guests, 0 anonymous users