Props to TantumBull who made a write up for the basics of overhauling an AT2K.
MaterialsAT2K
12" PETG (plus a shorter segment to connect the tank to the turret)
Craft Foam
17/32" Brass 4 1/2" segments (plus a small segment to help connect PETG to the turret)
Barrel spacer
ToolsDrill
3/8 Drill bit
1/2 Drill bit
Dremel
Screwdrivers
Plumber's Goop
Zap-a-Gap
Electrical Tape
Pliers
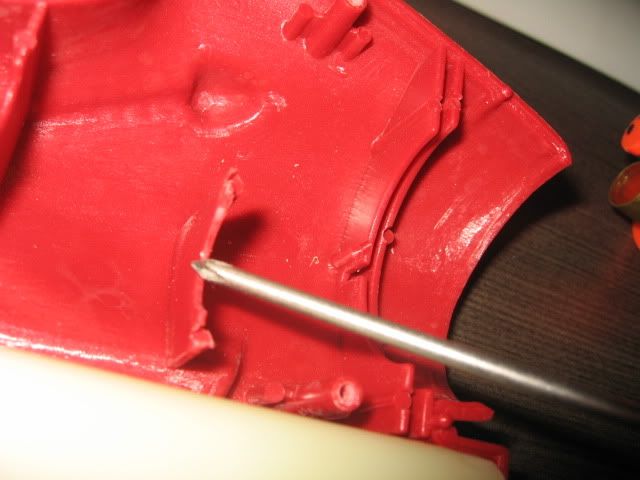
Step 1 - Open up the blaster
Remove the screws of the blaster and the cap for the pump. You can permanently remove this with a knife, dremel, or other tool, or using a knife, score around the gap slowly and carefully pry up until it pops off.
Once the cap is removed, the blaster can be easily opened.
Step 2 - Goo Gauge
Remove the tank from the blaster shell and carefully take out the pump rod, trigger, and clear cover from the assembly.
NOTE: At this point, you can replace the tubing between the tank and pump if you want to.
Now let's empty the goo gauge. First get to a sink and carefully remove the screws from the gauge. Separate the two sides and remove the small rubber membrane. Empty out the goo with water and gravity and wipe everything down. Back at your work station, fill the opening to the goo gauge with hot glue to seal it off. In the bottom chamber, I usually fill in the sides with hot glue being careful to leave an open path for the air to travel.
before you close this up, add goop all around the rim, close and tighten in the screws. Test to make sure there are no leaks!
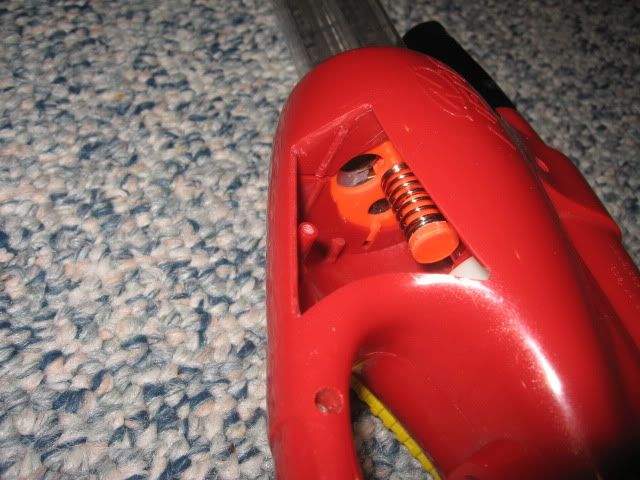
Step 3 - Tank Trigger Spring
The tank's pin as a spring that really should be a spacer. Get your hot glue and fill the area in the spring with hot glue.
On the trigger itself, part of the trigger nests inside the spring, so you will need to cut that off the trigger so it will sit correctly.
Step 4 - Tank Flow (Props to LouieC3)
AT2K Tank modification write up
NOTE: Just Some Bob noted that the pipe that connects the tank to the turret is one solid piece that goes into the tank valve. First try to twist and pop this out to save yourself the trouble of sawing and drilling in one neat step. If you are not able to, proceed with the rest of this step.
This can be tricky so you will need to be careful. But the point of this is to open the dump valve of the tank by making it larger.
First, cut the pipe that connects the tank to the turret. There's a natural division between the tank and connecting pipe where you should cut.
Once that is gone, get your drill with a 3/8" bit, holding the pin back, carefully drill into dump value to widen it. When this is complete, be sure to remove any debris that may have fallen into the tank and wipe away any dust.
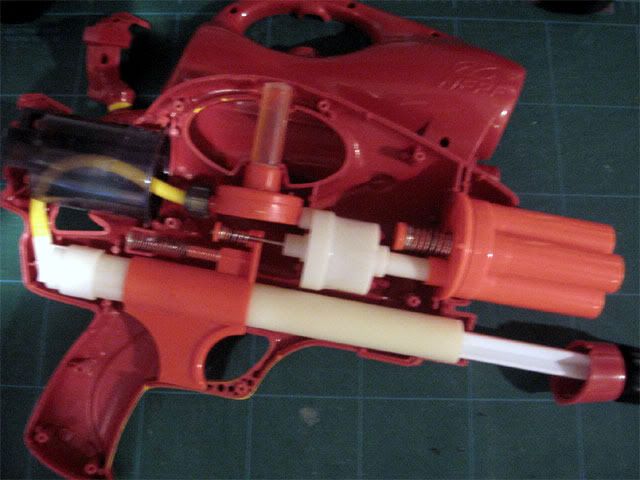
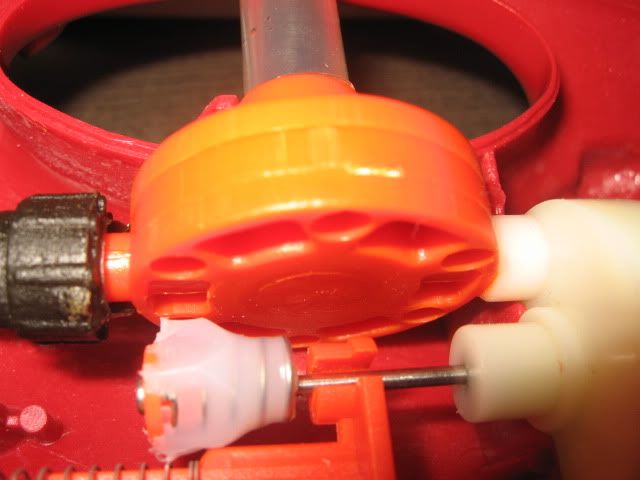
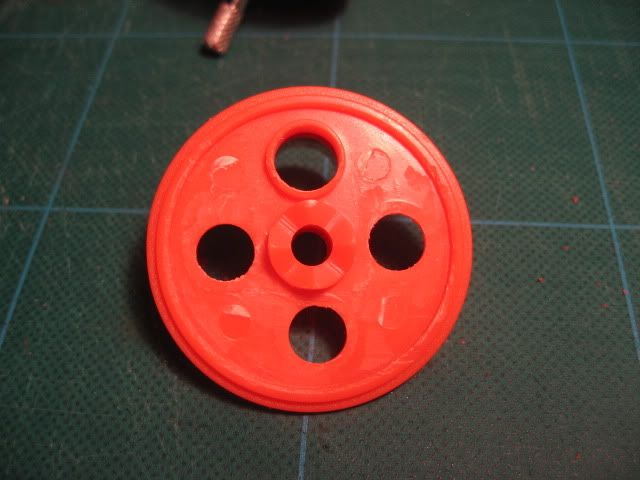
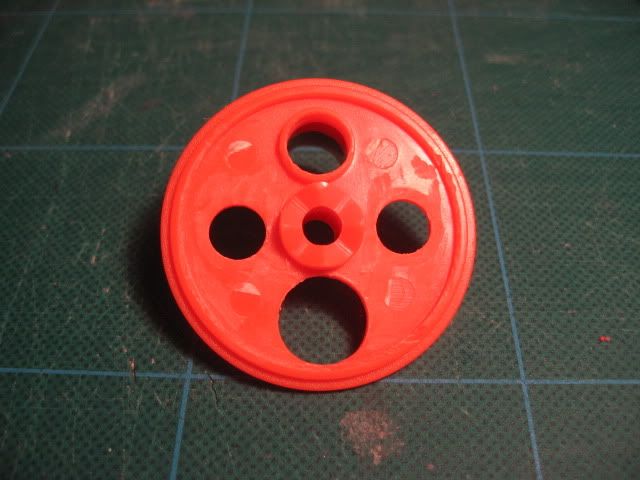
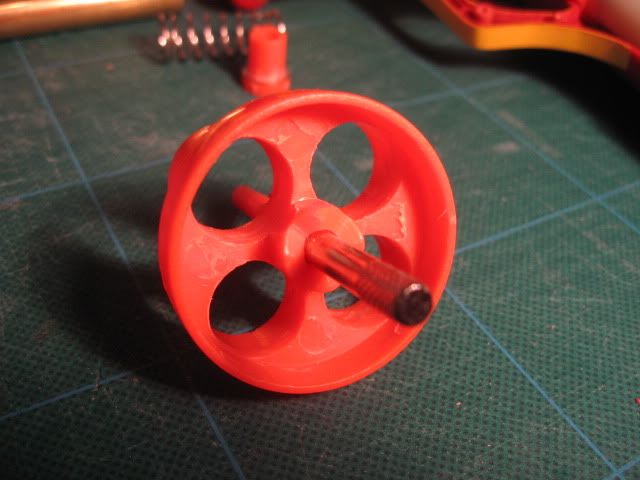
Step 5 - The turret (Props to RyanMc#'s)
Rear-loading 2k Turrets write up
The turret is definitely tricky so be sure that you work slowly through this.
First, remove the stock barrels from the base of the turret. Dipping the turret into hot water will help to weaken the glue but you still might need to use a knife to help finish removing it.
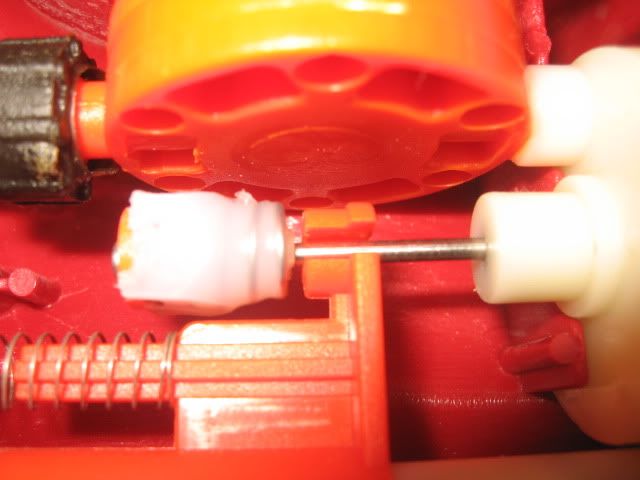
Once that is done, remove the two halves of the turret by using pliers to grab onto the plastic stop and twisting it off. Make sure to keep the spring and put these pieces off to the side.
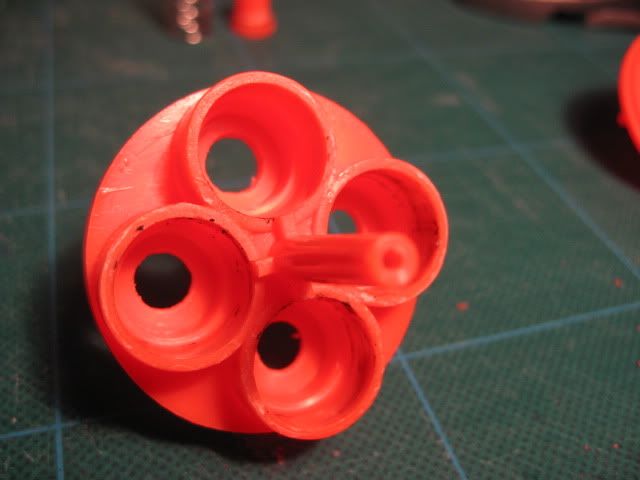
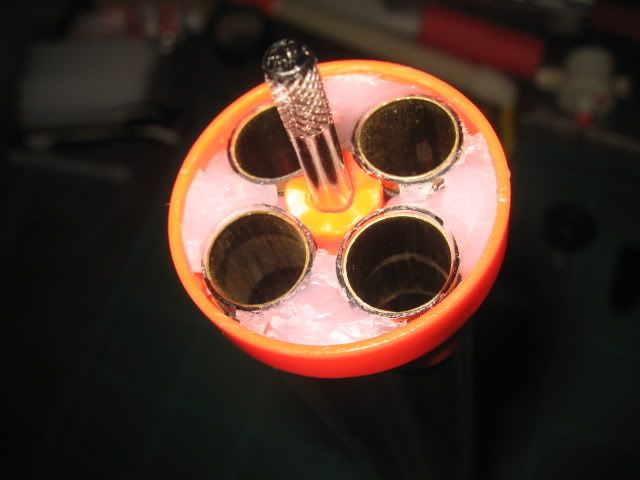
Take the bottom half of the turret and widen the inlet valve using your 3/8" drill bit. Be careful to keep the wall on the back intact. In the picture above the inlet valve is on the top.
The two small nubs adjacent to this inlet must be removed to make it easier for the seal. Grind them down with your dremel.
The nub directly across from the inlet valve will be the rear-loading slot. This is different from Ryan's original write up and I found that it was easier for me to do.
You want to drill a 1/2" hole in this area. If you don't have a drill press, drill a pilot hole and carefully widen it with your dremel trying to keep the shape as close to a circle as possible. Make sure the hole is wide enough for your darts to fit through.
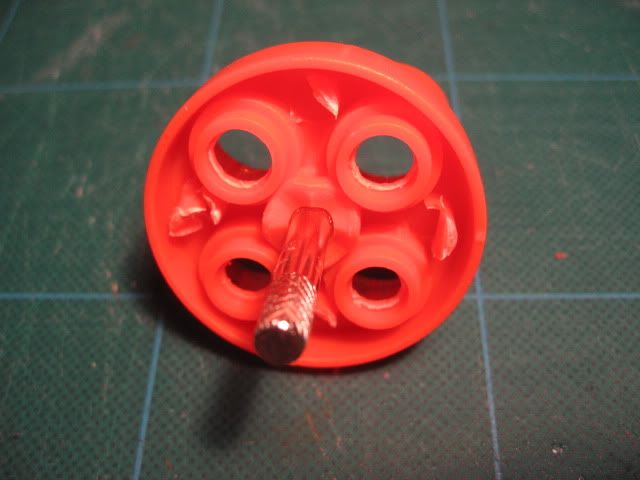
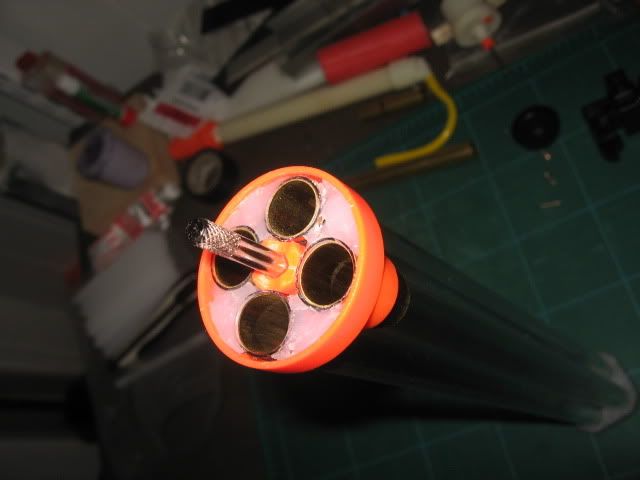
Now take out your craft foam and press the bottom inner half of the turret into the craft foam. This will give you an impression and show you where to cut. Cut out the circle a little wider than the impression. Cut out the center (I used a bit of brass to cut the circle by pressing and twisting into the foam) and fit the circle into turret. Trim as necessary.
I opted to use craft foam instead of rubber sheets because the cuts on my PETG were not straight and I wasn't able to get a good seal on all the barrels. Craft foam helped to seal against barrels that's weren't cut straight.
Once you have a good and snug fit all around, make a second circle from the foam.
Once you have the two, apply goop and sandwich the two sides together. Be sure to cover the entire area with goop. Let this dry for a while.
Once dry, fit this into the turret again and cut the foam away from the rear-loading slot, but keep the cuts close. You'll want as much foam there to keep the two halves aligned correctly.
For the inlet value, carefully cut/drill a 3/8" hole into the foam. I used a drill to make the opening and used a sanding bit on my dremel to clean/melt the sides to make it smooth.
Once that is done, apply goop to the inside of the turret and secure the foam.

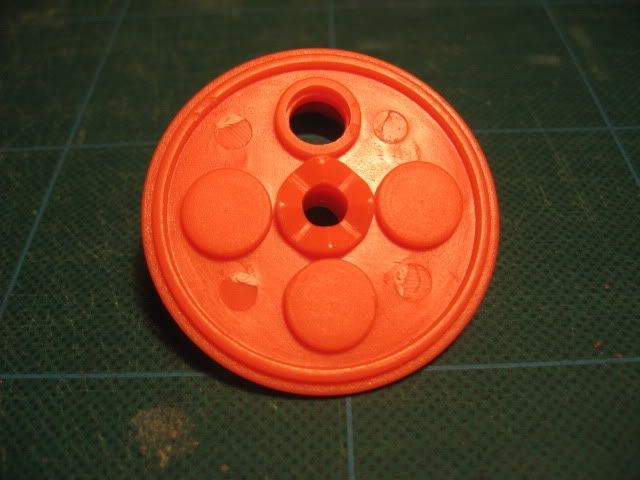
Top Half
Set the bottom half of the turret to the side and pick up the top half. The holes in the turret will need to widened to be able to get PETG all the way through. So using your 1/2" drill or a dremel open them up.
You should wrap a couple layers of electrical tape around the PETG to help secure them to the turret, but don't wrap all the way to the tip! You don't want the tape to be seen inside the turret. The reason is because the PETG will rest almost directly on the teeth of the rotation mech, having extra layers will deform and/or push the PETG which you do not want.
You will also want to line up the PETG with the lowest point on the teeth of the rotation mech. Make sure the PETG is secure so that you can test the alignment of the barrels.
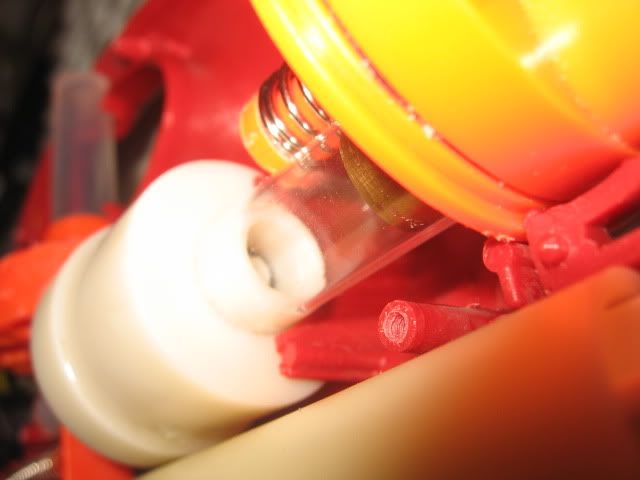
Close the two halves of the turret and add the spring and twist on the cap. Test the rotation of the turret and see how the seal works by plugging the inlet valve and blowing down the firing barrel. Adjust barrels as needed.
Once you are happy with the turret, separate the two halves again.
Now all hot glue into the space between the barrels of the top half of the turret to secure them. Be sure to not have glue go above the barrel's height or have glue in the teeth of the rotation mech.
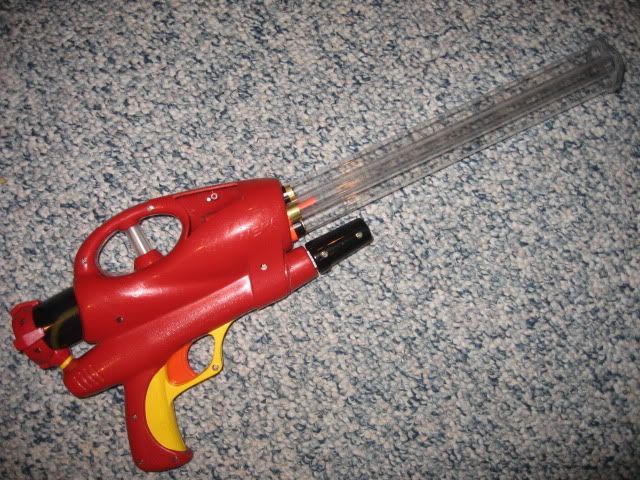
You can optionally insert a segment of 17/32" brass into the back of each PETG barrel to help hold darts. Secure with a little zap-a-gap.
Close the two halves and take a break.
Step 6 - Tank to Turret
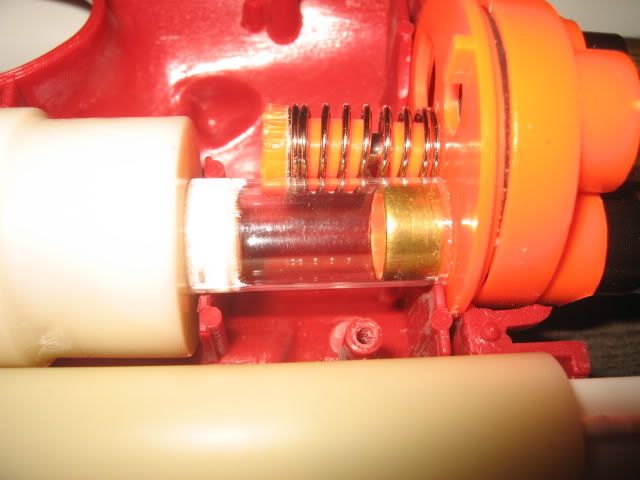
The difficult parts are over. Place the tank and turret back into the shell and measure the length between them. Make sure you are measuring from the actual tank (not the small wall) to the turret (not the inlet valve). Cut a length of PETG a little longer than that length and carefully twist it onto the tank's dump valve.
This should be a pretty tight fit already. Secure it by gooping around the base of PETG.
Slip a small piece of brass over the inlet value of the turret and secure that with zap-a-gap and goop. Then slip the PETG over that and test fit the assembly in the blaster as you may need to trim the PETG.
When that is good, goop the base of the PETG on the turret.
Edited by popatachi, 19 November 2010 - 12:10 PM.