
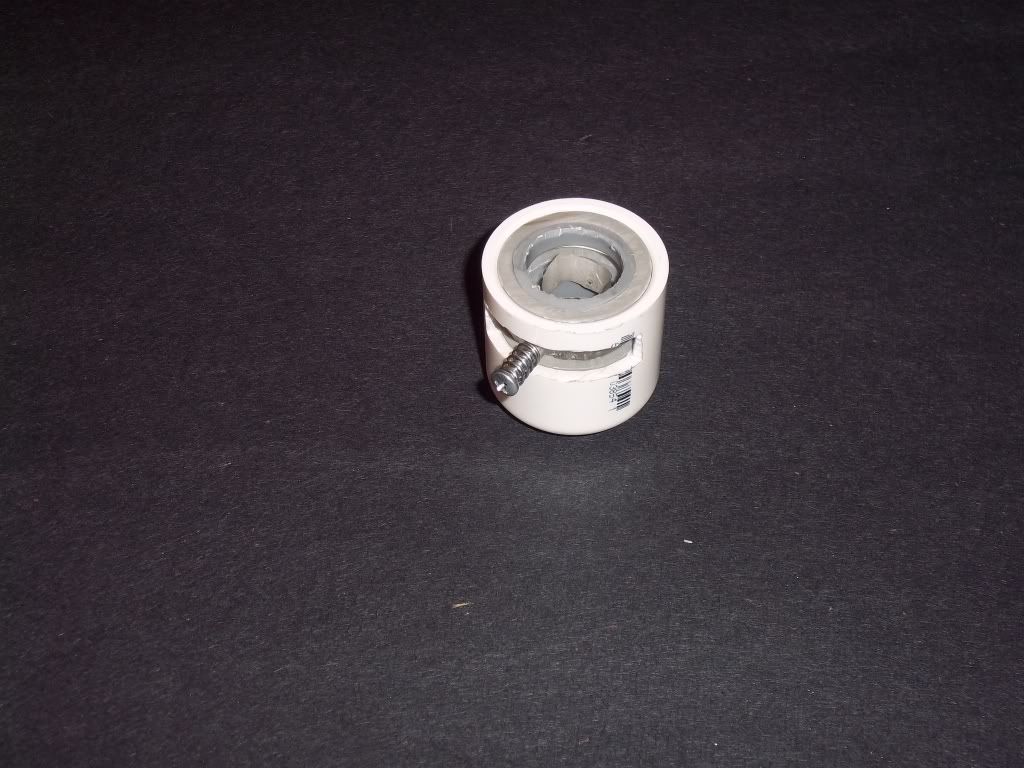
This catch design is way simple, I've found different dia. pipe and fittings that allow me to scale this up (1 1/2 dia.) or down (1/2 in. dia.) to different plunger tube dia. making it very versatile. Only a couple moving pieces keeps it simple and dependable.....and cheap. The catch assembly shown is for a 1 1/2in. dia. plunger tube. I use a 1 in. sch. 40 end cap, Charlotte (round dome type, not flat). I cut a slit the width of the thickness of the catch plate thickness. almost half way around the circumfiance of the cap. Check fit with cut out catch plate. Keep all surfaces smooth burr free. I then drill a hole the in the top of the end cap to accommodate the dia.+ of your plunger rod. This helps stabilize rod and keeps it centered in the catch plate.
Little helpful hint* I always use the factory cut ends of materials I'm using in the tight tolerance places, maybe because sometimes its hard for me to achieve the same quality of cut being somewhat of a hacker and all.
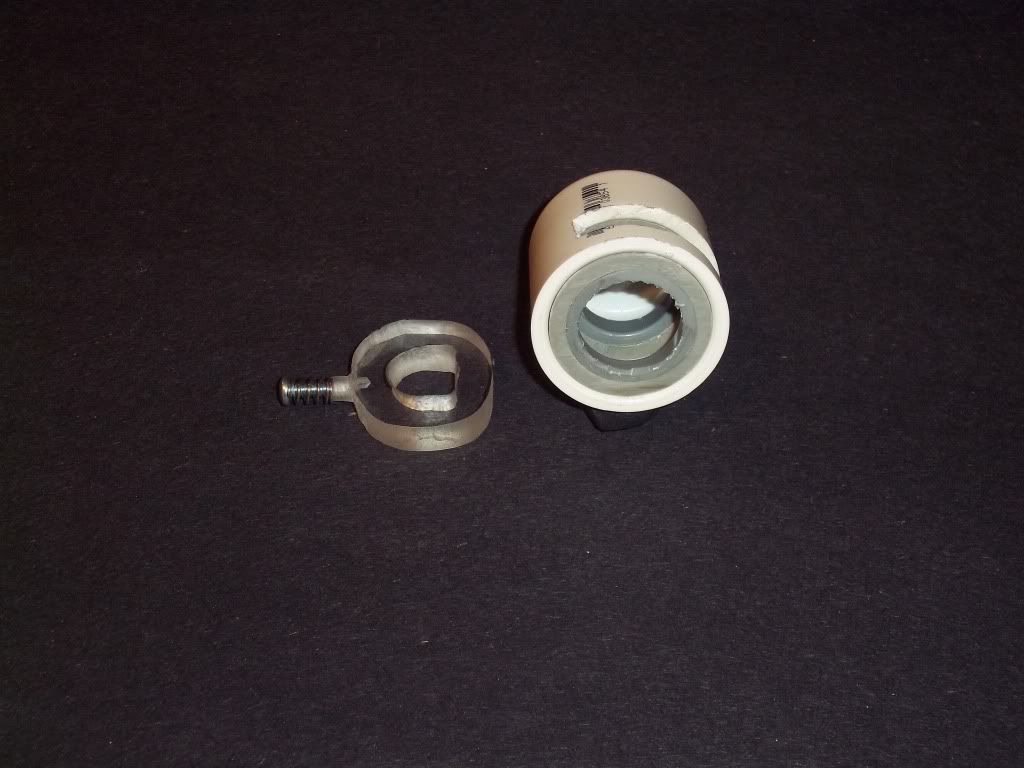
Then I cut 2 rings a 1/4 in. width spacers from 1 in. dia. (grey) sched. 40 conduit, one for each side of the catch plate guide inside the end cap. I also do the same with 2 1/2in. end caps, cutting the spacer rings a 1/4in. wide. These two rings, the 1in.dia. and the 1/2in end cap rings (glued together, one inside the other) make up the guides for the catch plate to slide between, when glued inside the 1in. end cap positioned on each side of the slit opening.
Sorry if this is all so confusing, I will try to do a write up soon w/picture and all. Its just that I'm crazy busy at the present time.
Cut the catch plate itself out of some durable material, lexan, ABS or whatever scraps you might have around. Check fit with dia. of plunger rod you are using. Tap a screw in the bottom of plate, !/2 in or 3/4in. small pan head machine screw will work. Get a small spring with dia. big enough to accommodate screw dia. this will spring load catch plate to engage the notch on your plunger rod.
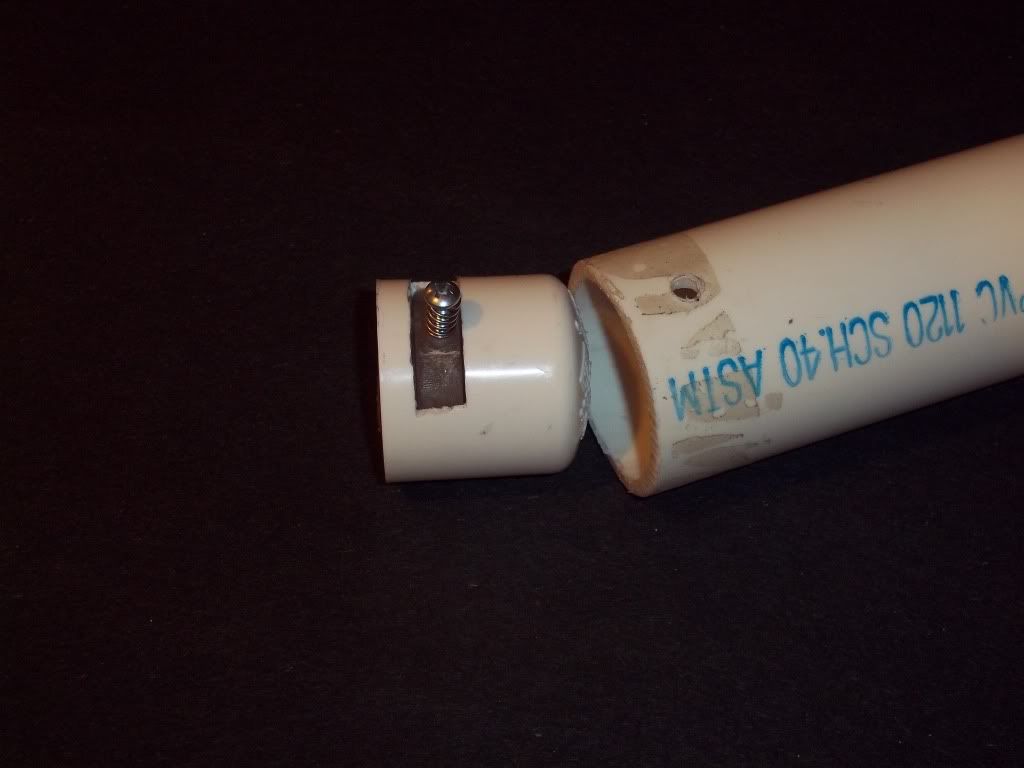
All that’s left to do is drill a hole in the side wall of your plunger tube (determined by spring length etc.) unscrew the screw and spring, slide assembly down plunger tube to where hole and bottom of catch plate align, screw the screw with spring into bottom of catch plate through the wall of the plunger tube (be easy and just snug up screw, plastic threads can strip without much force)
You can either glue or screw mount the assembly in place. Pressing the screw will lift the catch releasing the plunger rod. Monkey around with it to fine tune the travel and other characteristics desired, hair trigger etc.
Well that’s it, I hope that this info can help someone out there with there build. If you have any questions feel free to post here or pm me anytime. Thanks again for the info you guys offer out to the nic. Later, Mod


