Jump to content


Photo

Quick Stampede Rechargeable Battery Mini Write-up

Uses parts found at all hobby stores.

7 replies to this topic

#1 Wes7143

Wes7143

    Member

  • Members
  • 758 posts

Posted 09 September 2010 - 05:59 PM

I bought a Stampede the other day, and I'm lazy. I mean, I didn't even want to go buy D cells, I was so lazy. So, I thought of a quick, extremely simple modification that took me about 5 minutes once I had everything gathered together.

Materials:

-Large Tamiya MALE type connector (found at just about any hobby shop)

-A battery of the proper voltage with a large Tamiya female type connector. (I used an 8.4V)

-(optional) an insulation of some kind (could be paper, foam.. anything to stop an undersized battery from rattling around)

Tools:

-Screwdriver

-A clipping or cutting tool

-Soldering iron

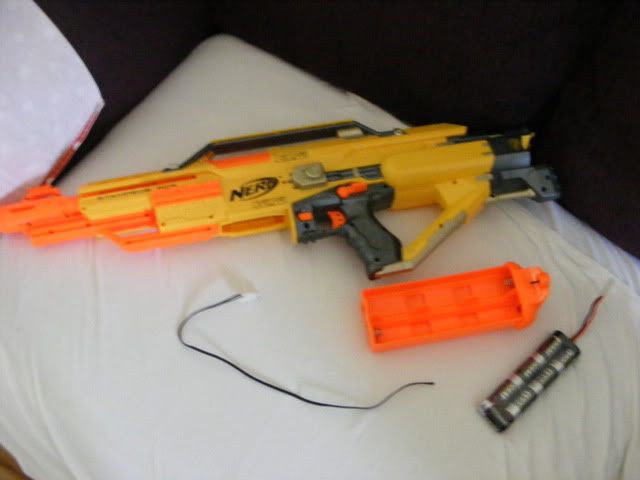
Here are all of the necessary materials together with the gun

Posted Image

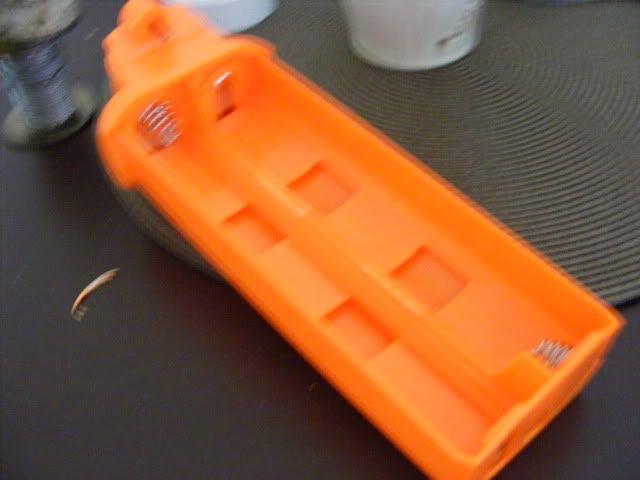
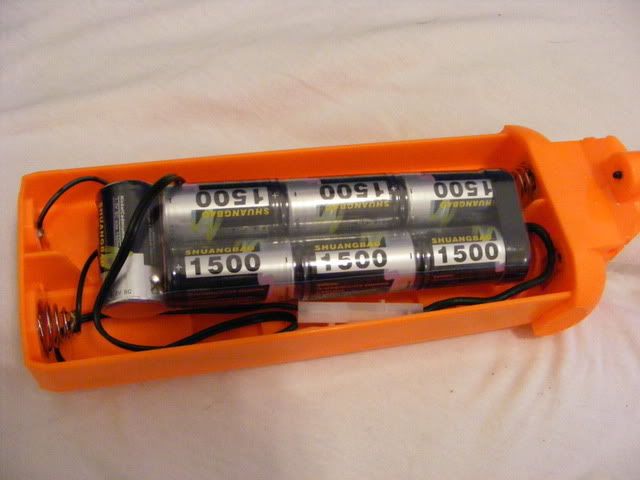
Start by removing the tabs and barriers inside of the battery box. The middle divider needs to be clipped, but the others come out easily if you unscrew the bottom of the battery box.

Posted Image

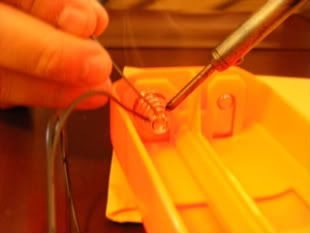
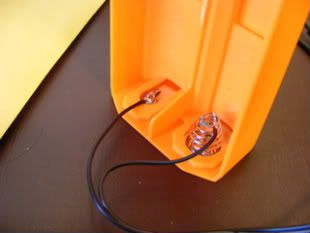
After establishing the positive and negative ends of both the battery box and the wires on your connector, solder the wires to their respective spots on the side of the battery box that enters the gun first.

Posted Image Posted Image

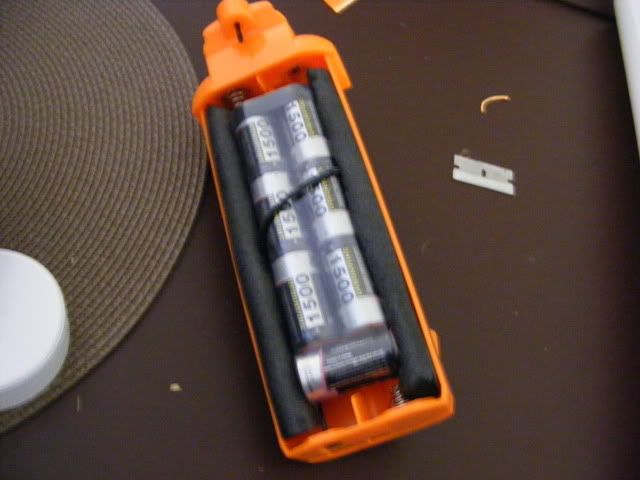
Your battery should fit in, since the stampede has such a large battery box. If you find your battery does not have enough room, use a dremel to completely remove the middle divider.

Posted Image

Add some insulation if necessary.

Posted Image

And, the blaster should work, like so:

Posted Image

Feel free to leave praises, flames, or death threats.
  • 0
QUOTE(VengefulWaffle)
Get off my boyfriend


If at first you don't succeed, add more epoxy.

#2 MavericK96

MavericK96

    Member

  • Members
  • 229 posts

Posted 09 September 2010 - 07:19 PM

Very nice, clean mod. I'm awaiting 2x 7.2v battery packs (similar to that one) and I'm going to see if two of them can be jammed in the battery compartment. If not, I will have to get creative. B)
  • 0

#3 rosenstyle

rosenstyle

    Member

  • Members
  • 5 posts

Posted 09 September 2010 - 10:00 PM

This is such a simple mod that can help quite a bit in the long run. I'm glad to see this up here. Good job on the write up as well. It's clean and concise.

Now about those death threats. All I'm going say is be careful... B)
  • 0
"When life hands you a Jeffree, stroke the furry wall."

#4 Lion

Lion

    Member

  • Members
  • 244 posts

Posted 10 September 2010 - 12:38 AM

Why was HALF the video, you screwing in the screws?
  • 0

#5 Chadpuff

Chadpuff

    Member

  • Members
  • 165 posts

Posted 10 September 2010 - 12:44 PM

How much did this cost you to do?

Edited by Chadpuff, 10 September 2010 - 12:46 PM.

  • 0
"Hokey religions and ancient weapons are no match for a good blaster at your side, kid." ...Han Solo

#6 MavericK96

MavericK96

    Member

  • Members
  • 229 posts

Posted 10 September 2010 - 04:56 PM

One thing to mention: If you are going to take apart the battery sled, two of the screws appear to be a weird triangle bit. Basically like a hex, but a triangle instead (not a tri-wing). I used a T7 Torx bit and it worked fine on it.

Just something to keep in mind, because a standard or Phillips head won't work.
  • 0

#7 stuck by stefan

stuck by stefan

    Member

  • Members
  • 280 posts

Posted 10 September 2010 - 06:32 PM

Hey, that's my fbr! Nice mod though.
  • 0

This is the NerfHaven profile of Northeast Designs. For more info visit https://www.facebook...p8OwIso&fref=nf

Old school Nerf engineer since 2008


#8 Wes7143

Wes7143

    Member

  • Members
  • 758 posts

Posted 10 September 2010 - 09:42 PM

Why was HALF the video, you screwing in the screws?

Because the video needed to include me putting the new battery into the gun, to prove that it worked. If you wanted to see a stampede fire, there are several other videos on the web.

How much did this cost you to do?

It cost me nothing, because I already had the materials. If you wanted to buy a tamiya plug, it would cost anywhere from $1.50 to $5.00, depending on where you get it from. I got mine from a cheap wall charger for an airsoft gun. As for the battery, prices range from $15 to $70, depending on the size, MAH, voltage, chemistry, and brand.

One thing to mention: If you are going to take apart the battery sled, two of the screws appear to be a weird triangle bit. Basically like a hex, but a triangle instead (not a tri-wing). I used a T7 Torx bit and it worked fine on it.
Just something to keep in mind, because a standard or Phillips head won't work.

I didn't need to take the triangular screws out to remove the sliding battery guides, although removing those screws would probably make it a little easier.
  • 0
QUOTE(VengefulWaffle)
Get off my boyfriend


If at first you don't succeed, add more epoxy.


1 user(s) are reading this topic

0 members, 1 guests, 0 anonymous users