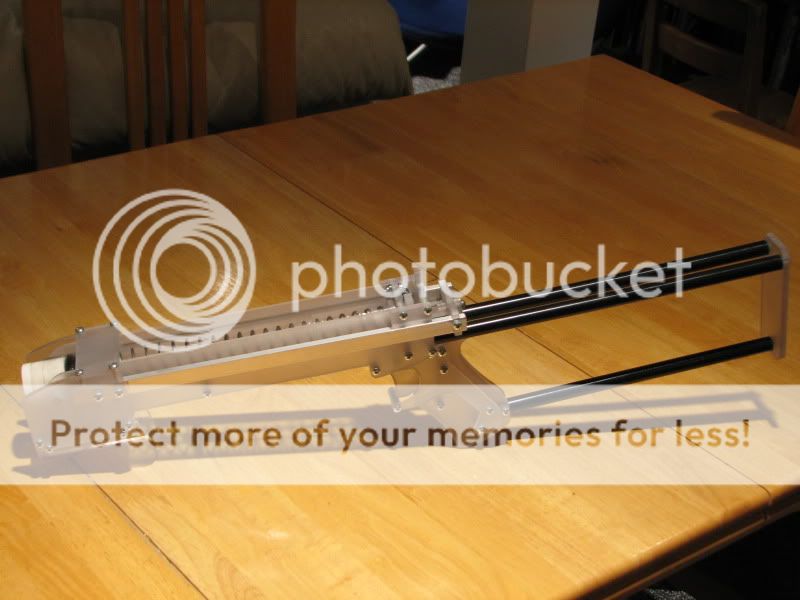
This is my take on the pump action Plusbow, herein the PAPbow.
This thread will serve as a semi-writeup/overview.
First off, credit to Ryan for his original idea and credit to Split for his awesome way of connecting the priming to the plunger rod.
I have been working on this for quite some time. This is my second design, but I have waited until it was working consistently to post. It is still not complete; in the next version I plan on changing a few minor things. Now on to the goods.
Materials
-Normal +bow materials
-Materials for a grommet plunger head
-90402A148
-89755K41
-9245K531
-91780A123
-91780A132
-[k25] spring
Tools:
-Band saw
-Scroll saw
-Drill press
-Drill
-Taps
-Files
-Bench grinder (optional)
Templates: will be available today or tomorrow. I have to finish changing the things I mentioned earlier.
Now the writeup.
Step 1: Print the templates on legal sized paper, paste them on to the PC and start drilling cutting. I don't feel like labeling thicknesses/holes but it isn't hard to figure out. All the 1/4" T pieces are grouped, and all the 1/8" T pieces are as well. As for the holes, drill them to the same size that you would on a normal Plusbow.

Then mark, drill, and tap holes on the sides of the pieces as shown. Make sure to label which side is which so the holes line up when you put it together.


You should end up with this:

Step 2: Put together the handle the same way you would on a regular +bow. The only difference is a 5/16" standoff that goes between the two core pieces toward the front.

Step 3: Assemble your catch like you normally would, and attach it to the side plates. Also put ½" standoffs in the side plates where shown.

Step 4: Cut three stock rods. The length can be whatever you want it to be, except two have to be 1 1/2" longer than the other one. I used 10, 10, and 8 1/2, but I think that is too short for my tastes. Now take the two longer ones, drill and tap holes in both ends, and attach it to your frame piece like you normally would. Then attach the frame piece to the side plates/handle, and add your stock. Put everything together so far and you should have this:

Step 5: Now take your shorter stock rod and mark where to cut the sides off so it fits in the grip. Then attach the flat end to the stock, and slip the cut end into the grip. Now align it so it is parallel to the other rods and drill through the whole thing and put a bolt/locknut on it. It's hard to explain, so hopefully this picture will show you.

Step 6: Take a 1 ¼" length screw and a catch spring. Bend the last loop of the catch spring and put the bolt through the two holes as shown. Add a locknut.


Step 7: Cut your plunger tube/plunger rod/bushing and put them in the gun as usual. If you are using a [k25], you will need a 1-1/4" O.D. washer on the back of the plunger head.

Step 8: At this point you should have a completely functional +bow, save for the priming handle. So we will start working on that. Assemble the handle as shown.

Step 9: Take your PETG tube and cut it in half. Make the cut two inches.

Then angle the crosscut to free the piece from the tube. You will end up with this:

Step 10: Mark holes in the PETG and drill/tap them and attach them to the holes on the handle. You will get this:

Edited by Lt. Stefan, 29 May 2012 - 03:32 PM.


 This topic is locked


