Jump to content


Photo

Crossbow-style Longshot

The Longbow (Jwasko style)

10 replies to this topic

#1 jwasko

jwasko

    PowerBeard

  • Moderators
  • 1,021 posts

Posted 04 February 2010 - 11:10 PM

The goal of this modification is to alter the Longshot (LS) in such a way that the completed product imitates the form and function of the legendary Nerf Crossbow (Xbow). It also includes a brass breech which one may choose to employ on any singled LS.

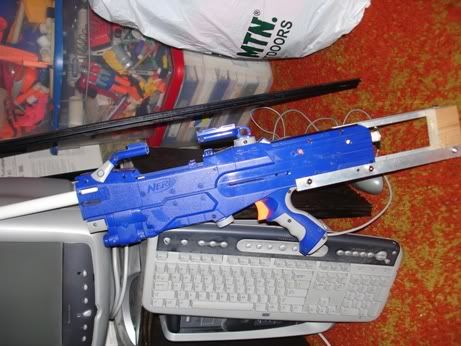
Several people have created Xbow-style LSes, which I and others have called “Longbows.” As far as I know, Balisticjoe was the first to post a Longbow online. I had been working on a version before that, and (if I remember correctly), Sputnik was, as well. We weren’t done, though, so Balisticjoe definitely deserves props for being first.

Nearly a year ago, I posted a video of my own version http://www.youtube.c...v5ggZPuGrM]here[/url]. It still needed work, but I set it aside in favor of other projects. Recently, however, I finished the modification.

In this writeup, I will include instructions on how to:
- Give the LS a Xbow-style plunger rod
- Make a sort of “backwards” Angel Super Happy Fun Time brass breech
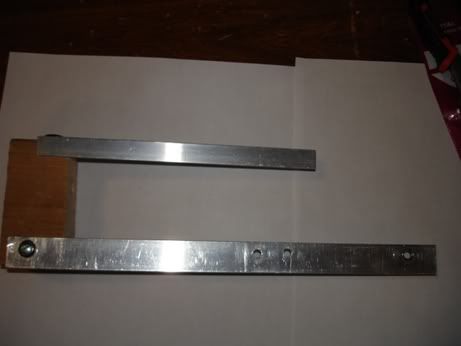
- Build and attach a stock that allows for the comfortable use of the new, Xbow-style plunger rod

These modifications do not rely on one another, so you could do just one of the three.

By the way: No, the breech doesn’t work with N-Strike clips (as far as I know). I built this to mimic the functionality of the Xbow: a single, long-range shot.

X-bow Style Plunger Rod

LS Parts needed:
- Plunger rod
- Catch
- Spring rest (the part that screws onto the plunger tube)
- Plungeer head (Optional)

Other Materials required:
- 0.5” Alminum tubing (get this from the bar stock section of Home Depot, Lowes, etc. It’s 0.5” OD with an ID of about 0.4”)
- 0.5” CPVC (must fit over 0.5” Aluminum)
- #8-32 threaded rod (aka All-Thread)
- 3x #8-32 nuts (you may wish to substitute one with a cap nut)
- 2x #8 split lock washers
- Fender washer (or other priming handle)
- several #8 washers (Optional)

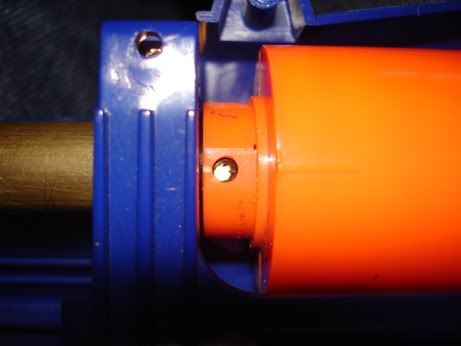
1. Open up your LS and take out the plunger rod. While you’re at it, remove the bolt from the plunger tube (you’ll need to cut it, of course)

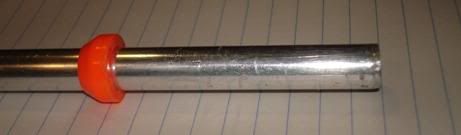
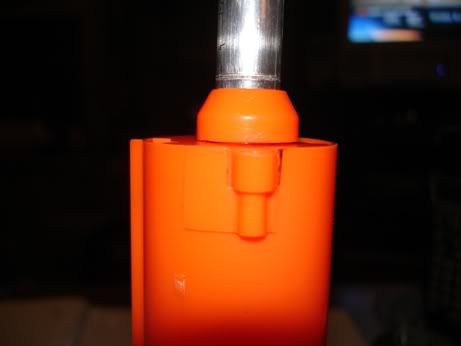
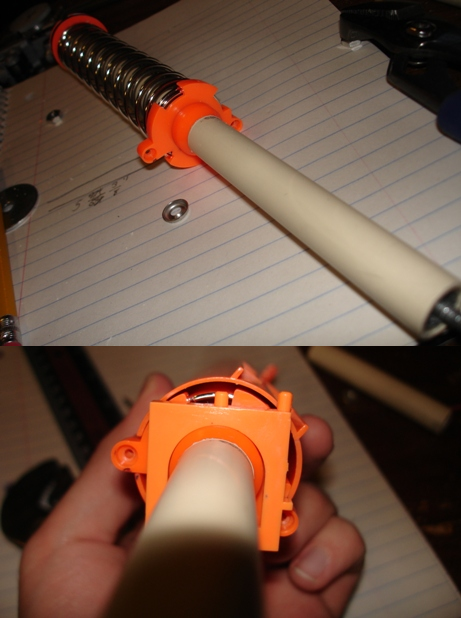
2. Cut off the “catch knob.” You may notice that the catch knob already has a 0.5” hole in it. Using a drill or dremel, extend this hole so that it goes all the way through the catch knob.
Posted Image
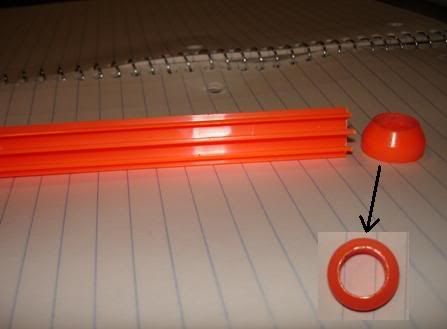
It should now be able to slide onto the 0.5” aluminum tubing:
Posted Image

3. If you want, you can make a replacement plunger head out of metal and neoprene fender washers (like here). I used the stock plunger head, instead. To do so, first cut the ridges off of the back of the plunger head like so:
Posted Image

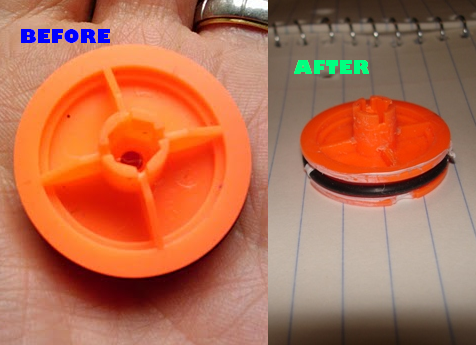
It should now be able to slide into the 0.5” aluminum tubing:
Posted Image

4. Measure the length of the new plunger rod: Put the plunger head into the aluminum tubing (Note: if you’re planning on adding any padding to the plunger head, do it now). Put this assembly into the plunger tube, then put the plunger tube into your LS.

I recommend cutting the aluminum about an inch past the back the LS.

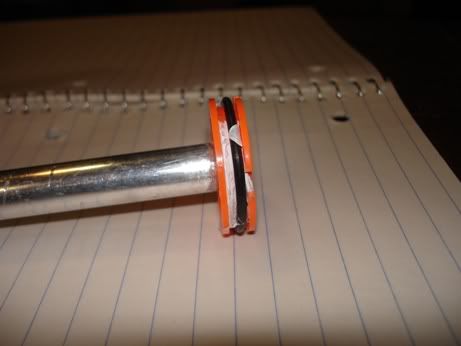
5. Measure the length of the rear CPVC spacer: Put the plunger head, spring rest, and catch knob onto the newly cut down aluminum tube.
Posted Image
Insert this into the plunger tube and screw down the spring rest. Slide the catch knob all the way down.
Posted Image
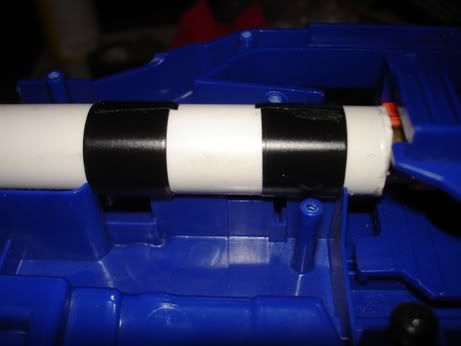
Now measure the length from the end of the aluminum to the back of the catch knob. Cut a piece of CPVC that is this length and slide it onto the aluminum. (Note: Depending on your piece of CPVC, this may actually require a hammer.

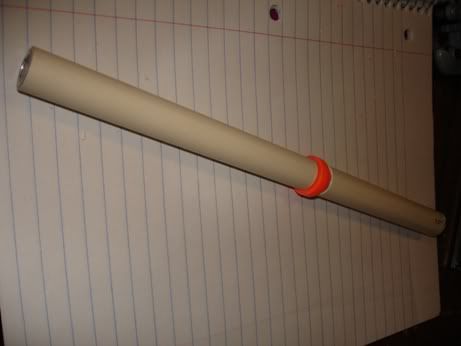
6. Cut a second piece of CPVC that covers the rest of the aluminum (the part in front of the catch knob).
Posted Image

7. Put the plunger head (stock or Captain Slug’s washer sandwich) onto the #8-32 threaded rod. Put a nut behind it, and the following in front of it (in order):
- #8 washer
- #8 split lock washer
- #8-32 nut
Posted Image

As you can see, I put a piece of craft foam (for cushioning) on the front of my plunger head.

You may also want to add a few #8 washers or nuts onto the middle of the threaded rod. The #8 nuts and washers fit well inside the aluminum tubing and thus help prevent the threaded rod from bending.
Posted Image

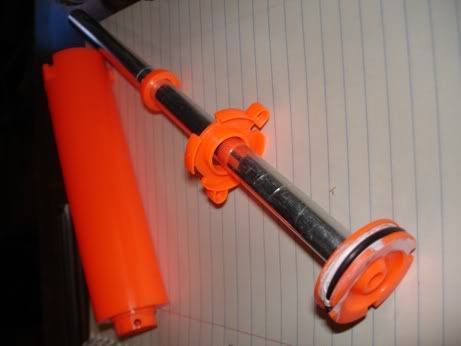
Once you’re done with that, you can slide the threaded rod (with plunger head) into the aluminum/CPVC assembly
Posted Image

Make sure you put the plunger head on the flat side of the catch knob.


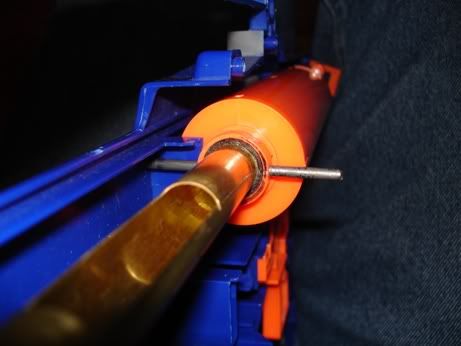
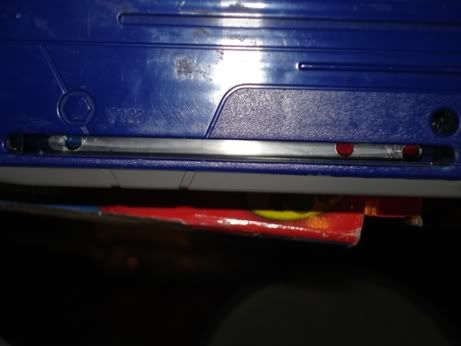
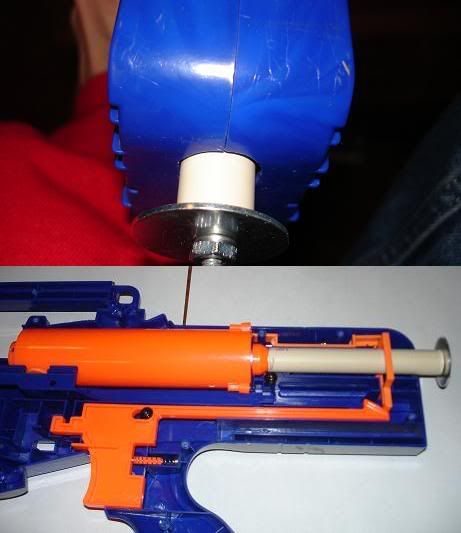
8. On the other end of the plunger rod, add a priming handle. I used a 1.25” by 3/16” steel fender washer. Secure it with another lock washer and #8 nut.
Posted Image

Then cut down the threaded rod so that it is flush (or nearly so) to the nut.

9. Before your final assembly, put the following onto your plunger rod:
- Spring(s)
- Spring rest
- Catch
Posted Image

Make sure you put everything on the right way, too. You should be able to disassemble it if you need to, but it can be a bit of a pain after you’ve tightened down the nuts.

Then you can insert the whole thing into the plunger tube and screw the spring rest onto the plunger tube.

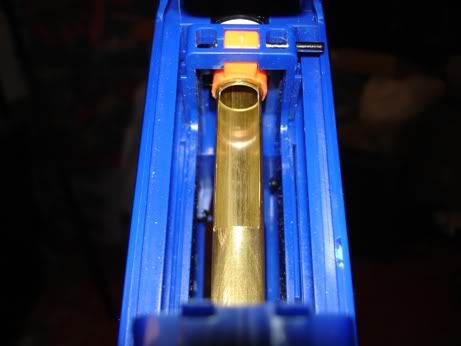
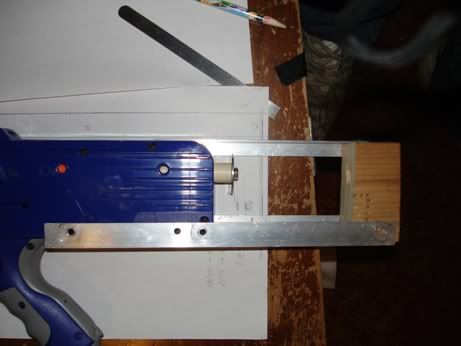
10. Drill/dremel a hole in the back of the LS that will allow the plunger rod to pass through.
Posted Image

Edited by jwasko, 18 February 2010 - 01:56 PM.

  • 0

-Jwasko, STILL Sole Surviving member of Steel City Nerf and Sober Sister of the Sex Dwarves
We NERF ON all day, and FUCK OFF all night


#2 jwasko

jwasko

    PowerBeard

  • Moderators
  • 1,021 posts

Posted 04 February 2010 - 11:14 PM

I developed a “Reverse Angel Breech” Super Happy Fun Time brass breech for my Longbow. I don’t intend to use it with an LS clip; I just wanted a dead-space-efficient brass breech that can be operated by the stock bolt.

In stead of the breech opening by sliding brass back, it opens by sliding the barrel forwards:
Posted Image

It’s probably more complicated than it needs to be, but whatever. I like it.


LS Parts Needed:
- Bolt
- Bolt sled

Other Materials Needed
- 17/32” brass tubing (at least 9 inches)
- 9/16” brass tubing (about 6 inches)
- 19/32” brass tubing (at least 9 inches)
- 1/8” metal rod (I used 1/8” music wire)
- 1/2” Sch. 40 PVC

1. Cut the brass like so:
a. 4.5 inches of 9/16”
b. three 3/8 inch long pieces of 9/16”
c. If you want to use a barrel shorter than 12 inches long, cut down the 17/32.” However, the barrel needs to be at least 9 inches long for this breech.
c. 4 and 3/8” of 19/32.” Use a pipe cutter for this cut. As you cut the one end, make a tightening ring before cutting all the way through.
Posted Image
(Note that the pieces there have had some work done on them, and not all of the 3/8 inch long pieces are pictured…one is on the 17/32” piece.)

2. Cut off the end of the stock LS bolt and glue it to the 19/32” brass. Note that the front of the plastic piece should not be on the end of the brass.
Posted Image

3. Assemble the “barrel” half of the breech (we’ll just call it the barrel from now on) like so:
Posted Image

You’ll want to glue the pieces of 9/16” to the 17/32” brass.

4. Drill a 1/8” hole through the “output” of the plunger tube. Make sure that, when a piece of metal rod is put through this hole, it does not hit the nut on the plunger head.
Posted Image

5. Wrap electrical tape around one end of the 4.5 inch long piece of 9/16” brass until it fits snugly into the “output” of the plunger tube. Put the 9/16” in until it hits the front of the plunger, and then pull it out slightly (about 1/8”). Drill a 1/8” hole through the brass and electrical tap, using the holes drilled in step 4 as a guide.
Posted Image

These holes will allow the use of the 1/8” metal rod (mentioned in step 4) as a dart stop.

6. Put the plunger tube (with the long piece of 9/16” brass) in one half of the LS shell. Using the previously drilled holes as a guided, drill a 1/8” hole in the shell. Then, do the same on the opposite side of the shell.

7. Close up the shell and insert your metal rod through the holes drilled in the shell. Cut the rod so that it is just barely long enough poke out of the shell on either side.

Passing the rod (aka “pin”) through the shell as well as the plunger tube accomplishes two things:
a. Keeps the friction of the breech closing from putting strain on the output of the plunger tube
b. Reinforces the front supports of the plunger tube (which resist the force of the plunger slamming into the front of the plunger tube)

This is the best picture I have of the finished product:
Posted Image

8. Cut off any excess electrical tape from the 9/16” brass (that is: any electrical tape that is not covered by the plunger tube).

9. Connect the barrel to the bolt sled.

10. Slide the 9/16” brass (still attached to the plunger tube) between the 17/32” and 19/32” pieces of brass of the barrel. Put the whole plunger tube/breech/barrel assembly into the shell.

10. Slide the bolt sled (and the barrel with it) all the way forward. Mark where you want the breech slot (in the 9/16” brass) to be. It should begin where the 19/32” brass ends, and there should be at least a quarter inch of uncut brass between the plunger tube and the end of the breech slot.

Here is a picture of my cut breech slot…it’s only about 1.75” long, since I use short darts.
Posted Image

Note that the breech slot is on top of the 9/16” brass, since this is a single shot blaster (like the average Xbow).

11. Remove the 9/16” brass and cut the breech slot, then reassemble the breech. Don’t forget to add the pin.

12. Cut a piece of PVC that covers the entire barrel when the bolt sled (and barrel) are in the forward position. It fits where the stock LS barrel was; I just used a few wrappings of electrical tape to keep it from sliding with the breech.
Posted Image

13. Glue the second piece of 19/32” to the inside of the PVC barrel sheath, making sure that it still allows your breech to be opened all the way.

13. You may wish to cut off all or a portion of the tacticool rail in order to make loading easier. I chose to only cut off a portion, since I can aim down the rail rather well.
Posted Image

------------------------------------------------------------------------------------------------------------------------------
------------------------------------------------------------------------------------------------------------------------------

Here’s an easily removable yet sturdy stock for a Longbow (or, really, any LS):
Posted Image

Here’s how to make it:

Materials Needed:
- 3/4” wide x 1/16” thick Angle (Offset) Aluminum
- A ~2inch long piece of 2x4 wood
- #10-24 threaded rod
- 4x #10 lock washers
- 4x #10-24 cap nuts (or regular nuts)
- 3x #8 (3/4” long) metal screws
- 3x #6 finishing washers

1. Prime your Longbow. The front of the wood 2x4 block should be at least a quarter inch behind your plunger’s handle, but a half inch is safer. You can make your stock even longer, if you want.

2. Cut two lengths of the aluminum angle. Their length depends on how long you want your stock to be; they need to cover the slots that the normal LS stock slides in, plus extend how ever far you want.

Mine are 11 inches long.

3. Put one of the pieces of aluminum angle on the bottom of the LS, over the aforementioned slot. Use something (a pen/pencil, or you can scratch it with a screwdriver or some such) to mark either end of the slot onto one piece of aluminum angle.

4. Then drill two 1/4” holes, just short of those two marks you made. Don’t drill the holes too far apart; tightening the nuts later will add enough friction to make up for any wiggle room.
Posted Image
(Note: Ignore the hole in the middle…that was for an experiment)

5. Drill a 1/4” hole about an inch from the back end the piece of aluminum (this is where the wood block will be attached).

6. Use the holes in this first piece of aluminum as a guide to drill holes in the second piece.

7. Cut pieces of #10-24 threaded rod, and use the lock washers and nuts to attach the pieces of aluminum to the Longbow.

8. Cut about 1/3” off the top (or bottom) of the wood, so that its top is even with the top of the LS
9. Put the wood block in place, making sure that there’s enough room to prime the Longbow. Drill small pilot hole into each side of the wood, using the holes in the back of the aluminum as a guide.

When doing so, make sure that the wood is pushed firmly down against the aluminum

10. Put a #8 metal screw and a finishing washer on either side to secure the wood.
Posted Image
At this point, the stock is already rock solid.


11. Cut another piece of aluminum angle, about 8 inches long, and drill a 1/4” hole near one end. Using this hole, attach the aluminum to the top of the wood block using another metal screw and finishing washer.
Posted Image
This piece serves as a cheek guard.

Because I’m left handed, I put this piece of aluminum on the top right hand side of the wood block to protect my cheek. If you’re right handed, you’ll want the cheek guard on the top left side.

I didn’t put a cheek guard on both sides because it made it a little difficult to grab the priming handle. With just one, on the other hand, there’s plenty of room and priming it is very easy.

And…done.
Posted Image

I used this blaster at an indoor war a few weeks ago and was quite satisfied with it.

The only thing I would like to do is some shaping on the buttstock.

No, I haven't range tested. Maybe I'll do that in the spring.

Edited by jwasko, 18 February 2010 - 01:57 PM.

  • 0

-Jwasko, STILL Sole Surviving member of Steel City Nerf and Sober Sister of the Sex Dwarves
We NERF ON all day, and FUCK OFF all night


#3 HOTH

HOTH

    Member

  • DO NOT TRADE
  • 557 posts

Posted 04 February 2010 - 11:25 PM

Very cool. Much more theorizing, engineering, and cleanliness than I expected.
  • 0
My YouTube

Solved the Rubik's Cube in 46 seconds

"Nobody understands quantum mechanics" - Richard Feynman

#4 Broderick

Broderick

    Member

  • Members
  • 279 posts

Posted 04 February 2010 - 11:49 PM

Really fantastic mod here, I like that Breech. Are you sure 9" of 17/32" Brass isn't pushing it a bit?
  • 0

#5 Mr BadWrench

Mr BadWrench

    Member

  • Members
  • 781 posts

Posted 05 February 2010 - 12:24 AM

Very cool. Much more theorizing, engineering, and cleanliness than I expected.


Never Underestimate a Wasko
  • 0
NerfChat IRC Chatroom Click to chat!

#6 jwasko

jwasko

    PowerBeard

  • Moderators
  • 1,021 posts

Posted 18 February 2010 - 02:19 PM

Just realized I never answered this question:

Really fantastic mod here, I like that Breech. Are you sure 9" of 17/32" Brass isn't pushing it a bit?


If you're talking about barrel length:

Angel used a 12" piece of 9/16" for his barrel, with 2.5" to 3" cut down to a half-pipe at the end. So, he probably had about 9" of useful barrel (with several inches of dead space behind it).

If you're talking about barrel diameter:

It all depends on one's darts. My darts pretty much fall right through 9/16" brass, and are fairly tight in 17/32".

If 17/32" is way too small for your darts, just increase the size of each piece of brass by 1/32". There's plenty of room in the plunger tube for a larger piece of brass than 9/16". The PVC shroud probably won't fit anything larger than 19/32", but you could substitute it for 3/4" CPVC (it has a slightly larger OD and significantly larger ID)...you'd probably need to sand the inside of your LS a bit for it to fit.

If you want a telescoping brass barrel, you could shorten the 17/32" barrel by several inches and replace the end with a solid piece of 9/16" (taking the place of the two 9/16" rings close to the muzzle), like so:
Posted Image

But, all in all: I don't really spend that much time draining every inch of range out of my blasters. If I did, I would experiment with dart fit and get the barrel length down to the inch; in reality, I just left a whole 12" of 17/32" on mine.

If you (or anyone) perform this mod and do it better, feel free to post a suggested barrel length...or a whole new writeup.
-----------------------------------------------------------------------------------------
Otherwise, thanks for the compliments guys.

Never Underestimate a Wasko

People have died.


(Probably not...but, you never know)
-------------------------------------------------------------------------------------------
Alternatively:

Never Underestimate a Wasko

Especially one with a Reactor in his hands.

Edited by jwasko, 18 February 2010 - 03:55 PM.

  • 0

-Jwasko, STILL Sole Surviving member of Steel City Nerf and Sober Sister of the Sex Dwarves
We NERF ON all day, and FUCK OFF all night


#7 ultimatenerf 320

ultimatenerf 320

    Member

  • Members
  • 38 posts

Posted 28 February 2010 - 07:55 PM

Nice mod but, isn't this just making a fancy singled ls with a still good boltsled? But even if it is, looks and most likely is awesome.
  • 0
I am not Mr.fail, but I am just-ever-so-slightly-insane.
"don't srcew with me, I have badass sword-fighting skills."
FL wars are amazing and Effeminate.

#8 NerfArmory

NerfArmory

    Member

  • Members
  • 8 posts

Posted 02 March 2010 - 04:58 PM

Holy crap that thing is Effeminate! But yeah I would reccomend padding on it. All that power just HAS to be loud.
  • 0
To Nerf, Or not to Nerf? That is the question.

#9 wohnson89

wohnson89

    Member

  • Members
  • 70 posts

Posted 02 March 2010 - 10:53 PM

Wow, i like how this turned out. I have seen people that try to turn longshots into xbow's, but this is the best engineered/most detailed write up I have seen yet. There is no doubt in my mind that this took forever to plan out. Mad props man,
Posted Image
  • 0
Make it idiot proof and someone will make a better idiot.

1992 Subaru SVX- My Baby


#10 jwasko

jwasko

    PowerBeard

  • Moderators
  • 1,021 posts

Posted 05 March 2010 - 05:26 PM

Nice mod but, isn't this just making a fancy singled ls with a still good boltsled?

Pretty much, yeah.

But yeah I would reccomend padding on it. All that power just HAS to be loud.

I made this recommendation in step 7 of the first post; however, I'm not so much worried about noise as I am about durability.

Thanks for the compliments.
  • 0

-Jwasko, STILL Sole Surviving member of Steel City Nerf and Sober Sister of the Sex Dwarves
We NERF ON all day, and FUCK OFF all night


#11 sputnik

sputnik

    Member

  • Members
  • 911 posts

Posted 11 March 2010 - 03:30 PM

Ah, I remember when you first came up with this.


Glad to see you improved it again.
  • 0
tcambre on IRC.

<3


0 user(s) are reading this topic

0 members, 0 guests, 0 anonymous users