Longshot With Cpvc And '2k Pump Tube Breech
#1
Posted 26 August 2009 - 02:23 AM
Overview
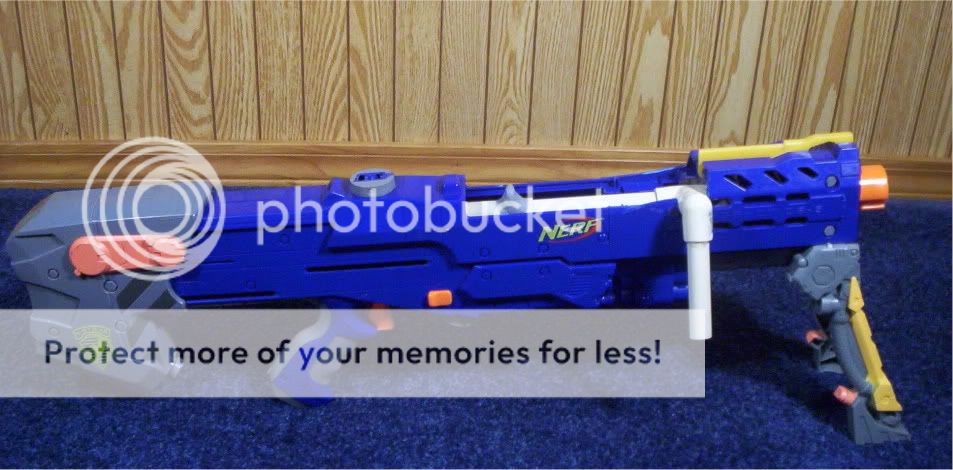
My intention was to make a new CPVC breech with minimal deadspace and that I wouldn't have to worry about harming my fingers with. I had to move the handle forward two inches to accommodate the 3+1/2" to be able tocock it.
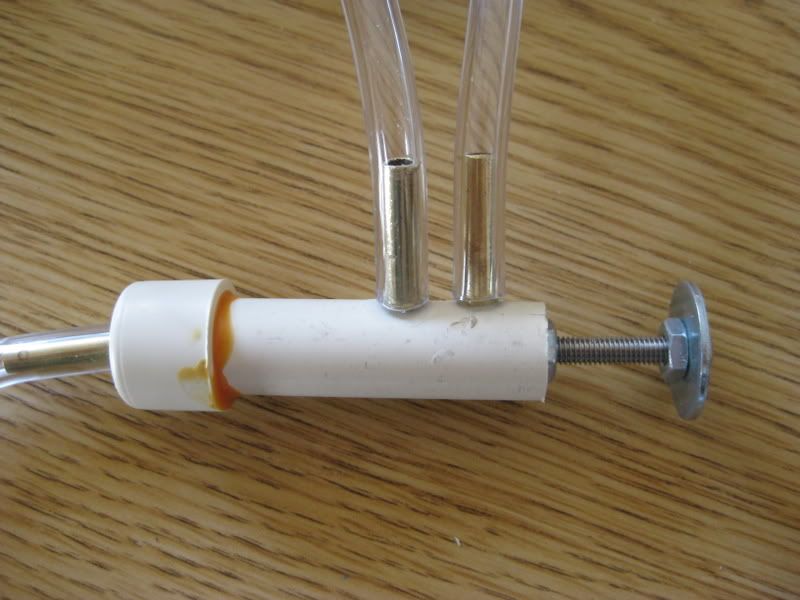
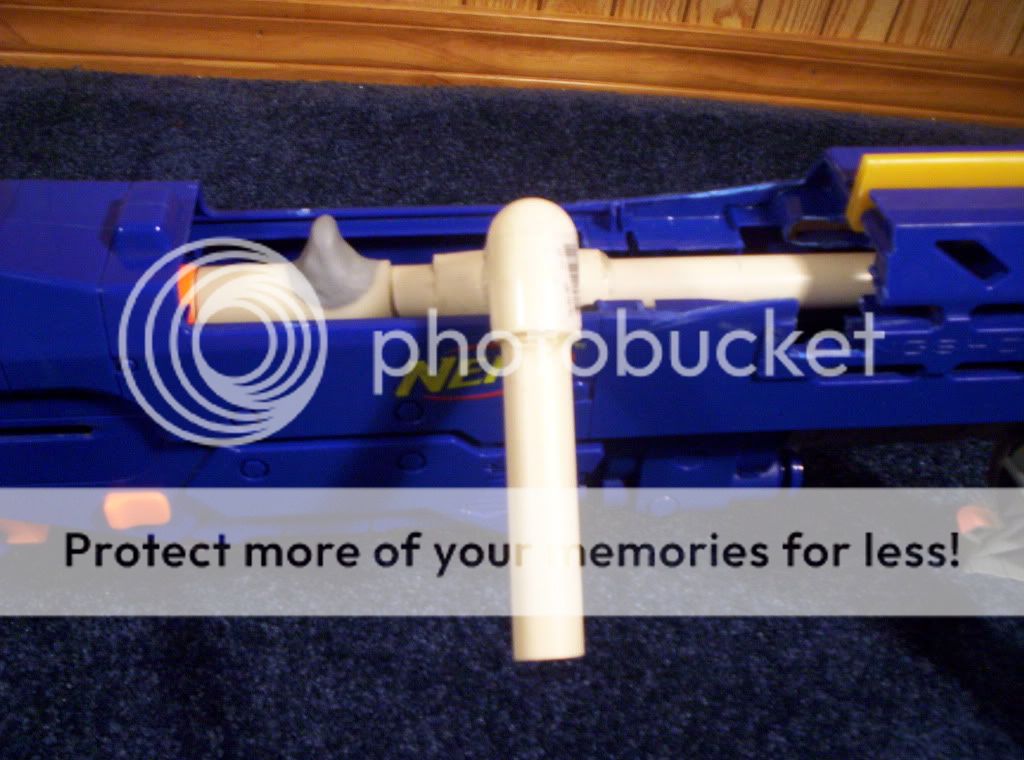
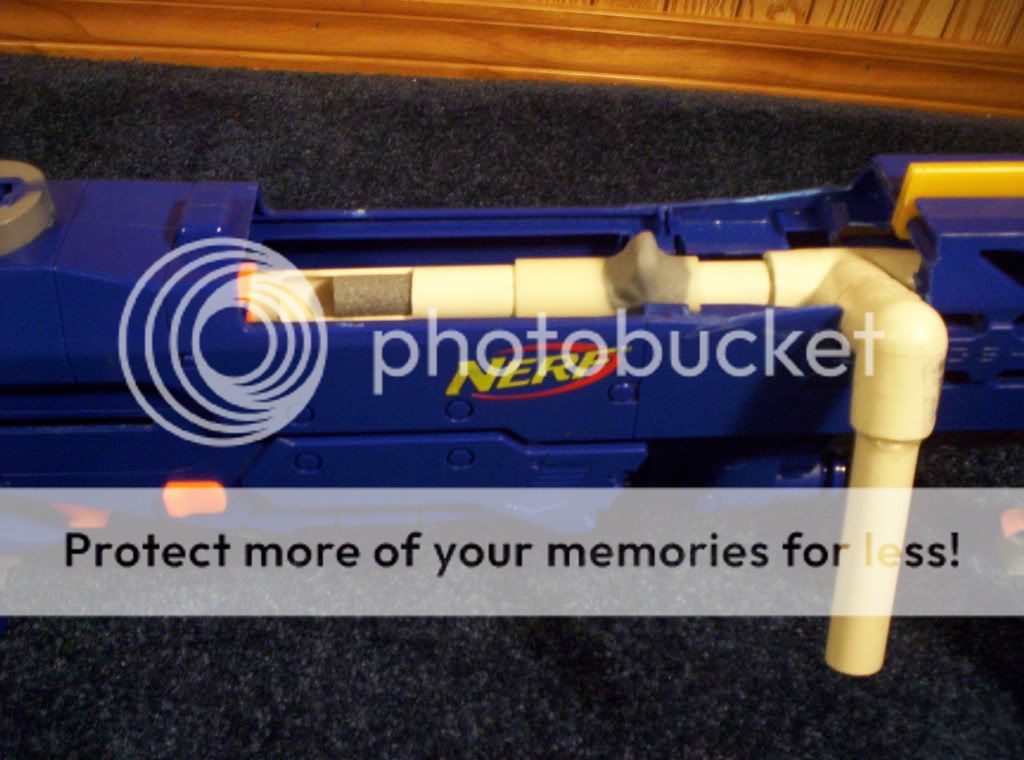
The breech assembly out of the shell:
^visible are the bolts I added to reinforce the epoxy
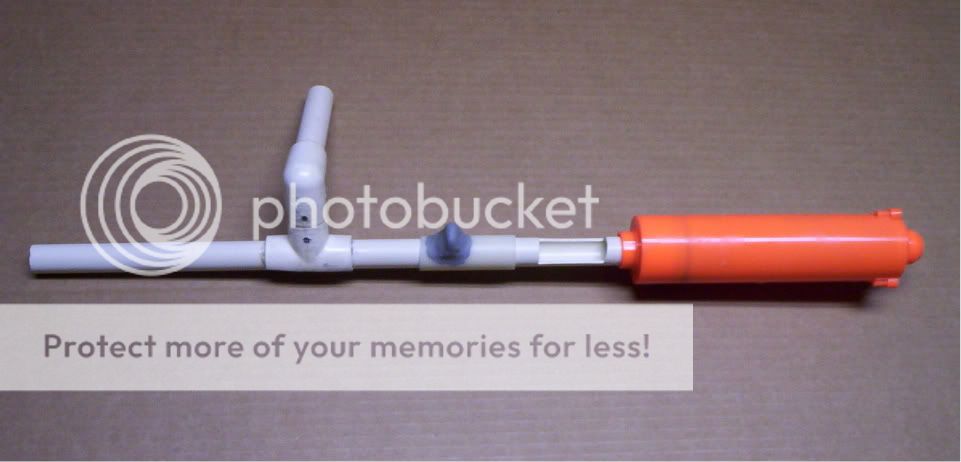
Here's a drawing too:
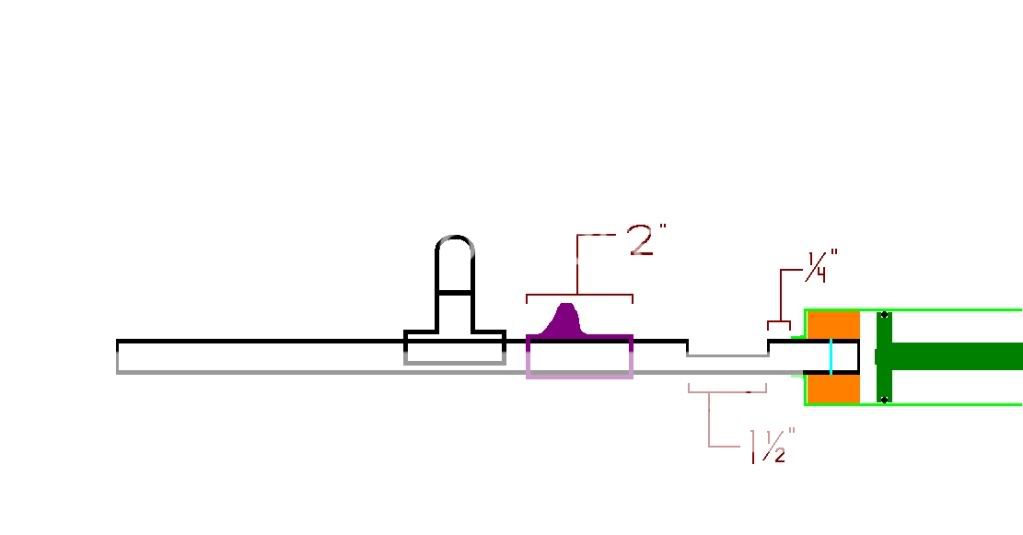
It's pretty straightforward, the purple thing is the breech cover, the little blue thing is a dart stop, black is CPVC, some measurements are shown.
Construction:(sorry, no pictures, this is post construction after all)
Took it apart,removed the stock breech and a lot of the internals
I made the breech using 14" of CPVC, I cut a loading slot 1+1/2" long, 2" from one end. The dart stop is roughly 1/2" from the end of the CPVC, I epoxied it directly into the orange/black pushing back part, NOT to the tube coming from it (the CPVC is in contact with the plunger head). Then I slipped the plunger tube over the cpvc (not forgetting that oring) and 2" of AT2K pump tube. 7" from the back of the breech I epoxied on half of a CPVC teeto attach the handle to. Then I cut up the shell to allow it to fit and to lock forwards
Operation:
Rest:
Primed (back):
Primed (forward):
Loaded:
Breech closed:
I have some plans for improving it... Integration much?
[/evil laugh]
Questions/whatnot?
Rainbow Clan
#2
Posted 26 August 2009 - 08:58 AM
-chefdave
#3
Posted 26 August 2009 - 05:29 PM
Don
#4
Posted 26 August 2009 - 06:37 PM
Did you base it off of my sadly underused design?
Edited by venom213, 26 August 2009 - 06:38 PM.
#5
Posted 26 August 2009 - 08:07 PM
My design doesn't change the volume of the pressurized space (I think that's what the problem is with yours). It is based a little off of a valve in a brass instrument (former trumpet/Baritone TC here), my intention is to have a multiple stage release, The rubber washers I'm using (00) are very stiff. I think it will work well after I've lubed it and stuff.
There isn't much room to work with the LSFG integration I'm trying to work around that and make it function like a Splitfire.
Rainbow Clan
#6
Posted 27 August 2009 - 07:09 AM
-Fresh
#7
Posted 27 August 2009 - 06:45 PM
#8
Posted 28 August 2009 - 02:11 AM
I believe this is the gun I got hit in the forehead by as I was peeking from behind a tree @ about 50'.Questions/whatnot?
Nice work all around, good luck w/ the integration!!
#9
Posted 31 August 2009 - 06:33 PM
This is the mock-Splitfire system I've been working on:
Compared to Splitfire internals:
The valve taken out:
And a simplified drawing: Before and after firing the two tanks.
Purple goes to the pump
Blue goes to the tanks
Green is the rubber sealing things
Red is 10/32" threaded rod/spacer/nuts
Black is thinwall CPVC/CPVC endcap
...In theory it functions perfectly, unfortunately the tanks go "fffshhht" instead of the nice "POP" from splitfire tanks. It seals fine, just not shooting up to par with what I expected ( >10').
Is this normal for Hornet tanks?
Anyone see any problems that I don't?
Rainbow Clan
#10
Posted 31 August 2009 - 07:11 PM
I think that new tanks might help, perhaps they are worn out or something is messed up inside them.
Edited by atomatron, 31 August 2009 - 07:12 PM.
Rainbow Clan
#11
Posted 14 November 2009 - 01:52 PM
A simple addition of 6 CPVC bits GREATLY increased the rof, I can get 7 shots off in 24 seconds (1 every 3.5 sec). compared to before when I was taking darts from my pocket.
And the mock-Spltifire turned into this.
I switched out the hornet tanks, added a check valve, an AT2K tank and replaced my trigger design with a blast button, the hornet tanks fire at the same time. That's a stub of aluminum on the 2k tank.
Rainbow Clan
#12
Posted 15 November 2009 - 09:06 PM
0 user(s) are reading this topic
0 members, 0 guests, 0 anonymous users