Jump to content


Photo

Homemade Holster For Minimized Nfs

The NFPH-1 MkIII

24 replies to this topic

#1 jmwasko

jmwasko

    Accessories

  • Members
  • 61 posts

Posted 02 August 2009 - 04:30 PM

As promised, the write-ups finally done. Thanks to jwasko for help with tons of stuff from general advice, a proofread, and holding the camera for range tests. Thanks to crankymonky for some helpful discussion on polymer chemistry and adhesives. Post away!

------------------------------------
The Holster
------------------------------------
Posted Image
Posted Image
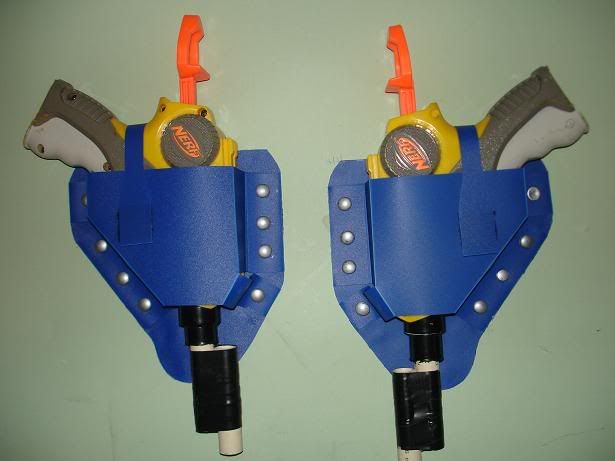
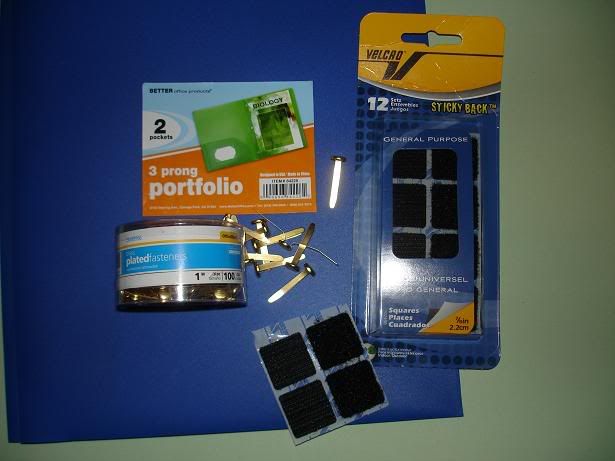
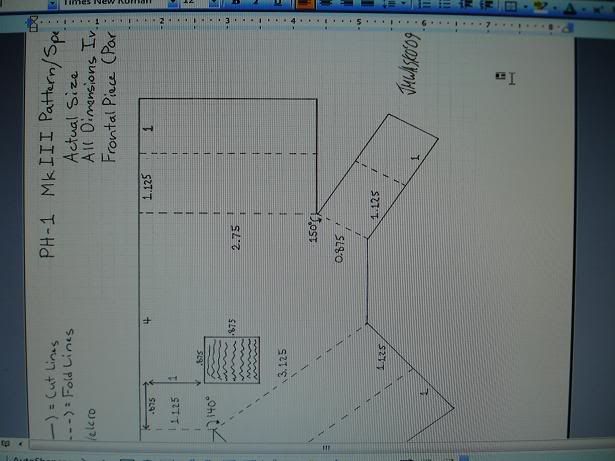
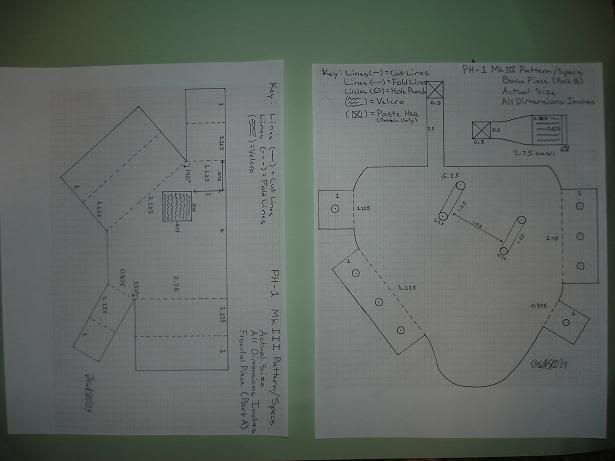
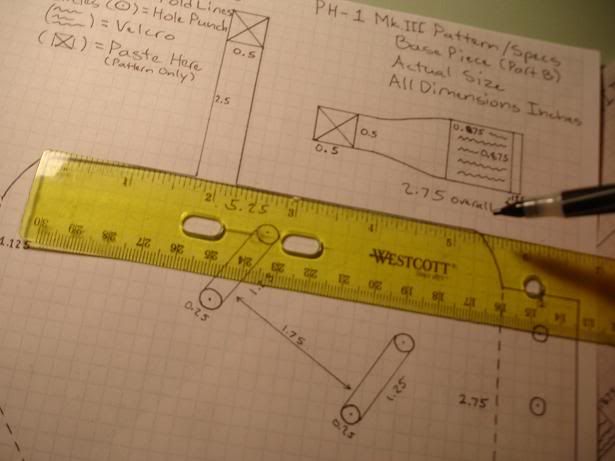
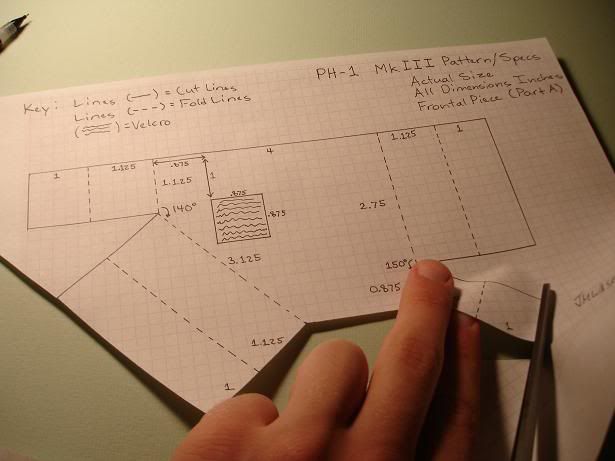
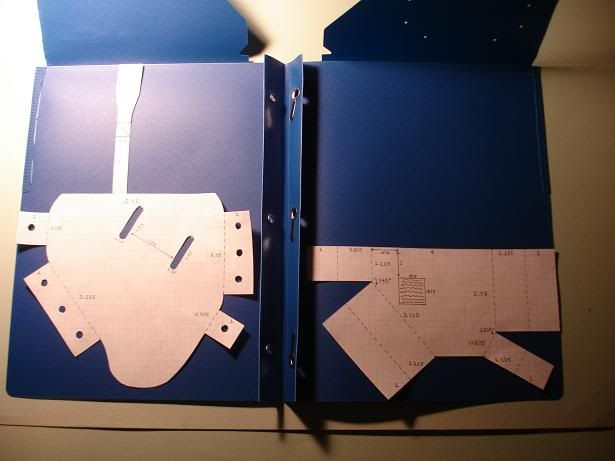
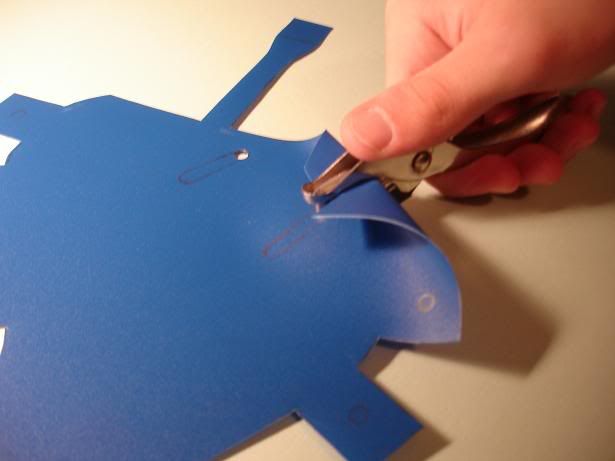
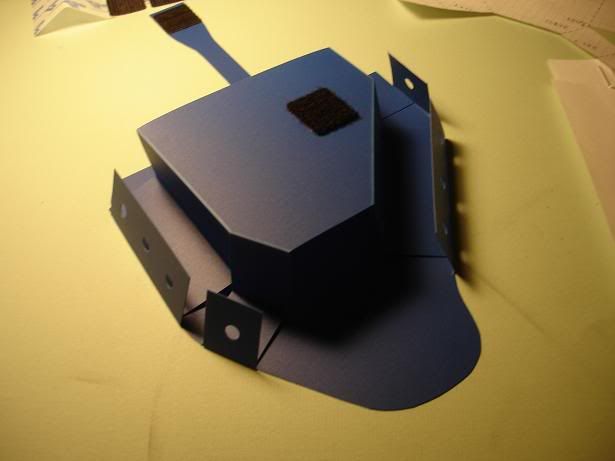
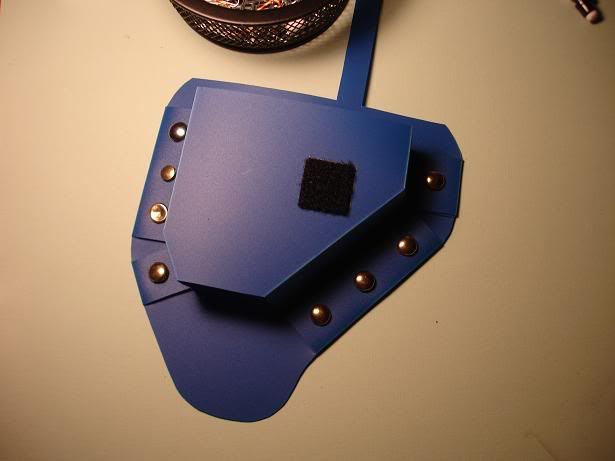
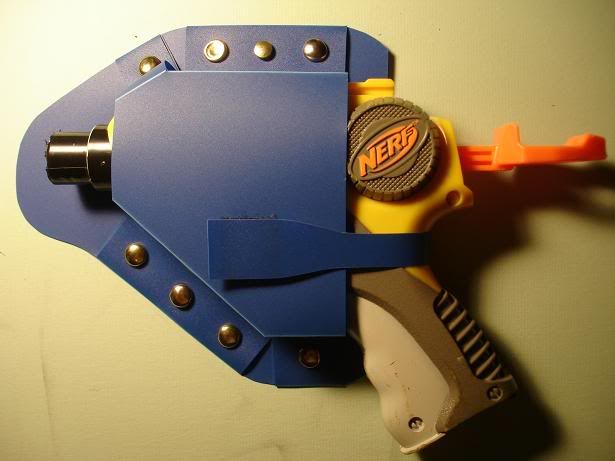
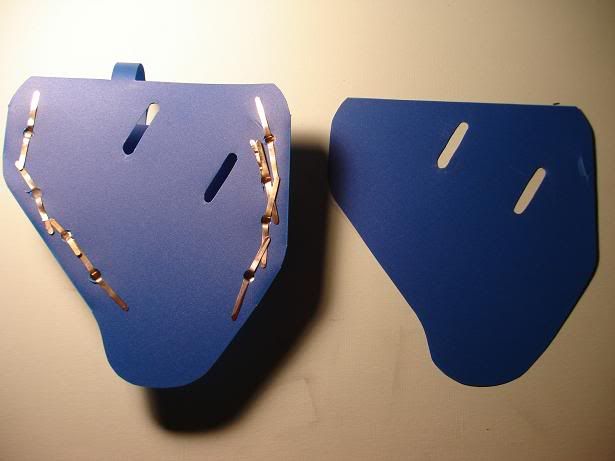
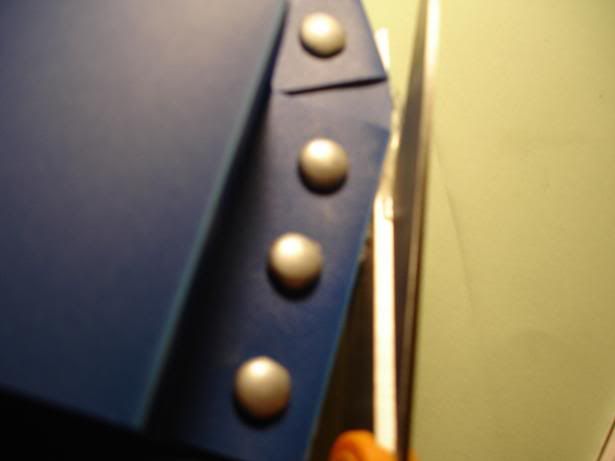
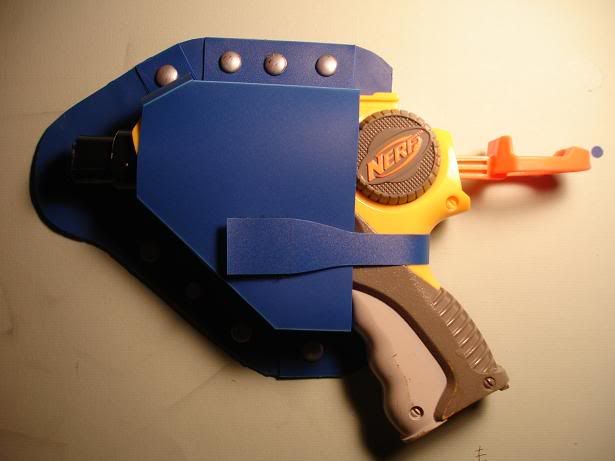
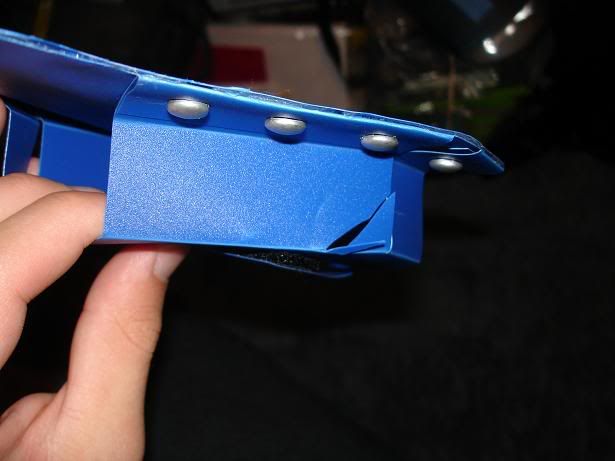
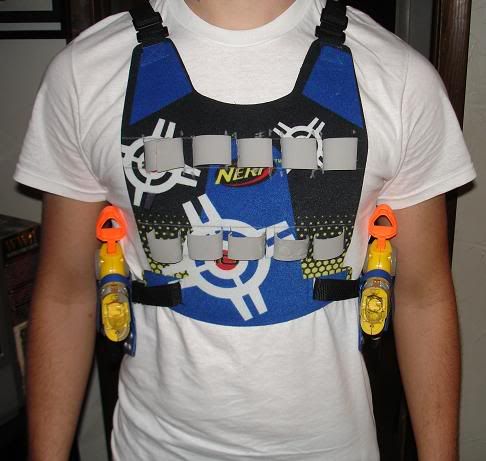
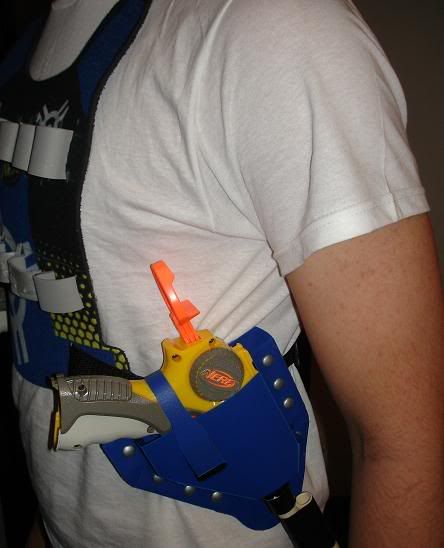
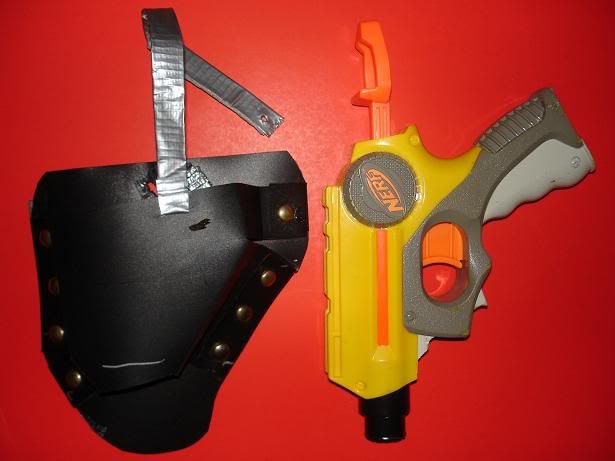
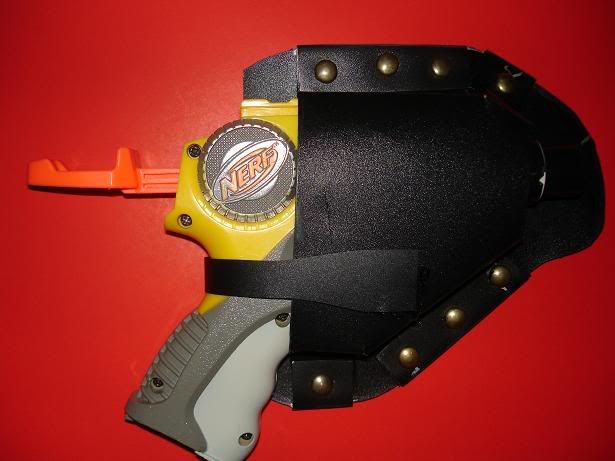
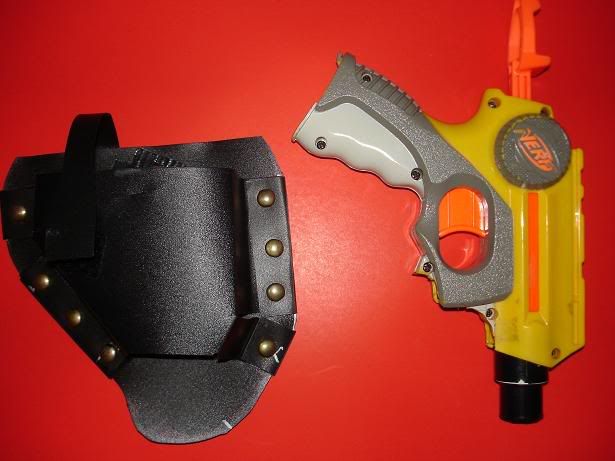
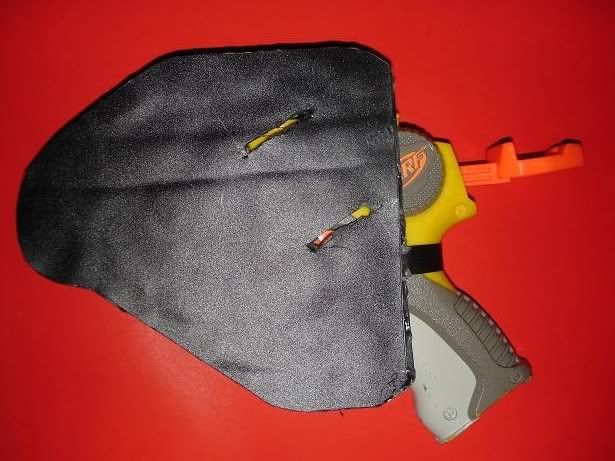
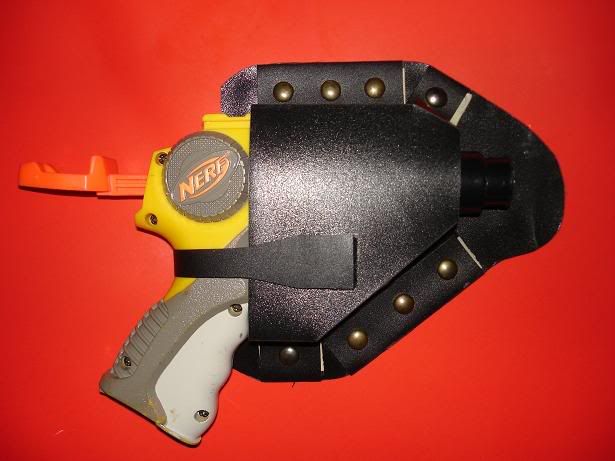
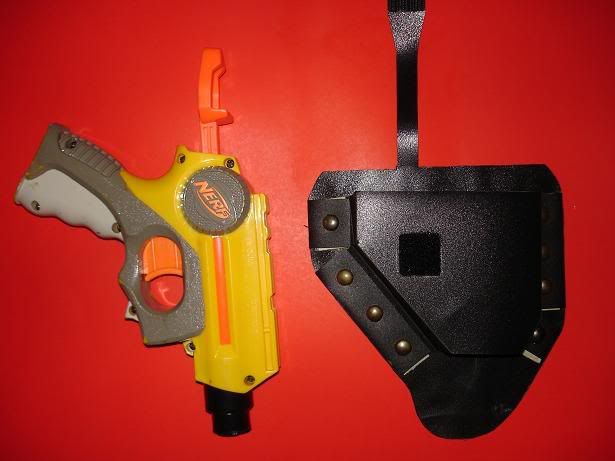
This is the PolyHolster One, Mark III. As you can see, it is for a minimized NiteFinder with trigger guard and surrounding screws intact. As the name implies, they are made out of a simple Poly Folder/Portfolio, and held together by paper fasteners. It is cheap to produce and is meant to be worn as a simple, relatively durable, but also very compact holster designed primarily for wear as a shoulder holster (as seen below) hanging at a 45 degree angle. However, it may be adapted to be worn on the leg, hip etc.
Posted Image
Posted Image

------------------------------------
The History
------------------------------------
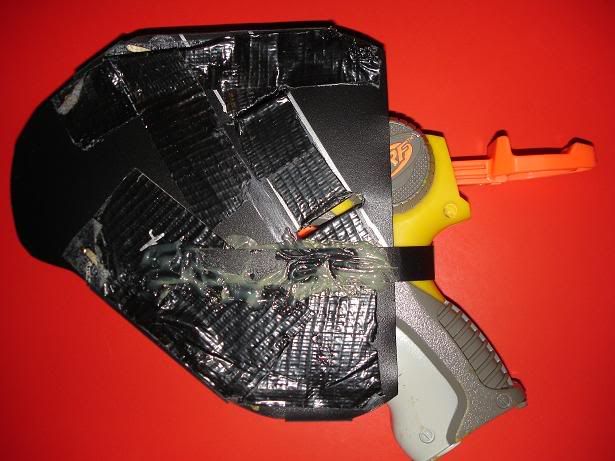
The Mark I was the original (prototype you could say) of the PH-1 holster. However, the body of the holster was for the most part preserved through the Mark II, and finally, III. In development for an upcoming local war in 2007, it was designed without straps in the belief that the holster would retain the NF. However, during excessive movement (running etc.) the NFs bounced out of the holster, mostly attributed to their 45 degree hanging. So, straps made of duct tape were devised. They hooked on a paper fastener which could be folded open/close for withdrawal/detainment. The process of opening and closing the holster was very time consuming and temperamental, so this failed after one local war.
Posted Image
Posted Image
Posted Image
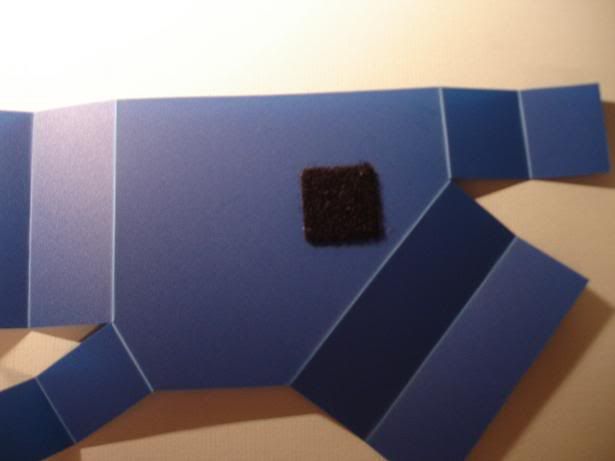
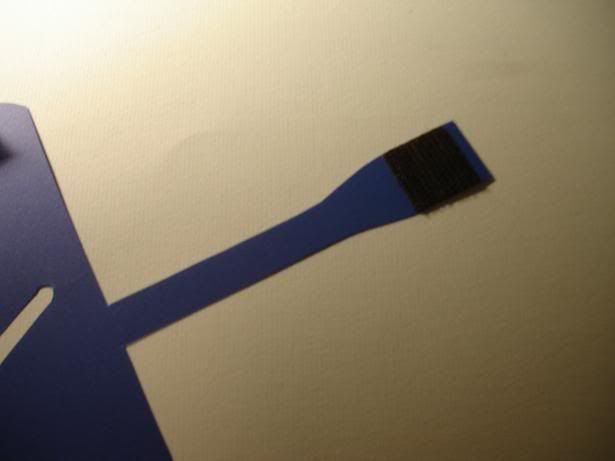
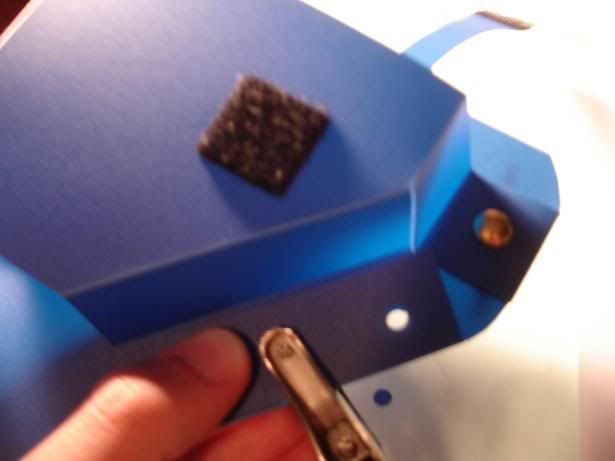
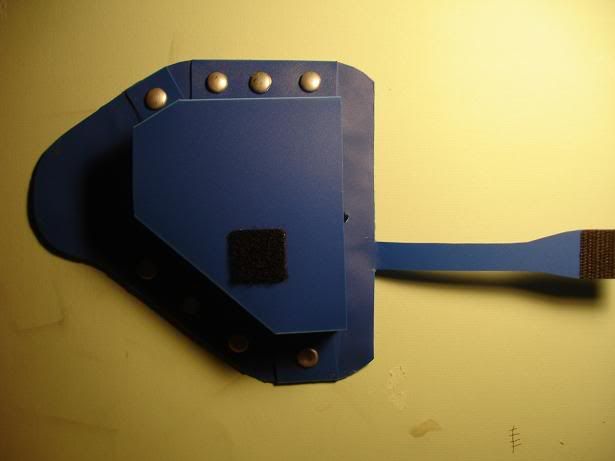
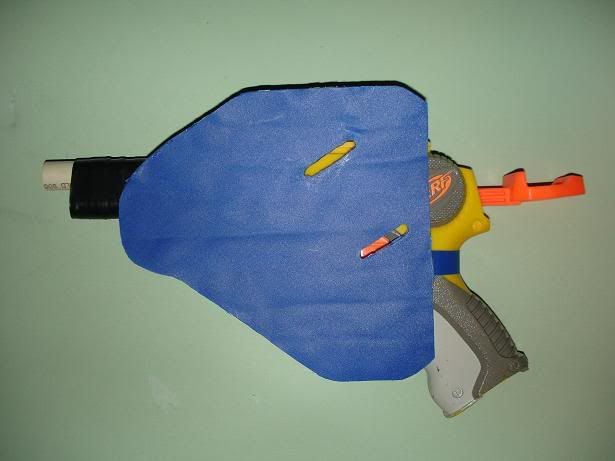
To improve for the next upcoming local war, I epoxyed a strap made of the same poly material as the rest of the holster to its back. It secured the NF by attaching via a Velcro square to the front of the holster. After a couple local wars and then DCNO and SuperNova this year however, the straps were breaking off and the duct tape backing needed constant maintenance. Though the Mark II was a solid design, it still needed perfection.
Posted Image
Posted Image
Posted Image
Posted Image
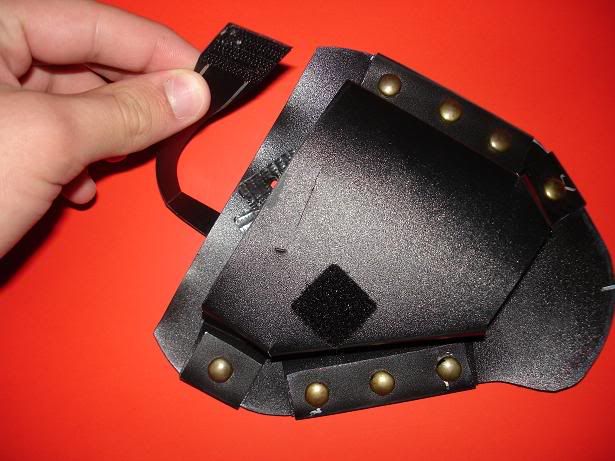
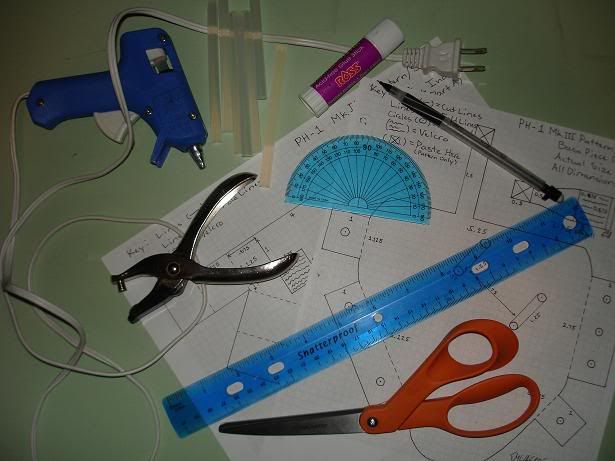
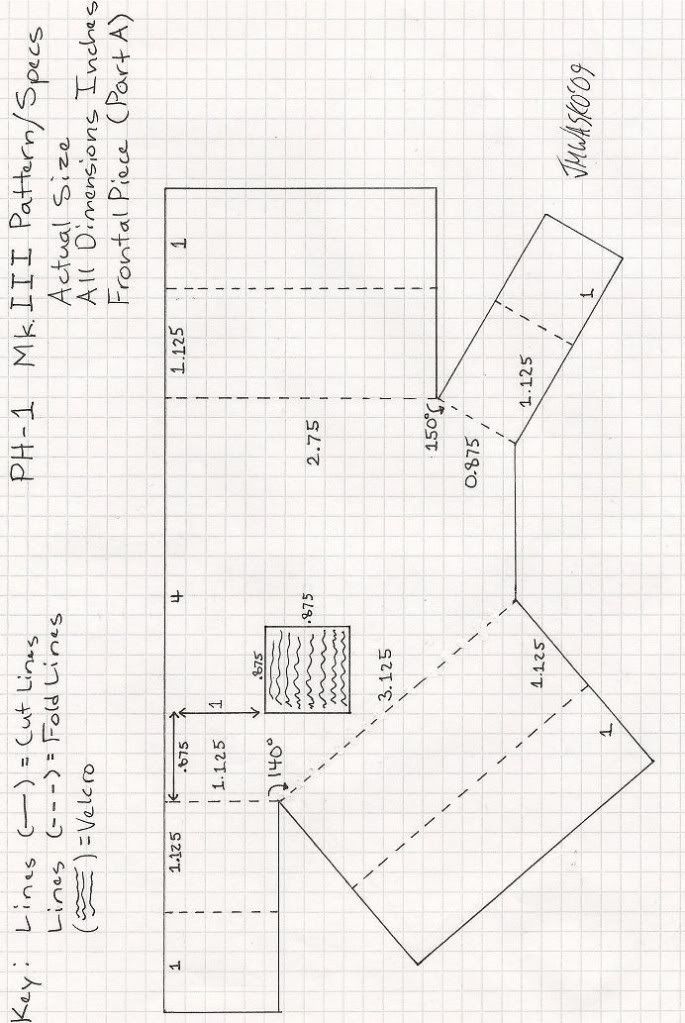
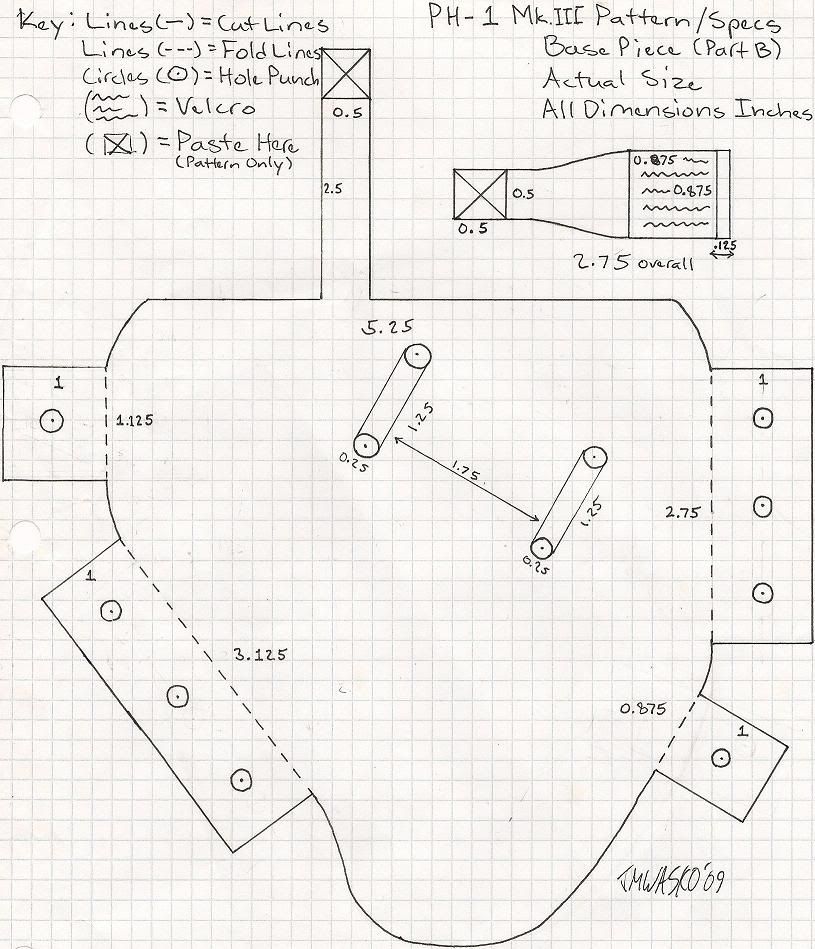
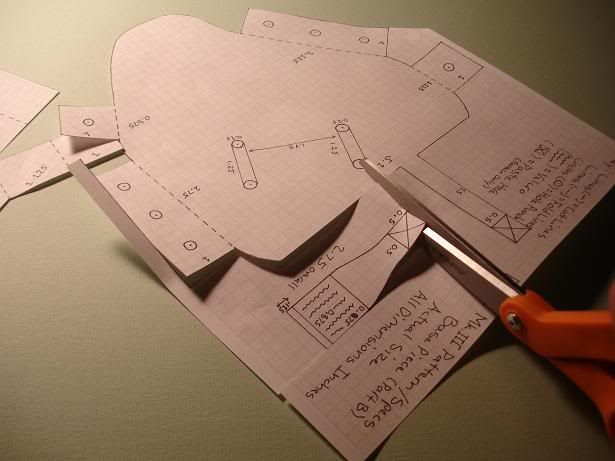
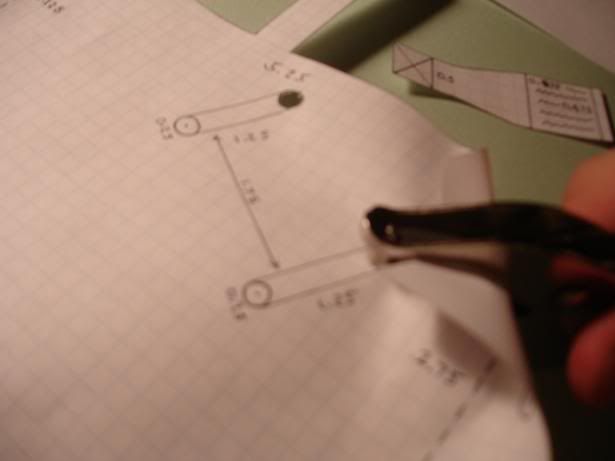
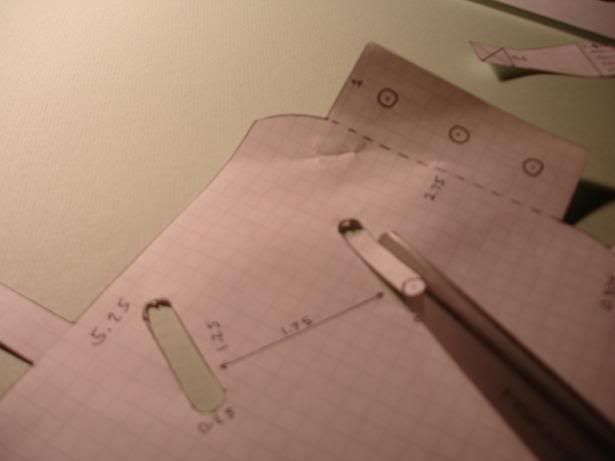
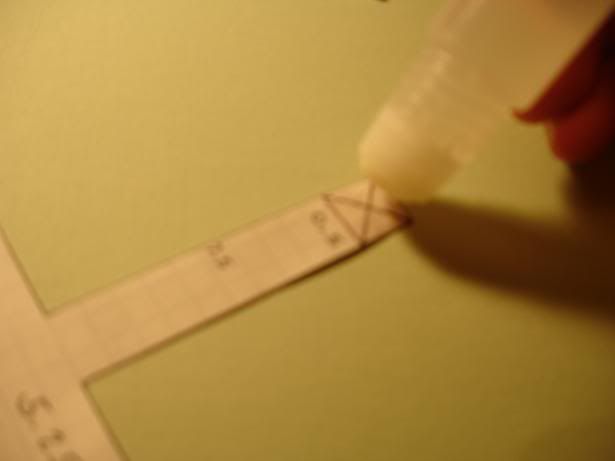
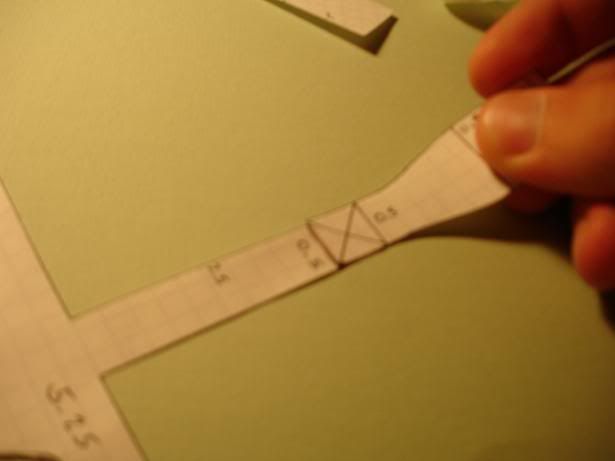
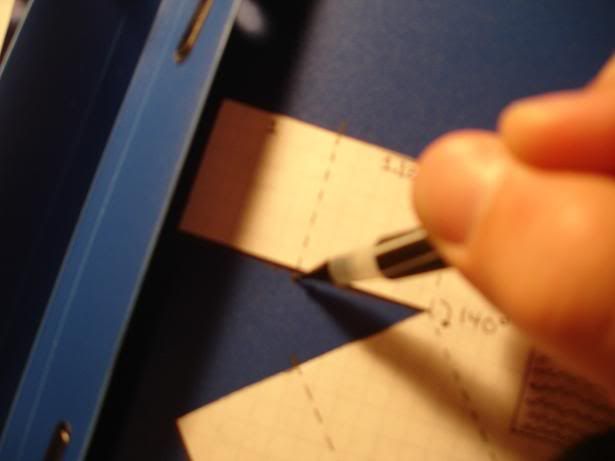
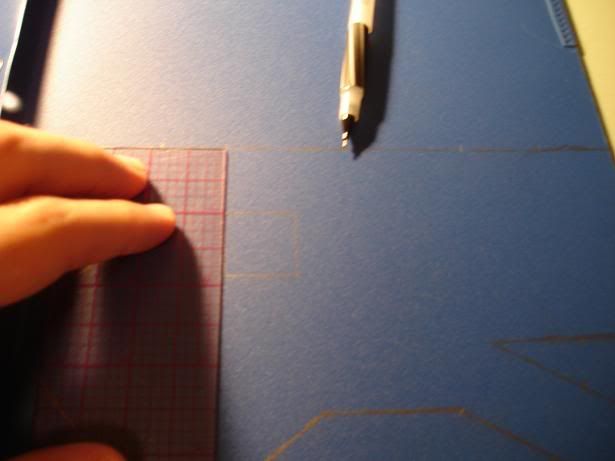
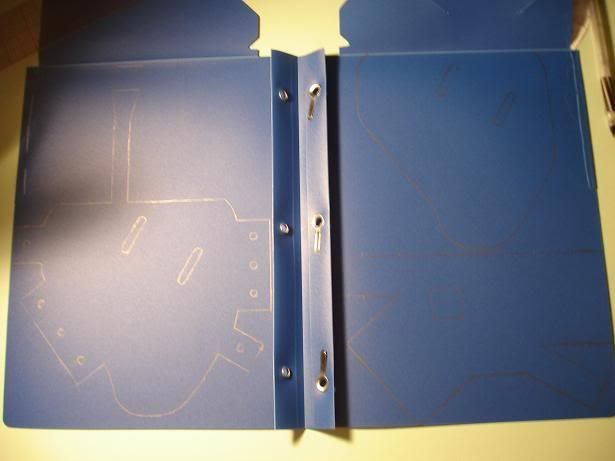
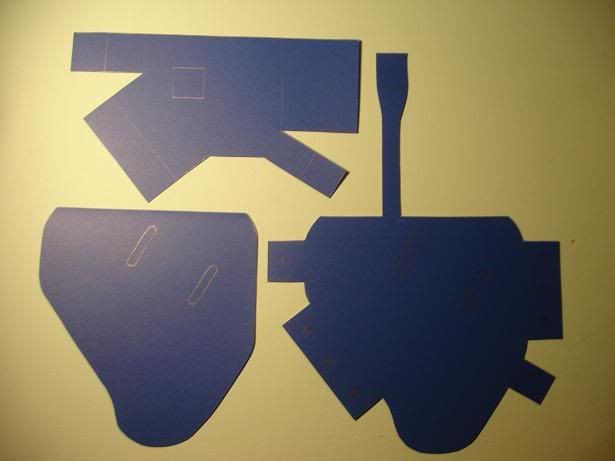
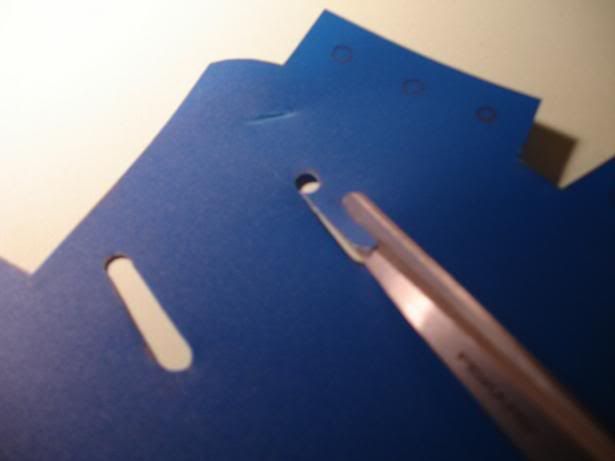
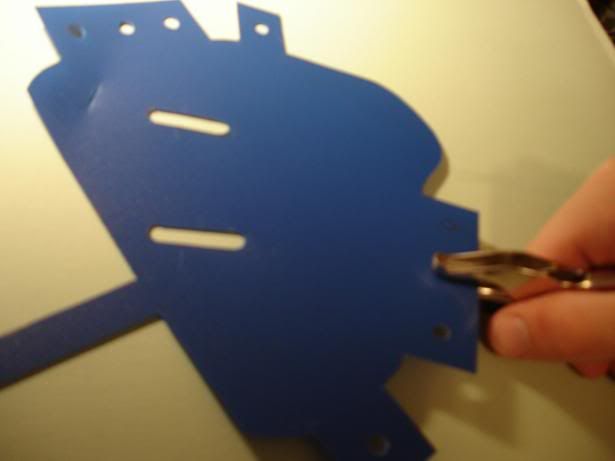
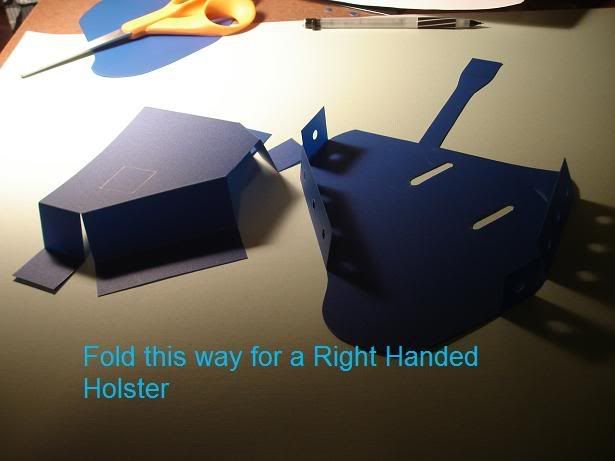
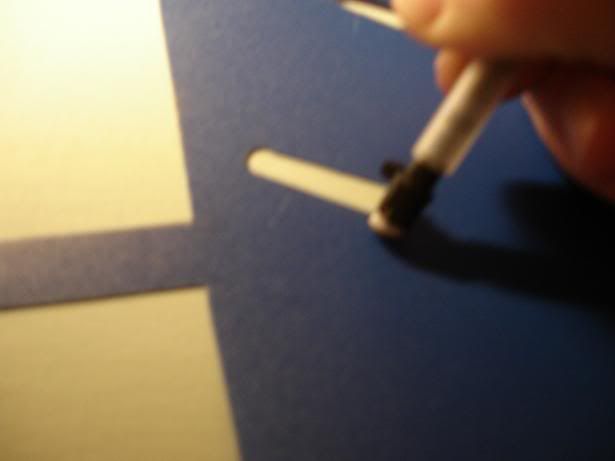
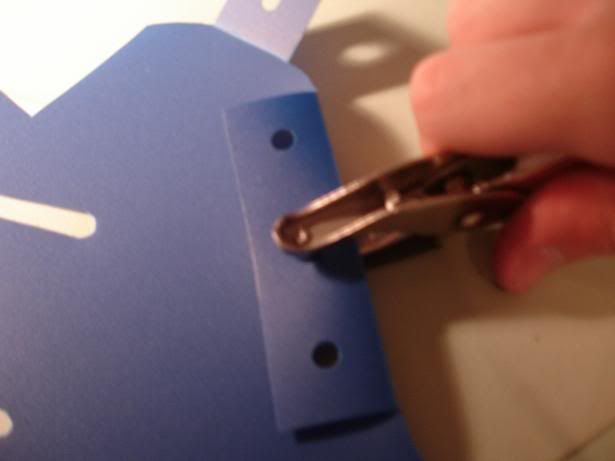
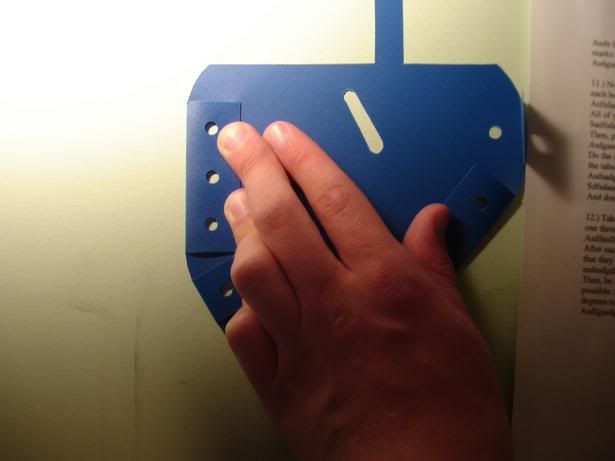
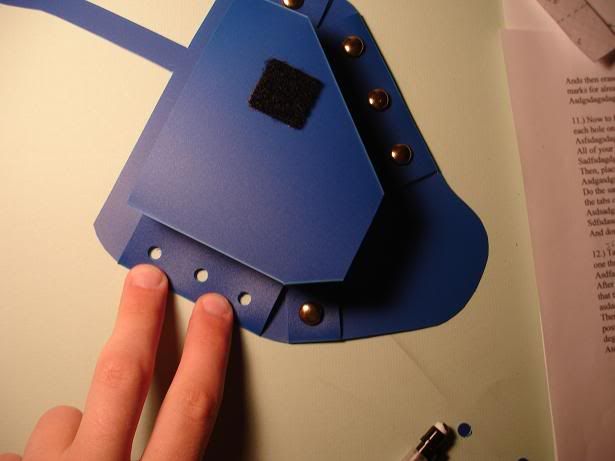
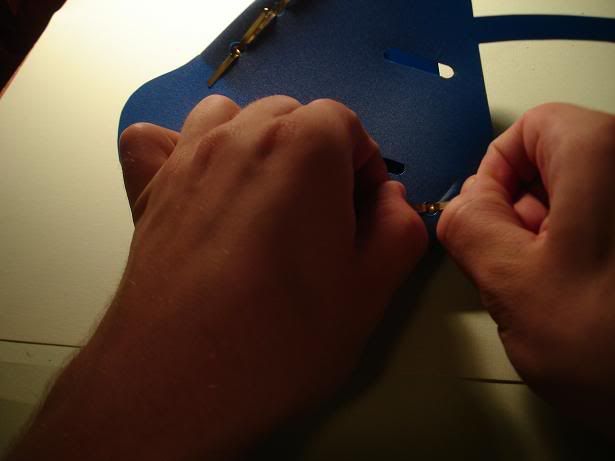
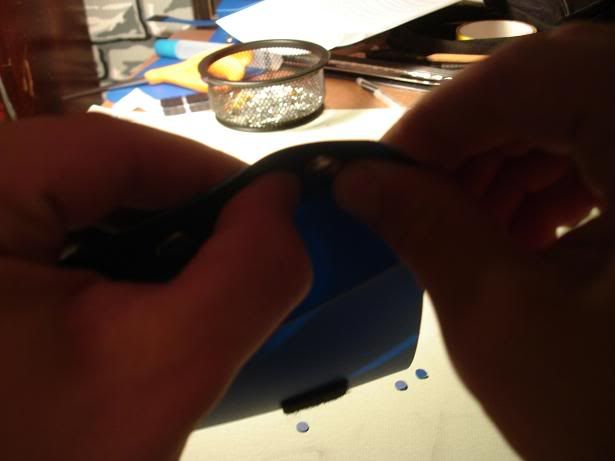
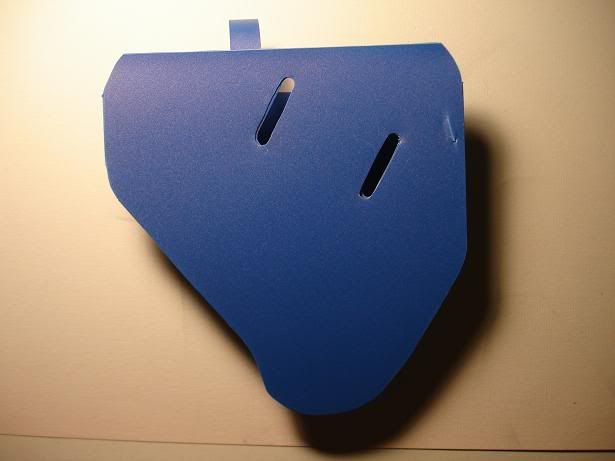
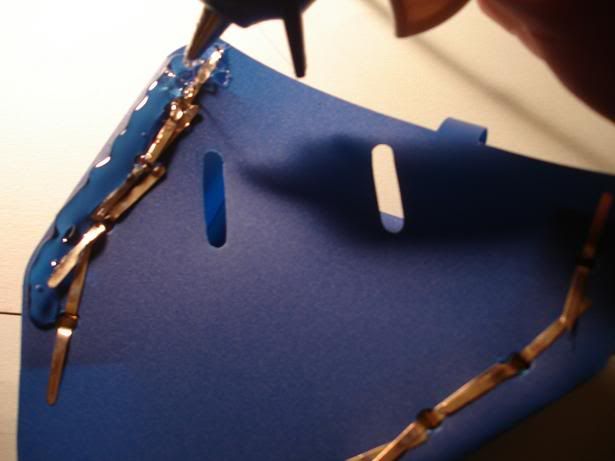
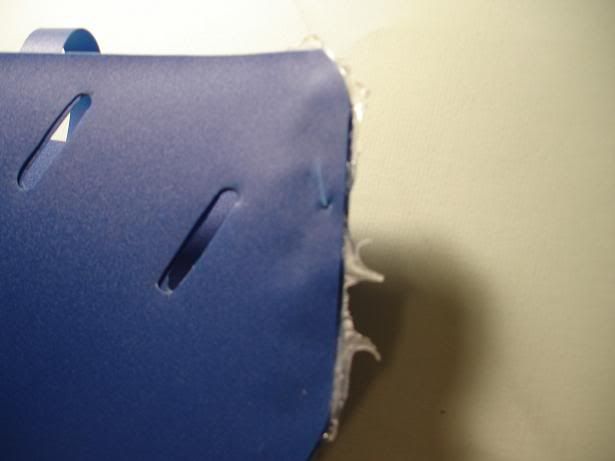
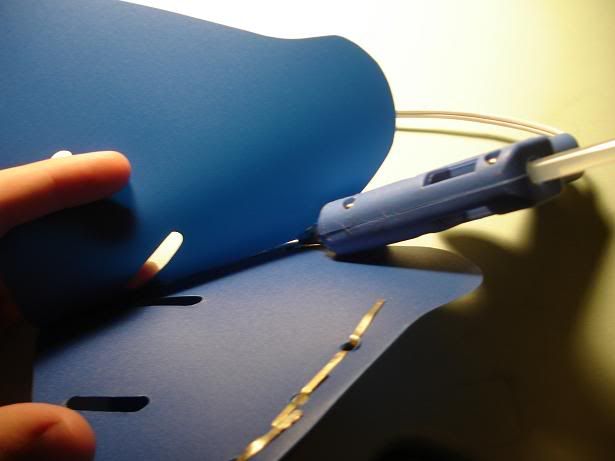
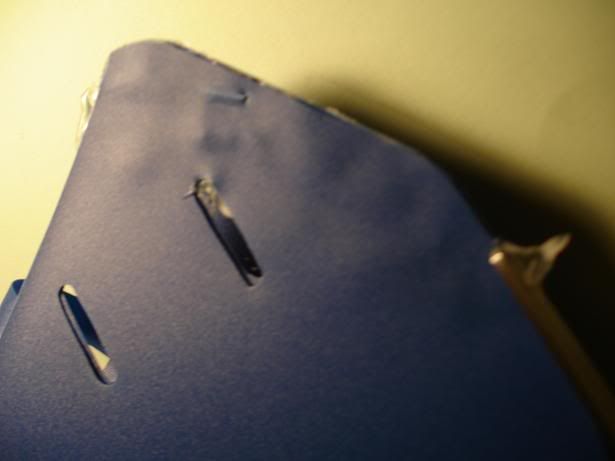
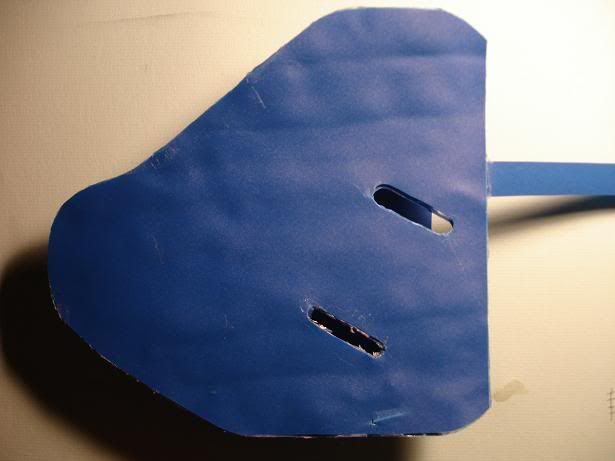
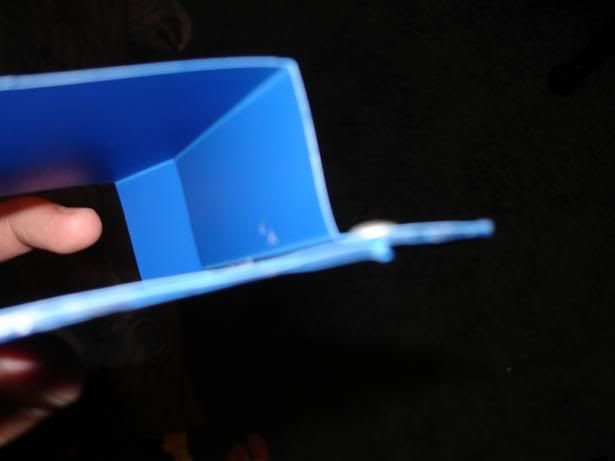
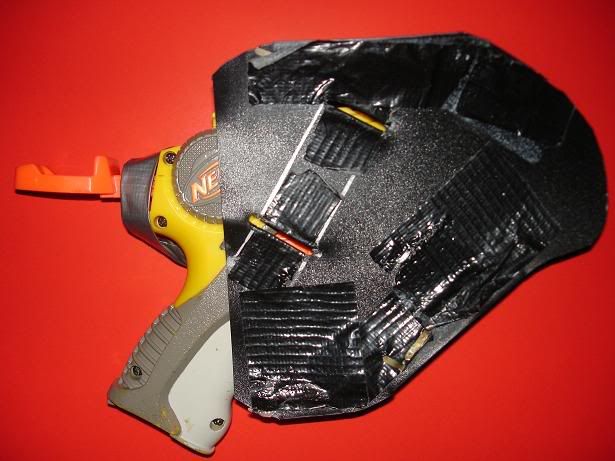
So then I began developing the Mark III PolyHolster. The first problem to solve was the strap. Rather than glue it on, I chose to include it in the design of the backing of the holster, so that the strap and base piece were one solid piece. Next to solve was the problem that there was no real backing to the holster (except duct tape) to retain the paper fasteners. They could come loose and poke the wearer. And maintaining them and losing fasteners during wars was a bother. I chose to attach a second backing. I was hesitant to use epoxy, seeing as it didn’t keep the strap attached well. After testing the attaching of one piece of poly to another with Plumbers’ Goop, Super Glue, Plastic Epoxy, PVC Cement, and lastly, hot glue, I was really only satisfied with hot glue. Lastly, I perfected the design and pattern of the holster to have more uniform, reproducible dimensions, and drafted a final pattern for widespread use. Thus came the Mark III.
Posted Image
Posted Image
Posted Image

Edited by jmwasko, 02 August 2009 - 04:49 PM.

  • 0
JMWasko, the blue Sex Dwarf.

NF PolyHolsters

#2 jmwasko

jmwasko

    Accessories

  • Members
  • 61 posts

Posted 02 August 2009 - 04:32 PM

------------------------------------
The Materials
------------------------------------
1x PolyFolder- Available most places that have any school or office supplies; I use ones made by Better Office Products for the Mark IIIs, but Mead Five Stars (more expensive) do seem stronger, I recommend them
8x Butterfly Paper Fasteners- Harder to find, most office stores have them; 1 inch long with any head diameter greater than 1/4” should be fine
1x Pair of General Purpose 7/8” Velcro Squares- Found mine at Lowes and Joann Fabrics
Posted Image

------------------------------------
The Tools
------------------------------------
A Hot Glue Gun with 6-7 sticks of glue to glue on the backing
Pencil to trace your patterns onto the folder and mark folds
One of the included patterns below to make the pieces of the holster
A ¼” Hole Puncher for the holes to hold everything together
A protractor in case you need to check the angles of your pattern printouts
A ruler to check your patterns dimensions and mark folds and more on your folder
Glue stick to assemble the Pattern for Part B
Posted Image

------------------------------------
The Patterns
------------------------------------
Below are the scanned images of the designs and patterns all in one for Part A (the holding part) and Part B (the base sheet with strap). Part C (the backing) is merely a repetition of Part B you’ll make in the process.
Posted Image
Posted Image

------------------------------------
The Write-Up
------------------------------------
Here’s the step by step process. Read the step, and then look below for images as a reference.

1.) Go the section “The Patterns” prior to this and right-click on the images to save them to your computer.

2.) Open up a blank Word (or similar) document where you can insert the images. Go to “File”, “Page Setup”.
Posted Image
Set all of the margins to 0. If, when you click “Ok” to enact this setting, it tells you the margins are too small, simply select “Fix”.
Posted Image
Posted Image

3.) Now that your page is set, go to “Insert”, “Picture”, “From File…”.
Posted Image
Select your saved pattern of Part A, and it will be inserted into the page.
Posted Image Posted Image
It should be sized correctly, but to check, right click on the inserted image and go to “Format Picture”.
Go to the “Size” tab, and make sure the dimensions are: 10.32”x6.92”
Posted Image Posted Image
If you wish, for future use, save this document to your computer. Then, print it.

4.) Now repeat the process with the pattern for Part B. Check to make sure its dimensions are: 9.49”x8.15”
Posted Image Posted Image
Save and Print.

Edited by jmwasko, 02 August 2009 - 05:07 PM.

  • 0
JMWasko, the blue Sex Dwarf.

NF PolyHolsters

#3 jmwasko

jmwasko

    Accessories

  • Members
  • 61 posts

Posted 02 August 2009 - 04:35 PM

5.) So here are the printouts.
Posted Image
Check to see that the measurements are correct and that they printed out correctly.
Posted Image

6.) Cut out the patterns with your scissors. Don’t forget to cut out the extra strap in the upper right corner of Part B’s page.
Posted Image Posted Image
Once you’ve cut out both, punch holes in Part B where marked. Also, punch the holes in Part B and cut in between as marked to make the holes for the Belt to go through, if you choose to wear it as I do (See “The Holster” Section for how I wear mine.).
Posted Image Posted Image
Then, assemble Part B’s pattern by attaching the strap section to the main body of the pattern. Apply your glue stick where the “x” is marked on the pieces, and stick them together. Let dry while you continue to work.
Posted Image Posted Image

7.) So, now you have your patterns ready to go. Cut open the flaps of your folder and lay the two patterns out on it like so. Leave plenty of room above Part A. You’ll need that area later.
Posted Image
Trace around your patterns and in the punched holes and cut belt holes of Part B (if used) to mark their location.
Posted Image Posted Image
Posted Image
Mark also where the folds take place on Part A in the middle of the tabs, as, unlike the tabs on Part B, these are not apparent due to the fact the run into another face of the part.
Posted Image
Also, measure out and mark where the velcro tab will go on Part A, as well as the on the strap on Part B.
Posted Image
Finally, to create Part C, fold in the tabs and strap of the pattern for Part B and trace it onto the folder in that area that you left open above Part A before. Trace inside the belt holes on this piece too!
Posted Image
  • 0
JMWasko, the blue Sex Dwarf.

NF PolyHolsters

#4 jmwasko

jmwasko

    Accessories

  • Members
  • 61 posts

Posted 02 August 2009 - 04:40 PM

8.) Here are the pieces ready to cut.
Posted Image
Cut them out, being sure not to “overcut”. See the diagram below if it helps. Also try to cut on or inside your pencil lines, because if you cut outside them, the parts will turn out to be bigger than they should. If you cut inside, they should match the patterns better.
Posted Image
Once they’re cut out like so,
Posted Image
Cut out the belt holes in Part B and Part C by first punching a hole at the top of each. You’ll have to bend the poly a little to get the second one, and doing so may crease it. If you’d rather avoid this, you can poke through them with scissors to get the hole started.
Posted Image Posted Image
Lastly, punch all of the holes marked on the tabs of Part B.
Posted Image

9.) Now, fold your parts as marked on the patterns by the dashed lines and in the direction needed. Depending whether you’re making a left or right handed holster (mine will be a lefty in the end), you’ll have to fold the parts like so:
Posted Image Posted Image

10.) Go ahead and stick on the Velcro tabs where marked. If you’re making a left handed holster, you’ll have to remark the placement of the Velcro on the opposite side of both parts. Just refer back to the patterns and remark them on the correct side of the poly. Here’s where they go (fuzzy Velcro on Part A, Scratchy on Part :D:
Posted Image Posted Image
Ands then erase any pencil marks left on your parts, as we’ve done everything we needed marks for already. Even just rubbing your finger over the pencil lines should erase them.
Posted Image

11.) Now to finish punching the holes. With Part B’s tabs folded over, punch through each hole on the tab you’ve already punched and into the main face of Part B.
Posted Image
All of your holes on Part B should line up perfectly.
Posted Image
Then, place Part A on Part B and inside it’s folded over tabs like so.
Posted Image
Do the same thing as with Part B, punching through the already punched holes and into the tabs of Part A, so there are three layers of holes lined up perfectly.
Posted Image
  • 0
JMWasko, the blue Sex Dwarf.

NF PolyHolsters

#5 jmwasko

jmwasko

    Accessories

  • Members
  • 61 posts

Posted 02 August 2009 - 04:43 PM

So that everything stays in place as you punch the holes, go ahead, if you like, and place a paper fastener now in each hole as you go along, like I do.
Posted Image
And be sure not to punch any holes in Part C!

12.) If you haven’t already, take out your “butterfly” paper fasteners and, with Part A and B assembled, place one through each of the 8 holes.
Posted Image
After each one, flip the holster over, and pull/fold the wings open as much as possible so that they brace against the sides of the hole.
Posted Image
Then, be sure to fold them back against the base of the holster as flat and tight as possible. Even bend the holster with the wings so that they are bent open beyond 180 degrees to be sure to brace against the folder. You can see how I bend it here, sorry for the darkness, I had to use both hands and tuck the camera under my chin with the timer on. Rather skillful really.
Posted Image
Once assembled, check the fit of your NF in the holster. Here’s mine which fits fine. If you have anything to adjust go ahead, but it should fit fine.
Posted Image
Now that the main portion of your holster is assembled, take Part C (which should have the belt holes cut out already and pencil marks erased, right?) and line up how it will lay on the back of the holster.
Posted Image Posted Image
Plug in your hot glue gun and let it heat for a rather long time. Working with it after a long time will get tough due to the heat (which does burn a little, even through the plastic of the holster), but the glue will stay melted and thus workable for awhile before solidifying. Plus, it seems to attach to the poly material better at a high heat.

13.) Once hot, put a thick line of hot glue on the long side of the back of the holster. Apply liberally (go crazy). Note the below picture is from a right handed holster, not the left handed I have been working on. If you’re doing a left handed holster, then the longer side should be on the right, not the left like here.
Posted Image
Then, press Part C down on top and squeeze out the excess glue and press it down flat on top of the rest of the holster. Careful getting everything lined up though. A warning, this process of working out the excess glue is very hot. I don’t think it will burn you really, but it will hurt a little because the heat will be able to be felt through the plastic or the paper fasteners as you press down.
Posted Image
Keep pressing down until the glue cools and dries and you have the excess hanging out, also dry.
Posted Image
Now trim off the excess dried glue and any extra of Part C over hanging the rest of the holster. This way the sides are flush. However, don’t trim off any of Part B so you keep the shape of the holster.
Posted Image
This trimming should leave a solid (and difficult to peel apart) edge of 2 flush layers of poly material with hot glue solid in between.
Posted Image
Continue to add these lines of glue across your holster one at a time. Just peel open the backing enough to fit your hot glue gun in, but no break off what you’ve already glued.
Posted Image
And add another line of glue from top to bottom.
Posted Image
Press down to work out the excess glue, let dry, and trim off the excess.
Posted Image
  • 0
JMWasko, the blue Sex Dwarf.

NF PolyHolsters

#6 jmwasko

jmwasko

    Accessories

  • Members
  • 61 posts

Posted 02 August 2009 - 04:45 PM

Repeat 4-6 more times until all the way across the holster. And here’s the finished back. Yours should be like this. If you notice, you can see your lines of hot glue as kind of ribs warping the pack. That’s normal and trust me it isn’t noticeable on the front.
Posted Image
Additionally, my holsters, after adding the backing, always bend in a slight curve after drying. This is convenient though, seeing as the holster, when worn, is more inclined to contour to the curve of the waist, leg, etc. So, here’s the finished product with and without NF inside (the NF is missing its speed loader barrel). I added silver metallic sharpie to the paper fasteners head just to see how the color would work, though I’m sure it will wear off soon.
Posted Image Posted Image

------------------------------------
The Ranges
------------------------------------
After finishing the Mark III I decided to range test it seeing as putting ranges for writeups are such a formality. Sadly, jwasko wanted the honors to be the first to do so, and proceeded to whip it directly into the corner of his book case. Here is the resulting damage: a nick on top and some shattering on the side after a second throw.
Posted Image
Posted Image
So maybe this isn’t recommended. Anyway though, once outside, jwasko and I did some legit tests.
Without NF: 38 ft
With NF: 25 ft http://www.youtube.com/watch?v=wtrXhkJOkgg
And no further damage to either the holster or NF!

------------------------------------
The Future
------------------------------------
Now that you all have my info, I hope, if this type of holster is liked, that you may develop patterns for different styles of NFs or different guns completely (Perhaps put the gun name abbreviation in front of the model name, such as NFPH-1 for mine.). As another pattern is made, it can be the PH-2, the next the PH-3, and so on. By all means, if you develop a pattern, I’m sure you can post it in this thread to share and have the creation process just above it for everyone’s convenience.
Additionally, depending upon the feedback I get, I hope to post a write up of the modified Dart Tag vests I use in conjunction with these holsters, which you’ve seen the initial version of in the first pictures of this write-up.
Thanks all, and enjoy.

------------------------------------
The End
------------------------------------
You’re still reading? It’s over…Go make something…Go.
  • 0
JMWasko, the blue Sex Dwarf.

NF PolyHolsters

#7 Blue

Blue

    Member

  • Members
  • 2,222 posts

Posted 02 August 2009 - 04:53 PM

That was an extremely well done writeup, the pics are great and it looks very easy to recreate.
  • 0

#8 durka durka

durka durka

    Member

  • Members
  • 364 posts

Posted 02 August 2009 - 05:33 PM

Incredible detail in the write-up. The detail is so great that any goober should be able to recreate this. It is easy to see that a lot of thought was put into this.
  • 0
"The warrior who cultivates his mind polishes his arms"

#9 Fome

Fome

    Member

  • Banned
  • 312 posts

Posted 02 August 2009 - 06:06 PM

Not to be redundant or anything... but this is one of the best write ups I've ever seen.

I'm probably not going to use your actual layouts though, instead I'll just make my own loosely based on the designs and measurements of yours. Still, mad props.

Yo.

#10 Nerf Bros

Nerf Bros

    Member

  • Members
  • 309 posts

Posted 02 August 2009 - 06:35 PM

Wow. A very high quality write up. Nothing more needs to be said.
  • 0
We have no sig.

#11 sublimedom777

sublimedom777

    Member

  • Members
  • 468 posts

Posted 02 August 2009 - 08:50 PM

Truly a masterpiece. I'll be working on mine after seeing their truly wonderful performance at LNDH.

Edit: Missed the ranges, I'll test mine when I get it finished, but i expect some variance due to my NF being coupler'd different.

Also, wonderful Ferris-Bueller-esque ending, Bravo again sir.

Edited by sublimedom777, 02 August 2009 - 10:18 PM.

  • 0

Last of the Sex Dwarves, Head of Waifu Relations, Fetishizer of Blasters, The Far Warring, Mini-Van Driver, Possessor of Mattels, and Warden of the Manongahela
 

We NERF ON all day, and FUCK OFF all night


#12 thedarksideofnerf

thedarksideofnerf

    Member

  • Members
  • 124 posts

Posted 02 August 2009 - 09:54 PM

figured it out., but thanks for the help jmwasko.
Also I vote for this to be pinned

Edited by thedarksideofnerf, 02 August 2009 - 11:33 PM.

  • 0
<death09>my girlfriend broke up with me and sent me pix of her and her new boyfriend in bed
<ktp753>ouch.
<death09>yeah.i sent them to her dad

#13 DartzDude

DartzDude

    Member

  • Members
  • 33 posts

Posted 02 August 2009 - 10:43 PM

I will have to try this! Nice Job!!! ;)
  • 0
When life gives you burrito's, you simply devour them!

#14 jmwasko

jmwasko

    Accessories

  • Members
  • 61 posts

Posted 02 August 2009 - 11:00 PM

Well before I turn in for the night:
Blue, thanks for the compliments, that's what I hoped for.
Durka, thanks. I know its probably overkill seemingly to the more experienced, but I wanted anyone on any level to be able to do it, as well as show this wasn't thought up over night.
Thanks Fome. Off topic: Your Fome Bow Rocks. On Topic: That's fine by me because that's why I included the dimensions on the patterns. Be sure to post anything you design if you want.
Thanks Nerf Bros, I like to think so.
Dom, two words. Save Ferris.
DarkSide, I used Word '07 on a trial for awhile but can't recall how everything worked. I might be able to look into it or I'm sure if you did some google searching you could find tutorials. More importantly however, are you talking about the page/margins settings or the picture size formatting? Have no fear for I am a computer idiot too. That's probably why my method of printing out the patterns is probably the most inconvenient way, but its the only way I know.
DartzDude, well, then go do it.
Thanks all.
  • 0
JMWasko, the blue Sex Dwarf.

NF PolyHolsters

#15 TantumBull

TantumBull

    Member

  • Moderators
  • 1,929 posts

Posted 03 August 2009 - 12:39 AM

Oh my god, great job. I love the use of the polyfolder things. That looks real sturdy and functional, and doesn't even look homemade. Once again, great work. You told me about this a while ago, and I had no idea what to expect. This is awesome.
  • 0

#16 Judging Eagle

Judging Eagle

    Member

  • Members
  • 23 posts

Posted 03 August 2009 - 10:17 AM

I'm not really interested in usng a pistol for a foam launcher; but this is an excellent re-purposing of materials. As well as a good demo for how planning is a pretty big deal when it comes to nearly everything.
  • 0

#17 Norther of Heaven

Norther of Heaven

    Member

  • Members
  • 349 posts

Posted 04 August 2009 - 03:47 PM

I might have to do this at some point. Very very nice write-up!
  • 0
"I don't always drink beer. But when I do,
I beat my wife."

#18 hockeyfights118

hockeyfights118

    Member

  • Members
  • 243 posts

Posted 04 August 2009 - 07:59 PM

Those look great. I love them on the dart tag vest.
  • 0
I love nerf.

QUOTE(Poseidon @ Oct 2 2009, 05:28 PM)

Stalk... do you mean "stock" or are we talking about corn now?


#19 Saber

Saber

    Member

  • Members
  • 17 posts

Posted 05 August 2009 - 09:43 PM

As very very amazing write-up. One of the best I've seen so far.

Though, I got lost trying to figure out what the size of each square is. When I tried to put A and B together, I felt like a retard and threw my "Computer Geek" ball across the room. I can see how it goes together, just the measurements look kinda funky and I don't have my trusty handyman eyes (dad) around for a bit.
  • 0
Do you like waffles? Pancakes?! French toast?!?!

~ Wardog Squad Scout

#20 BustaNinja

BustaNinja

    Member

  • Members
  • 1,916 posts

Posted 06 August 2009 - 05:32 PM

I can see how it goes together, just the measurements look kinda funky and I don't have my trusty handyman eyes (dad) around for a bit.

You stole your father's eyes?

Would doing these in leather be an acceptable substitute? or is the rigidity of the plastic completely necessary?
  • 0
Me: Yeah. he beat a hooker
Venom: Haven't we all?

#21 jmwasko

jmwasko

    Accessories

  • Members
  • 61 posts

Posted 06 August 2009 - 06:11 PM

Thanks for all the compliments I haven't gotten back to.
Busta, I don't know because I haven't made one of these with anything but plastic.
But to elaborate....I'm sure alot of the design dimensions could be applied to a leather holster, but you really could do better than this design with leather. Think more along the lines of the leather holsters you always see for firearms that seem molded to the gun. If you really wanted to though, a passable holster could be made similar to this with leather and some stitching using these designs I guess.
I didn't make this holster out of plastic because it was necessarily essential or because I couldn't make one with leather or nylon, I made it because it was cheap, easy, and quick for me as well as others without the means to use leather or fabric. And most importantly, as it is now, it works.
  • 0
JMWasko, the blue Sex Dwarf.

NF PolyHolsters

#22 Black Wrath

Black Wrath

    Member

  • Members
  • 1,071 posts

Posted 19 August 2009 - 02:28 PM

I just wanted to say that these look great dude; I'm very happy to see that holster making has come a long way from my coathangers and hockey tape!
  • 0
Xx_Black-Wrath_xX of The Canadian Foam Militia

Not in the game anymore, but it was great while it lasted. Thanks for the great years of fun, NH!
--
Resident "Spawn of Talio"

#23 spartan062

spartan062

    Member

  • Members
  • 206 posts

Posted 19 August 2009 - 03:23 PM

These are very clean holsters. But, how durable are they?
  • 0
Join the Revolution- NerfRevolution.com

#24 jmwasko

jmwasko

    Accessories

  • Members
  • 61 posts

Posted 19 August 2009 - 08:37 PM

You have no idea how much of a pat on the back that is from you Black Wrath.

And they're very durable Spartan. At least I think so, but the facts are present. I had my doubts when I made the first set back in '07. But as I said in the writeup, that set held up fine until this summer when only the straps started to detach. The rest of it was fine. With the improvements of the MkIII, these should last years as long as they aren't abused horribly, and shouldn't need frequent maintenance like the MkII. The straps and velcro hold your nitefinder in place very well too and they hold up fine through a whole day of nerfing and wear. In no way are they a profesionally manufactured holster, but for around 5 bucks, these are very durable.

Also, I'll be adding info to this about a modification I'll be making to the holsters to accept Alice Military clips so the holsters can be durably worn on a waist belt. I'll be testing them at my war on Saturday so expect it next week.
  • 0
JMWasko, the blue Sex Dwarf.

NF PolyHolsters

#25 bhajj94

bhajj94

    Member

  • Members
  • 180 posts

Posted 11 June 2012 - 09:08 PM

Really nice! I just made one myself, except I used magnets instead of Velcro to hold the gun in place. It seemed to work a lot better since the two pieces would just snap together.

USER WAS WARNED FOR THIS POST

Edited by Langley, 11 June 2012 - 09:58 PM.

  • 0
Probably lurking somewhere...


0 user(s) are reading this topic

0 members, 0 guests, 0 anonymous users