Jump to content


Photo

Longshot Carbine With Custom Cosmetics, Total Reinforcement

All the carbine-ness, none of the ugly holes. Better than stock.

17 replies to this topic

#1 Zack the Mack

Zack the Mack

    Member

  • Members
  • 360 posts

Posted 08 July 2009 - 11:25 AM

Howdy, NerfHaven faithful! For my first post EVAR, I'm going to cover Sholef, the amped-up, cut-down Longshot CS-6 that I'm putting together for the mod contest and Apoc as a concept piece. Since JLego turned me on to Nerf a couple of weeks ago, I've been modding nonstop. Now that I've finally become validated (Thanks, VACC!) I'm a-gonna give you a little sneak peek into the creation of my newest blaster.

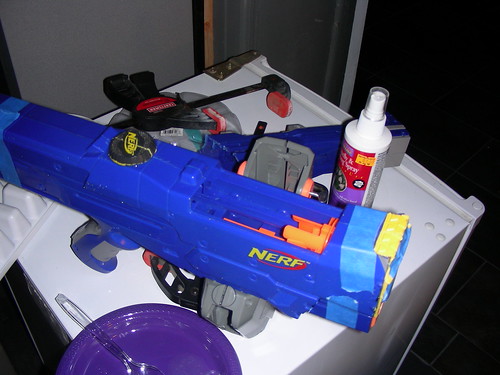
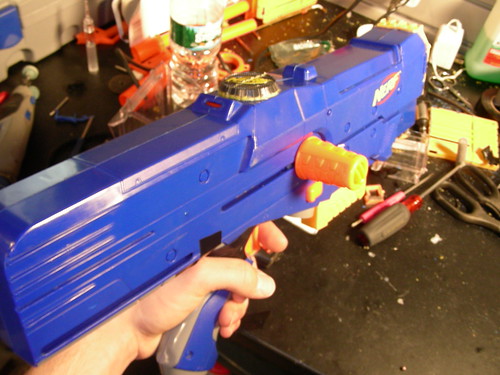
I love the Longshot. The solid cocking, the nice 'whump!' as it fires a Streamline, the clip, it's all just fun. However, it's huge and unwieldy. After getting inspired by FenixHarth's carbine mod, I decided to make one. For now, it'll be used for short ranges and indoors. Later, I'll probably add an Angel Breech to convert it to long-range.

TL;DR - I'm cutting down a Longshot. Here are some pictures.

Posted Image

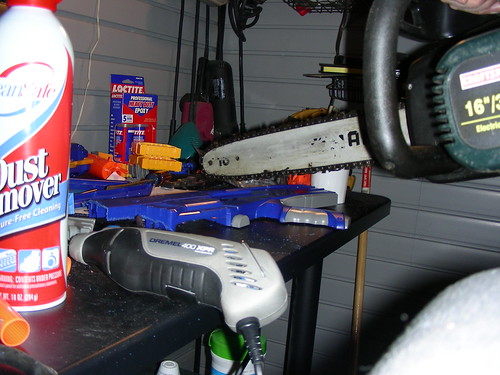
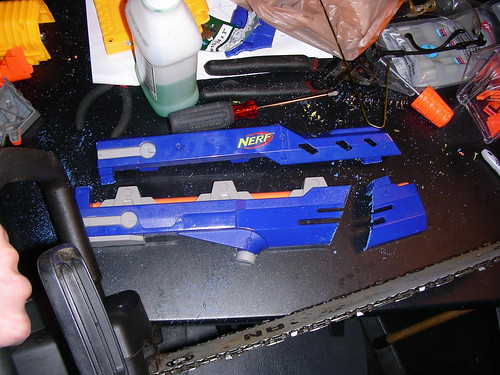
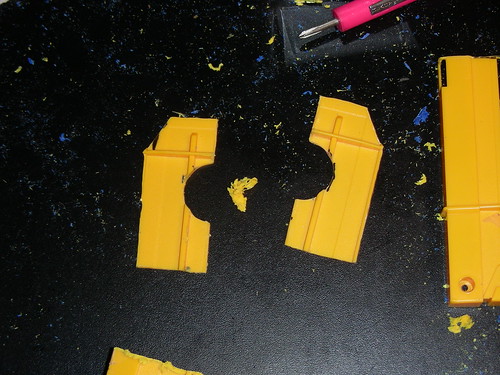
The first step is cutting down the Longshot to make the carbine shell. Diamondback suggested in #nerfchat that I use a band saw. That probably would have been a good idea - I sliced off half of the dart-tooth retaining screw. Oops.

Posted Image

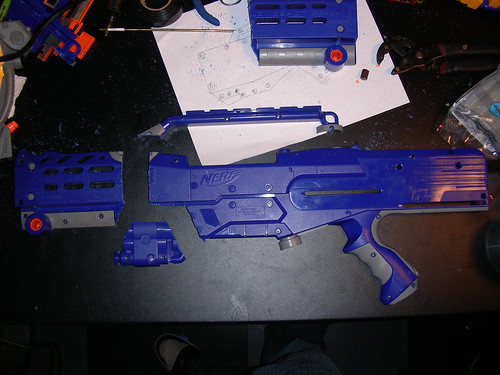
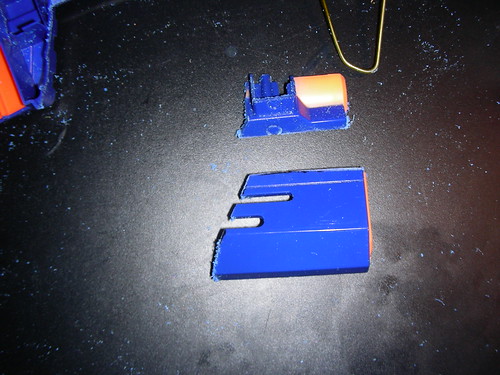
This is an exploded view of the pieces I cut off.

Posted Image

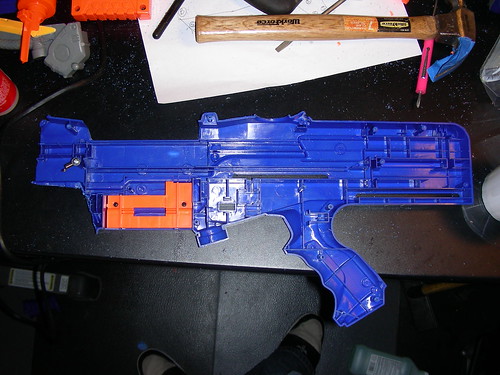
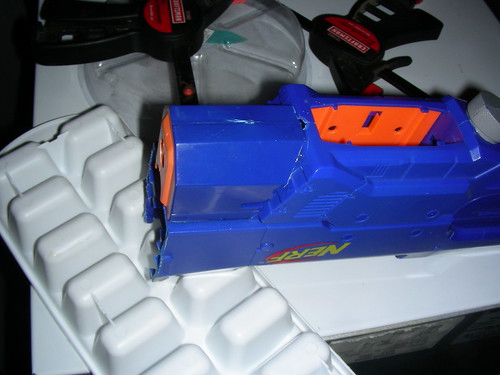
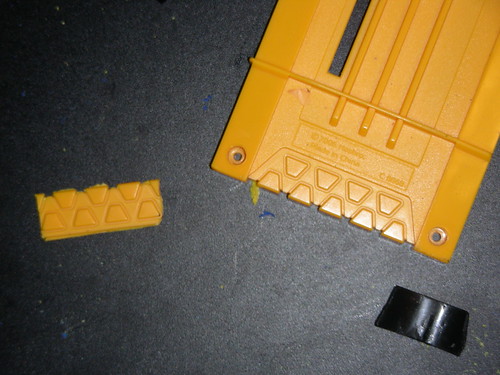
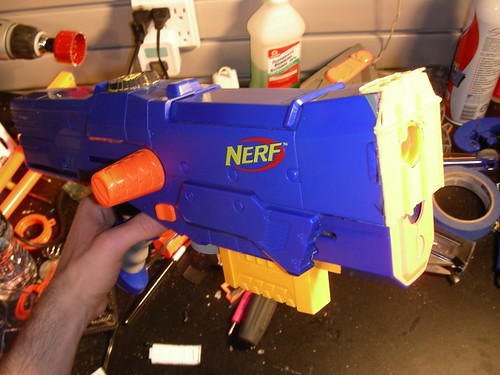
And here's the final product. Bust out a magnifying glass and peep the mangled peg at the bottom.

Posted Image

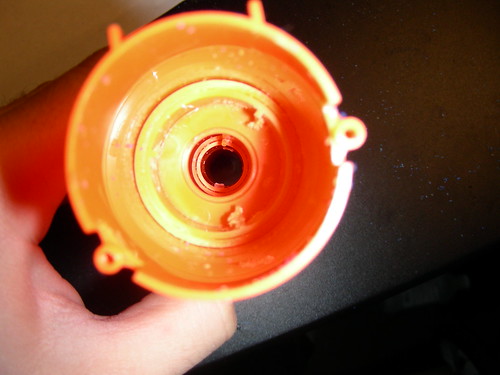
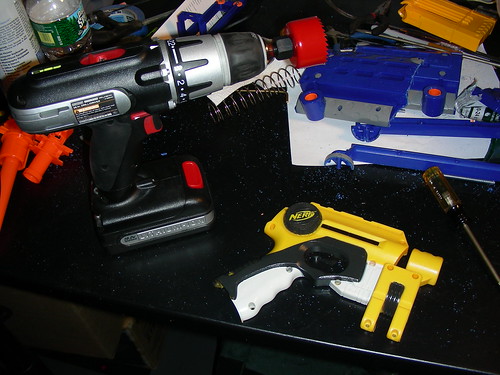
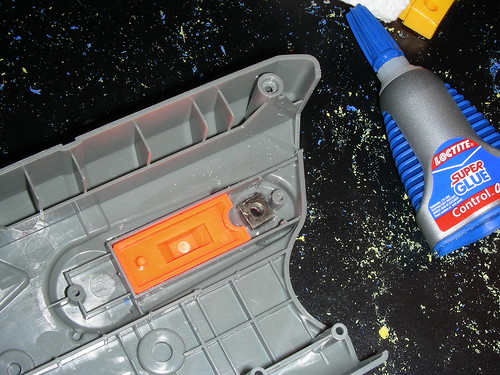
Then it was time to beat the crap out of the restrictor. O'Bob on #nerfchat suggested I use a pipe cutter, but I decided to stick with the classic drill. Drilling actually wasn't as hard as I'd thought. I just went in through the back of the tank, weakened the three posts with a Dremel, and finished the job with a flathead.

Posted Image

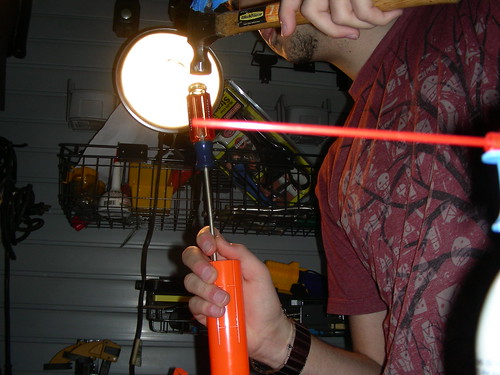
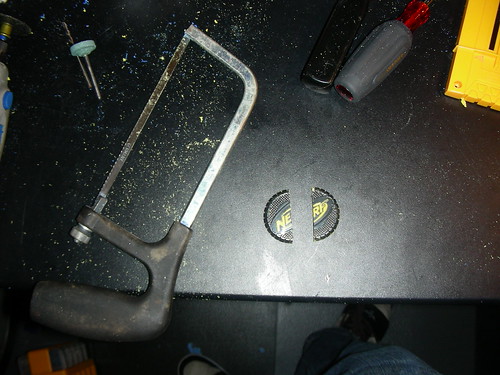
To get rid of the peg, I carefully inserted the flathead into the barrel and CAREFULLY tapped it with a hammer.

Posted Image

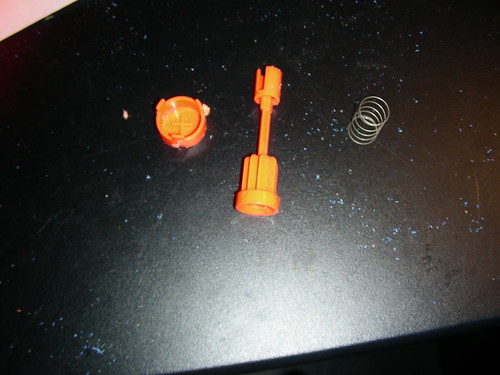
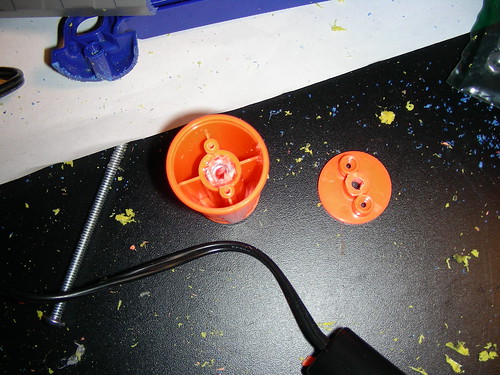
Here's all the restrictor crap. The peg mysteriously went missing.

Posted Image

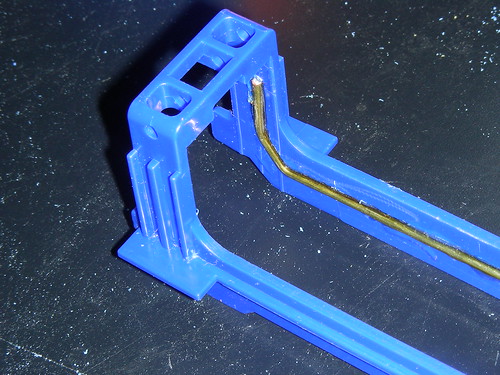
Now the fun part - epoxy! I reinforced every load-bearing piece with plenty of steel-reinforced epoxy putty. The plunger got four brass rods, steel putty, AND epoxy. You can see the empty tube of FastSteel in the upper-left.

TO READ THE REST OF THE MOD, CONTINUE TO POST #9!

EDIT 1: Corrected overly harsh language when referring to another member.
EDIT 2: Added second part of writeup.
EDIT 3: Corrected citing Shorty for carbine mod - actually was FenixHarth.
EDIT 4: Name and description edited to comply with Talio's mod naming rules.

Edited by Zack the Mack, 17 July 2009 - 01:46 AM.

  • 0
Ask me questions about electronics, Arduino, and 3D printing

#2 stuck by stefan

stuck by stefan

    Member

  • Members
  • 280 posts

Posted 08 July 2009 - 12:41 PM

For a first post, that is very good. but still, you could have just posted in the mods and pjs thread.
  • 0

This is the NerfHaven profile of Northeast Designs. For more info visit https://www.facebook...p8OwIso&fref=nf

Old school Nerf engineer since 2008


#3 taerKitty

taerKitty

    Member

  • Members
  • 883 posts

Posted 08 July 2009 - 02:45 PM

For a first post, that is very good. but still, you could have just posted in the mods and pjs thread.

Nah, this is a writeup with internals. I see the M&PJ thread as for finished products.

Speaking of which, can we get a shot of the finished product?

Thanks for the clear walk-through on reinforcing the tender bits. If I could, could you take shots of the three parts from different angles? I'm especially interested in how you braced the (infamous) bolt sled.

I love Longshots as well - but I like shotgun modding mine so it's not so inconvenient to prime.
  • 0
Fugly is a feature.

#4 ZACHARIAH

ZACHARIAH

    Member

  • Members
  • 41 posts

Posted 08 July 2009 - 06:49 PM

Did you minimize that gun with a chainsaw?
  • 0
"When the pin is pulled Mr. grenade is not your friend." -US army training manual

#5 Ner Commando

Ner Commando

    Member

  • Members
  • 118 posts

Posted 08 July 2009 - 09:08 PM

Good job. Although it's been done many times before you did it nice, from what I can tell. Hope you get those final pix up soon.
  • 0

#6 Hi Yah

Hi Yah

    Member

  • Members
  • 294 posts

Posted 08 July 2009 - 10:18 PM

Great first post! I personally love reinforcing with putty because it's so easy and effective.
  • 0
The yellow balls are also slightly smaller in diameter than the green ones.

#7 Icey

Icey

    Member

  • Members
  • 37 posts

Posted 09 July 2009 - 04:40 PM

Holy crap!! Someone made a first post with proper grammar and did not sound like a 6 year old! Congratulations!
Anyways, it looks good and I can't wait to see it finished.

Edited by Icey, 09 July 2009 - 04:41 PM.

  • 0
Haven't been on here since what...like 2006?

#8 navyseal849

navyseal849

    Member

  • Members
  • 44 posts

Posted 09 July 2009 - 06:40 PM

Holy crap!! Someone made a first post with proper grammar and did not sound like a 6 year old! Congratulations!
Anyways, it looks good and I can't wait to see it finished.

Hey! I did that! I think...
Errr this might sound a tad stupid but what is the part under the boltsled? I don't recognize it...At first sight I thought it was the plunger...Wait is it the plunger AND plunger tube?
It would be pretty sweet of you integrated an eliminator where the bipod used to be...Or two eliminators...If you want the LS completely minimized keep the stock off. It's more of an assault rifle that way. Besides I would feel better if I knew someone else was doing it.
  • 0
To stop yourself from having mood swings take a cyanide pill! Guaranteed to permanently prevent changes in your mood!
QUOTE(Hi Yah! @ Jun 28 2009, 07:45 AM) View Post

That thing is huge! You should get a leash for it.


#9 Zack the Mack

Zack the Mack

    Member

  • Members
  • 360 posts

Posted 10 July 2009 - 12:43 AM

Posted Image

Originally, I wasn't planning on reinforcing the bolt sled joint. However, after hearing so many horror stories about how they snapped on the first shot, I decided to give the sled the TantumBull treatment. I put an extra bend in the wire so the stress won't be concentrated on a corner.

Posted Image

While that was cooking, I made some shell additions to cover up the holes my minimization left all over the place. The first part was the gaping hole at the bottom. This is an important area to cover up because a prong on the dart-tooth protrudes here. I cut a piece off the Longshot's front gun...

Posted Image

...tweaked it to fit more tightly...

Posted Image

...and epoxied it into place. It's not big or sturdy enough to grab, but it neatly covers the hole and protects the dart-tooth.

Posted Image

To cover the massive opening at the front of the blaster, I cut a new front panel out of a Longshot clip. Calm your raging hearts - it was mangled by a friend when he tried to make a double clip.

Posted Image

This left a little hole at the top, so I cut another scrap of clip.

Posted Image

The only hole left was a nice, round one where the N-Strike rail used to be. I needed something nice and round to cover it. As chance would have it, I had half a discarded Nite Finder shell and a hole saw just sitting there in front of me. How convenient. The emblem is actually surprisingly hard to get out - it's got a lot of structural crap on the back.

Posted Image

I carefully split the front pieces and the NiteFinder emblem so I could open the gun as normal. This made me really wish I had a band saw.

Posted Image

A little more epoxy, and the blaster had no open holes that gunk could slip into. I wish I could say the same about your mom.

Posted Image

The epoxy fumes eventually overwhelmed me and I slipped into a hallucinogenic trance. After having a curling match with a very kind walrus, I woke up to discover that I had invented the ZtM Anti-Collapsing Adjustable Buttstock...

Posted Image

...and the ZtM EZ-Remove Single Cocking Handle. If I didn't really invent these, I'm sorry for not giving you credit. I did a search, and as far as I can tell, neither one has been done before. They'll get individual, separate write-ups unless someone has already beat me to the punch.

TO CHECK OUT THE FINISHED PRODUCT, CONTINUE TO POST 13!

Questions:
Q: WTF does Sholef mean? A: 'Gunslinger' in Hebrew. It's named after an IDF concept tank. Say Show-LEFF.

Edited by Zack the Mack, 17 July 2009 - 01:49 AM.

  • 0
Ask me questions about electronics, Arduino, and 3D printing

#10 Zack the Mack

Zack the Mack

    Member

  • Members
  • 360 posts

Posted 10 July 2009 - 12:46 AM

Thanks for the clear walk-through on reinforcing the tender bits. If I could, could you take shots of the three parts from different angles? I'm especially interested in how you braced the (infamous) bolt sled.


You're welcome! Check post #9 for the bolt-sled reinforcement. I might do a dedicated LS reinforcement thread if my mods work and the admins give me the thumbs-up.

EDIT: God dammit, I thought these were threaded posts, didn't mean to double-post. Admin, delete this post plox.

Edited by Zack the Mack, 10 July 2009 - 12:47 AM.

  • 0
Ask me questions about electronics, Arduino, and 3D printing

#11 Fenixharth

Fenixharth

    Member

  • Members
  • 187 posts

Posted 10 July 2009 - 01:14 AM

But that's my Longshot Carbine you're linking too there... But any-who:

I like it. Its very clean and I can't wait to see some ranges and some finished pictures.
  • 0

#12 wingd man

wingd man

    Member

  • Members
  • 514 posts

Posted 10 July 2009 - 12:50 PM

Really cool cosmetics


That's... really cool. At first I thought this was just another stupid long shot carbine thread, but this is the best way of covering up the holes I have seen! Could we have another shot of it that's a little more general, even if it's not totally put together?
  • 0

#13 Zack the Mack

Zack the Mack

    Member

  • Members
  • 360 posts

Posted 12 July 2009 - 04:58 PM

I put the Longshot back together after finishing the last bit of the write-up, but the performance was awful. The magazines and mechanism jammed, the plunger released itself, ranges were horrible (40's) and the NiteFinder spring rattled around.

After some perusal of NerfHaven, an hour on #nerfchat, and some intense soul-searching, I figured out what the problems were. First off, I forgot to reinstall the clip-tooth and some other plastic diddly. Second, some of the reinforcements were unnecessary and causing friction, so I replaced them with stock parts. I also replaced the NiteFinder spring with a Big Bad Bow spring to stop the jangling, and put a fatter spring on the plunger retainer. Finally, the part of the dart-tooth retaining screw I hacked off was causing the dart-tooth to jiggle around, so I repaired the area with FastSteel.

I put 'er back together again, prayed, tugged back the handle, and pulled the trigger. The Stefan chambered perfectly and exploded from the barrel, sailed through the air, and tunneled half an inch into some exposed insulation foam. Success!

Posted Image

Here's the view from the front. Peep the plastic panels on the front and bottom.

Posted Image

And the view from the back! Take a look at the NiteFinder emblem on top.

Posted Image

The priming handle needs some serious effort to pull back, and left this pressure blister after only 20 or so test fires. I added some thick grip tape to help, but this blaster can't be used for an entire war without some gloves.

Final ranges are between 50 and 75 feet. Accuracy is pretty bad. Reload time is very short to decent, depending on how beefy your right bicep is. Aesthetics are orgasmic.

Future work will include adding a brass barrel and possibly an Angel Breech and paint job. This blaster will be used as a secondary in outdoor wars, and a primary in indoor wars and close-quarters games.
  • 0
Ask me questions about electronics, Arduino, and 3D printing

#14 wingd man

wingd man

    Member

  • Members
  • 514 posts

Posted 12 July 2009 - 09:47 PM

With some internal mods, this could be the best longshot since... well there, in my opinion, has never been a good longshot (except the lancer, but that really shouldn't count) so this is the best.
Just some suggestions:
  • Angel breech
  • 2K integration into the LSFG segment
  • better system of priming (ice's keyring thing?)
  • paint
  • put the goddamn stock on, it looks so much better, and if you leave it collapsed with the bottom cut off, it doesn't take up much room
EDIT: Forgot hereticorp's, that's also a good LS.

Edited by wing'd man, 12 July 2009 - 09:48 PM.

  • 0

#15 Zack the Mack

Zack the Mack

    Member

  • Members
  • 360 posts

Posted 13 July 2009 - 11:02 AM

With some internal mods, this could be the best longshot since...

Thanks a lot, that's a hell of a compliment! Let me deal with the suggestions...

  • Angel breech

Like I said in the first part of the write-up, an Angel Breech is way beyond my abilities and I don't feel the need to pay for someone else to do it. Maybe in the future...

  • 2K integration into the LSFG segment

I couldn't integrate a Secret Strike, let alone an AT2K. The front piece is about a 2" cube, and part of that holds the reinforcements for the dart-tooth screw I hacked off. I already have six shots on tap, so why bother with another gun?

  • better system of priming (ice's keyring thing?)

I absolutely need to replace the cocking handle. The two springs are so forceful, I can barely prime the blaster, and the lack of front barrel makes a shotgun handle impossible. I'm drawing up plans for a rear handle, but this project is backburner-ed at this point.

  • paint

Absolutely, this is just begging for a nice paint job. However, my painting skillz are horrible, and I don't want to risk ruining such a sweet blaster! Maybe in the future.

  • put the goddamn stock on, it looks so much better, and if you leave it collapsed with the bottom cut off, it doesn't take up much room

I originally customized the stock and put it on, but ended up removing it. I like firing blasters from arm's length, which makes the stock just get in the way. When it's folded up, I can barely even grab the gun.

So thanks for the suggestions - in time, you might even get shot by them!
  • 0
Ask me questions about electronics, Arduino, and 3D printing

#16 OnyxZenith

OnyxZenith

    Member

  • Members
  • 191 posts

Posted 16 July 2009 - 01:09 AM

I like it :( but Id personally keep the railand the stock.. idk I jusr like them for decent cosmetics... overall its bad ass :D
  • 0
SoothSayer-


"Just adding some lube and twisting it back and forth for a while should make it easier"

Subscribe to my Music page and mods >> http://www.youtube.com/user/OnyxMP312

#17 TantumBull

TantumBull

    Member

  • Moderators
  • 1,929 posts

Posted 16 July 2009 - 02:07 PM

That's flippin' awesome! Excellent job! Very, very sexy LS you have there. And I wouldn't worry to much about a PJ. IMO a PJ is only completely essential if you've fucked the stock PJ, which you obviously have skillfully retained.
  • 0

#18 spartan062

spartan062

    Member

  • Members
  • 206 posts

Posted 22 July 2009 - 05:30 PM

Very nice mod. What do you mean by "peep"?
  • 0
Join the Revolution- NerfRevolution.com


0 user(s) are reading this topic

0 members, 0 guests, 0 anonymous users