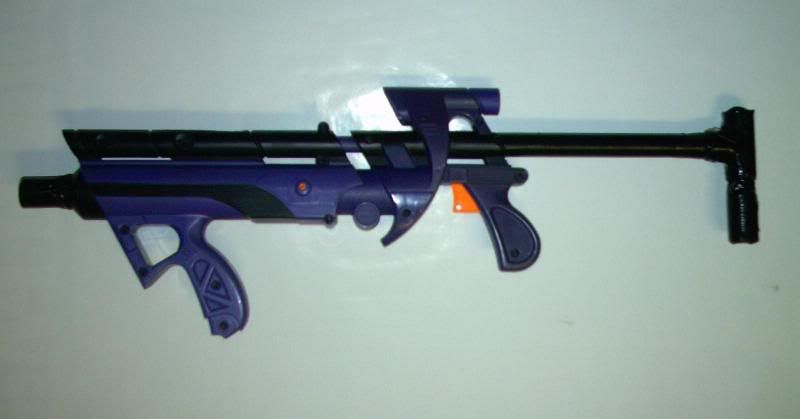
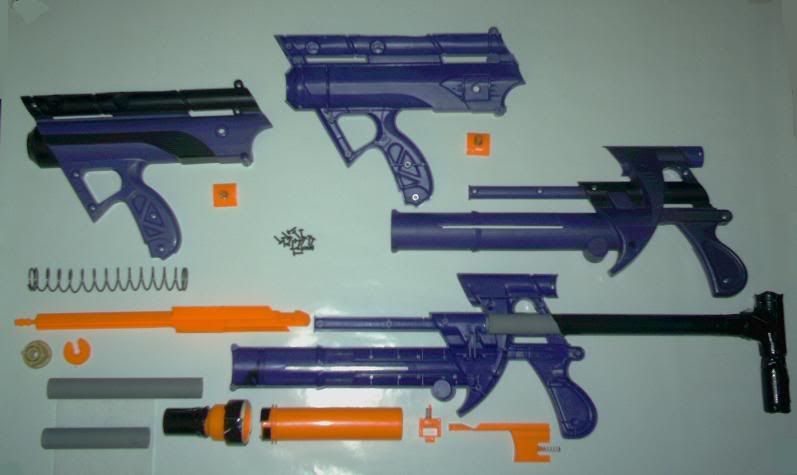
Okay, so starting off I want to make it clear that I'm using ¾ CPVC in this writeup. Or at least it looks that way. Really, I have PETG nested inside the CPVC using electrical tape and some plumbers goop, and the CPVC is there for speed loading and couplers. I've heard this called a bone marrow-style barrel, so that's what I'll refer to it as. If you are using ½, it's the exact same thing except your finished product will look a touch different.
I'll be running through some basic mods here that I collaborated from existing ones, just for the sake of actually knowing what I did.
First off, you want to saw/shave down the existing orange barrel part until it's flush with the big orange part that holds the AR.

Next sand/cut down the inside of the AR ring itself until it's just a ring, with no ridge on one side or anything. The inside should be completely smooth.


Now you can take your CPVC coupler and cut it in half (if you want, not necessary. It just makes for a smaller more compact look, and you get two couplers for the price of one). Sand down the side you cut with a Dremel sanding bit until you can eyeball it's fairly straight, then manually sand it until you know it's perfectly straight (shove a piece of CPVC in there and let it rest on the orange barrel part we trimmed down before then take a ruler to it). It is extremely important this side of your coupler is perfectly straight, or else the whole barrel itself winds up crooked, and that's a practically completely useless gun right there.
Here comes the part where my writeup differs a bit from the rest. This might be the way people did this, but I don't exactly know so I'll show you what I did. We'll be getting rid of all the dead space in the barrel/AR area and creating a new, safer place for the the plunger head to hit so your gun can be durable over time.
Stick your AR ring inside the barrel area the way it should go. Now take a piece of PETG (or CPVC might work better, the PETG was a little wobbly but worked nonetheless) lube it all over one end. When I mean all over, I mean go crazy. Get like 5 or more inches of the barrel insanely lubed up, and a bit inside just for safe keeping. Go absolutely nuts without worrying. Once that's done , put that lubed side of the PETG in the barrel area and hold it there with your hand like this:

So that the lubed side of the PETG is all inside the barrel area, and some it protruding out also.
Now completely go to town with hot glue in there. Keep on pouring it all in there until you have a hot glue that's flush with or a bit above (enveloping the top) of the AR ring. Leave the hot glue to dry for a while, as multitudes of hot glue take longer to dry upon themselves. Once it's dry, pull out the PETG barrel. I had a really hard time with this and had to spray some lube on the top of the hot glue plateau and hope it got down in there. After a lot of pushing my PETG finally same out, leaving behind a fairly clean hole down the centre of the hot glue. Just to make it cleaner I took a sanding bit of a Dremel and put it as far as I could down both sides of the hot glue/barrel end so make it perfect.
Here's the final product:

Warning: I had to cut off about 4 inches of the end of my PETG because there was hot glue still stuck to it that I couldn’t get off. So if you're sexually attracted to your PETG or something and don't want to waste like 4 inches of it, find something else to use. Just warning you.
Now all you need to do is add your coupler on the top of the barrel end with all the hotglue in it now. On the end where the old, arrow barrel used to be is where it goes. Epoxy it down, and then spread some Plumbers Goop around the edges where it meets the barrel end. Leave it to dry.
In the meantime do whatever other mods you want/can find. The only other thing I did was reinforce the washer on the end of the plunger rod:

Even though I didn't add a new spring, I just did it to be safe and to keep the gun stable and durable.
Now would also be a good time to make your speedloader and bone marrow barrels.
Once you're all dried up slap 'er all back together and you've got yourself a clean, durable and great working BBB with a higher RoF than most. Simple mods that don't really deserve a post this big, but they have it anyways.


I'd like to thank boom13 and joeyaglr444 for their BBB mods, and FA24 for his post in joeyaglr444's mod showing a better way to use the hot glue mess. His way of hot gluing a spring in the Doomsayer mod also gave me the idea to sue PETG to keep the hole in the barrel end amid all the hot glue.
Hope everything was clear. Sorry if the pictures were a bit blurry, my camera's not the best. But hopefully my explanations got the point across.
Edited by Glint, 24 April 2009 - 09:42 PM.


