
Based off of Ice9's hornet blast button.
Start with:
End with:

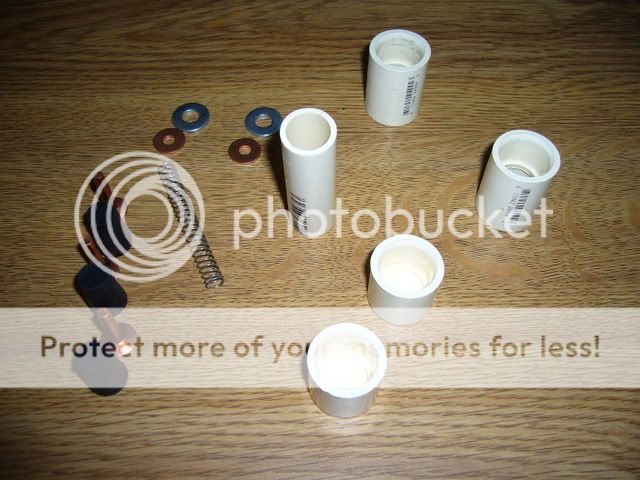
Materials:
3x #9 3/4" copper stud
3x 1/2" top diam rubber stopper
2x #8 copper burr
2x 1/2" OD flat washer
2x 1/2" CPVC endcap
2x 1/2" CPVC coupler
1x 1/2" CPVC scrap tubing
1x spring (ACE #3)
(not pictured)
4x 1/8x1/4" vinyl tubing pieces
Start by cutting the end caps and couplers in half. For the couplers, cut 1/4 of it off of each end:


Superglue a burr to a washer, rounded side of the burr to the flat side of the washer. Center the burr on the washer:

Drop a burr+washer into each coupler, burr side down. The washer should catch on the ring inside of the coupler, holding the burr perfectly centered (length-wise and cross-sectionally) in the coupler. Goop around the washer:


These couplers form "walls." Rubber stoppers will seal against the flat side of the burr, forming a triggered check valve.
Take your scrap of CPVC and cut it into 3 sections. Put these aside, or into the couplers/endcaps (as you can see in some of the pictures) depending on the scenario. I generally left them in, and took them out only if they would get in the way of assembly.
Take an endcap and drill a hole in it. Assemble the beginnings of a blast button:


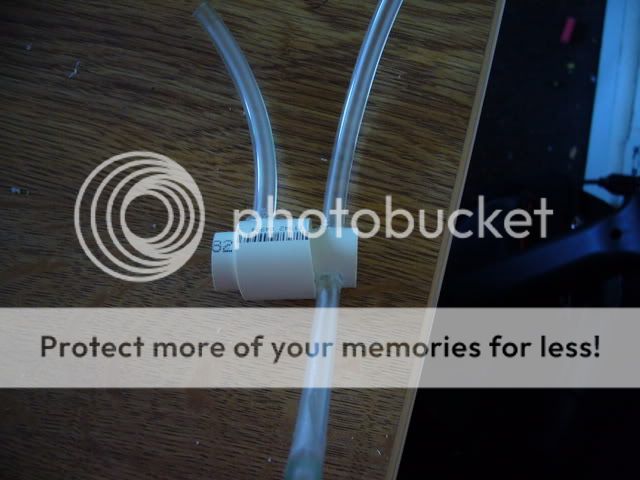
While you wait for your glue of choice to finish curing, stick CPVC into couplers and drill holes for the tubing. Be mindful of which segment of CPVC corresponds to which chamber. A quick schematic is [(endcap)(CPVC)(coupler|washer|burr][coupler)(CPVC)(coupler|washer|burr][coupler)(CPVC)(endcap)]. () denote parts. [] mark off chambers. Here's a picture of half of two chambers with tubing:
Here's where it gets tricky. Take the endcap with the triggered check valve installed, and attach it to a coupler. The flat side of the burr should face away from the trigger. Depress the trigger 1/3 of the way, and then somehow measure the distance from the end of the stopper on the first trigger to the flat side of the burr in the coupler. I did it by inserting a stud and spring backwards, pushing it to the trigger, holding in place with my finger, depressing the trigger and pushing my finger holding the stud back, removing the first half, and then marking the end of the stud. Then I measure that, and cut that distance from the top of the stud, plus a small amount to account for overlap between stud and stopper. There is probably a much easier way to do this (like a small triangular-prism ruler), but this is what I thought of at the time with the materials I had:


Edited by Zorn's Lemma, 27 July 2009 - 02:43 AM.


