I paint everything by hand, from start to finish, including sealing the final layers of paint. I've found I have much more control that way, and the paints dry more quickly. It also means I can paint without worrying about humidity, temperature, or having adequate ventilation.
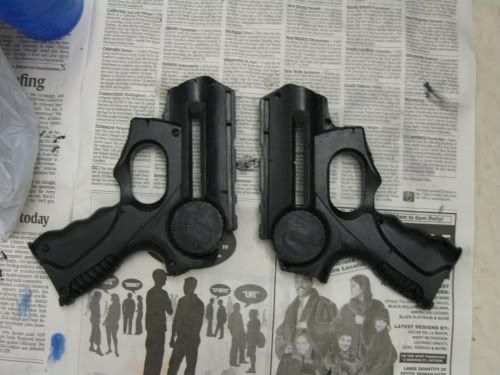
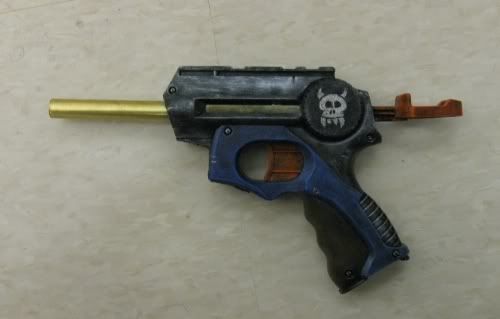
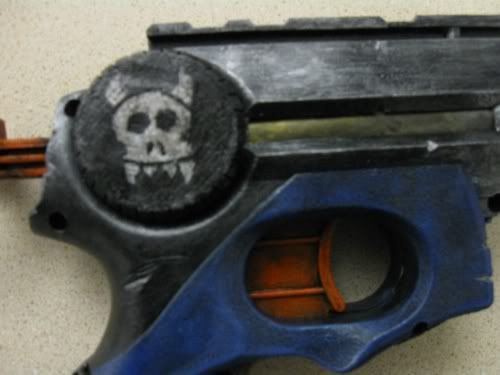
Anyway, the "test subject" for this demonstration is a minimized NiteFinder with a spring replacement and a 3.5" length of 17/32" brass for a barrel. I also replaced the catch spring and cushioned the plunger head. All of these mods are pretty standard and you could easily find write-ups for them around NH.
Materials
Acrylic paint
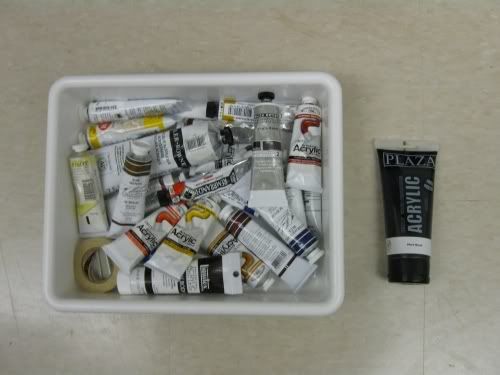
On the left is my big bin of paint. I use artist quality paints except for the big tube of black on the right, which is student-grade. This is important. Student-grade paints are often made with cheaper pigments and dyes that will fade over time with exposure to light, which is definitely not something you want to happen if you plan on doing a lot of outdoor nerfing. They also have a lot of fillers and brighteners that will end up looking like mud in some mixtures. They don't look as bright or as clean as the artist quality paints, so I use the good stuff. It's expensive, but it's worth it if you want a paint job that won't fade away in a few months.
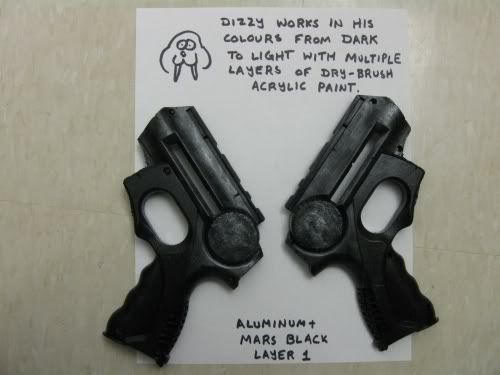
The black I use to prime the surfaces of the blasters. Black usually doesn't fade, nor does white, but other colours of student grade paints aren't always as reliable.
Brushes
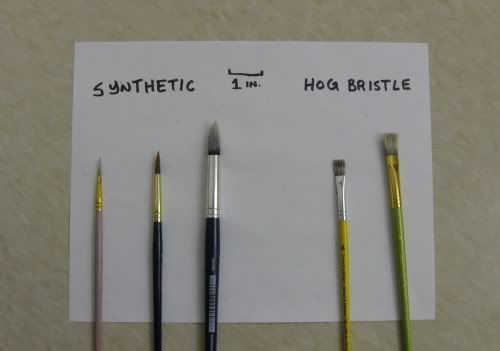
I don't use my best brushes for painting blasters, since my method puts brushes through hell and back. These ones are pretty inexpensive but reliable. The synthetic ones are for applying flat areas of paint, while the hog bristle ones are for dry brushing and scumbing. Take care of your brushes; wash them out regularly with soap and water, and don't let the paint dry in the brush hairs.
From left to right:
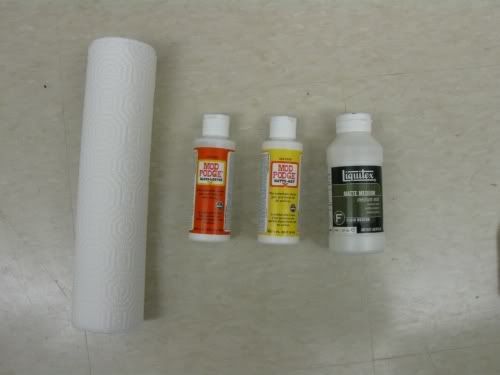
Paper towel
You can use this for anything and everything, most notably wiping excess paint from your brush when drybtushing. It's also handy for creating textures or wiping paint from the blaster in the event you make a mistake, though with acrylics it's often easier to simply paint over a bad area than to try to wipe it clean.
Mod Podge Gloss & Mod Podge Matte
These are sealers; you use them on top of painted areas to protect the paint underneath them. Usually I apply them over the first couple of layers of flat black before I move to colours, then on top of the finished colours, and finally over the entire blaster once graphics and lettering are finished. You can mix paint into them for some really nifty transparent glazing effects. You can also mix the matte and the gloss to get something in between flat-looking matte and retina-searing gloss.
Acrylic Matte Medium
Use this to thin down your paints instead of water. It's useful for details and small areas when the paint is too thick to apply with a fine brush.
Scarring
I use hobby knives, needle files and sandpaper for this. For bigger scars, I use bigger files, or for a really big one I might use a Dremel rotary tool grinding bit.
To make more convincing scars, emphasize them more around corners and edges. The front of the blaster would be the first thing to hit the ground usually if it were dropped, or if something was coming towards its wielder, it would hit the front of the blaster first, so naturally there would be more scars towards the front. Just something to take into consideration.
(Over the image limit... again. Part 2 is on its way.)