
http://nerfhaven.com...topic=9477&hl=#
You can find pics of stock internals in that thread. The SW RTB internals are really similar to the NiteFinder. The front and end caps are glued on, so you'll have to cut them down the centre and pry them off. The light scope on the top is also glued on, keeping the two halves of the shell together, so you can cut that off too.
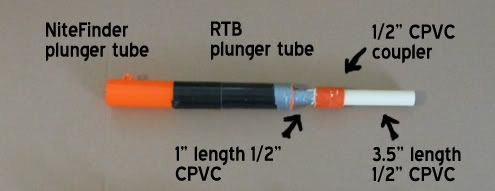
First thing I did when I got the blaster open was to remove the air restrictors. (They're in the same place you would find them on a NF). I removed the stock barrel (which has holes punched in it too) and plunger chamber, then attatched a NiteFinder plunger chamber to the stock RTB tube, sanding the inside of the NF tube out so that the plunger would slide smoothly between them. I then added a CPVC coupler to the end of the plunger tube.
In order for the new plunger chamber to fit inside the shell properly, I had to do a bit of body work. A Dremel rotary tool comes in handy for this, otherwise it would take quite a lot of cutting and trimming with a craft knife or utility knife.
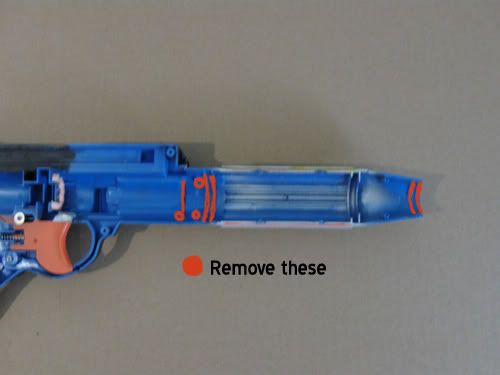
(There is also a screw housing stub on the other side of the shell that needs to be removed.)
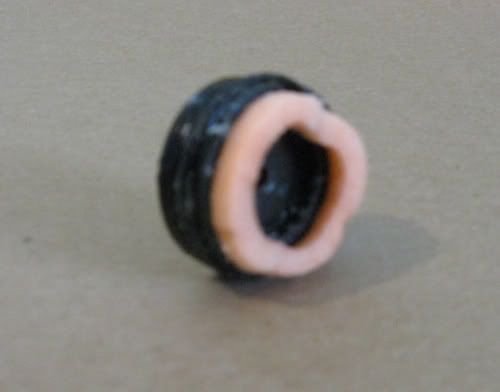
Once the plunger chamber was extended and the body trimmed to house it, I got to work on the rest of the internals, adding a second O-ring to the plunger head (Danco Repair no. 9, 5/8" OD x 7/16" ID) and using some foam from one of the stock darts to cushion the end of the head.
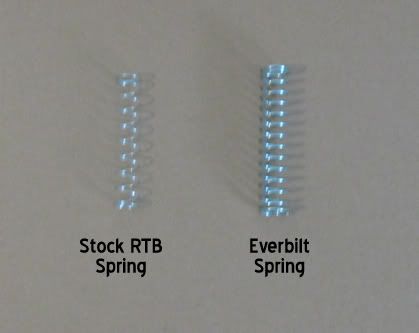
I replaced the unimpressive stock spring with a heftier Everbilt one (7/8" x 4" x .08"; you can buy these at Home Depot in packs of two).
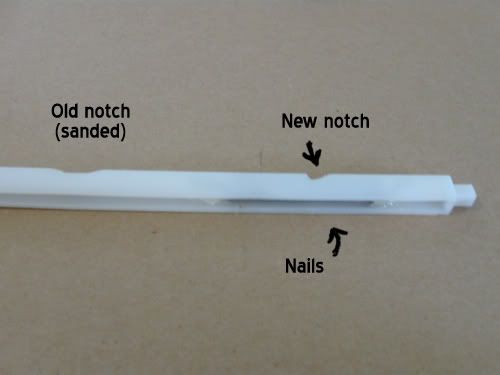
Since the plunger tube is longer, I needed to make the plunger slide back further in order to maximize all of the air space of the plunger chamber. I sanded the old catch notch down to a smooth curve, then cut a new catch notch two inches from the end of the plunger rod, making sure there was enough space for the catch to go down and keep the rod from sliding forward. I then reinforced that part of the nod with a few nails and secured them in place with a generous amount of hot glue (without it, the pressure of the spring may cause the rod to snap while the blaster is primed).
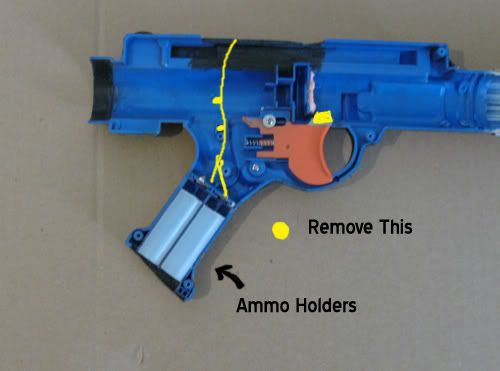
I had to cut the trigger down so that it would slide underneath the longer plunger tube. I took out the wires in the shell and cleared the battery containers out, then fit some tubing in there so that they could hold spare darts (I had a brush head shield that fit 1/2 inch foam perfectly). I also added some more stock dart foam to the front of the catch plate housing to cushion the structure from the impact of the spring.
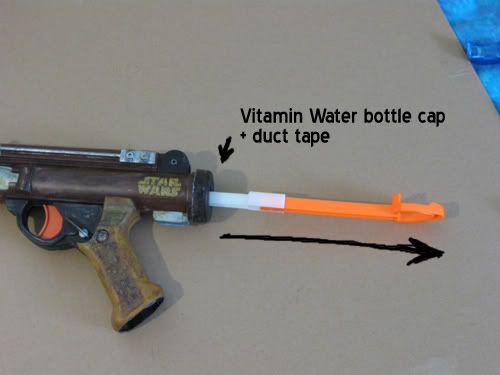
I figured out that a Vitamin Water bottle cap fits over the back end of the blaster near perfectly. A layer of duct tape on the inside of the cap made sure that the fit was snug, and then I cut out a big hole in the middle of the cap so that the entire extended plunger rod could fit through it.
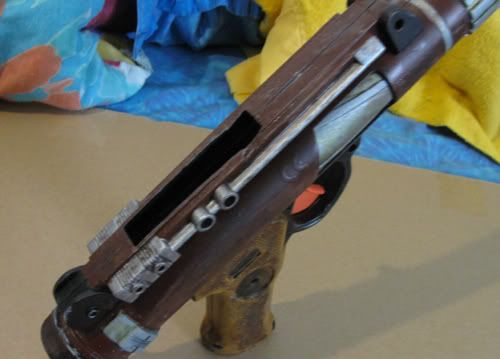
Here are all of the modified internals put back into place:
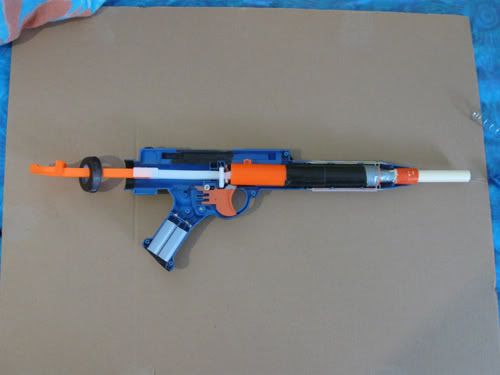
I gave it a battle-worn desert trooper kind of paint job, hand painting over aluminum and brown spray with my acrylics, sealing it with Krylon Matte Finish.

Ranges are good. I was getting about 55-65 feet on a very cold day with Streamlines, so I would guess it would be around 70 feet indoors. Ranges would increase with bands or bungee cords.
(Please bear with me; this is my first write-up, so if there is anything I could clarify for you feel free to ask. Thanks.)


