Jump to content


Photo

Firefly Plunger Seal Improval + Integration

Integration internals + write up on pg 2

16 replies to this topic

#1 Zorns Lemma

Zorns Lemma

    Sir Scrt

  • Moderators
  • 1,277 posts

Posted 16 January 2009 - 02:21 AM

Posted Image

My roommate, Ice Nine, wanted me to call this gun the Marvelous Mussolini in appreciation of "hornet hitler" (now, "horny hitler") and the not-really-marvelous Salvo integration. Since the integration part was his idea, I would've let him name it, but my other, much more sensible, roommate christened it Shiva (something much more agreeable), in appreciation of the temple-esque nature of the front of the gun, and the 4 "hands" and 3 "eyes" aspect.

Posted Image

1 firefly, 3 big salvo chambers, 2 hornet chambers, 1 big salvo pump + trigger mech. The profuse amounts of duct tape are temporary: I will be replacing all the exterior mounting with putty and liquid nails once I've finalized alignment and such.

Keyring fires the air guns like so:

Posted Image

Write up will consist of two parts, the firefly internal mod, and the integration process.

========================
Part One
========================

Start with a preliminary check. My firefly stock had a weird problem where the firing barrel didn't align properly with the plunger tube on trigger depression. Pull the trigger and look at the front of the gun. It should look like this:

Posted Image

Note that the barrels are such that one of the barrels aligns with the split in the case. If you don't see this, you've got a turret alignment issue. Keep this in mind for later.

Now, open up the gun, and unscrew the plunger tube. Take this piece and burn it (but keep the spring that's behind it):
Posted Image
(pic from Renegade's basic firefly mod writeup)

Here we have the turret mechanism:

Posted Image

If you don't have an alignment issue, just follow http://nerfhaven.com...?showtopic=5323 and remove ARs from the turret and rebarrel (I am actually using stock barrels).

If you do have an alignment issue, then you'll need to use some adhesive within the racheting mechanism of the turret to artificially create a new alignment between the turret and its rotation mechanism. I can't take mine apart, so I have no pictures, and thus you'll have to get the gist of it and figure out the specifics yourself.

If you don't have alignment issues, skip the next section

Turret alignment fix
----------------------------
What I did:
0) Reassemble the turret, except for the ratcheting wheel and back half of the rotation mech. Be sure to put the retention bracket (see http://nerfhaven.com...showtopic=12814 if you have no idea what I'm talking about) on.

1) Take the spring behind that blue/yellow ovalish piece I told you to burn and place that where the original spring would go in the well in the front half of the rotation mech (the one connected to the barrels):
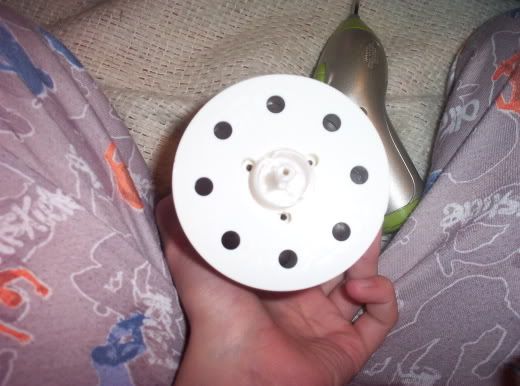
Posted Image
The spring should go in that inner circle surround the peg (pic taken from writeup I linked to).

2) Hotglue the spring and while the glue is still drying, reassemble the turret, remember to put the racheting wheel (the thing with the gears that mates with the gears on the insides of the other half of the rotation mech) on top of the spring.

3) Disassemble the turret, and the spring should now be hot glued into a solid shape that roughly takes up the space behind the racheting wheel.

4) Bond the wheel to the hotglued spring. Add more hot glue if you want.

5) Add a sizeable amount of hot glue to the face of the wheel and slap on the back half of the rotation mech, screw it in, and then slap it into the firefly shell.

6) Your trigger mech should still be in, so depress the trigger to rotate the barrels, and with the trigger still depressed, rotate the barrels so that they align properly (see the first pic of alignment).

The following steps are optional, but will ensure the alignment is properly done and will hold.
7) Pull out the turret, unscrew the back half of the rotation mech, and pry that thing apart. The hot glue should still be drying, and if it isn't, hotglue isn't that strong anyways.

8) Fill the space where you initially added hot glue with liquid nails, and then reassemble the turret fully, and screw it in place.

9) Screw in the plunger tube. Depress the trigger, look down the plunger tube from the back, and make sure the hole to go to the barrel is smack dab in the center of the exit hole of the plunger tube. If it isn't, adjust by turning the turret, remembering to keep the trigger depressed so that you're changing the alignment within the ratcheting system in the rotation mech.

10) Put the plunger in. Look at it from the front. You should see this:

Posted Image

The picture isn't the greatest, and "up" is actually the lower right-hand corner, but essentially you should see that the holes are "centered"

Let that mess cure overnight.

Plunger tube seal improval
------------------------------

Here's what you want to get:
Posted Image
Posted Image

I took the tubing that the SMDTG pump is in, cut a section of it, and then glued it in to the front of the plunger tube, where that blue piece I had you throw out earlier is supposed to go. Hot glue around that to eliminate dead space, and then slap on an o-ring to improve seal.

The tubing should be cut to a length such that with the o-ring on and everything screwed into place, the plunger tube presses slightly against the turret. Too short, and you'll have zero seal. Too long, and you'll be a) placing undue stress on the internals and B) preventing turret rotation.

If you don't have a SMDTG pump to cut up, use any scrap tubing you can find lying around, or use 3/8(?) brass. A fat straw will probably work too. Anything that's slightly wider than the holes in the turret, should work.

Here's a view from the back:

Posted Image

That black ring is the stock o-ring on the plunger that I put in there for some (although probably pathetically little) cushioning.

My plunger looks like this:

Posted Image

New o-ring and a slightly-cut-down NF spring nested over the stock spring. Because the springs don't nest as well as I'd like, I cut down the NF spring to allow horizontal expansion, and thus reduce outward spring expansion, which could wear down the insides of the plunger tube.

Take a look at your turret again:

Posted Image
(of course, the rotation mech should be fully reassembled)

Compare that to the improved plunger tube, and if you have room to do it, dremel out the holes in the back to increase airflow.

Finally, I used silicone grease to lube the front of the plunger tube and the plunger head. Then reassemble the gun. Depress the trigger to rotate the turret and blow into the top barrel. If you can feel the pressure build up, then you've got a good seal. If you hear air escaping, open her back up and try again.

Ranges, shot flat from shoulder level:

Batch 1 - 54, 62, 67, 68, 73, 73, 74, 86
Batch 2 - 47, 68, 68, 70, 71, 73, 75, 75

We don't have uniform stefans yet, so I shot a mix of stefans, stock whistlers, cut streamlines, and CDTS. Measuring was done with 20-foot and 5-foot sections of vinyl tubing, laid out along the wall of the hallway. Anything not a multiple of 5 was eyeballed.

Part 2 on Page 2

Edited by Zorn's Lemma, 11 February 2009 - 12:54 AM.

  • 0
"In short, the same knowledge that underlies the ability to produce correct judgement is also the knowledge that underlies the ability to recognize correct judgement. To lack the former is to be deficient in the latter."
Kruger and Dunning (1999)

#2 A side of nerf

A side of nerf

    Georgia Nerf Lives

  • Members
  • 755 posts

Posted 16 January 2009 - 07:30 AM

That's pretty cool that you got such good ranges out of a Firefly. Great work!
  • 0
Southeast Nerf Contingent

#3 Mr BadWrench

Mr BadWrench

    Member

  • Members
  • 781 posts

Posted 16 January 2009 - 07:58 AM

HOLY SHIT!!!
  • 0
NerfChat IRC Chatroom Click to chat!

#4 slienced assassin

slienced assassin

    Member

  • Members
  • 66 posts

Posted 16 January 2009 - 08:16 AM

Oh my god. I almost crapped my pants when I saw that.
  • 0
92% of teens have moved on to rap.
If you are part of the 8% who still listen to "real music",
copy and paste this into your signature

http://supernerf.piczo.com/?cr=1

#5 Ice Nine

Ice Nine

    Prince Dangus

  • Administrators
  • 1,460 posts

Posted 16 January 2009 - 09:04 AM

I think this is appropriate:

Fucking. Nailed it.

I can attest to this gun's ranges, it's actually really impressive. Admittedly the plunger tube did crack pretty intensely after a few shots the first time but after that we learned our lesson (tons of goop and epoxy putty). The seal on the turret is fantastic, and the BS trigger mechanism is really cool. We took a BS trigger, cut it down to the rod and a little of the original mechanism, screwed it in place, attached it to a keyring via fishing line (rated to thirty pounds of pull, just in case), looped the line around a screw port (so pulling the keyring would move the trigger into the firing mechanism), and used an expansion spring from either a BS or Maverick (can't remember which) to make it return to its original place.

This was a fun one.
  • 0

Unholy Three: DUPLUM SCRTA, DUPLUM PROBLEMA (2009)

But Zeke guns tend to be like proofs by contradiction

Theoretically solid but actually non-constructive

Rnbw Cln


#6 Mr BadWrench

Mr BadWrench

    Member

  • Members
  • 781 posts

Posted 16 January 2009 - 09:12 AM

if you wrap the plunger tube tightly with aluminum tape it will not crack. make sure the tape overlaps itself at least an inch.

Don
  • 0
NerfChat IRC Chatroom Click to chat!

#7 imaseoulman

imaseoulman

    Member

  • Members
  • 1,005 posts

Posted 16 January 2009 - 09:14 AM

This looks very promising. I love how Big Salvos are getting integrated into more and more blasters.
  • 0

#8 d0nk3y k0n9

d0nk3y k0n9

    Member

  • Members
  • 26 posts

Posted 16 January 2009 - 11:39 AM

Wait... did I miss you doing a barrel replacement or did you improve the seal so much that you're getting those kinds of ranges out of a Firefly with STOCK BARRELS?


Awesome!
  • 0

#9 Split

Split

    Member

  • Members
  • 1,771 posts

Posted 16 January 2009 - 11:49 AM

Batch 1 - 54, 62, 67, 68, 73, 73, 74, 86
Batch 2 - 47, 68, 68, 70, 71, 73, 75, 75

Strictly in disbelief that these are all from the firefly. I assume you mean (since there are 8 shots in each batch, 8 barrels in the Firefly turret, yet only 6 firing barrels on the gun) that these are (and because they're in there before you talk about putting in the integration), but if you claim that, I will call bullshit. A nightfinder with no air restrictors and an added, full firefly spring won't even hit 60 flat, max, with a barrel replacement and good dart fit. And yet here you're saying that a gun with a smaller plunger tube, loosely turreted, and a cut down nitefinder spring added shoots 10-12 feet further on average? I say bullshit. My fucking pistol splat only shoots 70 flat, 80 flat when the spring hadn't been broken in yet.

And you had only 6 range numbers before, last time I read this. Which made sense, because 50 flat average out of a firefly is normal, and the highest ranges there are normal for big salvos, and the middle would therefore be from the hornet tanks. But all of a sudden 2 new numbers popped out of no where to each batch. Mmkay.

For the record, I did actually edit this before DJ Mashbot replied. Like I said, OP added a couple of numbers.

Oh, and I do like the gun, just don't believe the ranges for a second.

And (man, I just keep going), I just want to add a note about the "alignment issue." When reinstalling the rotation mechanism, you can just change the starting position simply by turning it before it's screwed in. In fact, this is where most people mess up their fireflies. No need for the glue and all that jazz.
And as for the seal on the plunger tube, hot glue doesn't make an airtight seal to the o-ring or plunger tube. Try goop.

Edited by Splitlip, 16 January 2009 - 12:10 PM.

  • 0
Teehee.

#10 DJ Mashbot

DJ Mashbot

    Member

  • Members
  • 58 posts

Posted 16 January 2009 - 11:54 AM

Batch 1 - 54, 62, 67, 68, 73, 73, 74, 86
Batch 2 - 47, 68, 68, 70, 71, 73, 75, 75

You guys do realize that the firefly is shooting 50 average, and the other 6 shots are from the other six barrels? Because 86 max is normal, if not low, for a big salvo.


Each batch lists 8 shots. Even if he was only getting 50's, that's pretty decent for a FF. Good job making a decent gun out of a mostly ignored blaster.
  • 0
QUOTE(dizzyduck @ Apr 1 2009, 09:14 PM) View Post

Forget about ranges; range means nothing if your blaster is a giant rattle after three shots.

#11 Kid Flash

Kid Flash

    Member

  • Members
  • 1,985 posts

Posted 16 January 2009 - 01:53 PM

Splitlip... The firefly has 8 barrels... Not 6 (edit: oh you're saying he added numbers... I get it now.). I really like the looks of this mod and would not want to go against it anytime soon.

Edited by Kid Flash, 16 January 2009 - 01:55 PM.

  • 0

#12 Fome

Fome

    Member

  • Banned
  • 312 posts

Posted 16 January 2009 - 01:54 PM

I believe those ranges. It's entirely possible. I did almost the exact same thing to my dad's firefly, nested a nitefinder spring (got a good source for industrial springs that fit perfectly in the nitefinder) against the firefly spring, took out the ARs and it NAILS the other wall of my basement 40 feet away with a pretty good crack. No official range tests, obviously, and the lack of a barrel replacement makes it somewhat inaccurate, but still. I took the spring out because we are indoor warring that day and a.) thought the blaster too powerful to be safe in an intimate environment, and b.) didn't want to break the gun without some reinforcement.

Although I like the disputes in this forum (almost typical of a scientific environment), basing your argument on the fact that YOUR guns don't perform like SOMEONE ELSE'S guns is downright insubstantial.

#13 Zorns Lemma

Zorns Lemma

    Sir Scrt

  • Moderators
  • 1,277 posts

Posted 16 January 2009 - 03:26 PM

And (man, I just keep going), I just want to add a note about the "alignment issue." When reinstalling the rotation mechanism, you can just change the starting position simply by turning it before it's screwed in


Since I don't have internals to look at, I cannot verify my statement, but based on what I've tried to do, I don't think this is possible.

The ratchet wheel locks to the turret via grooves, and the gears match up with the barrel rotation. Therefore, turning the ratchet wheel to a new alignment isn't possible to do effectively and permanently without glue.

Turning the rotation mech on the other hand, will do absolutely nothing by itself, because the gears in the ratcheting wheels will lock the turret into a position such that the barrels are always misaligned.

And as for the seal on the plunger tube, hot glue doesn't make an airtight seal to the o-ring or plunger tube. Try goop.


Hot glue is airtight, but it does not hold up to pressure. However, the use of hot glue in the plunger tube is not to increase seal, but to stabilize the inner tubing and to eliminate dead space. Given that I'm not powering this with an air tank, there will never be enough pressure in the areas the hot glue seals such that structural strength will be an issue.

As to ranges, a video is being uploaded.

----

Video:

Posted Image

Two shots fired, because one would be unconvincing, but all 8 is rather tedious. Plus, the two prototype washer-stefans we have don't fit the barrel, and the rest of our CDTSs have ripped (there's probably 12 good CDTSs in our room, and looking for them is annoying).

As I've already said, we don't have a tape measure, so the video only gives you a good "eyeball" distance for the darts (measuring using set ft lengths of foam/tubing is tedious, and I don't have FA_24's video acting/editing gifts). Should be enough to convince people of the high 60s, low 70s range.

Edited by Zorn's Lemma, 11 February 2009 - 12:55 AM.

  • 0
"In short, the same knowledge that underlies the ability to produce correct judgement is also the knowledge that underlies the ability to recognize correct judgement. To lack the former is to be deficient in the latter."
Kruger and Dunning (1999)

#14 d0nk3y k0n9

d0nk3y k0n9

    Member

  • Members
  • 26 posts

Posted 19 January 2009 - 03:39 PM

At some point you should get a tape measure and do an "official" range test. Other than that, it looks like an awesome mod + integration. If it gets that good ranges, I'm definitely going to have to buy a firefly just to do those mods to it; I probably won't bother with the integrations since those ranges and 8 shots is enough for me, plus I love the ergonomics of the firefly.
  • 0

#15 Icespartan 1114

Icespartan 1114

    Do NOT buy/sell with me

  • DO NOT TRADE
  • 934 posts

Posted 19 January 2009 - 04:10 PM

I wish I didn't sell my FF now. Really nice work.
  • 0
QUOTE(Zaxbys @ Mar 2 2009, 02:08 PM) View Post
I won't be there til about 1-2...

Church... gotta soak up that Jesus!


NERFSTRONG #51

#16 Draconis

Draconis

    I am not Lord Draconical

  • Members
  • 2,712 posts

Posted 19 January 2009 - 07:14 PM

I wish I didn't sell my FF now. Really nice work.


Hit your local thrift stores. Being a current line blaster, they are pretty common to come across. I had to stop buying Fireflies, as I have too many now. Along with everything else.
  • 0
[15:51] <+Noodle> titties
[15:51] <+Rhadamanthys> titties
[15:51] <+jakejagan> titties
[15:51] <+Lucian> boobs
[15:51] <+Gears> titties
[15:51] <@Draconis> Titties.
[15:52] <+Noodle> why is this so hard?

#17 Zorns Lemma

Zorns Lemma

    Sir Scrt

  • Moderators
  • 1,277 posts

Posted 21 January 2009 - 12:01 AM

Wait... did I miss you doing a barrel replacement or did you improve the seal so much that you're getting those kinds of ranges out of a Firefly with STOCK BARRELS?


I'm going to have to do a barrel replacement because we're down to a few unripped CDTSs which are the only darts that fit well. Standard stock darts don't go all the way back (removing the ARs in the turret creates dead space that you can shove a dart into) and the stefans we're making are too loose.

Anyways:

==========
Part 2
==========

There isn't many tricky parts to this, so I'll start with a few internal pictures.

Posted Image
Posted Image
Posted Image

Materials needed:

1x Big Salvo pump/trigger
1x Big Salvo extension spring
2x Big Salvo screws (the ones keeping the extension springs down)
"4" Air tanks (I used 3 Big Salvo ones and 2 hornet ones with a barbed tee joining the 2 hornet tanks into one)
Vinyl tubing
Fishing line or alternative
1x Keyring

Optional:
Barbed connectors

General procedure
0) Take out the FF internals, including all the components for the flash (battery area, switch)
1) Cut the BS pump along the back where the pump moves into becoming the trigger mech. I would advise a hacksaw
2) Dremel out the FF lower handle to accommodate the pump. The handle is tapered, so unless you cut a massive section out, the pump won't fully fit. I compromised and shaved out 1-2 inches, dremeled out as much as I could, and then in final assembly used duct tape to keep it tight, given that I'd gotten rid of the screw posts
3) Cut the trigger down, sand out an area for the post (see pictures), and cut a slit for the extension spring to hook into (see pics)
4) Dremel down the ridges that held up the battery compartment so that the trigger mech can fit
5) Attach tubing to the holes in the pump and trigger mech where they used to be connected via plastic. I advise cutting your tubing at an angle to fit the hole size (and as you can see in the pic, to accommodate the bending), using hot glue to temporarily hold it in place, and then gooping all around for a tight seal. Let this cure thoroughly.
Posted Image
6) Attach the BS screws to the posts in the pictures. One of them is just by itself, while the other is used to hold down the extension spring. The solitary one will hold down the fishing line so it doesn't slid off (again, see pictures).
7) Attach tubing and barbed connectors as you see fit. I used barbed connectors so that I can remove tanks easier once I glue the tubing to the trigger mech. However, as this is still in the "play around with" stage, the tubing is still removable in most places (in fact, there's a missing tubing+connector piece in all the pictures).
8) Drill holes in the shell for tubing
9) Tie fishing line to the trigger, and superglue the knot. Place trigger in trigger mech, and place trigger mech and pump in shell and glue down (hot glue works fine here if you dremeled the shell for the pump just right. A small amount will prevent the pump from sliding back and forth, though nothing bad ever came from more adhesive
10) Drill a hole near the FF trigger area for the keyring. Apply a small amount of etape to this hole to increase smoothness. Feed fishing line through the hole and around the posts in the shell (refer to pics).
11) Dremel out the other side of the FF shell to accompany the new internals.
12) Attach tanks, mount them as you see fit.

The pictures should give you a general idea of how this is set up. I don't forsee many people actually doing the integration part, but if you are, common sense and guess+check will work to your aid.

Also, I didn't integrate anything into the front of the gun, in the now-dead-space created by the removal of the flash/light as the hornet tanks require barrels long enough to make reloading annoying; there isn't enough structure for an airtight coupler system (I like keeping things reversible so massive epoxy wouldn't work); and the SMDTG is really really horrible.

Edited by Zorn's Lemma, 11 February 2009 - 12:56 AM.

  • 0
"In short, the same knowledge that underlies the ability to produce correct judgement is also the knowledge that underlies the ability to recognize correct judgement. To lack the former is to be deficient in the latter."
Kruger and Dunning (1999)


0 user(s) are reading this topic

0 members, 0 guests, 0 anonymous users