Jump to content


Photo

The Official Snapbow Writeup

Rev. 3 on Page 5!

174 replies to this topic

#1 rork

rork

    Member

  • Members
  • 1,008 posts

Posted 30 August 2008 - 05:53 PM

At this point, Crossbows are a classic, reliable, powerful blaster. They are also rare, and so ludicrously expensive that they are more or less out of the question for most of us. Captain Slug gave us a great alternative with the Plusbow, but not everyone has the time, money, and tools to build one. A little while ago, I attempted to build a SNAP-based blaster that would roughly imitate the Crossbow in its performance and design, inspired by Captain Slug’s Plusbow. After introducing the prototype, I proceeded to refine the design (with help from Carbon and CS). A month of experimentation later, I confidently give you the official SNAPbow Writeup.

Here’s what you’ll need (at minimum); some things can be substituted, but not all:
-PVC piping in 2”, 1 ¼”, ¾”, and ½” sizes.
-a pack of +bow springs (mcmaster part #9637k26)
-1/2” cpvc pipe
-1/2” cpvc T
-1/2” cpvc endcap
-3/4” coupler
-3/4” curved endcap
-3/4” plug
-3/4”x1/2” reducing bushing
-1/2”x3/4” slip/thread adapter
-1/2” T
-1/2” 45 deg. elbow
-(2) 1 ¼” couplers
-1 ¼” endcap
-1 ¼”x3/4” slip/thread bushing
-1/2” #6 pan head sheet metal screws
-3/4" #6 sheet metal screws (you just need one for the plunger head, so don't buy a huge pack).
-pack of 1/8”x1” cotter pins
-pack of small angle brackets
-pack of 3/16x1 1/2x1/16 rubber washers
-pack of 3/16x1 1/4x1/16 rubber washers
-pack of 3/16x1” fender washers
-pack of #8 finishing washers
-roofing nails
-industrial-strength clothespins
-small zip ties
-large zip ties
-hot glue sticks
-super glue

Tools: a hacksaw/pipe cutters, a drill, hot glue gun, 1/8”, ¼”, 5/8” drill bits, sanding drum/cutting blade.

Here’s what you’ll end up with:
Posted Image

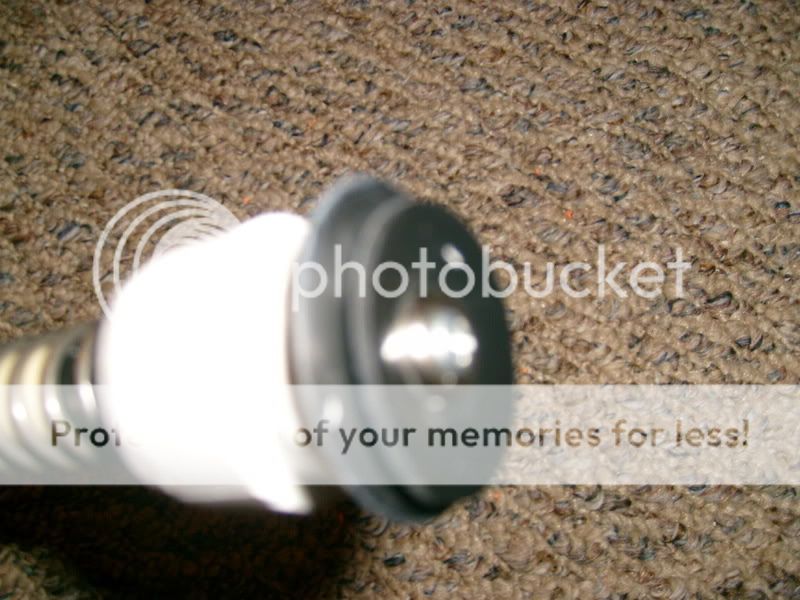
Start with a 1 1/4’’ endcap, and drill a 5/8’’ hole in the exact center. Dremel the hole until the cpvc that you’ll be using as a plunger rod slides freely. Be sure that the hole is not so large that the spring (which fits perfectly around the ½” CPVC rod) can fit through; this would, in point of fact, be bad. Just go slowly and be careful. There should be a TINY gap all around the plunger rod, as you can see here. EDIT: If you don't want to be as careful about the size of the hole, and want even less friction, go ahead and grind it out a bit larger, and simply flare out the wire at one end of the spring. A tag of about 1/4" works perfectly.
Posted Image

To make the plunger, drill a 5/8” hole in the center of a ¾” endcap (curved). Make sure that the hole is a bit bigger than the plunger rod, so that the plunger head can shift around separately from the plunger rod. This keeps the plunger from binding. Jam a length of ½” CPVC through the hole, drill a 1/8” hole in the end, and put a cotter pin through the hole, wrapping it around the pipe. (reference Carbon’s SNAP-1 writeup; the process is identical). EDIT: wrap a bit of e-tape around the plunger rod, to keep the spring in place. If needed, you can also add a small screw at the end coil of the spring, to make sure it's not going to slip intp the plunger head. Cut a ¼” ring from the end of the endcap. Then, jam a ¾” plug into the endcap. Stack a #8 finishing washer, a 3/16” ID x 11/4” OD x 1/16” thick rubber washer, a 3/16” ID x 11/2” OD x 1/16” thick rubber washer, and a 3/16” ID x 1” OD fender washer on a 3/4" sheet metal screw, drill a 1/8” pilot hole in the center of the ¾” plug, and screw everything down; basically, it’s Carbon’s washer setup, with an extra washer for padding.
Posted Image
This way, the sealing washer is subject to far less wear, and the gun is significantly quieter. The handle is a ½” cpvc T, held on with a couple of screws (a cotter pin also works). The plunger shaft is a piece of cpvc 11 1/2" long.

Now, on to the pressure chamber. First, a 10 ¾’’ length of 11/4” pipe, and drill a 1/8’’ hole 3 7/8’’ from one end. Wiggle the drill bit, so that your trigger pin slides freely. Now, glue a coupler on, but don’t use cement. Instead, run a thin line of CA (super) glue around the ring at the center of the coupler.
Posted Image
Then shove your pressure chamber all the way down; the glue won’t take until it’s seated, so there will be less of a gap, and the blaster will be a bit more efficient. Wipe out any excess glue, and wait for the glue to dry. Drill four holes around the end of the coupler, seat a 1 ¼”x3/4” slip/thread coupler, and screw it down. Now you can use a screw-in adapter to use various barrel systems.

The trigger is a standard clothespin trigger in construction, but not materials. I use an industrial-strength clothespin, and a roofing nail as a catch. Hot glue the trigger onto the tube, reinforce with a zip-tie, and you’re done. Cover it up with a 1 ¼” trigger cover. This pic is from a much earlier prototype, but you get the idea.
Posted Image

For the grip, I just do as Carbon did on the SNAP-5 and the SNAP-6; drill two holes in a ½’’ cpvc endcap, screw it onto the 1 ¼” endcap, jam a ¾” boltsniper handle on the end, drill a couple of pilot holes in each side, screw it down, and reinforce with hot glue (to get rid of any annoying wiggling). Take special not of the screw placement; this is repeated on both sides.
Posted Image

Now, the stock. This needs to be both solid and comfortable. First, drill two pilot holes in each side of one side of a ¾” coupler, enlarge two of them to ¼” (access holes for your screwdriver), and screw the coupler onto the 1 ¼” endcap.
Posted Image
Reinforce the joint with a bit of hot glue (wherever I call for hot glue, you could also use epoxy, but I like to keep everything removable).
Posted Image
Now, build your stock out of ½” pvc; the pictured design is the one I find most comfortable, but use whatever works.
Posted Image
I use a ¾”x1/2” bushing to reduce it down; alternatively, you could just build the stock from ¾”, but ½” works fine, and is lighter and cheaper. I only recently made the jump to a ¾” coupler, but it works way better: it’s sturdier, and the extra bit of height keeps the plunger rod from barking your cheek. Screw it down, and you’re ready to go.

The screws that hold the stock and grip on also secure the 1 ¼” endcap to the pressure chamber. Be sure to drill a couple of vent holes somewhere behind the trigger; otherwise, a vacuum will be created when the plunger is released, slowing it significantly.

Finally, slap a fore-end on there. SNAPs tend to be skinny and bulbous—functional, but not too attractive (more importantly, such characteristics tend to be less than comfortable, especially with those screws sticking out all over the place). To start, cut a 1 ¼” coupler in half lengthwise, then cut the halves in half crosswise. The piece you want is on the left,next to a full coupler.
Posted Image
Take one of the pieces, and glue it on the pressure chamber, just ahead of the trigger guard. Now, cut 6” of 2” pvc, and split it down the middle, keeping your cuts as even as possible. Smooth the edges, and mount the resulting fore-end on the front coupler and the coupler piece, using a dab of hot glue on both.
Posted Image

The resulting blaster is extremely comfortable, solid in its construction, and very economical. I believe it to be a great alternative for those of us who want a blaster of this type, but don’t have access to a crossbow or plusbow (or who want something sturdy and cheap enough so that breakage is not really an issue). The SNAPbow is also quite powerful (somewhere between a crossbow and a plusbow), and very reliable in my experience. I believe it to be completely war-appropriate, as well. All feedback is appreciated. ~Rork

EDIT: gun porn time. There's one with a dogbone cpvc barrel, one with a 4-shot turret, and the first completed one, with a 6-shot turret and no foregrip.
Posted Image

ANOTHER EDIT: more detailed pics of how the business end of the plunger is made.
Posted Image
Posted Image
Posted Image

Of course, this piece just plugs right into the cut-down end cap. Happy building!

Edited by rork, 04 October 2008 - 05:35 PM.

  • 0
<a href="http://nerfhaven.com...howtopic=20296" target="_blank">SNAPbow Mk. V</a>
<a href="http://nerfhaven.com...howtopic=20409" target="_blank">Make it pump-action</a>

#2 Salmon

Salmon

    Member

  • Members
  • 447 posts

Posted 30 August 2008 - 06:24 PM

Nice job, is accuracy good? Also, as far as ranges, you said somewhere between a +bow and a Crossbow; would that mean around 115' or so?

Edited by Salmon, 30 August 2008 - 06:25 PM.

  • 0
Welcome to I-dont-care-isburg, population: me.
We're located in I-Don't-Give-a-Damn County, in scenic Shut-the-Hell-Up-achussets.
Maybe you're familiar with our annual charity drive where we ask for shit, and no one gives any.

#3 rork

rork

    Member

  • Members
  • 1,008 posts

Posted 30 August 2008 - 06:37 PM

Assuming the darts are good, the accuracy is superb. Ranges are about what you said; conservatively, I could say 110' flat, and never lie; or I could say 120', and be wrong every few shots. Really, it's all about the barrel and darts; I like 12" of cpvc. I'll get some more finished pics up here in a bit. ~Rork
  • 0
<a href="http://nerfhaven.com...howtopic=20296" target="_blank">SNAPbow Mk. V</a>
<a href="http://nerfhaven.com...howtopic=20409" target="_blank">Make it pump-action</a>

#4 Shrub

Shrub

    Member

  • Banned
  • 862 posts

Posted 30 August 2008 - 10:02 PM

Really good. Have you thought about selling these?

Edited by Longshot Wielder, 30 August 2008 - 10:02 PM.

Favorite Quotes:
Sorry to hear that man, it's like that one famous bumper sticker, "Shit Happens"
QUOTE
it still seems that your balls drop very rapidly

#5 rork

rork

    Member

  • Members
  • 1,008 posts

Posted 30 August 2008 - 10:08 PM

Really good. Have you thought about selling these?


I would consider it, but I would have to get an reasonable return. Just out of curiosity, what do you guys think I could get for one of these things? ~Rork
  • 0
<a href="http://nerfhaven.com...howtopic=20296" target="_blank">SNAPbow Mk. V</a>
<a href="http://nerfhaven.com...howtopic=20409" target="_blank">Make it pump-action</a>

#6 bogboogalars

bogboogalars

    Member

  • Members
  • 398 posts

Posted 30 August 2008 - 10:39 PM

Well how long did you spend on it and how much did you spend on it?
  • 0

#7 rork

rork

    Member

  • Members
  • 1,008 posts

Posted 30 August 2008 - 10:51 PM

It takes about 3 hours of work (at minimum), and approximately $10 worth of materials (or $40 for 3, with extras). It's not that terribly difficult, but there's a lot of grunt work involved. ~Rork
  • 0
<a href="http://nerfhaven.com...howtopic=20296" target="_blank">SNAPbow Mk. V</a>
<a href="http://nerfhaven.com...howtopic=20409" target="_blank">Make it pump-action</a>

#8 bogboogalars

bogboogalars

    Member

  • Members
  • 398 posts

Posted 30 August 2008 - 11:31 PM

I would take no less than 40 dollars for it.
  • 0

#9 rork

rork

    Member

  • Members
  • 1,008 posts

Posted 30 August 2008 - 11:44 PM

I was thinking maybe 45 plus shipping...~Rork
  • 0
<a href="http://nerfhaven.com...howtopic=20296" target="_blank">SNAPbow Mk. V</a>
<a href="http://nerfhaven.com...howtopic=20409" target="_blank">Make it pump-action</a>

#10 needak

needak

    Member

  • Members
  • 45 posts

Posted 31 August 2008 - 02:50 PM

Like i said before, this is going to be my first homemade; but i have some questions. First off, would a clip be practical for this gun; second, if so what clip should i use; and third (most importantly) my parents don't want me using any kind of homemade dart :D , so would i be able to use stock LS darts. thx in advance.
  • 0
Why the fuck would you put a bullet in someones head when you can just pump the bastard full of stefans until he's got so many welts and goose-eggs he looks like blueberry with pimples?

#11 rork

rork

    Member

  • Members
  • 1,008 posts

Posted 31 August 2008 - 03:07 PM

You could theoretically use any kind of feed system you want, since there's no barrel assembly built into the gun. However, I am not terribly familiar with clip/breech systems (I'm more of a turret kind of guy); I suggest you do some research. Check out Ompa's clip/breech; look at Forsaken's Angel breech (both these would require heavy customization, though). Look at Carbon's various clip systems. I'm sure there are more, but those are the ones that come to mind. On the other hand: if you don't have a ton of fabrication experience, I advise against trying to build a clip right away. Breeches are complex and precisely made. Instead, do something simple. This design is Crossbow-inspired; I suggest the classic flip breech. And yes, streamlines are fine. Or, you could give CS darts a go. ~Rork
  • 0
<a href="http://nerfhaven.com...howtopic=20296" target="_blank">SNAPbow Mk. V</a>
<a href="http://nerfhaven.com...howtopic=20409" target="_blank">Make it pump-action</a>

#12 needak

needak

    Member

  • Members
  • 45 posts

Posted 31 August 2008 - 03:15 PM

my parents aren't swayed by padding on darts :angry: (i even suggested putting a 1/4 inch long piece of FBR on the tip) My mom said she'd rather buy darts "from a company that is worried about getting sued" :D . I realize this is a change of topic, but do foam tipped stefans hurt anymore than stock darts (please provide evidence)
  • 0
Why the fuck would you put a bullet in someones head when you can just pump the bastard full of stefans until he's got so many welts and goose-eggs he looks like blueberry with pimples?

#13 Aimless

Aimless

    Member

  • Members
  • 169 posts

Posted 31 August 2008 - 03:23 PM

my parents aren't swayed by padding on darts :angry: (i even suggested putting a 1/4 inch long piece of FBR on the tip) My mom said she'd rather buy darts "from a company that is worried about getting sued" :D . I realize this is a change of topic, but do foam tipped stefans hurt anymore than stock darts (please provide evidence)


Ever been hit by a stock Tagger dart from a Titan? Cross-shaped welts and scrapes and cuts from grazing shots. As long as your padded darts stay intact they will be less damaging than stock darts. As for evidence, I don't have anything on hand.

Edited by Aimless, 31 August 2008 - 03:27 PM.

  • 0
It makes the world go round.

#14 CaptainSlug

CaptainSlug

    Resident Mad Scientist

  • Administrators
  • 4,763 posts

Posted 31 August 2008 - 04:25 PM

my parents aren't swayed by padding on darts :angry: (i even suggested putting a 1/4 inch long piece of FBR on the tip) My mom said she'd rather buy darts "from a company that is worried about getting sued" :D . I realize this is a change of topic, but do foam tipped stefans hurt anymore than stock darts (please provide evidence)

My Felt + Washer stefans weigh roughly the same as dart tag darts. They hurt the same amount when propelled at identical speeds.
  • 0
The little critters of nature, they don't know that they're ugly. That's very funny, a fly marrying a bumble bee. I told you I'd shoot, but you didn't believe me. Why didn't you believe me?

#15 needak

needak

    Member

  • Members
  • 45 posts

Posted 31 August 2008 - 05:01 PM

my mom saw what you guys wrote and she's going to re-consider her decision :D . in other words, she's going to talk to my dad. :angry:
  • 0
Why the fuck would you put a bullet in someones head when you can just pump the bastard full of stefans until he's got so many welts and goose-eggs he looks like blueberry with pimples?

#16 rork

rork

    Member

  • Members
  • 1,008 posts

Posted 31 August 2008 - 11:35 PM

That's very nice. Of course, you could have done your research before hijacking my thread, but that would apparently be asking too much. If there are any legitimate questions, I'll be more than happy to answer them, but I'm sick to the death of "how much do stefans hurt?" topics... *sigh* ~Rork
  • 0
<a href="http://nerfhaven.com...howtopic=20296" target="_blank">SNAPbow Mk. V</a>
<a href="http://nerfhaven.com...howtopic=20409" target="_blank">Make it pump-action</a>

#17 mind13

mind13

    Member

  • Members
  • 48 posts

Posted 01 September 2008 - 06:39 AM

Great work. Those things look like they would leave some serious welts.
  • 0
Life comes at you fast yet a foam dart comes faster
Mind13


#18 needak

needak

    Member

  • Members
  • 45 posts

Posted 01 September 2008 - 11:25 AM

Sorry about that rork :) ; back to business, my first question would be how you made that turret that's shown on the last picture of the write-up
  • 0
Why the fuck would you put a bullet in someones head when you can just pump the bastard full of stefans until he's got so many welts and goose-eggs he looks like blueberry with pimples?

#19 BendyStraw

BendyStraw

    Member

  • Members
  • 183 posts

Posted 01 September 2008 - 04:56 PM

Great job. Those things look very strong. Are you thinking about painting them?
  • 0
WARNING - I'M BRUTALLY HARD TO READ!

#20 rork

rork

    Member

  • Members
  • 1,008 posts

Posted 01 September 2008 - 05:11 PM

Needak: the turret is rather simple; it's a modified version of this. I used cpvc for the axle, in a piece of pvc that had been dremeled out to form a coupler. There's another bit of dremeled pvc stuck into the adapter; thee barrels fit into it. The axle goes through a 2" length of 3/4" pvc, and there are a couple of screws in the axle that act as a stop. There's another inch of 3/4" pvc at the front, to keep everything braced. The axle system is carefully hot glued to the screw-in adapter, then reinforced with e-tape; it's quite strong. The barrels are 12" cpvc.

Mind13 & Bendystraw: They are strong, both construction and performance-wise. And yes, paintjobs are in the works. I'm pondering color schemes...

Thanks for all the great comments, guys. Keep 'em coming. ~Rork
  • 0
<a href="http://nerfhaven.com...howtopic=20296" target="_blank">SNAPbow Mk. V</a>
<a href="http://nerfhaven.com...howtopic=20409" target="_blank">Make it pump-action</a>

#21 needak

needak

    Member

  • Members
  • 45 posts

Posted 02 September 2008 - 06:18 PM

what are the parts to the turret (send by private message)

edit: never mind.

Edited by needak, 02 September 2008 - 06:18 PM.

  • 0
Why the fuck would you put a bullet in someones head when you can just pump the bastard full of stefans until he's got so many welts and goose-eggs he looks like blueberry with pimples?

#22 Falcon

Falcon

    Velcro'd Beanpole

  • Members
  • 1,375 posts

Posted 03 September 2008 - 03:35 AM

Now THIS is a homemade!

Dripping with glue in some areas, clothespin trigger, PVC coming out its ass...

...PVC FORMING its ass...

It's VERY nerfy.

I'm all for clean mods, homemades and whatnot, but I'll argue until the day I die that there's something to be said for hacked apart pipes, duct tape, hot glue, and elbow grease. The only manufactured parts on a gun (in my opinion should be the parts that came out of Hasbro's mold. The perfectly machined stuff coming out of the forums these days...just doesn't hit the spot with me.

But this...

THIS is just plain awesome. Great work. If I needed a new crossbow (and decided to not be stupid and sell my car or something to buy one) you're the first person I'd go to. But alas, I'm stupid, so if my crossbow breaks, I'll WALK to the east coast next summer, but I'll have a Nerf Brand crossbow in tow.

Edited by Falcon, 03 September 2008 - 03:35 AM.

  • 0
----------||||||||)
QUOTE(Ilùvatar @ 0000) View Post
Of the theme that I have declared to you, I will now that ye make in harmony together a Great Music.

#23 rork

rork

    Member

  • Members
  • 1,008 posts

Posted 03 September 2008 - 10:31 AM

Thanks...I think :) The pics were taken right after completion, so everything is a bit...gooey, I suppose. Seriously, though, I hear you; this thing was built from the ground up to be completely utilitarian, and it succeeds in that, so I'm satisfied. It's cheap, simple, and shoots like a motherfucker (assuming that the motherfucker in question shoots very well indeed). Although in my defense, there's no duct tape. ~Rork
  • 0
<a href="http://nerfhaven.com...howtopic=20296" target="_blank">SNAPbow Mk. V</a>
<a href="http://nerfhaven.com...howtopic=20409" target="_blank">Make it pump-action</a>

#24 rork

rork

    Member

  • Members
  • 1,008 posts

Posted 03 September 2008 - 10:10 PM

Certain aspects regarding the construction of the plunger, as well as spring retention issues, have been improved. The writeup is now updated accordingly. ALSO: part # for the plusbow springs has been added.

ANOTHER EDIT: I've been experimenting around with the front bushing, and while I initially used a threaded bushing/adapter to make the design more versatile, I'm now using a 3/4" slip bushing to mesh with my dogbone barrel, and it works just dandy. Doing it this way will cut down on your choice of barrel assemblies, but if you know what you'll be using, it cuts down on dead space/needed parts a bit.

Edited by rork, 09 September 2008 - 08:10 PM.

  • 0
<a href="http://nerfhaven.com...howtopic=20296" target="_blank">SNAPbow Mk. V</a>
<a href="http://nerfhaven.com...howtopic=20409" target="_blank">Make it pump-action</a>

#25 needak

needak

    Member

  • Members
  • 45 posts

Posted 07 September 2008 - 03:13 PM

rork, assuming it hurts, i need a way to dim down the range so my parents will let me have it, any ideas, thx in advance.

Edited by needak, 07 September 2008 - 04:26 PM.

  • 0
Why the fuck would you put a bullet in someones head when you can just pump the bastard full of stefans until he's got so many welts and goose-eggs he looks like blueberry with pimples?


0 user(s) are reading this topic

0 members, 0 guests, 0 anonymous users