Jump to content


Photo

The Snapbow, Updated

updates start at post 13

20 replies to this topic

#1 rork

rork

    Member

  • Members
  • 1,008 posts

Posted 29 July 2008 - 12:25 AM

I wanted to wait until I had something worth posting before doing so; after extensive testing, refinement, and de-bugging, I present: The SNAPbow. That’s right.

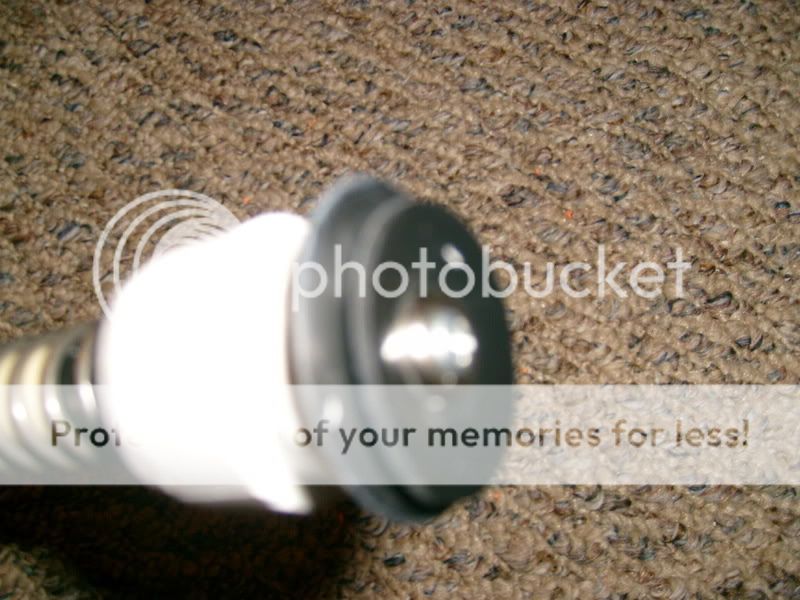
Like everyone else, I was inspired by the brilliance of CS’ Plusbow, and I find the bulbous, ten-dollar practicality of Carbon’s SNAP series to be a perfect platform for simple, solid designs. Thus, I set out to build a SNAP variation that used the +bow as inspiration—not directly, of course, but rather as a stylistic inspiration for a new kind of SNAP. The primary commonality between the +bow and my SNAPbow is the spring (McMaster part # 9637K26); the entire blaster is built around this rather vicious spring. The first step is to make the receiver. Take a 1¼” T fitting, drill a 5/8” hole in the center of the closed side of the fitting, and lightly dremel it out until the ½” CPVC plunger rod slides easily through the hole. Be sure that the hole is not so large that the spring (which fits perfectly around the ½” CPVC plunger rod) can fit through. Then, glue a stub of ½” sched. 40 PVC into a 11/4” by 1/2” bushing, and screw/glue a ½” sched. 40 elbow to the stub, and jam the whole assembly into one end of the T. Take a 11/4” plug, and glue a standard Boltsniper-type handle (sans sanding) onto the plug, then jam the assembly into the opposite end of the T. Drill a pilot hole into the end of the T that will receive the pressure chamber. Your receiver is complete. Photo of the receiver and plunger:
Posted Image
To make the plunger, drill a 5/8” hole in the center of a ¾” endcap (curved). Jam a length of ½” CPVC through the hole, drill a 1/8” hole in the end, and put a cotter pin through the hole, wrapping it around the pipe. Cut a ¼” ring from the end of the endcap. Then, jam a ¾” plug into the endcap. Stack a #8 finishing washer, a 3/16” ID by 11/4” OD by 1/16” thick rubber washer, a 3/16” ID by 11/2” OD by 1/16” thick rubber washer, and a 3/16” ID by 1” OD fender washer on a sheet metal screw, drill a pilot hole in the center of the ¾” plug, and screw everything down; basically, it’s Carbon’s washer setup, with an extra washer for padding, and it's simplified (using only 2 PVC parts).
Posted Image
Now, on to the pressure chamber. First, take a length of 11/4” pipe, and cement a coupler to the end. Cement a 11/4” by ¾” slip by thread bushing into the coupler. Then, screw a ¾” by ½” slip by thread adaptor into the end of the bushing. (for CPVC barrels, you can glue a stub of sched. 40 that has been ground down to the correct ID into the adaptor; by using the threaded bushing you can switch out adaptors and barrel sizes). Then, slide the spring over the plunger rod, and run the plunger rod through the hole drilled in the back of the T. Cut the plunger rod so that approximately 11/2” protrudes through the back of the receiver. Cap it off with a T, drill a hole through both, run a cotter pin through all layers, flare it, and clip the ends. Snug the spring against the receiver, and cut the pressure chamber to length—just long enough so that the plunger head fits snugly against the back of the bushing, with no rattling (I cut mine long, then trim it bit by bit until the length is perfect). Ignore the rear hole; it is a result of bad drilling.
Posted Image
For the trigger, the normal SNAP setup will not work—more properly, it will, but only after extensive beefing up. Instead of a regular clothespin, get the ones that are labeled “industrial strength” (I got mine at Wal-Mart, right beside the regular version). The industrial-strength version is made of a stout, flexible plastic (nylon?), and they have an internal brace to prevent splaying. Proceed as normal, but fill the hollow end of the clothespin (yep, the ends are hollow) with hot glue. Flatten it out. This will allow the pin to snug up against your pressure chamber (discussed next). I use a roofing nail that has been cut just behind the point where it starts tapering as a catch. The best demonstration of the trigger placement is with a photo:
Posted Image
It's about halfway between the edges of that part of the T fitting.
Now, line up the pressure chamber, and drill a ¼” hole in it where the nail meets the pressure chamber wall. Glue a small tab of scrap PVC to the pressure chamber, just ahead of the hole. This braces the trigger, keeping it even. And now: Reinforcement! Even with the larger clothespin, the trigger will not retain the plunger as-is; the spring is simply too powerful. To reinforce the trigger, take a couple of rubber bands, double them up, and slide them over the trigger. Now the trigger will retain the plunger, and stay snugged against the tab on the pressure chamber. The blaster is now functionally complete.
Posted Image
11/2” PVC makes a great trigger guard. Make a stock, plug it into the receiver, attach the pressure chamber to the receiver via a sheet metal screw or 2, add a barrel, and…
Posted Image
It’s cheap, comfortable, ultra-simple, and costs roughly 10 dollars to make. Plus, all systems are repeatable and modular. It breaks down into stock, barrel, and blaster with no tools, and when broken down, I can easily fit 2 into a backpack. Ranges are quite good: 110-120 feet flat, using micros and 12” of CPVC. Feedback would be most appreciated. Thanks! ~Rork

Edited by rork, 03 August 2008 - 11:54 PM.

  • 0
<a href="http://nerfhaven.com...howtopic=20296" target="_blank">SNAPbow Mk. V</a>
<a href="http://nerfhaven.com...howtopic=20409" target="_blank">Make it pump-action</a>

#2 Ubermensch

Ubermensch

    Member

  • Members
  • 1,056 posts

Posted 29 July 2008 - 12:31 AM

Wow, nice first post! Are those ranges banded or unbanded?
  • 0
"In order to make an apple pie from scratch, you must first create the universe."-Carl Sagan
Nerf Rocket Air Launcher

#3 rork

rork

    Member

  • Members
  • 1,008 posts

Posted 29 July 2008 - 12:36 AM

No bands--just the spring. Actually, I would worry that anything stouter would be hard to contain, or would shred the plunger head.
  • 0
<a href="http://nerfhaven.com...howtopic=20296" target="_blank">SNAPbow Mk. V</a>
<a href="http://nerfhaven.com...howtopic=20409" target="_blank">Make it pump-action</a>

#4 serpent sniper

serpent sniper

    Member

  • Members
  • 222 posts

Posted 29 July 2008 - 01:14 AM

Impressive. I must say, a bit funny looking, but form follows function.
  • 0
Animus GmbH My Custom Nerf Props and Paintjobs

#5 Shadowblade

Shadowblade

    Member

  • Members
  • 404 posts

Posted 29 July 2008 - 07:49 AM

As unclean as it looks, I kinda like that concept. I'll have to try my own variation when I find time. Perhaps you could do a second, cleaner model of this (a sturdier looking stock maybe? and a clean paintjob would be cool).

Good job, this shall serve as my inspiration for my own homemade.
  • 0
QUOTE
Proverbs says, "The wise man doth not shoot the Viking in the ding ding for he shall pummel thee."

But you can totally shoot Vacc there, he loves it!

~Talio

#6 Carbon

Carbon

    Contriberator

  • Moderators
  • 1,894 posts

Posted 29 July 2008 - 09:02 AM

Lots of good stuff going on here. I like your plunger head design: compact, with the simplicity of the standard plunger head. And industrial strength clothespins? Sign me up. That was the reason I never really started using roofing nails, because a standard clothespin was weakened far too much with the hole size needed. Also, what McMaster part number is the spring?

As far as your trigger, it could be greatly strengthened and simplified. First off, those rubber bands. By how I see it, your problem isn’t because your spring is too strong, but because your firing pin hole is way too big. If the hole is big enough to allow the nail to start going at an angle, it’s too big. It should be just large enough to let the nail slide up and down without binding. Second, you could make that portion even stronger by increasing your support PVC scrap big enough to go over the firing pin hole, and drill through them both. Your spring won’t push past a nail that can only move up and down. That will also lighten your trigger pull.

I’d agree that the stock looks flimsy, but that’s just personal taste. Good work!
  • 0
Hello. I am Indigo of the Rainbow Clan. You Nerfed my father. Prepare to die.

#7 CaptainSlug

CaptainSlug

    Resident Mad Scientist

  • Administrators
  • 4,763 posts

Posted 29 July 2008 - 09:32 AM

Also, what McMaster part number is the spring?

9637K26
  • 0
The little critters of nature, they don't know that they're ugly. That's very funny, a fly marrying a bumble bee. I told you I'd shoot, but you didn't believe me. Why didn't you believe me?

#8 Shrub

Shrub

    Member

  • Banned
  • 862 posts

Posted 29 July 2008 - 10:19 AM

The way I look at it is a cheaper form of the +Bow with very similar ranges and a pull back priming mech it and a better looking stock the only question is is it war legal or lethal. Off topic: Capitan Slug are you a mcmaster part# computer?
Favorite Quotes:
Sorry to hear that man, it's like that one famous bumper sticker, "Shit Happens"
QUOTE
it still seems that your balls drop very rapidly

#9 CaptainSlug

CaptainSlug

    Resident Mad Scientist

  • Administrators
  • 4,763 posts

Posted 29 July 2008 - 10:41 AM

To somewhat improve the looks of this design, the tee for the rear of the plunger tube could be reoriented and plugged with a hex bushing adapter so that you end up with a configuration that looks more like this.
Posted Image

Capitan Slug are you a mcmaster part# computer?

No, I pulled that part# from the partlist for the +Bow
  • 0
The little critters of nature, they don't know that they're ugly. That's very funny, a fly marrying a bumble bee. I told you I'd shoot, but you didn't believe me. Why didn't you believe me?

#10 VACC

VACC

    Vacc is Legend

  • Founders
  • 3,265 posts

Posted 29 July 2008 - 10:44 AM

Piney's Snap is a beautiful thing. There's just soemthing about purple plastic that makes me wanna shoot people.
  • 0

#11 venom213

venom213

    Member

  • Validating
  • 1,294 posts

Posted 29 July 2008 - 10:54 AM

This is crazy. When I was building a SNAP, my friend kept calling it a SNAPbow, this was like 5 months ago. I guess it was just some forshadowing. I'm glad that somebody finally made a true Snapbow though, good job.
  • 0

#12 rork

rork

    Member

  • Members
  • 1,008 posts

Posted 29 July 2008 - 06:28 PM

As far as the stock goes, it's actually more sturdy than everyone seems to think, but it would be simple to reinforce it--or just make from a bigger size of PVC.

Carbon: Thanks for the approval :) . As for the trigger issue, I'll have to try a smaller hole; I started drilling them larger in earlier experiments, so the pin wouldn't come out while I was using it with no trigger guard. It seems like a bit of an oversight now...

CaptainSlug: I'm not sure exactly what you mean; Piney's (impressive) SNAP seems to be a straight SNAP 1.5 with a different handle. I initially chose the crossbow-esque stock-offset-above-the-pressure-chamber configuration specifically to avoid the necesssary dremel work that goes with the SNAP 1.5 stock; those slots are a raging bitch to cut, and my stock makes sure that you don't get walloped by the plunger rod. If, on the other hand, you are talking about eliminating the offset handle in favor of a more typical, glued-to-the-blaster configuration (like Carbon's), I have considered that; I went with a tee fitting rather than a reducing elbow more for versatility's sake than anything. The first incarnation of this design used a straight piece of vertical pipe a la 3DBBQ, which works better than it should.

Longshot Wielder: This blaster is NOT "a cheaper Plusbow." It is a SNAP that is designed to be similar to the Plusbow in terms of performance and ergonomics. The Plusbow is a triumph of high-tech nerf design, whereas the SNAPbow is an example of simple, solid tech that gets the job done. I am absolutely not enough of an arrogant douchebag to try to one-up CS' work; these are very different blasters, made from very different points of view. Or, to put it another way: I don't care so much about looks, as long as it works well.

Edited by rork, 29 July 2008 - 06:57 PM.

  • 0
<a href="http://nerfhaven.com...howtopic=20296" target="_blank">SNAPbow Mk. V</a>
<a href="http://nerfhaven.com...howtopic=20409" target="_blank">Make it pump-action</a>

#13 rork

rork

    Member

  • Members
  • 1,008 posts

Posted 03 August 2008 - 11:52 PM

UPDATE: After some of the "fugly-but-interesting" feedback, I've streamlined things quite a bit. Internals are identical, but the trigger hole is the right size (thanks Carbon), so no rubber bands, and it's built on a 1 1/4" endcap, rather than a tee; everything is screwed together.

Posted Image

The new version is, of course, on top; both are pictured primed. Incidentally, I'm getting full spring compression with these things: an 11'' spring down to about 3". The air volume is MASSIVE.

Edited by rork, 03 August 2008 - 11:53 PM.

  • 0
<a href="http://nerfhaven.com...howtopic=20296" target="_blank">SNAPbow Mk. V</a>
<a href="http://nerfhaven.com...howtopic=20409" target="_blank">Make it pump-action</a>

#14 CaptainSlug

CaptainSlug

    Resident Mad Scientist

  • Administrators
  • 4,763 posts

Posted 03 August 2008 - 11:53 PM

Ah, that's much better.
  • 0
The little critters of nature, they don't know that they're ugly. That's very funny, a fly marrying a bumble bee. I told you I'd shoot, but you didn't believe me. Why didn't you believe me?

#15 rork

rork

    Member

  • Members
  • 1,008 posts

Posted 03 August 2008 - 11:57 PM

Thanks, CaptainSlug. Yeah, this thing is a little scary...I like it a lot. Incidentally, I'm thinking of trying some CS-style darts...do you see any range difference, compared to traditional slingshot-weights-and-hot-glue stefans?
  • 0
<a href="http://nerfhaven.com...howtopic=20296" target="_blank">SNAPbow Mk. V</a>
<a href="http://nerfhaven.com...howtopic=20409" target="_blank">Make it pump-action</a>

#16 CaptainSlug

CaptainSlug

    Resident Mad Scientist

  • Administrators
  • 4,763 posts

Posted 04 August 2008 - 12:11 AM

Thanks, CaptainSlug. Yeah, this thing is a little scary...I like it a lot. Incidentally, I'm thinking of trying some CS-style darts...do you see any range difference, compared to traditional slingshot-weights-and-hot-glue stefans?

It REALLY depends on who made the traditional stefans you are comparing my style of darts to.
Well-crafted traditional stefans of identical weight usually get 10-feet more range out of the same blaster.

However, my style of darts are much easier to make consistently and in bulk. And I personally find them to be more accurate.

On Saturday we found some of my darts that had been sitting on the ground at Deal park ALL YEAR and in spite of having brown shriveled felt they still performed fine. Something I never thought I would ever see.

Edited by CaptainSlug, 04 August 2008 - 12:12 AM.

  • 0
The little critters of nature, they don't know that they're ugly. That's very funny, a fly marrying a bumble bee. I told you I'd shoot, but you didn't believe me. Why didn't you believe me?

#17 rork

rork

    Member

  • Members
  • 1,008 posts

Posted 04 August 2008 - 12:19 AM

That's nice to know; this thing throws darts hard enough to make me worry about eye/face damage, and the range is more than sufficient; a loss of 10' won't hurt me.
  • 0
<a href="http://nerfhaven.com...howtopic=20296" target="_blank">SNAPbow Mk. V</a>
<a href="http://nerfhaven.com...howtopic=20409" target="_blank">Make it pump-action</a>

#18 needak

needak

    Member

  • Members
  • 45 posts

Posted 24 August 2008 - 03:56 PM

Looks like I found my first homemade :blush:. i'm going to add a breach and a clip to make it even better

Edited by needak, 29 August 2008 - 06:33 PM.

  • 0
Why the fuck would you put a bullet in someones head when you can just pump the bastard full of stefans until he's got so many welts and goose-eggs he looks like blueberry with pimples?

#19 rork

rork

    Member

  • Members
  • 1,008 posts

Posted 25 August 2008 - 12:49 AM

I'm glad to hear it. This would be a great choice; I've built 3 of them so far, and they consistently perform almost absurdly well. The level of performance is rather less than that of a plusbow, but this is simpler and more practical for those of us who don't have the time, materials, or tools to build a plusbow. Also, crossbows have become so prohibitively expensive that they are more or less out of the question for newer nerfers. I plan on doing a full, detailed writeup soon, but if anyone decides to build one, and has questions, PM me, and I'll happily provide tech support. ~Rork
  • 0
<a href="http://nerfhaven.com...howtopic=20296" target="_blank">SNAPbow Mk. V</a>
<a href="http://nerfhaven.com...howtopic=20409" target="_blank">Make it pump-action</a>

#20 Guest_Killakit_*

Guest_Killakit_*
  • Guests

Posted 01 October 2008 - 08:15 PM

Man these are cool. I would maybe get one but, I am more into plus bows.
  • 0

#21 rork

rork

    Member

  • Members
  • 1,008 posts

Posted 01 October 2008 - 08:22 PM

Your constant necromancy is highly annoying. This is a prototype thread. If you'd been paying ANY attention, you'd have realized this fact, since the "official SNAPbow Writeup" thread is on the front page of the homemades section, and features a FAR better weapon. Let this poor zombified thread die, for fuck's sake.
  • 0
<a href="http://nerfhaven.com...howtopic=20296" target="_blank">SNAPbow Mk. V</a>
<a href="http://nerfhaven.com...howtopic=20409" target="_blank">Make it pump-action</a>


0 user(s) are reading this topic

0 members, 0 guests, 0 anonymous users