
PROMETHEUS
After seeing Renegade’s tri-barrel titan and The Inventor Guy’s integration onto a crossbow, I realized I needed to do something Titan style. So Christmas rolled around, and a group of us all decided to by recons for each other. Only one found a recon, so the rest of us got Titans from Target. I do agree that the Titan is quite fun, especially considering the insane power of the missile, but I wanted something better. The Inventor guy stripped a Titan, put brass barrels in it, and zip tied it to his crossbow. I loved it so much, I decided to do it. But given I don’t have the master of all rifles, I looked to my Longshot. A lot of imagination, and I figured out a general plan. Scouring Nerfhaven, I nearly had a heart attack realizing nobody had tried it before. As vice minister of Bad Ideas in the council here, I started work on it.
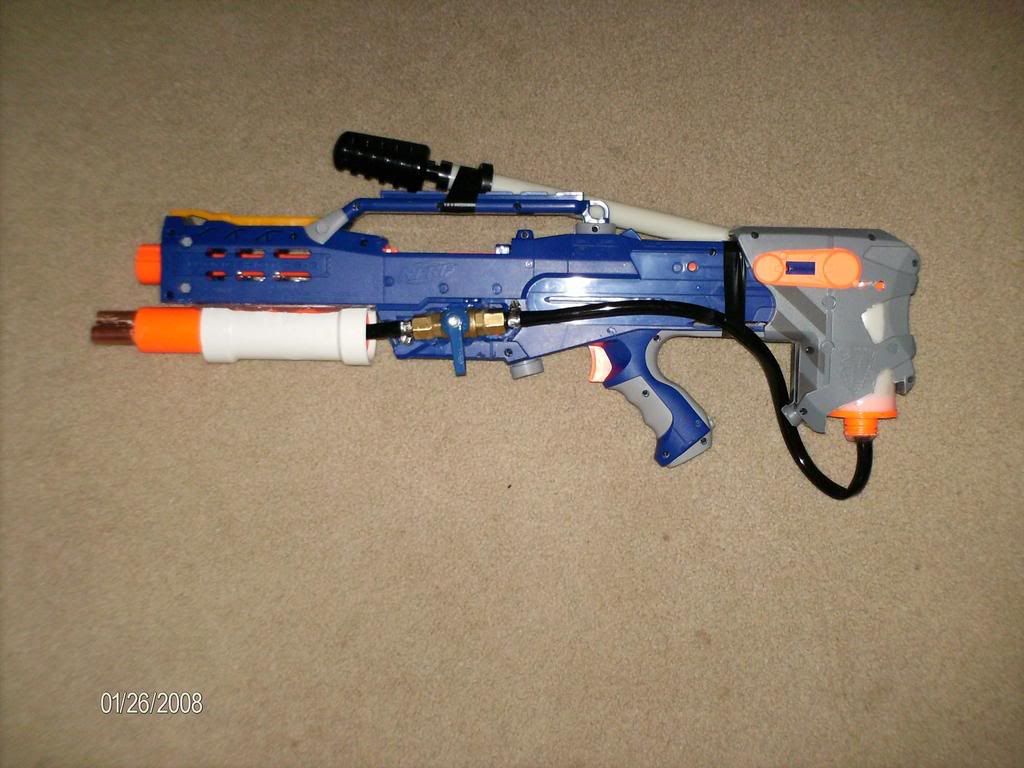
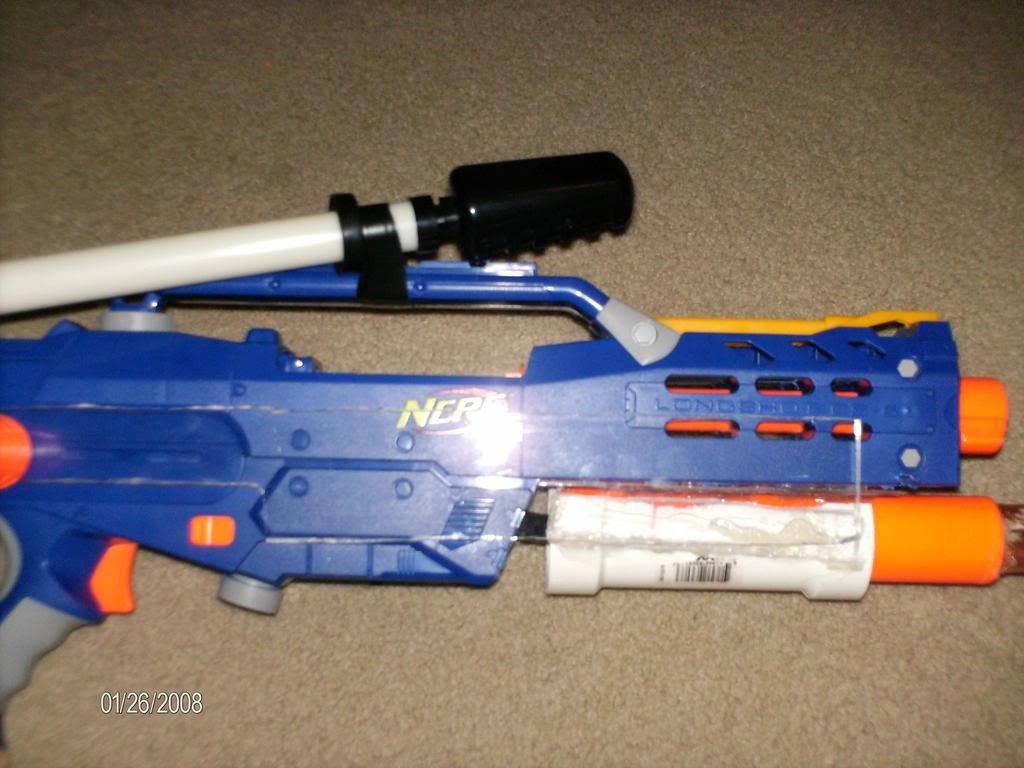
Here is the finished picture, just to show how shiny it is before you get into the messiness of building it. I’m posting this before I cleaned it up, so there won’t be any electric tape when it gets done.
But back to basics. Planning and salivating aside, this is the toughest I’ve tried yet, but the most rewarding. Begin with a Longshot.
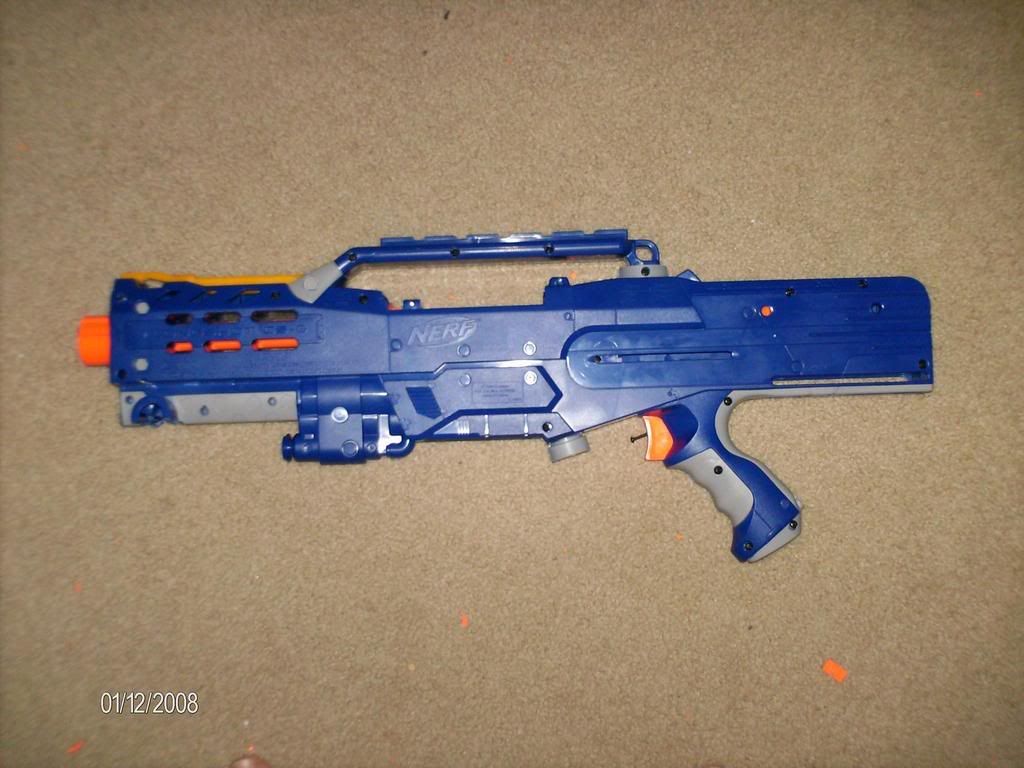
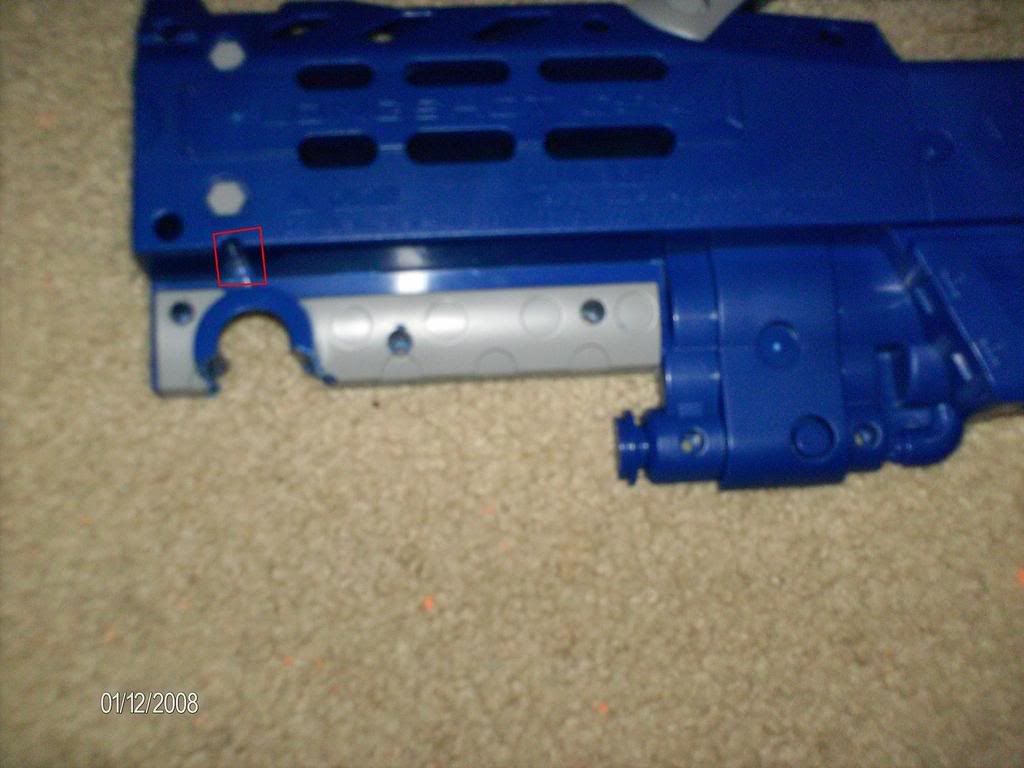
This one is not my modular design, but a stock gun. Rip out the AR, Do whatever you do to make it your own. Once that’s over, open it up, and take off the bipod legs. When they’re gone, take a hobby knife and start cutting off the entire foregrip area.
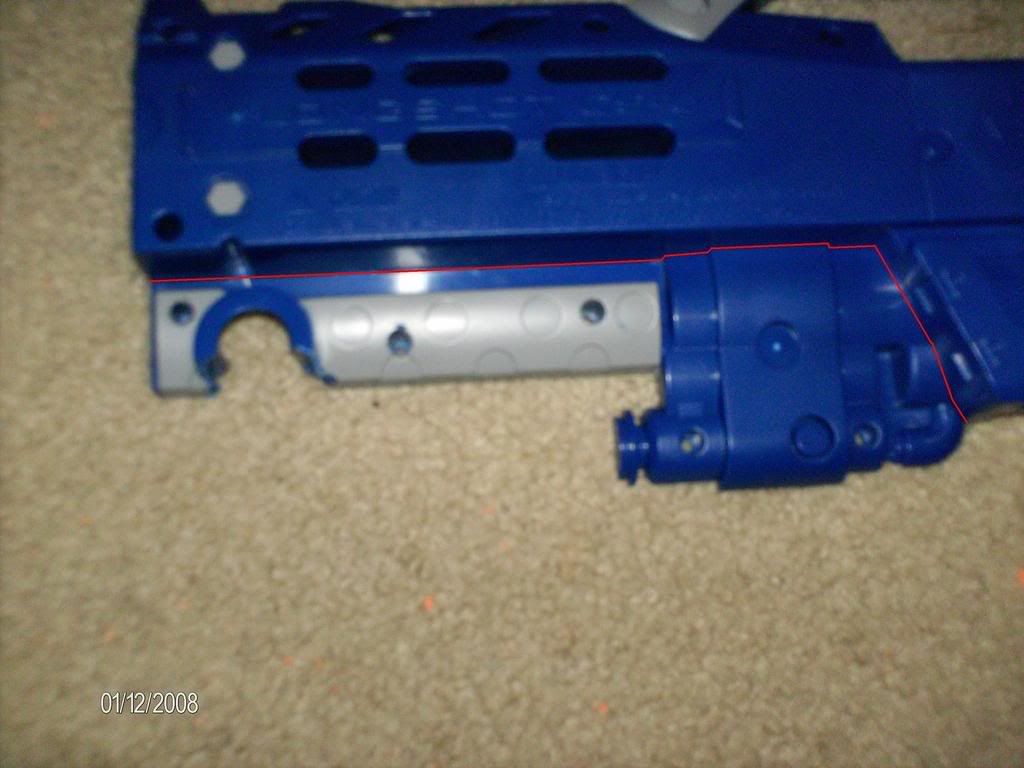
This could be done with a dremel, band saw, or anything, but I like the feel of a hobby knife in my hand. Cut along the shown red line, separating the bipod mount and grip from the gun.
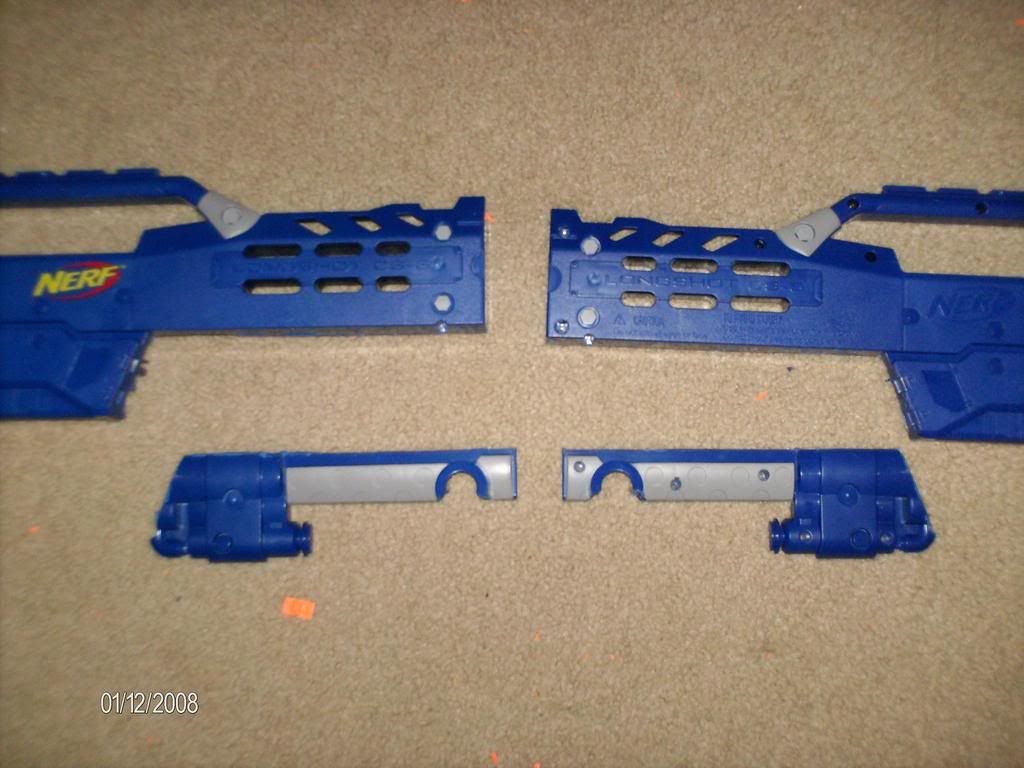
Once you’ve finished that, you should have a long flat surface there, perfect for mounting any sorts of interesting stuff.
Now set aside the LS, and pull up your Titan. Regrettably, I don’t have any pictures of the titan before I gutted it, but looking at some of the other titan mods should show you what you need. When you get it right, you should have just the air tank, barrel, and pump left.
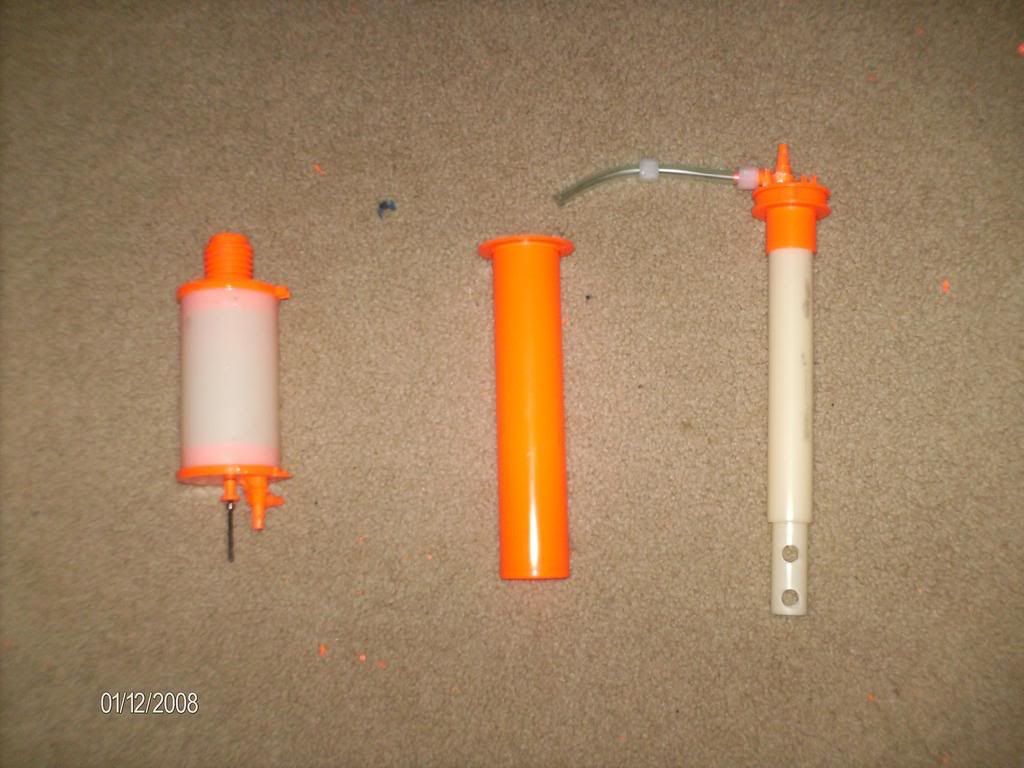
Start by removing the red ring in front of the Air tank, it just causes problems on mine, so I removed it. Next take your trusty hobby knife, and get the barrel ready. Near the base, where the wide flat section mates to the actual barrel, there is a small gap. Insert your knife, and while holding the knife steady, rotate the barrel. It takes time, but it’s clean. I snapped my first knife blade out of impatience, and resorted to my dremel. Once you get the ring off, clean up the edges with sandpaper or a sanding bit, and it’ll look a lot cleaner. Take the air restrictor out of the barrel, and clean the inside. For the tank restrictor, wait until you’ve purchased the supplies to cut it out. When you do, make sure your 3/8 inch hose fits cleanly inside the remnants of the AR. This won’t create a seal, but it will help stabilize the hose during gluing.
Now it’s shopping time. For the Titan part, you’ll need:
3/8 inch tubing. I used some black Vinyl tubing I found at Lowes. Recommend 2 feet.
2 3/8 inch hose to threading adapter. Barbs on one end, a hex on the other. The inside of the hex should be threaded.
3/8 inch ball valve. This is the tricky part. Take some time and find the loosest one the store has, it’ll come in handy later.
2 small hose clamps. As long as they fit around your hose, it’s good.
Plumbers goop/hot glue/epoxy/JB weld. You’ll need something to form a perfect seal around the hose.
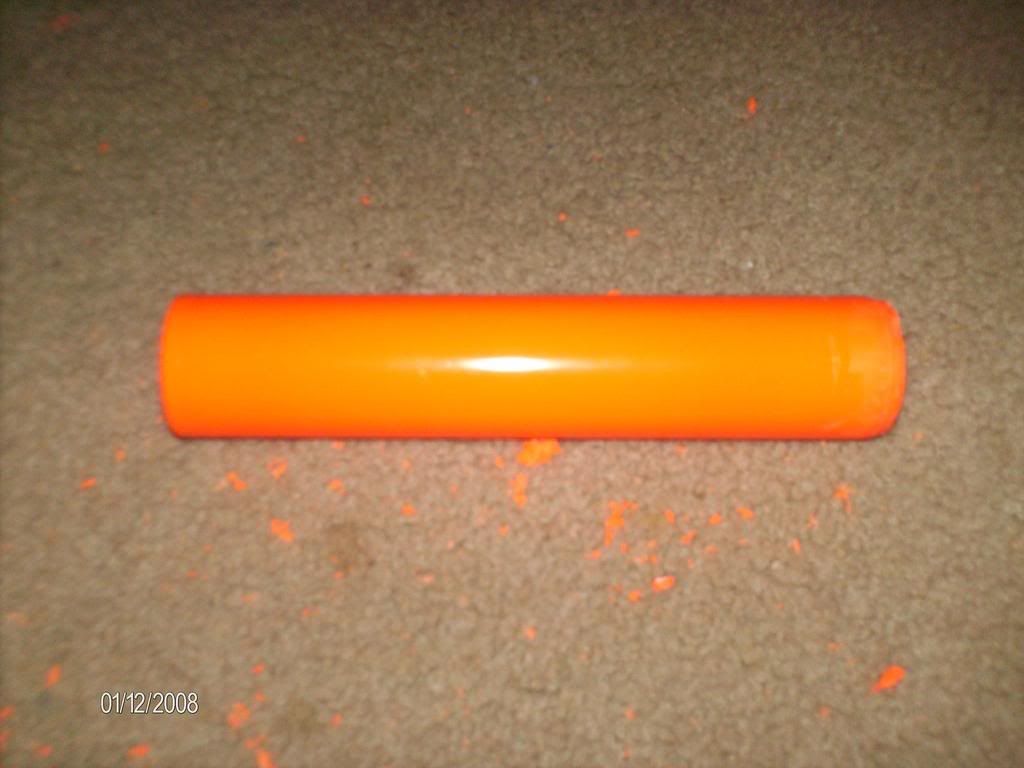
Brass. I used a 2 foot section of ½ inch brass.
But that’s not it. This mod includes a shotgun foregrip. Refer to the other designs if you want one cleaner than mine. But for my design:
Lexan or plexiglass. Make sure it is long enough to go from the front of the gun to the bolt, with extra room to spare. You’ll want some decently thick plexi, I used ¼ inch. You’ll also need some thin stuff, I used sheets of 1/8 inch for some building parts.
1 ½ inch PVC Tee. Yes, it’s smaller than the normal ones, but I like it, and there’s a bonus for using it.
Righty, now that you’ve got this pile of stuff, you’re wondering how the hell it’s going to come together, other than in the trash can.
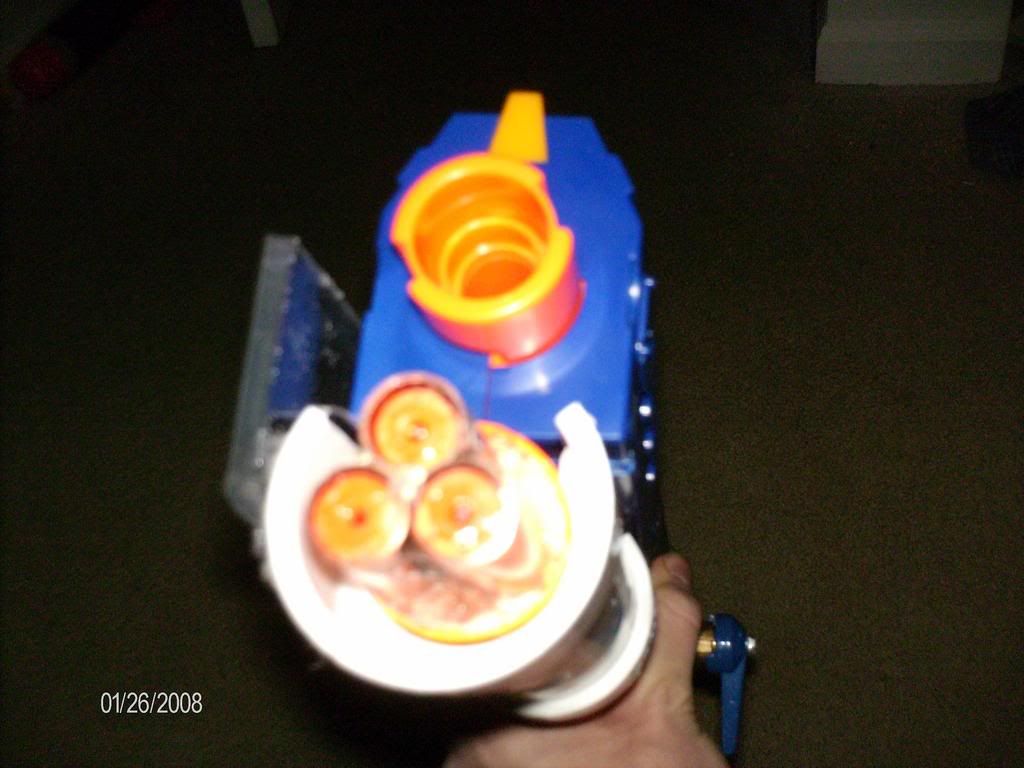
The first step is to make the shotgun barrels. Tape a pipe cutter and cut the brass into three equal sections. This will give a 9 round blast. Not too complicated here. Glue all three barrels together into a triangle, and slide it into the titan barrel. Use Great Stuff/ Hot glue to seal around the barrels.
Take your Titan tank, take a deep breath, and draw a line about halfway down the threads. Closer to the tank is better, but make sure there is about ½ inch on each side of the line. If you’re squeamish or somewhat reserved about doing this mod, stop now, because your next act will be a crime and a waste of money if you fail.
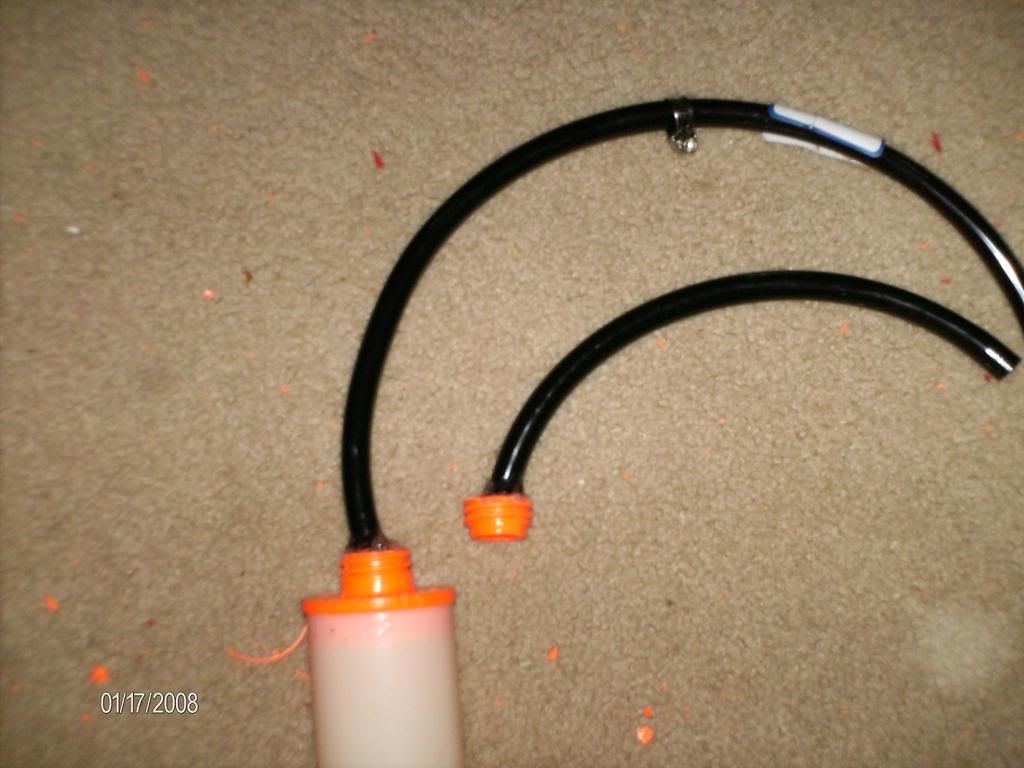
Once you’ve got the line drawn, dremel along it. This sounds crazy, but it’s a very effective way to connect it all. When it comes off, start cleaning it up. A sanding bit goes a long way in this. Clean out the AR, but not too much. Grab your hose and stick it in the cut out section of threading. The closer more plastic around the tube, the better. If you go too far, it’s not too bad. You’ll just have to be more careful when gluing it. Now that it’s looking pretty good, go over to your hose. The 2 foot section has to be divided, and this is where a little bit of preference comes in handy. If you want to place the valve where I did, then cut the hose into 2 sections, one 6 inches long, the other with the remainder. Take the shorter length of hose, and insert it into the thread piece. If it looks good, grab the glue. The hose should be coming in the raw end of the threads, so that the original start to the thread is unblocked. I began with a medium coat of glue, then wrapped it in electrical tape. When you get the glue on, make sure the hose does not extend beyond the end of the threads. Flush with the threads is good.
Once that end of the tubing is good, take your other end of the hose, and insert it into the remnant of the threads on the air tank. Sand until it sits pretty well, and glue it the same way the other piece. The only big concern here is gluing the dump valve closed, but a thin coat of glue, drying then a thick coat will avoid it. Tape it up for drying and set it aside.
Now to begin the cool mounting procedure. Take your thin plexi, and get your knife ready. The first and second pieces are both the same size, 1 7/8 inch by 5 ¾ inch. One of them may have to be trimmed down further, but these are good rough measurements. Cut them out and get ready to start fitting. Take your LS, and strip everything out of it. I’ve found it easier to do the fittings without all the pieces in place. One of the plexi sheets is going to sit inside the shell. Looking closely at the shell of the LS, you’ll find a small semicircle cutting into the frame.
I don’t have a picture of it after removing the foregrip, but you should be able to see where it will be placed. Take your hobby knife, and the first sheet of plexi. Place the plexi against that little semicircle, and the bottom of the LS. There are a series of supports going from the barrel shroud to the flat bottom. Cut a gap in these just wide enough to fit the plexiglass in. When all of them are cut, slide the sheet in and make sure it fits. Repeat with the other side of the shell, then make sure that the shell can completely close with the plexiglass in it. If the shell won’t close, either make sure the plastic is cut completely, or dremel out a little bit of the plexiglass. A perfect fit here is crucial, or the entire system can slide around.
When it fits well, you have to connect this to it’s twin outside the gun. To do this, you need a separator. Take some shards of plexi, and align them along the center of one of the larger pieces. They have to be thinner than the gap in the bottom of the LS, so checking them one at a time is a very good choice. When it’s good, glue them together. I used the shell of the LS to make sure it all sat nicely. Once it fits well, remove it from the shell to avoid gluing it together, and let it dry.
Hopefully you’ve been working slowly enough that the first piece you glued will dry. Take the short piece of hose and threads, and check them. If they need more glue, do it. Same with the air tank and hose length.
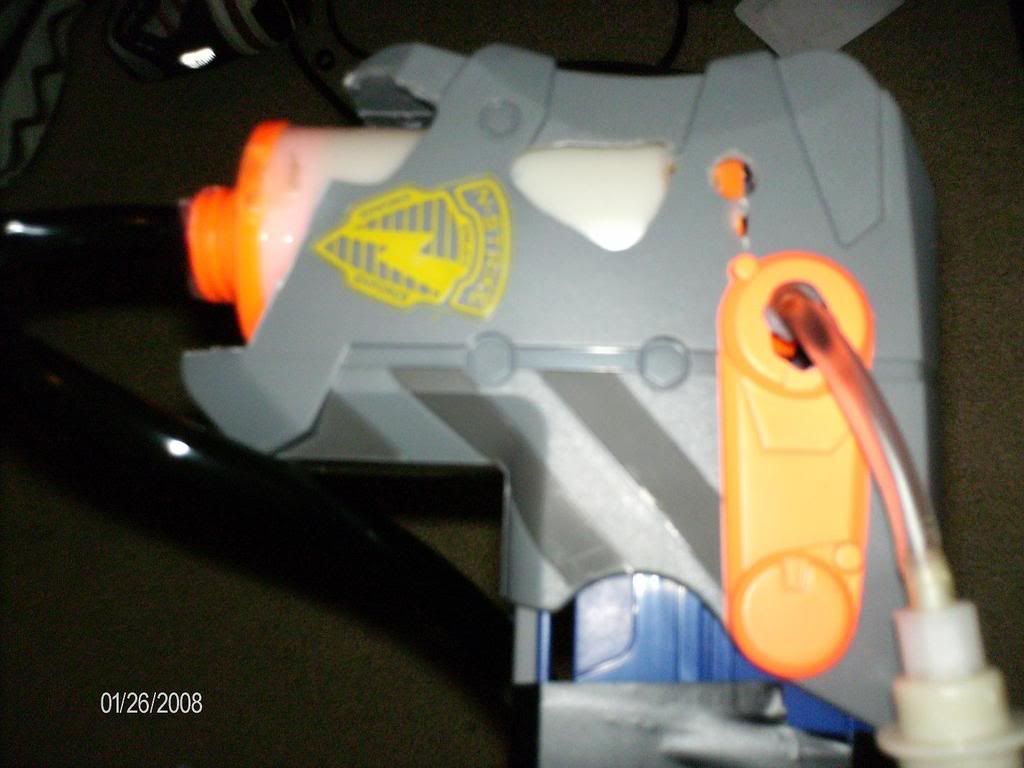
Once it’s all dried, you should have an interesting piece of junk sitting in front of you. Should look something like this.
Maybe now you can see where this is going. Take the air tank and say another prayer. When that’s done, call a friend over. Have him/her/it pull the dump valve so it’s open, and while he does that, grab the metal rod as close to the plastic as possible and bend. The entire goal is to jam the dump valve open. Bend it far enough so that it doesn’t close when you release your grip. This will never hold a seal, so surround it with glue. You can cut the extra length of rod if you wish, given it makes it far easier to work with. Set it aside to dry.
Go back to the thread remnant. If it’s dry, try screwing it into the barrel. If it fits, good, if not, figure out why. If you can’t find why it doesn’t fit, message me, and I’ll give you my list of possible reasons. The easiest way to finish the next step is to use the LS shell. A friend will come in handy here, if not, use tape. Put the flat plexi panel you made earlier into place. Now set the barrel onto it. Make sure the hose has enough room to maneuver around the magazine well of the gun. Having it stick out a bit too far is a good thing here. It may seem smart to center the barrel, but I found it easier to place it off center. If looking at the LS from the bottom, so the handle is sticking up, the barrel will be offset to the left. It should only be offset ¼ to 3/8 inch, but this small change makes a big difference soon. Glue it in. I will admit my barrel isn’t perfectly straight, but given the function of the titan, it doesn’t matter that much. Let it dry, and apply a second coat of either hot glue, or epoxy.
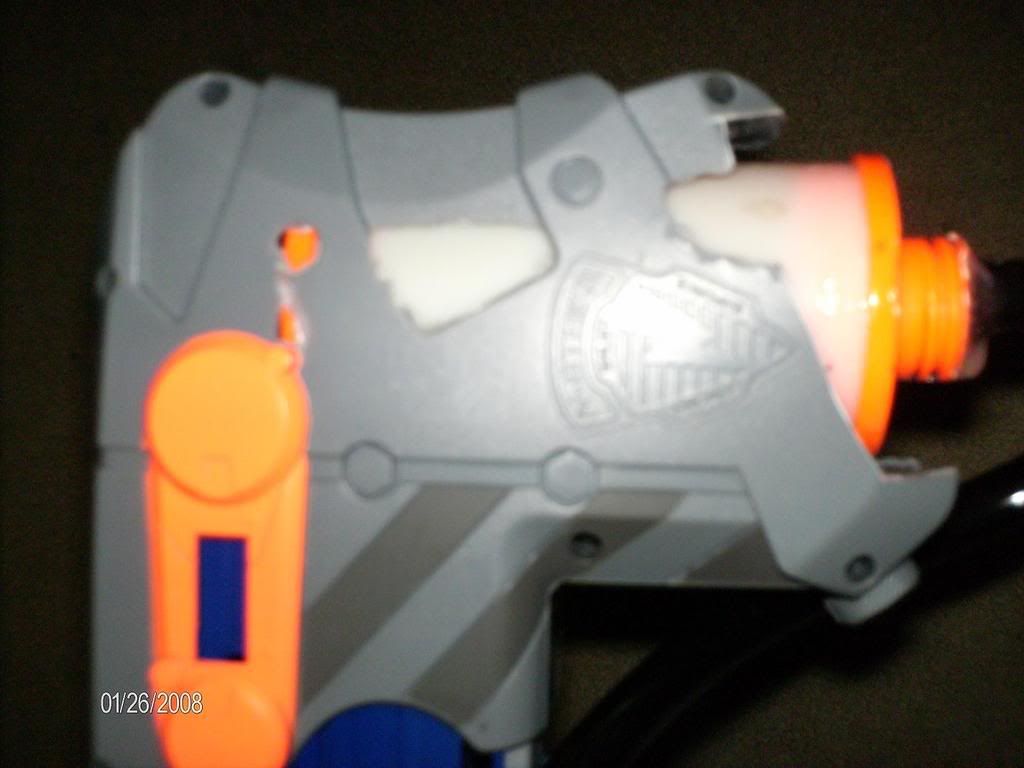
Switch back over to the air tank. This will eventually sit in the stick of the gun, but right now, it’s a bit too fat. Start by cutting off the small nubs on the orange rings. They’re useless. After that, the tank can’t be minimized any more. Start cutting the stock away. This is a custom process, so instructions aren’t going to help. But continue cutting it down, until the tank fits in. I flex the shell of the stock slightly to fit the tank so it doesn’t lose integrity. When you get that done, it should fit well. For air to come in, one of the two inputs must be used. I chose the input that is bent at a 90 degree angle. I sealed the other input to guarantee no air loss. Align the bent input with the right side of the stock shell, and cut a hole. This is made easier because the stock has a circle that acts as a great location for the input hose. Cut out the hole and align the tank input to it. If you wish, run a hose into it and connect to the titan pump. It does look cool, but right now it’ completely nonfunctional.
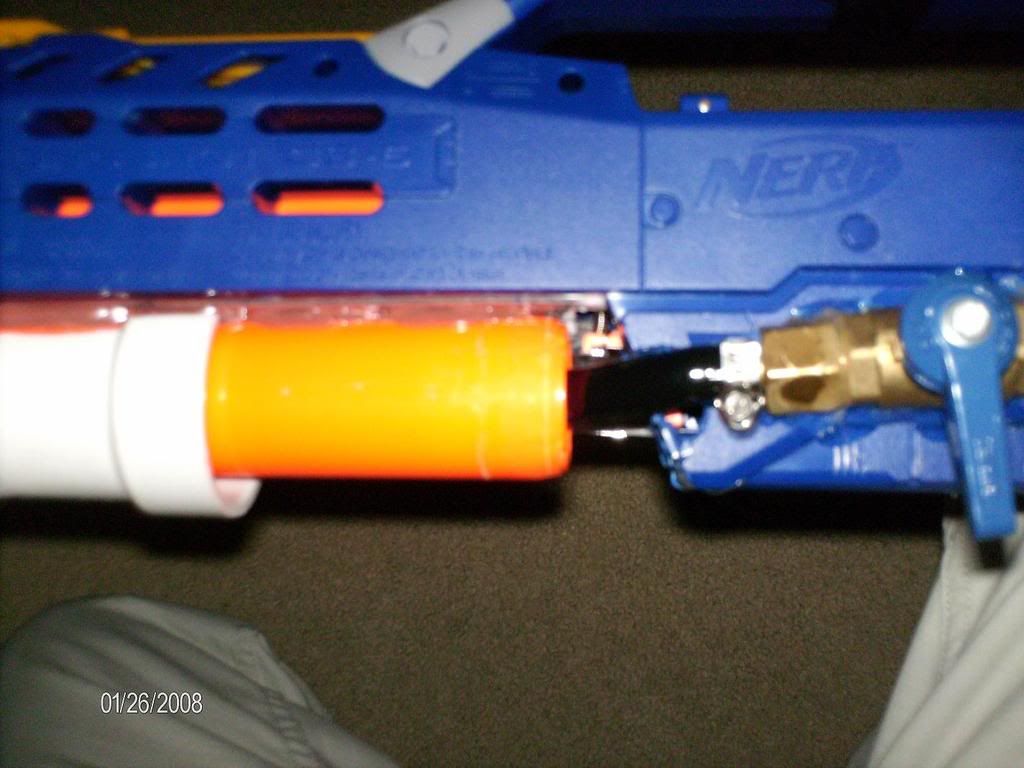
It’s time to start connecting the pieces together. Before working on the guns, build the valve. The ball valve sits between then two barbed hose adaptors. Teflon tape helps a lot for sealing. I liked the placement of the valve on the left side of the magazine well. To make the positioning easier, I cut into the mag well until the valve sat against the orange magazine shroud. It requires a lot of cutting plastic, but makes the system more fluid. When that fits, push the barrel end of the hose onto one of the barbs. Right now, it’s way too long. Start cutting it down until it fits nicely. Put a hose clamp on it and crank it tight. Attach the hose from the air tank, and you can see how it’s going to work.
One quick sidenote. The plexiglass connected to the barrel might slide backwards and interfere with the Dart tooth. To fix this, I dremeled out a large portion of it. About a ½ inch wide, and the same distance deep.
Really, the work on the titan is done now, but the mod itself isn’t finished. Take your PVC coupler, and cut it down so it fits around the titan barrel. If done right, the grip will hang from the barrel, requiring no external modification for the rails. It should fit closely around the barrel. Grab your ¼ inch plexi, and cut a length out of it. I only put one rail on the gun, because the valve sits where the rail would’ve gone. If this backfires on me, I’ll post a repair. Start with a 2 inch wide, 18 inch long piece. Tape it to the PVC grip and start cutting. It will need to be cut to allow the magazine release to function, and a hole for the bolt handle. Additional decoration is always fun, but for the base design, I left it somewhat square and lacking.
If you offset the titan barrel correctly, the grip and the rail should be in contact. If not, add some plexiglass into the gap so they are connected. Glue them together.
If it’s all gone well, you should have a working system. Since this is an insanely long write up, I’ll go over a few basic points:
Make sure all your seals are good. If they aren’t, add some glue over the problem area.
The grip should slide cleanly. If it doesn’t then sand out a bit of the PVC.
This should be obvious, but I almost made the mistake. Make sure the grip has enough range of movement to cock the LS. If not, you’ll be working to fix it, and probably taking glue off to do so.
Assemble everything, and it should all come togeather. Just for reference, here's a few pics of it
Thanks:
Renegade
Inventor Guy
Dickie
TailsChaser
Edited by Kalentar13, 26 January 2008 - 05:25 PM.


