Just telling you now, I had already modded it before I realized that there wasn't a write-up like this. Therefore, there aren't as many pictures as I'd like.
I'm sure this has probably been done before.
Also, I'm sorry some of my pictures are huge. Even when I resize them in photobucket, my pictures show up huge here. Edit: The large pictures have been fixed
Materials needed:
Lock 'N Load
Screwdriver
3-4" of ½" cpvc piping
½" cpvc coupler
Hot glue, Epoxy, Etc.
Duct/Electrical tape
Dremel/Hacksaw
Pen spring
Key ring
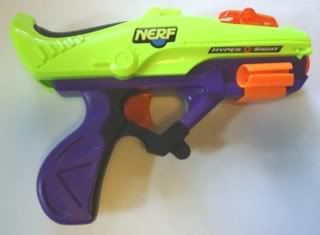
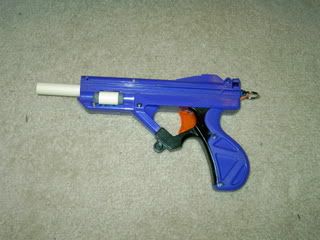
Here is a picture of a stock Lock 'N Load. Thanks to Orange for letting me use it.
Start taking it apart. There are 3 screws on the slider, 7 screws on the left shell half, and 1 on the right half.
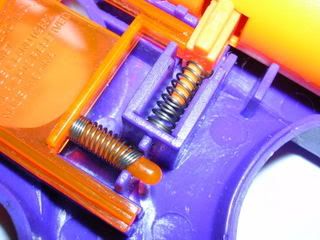
Thanks to NerfMonkey for letting me use his picture of the trigger-catch setup. If stuff flies out, this is how it goes back in.
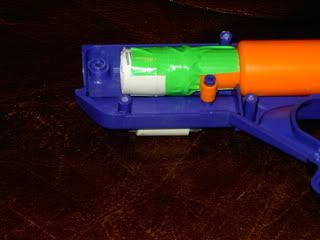
Take out the plunger tube. This is the part of the mod where we need to cut. On the plunger tube, there are two rings that go over the screw shafts, holding it in place. Cut a centimeter in front of the rear one.
From here, you can get to the air restrictor. I just knocked mine out with a screwdriver. Easy to do, because the AR is connected thinly at only three points, and one of them actually broke as I was sawing.
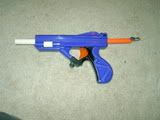
Now, take your cpvc coupler. Go ahead and stick your 3 or 4 inch barrel in one side. Glue the other side to the end of the plunger tube. Quickly put the plunger tube in the blaster's case and close it. This way, by looking down the seam, you can make sure the coupler dries straight.
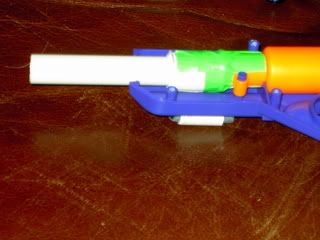
One you are satisfied, and the glue is dry, whip out your tape. I used 2 strips. 1 was horizontally put from one side of the screw brace to the other. The second, shorter piece was put vertically (pointed toward the barrel) making sure that the first piece won't come off. Mine just happens to be green.
Lastly, my trigger wouldn't come back all the way after I pulled it, so I replaced the flimsy little spring with my pen spring. This isn't necessary, but it was pissing me off.
That's really all we do. The original plunger head is more air efficient than those currently on the market. We could put in a new spring, but I'm not sure how much this blaster can take; and I don't think I'll be able to find another.
Close up the blaster, making sure everything is in the correct place. The catch should go in with the slanted side facing forward. Remember, the only screw on the right shell half, and the one opposite on the left half, will no longer go in. Once your blaster is closed up, glue a key ring into the notch in the plunger shaft.
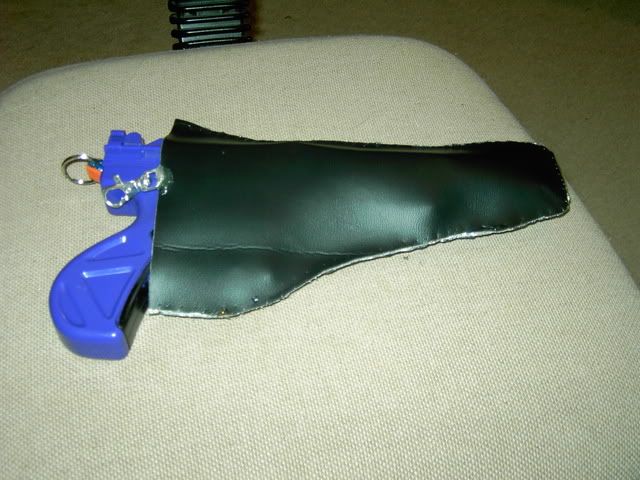
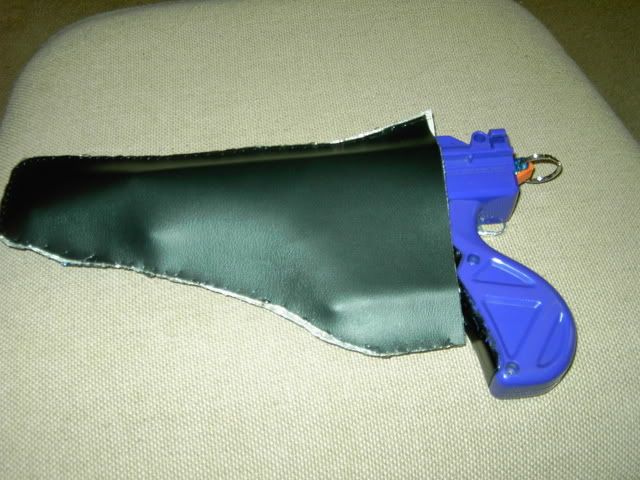
The final thing I did was to add cpvc rings to the grooves that megas would fit into in the ammo holders. It fit perfectly. When I eventually make a holster, they'll have to come off, but until then they're a charm.
Voila! We now have a Lock 'N Load with a replaceable barrel!
RANGES-
I am 5'6", all shots are taken from shoulder level, and I have a big head, so about 4'5". Dart skip was about 5 feet. I had a friend tell me as close as possible where it originally hit the ground.
Shot 1: 49ft, 6in
Shot 2:47ft, 9in
Shot 3: 51ft, 2in
Shot 4: 47ft, 10in
Shot 5: 45ft, 5in
Pretty good, for not even using a single band.
This has been an Aslan Arms production.
As a final note, if any of my pictures ever break, send me a pm.
Questions? Comments? Flames?
EDIT: I managed to fix the pictures.
Edited by lionhead333, 10 February 2008 - 04:18 PM.