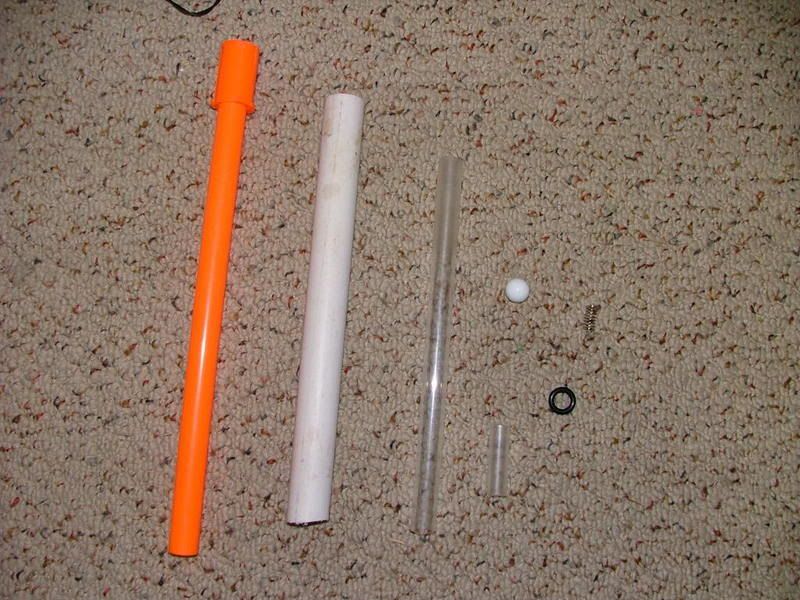
Materials.
-3\4" ID PVC
-1\2" ID Acrylic*
-3\8" ID Acrylic**
-Longshot barrel extension*
-3\8" ID O-ring*
-6\8" marble*
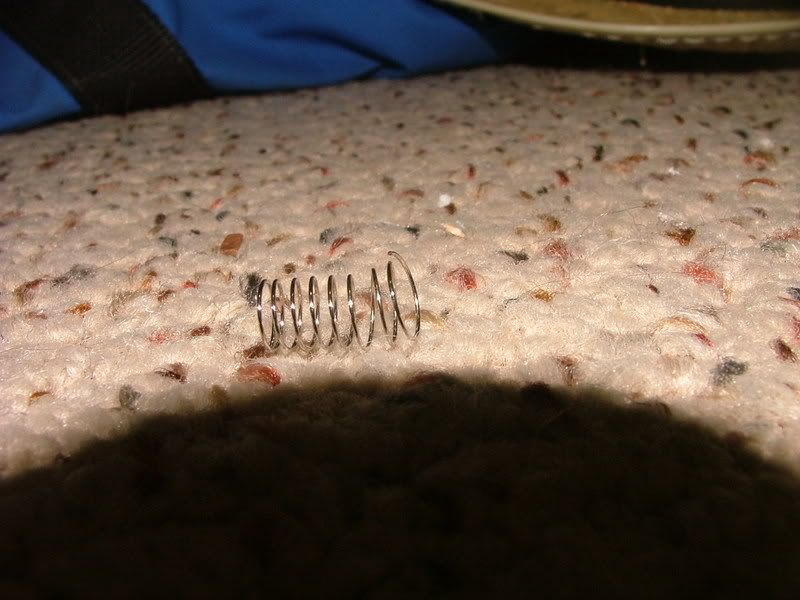
-6\8" long spring
* These are just the materials I had on hand, but they can be subsituted for with many other things.
**Optional, this depends if you spring is thin or thick. if your spring is thicker than 3\8", then you will not need this piece.
Here is a pic of all your materials laid out.
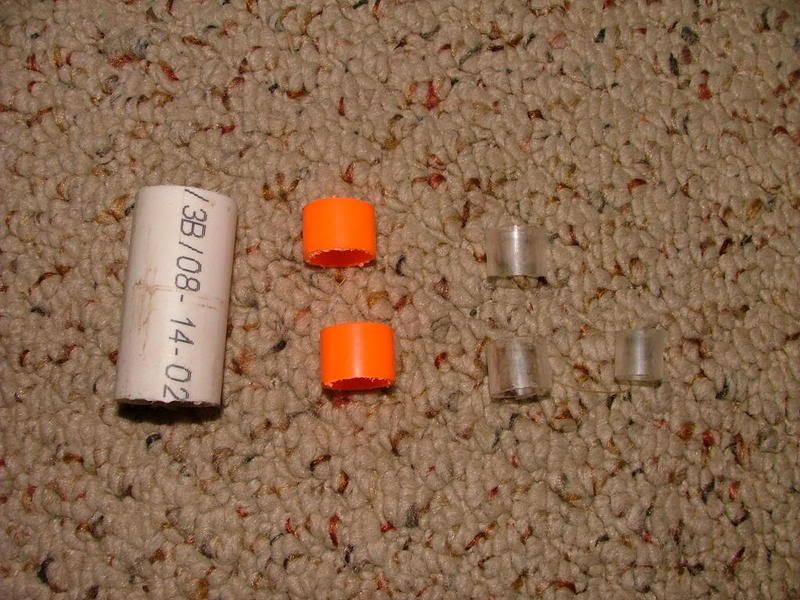
We first need to cut our materials to length. Cut the PVC to 2 inches, the 3\8 Acrylic to half an inch, and for the 1\2 Acrylic and the longshot barrel we will need two sections each at half an inch. Here is a picture of your cut tubing.
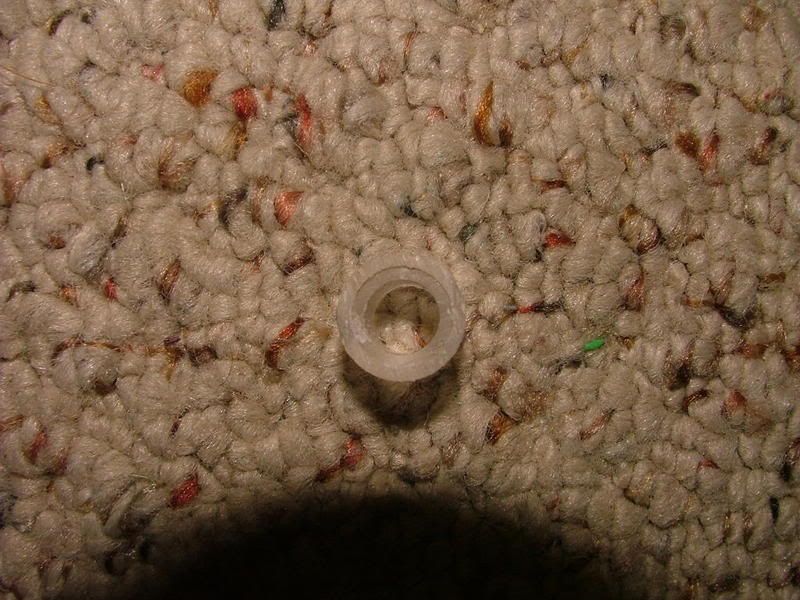
Now, take the 3\8 Acrylic, put a thin layer of epoxy on the outside, and shove it into the 1\2 Acrylic. This is not necesary if your spring can rest on the 1\2 acryic, but if you are using a thin spring, like me, you will need to do this. It should look like this.
Time for the spring. Mine was really, really thin, so I needed to flare it so it was big enough to rest on the 3\8 Acrylic. If you have to flare it like I did, just use some needle nose pliars, grab the end of the spring, and pull out. This will nicely give the spring a flare.
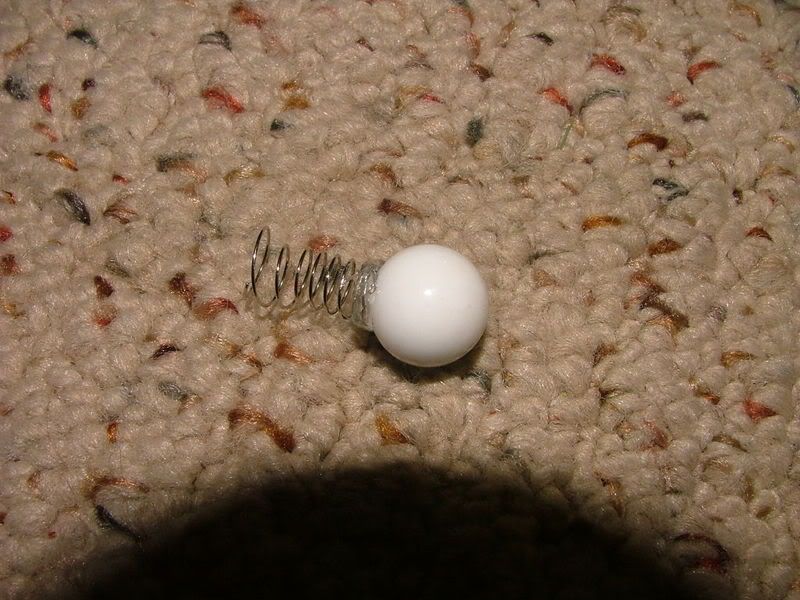
Now, glue the marble to the spring. If you flared your spring, glue the marble to the non-flared side.
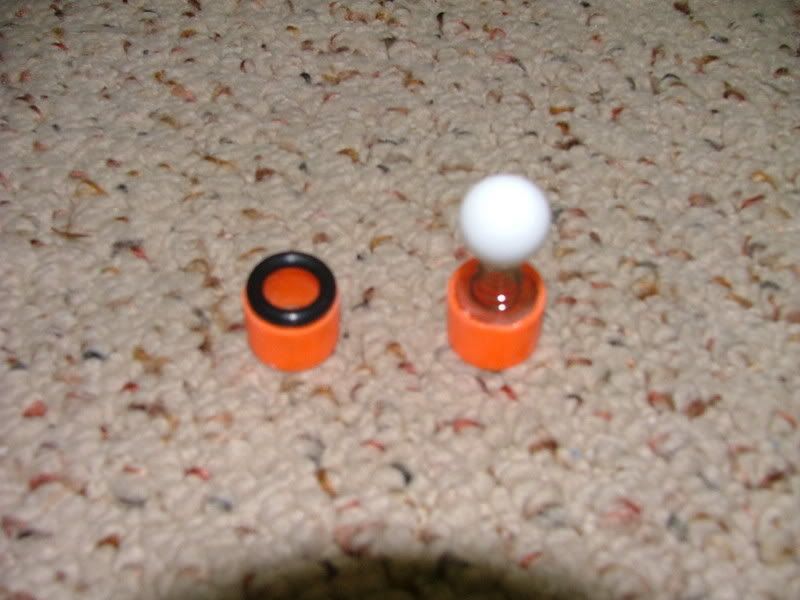
Nw, take your pieces of Acrylic and epoxy them into the pieces of LS barrel, then epoxy the O-ring and the spring\marble to the corresponding pieces(the O-ring to the 1\2 Acrylic, and the spring, if necesary, to the 1\2 and 3\8 piece). It should look like this.
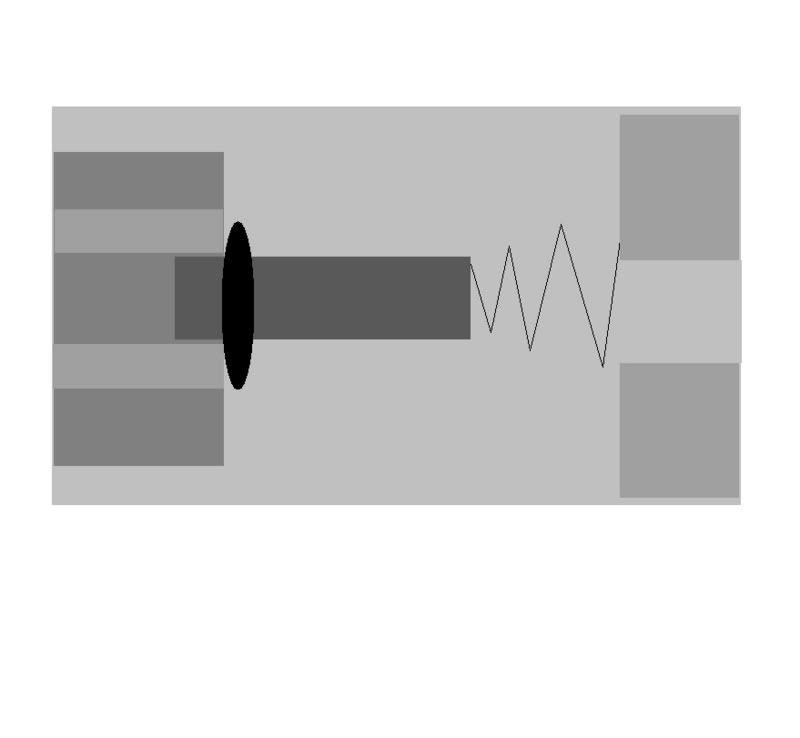
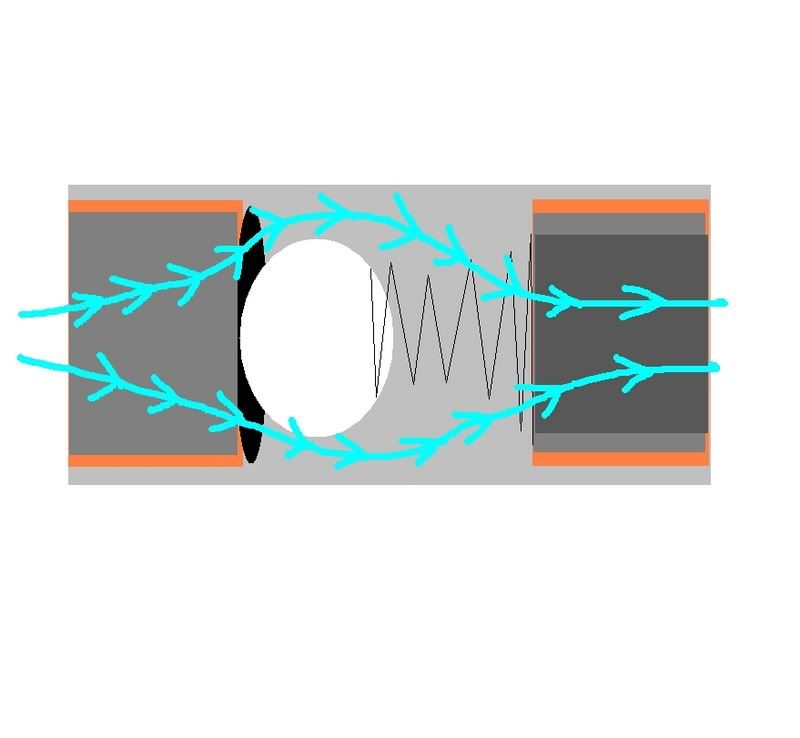
Final step, just lube up the O-ring and marble, and epoxy those two pieces into the 2" section of PVC so that the marble is in the O-ring seat with the spring at about half tension. So, the air coming towards the "in" side will push the marble back and let air through, and then the spring wll push the marble back. If air comes toward th "out" side will just be stopped by the marble. Here's one final picture for clarification.
Hope this is clear enough for everybody, If not, I'm happy to answer questions.