Jump to content


Photo

Sobr-p

Silent Offensive Bantam Rifle-Pneumatic

11 replies to this topic

#1 GeneralPrimevil

GeneralPrimevil

    Member

  • Members
  • 578 posts

Posted 03 April 2006 - 11:12 PM

Well, after much deliberation, the first SOBR variant I will be punching out is going to be finished sometime this week. First off, this thing is a bullpup rifle usign parts from an AT3k, but only the valve and maybe the pump, so it is still a homemade. Now, on to why I called it what it is called, which also make up the parameters I neded to meet with the design.

Silent: I made a silencer. I deserve a cookie. In all seriousness, after making 20+ silencers in my 8 year Nerf career, I have finally developed something which works better than most (if not all). I have pictures of it later in this post. The secret to it: toilet tissue. Yes, that magical thing which seperates the Western world from the Middle East, since TP over there is too expensive for most of the poverty-stricken countries' populations to afford it. Do NOT touch their left hands, whatever you do. It's called "southpaw" for a reason. Okay, that was not meant to be offensive, unlike my new homemade.

Offensive: I needed something which would still fit my playing style: screwing with the enemy in their own base (I'm Covert Operations for a reason, people). What I mean by this is shooting them once to get them to withstand only one more shot before they are out. That is the greatest thing to do for two-shot CTF. In order to do that as undetectedly (umm...I like to make up words...) as possible, I would have to have a silent, yet compact, blaster.

Bantam: This is a synonym for short(er/ened). I wanted the gun to be less than 30", even though the spring design I have is roughly 42" in length, or the length of an M16A2 with 20" barrel. Yeah, anything from compact. That is one of the other things which lead me to make it pneumatic instead.

Rifle: It's a rifle. Duh. It could be a pistol, but I want (re: need) a rifle.

Pneumatic: This is the pneumatic version. Yes, there are two versions. One spring, one pneumatic. The spring one will start to be made after MidMI.

SOBR: Pronounced "so-ber," as in, sober, like not under the influence. I took a nice break from posting for 24 hrs. after posting a total of 26 (3 after the timestamp of a PM I received telling me I was at 23) posts within 24 hrs. Yikes...Now that I am sobered up from posting, well, I felt that one of my first posts should be about this neat project.

Well, I can not take full credit for that name. Flaming Hilt and Carbon gave me the idea with a few names they came up with.

Other info: I'm using the same breach described by a member of East Side Nerf. Google them, if you want. The gun is based off of an AT3k, since they still are available at my local Meijer and TRU. I think they may even be at my local Target. Anyway, I will be using a peculiar trigger link to get the actual trigger in front of the valve as far forward as my barrel will allow me. Pretty much, I'd like to use 10" of 1/2" CPVC as a barrel and have my trigger at the 6" mark, allowing me to put the valve 6" behind the trigger and have 6"-x"=y" behind the valve for the stock, where x=length of the valve and y=length of the 1" Sch40 PVC attached to the valve between the valve and the 90deg elbow which starts off the stock. I have a peculiar way of priming this gun, by the way, which makes this a homemade. Since I want to have a quick follow-up shot, I decided to use a tube of 1" PVC 4" long attached in front of the trigger guard as a reservoir for the firing valve. Inside that 4" of PVC, there is 125 psi of air from my air compressor (135 at MidMI), reg'd down to 20-30 psi for firing. That way, I should get at least five shots off before having to resort to a contigency plan. Anyway, the reg is attached directly to the PVC. After that, a fitting gets me from pipe threads to vinyl tubing used in Nerf guns. Now, so that I can fire without having to be near a compressed air source, I can use the stock AT3k pump to prime the chamber as well via a tee fitting I will be adding later. Oh yeah, I have a double-needle air gauge monitoring both the pre-out (reservior) and regulated (vinyl tubing) pressures. I like that gauge. It goes up to 150 psi, but I will never really be needing that high of a pressure...or will I... :ph34r:

So far, I have the silencer completed and have started work on the breach. I have a question for everyone before proceeding, however, which is: Is there an easier breach to make for 1/2" CPVC besides the one which a member of East Side Nerf made out of 1/2" PVC? I'm trying to attempt that with a piece of 1/2" steel pipe, since it has a slightly larger I.D.

Posted Image
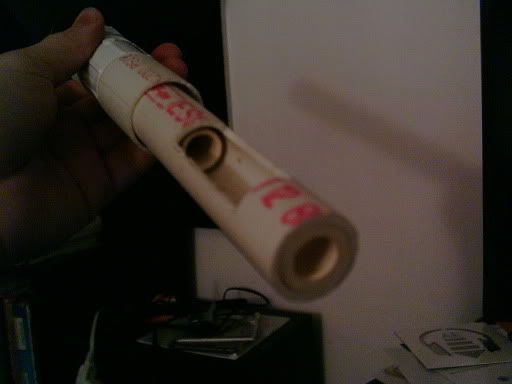
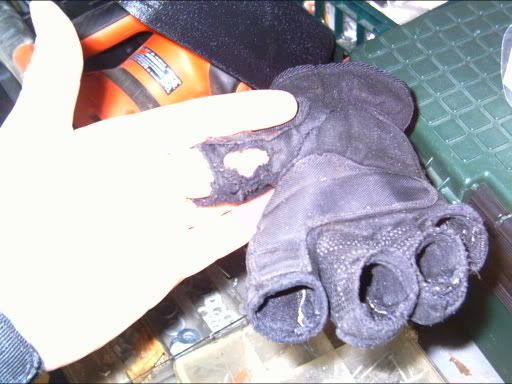
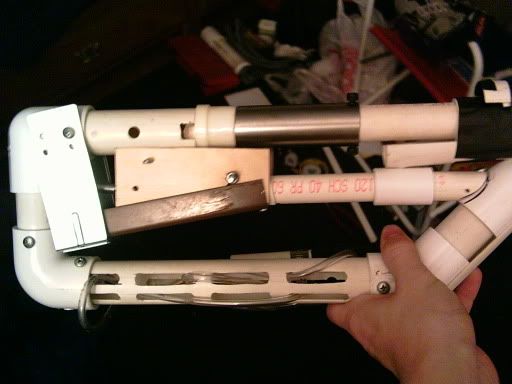
Complete Suppressor (is that picture offensive to anyone? If so, well, that was the goal of the rifle).
Posted Image
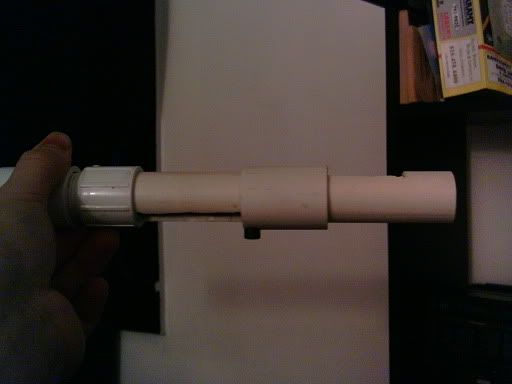
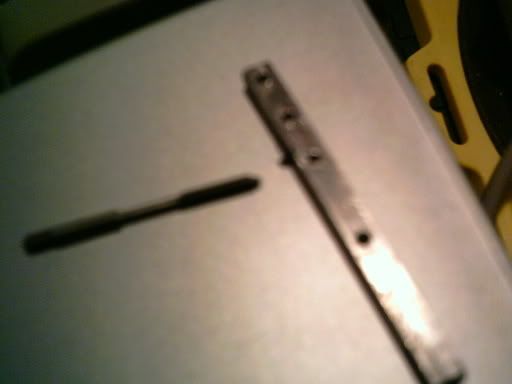
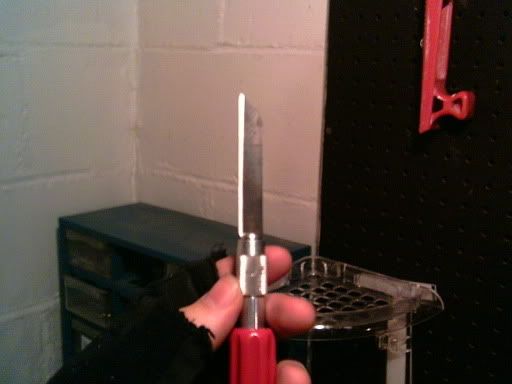
Suppressor core and sheath (prior to rubber coating)
Posted Image
Dual needle air gauge. Schuweeet... B) Oh yeah, that's out of a 1973 Ford school bus. See, since we got rid of the last one of those six years ago, I figured that we wouldn't need this anymore since all of the Internationals, GMCs, and every other bus we have has remote senders and idiot lights for the airbrake systems.

More pics later (like tomorrow night). Too tired, shitty lighting, not enough components to dry-fit the thing, pick an excuse.

Anyway, questions, comments? Oh yeah, all of this stuff is not only feasable, I have done it all in previous homemades. I really don't know why I switched designs to something so simple besides the fact that I haven't owned a Nerf gun in almost a year and really need to get back to rebuilding my armory. That and well, why make a gun which takes almost a week to build when all that is left for this one is to buy a length of 1" Sch40, a 1" plug, and a 1" slip to 1/2" NPT adapter bushing.

Edited by GeneralPrimevil, 04 April 2006 - 03:57 PM.

  • 0
"Fear the man with one gun, for he probably knows how to use it."

#2 Megothitinheadbydart

Megothitinheadbydart

    Member

  • Members
  • 20 posts

Posted 04 April 2006 - 08:05 PM

To get the 125 psi chamber down to 30 psi, are you using a storebought regulator or a homemade one? If you bought it what is it meant for, the only ones I can find are for paintball and are wicked expensive.

For your breech: I would just use a piece of cpvc in bored out 1/2" pvc, but instead of having a "bolt" like in the East Side Nerf breach, I would just put a coupler at the back of the pvc with a washer and rubber washer, and attach a handle to the barrel through a slit in the pvc. this would eliminate air leakage, having to hold the barrel in, and it would reduce the dead space to almost nothing.

Edited by Megothitinheadbydart, 08 April 2006 - 10:03 AM.

  • 0

#3 GeneralPrimevil

GeneralPrimevil

    Member

  • Members
  • 578 posts

Posted 04 April 2006 - 08:34 PM

I am using a regulator for air tools. It has 3/8" NPT inlet/outlet with a 1/4" NPT oulet gauge built in. I think you could find one for, oh say, $10? It isn't very complex and I'm not even sure if it could go all the way down to 30 psi from 125. I might be able to have it run 80 to 30, but I'll have to test it to make sure.

I have stopped work on that breach described earlier and picked up the old Unknown Breach made out of 3/4" PVC and modified 1/2" CPVC couplers I was working on a while ago, similar to what megothitinheadbydart was talking about. It isn't as good as what he was saying, but it works for now.

Posted Image
Breach & barrel in relation to the silence when fully assembled. Yes, the barrel goes inside the silencer. It's still somewhat tight of a fit, but that's gonna change soon.

Posted Image
Breach Open. That is the view of the chamfered barrel edge, like the opposite of a spud cutter barrel.

Posted Image
Breach closed. I want to replace that foregrip with something…different…since it's not going to be a foregrip. It's gonna be behind the trigger/pistolgrip.

I think I ended up using somewhere around 11" of barrel. If it's too long, I'll jsut shorten it. No biggy...

I ran into another problem. I need to pick up two parts for that fitting I was going to use to get me from pipe to tubing. I also am not sure if I can double flare vinyl tubing. I have the tool; I'm just not sure if it'll work too well. I also have to figure out how to mount the laser aiming device so as to make it windage and elevation adjustable.

Edited by GeneralPrimevil, 04 April 2006 - 08:35 PM.

  • 0
"Fear the man with one gun, for he probably knows how to use it."

#4 fobpawwor

fobpawwor

    Member

  • Members
  • 64 posts

Posted 04 April 2006 - 08:40 PM

Wow! I love the silencer, it looks similar to the real ones on AR-15's and other M4 series. Can wait to see what your AT-3K will look like, so far so good!
  • 0

#5 GeneralPrimevil

GeneralPrimevil

    Member

  • Members
  • 578 posts

Posted 05 April 2006 - 12:45 AM

Parts layout (thus far).

I still need to get a few parts, but it's almost done. I bet that I will have it ready to fire by tomorrow night. Then I will just have to take care of the things like the auxilary air reservior attachment, LAM (Light Attachment Module, it has a laser and flashlight), and rubberising it (same thing I did to the silencer to make it invisible in the dark). Those are harder things than putting together the whole rifle, since any one of those (minus the aux. air resv.) will screw up the aesthetics. Oh yeah, just in case you can't tell from the photo, that rifle should only be 26-28" long, since I put that "U" for the shoulder piece of the stock too far back...

Hey fobpawwor, if you want me to make a write-up for that exact silencer, just say so. I think I'm gonna have to make another one out of 1/2" PVC for a friend's CPVC'ed LBB. That can is gonna be massive...probably two inches or more I.D. for the sheath. That's gonna be a 12" suppressor, too...

Okay, I exchanged that 1" thinwall PVC slider for a stainless-steel tube. The stuff has thicker walls than thinwall PVC, yet isn't quite Sch40. It cost me one 12" hacksaw blade to use that SS tube.
New slide

I'm not quite sure about where to stick that steel track (the only thing that changed between those first two pics) on the gun. I don't even know if I want to stick it anywhere since it would then be the only visible steel part on the whole gun which isn't stainless (the 1/4" square stock for the trigger levers are SS).

Some more pics:
New breach, opened.
This shows how thick the SS tube is.

What the foregrip will look like, only with that momentary-on pushbutton switch in front of the vertical grip; the laser emitter staying put, well, it might be put on the other side...

Edit: reposted pics, since they seemed to have failed somehow. I also made them modem-friendly links ;) ...

Edited by GeneralPrimevil, 07 April 2006 - 01:09 AM.

  • 0
"Fear the man with one gun, for he probably knows how to use it."

#6 WratH

WratH

    Member

  • Members
  • 388 posts

Posted 05 April 2006 - 05:31 PM

That silencer looks really sweet, but your pics aren't working.
  • 0
Death be not proud. Though some have called the mighty and dreadful... Thou art not so.

#7 fobpawwor

fobpawwor

    Member

  • Members
  • 64 posts

Posted 05 April 2006 - 07:25 PM

Sure, a write up for that would be great!
  • 0

#8 GeneralPrimevil

GeneralPrimevil

    Member

  • Members
  • 578 posts

Posted 05 April 2006 - 11:37 PM

They work for me...anyone else having a problem? None of them are links, so...

I'll make a write-up for it then.

\
|| This seperates the above from the updates...
/

I finished the trigger. Know what, just look at the pictures and ask questions later. I don't feel like typing a whole lot right now...

Posted Image
Posted Image
Posted Image

Yes my hands look fat. No it is not fat. I can crush PVC stuffs, remember?

When I first started cutting the hole for the trigger pad, I broke a drill. Well, there's more where that came from. Unfortunatly none of those are TiN coated...

I am also way farther than those pics show. All I have to do is cut one piece of PVC, find new PVC cement since my other one seems to have cured in the can on me, and get the actuation rod pivoted. That will be interesting because I still have to find my 18ga sheet metal...

I have a 2k valve on there right now out of a KAF member's AT2k since they don't use it anymore. They apparently bypassed the goo tube so it looks like shit. I'm still able to work with it. I might glue a small section of 1/2" PVC to make it NPT-acceptable, allowing me to use bigger hoses and more pressure...that sounds like a good idea. I'll work on that later.

Questions/comments? Want detail photos of certain parts or how I did something? Want me to shut up? That last one was rhetorical, by the way...

I won't be posting any more until I get it to shoot. It will not be shooting until I find my sheet metal and PVC cement. Also, can anyone recommend joining two pieces of similar steel without the use of heat, eectricity, or rivets? I think that kinda rules out just about everythin except for bolts with locknuts...or roll pins.

Edit: took out a few pics...

Edited by GeneralPrimevil, 05 April 2006 - 11:54 PM.

  • 0
"Fear the man with one gun, for he probably knows how to use it."

#9 FromAbove

FromAbove

    Member

  • Members
  • 71 posts

Posted 06 April 2006 - 05:04 AM

Also, can anyone recommend joining two pieces of similar steel without the use of heat, eectricity, or rivets? I think that kinda rules out just about everythin except for bolts with locknuts...or roll pins.

May I say your homemade is coming along nicely!

Have you thought of using steel epoxy to join your metal together? It's usually located right beside the other epoxies at my local hardware stores and does a fine job attaching metal to like metal, or so I've seen. If you need something structurally sound, you might want to use some rivets along seams and the epoxy as good measure. Just a thought.

Goodluck.

Also many of your pics don't work for me either.
  • 0
Connor: Oh, is that right, Rambo?
Murphy: All right, get your stupid fucking rope.

Do you mean with an integration or what? Because size doesn't have anything to do with performance...-NerfMonkey

#10 davidbowie

davidbowie

    Member

  • Members
  • 422 posts

Posted 06 April 2006 - 08:45 AM

JBweld should do the trick. In the bike-powered vehicle I mentioned earlier, we used JBweld to attach the drive sprockets to the main axle, and it held like a charm. This wass up against a LOT of torque and it worked fine, so it should hold beautifully for your use.
  • 0
Check out the all-new DBNerf. The source for all your DBNeeds.

#11 GeneralPrimevil

GeneralPrimevil

    Member

  • Members
  • 578 posts

Posted 06 April 2006 - 09:34 AM

Wow, if JBweld held up against those axles...I'm just thinking now how much force I put on my pedals...That's probably about the same as two of you moving that thing in a parade, if not more...I've only bent three axles and broke another.

Hmmm...pics no work eh? Well, I'll just give a link to the sub-album which contains most of the pics for this project, and it has a few other Nerf-related projects in tehre as well. Yes, I take a lot of pictures. My puter has a little over 200 pics that I've taken within the last two months. Then there's the ones on my camera still for How-To: Part 3...I'll upload those later and write taht up when I have time...

I think I'mm gonna find my sheet steel. Then I'll worry about attaching it. That whole steel piece as one part will work well for where it needs to be.

Now, what a few people might be thinking (or have yet to think of but will understand when I say it) is, "How much will this thing weigh!? There's so much steel!" Well, I dunno yet, but I'm damn near positive that I blew the 4lb approximation out the window, simply because the silencer-breach-barrel component as one unit weighs about three to four. Now, with the addition of say the foregrip, weighs another two, and the gauge (which I might be able to use more easily now...I'm gonna have 1/4" NPT on the AT2k valve, making this more of a homemade. I'll do a write-up, don't worry) which weighs a good pound, so..7-8lbs? Hmm...I wonder how I'm gonna carry this thing when I'm not using it...three-point?


Edit: screw NPT. I can't find a handle for my tap and the conversion will not be liked by the valve, so...Also, mu pics quit working! Dubya Tee Eff, mate!

Edit2: I can not, for the life of me, find my sheet steel. I dunno where it went. I noticed that someone seems to have reorganized, to some extent, my home shop as well...hmm...I'll just have to use 1/16" aircraft plywood with 1/4" plywood reinforcement around the cotter pin. Well, I'll post something when I'm done for the day...

Edited by GeneralPrimevil, 06 April 2006 - 11:44 AM.

  • 0
"Fear the man with one gun, for he probably knows how to use it."

#12 GeneralPrimevil

GeneralPrimevil

    Member

  • Members
  • 578 posts

Posted 06 April 2006 - 08:42 PM

First off, I always wear gloves whenever I'm doing anything, inluding reading. Well, no longer will I be wearing gloves while dremeling. Although I could actually argue that they saved my hand, the gloves kept me from moving my hand away from the cutter moving at 30k RPM. Well, I guess you guys need a pic of where it got the glove, so here ya go.

Second, today was not a good day. I fell going up my basement stairs...Six times in a row. I broke a tap because I forgot to put cutting fluid on it. As I was backing it out to do so, snap, and I don't mean Carbon's homemade series ;) ...

Third, and foremost, I finished the rifle...mostly. All I need to do is fix some aesthetics and whatnot, like all of this, eventually:
-I'm probably gonna add an "Angel Mag" (a.k.a. deordorant stick) to this thing. That will involve a new slide...
-I need to fix a few problems with air pressure. Sometimes the tube entering the valve leaks, but only sometimes. The 1/2" CPVC coupler also leaks air, so I have to glue that on (not just friction-fit it. I knew that, but needed to check anyway) and make the barrel seal better by having it go farther into the coupler half.
-I need to make the extension spring attached to the actuation arm be a bit stronger; the piston doesn't always seal in the valve, and it gets annoying having to push the trigger forward all of 1/16 of an inch. That might make the incredibly light (lighter than my 2-3lb A-Bolt) trigger pull a bit heavier, but oh well.
-I'm gonna integrate that aux. resv. pretty quick, probably after I install the mag...Apparently that gauge is a very long 1/8"-27tpi, a.k.a 1/8" NPT. Nice to know that know. Expect me to have this thing firing almost semi-automatically by MidMI.
-Yes, the rifle does in fact fire. I need to make the coupelr a bit more airtight with the valve, and that's about it. See below. It makes a "pop" sound, but no resonance. That is a good thing. Now time to get rid of the pop, losing probably 10ft total distance at the same time...

Well, here's some pics; ask questions if need be:
Whole thing.
Front end, shooter's (left, for you non-HiPower peoples) side.
Rear end, observer's side.
Rear end, shooter's side.
The needs-to-be-made-comfortable grip, with my hand there for some purpose...

Finally, buy a #26 Xacto blade. Why? They make great Stefan (FBR) cutters since they are a good 2-3" long and very sharp.

I'll take soem vid of it over the weekend, or next Monday. I have yet to decide.
I shot myslef in the hand with an unglued 1.75" 3/0 micro Stefan. Yeah, it's hard to type now. My hand has a welt. Must...glue...Stefans...That was from a few inches in front of the suppressor, or a good 15" in front of the barrel end. That was also with 6-7 pumps.

Edit: Forgot to mention, I started making that rifle without really knowing how it would turn out, as in, I just literally threw pieces together as I was going along. I think it turned out okay for doing that. Just wait until I cover some stuff (like the holes) and coat it with something, like rubberized undersealer.

Edit2: Replaced shit photos (and made them links), added more photos, added some other stuff.

Edit3: I forgot to mention: the pipe that runs along the bottom of the gun with the pump attached was jst a random piece I was practicing a Dremel on about a year ago. I'm gonna replace that soon. Also, that is in fact 5ft of 1/2" vinyl tubing which is intertwined with the pipe. I didn't want to cut it...looks kinda cool in person, however.

Edited by GeneralPrimevil, 07 April 2006 - 06:22 PM.

  • 0
"Fear the man with one gun, for he probably knows how to use it."


0 user(s) are reading this topic

0 members, 0 guests, 0 anonymous users