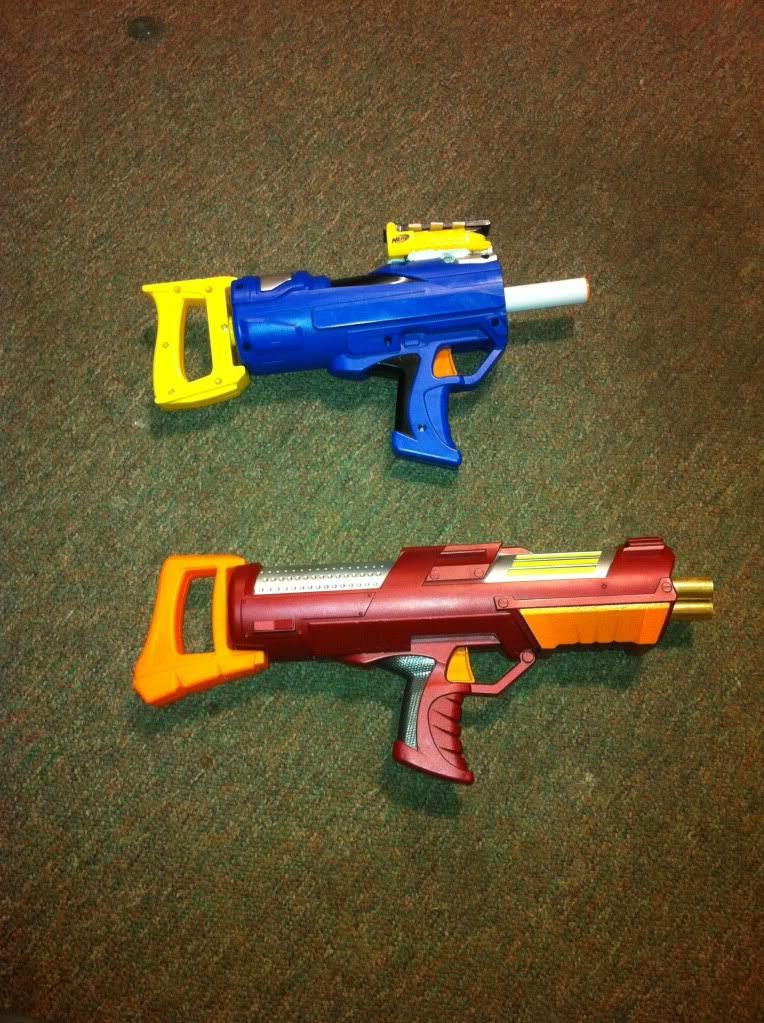
Before I begin, a mod to increase power can be found here:
[img]http://nerfhaven.com/forums/index.php?showtopic=21662&st
On with the modifications…
[img]http://i1137.photobucket.com/albums/n515/zx532/IMG_03941.jpg[/img]
This is relatively simple, especially if you realize that the sight is practically useless (since it is)
Materials:
• Sonic bazooka
• Recon flip up sight
• Epoxy putty
• Bottle cap
1. Cut away the front part of the shell (right up to the large flat support wall about 5 inches into the barrel) this will allow you to use whatever ammo you want
2. Disassemble the recon sight (2 screws on one side) and remove the black piece that attaches to the tactical rail. (watch out for the spring, you’ll need it)
3. Put the sight back together. (the black part will not flip up or down right now, don’t worry, you haven’t broken it)
4. Shove something into the bottom of the sight so that the spring is working (test by flipping the sight up and down) I found that the cap from a 2 liter Mountain Dew bottle fit almost perfectly
5. Remove the orange plastic (useless) viewfinder from the sight
6. Here are the markings I used:
[img]http://i1137.photobucket.com/albums/n515/zx532/IMG_03971.jpg[/img]
The column on the right is for the shorter rockets and the ones on the left are for the rockets from the Big Bad Bow. All measurements are in feet
The horizontal bars are square toothpicks, and the squares are Popsicle sticks. Everything is held together with CA glue
[img]http://i1137.photobucket.com/albums/n515/zx532/IMG_03991.jpg[/img]
7. When you are all done apply a liberal amount of epoxy putty to the bottom of the sight so that it is flush with the front of the gun
On to the shotgun…
[img]http://i1137.photobucket.com/albums/n515/zx532/IMG_03921.jpg[/img]
Materials:
• Sonic bazooka
• Pipe large enough to fit the dart inside of it (inner diameter of 5/8”)
• Pipe that fits snugly inside the dart (outer diameter 3/16”)
• Plumbing sections:
[img]http://i1137.photobucket.com/albums/n515/zx532/pipefixtures.png[/img]
• Epoxy putty
• Some thin cardboard or styrene or something (you will know what you need when you read farther)
1. Cut the larger pipe to 3” you need three of these
2. Cut the smaller pipe to 1 5/8” you need three of these
3. Make a disk that will fit the plumbing piece where the pink line is
[img]http://i1137.photobucket.com/albums/n515/zx532/pipefixtures2.png[/img]
4. Make 3-6 disks (depending on thickness) that fit inside of the larger pipes
5. The smaller disks will be attached to the larger one as shown:
[img]http://i1137.photobucket.com/albums/n515/zx532/pipefixtures4.png[/img]
6. Holes will be drilled through the centers of the smaller disks and through the larger one so that the smaller pipes may be inserted
[img]http://i1137.photobucket.com/albums/n515/zx532/pipefixtures7.png[/img]
7. Attach the 3 larger pipes to each other with epoxy putty:
[img]http://i1137.photobucket.com/albums/n515/zx532/pipefixtures3.png[/img]
8. The disk assembly from step 6 will now be inserted into the pipes
[img]http://i1137.photobucket.com/albums/n515/zx532/pipefixtures5.png[/img]
9. The entire assembly from the previous step will now be put right where the pink line from step 3 is
[img]http://i1137.photobucket.com/albums/n515/zx532/pipefixtures6.png[/img]
10. Seal around all the edges so that there is no airflow other than through the barrels
[img]http://i1137.photobucket.com/albums/n515/zx532/IMG_04001.jpg[/img]
11. Cut the front part off the sonic bazooka (leave about ¼”)
12. Attach the other plumbing piece to the sonic bazooka (the narrow hole in the plumbing thing should line up with the hole you just made in the sonic bazooka
13. You may now put everything back together, and the shotgun barrel assembly can be put on the front of the sonic bazooka assembly (I wrapped a bit of duct tape around where the two pieces meet for a better seal, you can glue them together if you want, but then it won’t be expandable)
[img]http://i1137.photobucket.com/albums/n515/zx532/IMG_04011.jpg[/img]
(Ranges on the shotgun suck by the way, it was more of a proof of concept than an actual functional mod. that is the only reason I included it here


