
(a link to the instructions is in the description, but it is in Japaneese, and it uses, I suspect, some parts only sold by Tamiya Japan)
also I apologize for not taking pictures ahead of time, I substituted the nescessary pictures for 3D renderings.
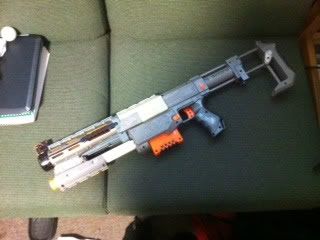
that is the finished gun
before you start do any performance mods, because once the shotgun grip is on it gets really annoying to take apart
this gun has the air restrictors, and safeties removed
The Powerstock:
this is specifically for a Maverick Rev-6 spring, but can be adapted for different sizes, by adjusting the length of the PVC
you will need:
8.5CM of 1 inch PVC (this is an important measurement, it is the distance between the back of the first stock support and the front of the second)
4.5CM of 3/4 inch PVC (this measurement is not as critical, especially if you use a different size spring)
2 washers/random disks of metal with a 1 inch Diameter
1 Maverick spring
epoxy putty
tools:
files/sandpaper
craft knife
screwdriver
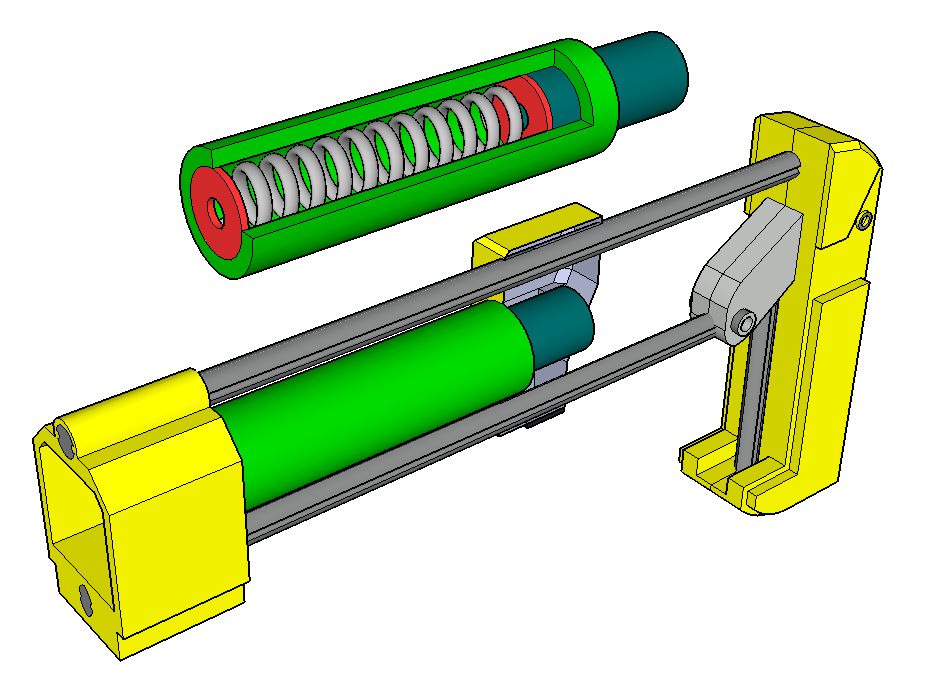
the green is the 1"
the teal is the 3/4"
the pinkish are the washers
the grey is the spring
shave down about 1.5CM of the 3/4" PVC so that it fits into the 1" (mine didn't require any glue to be held in)
cut a hole in the front face of the center stock support that has the same diameter as the outside diameter of the 3/4 inch pvc in my case it was about 3CM (you will also need to take the support apart at some point, it may be easier to d first or second depending on the tools that you have acess to)
you may need to trim/reshape the 3/4" PVC, but in the end the 1" should be flush with the face you cut a hole in (Nerf conveniently made this flat, so it doesn't look weird)
befrore gluing make sure everything fits back together
load up the inside of the center stock support with epoxy putty, and put the PVC pipe in, then quickly put it back together
the whole assembly should line up with the back of the recon so either hold it in place or just put the stock on to the back of the recon if you have the primed indicator still intact
when that is dry, cut the back of the indicator off, but leave the structural piece
it should look something like this
then put the washers and the spring into the 1" PVC as shown in the 3D rendering (washer, spring, washer)
the washers are to spread out the load of the spring so it doesn't damage the back of the piston
Shotgun Grip
materials:
some sheet metal (or whatever you want to use for supports, admittedly for some sheet metal is a BAD idea)
21.5CM 3/4 inch PVC
some screws
recon flashlight
recon barrel
tools:
tin snips (for the sheet metal)
drill
hobby knife
screwdriver
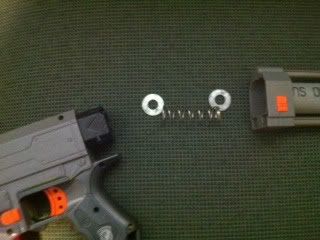
take apart, and gut the flashlight save the orange lens holder for decoration if you want, but the main thing is that the 3/4" PVC can slide through it well (see image)
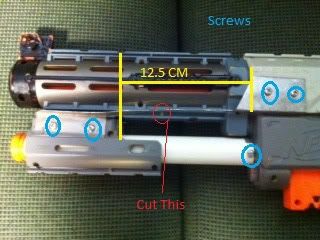
cut out that little tab on the Tac rail, because the part where the flashlight connects to the tac rail is used as the slide (it is marked in red in the image)
cut your sheet metal so that it is as close as possible to the distance marked in yellow. a bit long is ok, if it is too short, however, the gun will not be able to cock properly
finally put it al together, screw locations are marked in blue (one warning, if you use screws, you may need to shorten the ones that connect to the original slide, as it still needs to be able to move)
Performance:
streamlines curl like its their job when they leave the gun, but it can shoot about 50-60 feet indoors (the cluster actually spans from 30-60, but the average is still 50-60)


