
People I would like to thank
Captain Slug- For making the +bow which got me into homemades, l+l Cs, and for making the Diy: External Air Tank.
Forsaken_angel24- For making the Angel breech which made this gun possible.
Whoever owns McMaster Carr- If you don't know why I'm thanking them just leave now.
It started like this

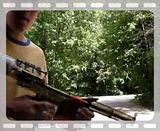
Finished product

The gun next to a recon.

I didn't even plan that it just was a coincidence.

As you can see it's about the same size as a +bow.
The video was taken at 100psi and at the end I think it was at 70 so it is inefficient but who cares it's semi-auto.
Ranges are about 30-40 feet. So not that good, but it can be improved.
On a recent test at 120psi one dart went 60 feet
On to the Write up.
For version 2 of the valve see page 2.
*It is more of a guide, so you still need to be able to problem solve and figure things out yourself.
Materials
1)Brass
19/32
9/16 2 sticks
17/32
1/2
15/32
7/16
13/32
3/8
5/32
2)Tools
Pipe cutter For Tightening Rings Only!!!
Dremel or other metal cutting device that doesn't deform the metal.
Drillpress
Bits: 1/8, 9/16 spade, 5/32, 1/4, 7/64
Scrollsaw
Screwdrivers
Good ruler
Fine tipped sharpie
6-32 tapping bit and tapping handle
Safety goggles (So shit won't get in your eyes)
Dust mask
3)Other stuff
Goop
Magstrike trigger valve
Epoxy putty
Super glue
Hotglue gun
PVC cement/primer
Spray silicon lubricant
some scrap wood I used a 1x4
Solder/ soldering iron (I used a blow torch
 )
)A eyehole or hook screw that wont bend easily.
1 1/2 bolt that wont bend ever.
Label paper print l+l Cs templates on it.
4)McMaster
If it has a * you can get it at a hardware store.
8580k28
4880k55 x2*
48925k95 only 1 FT*
85805k28
9654k921 or strong rubber band
51545K77
5012K36
5006k53
91780a131 x2
91780A133
90309a154 x2
90402a146
90402A144
9087K61 x2
5) Air tank
Either use a low pressure air tank like this one, or a high pressure like this one
Breech and Barrel construction.
1)Start off with your barrel make it like the picture.

I still need to experiment with different lengths and with or without the tightening rings. (I only used 4 rings)
2) Start cutting brass pieces so you have all the pieces in the pictures.


Don't worry about anything besides pieces that are square or rectangular and dont make holes yet.
All your brass pieces should look like this. (I forgot 1 half in piece)

3) Breech cover
-Flare out 1 end of the 4 1/2in piece of 19/32 with pliers

-Assemble it the same as an angel breech with the 19/32 from above, 1/2in of 9/16, 1/2in of 17/32, and the 4 1/8in of 1/2. The flared end should be away from the 9/16 and 17/32.
4)Breech pipe
-take the 3/8, 7/16, 15/32, and the 13/32 and nest them together like so.

-Glue them into each other so the finished product is this.

5) Breech piston
-Take the 4 1/2in of 17/32 1/2 of 9/16 and 1/2 of 19/32 and glue them together like so.

-The 5 in of 9/16 is the piston cover all you have to do is drill an 1/8 hole 1/2in from one end only go through 1 layer of brass; like the picture.

6) Now you need to bust out your scrap wood and make a clamp similar to this one to hold your Breech piston and Breech cover.

Solder those two pieces together making sure the flared end of the breech cover is away from the solder joint.
Edited by louiec3, 09 August 2009 - 07:23 PM.


