The latest upgrade is the Supreme crossbow kits, writeup here
Some key features:
Replaced plunger tube
Full internal reinforcement, including plunger
Singled 1500 integration with linked trigger
Swappable trigger grips for comfort
110' flat, no bungies, via perfect plunger head seal and DT3 arrowshooter spring
How to repair: Plunger, plunger head, screw posts and shell holes and imperfections
How to redo a paintjob
::Long, sappy intro about crossbows here::
Well, now that that's out of the way, I want to put up the new guide to modding a crossbow, from start to finish, and from someone else's terrible finish, back to start, and up to your perfect finish. This is completely intended to replace the old article about levels (I mean seriously, a Level 2 crossbow is stock, but with E-tape to cover the hole in the original barrel).
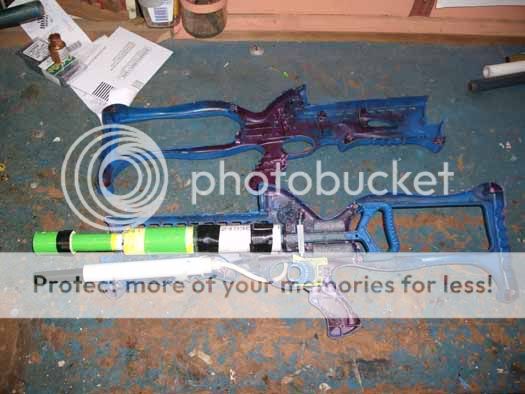
Here is our subject: The crossbow. This one has been through two owners, and two waves of modifications. The first was to bring it up to “Level 4,” which is merely a reinforced spring rest and having the barrel out the front. The second included gashing holes for integrations and adding epoxy and hot glue galore. Add on an “intentionally rough” paintjob and you have this:


We begin.
Clean up.
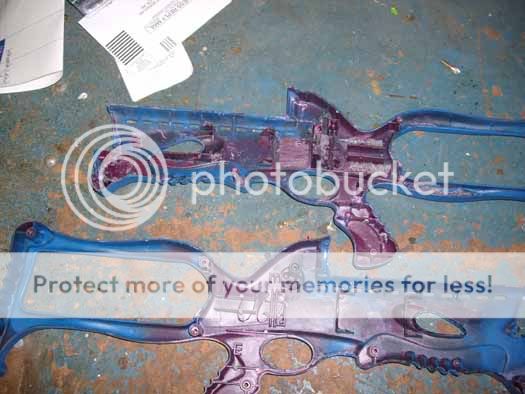
Taking out the internals, rip off that “integration” glued to the side, and set it all out of the way for now. Don’t be afraid if you find things like this:

What you want to do is to rip all pre-existing mods out of it, or at least the ones that you’re not completely positive are very well done. This is, after all, your crossbow.

There are a lot of tricks to doing all of these things right, well, and easily. I’ll put down most of the big, important ones.
Removing hotglued metal: A good set of pliers does you well here. You can generally just hold the shell or piece and pull. If the metal is shrouded in hotglue (i.e. nail in glue, post reinforcement), the same applies. Grab at the hot glue and pull. It will either start coming out and exposing the metal, or it will break off into chunks. If the latter, keep at it until you can get the metal.
Removing hotglue on the shell: This is a really common one. Again, start with a good set of needlenose pliers. The hotglue prefers to stick to itself than to the shell, so it will generally pull right out in one or two big pieces, pretty cleanly. There are two major exceptions to this – 1) the glue is a thin layer 2) the glue flakes off. Solutions: 1) There are two ways to go about this. The first is to add more hot glue on top, then go back to the pliers. The second is to spray a good amount of silicone based lubricant onto the glue. After letting it soak in (approx. 20-30 minutes), try prying it out with a dull chisel, or narrow (<1″) head scraper.
Removing items that were epoxied on: Be gentle with these. Rocking the item back and forth for a few minutes almost always does the job. If it’s a small piece, and it hard to grab hold of, blunt nose pliars are much better over the often damaging needlenose version in this situation. Another answer here is to use a chisel or fine tipped tool to carefully pry the epoxy off of the sides of the attached piece, until it comes out. Use needlenose pliers to remove as much epoxy as possible.
Foam Backer Rod (FBR) or Caulk Saver hotglued: Pull the foam out either with needlenose pliers, or with your hands. This will leave a small layer of left over foam with the hotglue. Now you can use the method for removing hotglue on the shell.
Small pieces, attached to small pieces: Here’s a good example of what I had to deal with. The crossbow trigger is small, and while not completely uncomfortable, could use improvement. That will be dealt with later. This is the product of an attempt at that mod:

Quite unacceptable. A few smacks with a rubber mallet should pop it right off. Since most people don’t use the most secure way of attaching pieces to each other (covered later), this is generally not a problem. If the small pieces can’t really be hit with a mallet, vise or hold one object at the joint, and use needlenose pliers on the other piece at the joint, and pry them away from each other in order to break the connection.
Sanding, and otherwise redoing the paintjob.
Clean and sexy. Words commonly used to describe a good cosmetic job. That’s not what’s on this bow. But it will be.
Start by roughing off the top layer or so of paint with 60 grit sandpaper. Gradually work up to a 600 grit. Wet sanding is definitely your friend here. This will be the most time consuming part of this whole guide. Both shells together took about 11 hours of total sanding. By the time you go to paint it, you’ll want it at 800 grit, but I’ll cover the repainting part later in this guide.


Hit the plunger tube pretty lightly as well. You can also sand the outside of your integration tank if need be, but don’t go overboard. I did mine just to show; my entire integration is internal.
Plunger Repair and reinforcement
Inc: Catch reinforcement, spring replacement, plunger head repair and replacement
For this next part, you will need the following:

That metal is 1/16″ aluminum, that can be bought from Home Depot or Lowe’s for about $3 for 6 feet. Very cheap, very useful.
Now the plunger for this crossbow isn’t broken at the catch (or at all) like most, but if it is, the same steps apply for repair.
First and foremost, we need to cut the aluminum. Using the snips, cut it to equal the length between the plunger head base to the longer side. Then cut straight down the center along the length. You should end up with something like this:

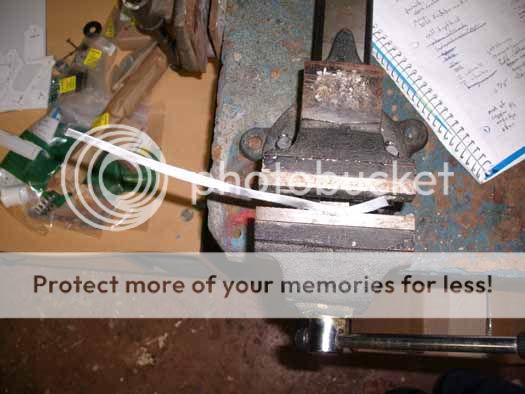
The snips probably have mangled it like so. All you need to do is to vise it at the turns, and squeeze it down. This may take a while, but it’s important that it’s flat in all directions.
Once it’s straight, snip down the one side to the proper length (one side will need to be shorter than the other), and mark the catch spot, as well as any spots that are too wide, and need to be shaved down:


The rest is continued later in the thread, click HERE
Edited by Split, 15 June 2011 - 02:39 PM.


